Intro
"Hey...are you a climber?....are you looking for a climbing partner for a few days?..." And that was how I met Sarah in the Mammoth Lakes Library. It turned out were both Stanford alums (she had started grad school there the year after I finished my undergraduate degree), and we had several mutual friends/climbing partners in the Stanford Alpine Club. So we hit it off quickly. Sarah and I proceeded to spend the next two days cragging in Pine Creek Canyon, a beautiful granite canyon located in the Sierra foothills between Bishop and Mammoth Lakes. After a couple of days of cragging, Sarah proposed we climb the West Ridge of Mt. Conness to give our arms a rest and get a cardio workout. Sure!, I said.
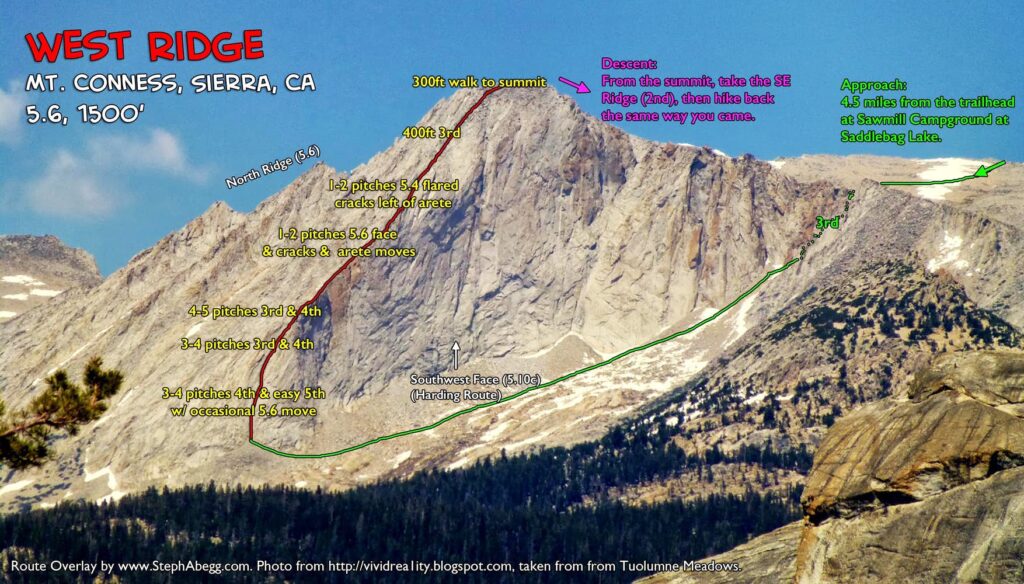
The West Ridge of Mt. Conness is one the best moderate alpine climbs in Tuolumne. In fact, Peter Croft called it the best route he had done in the Sierra backcountry (albeit before embarking on some of his recent mega-traverse-linkups). Most of the 1500' (vertical) route is 3rd and 4th class, with the most difficult climbing in the first two pitches which are rather sustained 5.6. The moderate level of difficulty makes this a great route to solo if you are comfortable with that sort of stuff. Sarah and I soloed it.
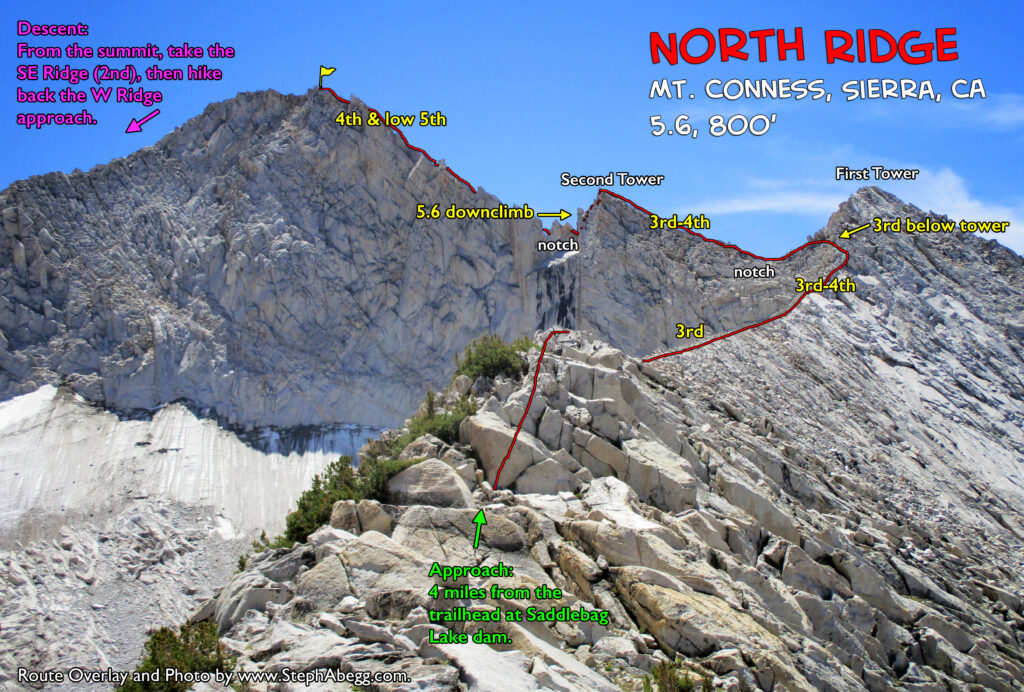
Sarah and I parted ways at the summit to descend by two different routes: Sarah by the standard SE ridge walk-off and me by the North Ridge. The North Ridge is also a popular moderate climb on Conness. Like the West Ridge, this route is rated 5.6, and is composed of long stretches of 3rd and 4th class occasionally interrupted with an exposed 5.6 move. By descending the North Ridge you get two classic routes in one day!
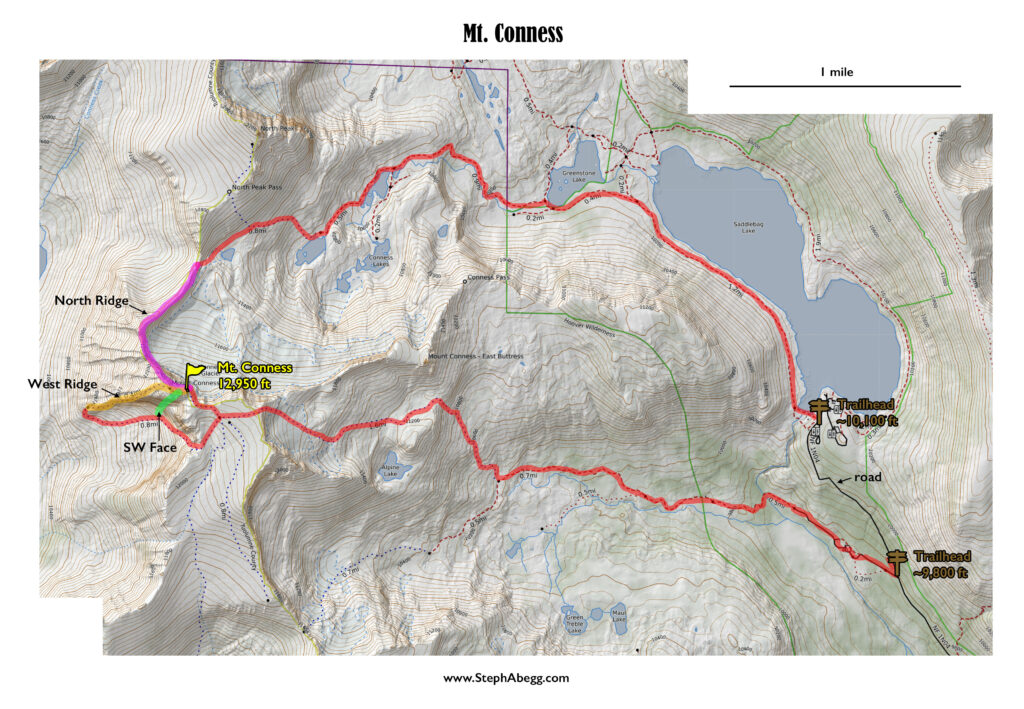
This was a super fun day—a wonderful way to stretch the legs and be treated to awesome views of Tuolumne the whole time. Since we were soloing, our packs were light and we moved pretty fast on the rock. Timewise, it took Sarah about 7.5 hours car-to-car for the West Ridge with standard descent and it took me about 8.5 hours car-to-car for my West Ridge to North Ridge link-up (break-down below). Long enough for a good work-out, but short enough that we were back at the car by early afternoon with plenty of time and energy to pack for the Incredible Hulk the next day....
Below are a couple of route overlays and some photos from the day. Thanks Sarah for the excellent suggestion and great company!


