Squamish Climbing (2006-2019, 2025)
Routes:
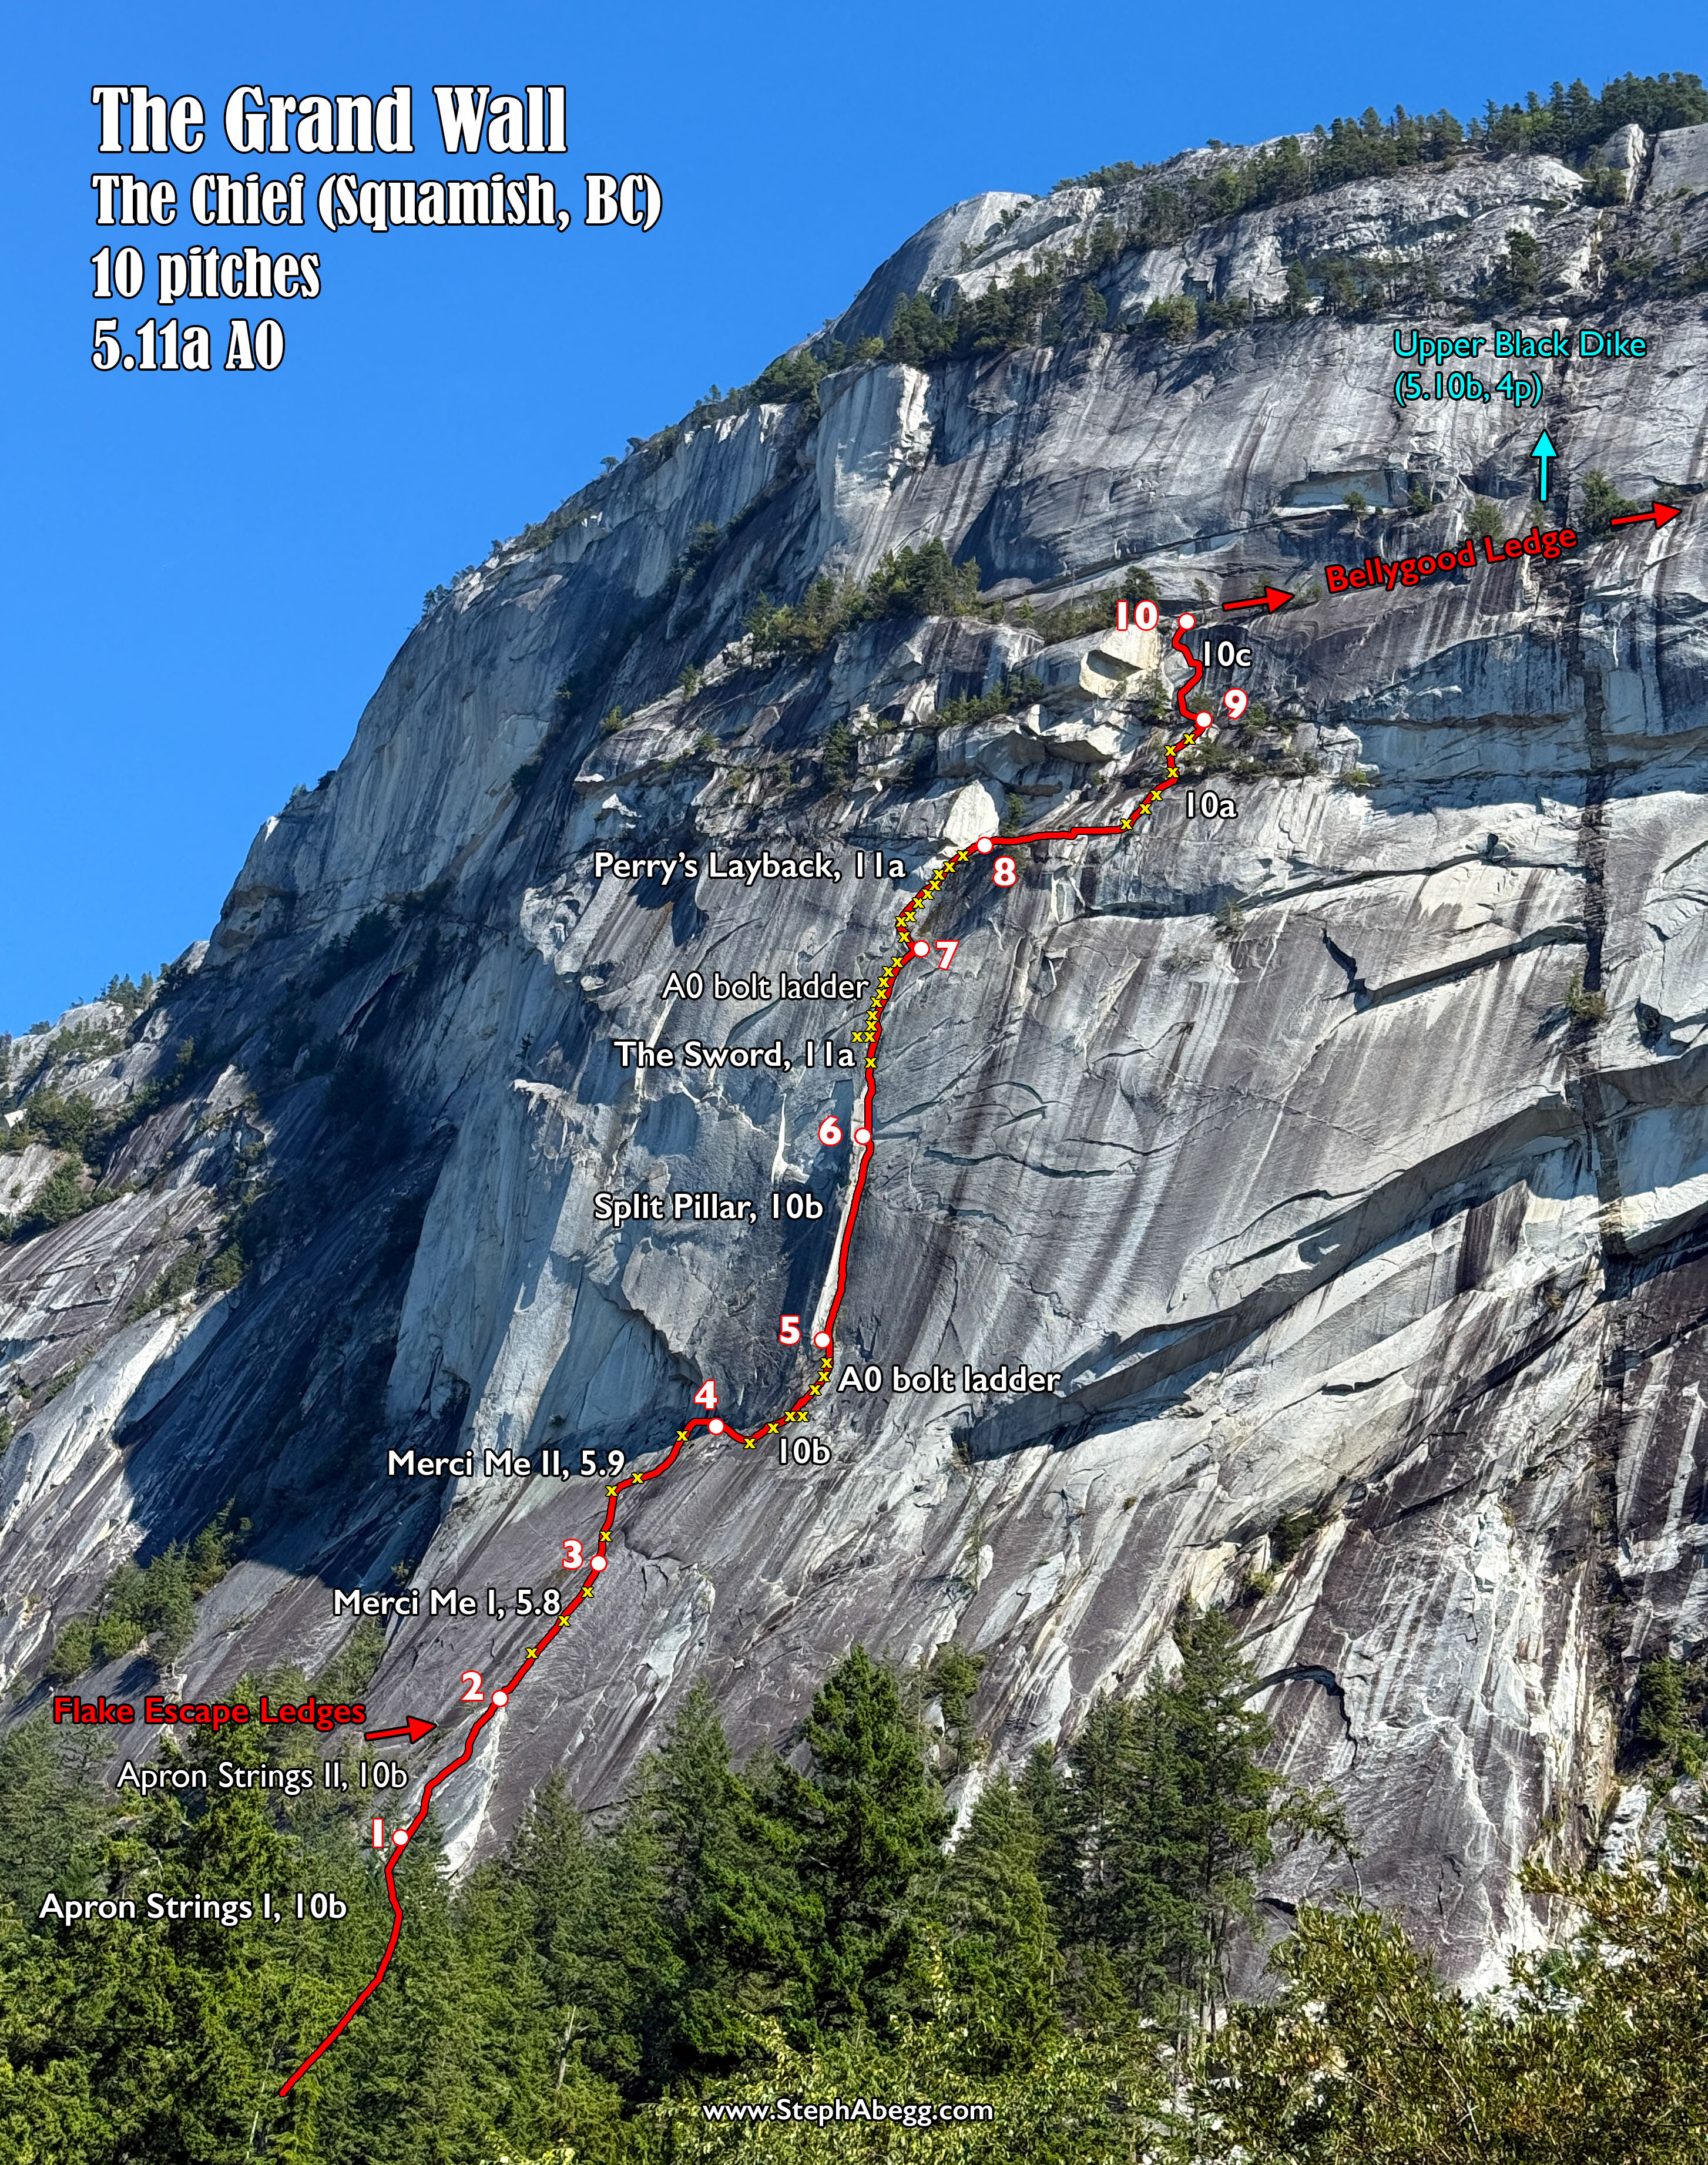
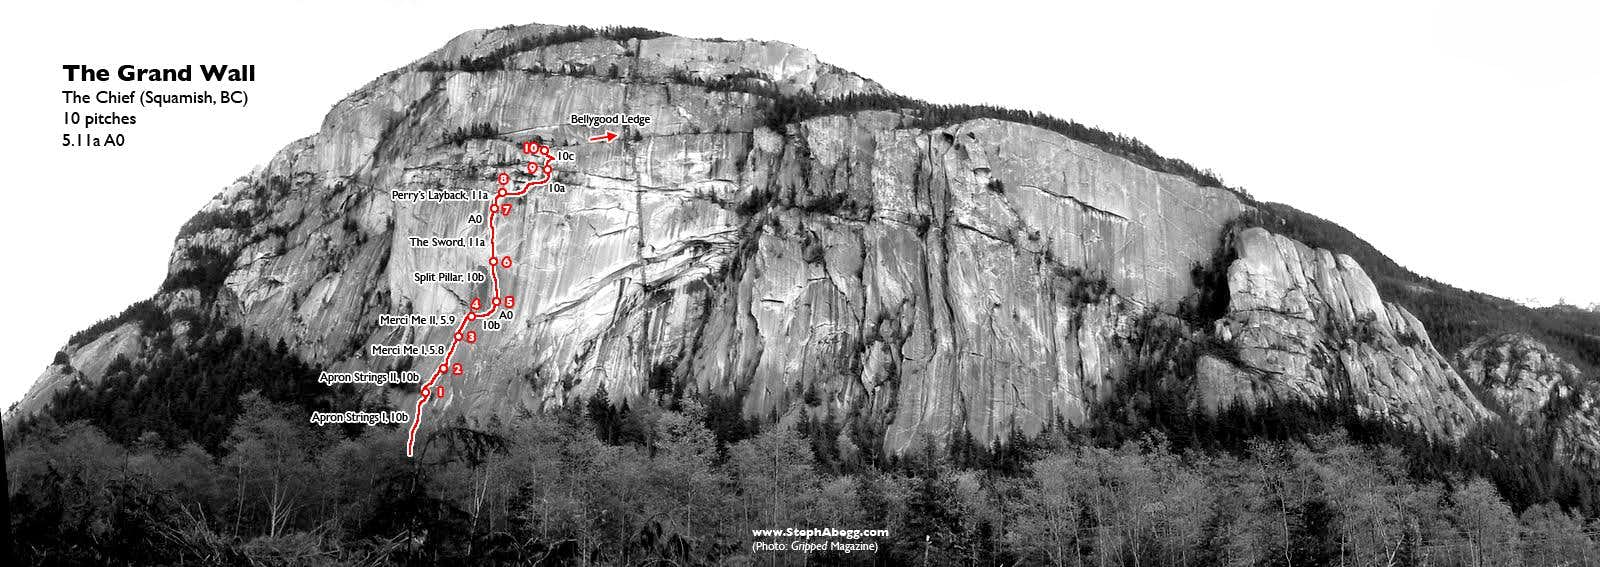
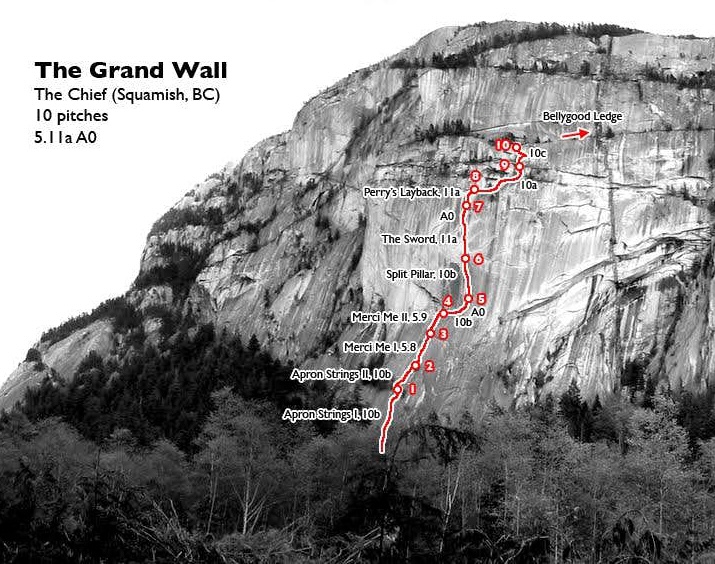
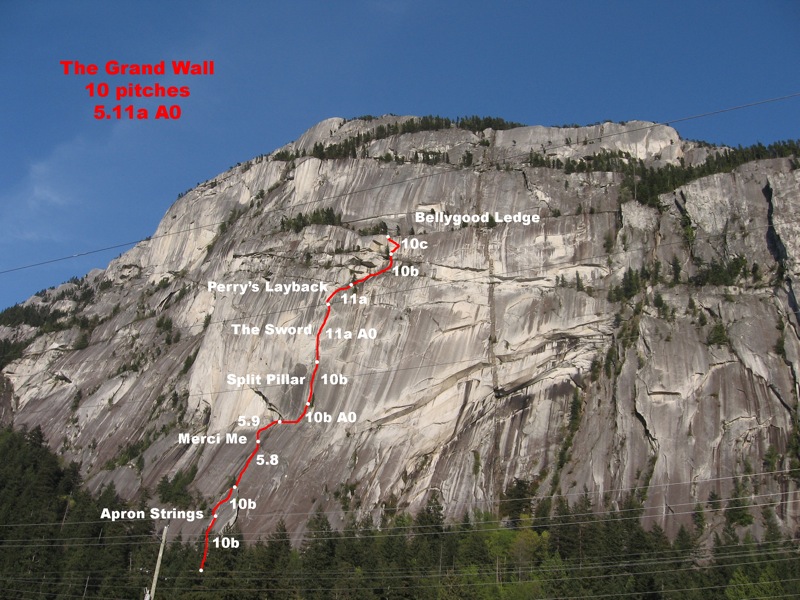
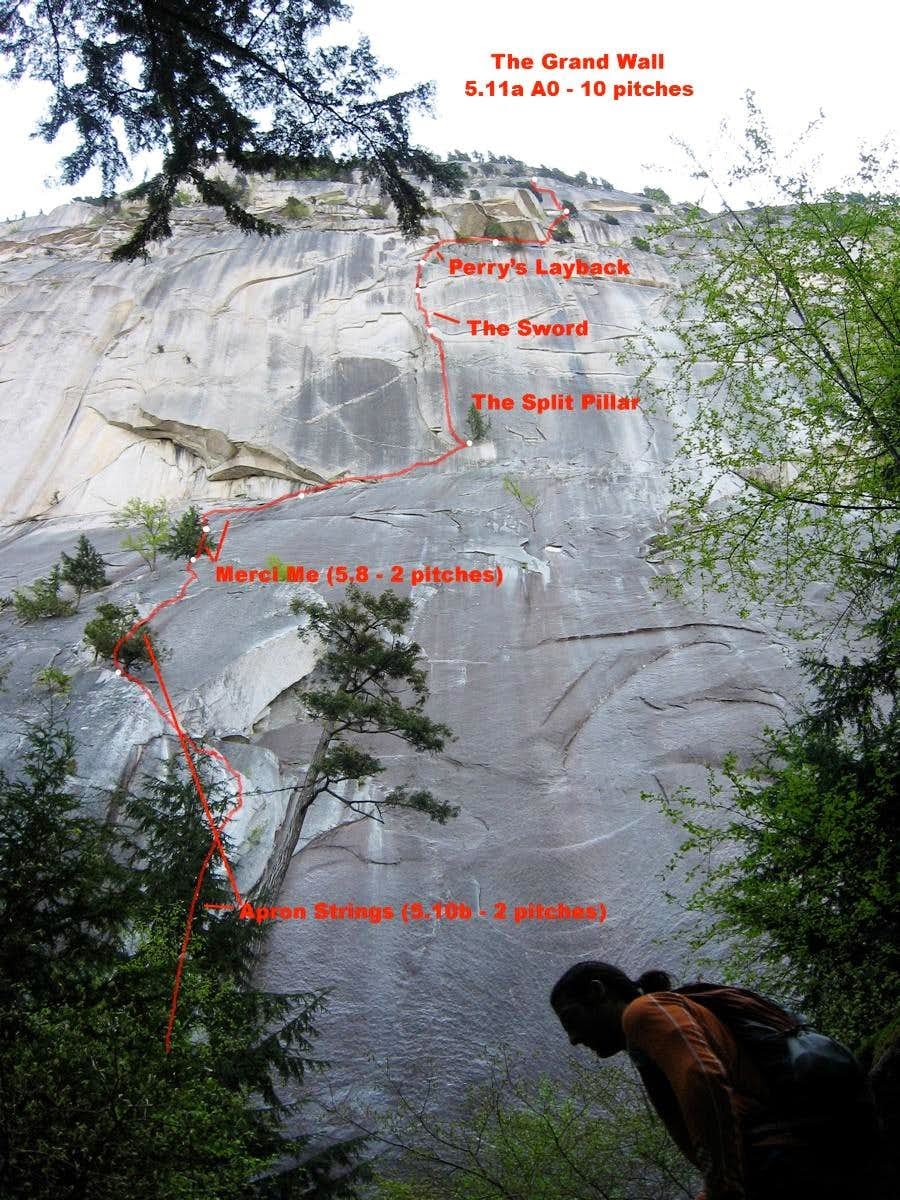
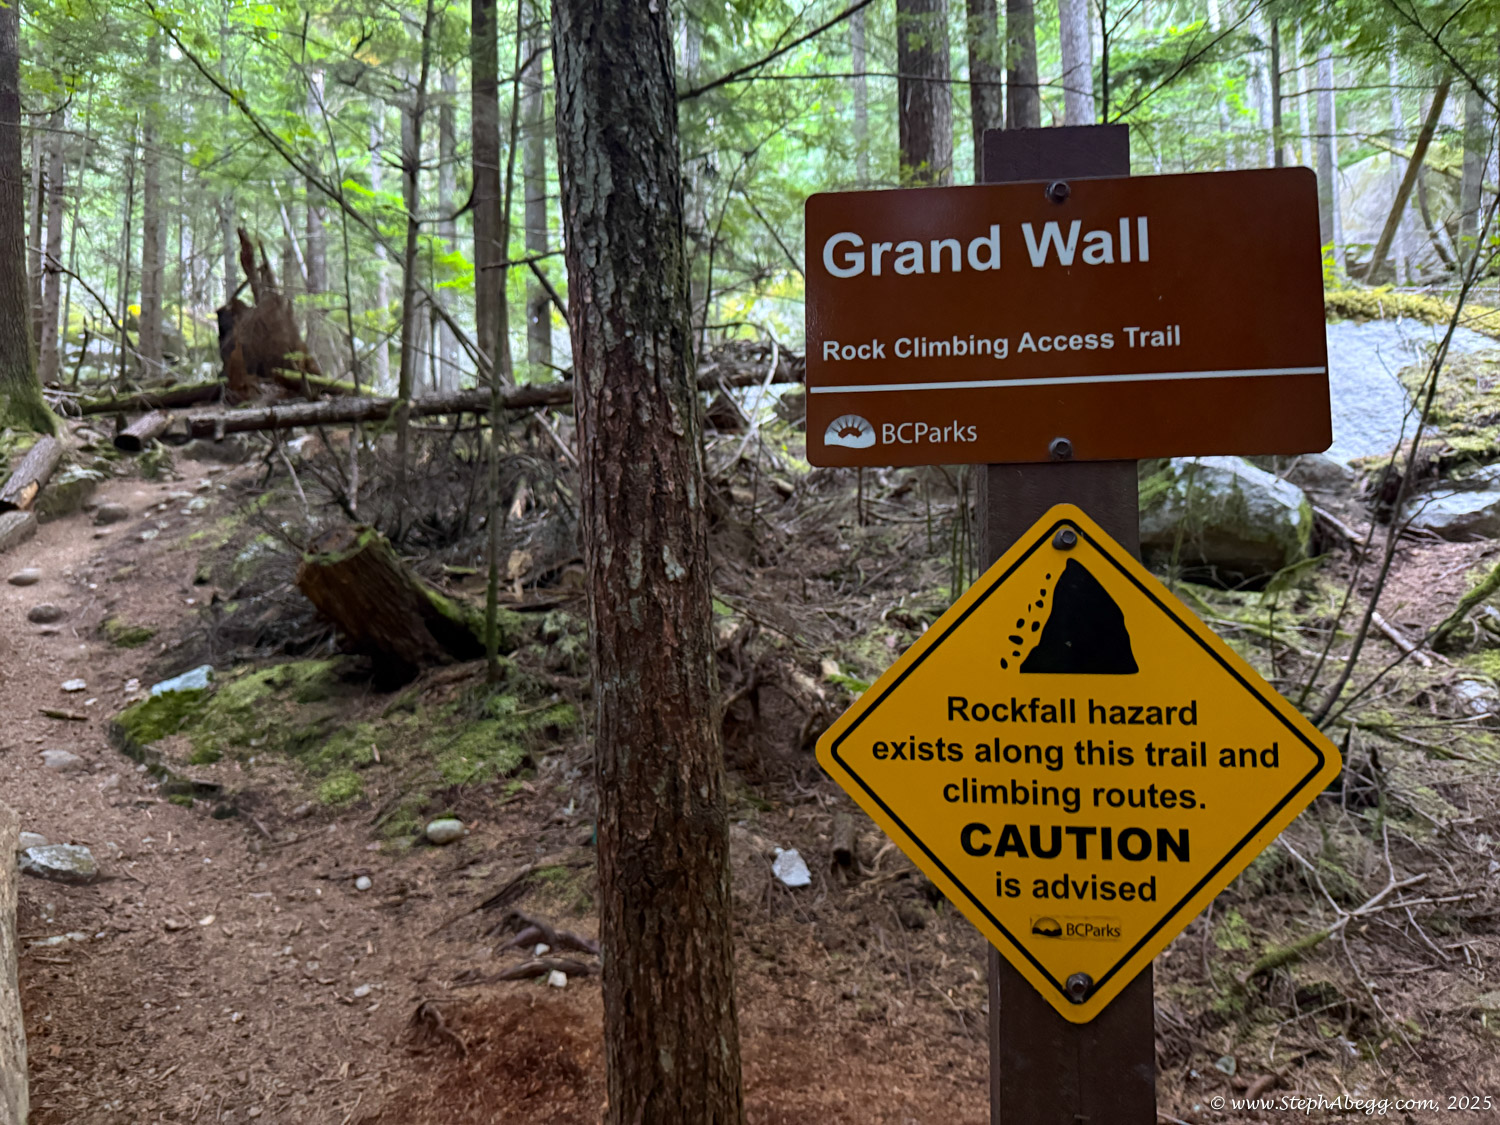
- The Grand Wall
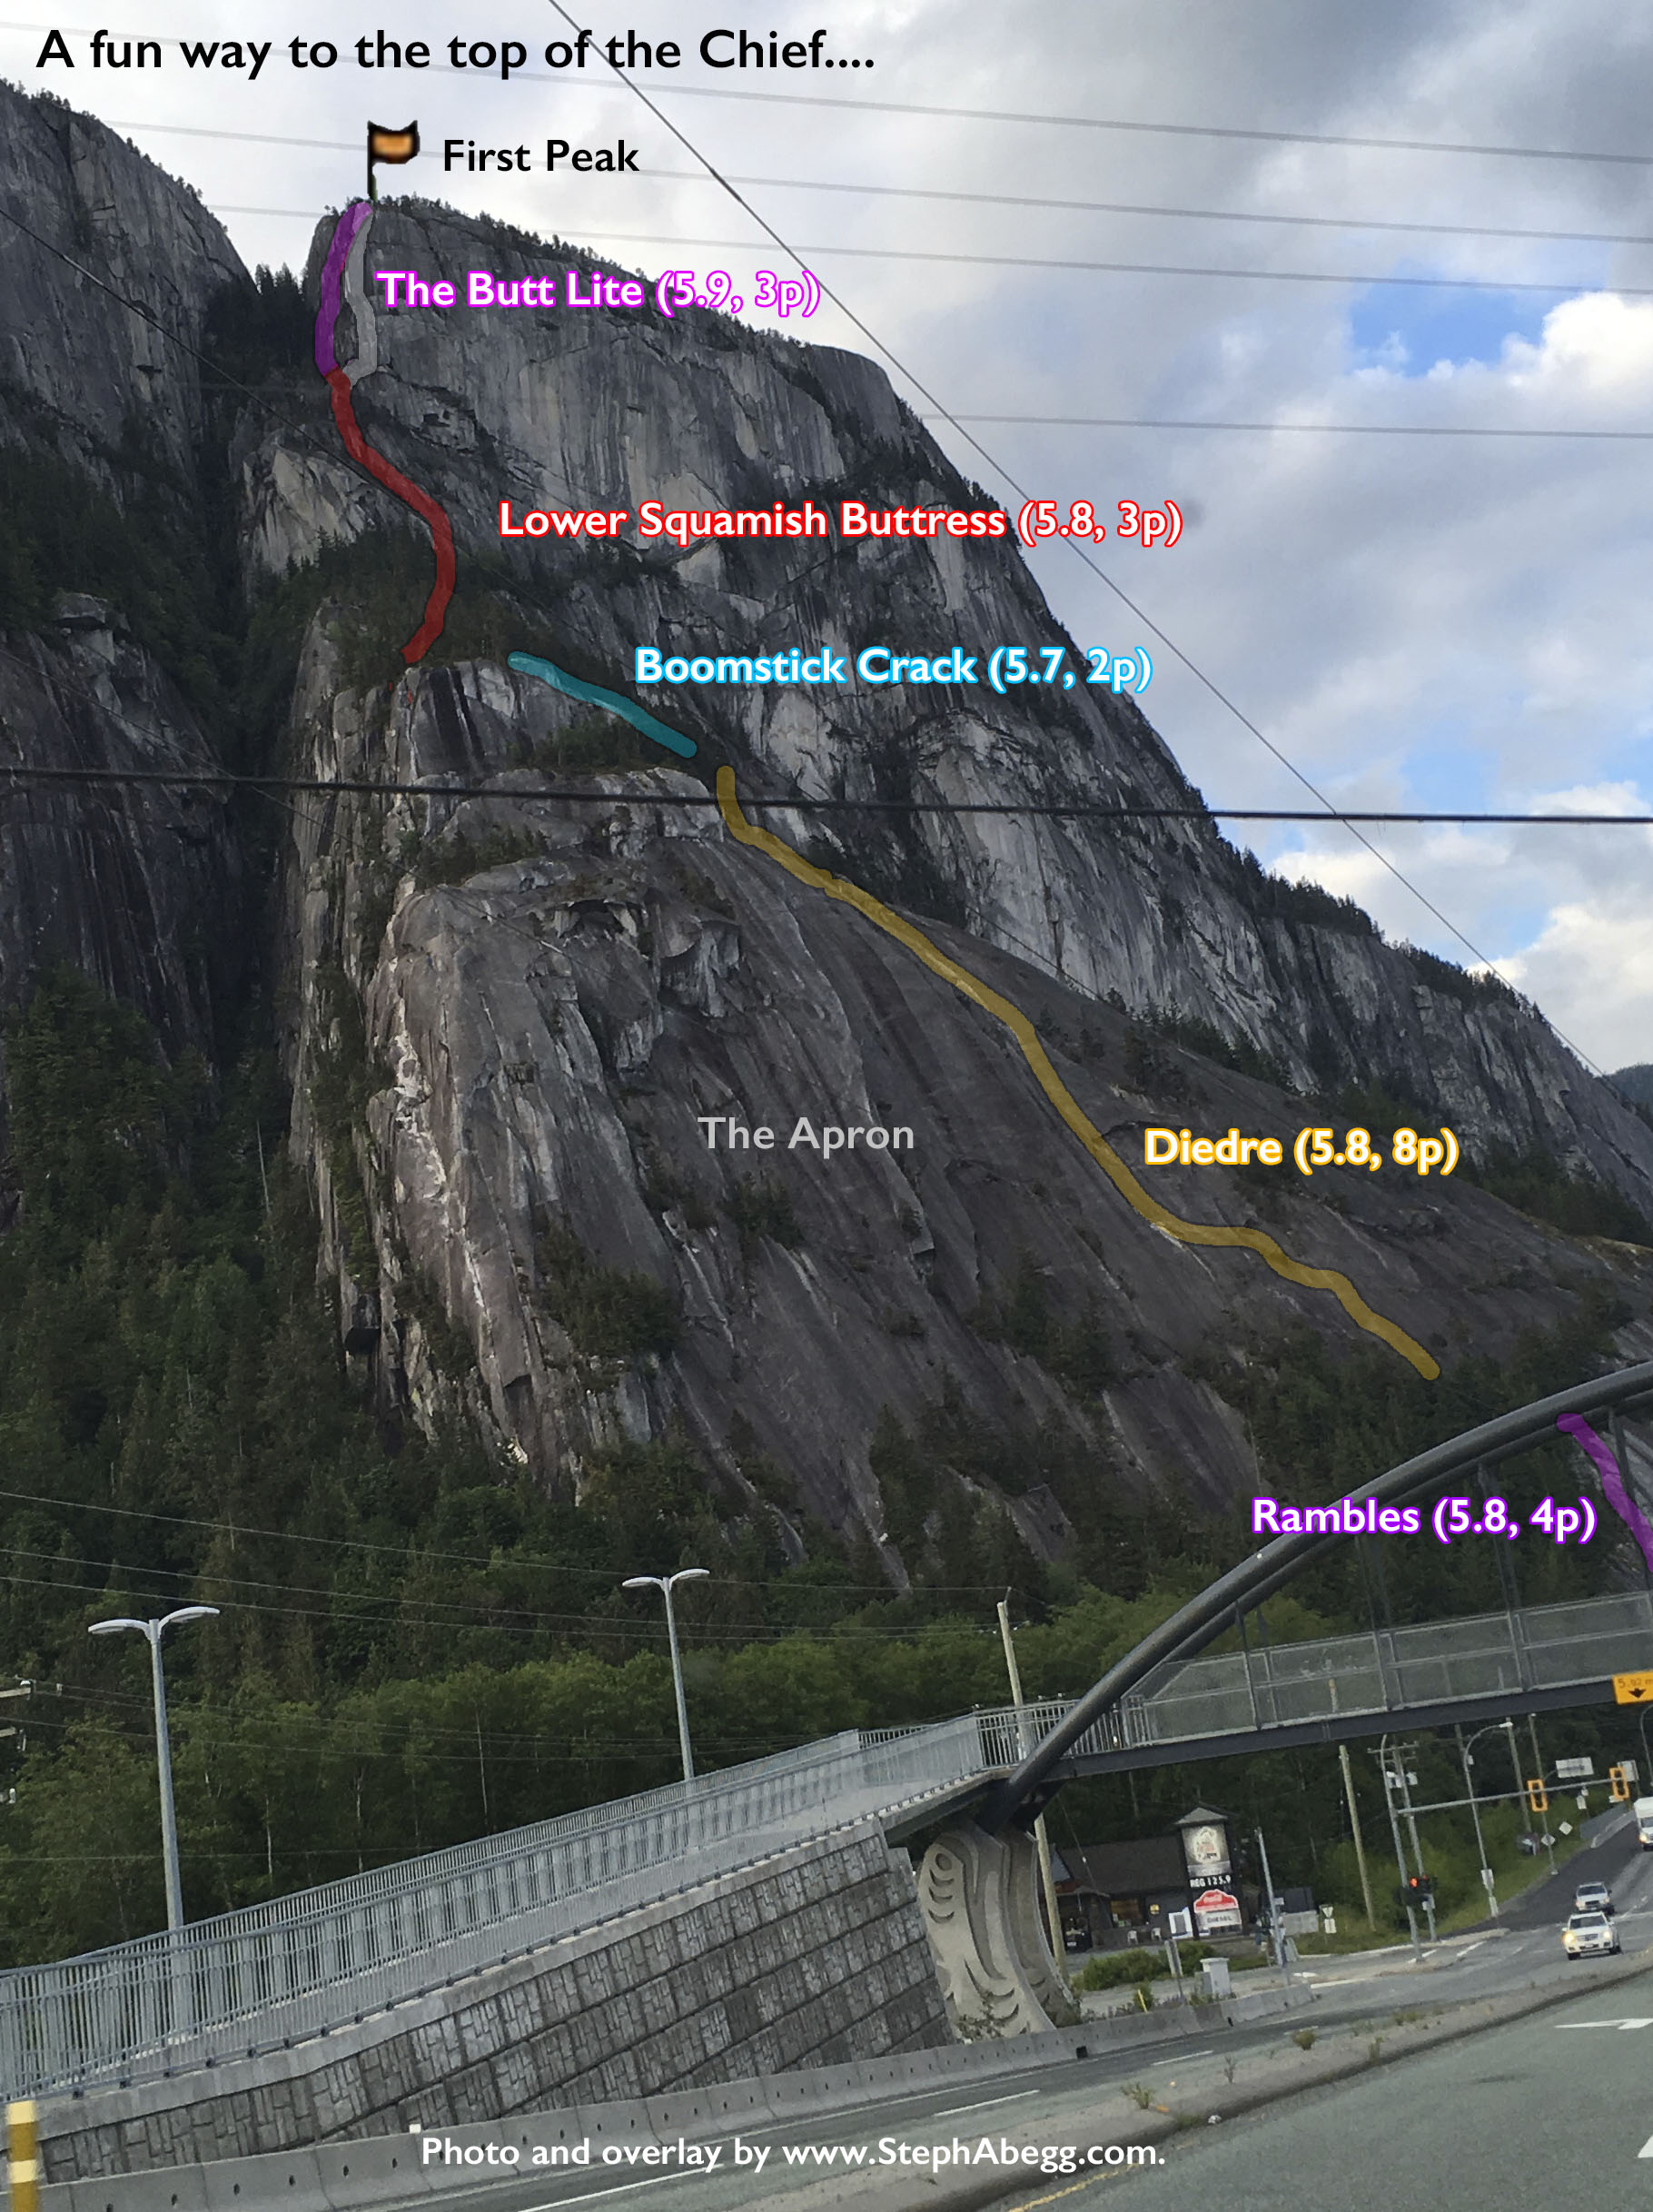
- Rambles + Diedre + Boomstick Crack + (lower) Squamish Buttress + The Butt Lite
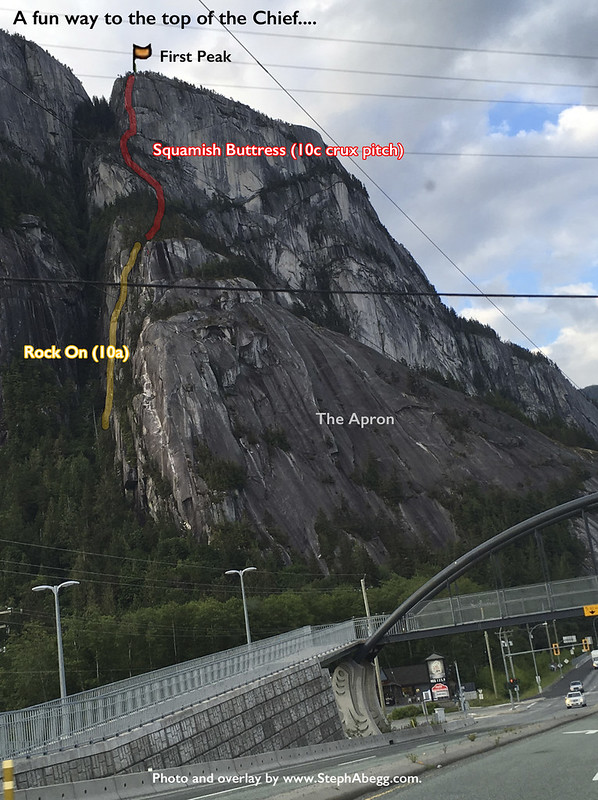
- Rock On + Squamish Buttress
- St. Vitus' Dance / South Arete + Karen's Math + Memorial Crack + Squamish Buttress
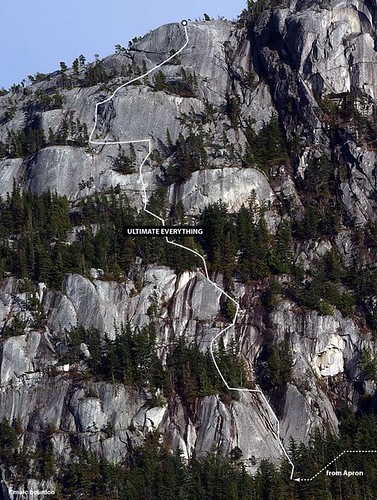
- Banana Peel, Boomstick Crack, Ultimate Everything
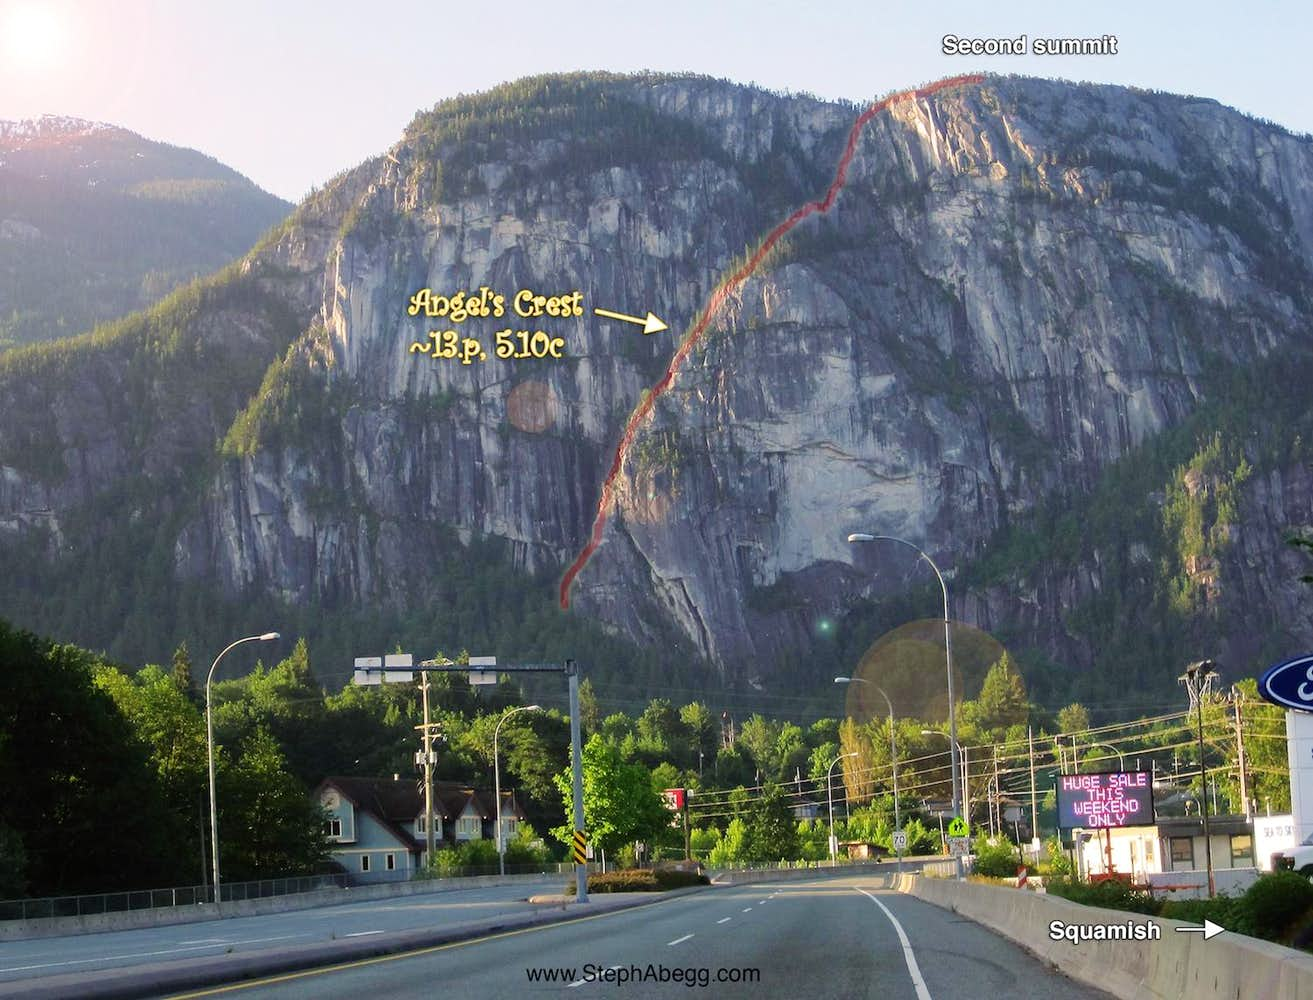
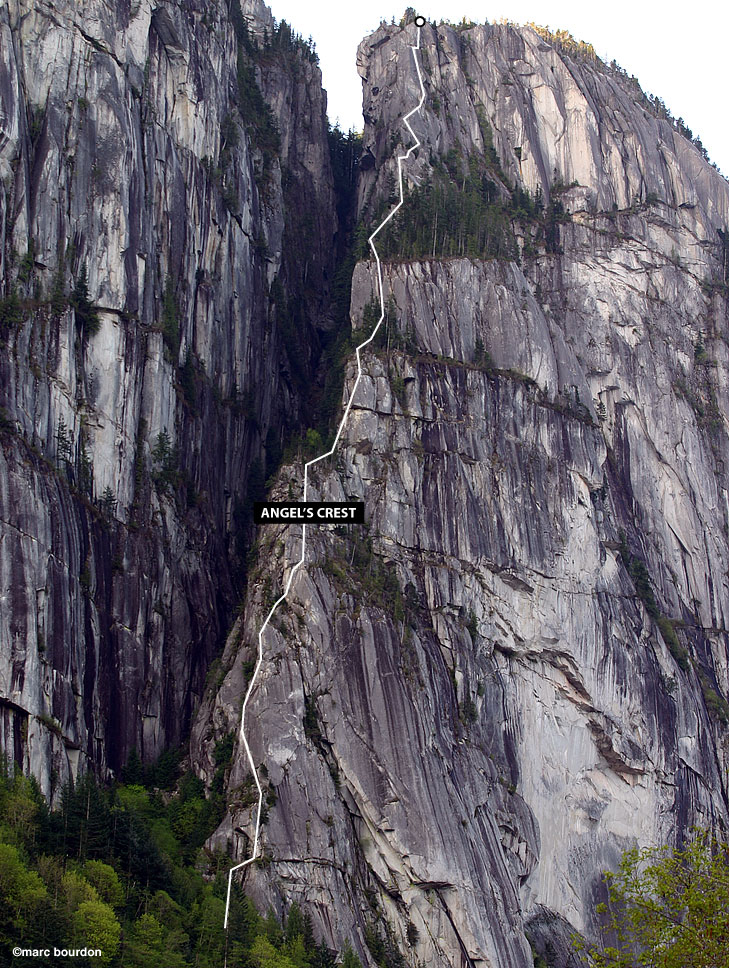
- Angel's Crest
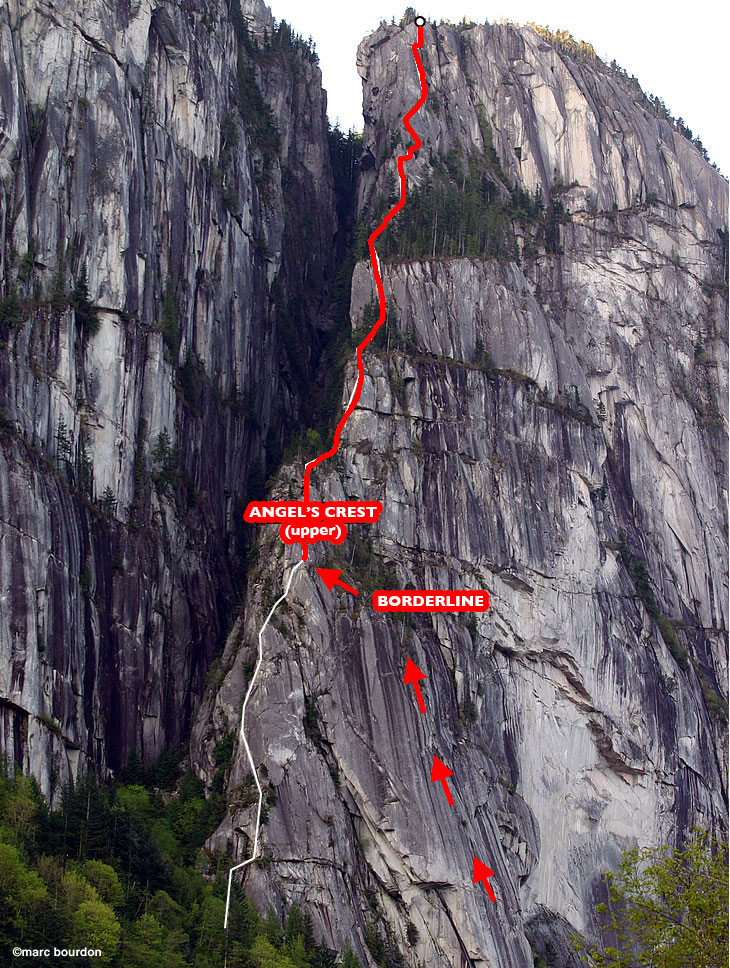
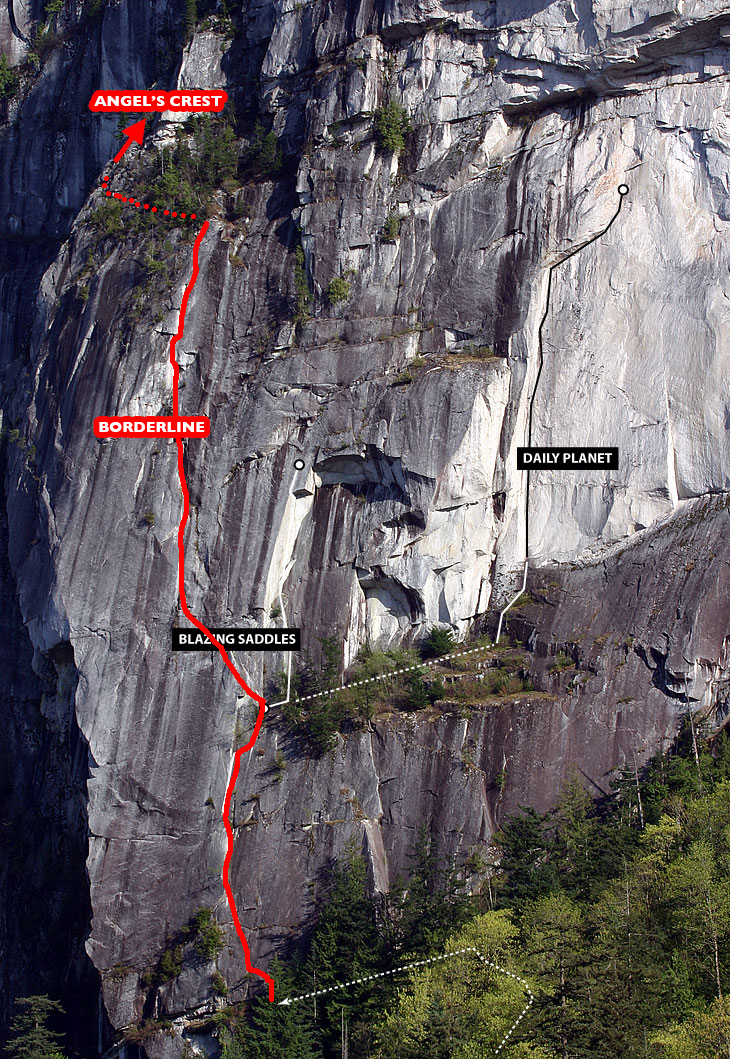
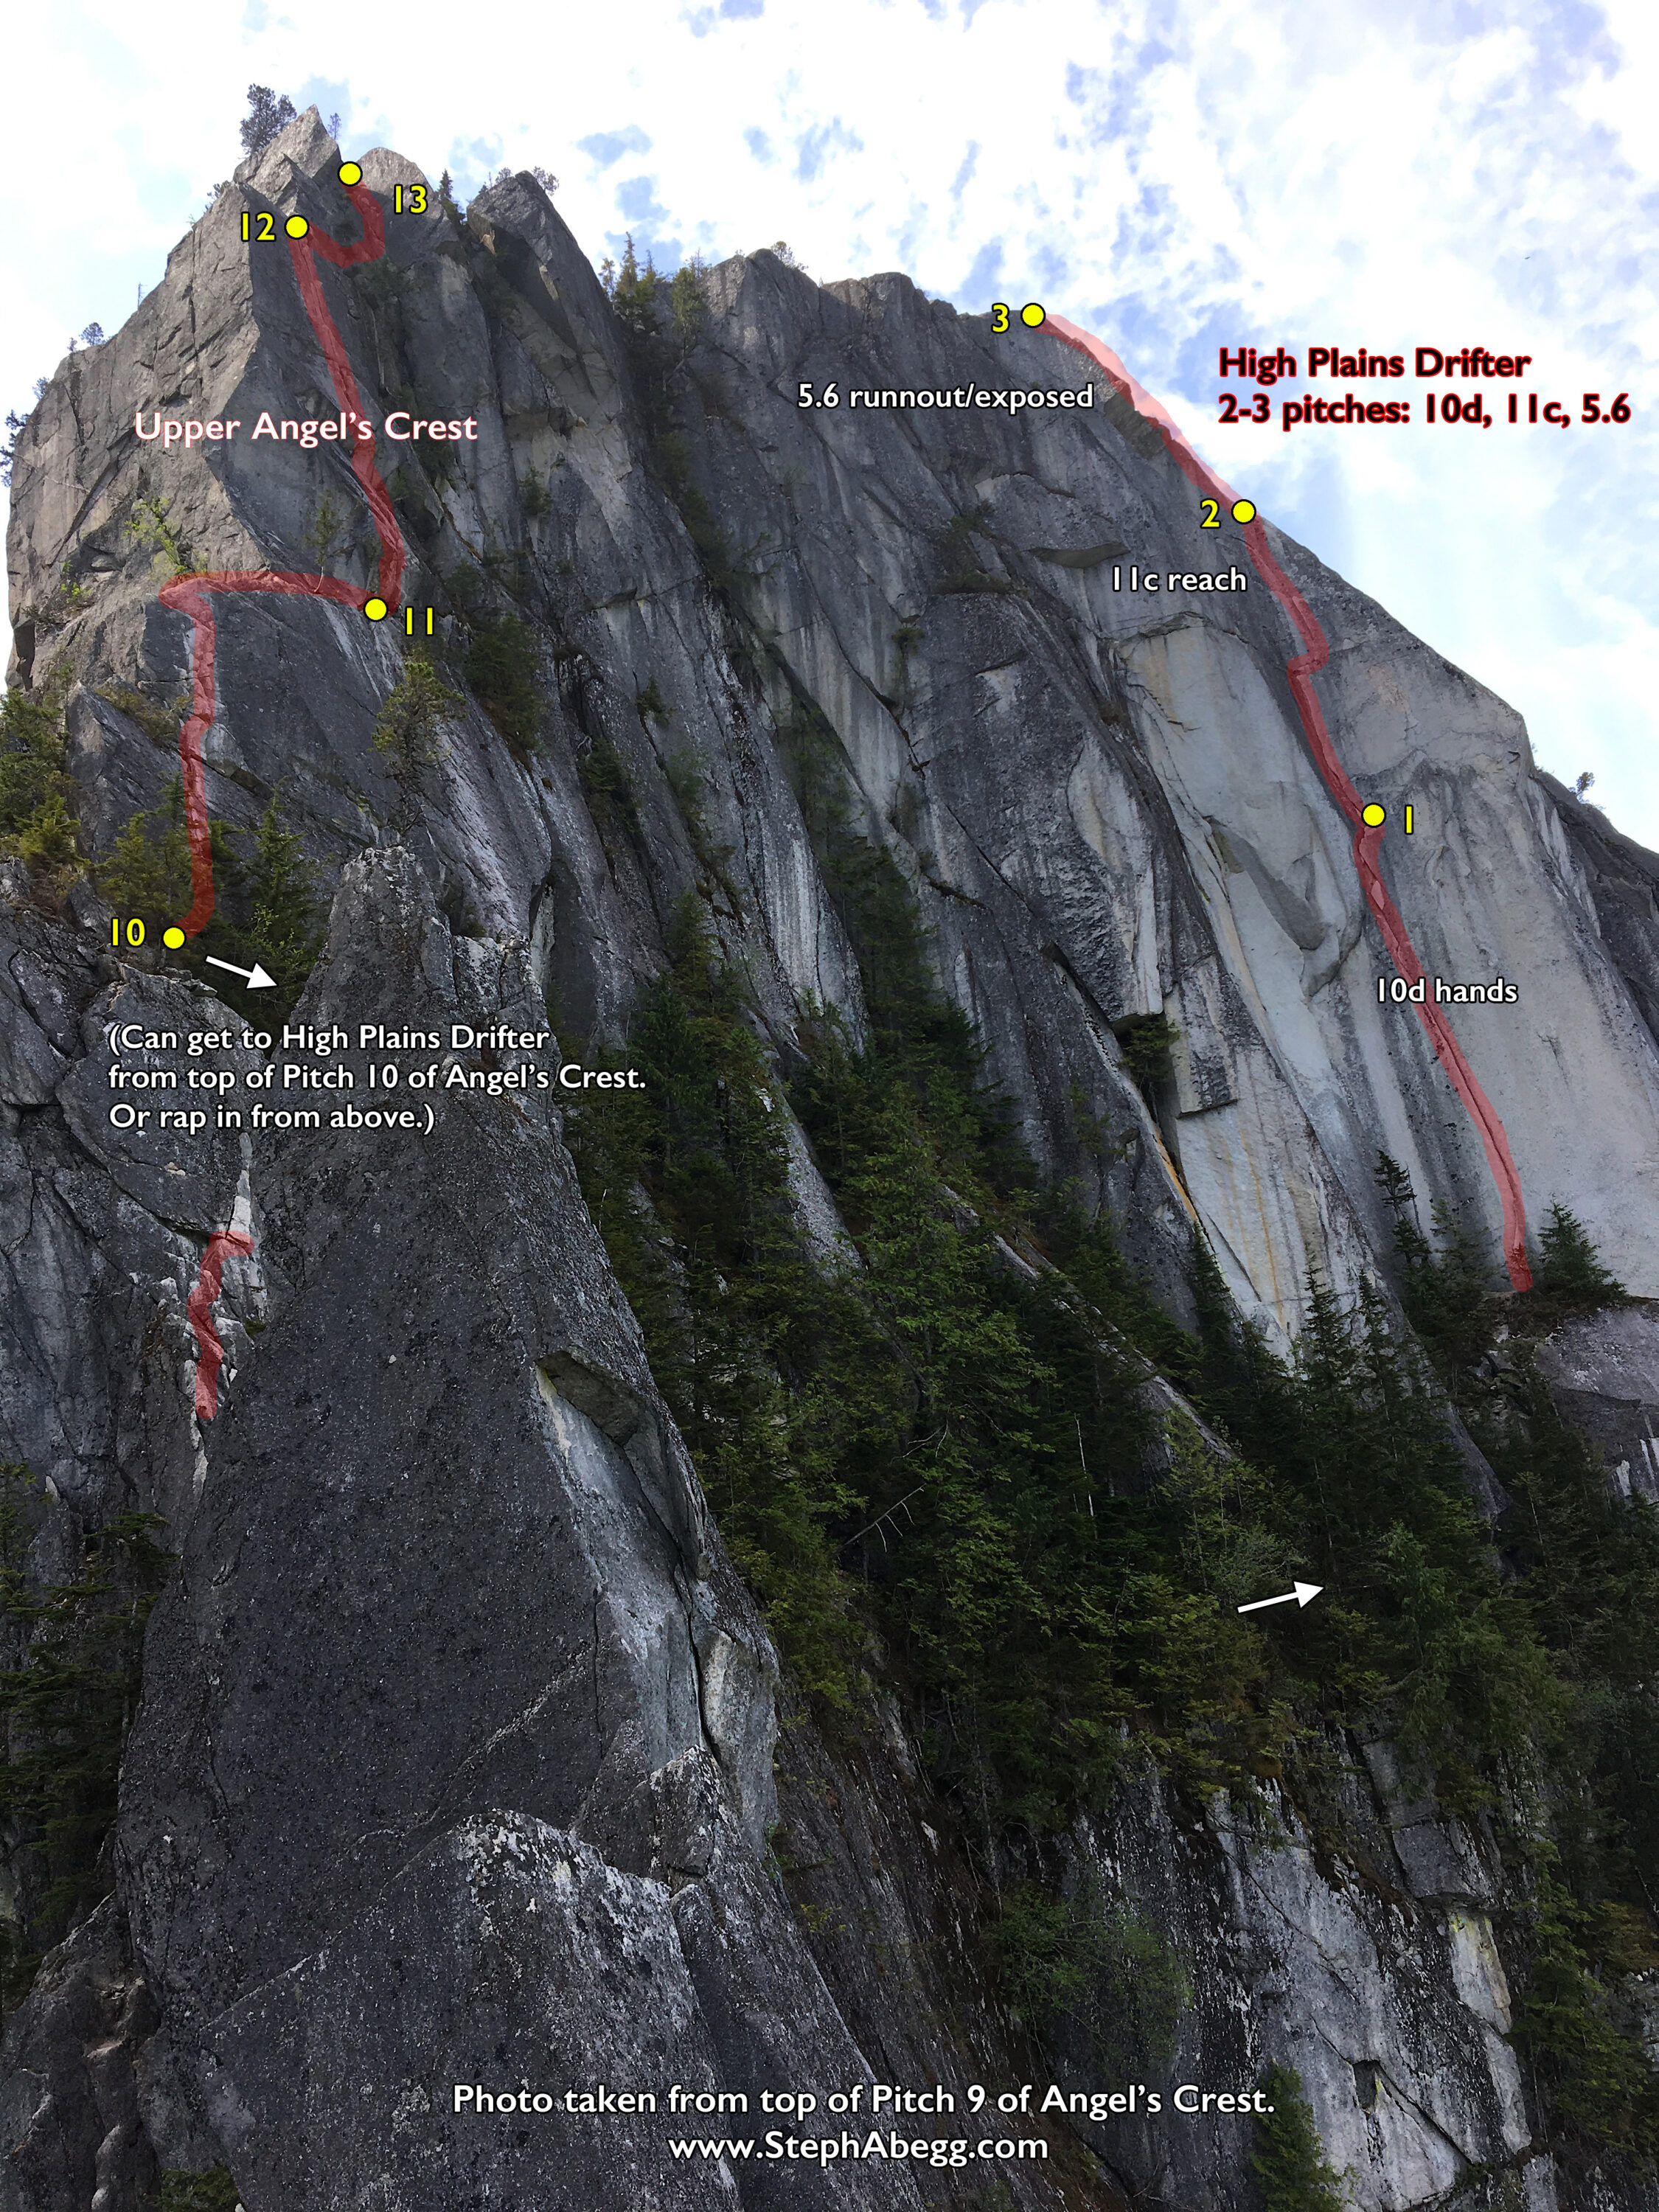
- Borderline + (upper) Angel's Crest
- Milk Road
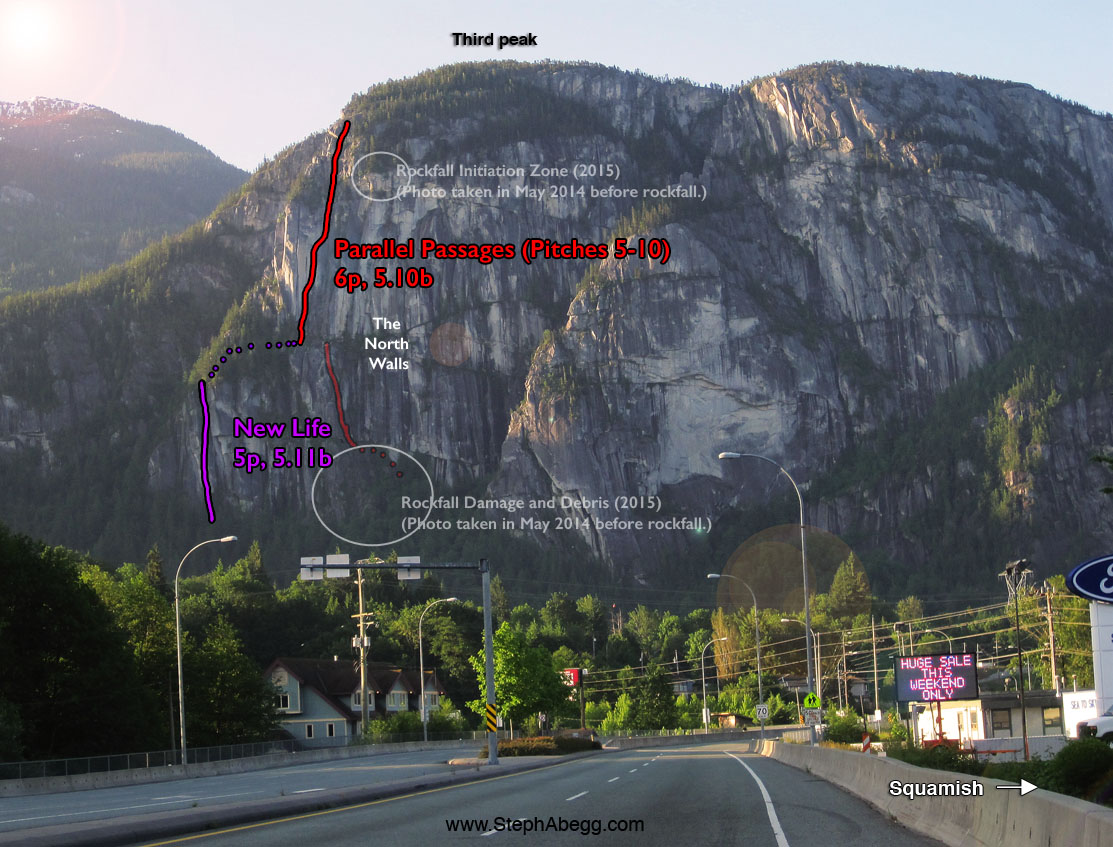
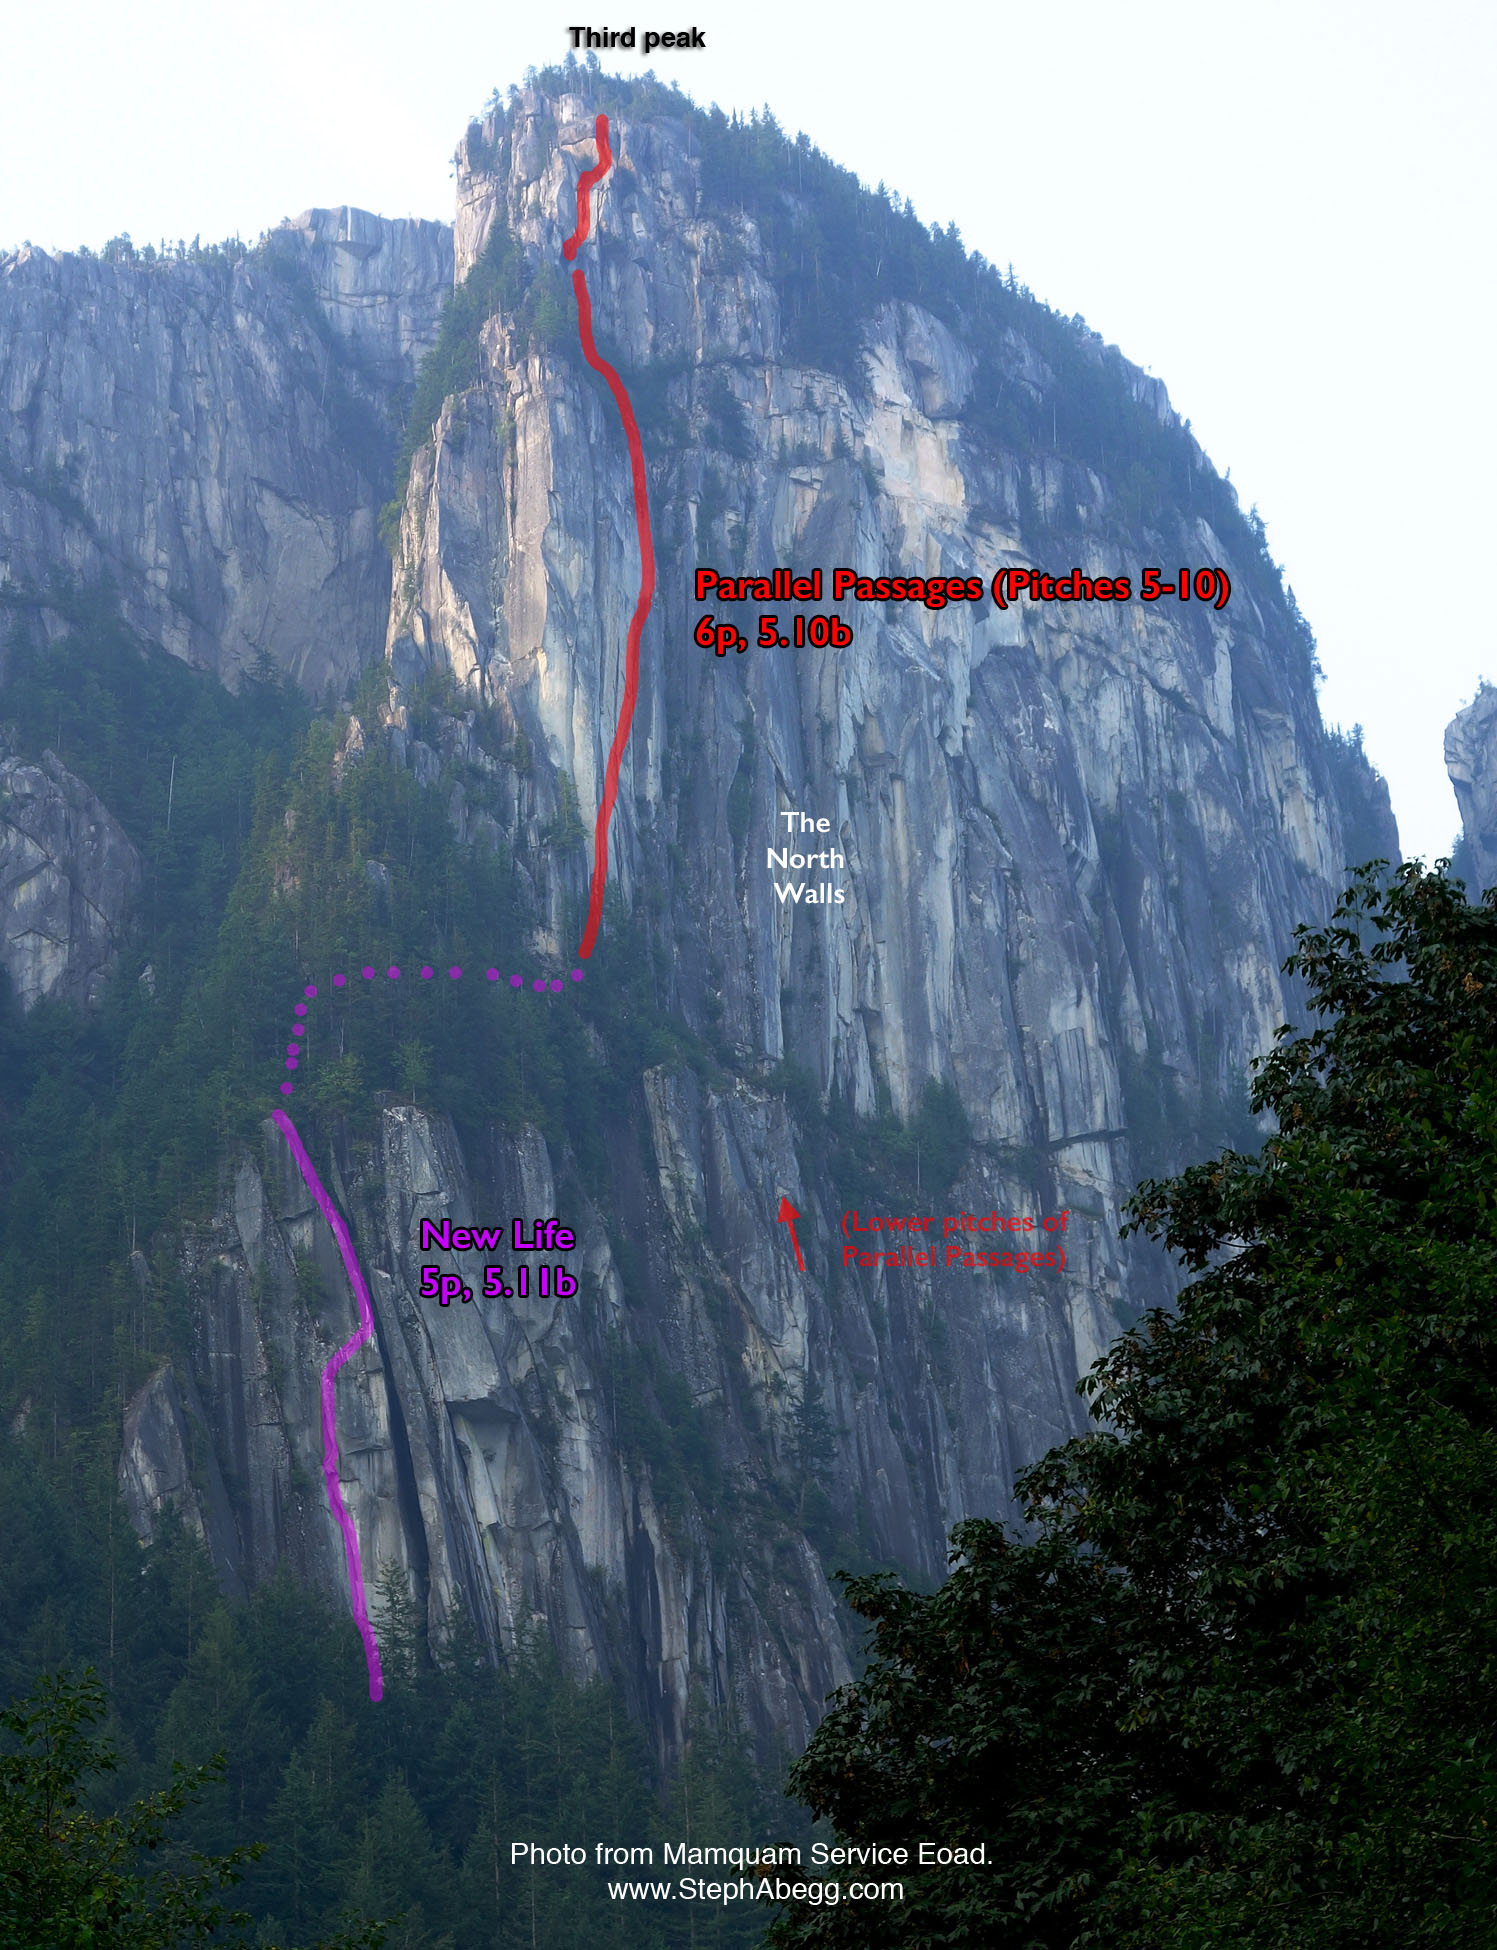
- New Life + Parallel Passages
- Sunset Strip
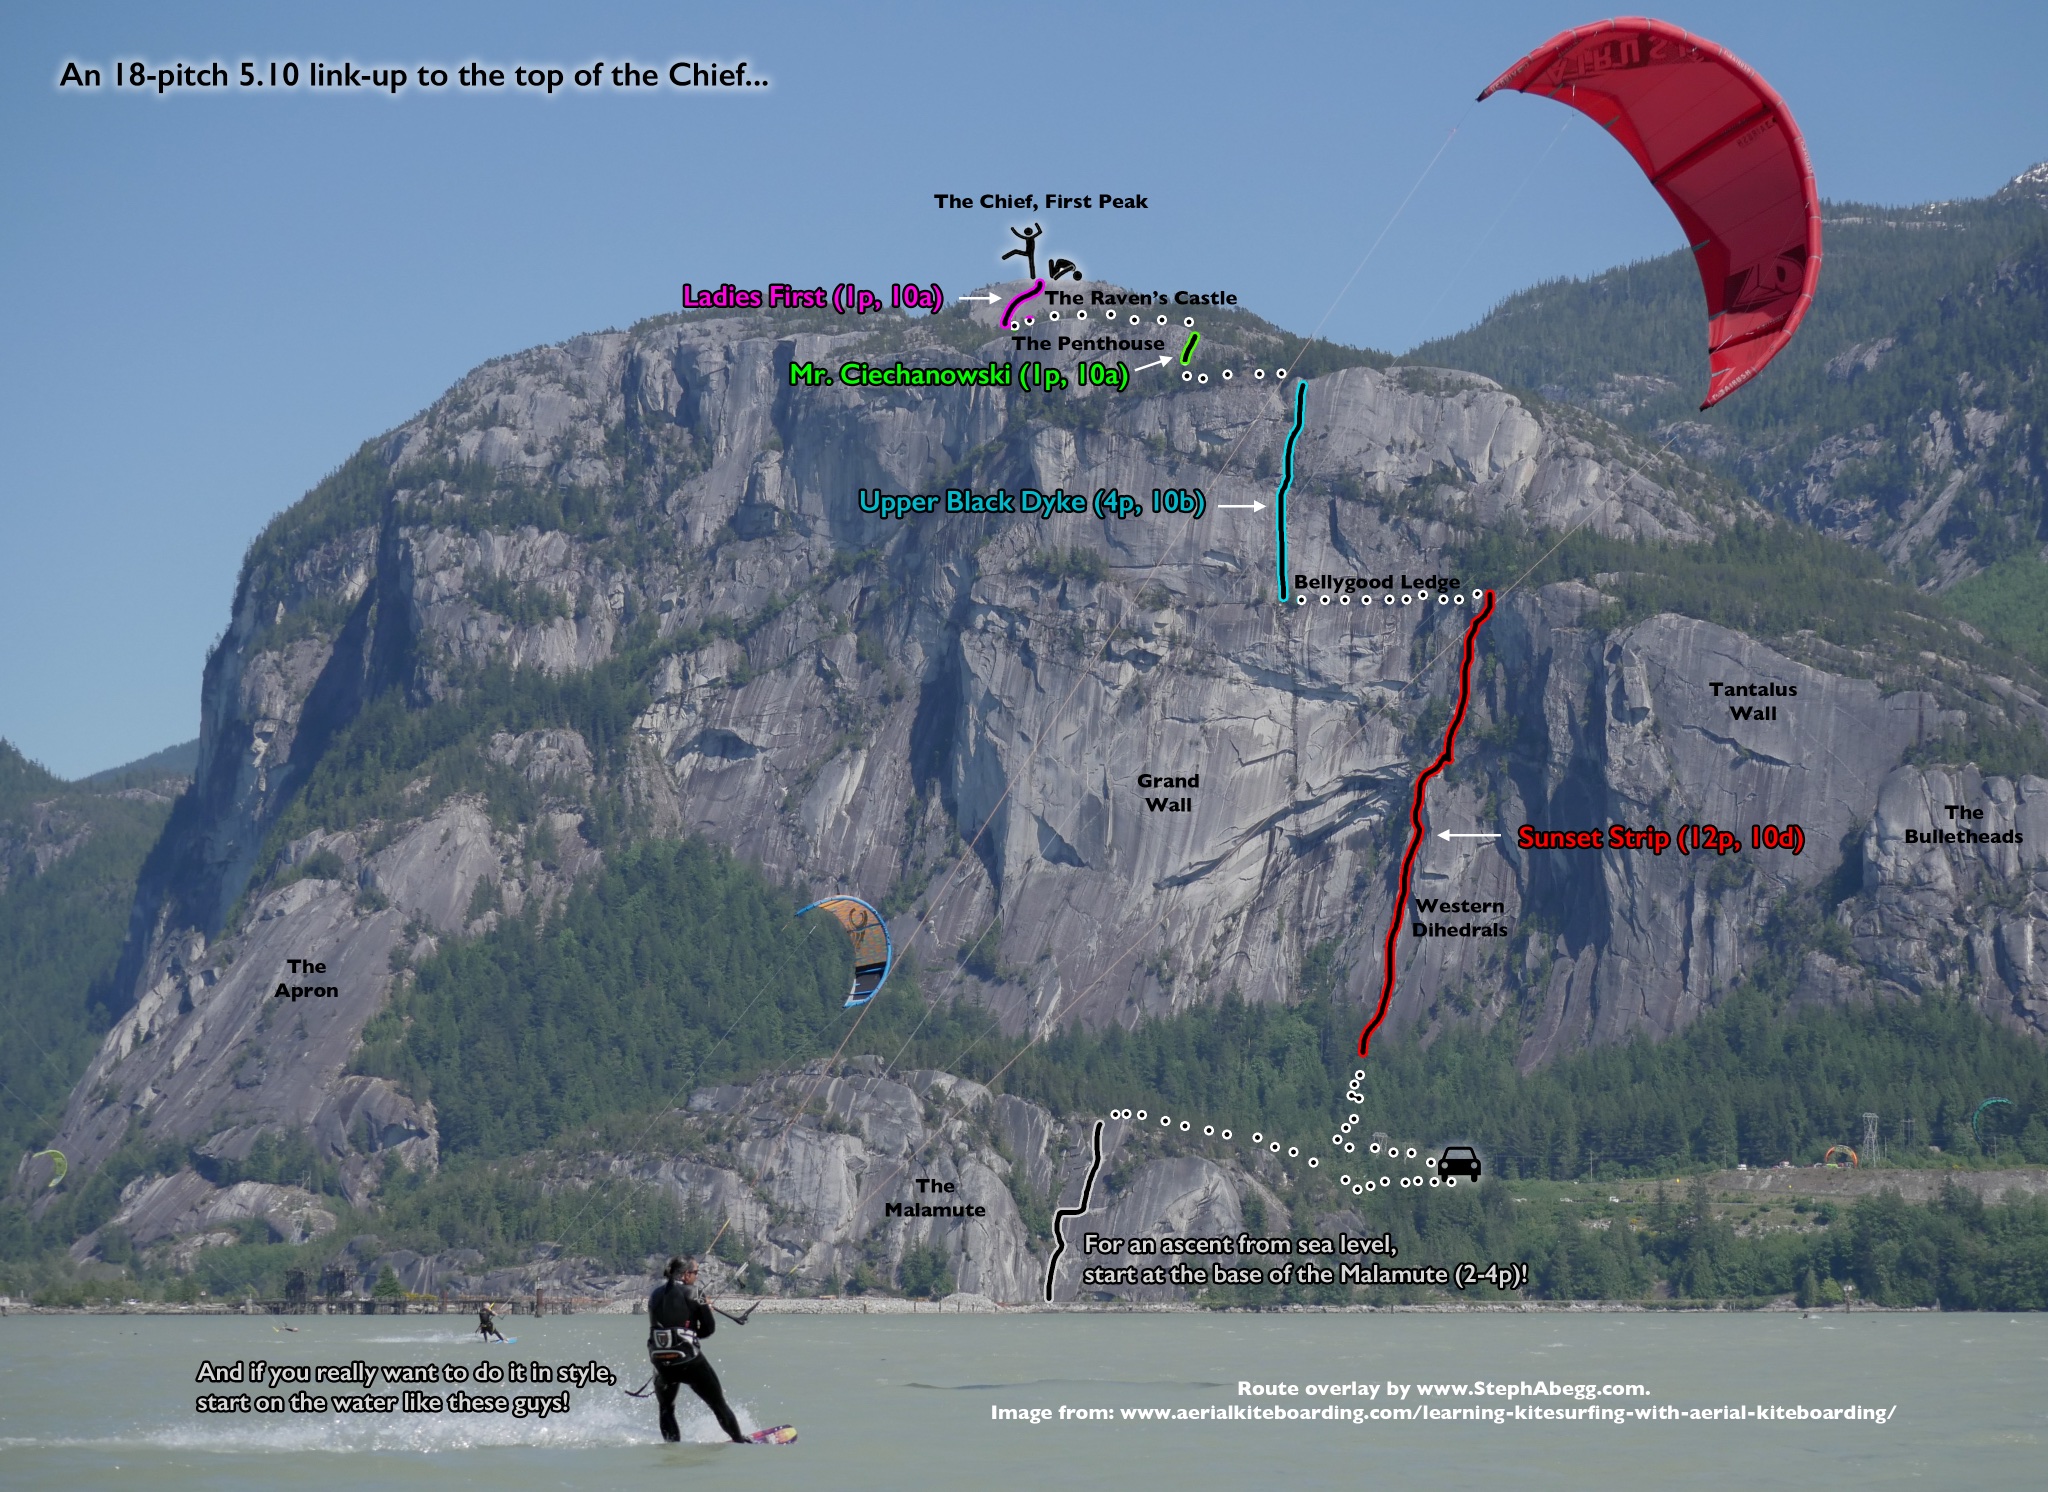
- Sunset Strip + Upper Black Dyke + Mr. Ciechanowski + Ladies First
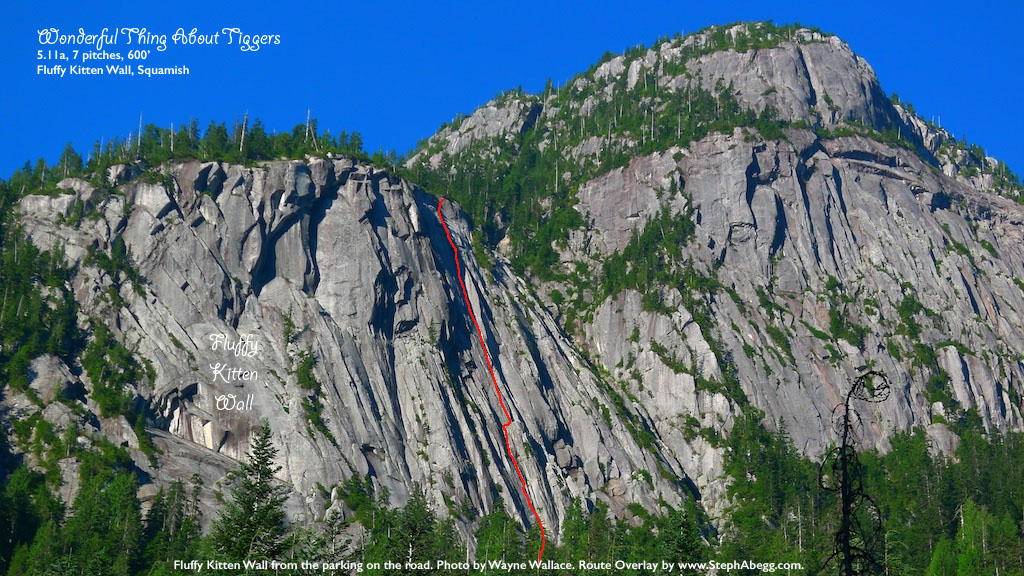
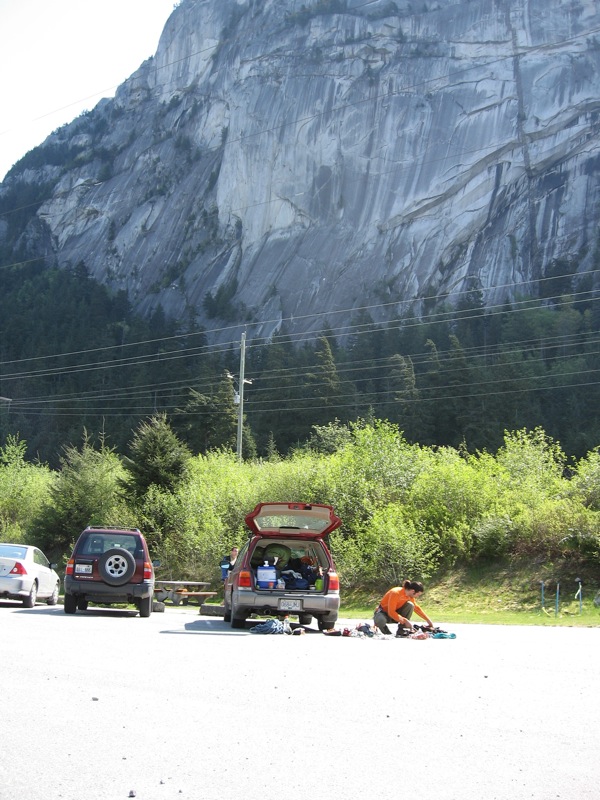
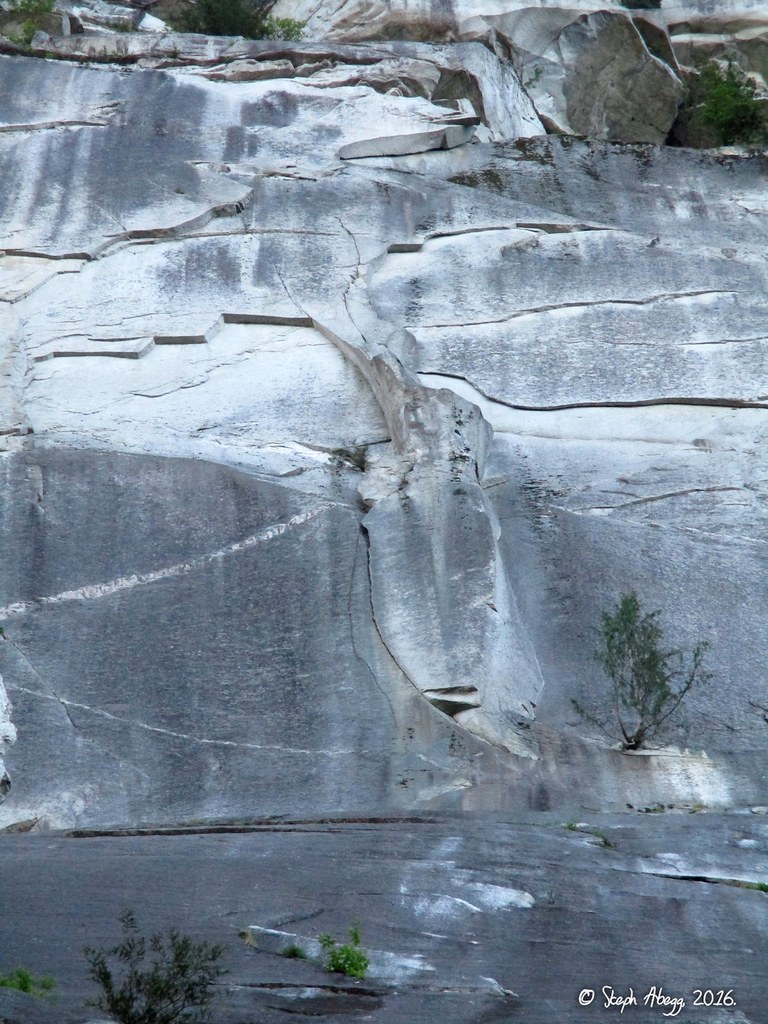
- The Wonderful Thing About Tiggers
- More Photos
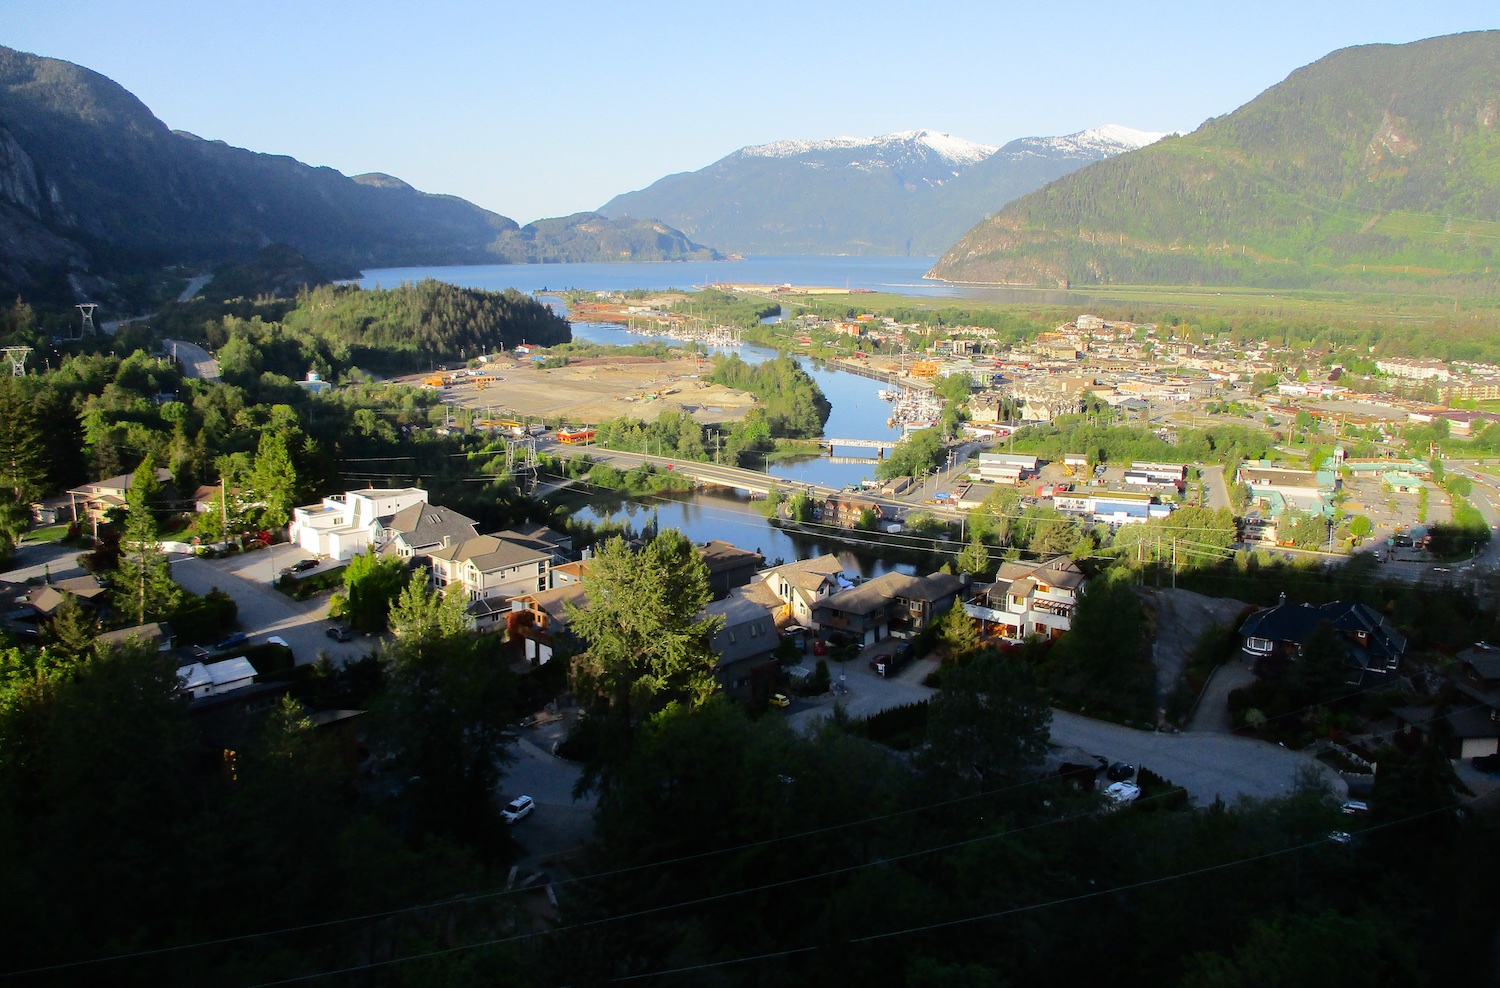
Region: British Columbia
Elev: 30-600 m / 100-2,000 ft
Rock: Granite
Mode:


Date(s): 2006(x6 days), 2007(x4 days), 2014(x3 days), 2015(x2 days), 2016(x6 days), 2017(x7 days), 2018(x5 days), 2019(x15 days), 2025(x3 days)
Partner(s): Trevor Edwards, Jason Cullum, Darko Sarenac, Ross Peritore, Jessica Todd, Geoff Georges, Tobias Tillemans, Jon Pobst, John Plotz, Todd Anderson, DR, Cindy Beavon, Chris Oleson, Kevin Piarulli, Hayley Pairulli, Noah Besen, Chris Cox, Braden Downey, Allie Downey, Shauna Morey, Joe Manning, Nate Beckwith