A striking line up the east face of Keeler Needle.
Region: California
Elev: 14,260 ft
Rock: Granite
Mode:
Date(s): June 26&27, 2018 (Tue&Wed)
Partner(s): John Bolte
Route Overlays
CLICK TO ENLARGE
Intro
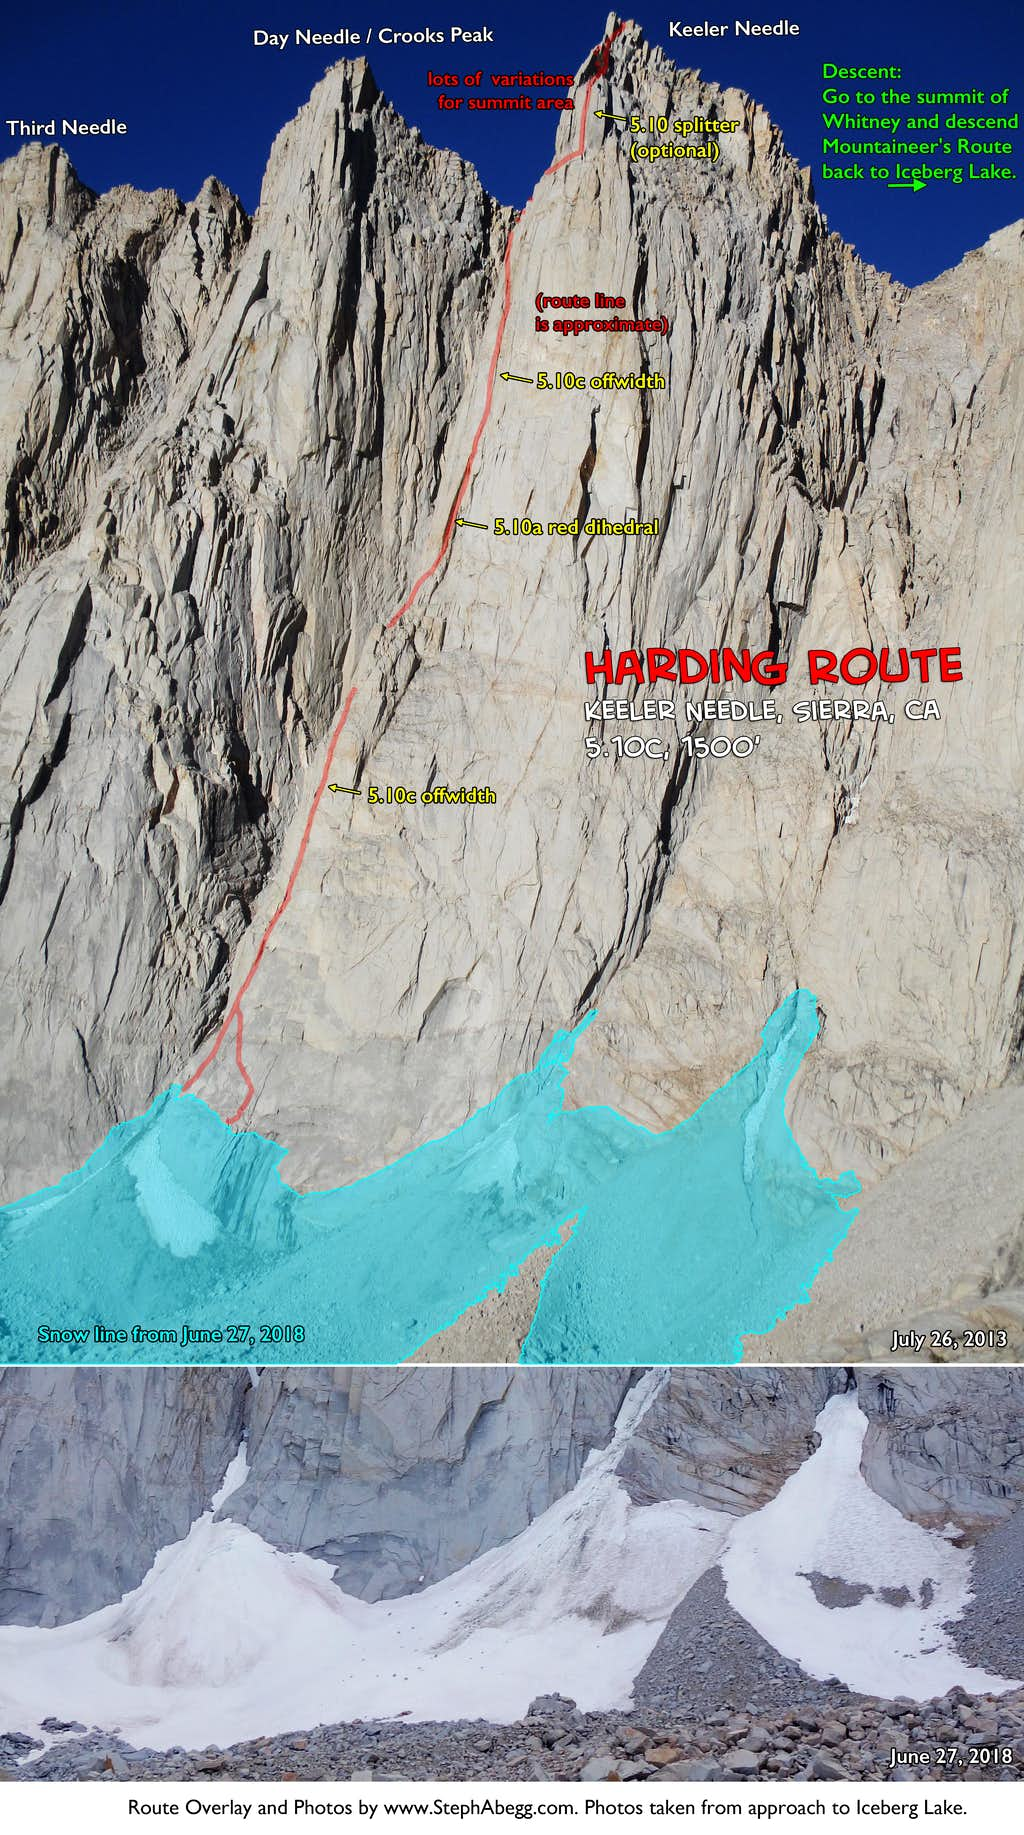
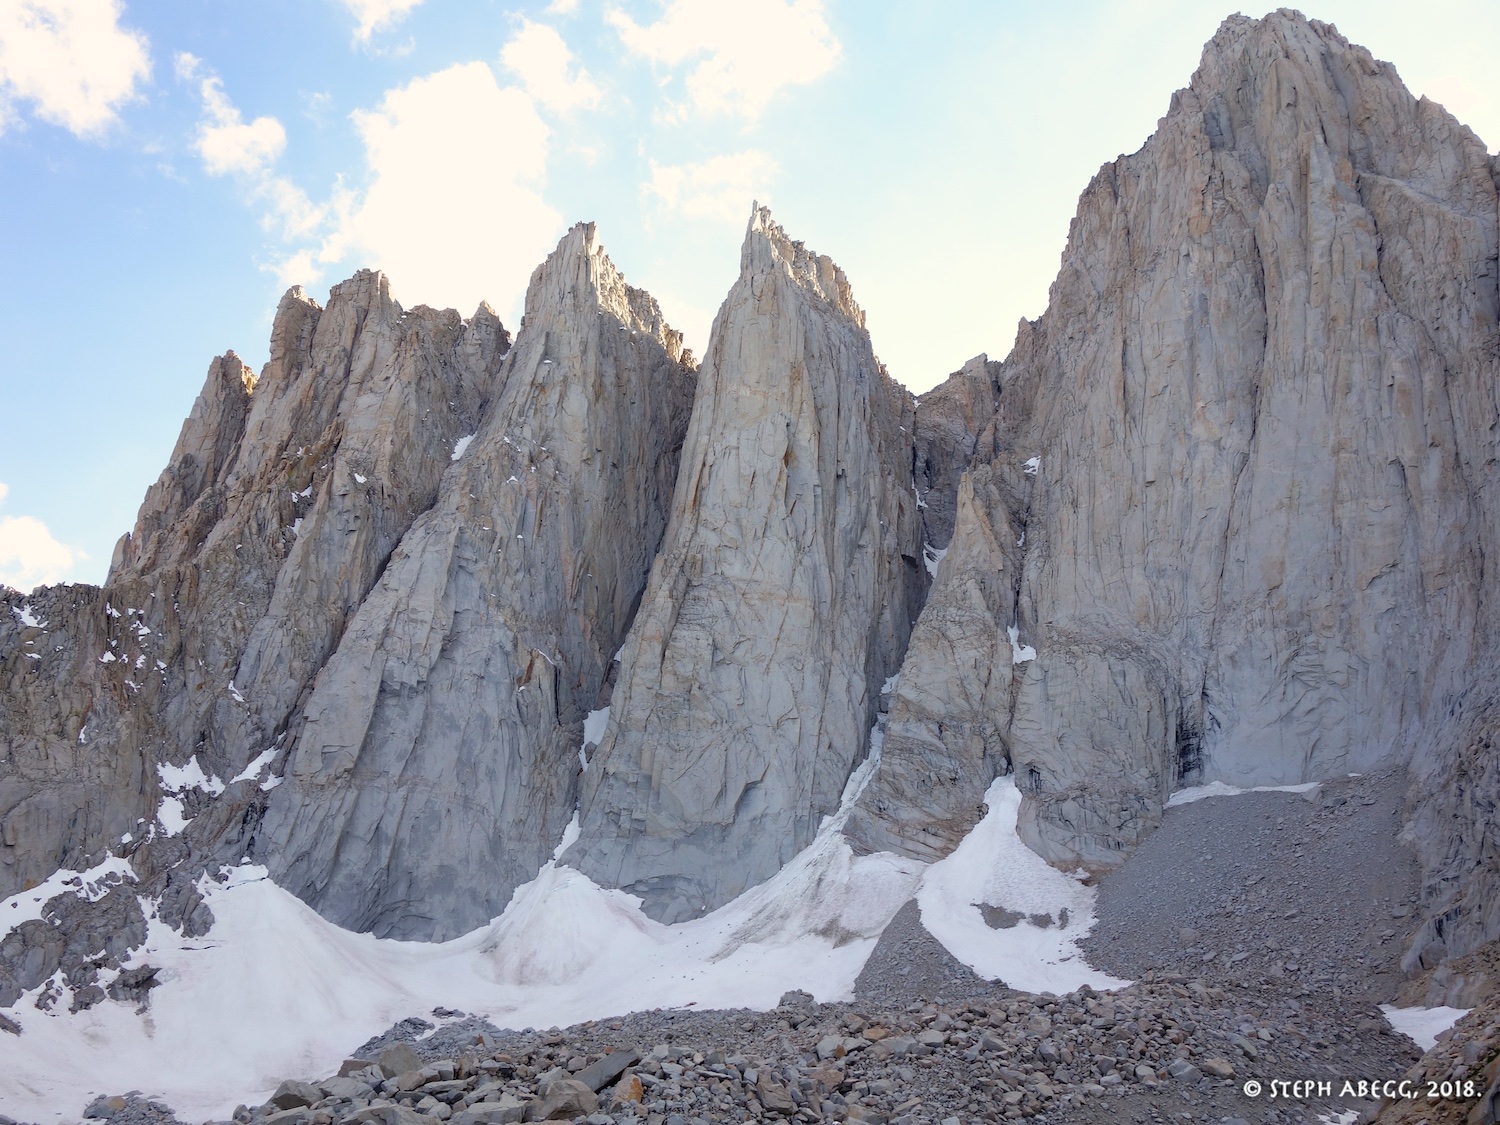
Keeler Needle's location, perfect needle-like shape, and sheer 1,500-ft east face make it one of the most striking formations in the High Sierra. The Harding Route is known to be a bit stout, with several 5.10 sections, some wide crack climbing, some rotten and dirty rock, some splitter cracks, and of course all done at 13,000+ feet above sea level. Sounds like just my kind of adventure!
In 2018, I found the perfect partner for the adventure: John Bolte. After a few days climbing in the Needles, John and I drove to the Whitney area to climb a few routes in the Portal. Stopping at the ranger station in town, we discovered that an overnight permit for Iceberg Lake was available that night. Plus, the forecast was for 60° temps on the summit of Whitney. So, instead of taking a rest day as planned, on the spur of the moment we packed up our gear and hiked up to Iceberg Lake, and climbed Keeler Needle the following day.
We had an awesome time on the route. The route is such a proud line and there is enough good climbing to overcome the sections of choss and physical wide climbing (but this is all part of the adventure anyway!). We climbed in t-shirts with our shoes, water, food, and puffies (never put them on) on our harnesses. At a pretty relaxed pace, we climbed the route in under 10 hours, reaching the summit in mid-afternoon, with plenty of time to hike back down to camp and hike out that evening. What a excellent High Sierra day!
The following page gives an overlay and photos from our climb.
"The Big Four"
In his guidebook The Good, the Great, and the Awesome, Peter Croft lists his "Big Four Free Climbs" of the High Sierra. These are:
In 2015, I climbed the first three, had hoped to climb Keeler Needle as well but it never worked out due to a combination of partner and weather issues. I climbed Keeler Needle three years later, in 2018. Click links to see trip reports.
Time Stats
Car to Iceberg Lake: 3 hours 40 minutes (includes a 30 min break) Iceberg Lake to base of route: 40 minutes Climb route: 9 hours 30 minutes Descent: Keeler to Iceberg Lake via Mountaineers Route: 2 hours Iceberg Lake to car: 3 hours 10 minutes (got dark somewhere between Upper and Lower Boyscout Lakes)
Pitch-by-Pitch Photos
THIS TRIP REPORT IS STILL MOSTLY IN THE EMBEDDED HTML FORMAT OF MY OLD WEBSITE. MOBILE Tip: Try Landscape mode. It is generally more mobile friendly.
Note about pitch breakdown: There are three sources of beta I found useful when researching the climb: (1) SuperTopo High Sierra Climbing guide, (2) Peter Croft's The Good, The Great, and The Awesome, and (3) Dow Williams' summitpost beta. For the most part, we relied exclusively on Dow Williams' beta, which was excellent beta and kept us on track. We ended up climbing his Pitches 8-10 as our Pitches 8-9 by not climbing all the way up to the headwall before traversing right for the next pitch, so we ended up with one fewer pitch than he had. Looking at the SuperTopo topo after8 and the climb, our route pretty much followed the SuperTopo, which gives the route 13 pitches (Dow gives it 14). In the following pitch-by-pitch description, I will use the 13 pitches from the SuperTopo guide, but will also note how they correspond to Dow's beta as well as Peter Croft's guide.
Photos:
Photo descriptions:
Approach
Approach to camp: Doing the route car-to-car would be possible but would be a pretty huge day and give no chance for acclimatization to the altitude if you come from sea level as I do. If not car-to-car, then you'll need to figure out where to camp. We camped at Iceberg Lake (took us just over 3.5 hours from trailhead to Iceberg Lake with overnight gear); Iceberg Lake is more pleasant and has easier access to water than bivy sites closer to the base of Keeler Needle, plus it is on the descent route, so it would be my recommendation.
Approach to base of route: Get to the base of the route. In early summer, there is a snowfield below the route, which can be a crux of the route depending on conditions. Obviously, it's ideal not to bring crampons up the route. In early summer with above-freezing nighttime temperatures (like when we did it), the snow can be soft and quite easy to kick steps in. In later summer it can be quite icy. If you can access the rock at the middle of the face, it is possible to climb left into the corner system of the route, as we did even though we did not need to.
1.
2.
3.
4.
5.
6.
7.
8.
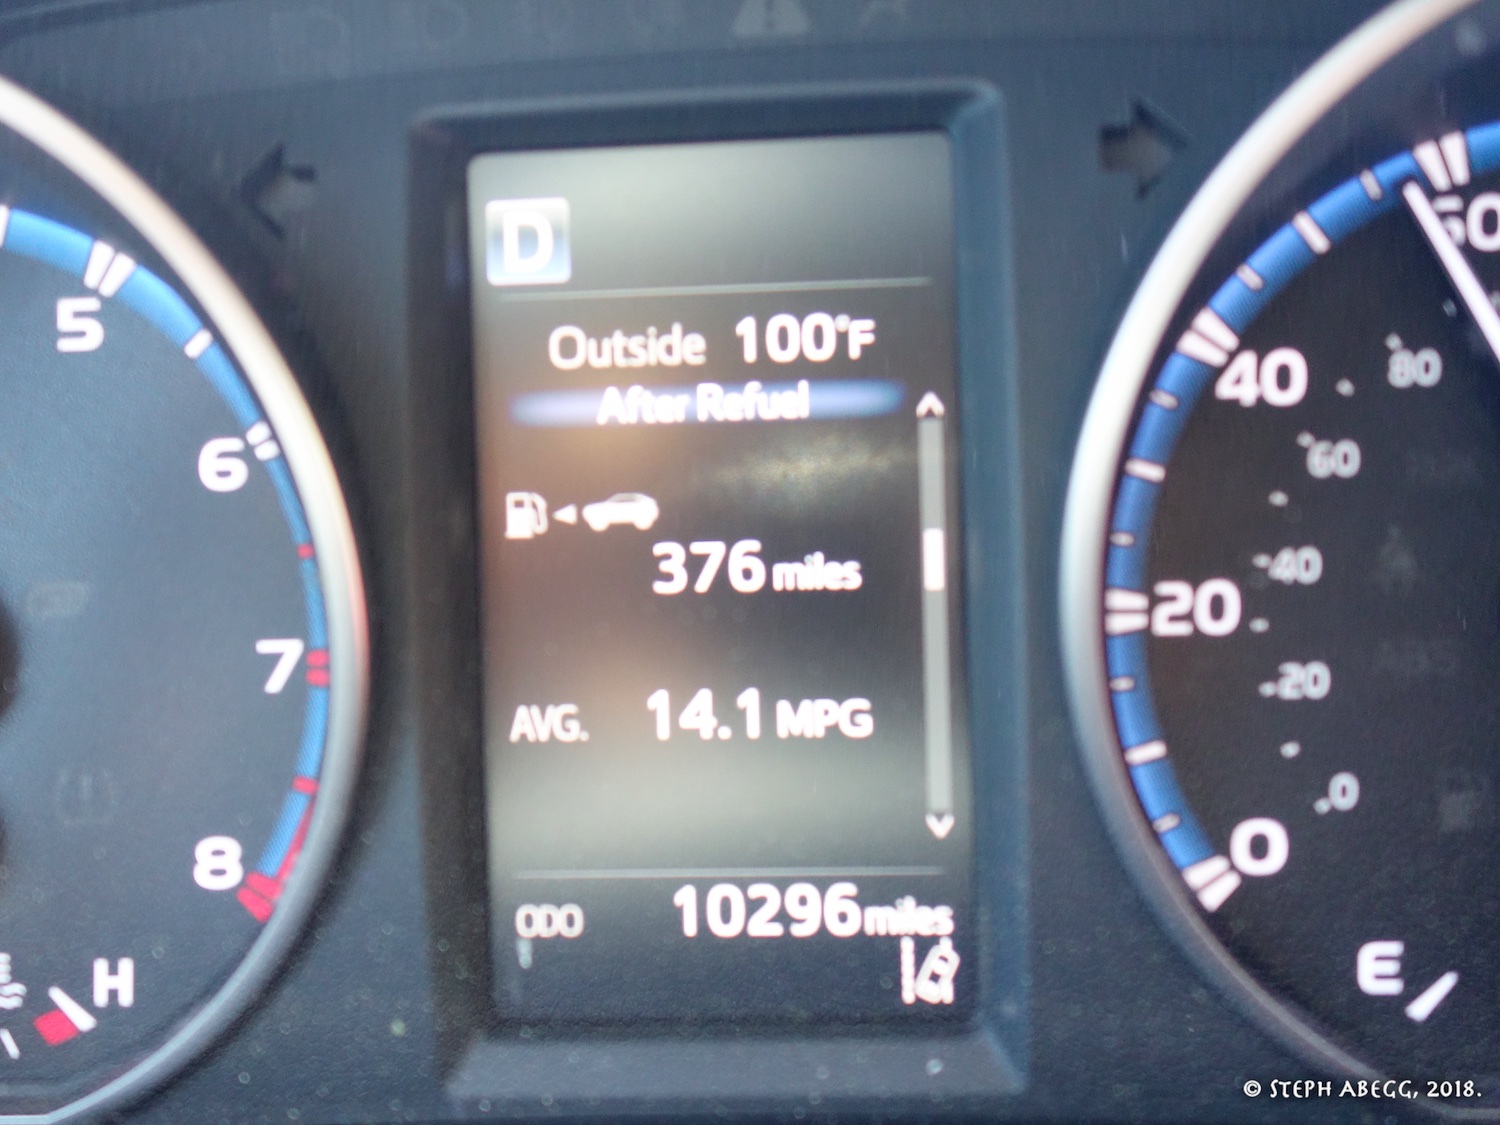
1.100° in Lone Pine means 60° on Keeler Needle. Perfect!
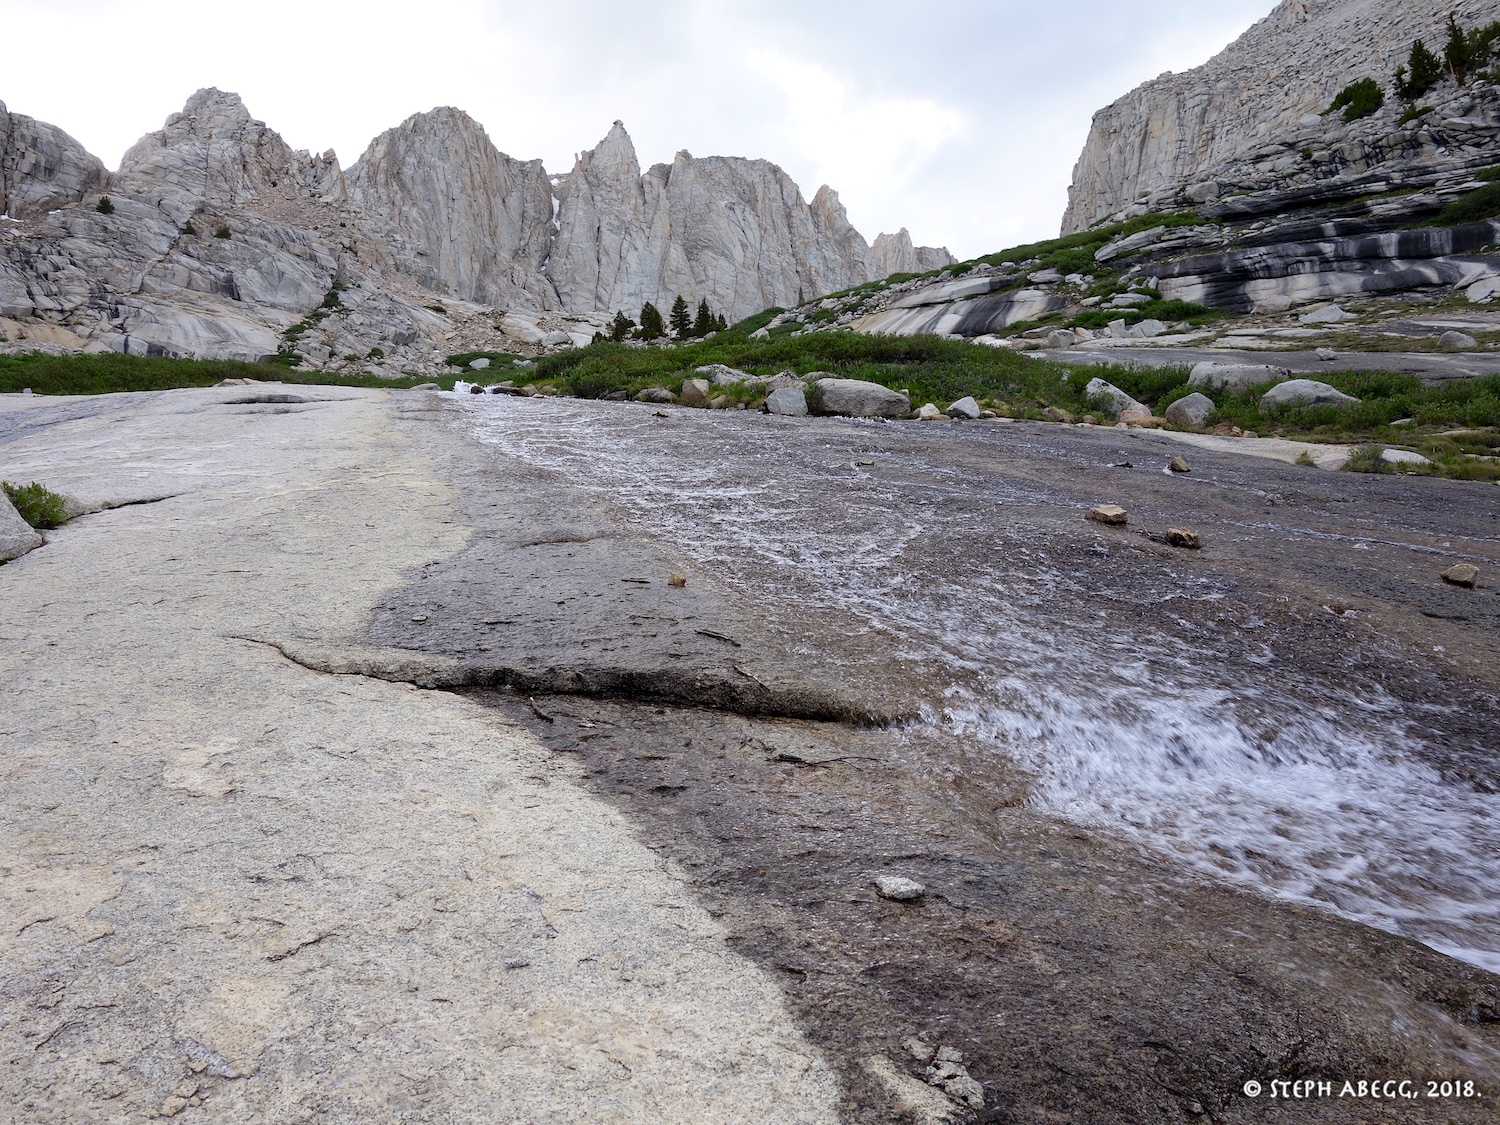
2. On the slabs between Lower and Upper Boy Scout Lakes.
3. Keeler Needle as seen from the final approach up to Iceberg Lake. We were a bit concerned by the snow below the base, but it turned out to be soft enough to kick steps up, even at 6am in the morning.
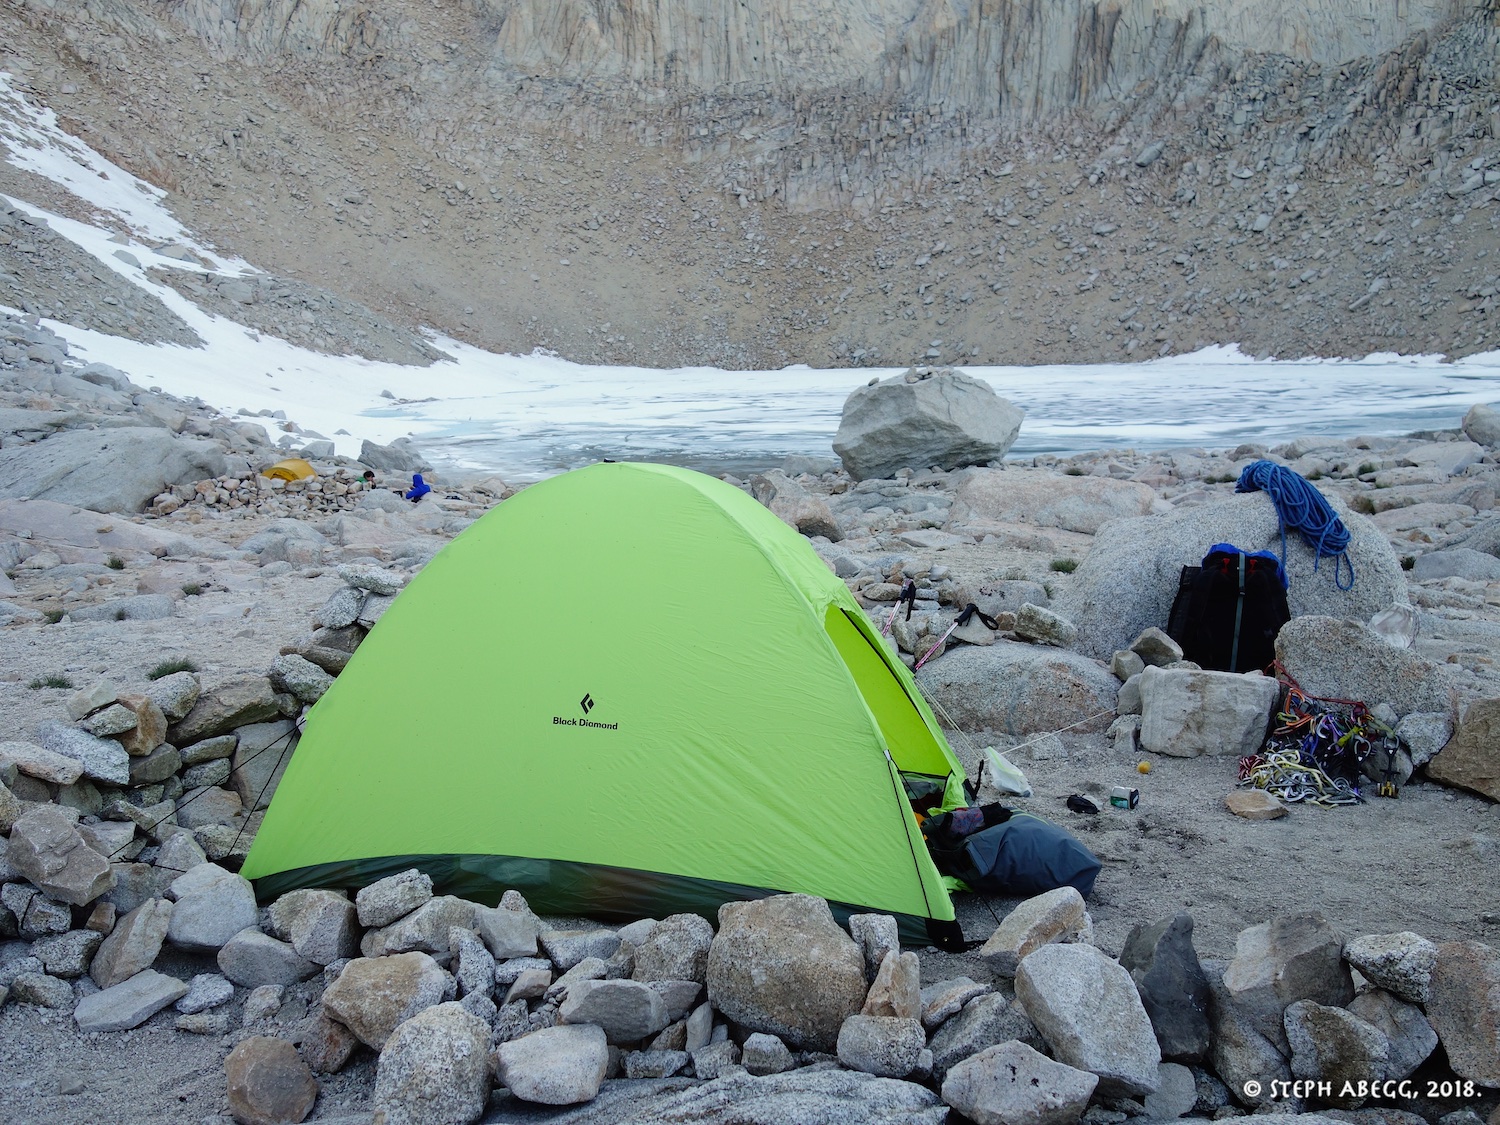
4. Our camp at Iceberg Lake. Sleeping at 12,000 feet is a good way to acclimatize!
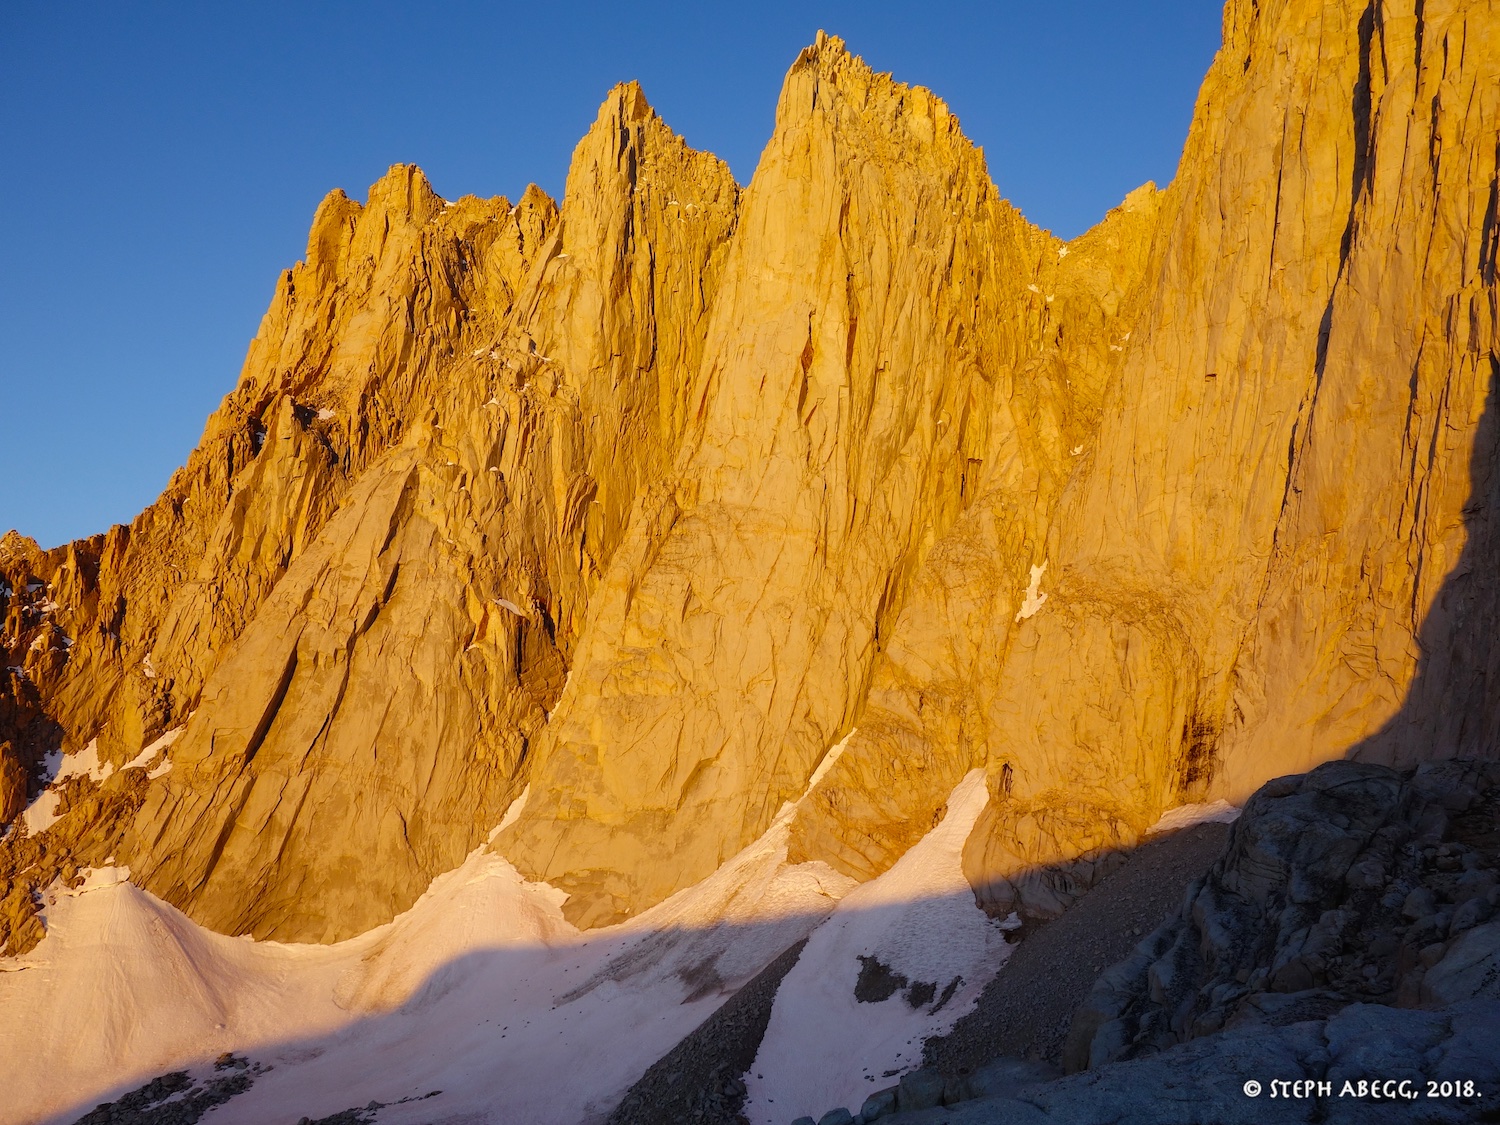
5. Morning sun on Keeler Needle. John had convinced me out of the plan of a "first-light" start, which would have put us on the rock at around 5am. Instead, we hit the rock around 6:45am, which gave us plenty of time.
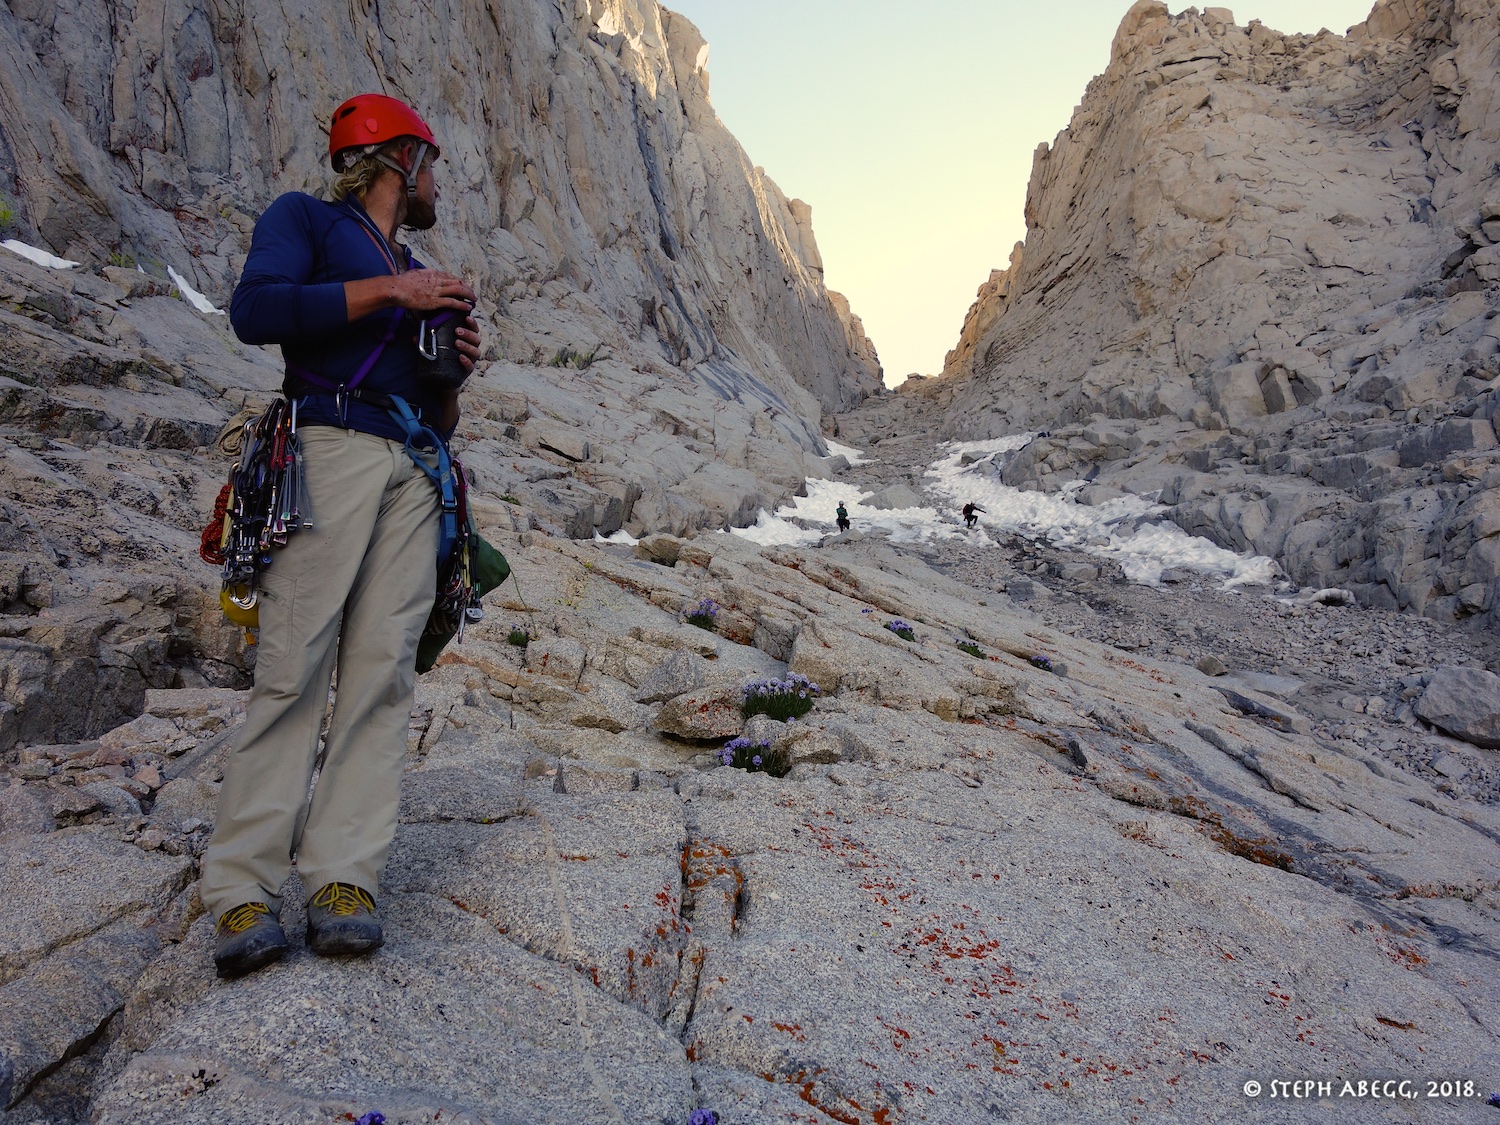
6. Approaching the base of Keeler Needle.
7. The final steep snow below the base of rock. Since it was a warm stretch of weather, the nighttime temperatures were above freezing and we found the snow soft enough to kick steps. But if the snow were bullet hard, we would have had to spend quite a bit of time chopping out steps with our nut tools....
8. We accessed the rock at the pink feldspar area just left of the center of the east face. This is probably the best place to access the rock if the snow is a problem. The actual route starts further left, which we could have accessed if we had traversed the snow further. But this way worked just fine.
Pitch
1
STopo P1
Croft P1
Dow P1
5.9. If you start in the corner, great. If not, traverse into it from the right. Then climb up cracks and corner to below an obvious roof. We linked this pitch with Pitch 2, but I am not sure that I would recommend this due to rope drag at the 10b crux on Pitch 2. Perhaps linking is better if you start in the corner or do a short approach pitch into the corner first.
9.
10.
9. We started to the right of the Harding Route and traversed left into it. This was good (5.8ish) climbing on clean rock first up a crack and underclinging a roof. 10.Looking up Pitch 1 once we traversed left into the Harding Route. Oops, it toggled to Manual on accident. But you can make out enough features to get an idea of where you are on the wall.
Pitch
2
STopo P2
Croft P2
Dow P2
5.10b. Pull the roof (crux), which is protected with a C4#4. Continue up to a belay ledge with a couple of old bolts on top of a block.
11.
12.
13.
14.
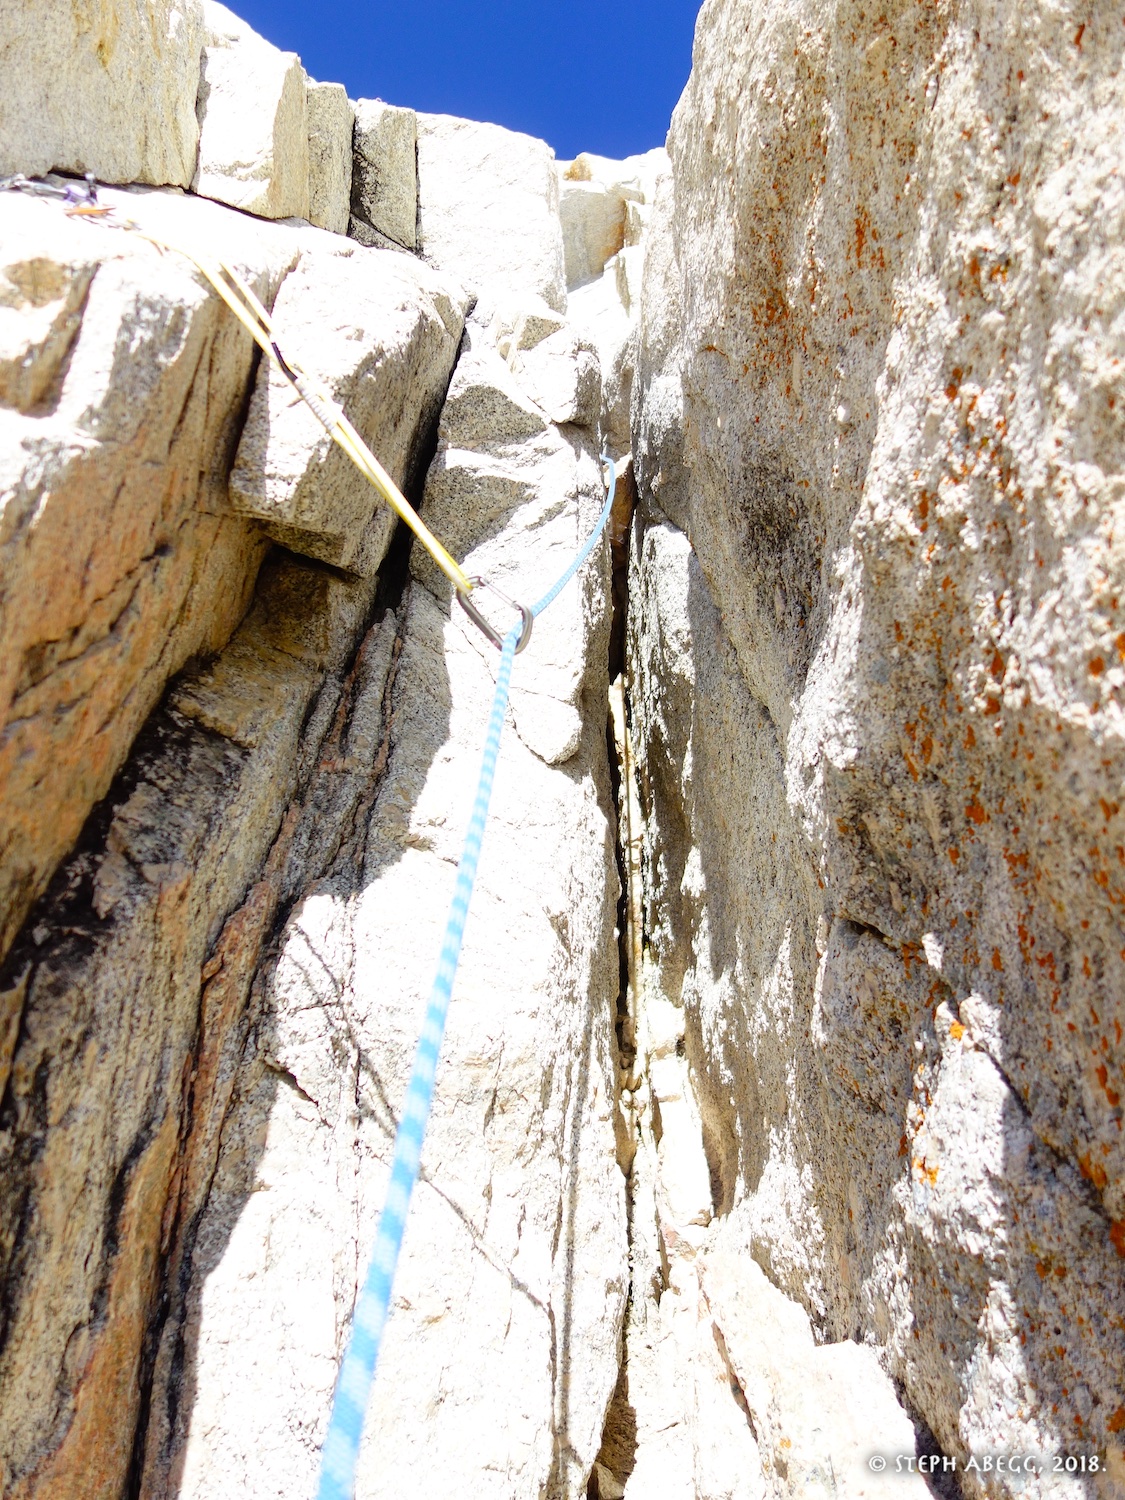
11. Looking up the chimney system.
12. Looking up at the roof which is the crux of the pitch.
13. And old pair of bolts at the top of the pitch. 14. Looking down from the top of the pitch. A pair of climbers is starting up the route. They had started at the actual start of the Harding Route rather than traversing into it as we did.
Pitch
3
STopo P3
Croft P3
Dow P3
5.10b. Pull the roof (crux) with double cracks and move right and up on steep 5.8/5.9 climbing to the base of the first off-width pitch.
15.
15. John pulling the roof. The rock is a tad rotten and doesn't give a whole lot of confidence at times, so pulling a 10b crux is no easy task on this route. Nice work John.
Pitch
4
STopo P4
Croft P4
Dow P4
5.10c. Climb up the off-width. The 10c crux protects with a C4#4. The pitch ends on a comfortable belay ledge.
16.
16. The first offwidth of the route. I found it kind of fun. The crux was pretty short and did not seem too bad for 10c.
Pitch
5
STopo P5
Croft P5
Dow P5
5.5. A long pitch (possible simulclimbing) of 4th and low 5th to a comfortable belay ledge about a pitch below the obvious right-facing red dihedral (although you cannot see the right face from here).
17.
17. Pretty moderate climbing.
Pitch
6
STopo P6
Croft P6
Dow P6
5.8. Climb up to a belay below the obvious right-facing red dihedral. There are several options here. The easiest ground is to the left, but eventually you head right and pull a short 5.8 move to the belay.
18.
18. More moderate climbing. Aim for the base of the red diheral which is around the middle of the photo (you cannot actually see the right-facing bit from this angle).
Pitch
7
STopo P7
Croft P7-8
Dow P7
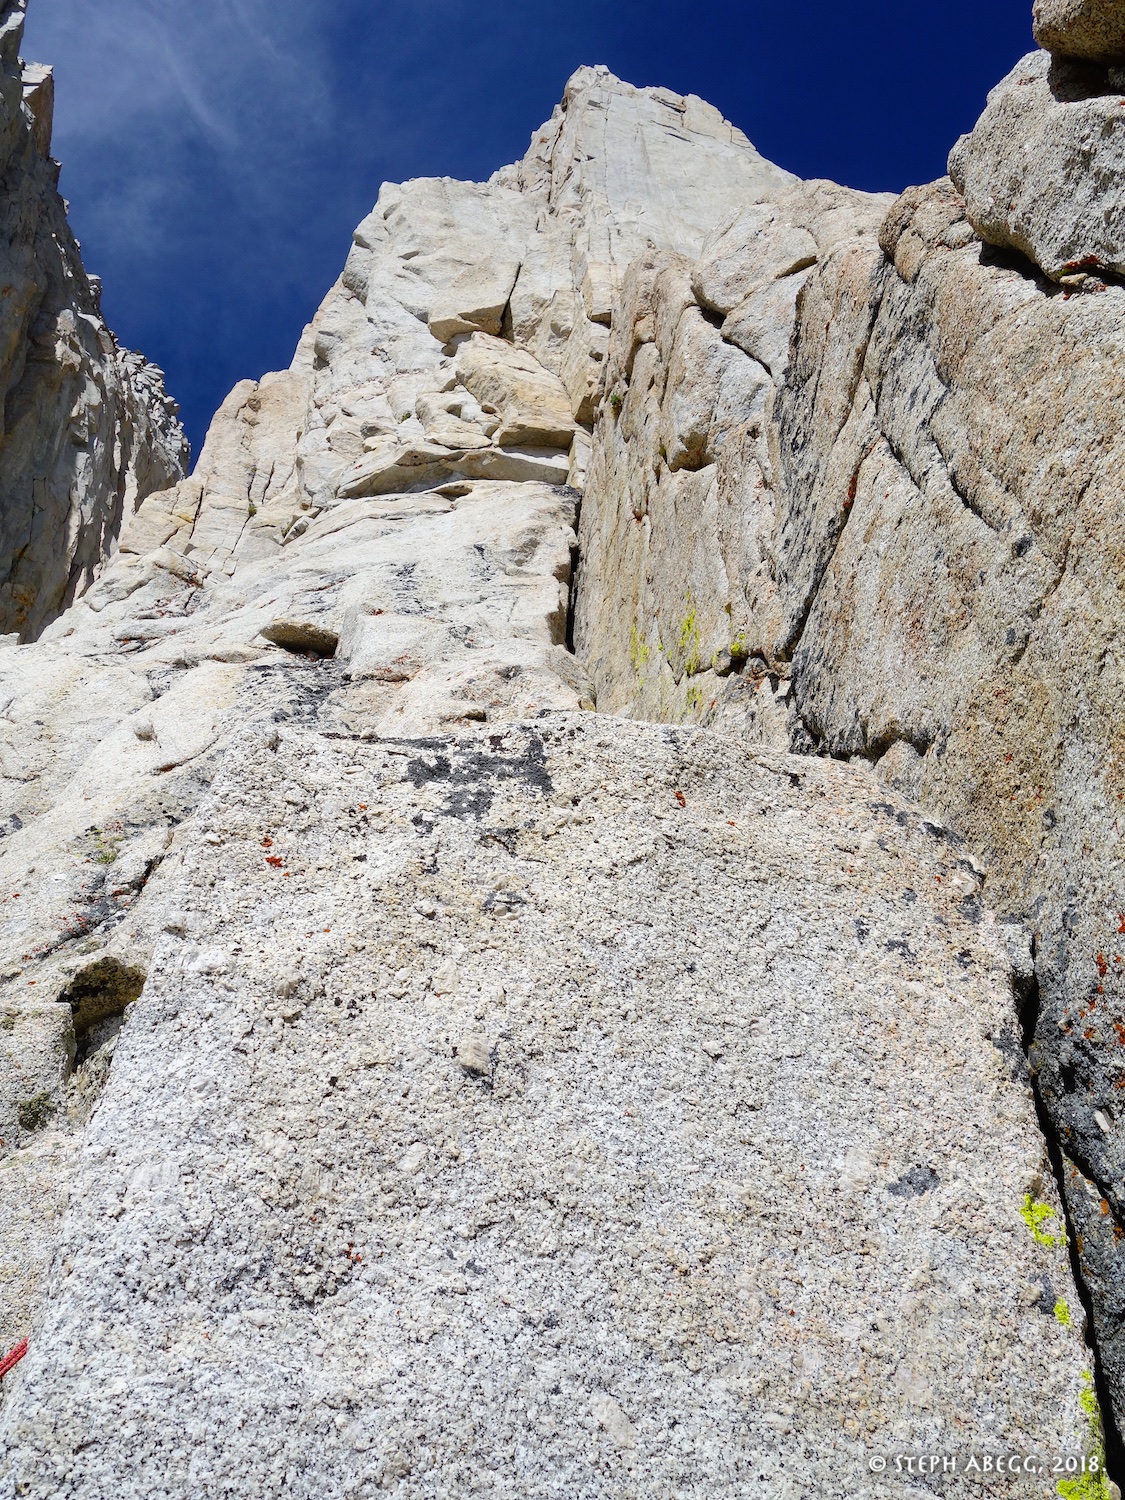
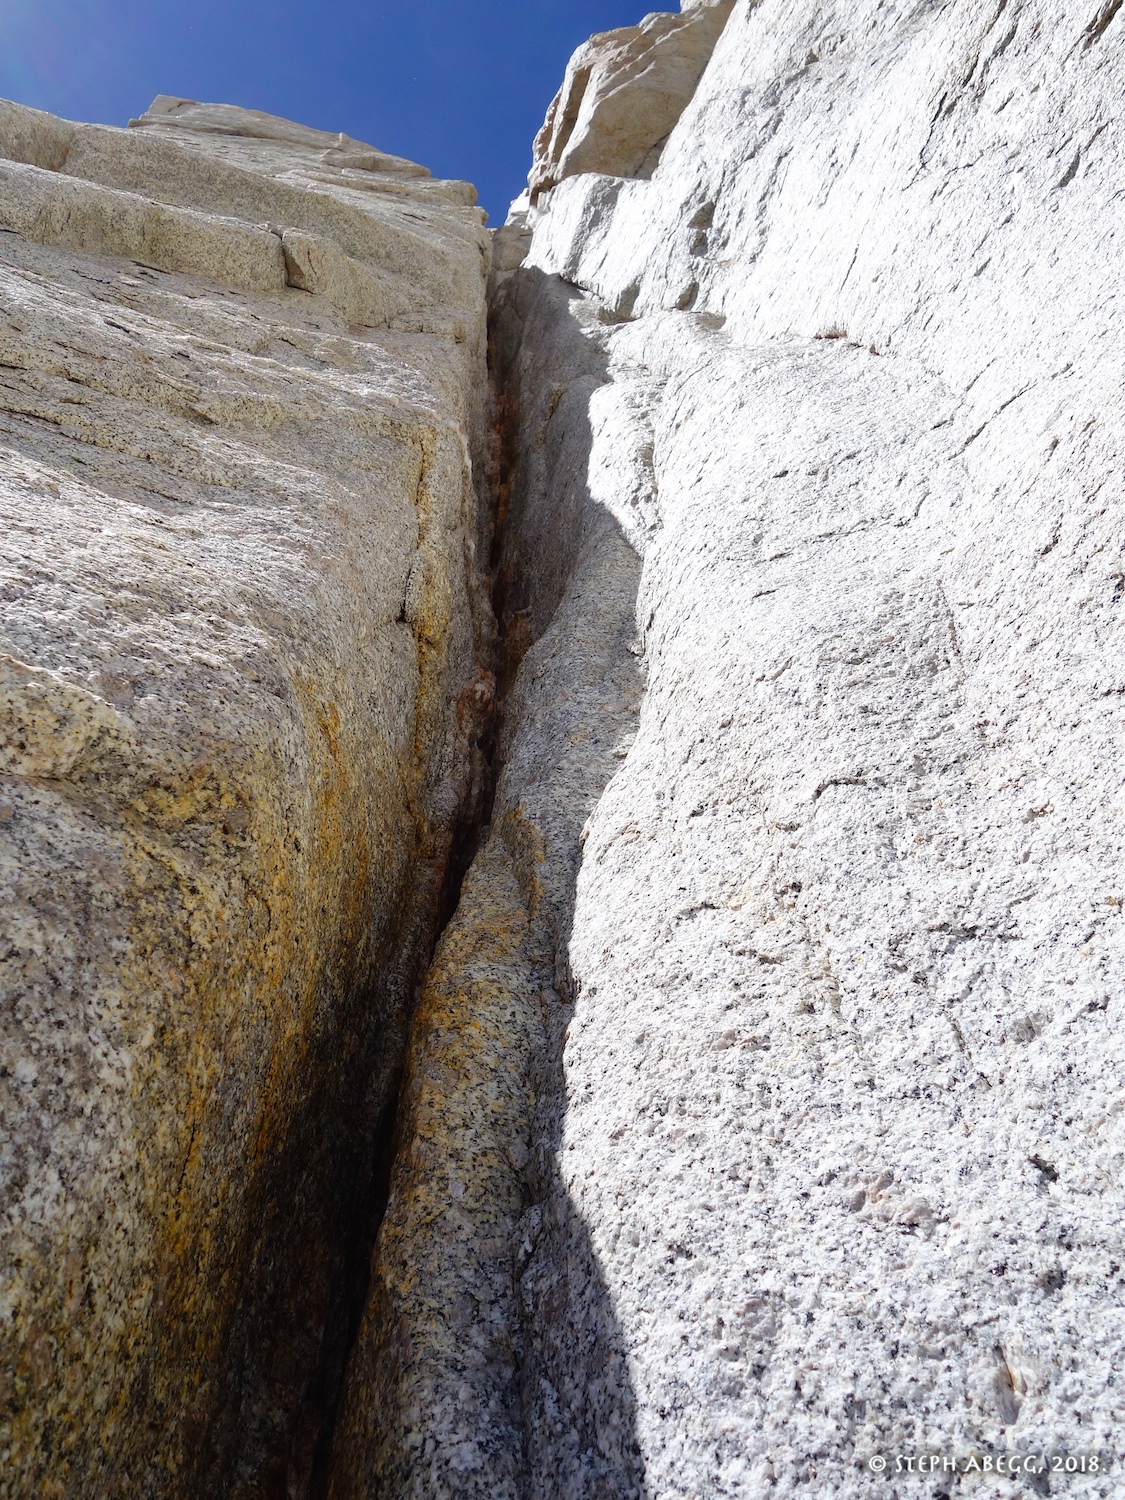
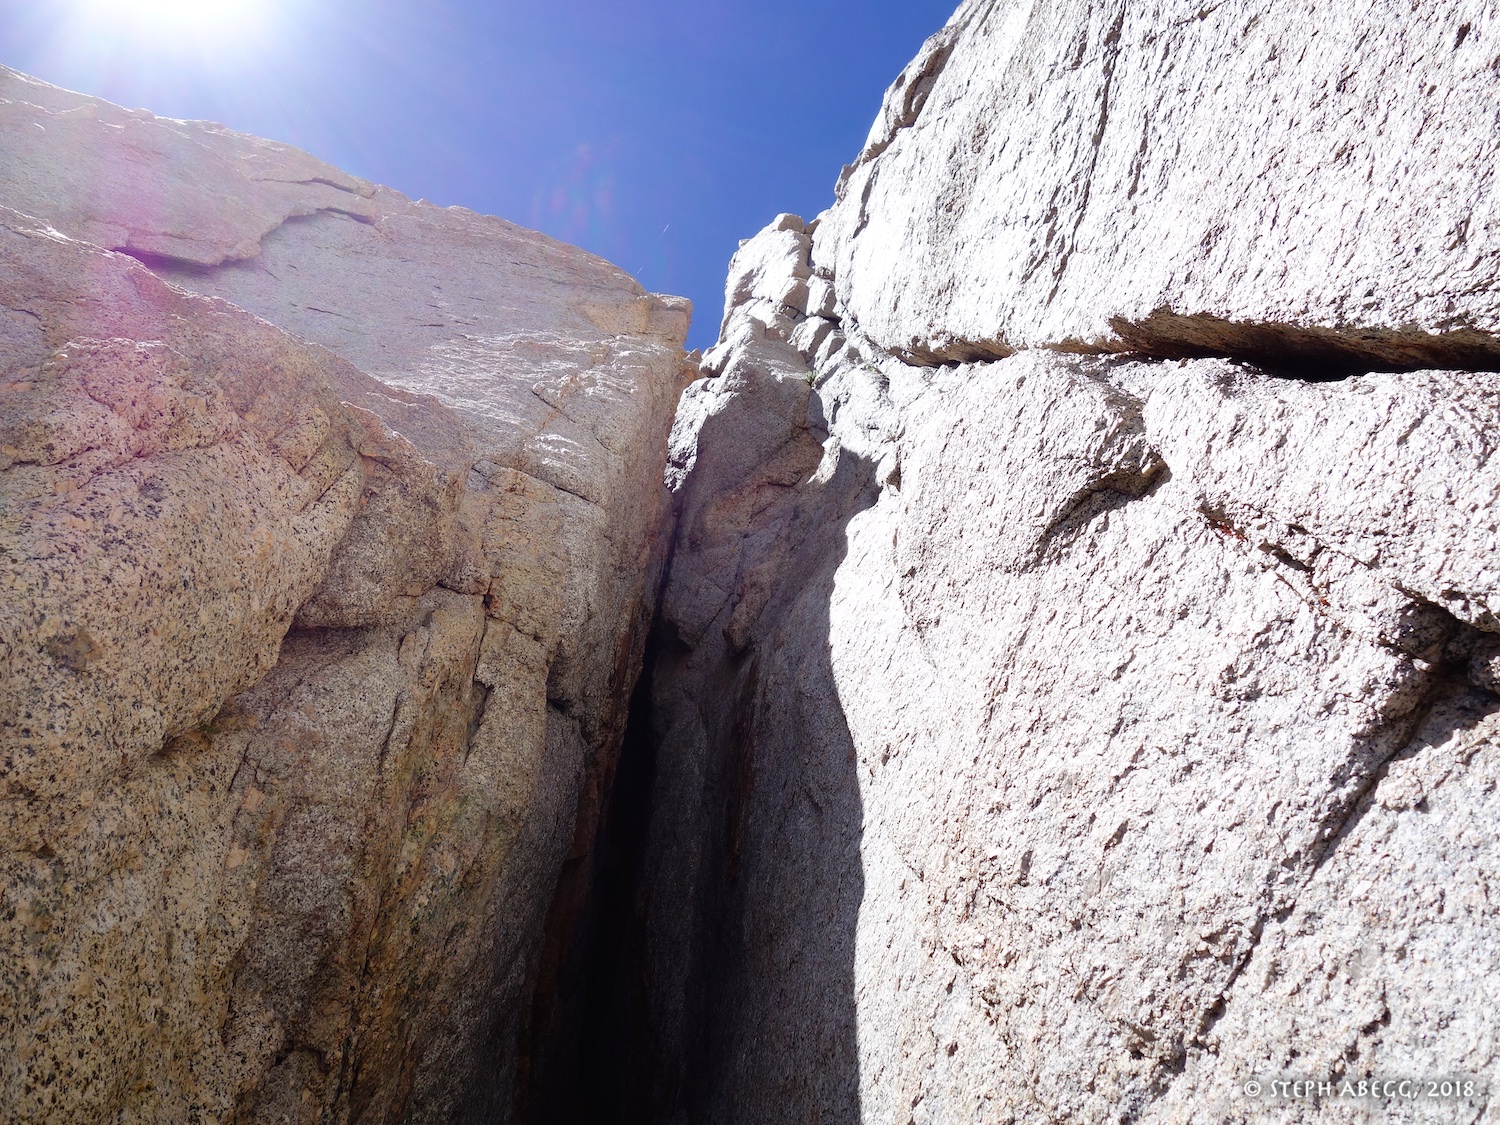
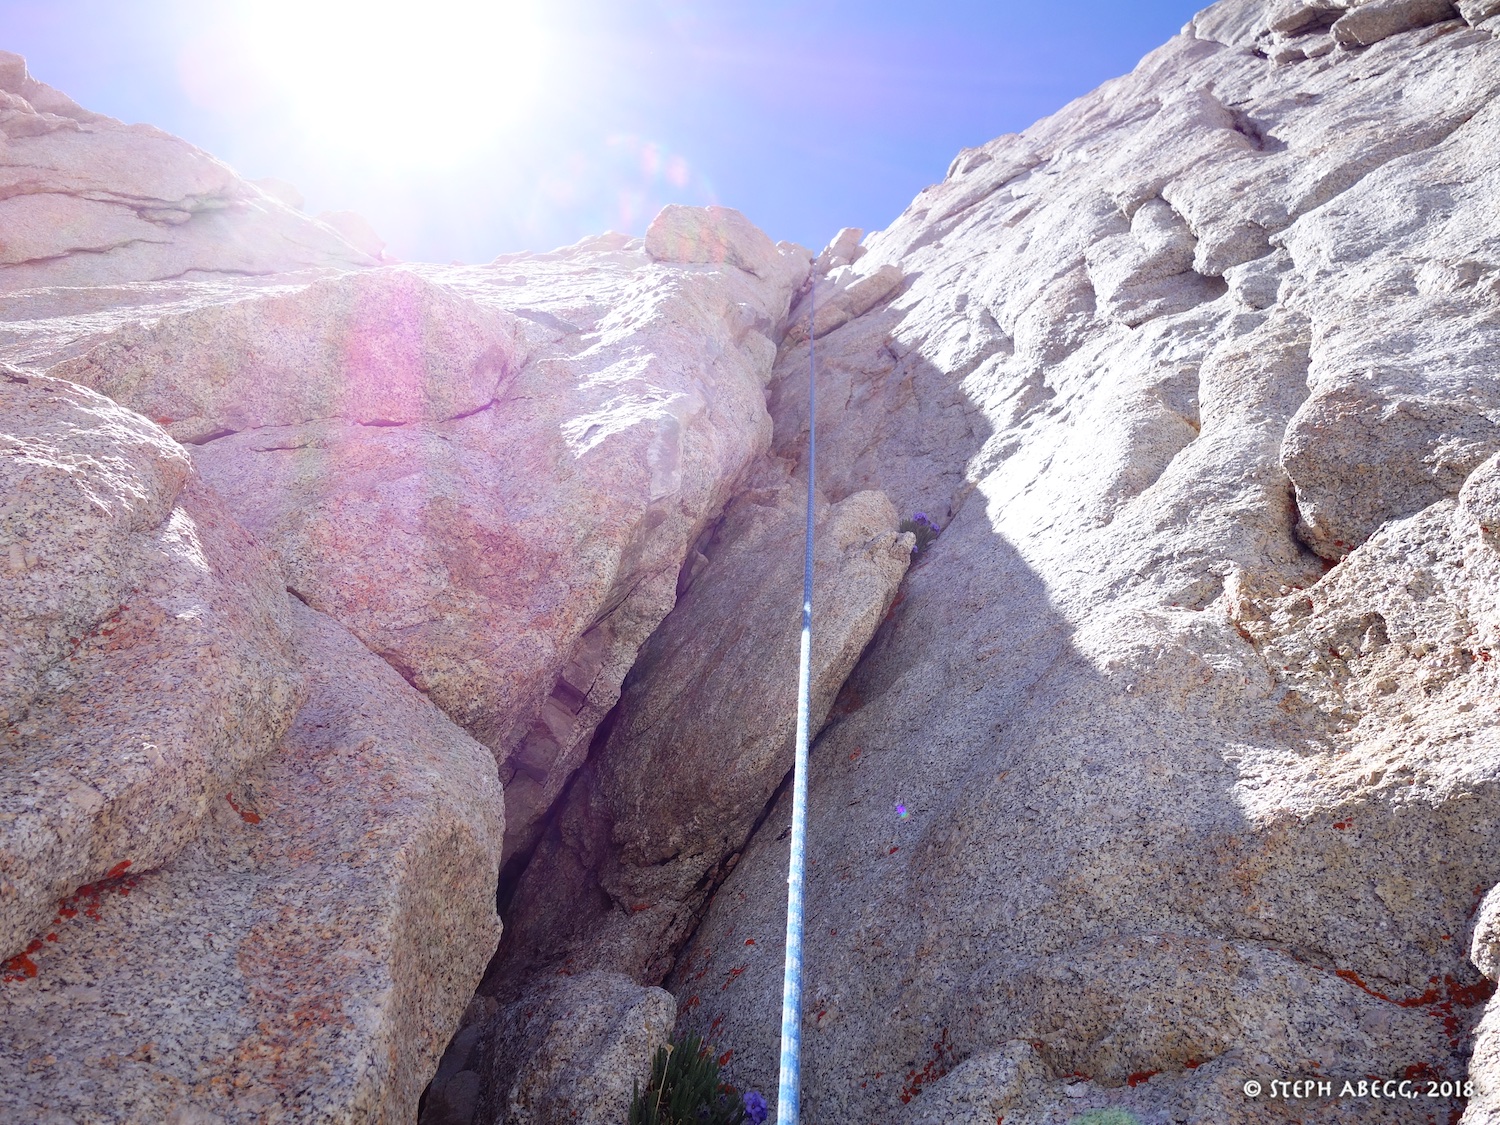
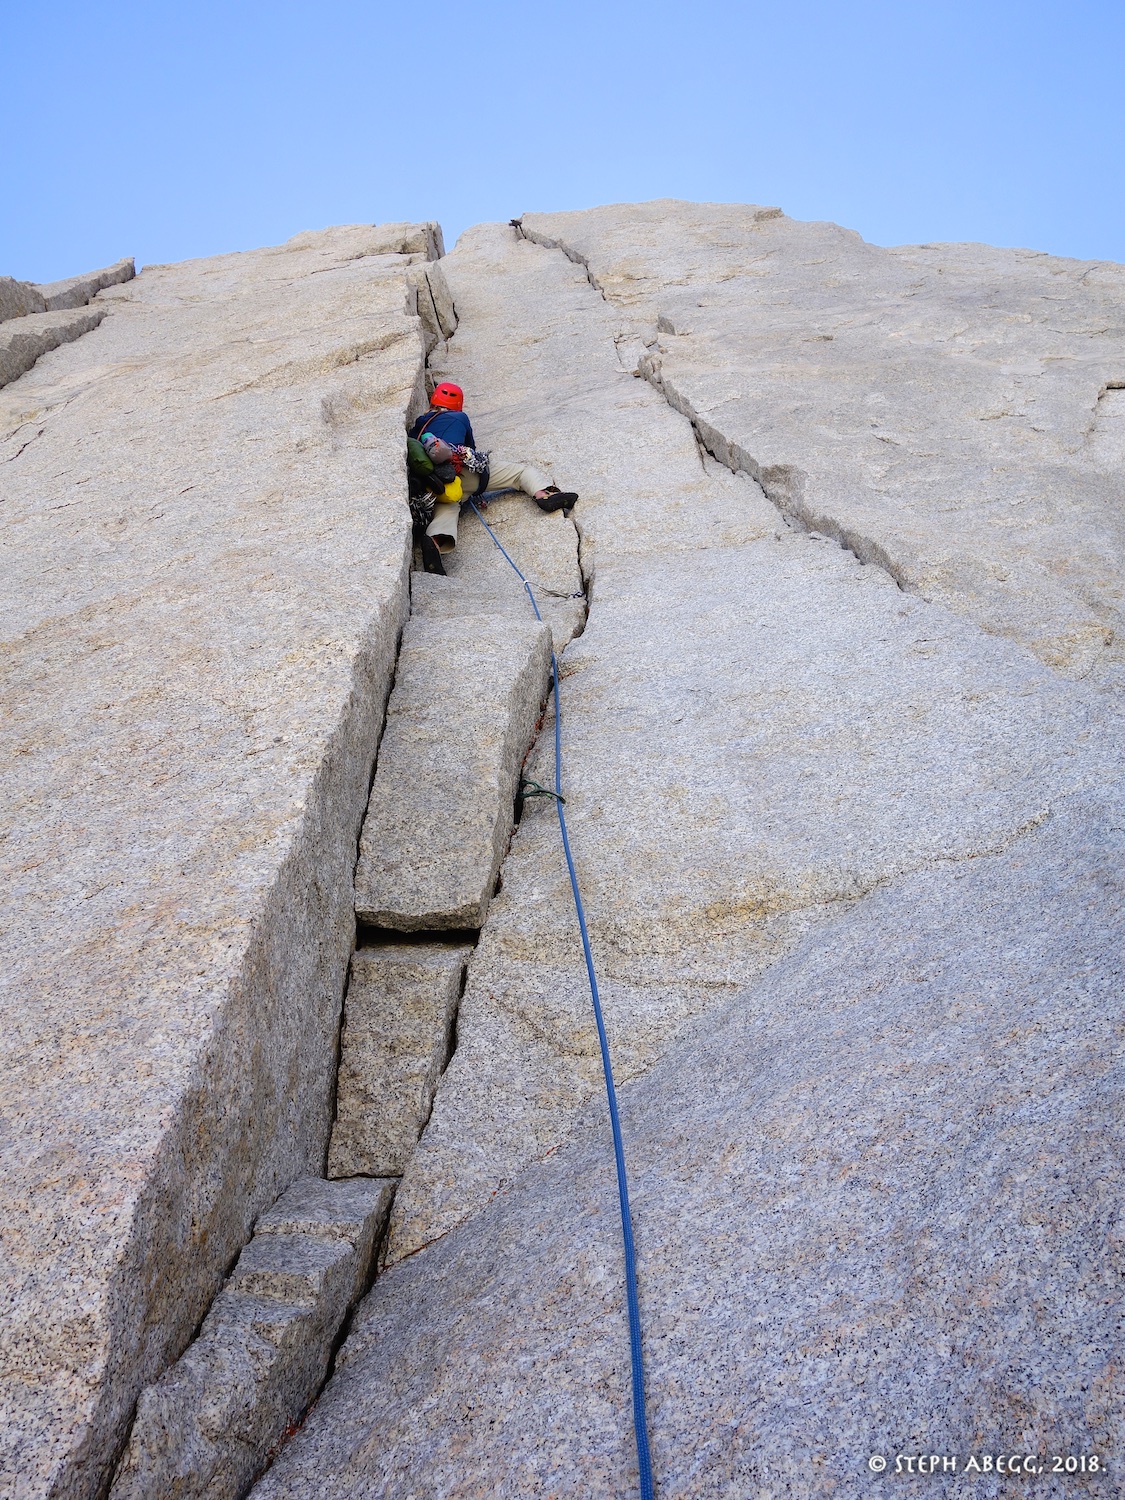
5.10a. This right-facing red dihedral is one of the most identifiable features of the route from the ground. It is also one of the best pitches of the route. Jam and stem up the steep corner to the base of the off-width/chimney. It is possible to set a belay right at the top of the corner, and then do a short pitch to the base of the off-width chimney.
19.
20.
21.
19. Looking up the red dihedral. This is an aesthetic pitch.
20. Looking down while leading the red dihedral. Fun stuff.
21. The final stretch to below the offwidth. This can be done as a separate short pitch.
Pitch
8
STopo P8
Croft P9
Dow P8-9a
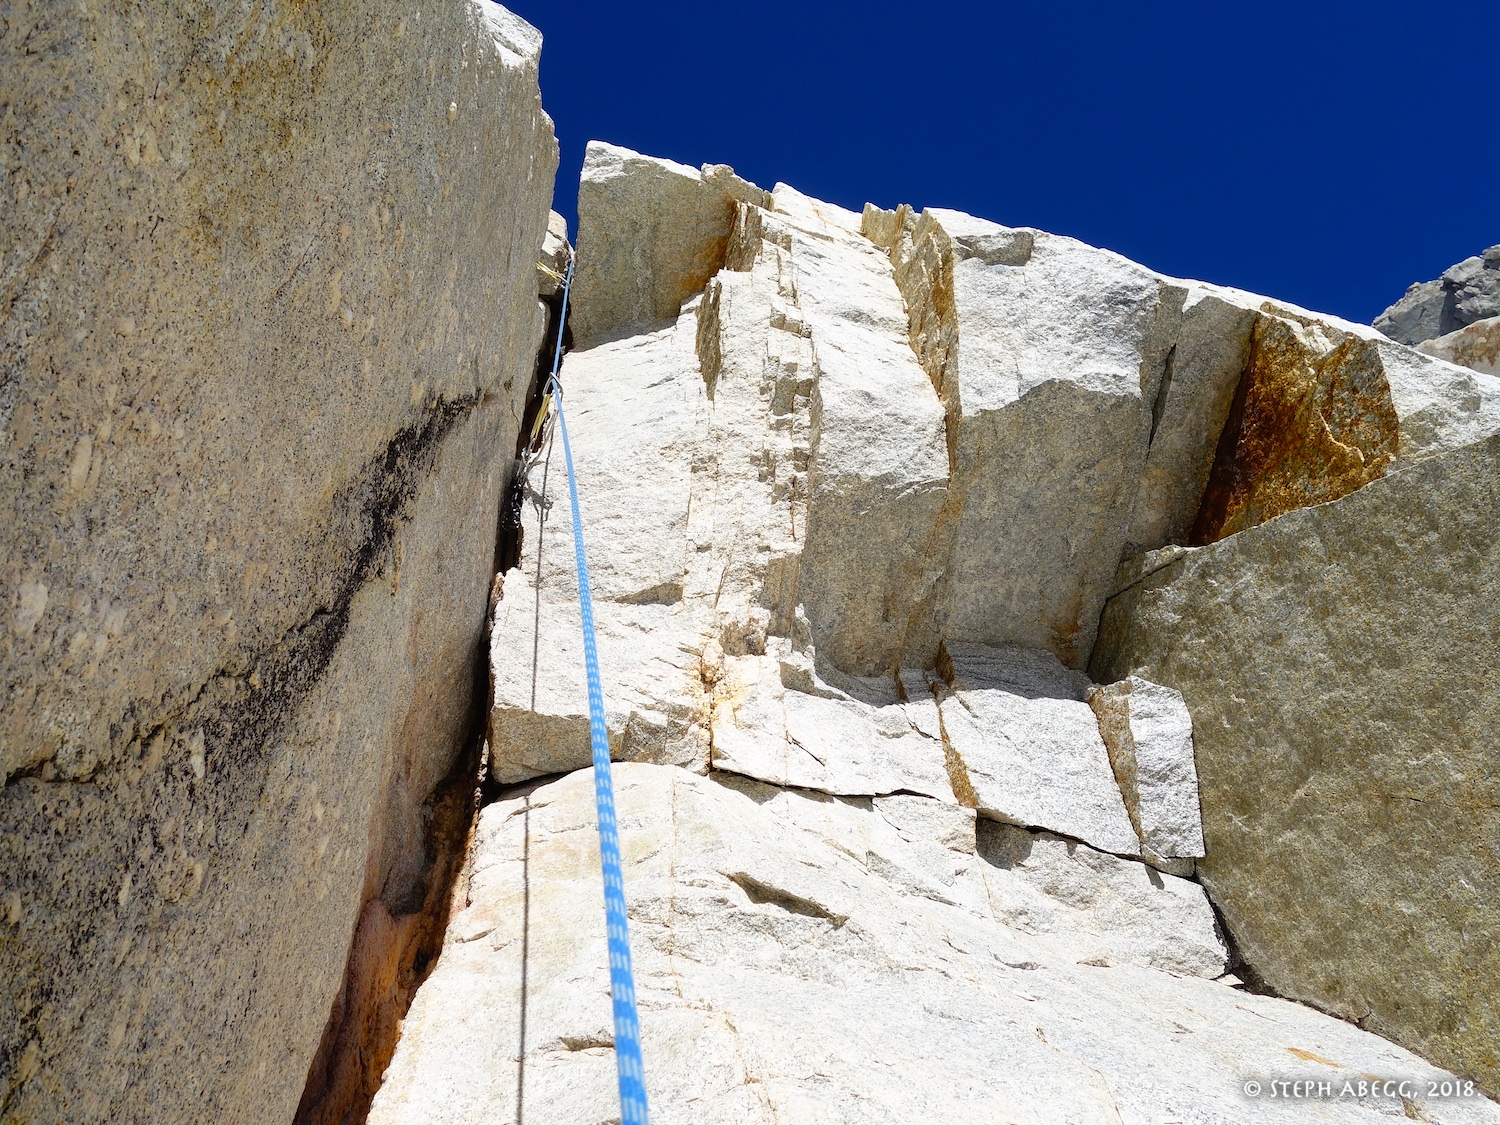
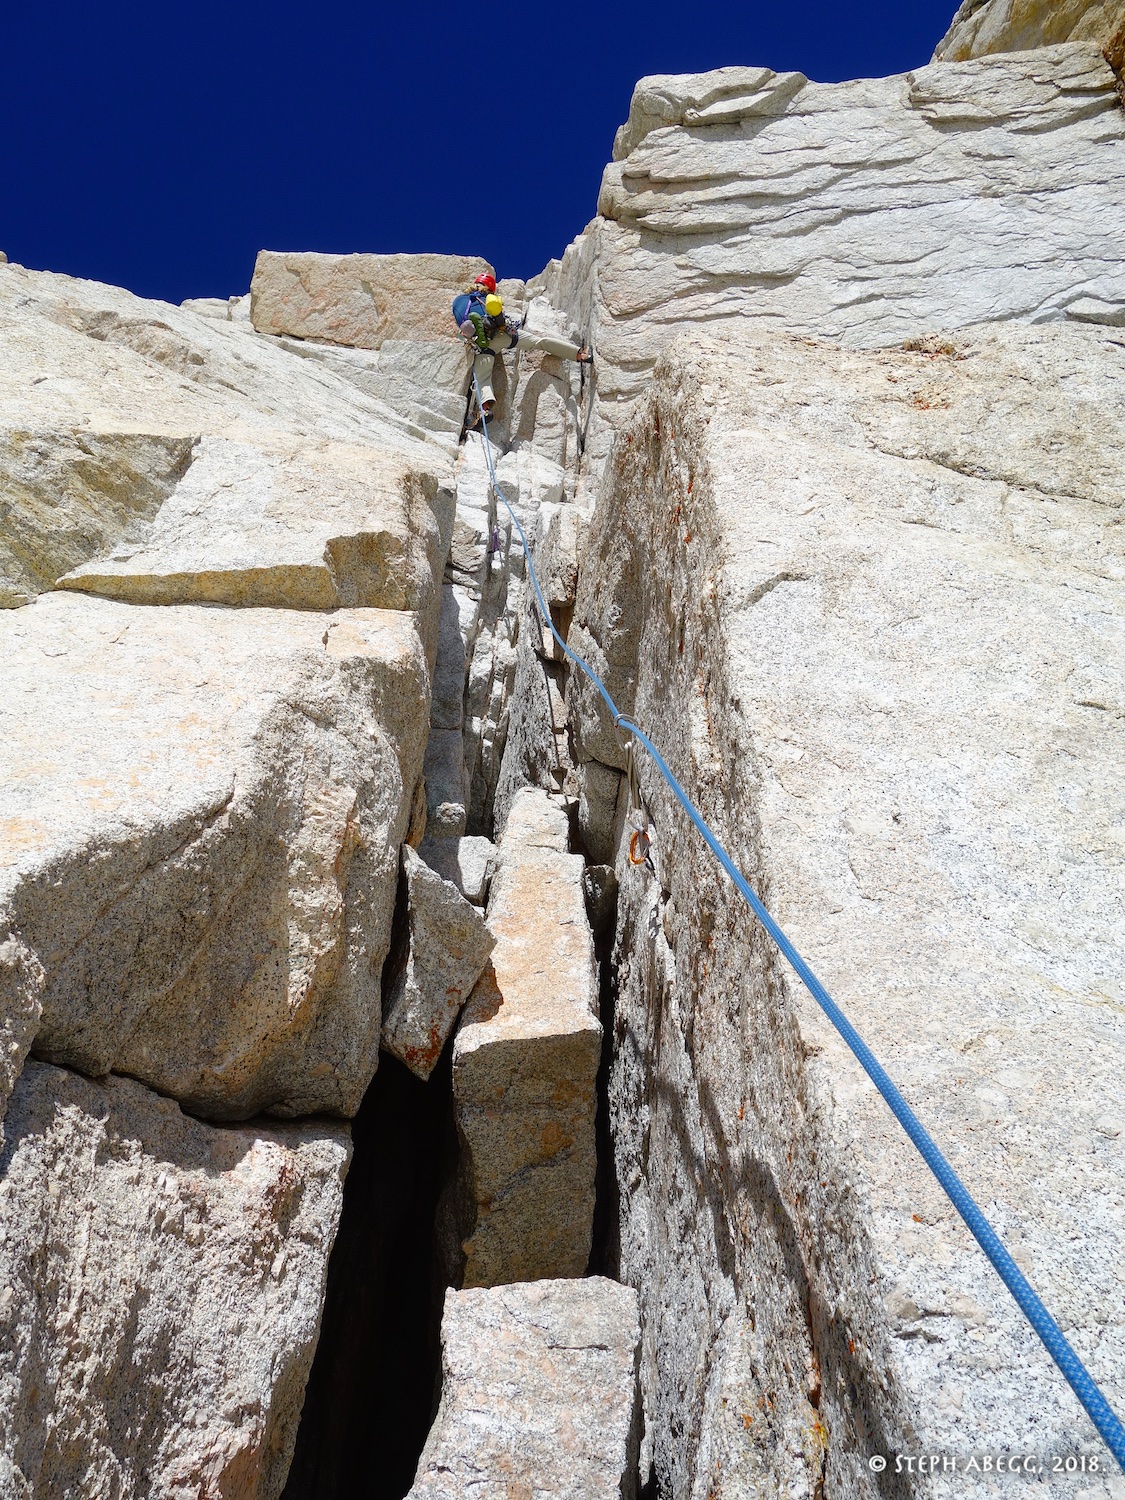
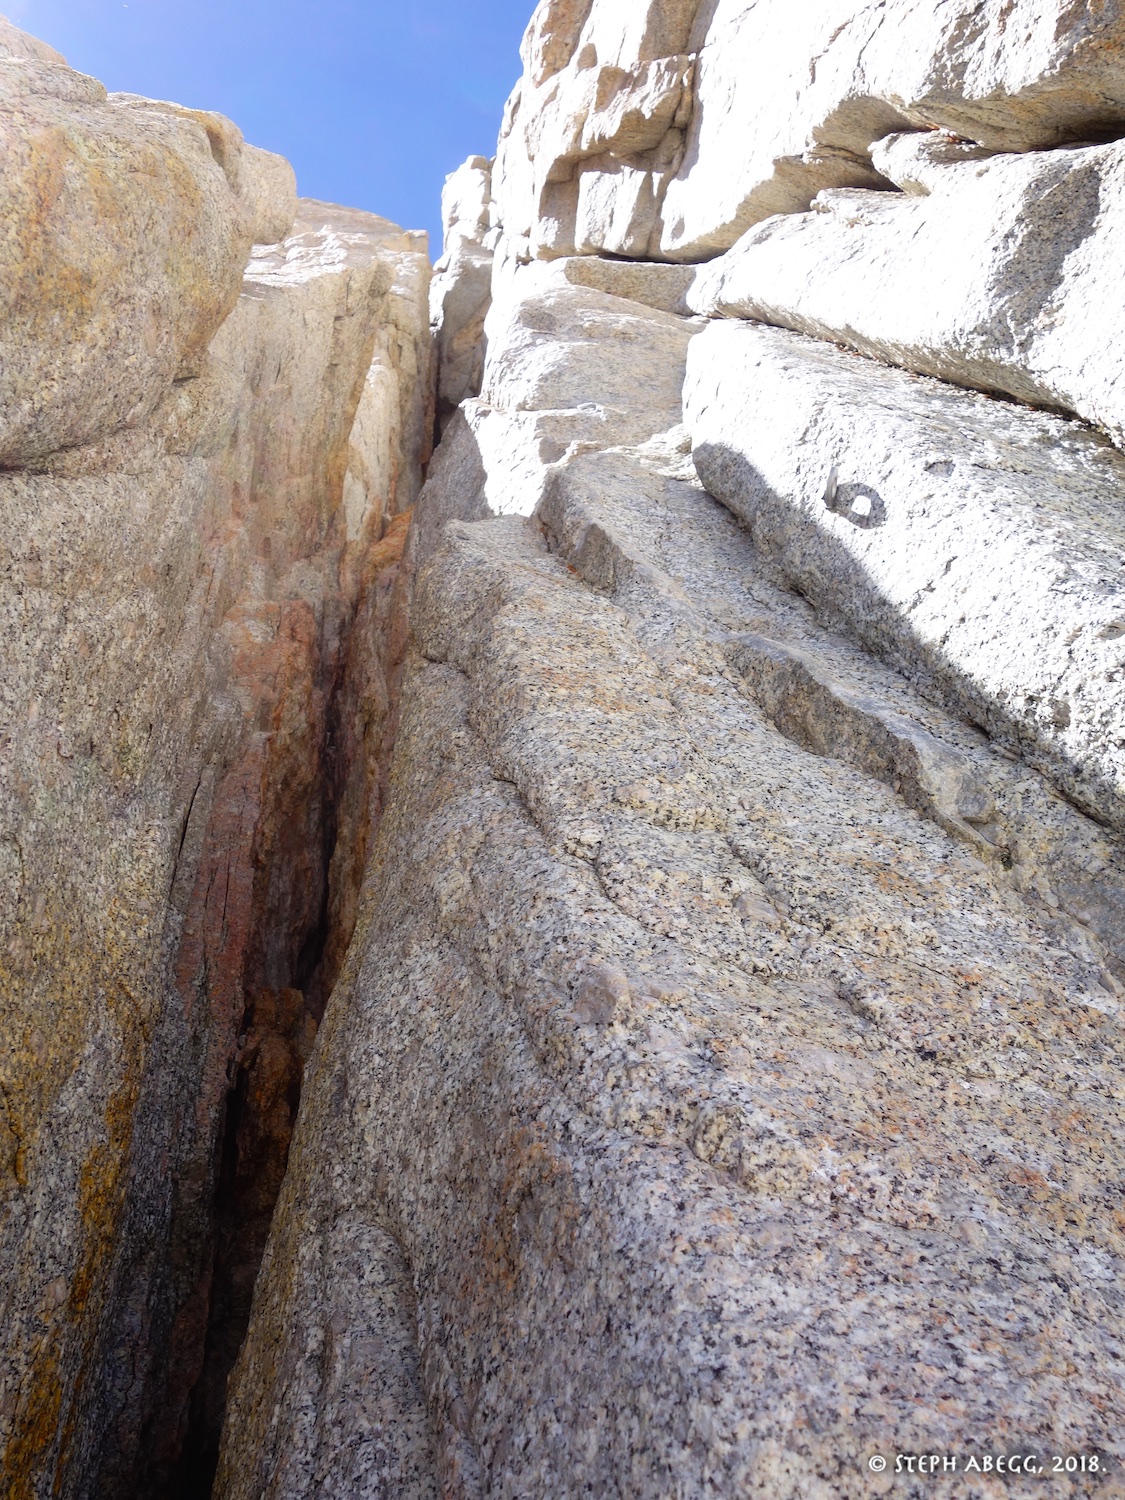
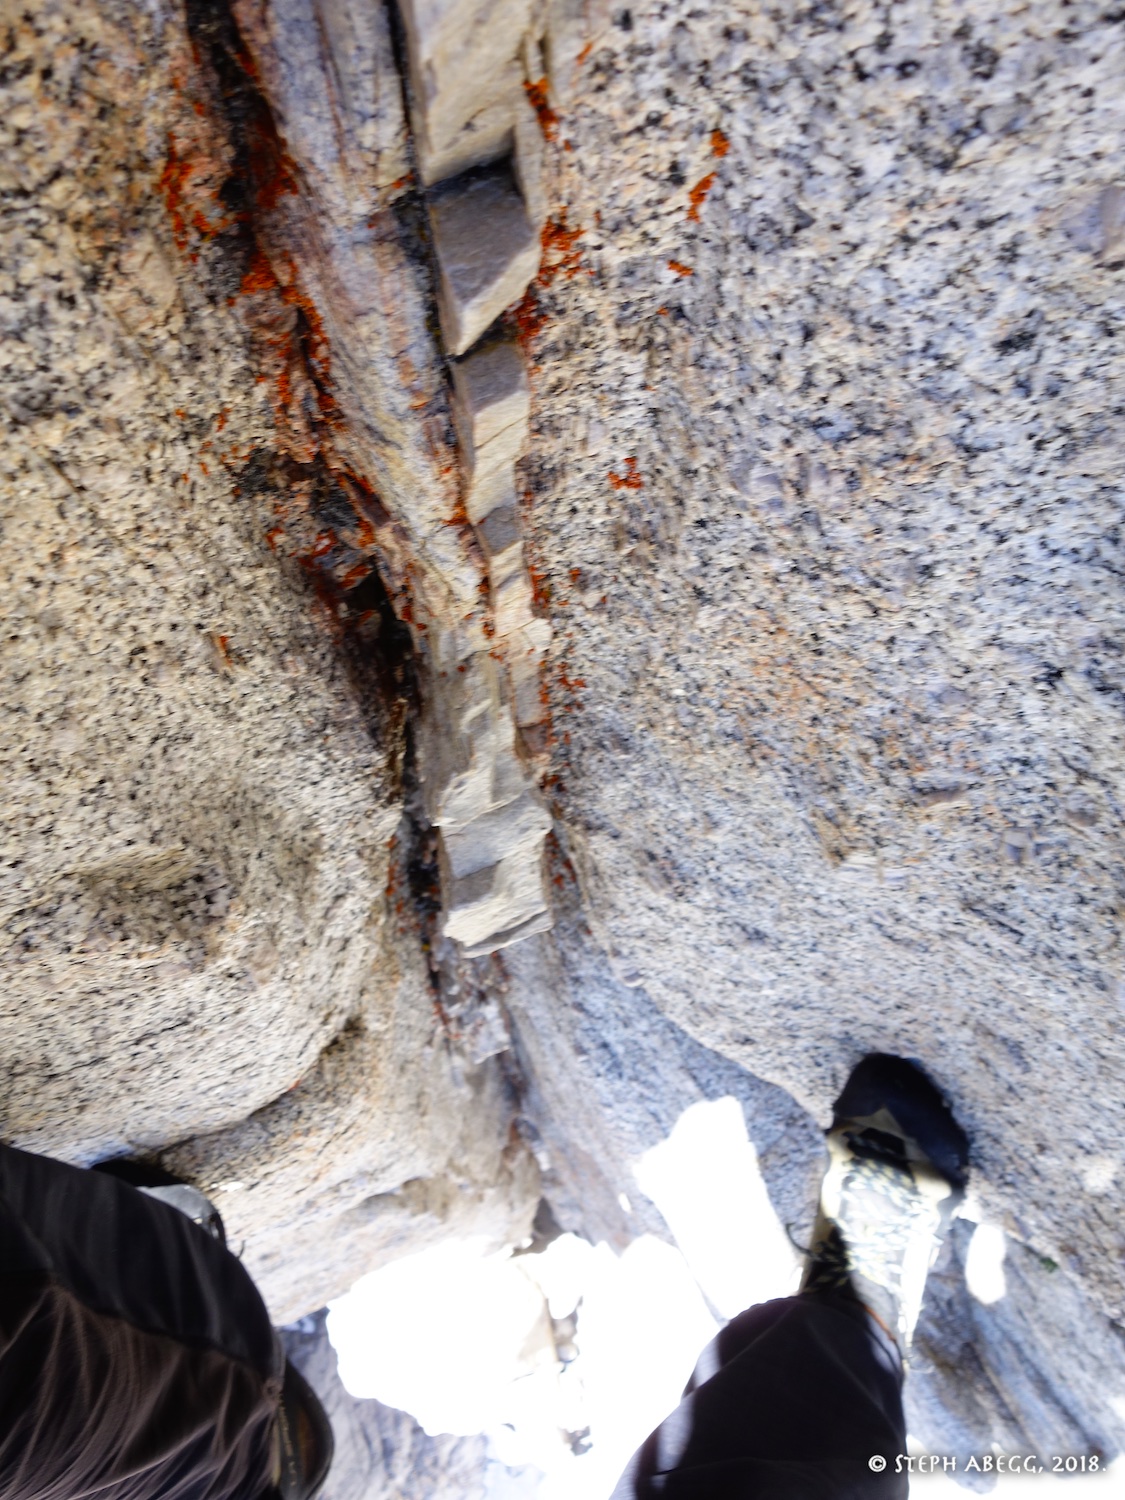
5.10c. This offwidth is perhaps the most sustained, steep, and burly pitch of the route. Avoid the offwidth as long as possible by climbing the hand crack to the right, then step into the corner and somehow get yourself to the top. There are a couple of old bolts at some point, although a C4#4 protects here; I also found a fair bit of medium gear could be placed in the back of the corner. You can belay at the top of the offwidth, or continue up to a higher belay by climbing a tight hand crack on the right wall beside the chimney. It might be a good idea to save a #3 cam for either of these belay spots.
22.
23.
24.
25.
26.
27.
22.Looking up the 10c offwidth pitch.
23. An old bong.
24. Midway up the offwidth. This pitch is much more sustained than the previous 10c offwidth pitch.
25. Notice the old bolt on the right. I clipped it, but you could protect with a #4 on the left.
26. I climbed the crack on the right wall.
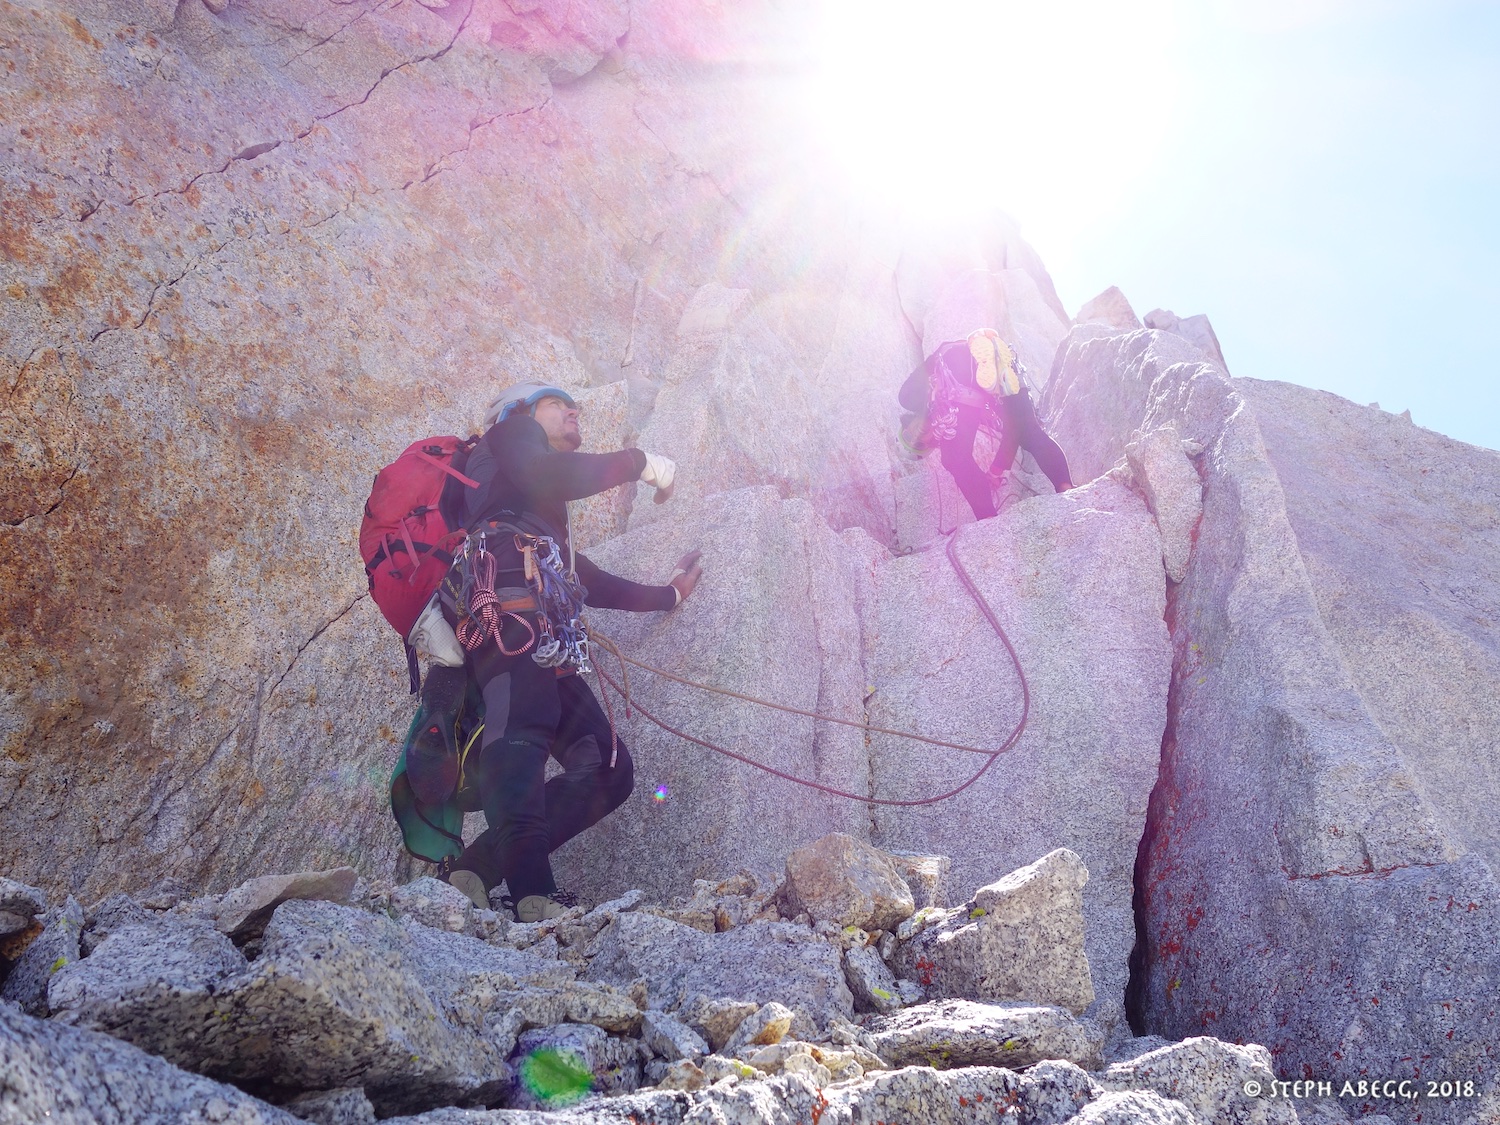
27. The other pair of climbers caught up to us at the top of the offwidth. They were a fast and friendly Spanish-speaking party named Sol and Jaume.
Pitch
9
STopo P9
Croft P10-11
Dow P9b-10
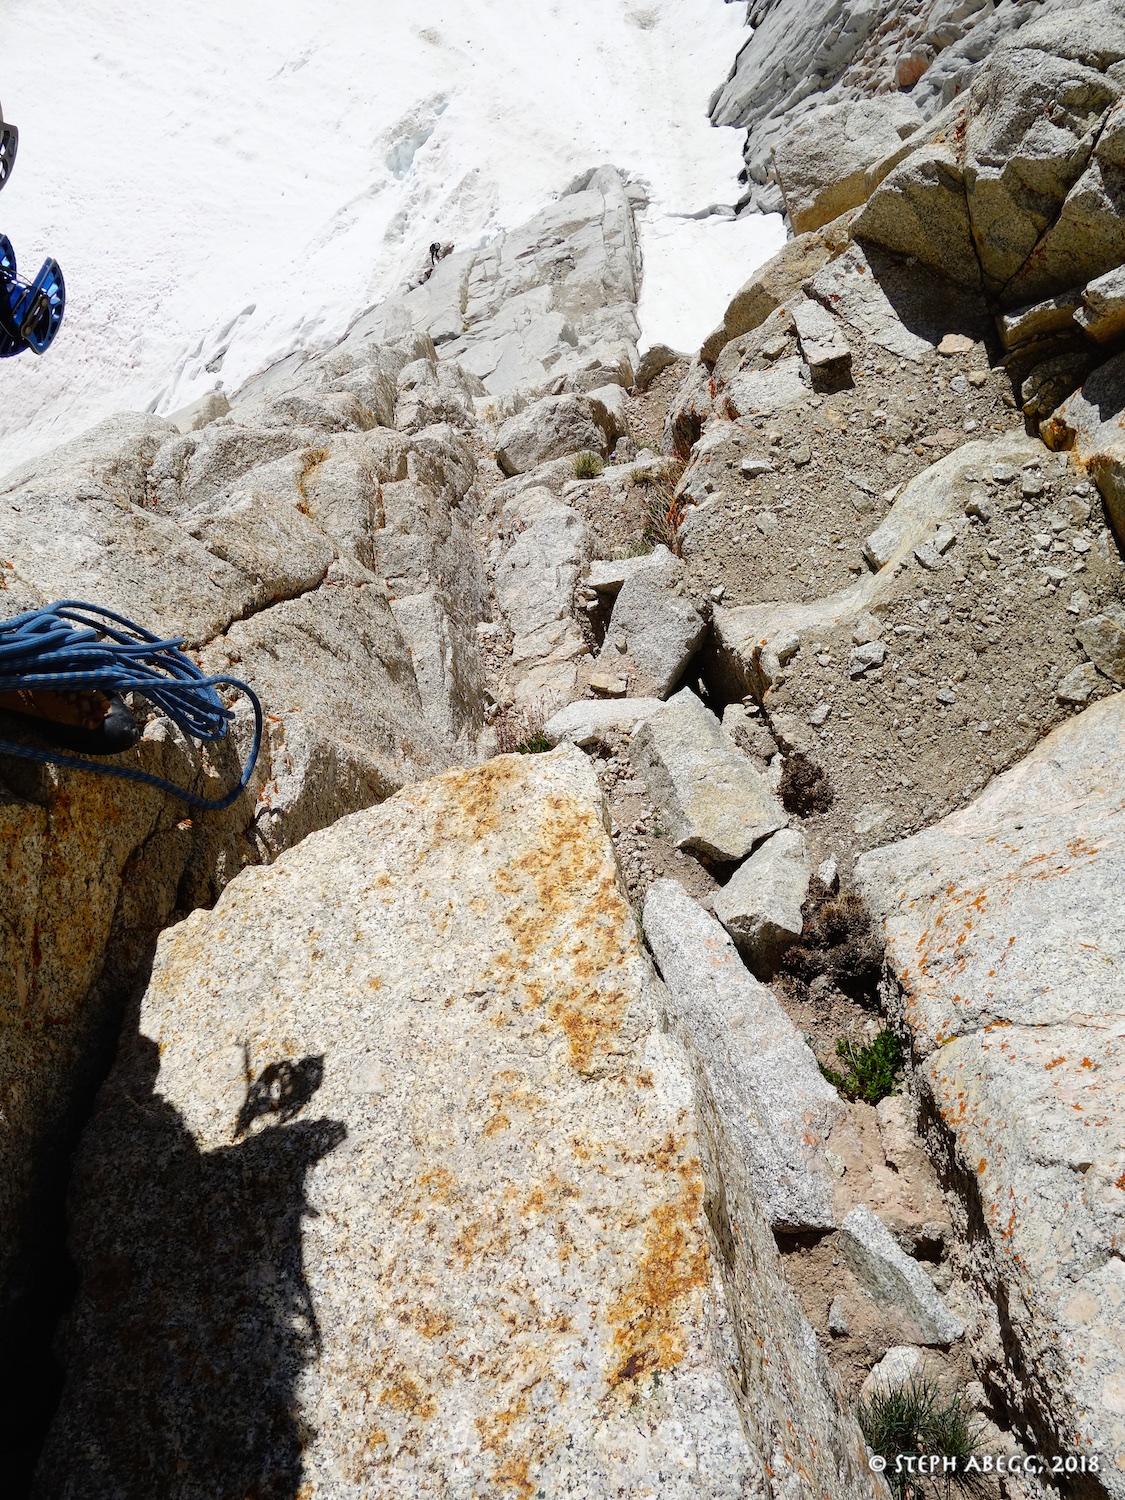
5.8(ish). There seem to be several options here, so just use your nose and climb generally upward. We followed Dow's suggestion to climb through a curving chimney and then continued up an easy chimney and up a pegmatite vein system to a nice ledge. We stopped about 80 feet below the massive head wall (I think Dow had climbed all the way to the ledge below the massive headwall but you don't need to).
28.
29.
30.
28. John leading up Pitch 9. We followed the curving chimney in the upper left of the photo.
29. Continuing up an easy chimney.
30. The pegmatite vein in the upper pitch.
Pitch
10
STopo P10
Croft P12
Dow P11
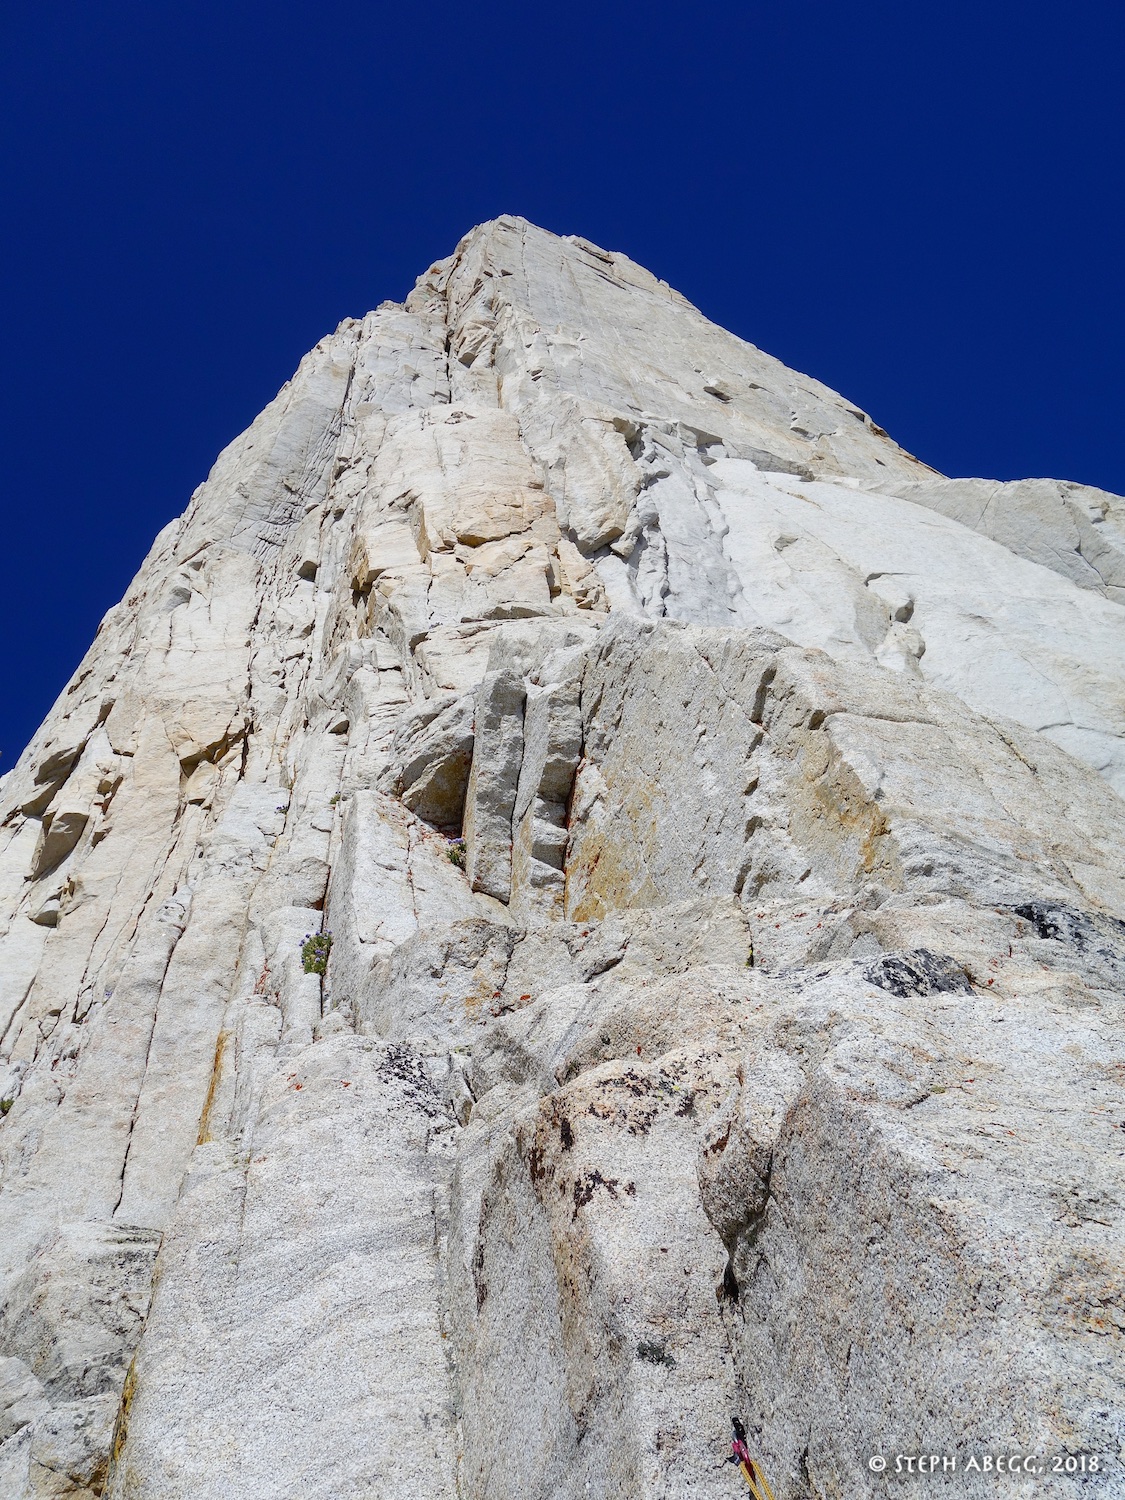
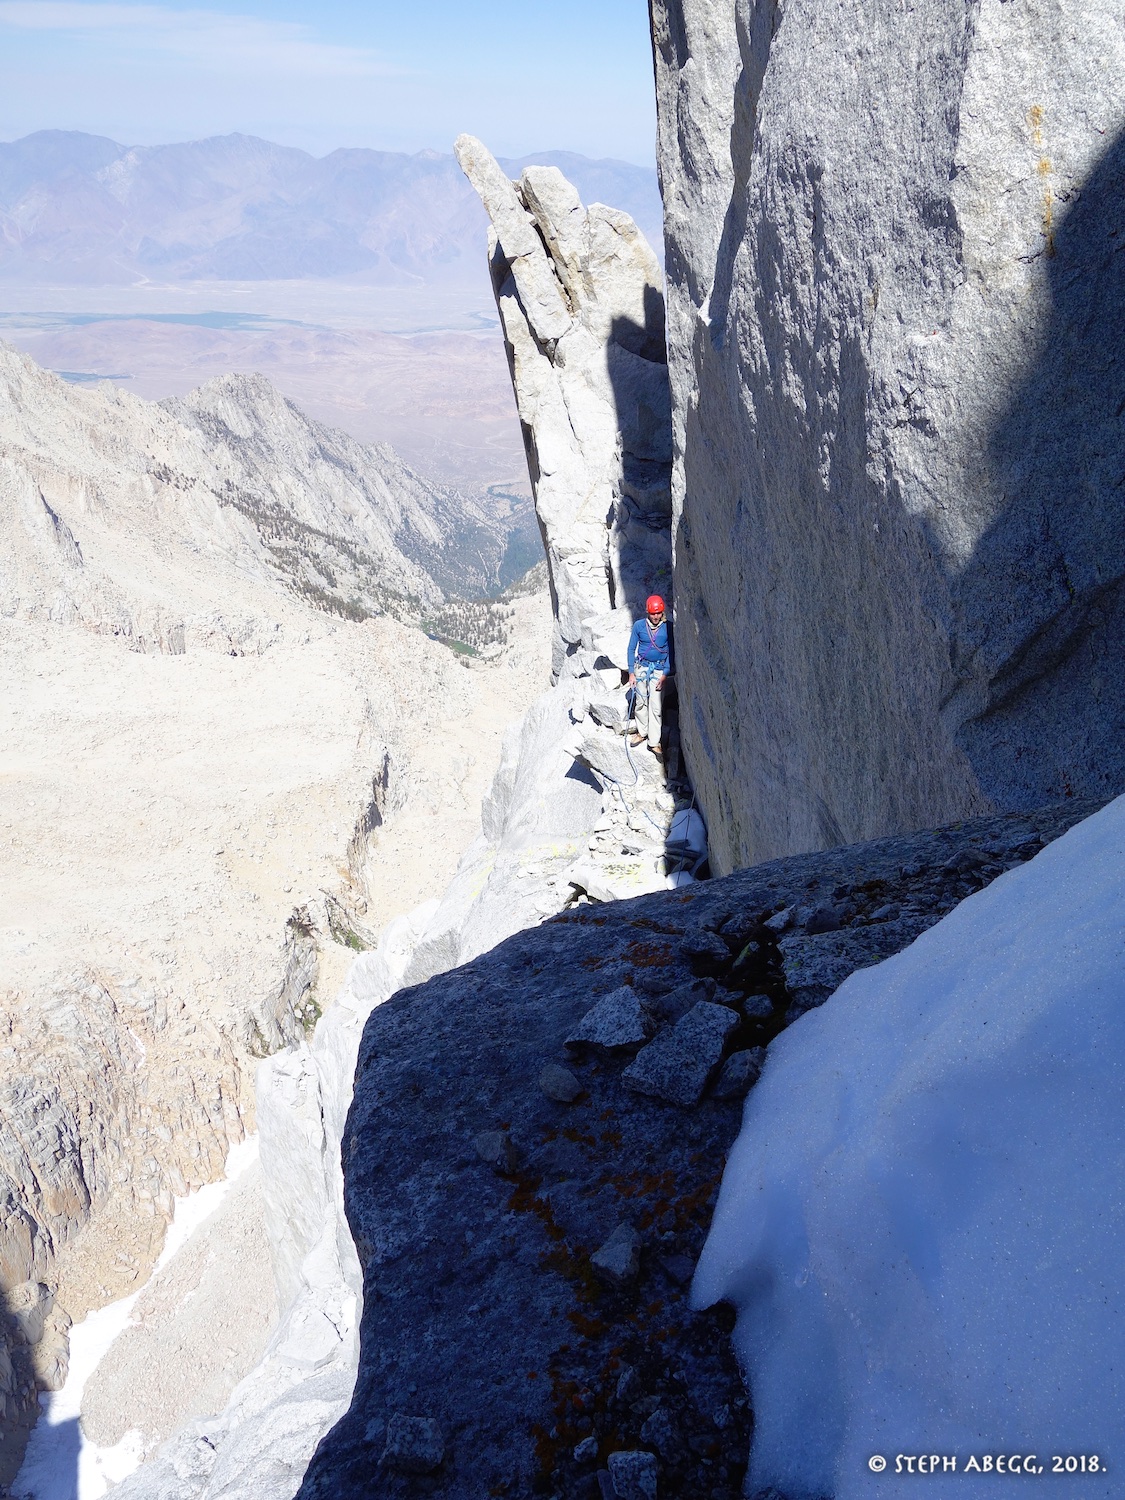
5.8. Traverse right and climb over the arete via face holds on bomber rock. Make some exposed moves to a large ledge below a head wall with lots of steep and clean cracks. You can also apparently escape left to easier ground (instead of going right around the arete) but then you will miss the last few pitches of the route.
31.
32.
31. Looking up towards the headwall from the belay. This pitch took us around the arete on the right.
32.The ledge below an even better-looking headwall.
Pitch
11
STopo P11
Croft P13
Dow P12
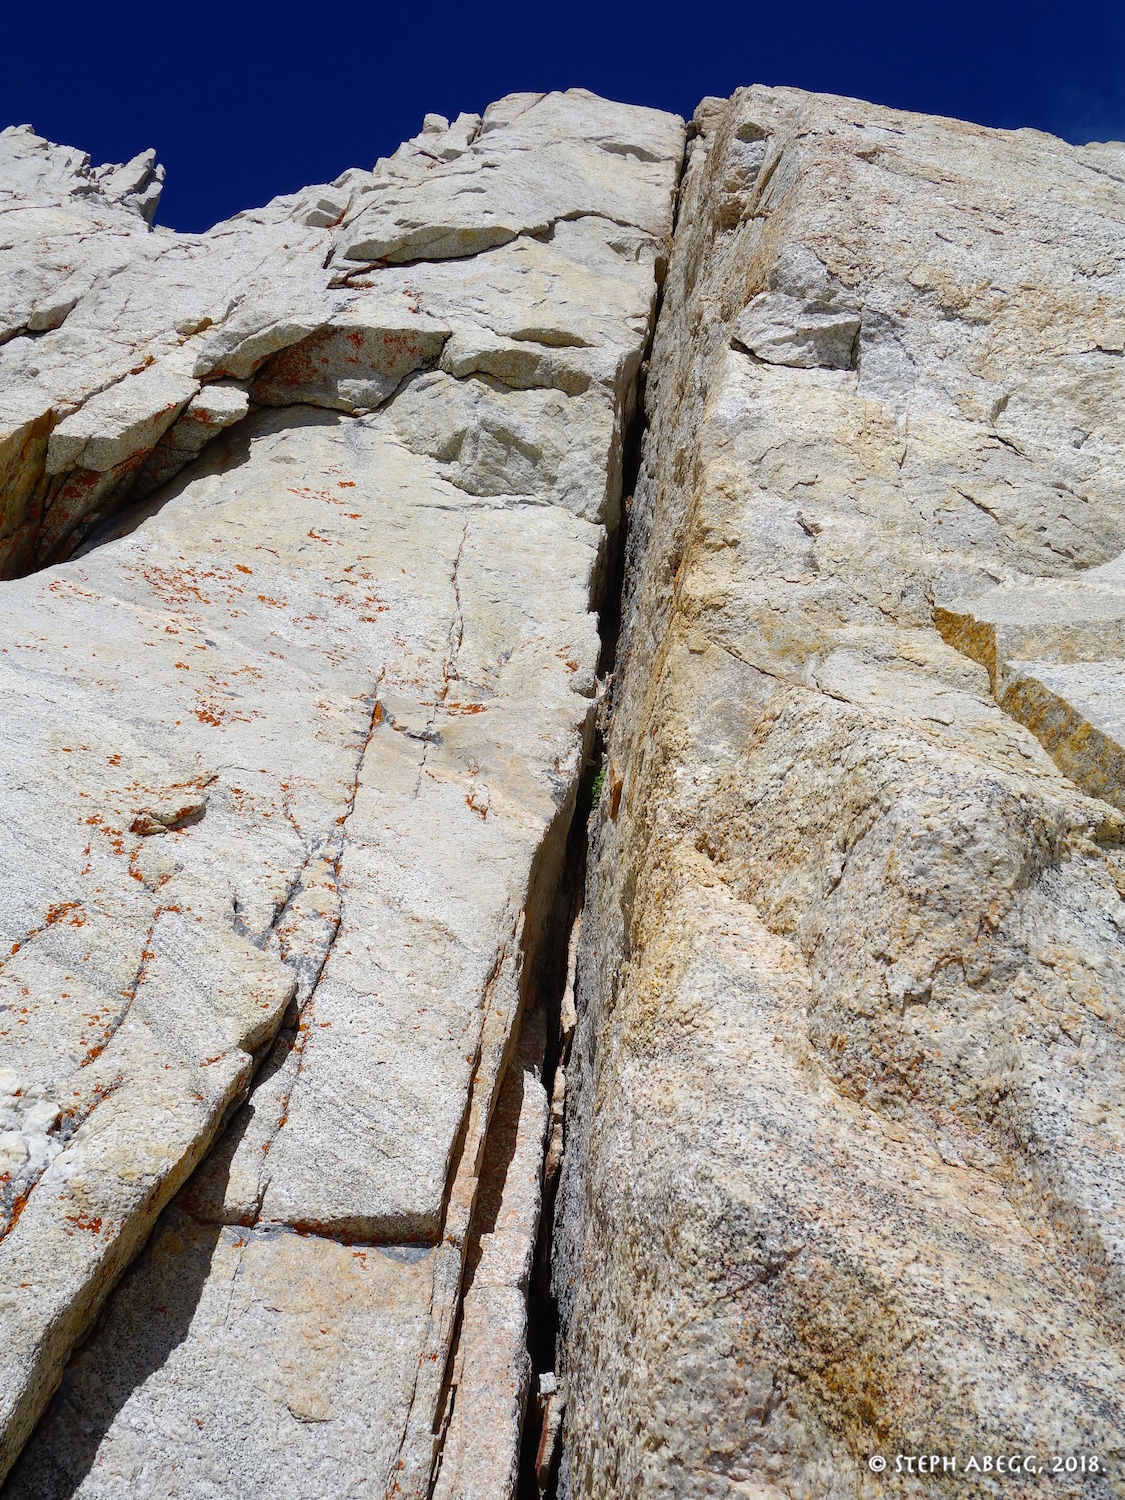
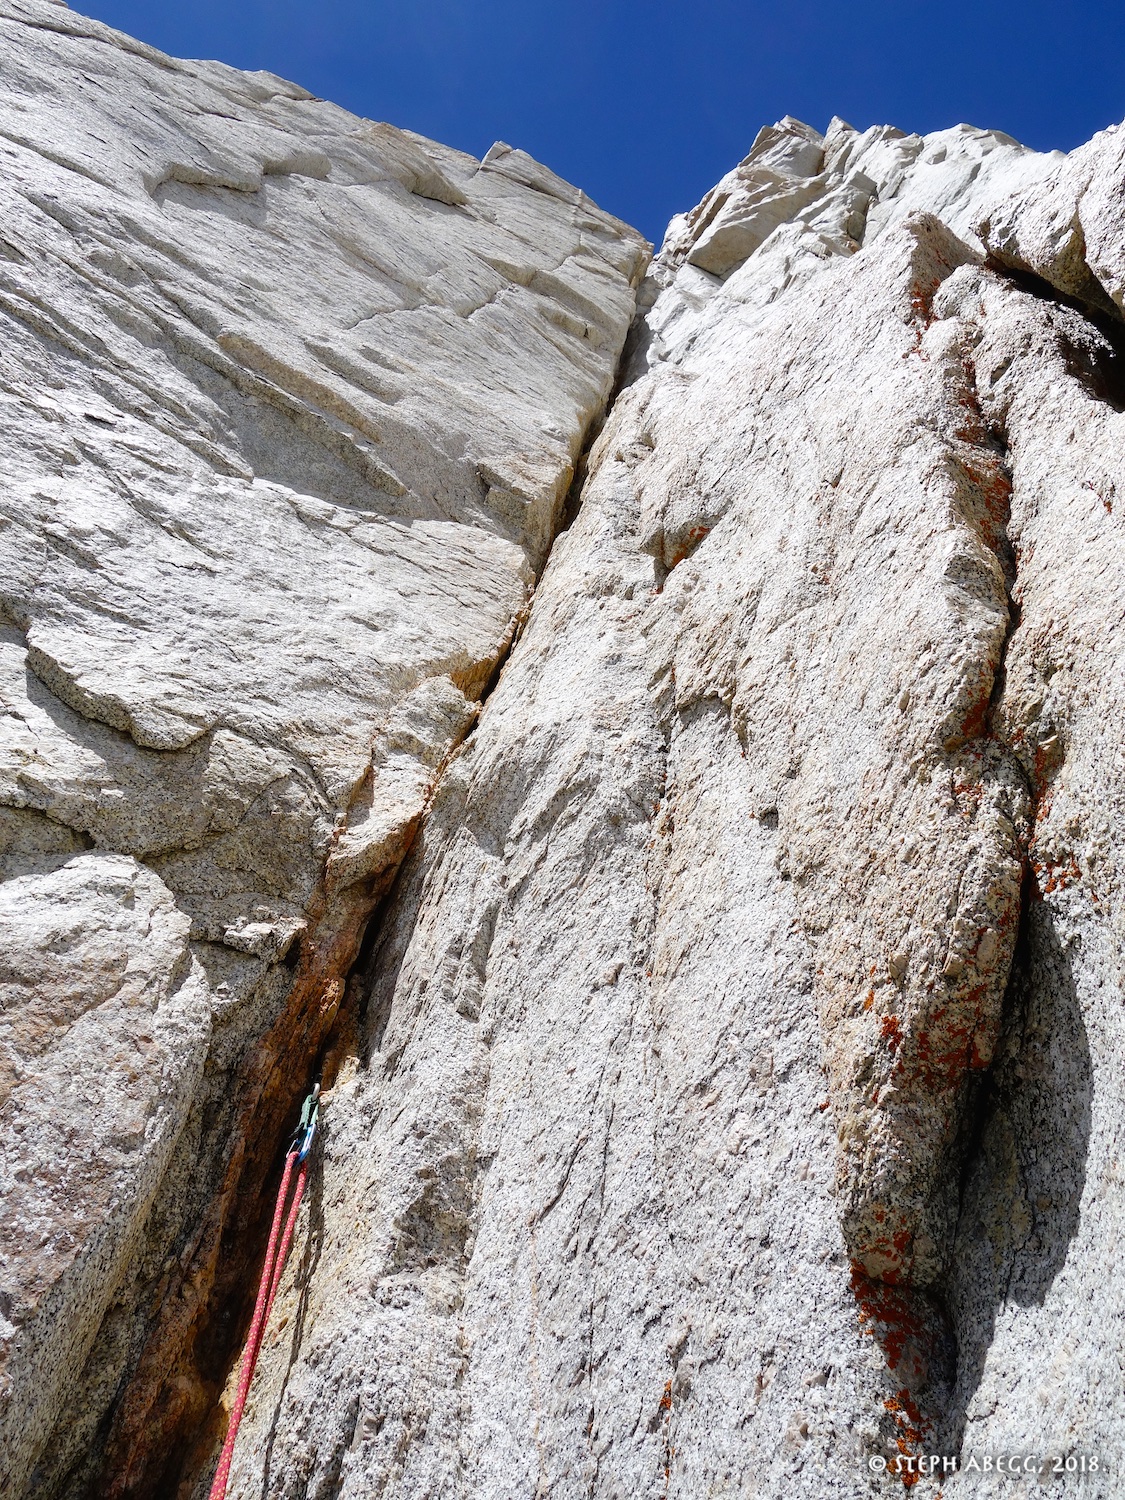
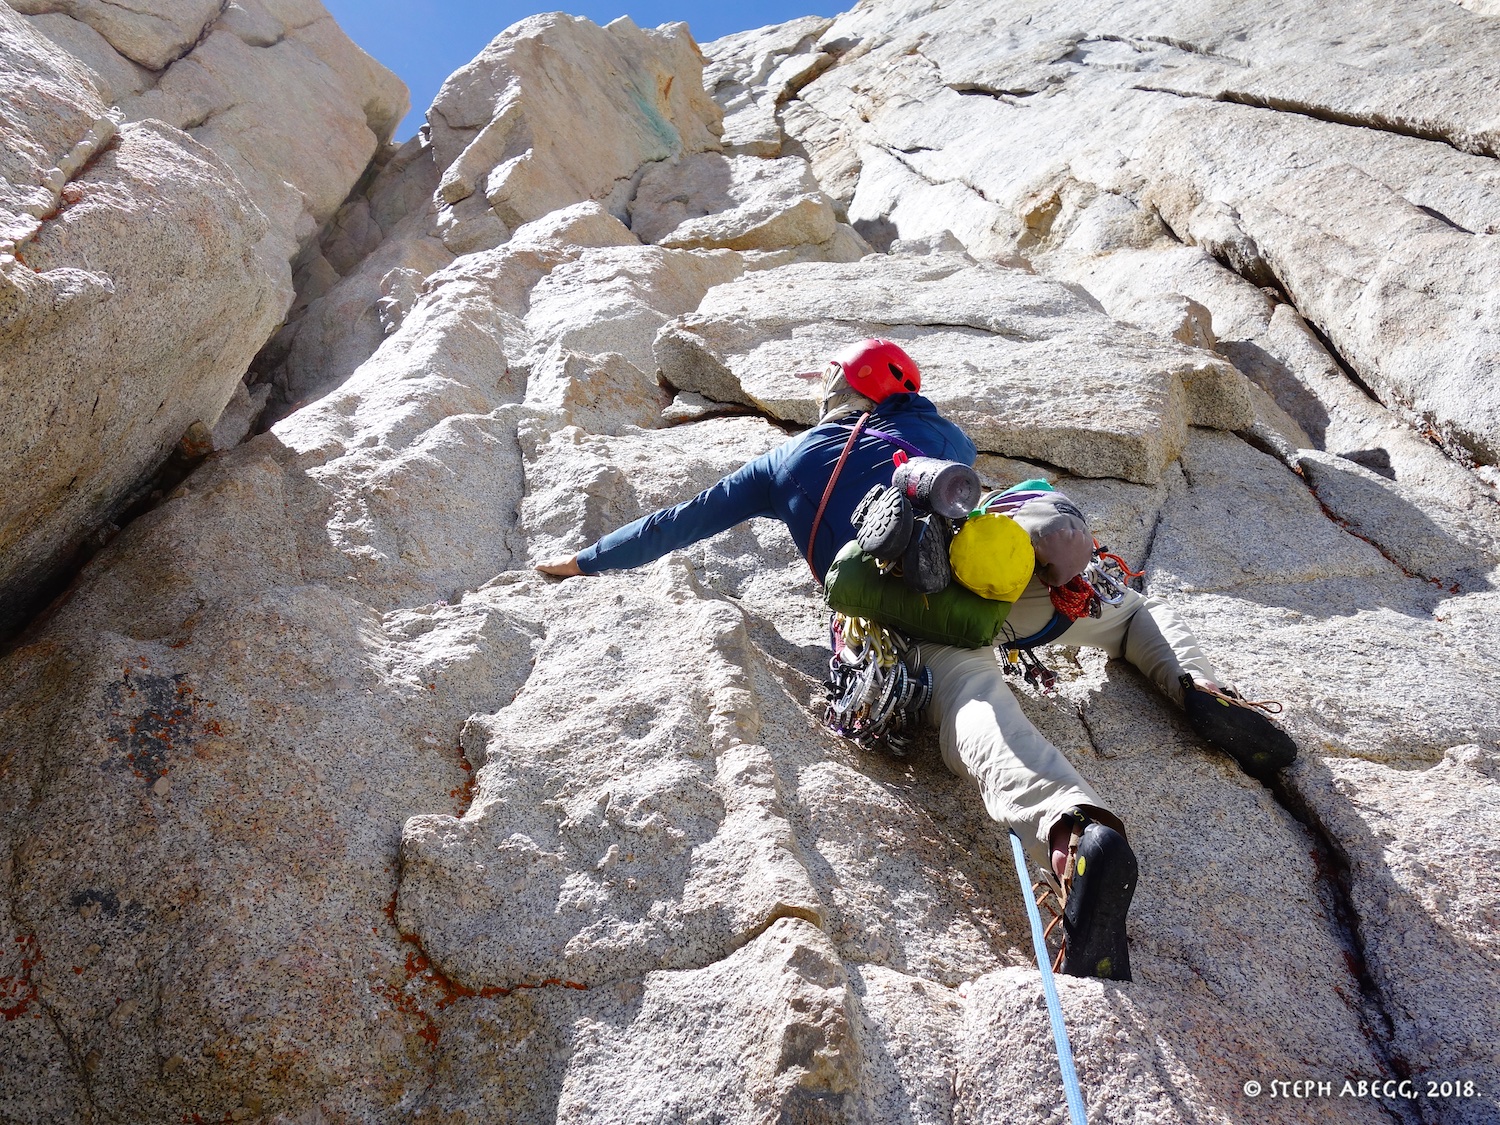
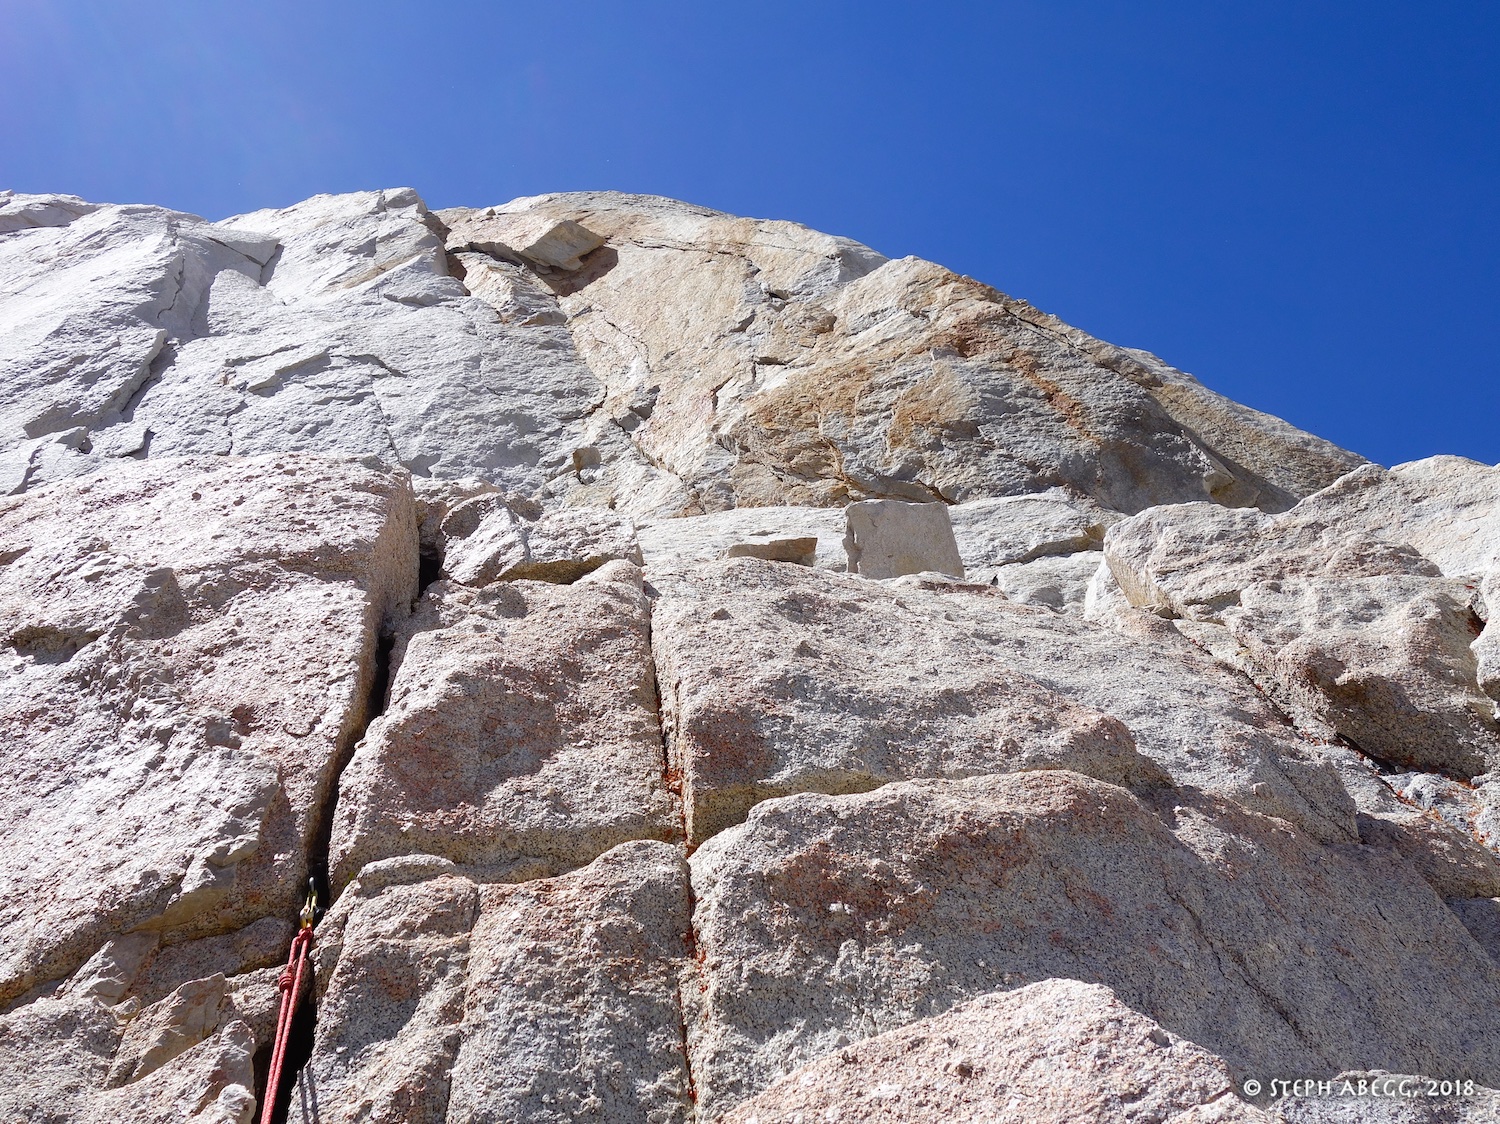
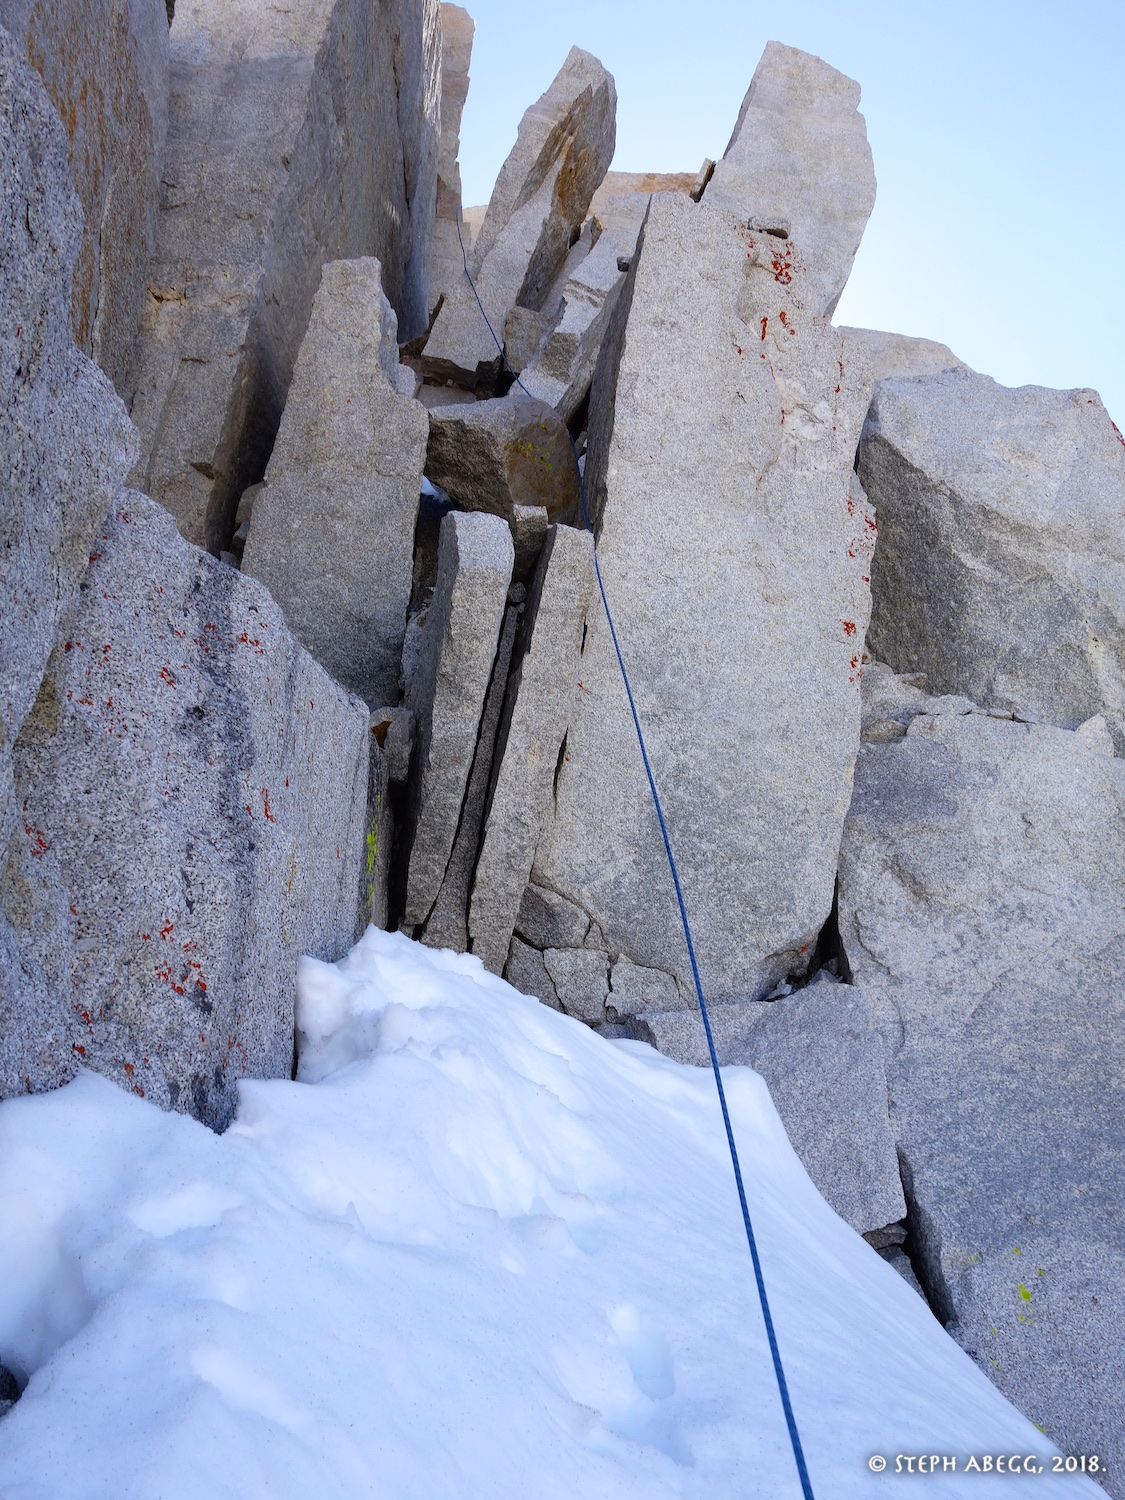
5.10. There are several 5.10 cracks going up the white headwall. It is possible to traverse further right and avoid these cracks on easier rock (5.7?), but these cracks are superb High Sierra alpine granite. We took Dow's suggestion and climbed the thin hands splitter in the center of the wall to easier ground and a nice ledge. This was my favorite pitch of the route, so don't let tired bodies dissuade you from doing it!
33.
33. How can you bypass such an awesome looking crack?! This was my favorite pitch of the route - High Sierra alpine granite at its best.
Pitch
12
STopo P12
Croft P14+
Dow P13
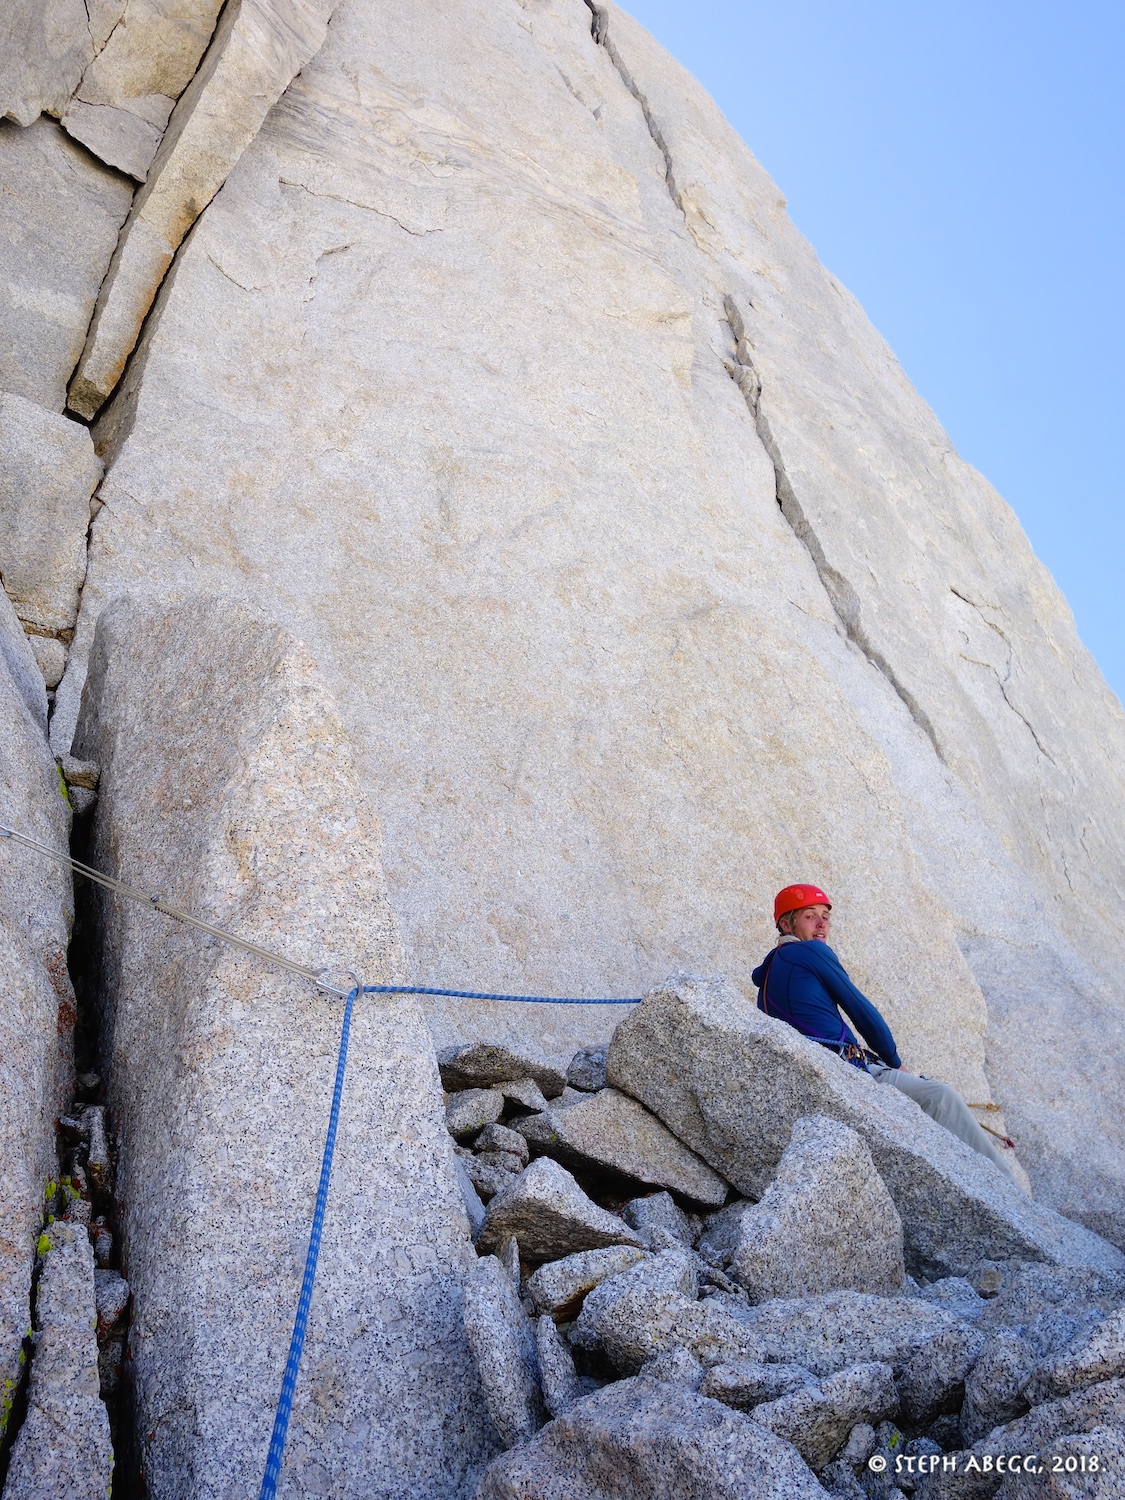
5.7(ish). We moved right, went up a short corner, walked across a large ledge, and then up another corner to a higher ledge, where we belayed (rope drag would prevent you from going onward). This was mostly 4th with a few 5.7ish moves. This is also the way Dow went. However, the Spanish party climbing the route behind us did not traverse right across the large ledge, but instead they went more directly up, which I think is the "5.10 move, crack on left" marked on the topo. Both ways work.
34.
35.
34. The other party had climbed a different crack system on Pitch 11, and we reconvened on this ledge. Pitch 12 traverses right and up.
35. The large ledge. The other party did not traverse this ledge, but rather climbed straight up from where John is in the photo (this is the "5.10 move, crack on left" mentioned by SuperTopo).
Pitch
13
STopo P13
Croft P14+
Dow P14
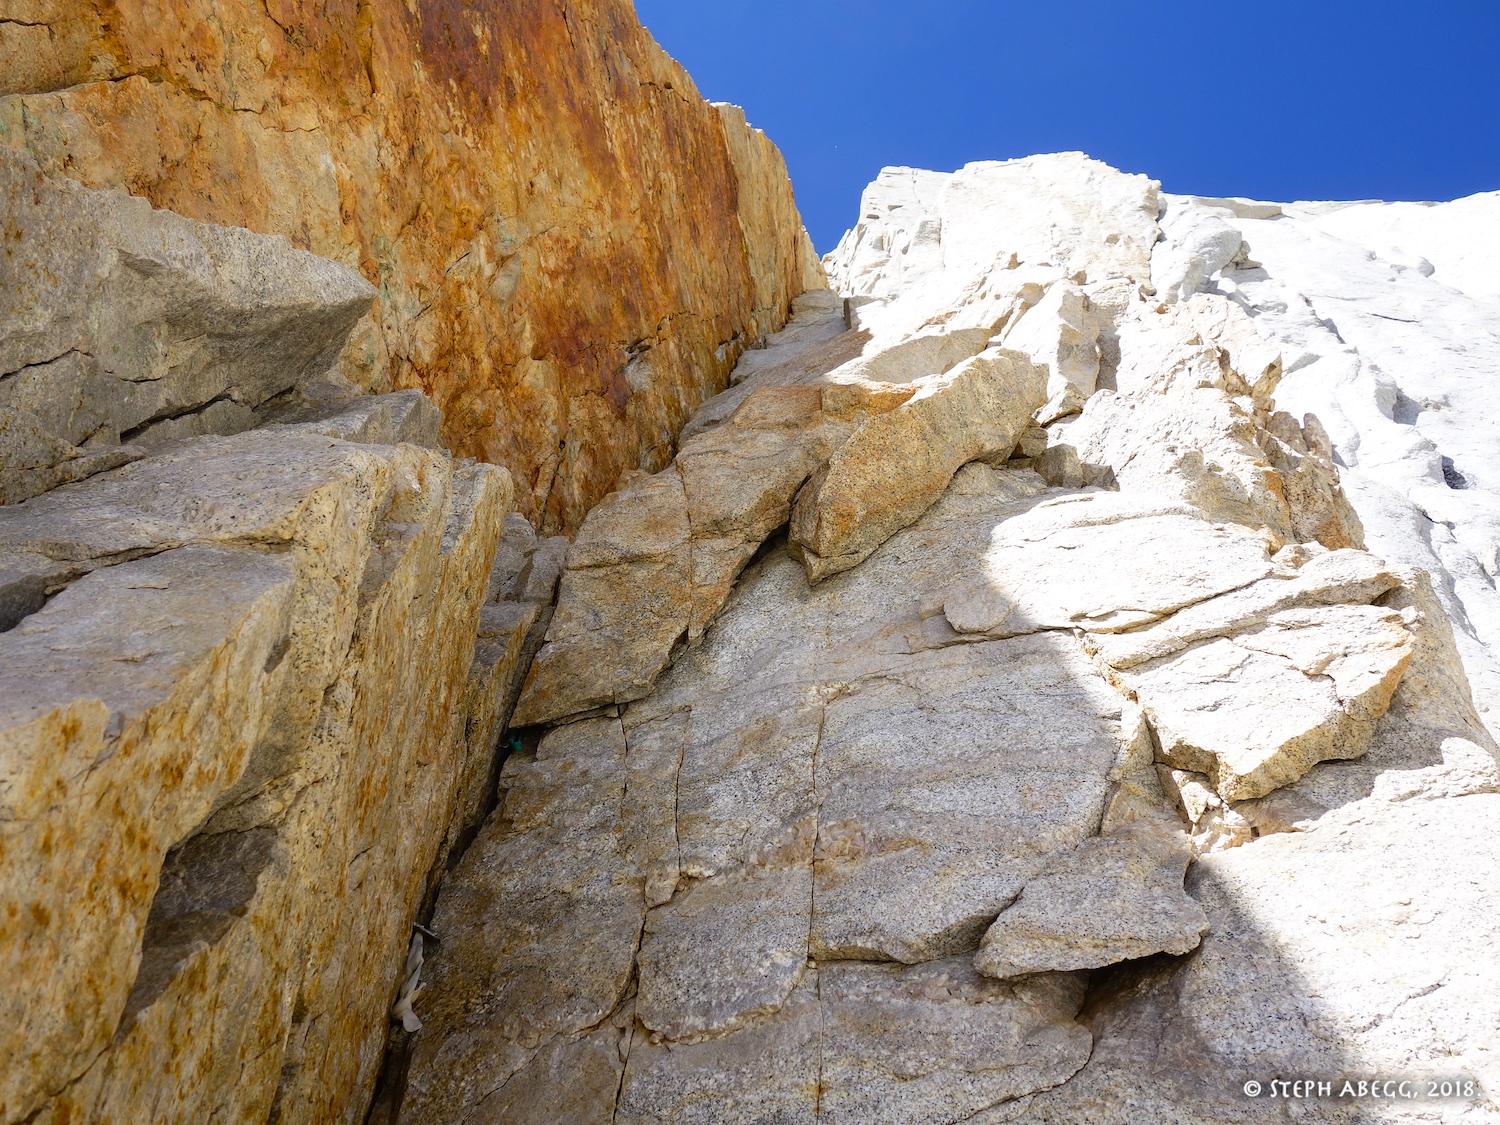
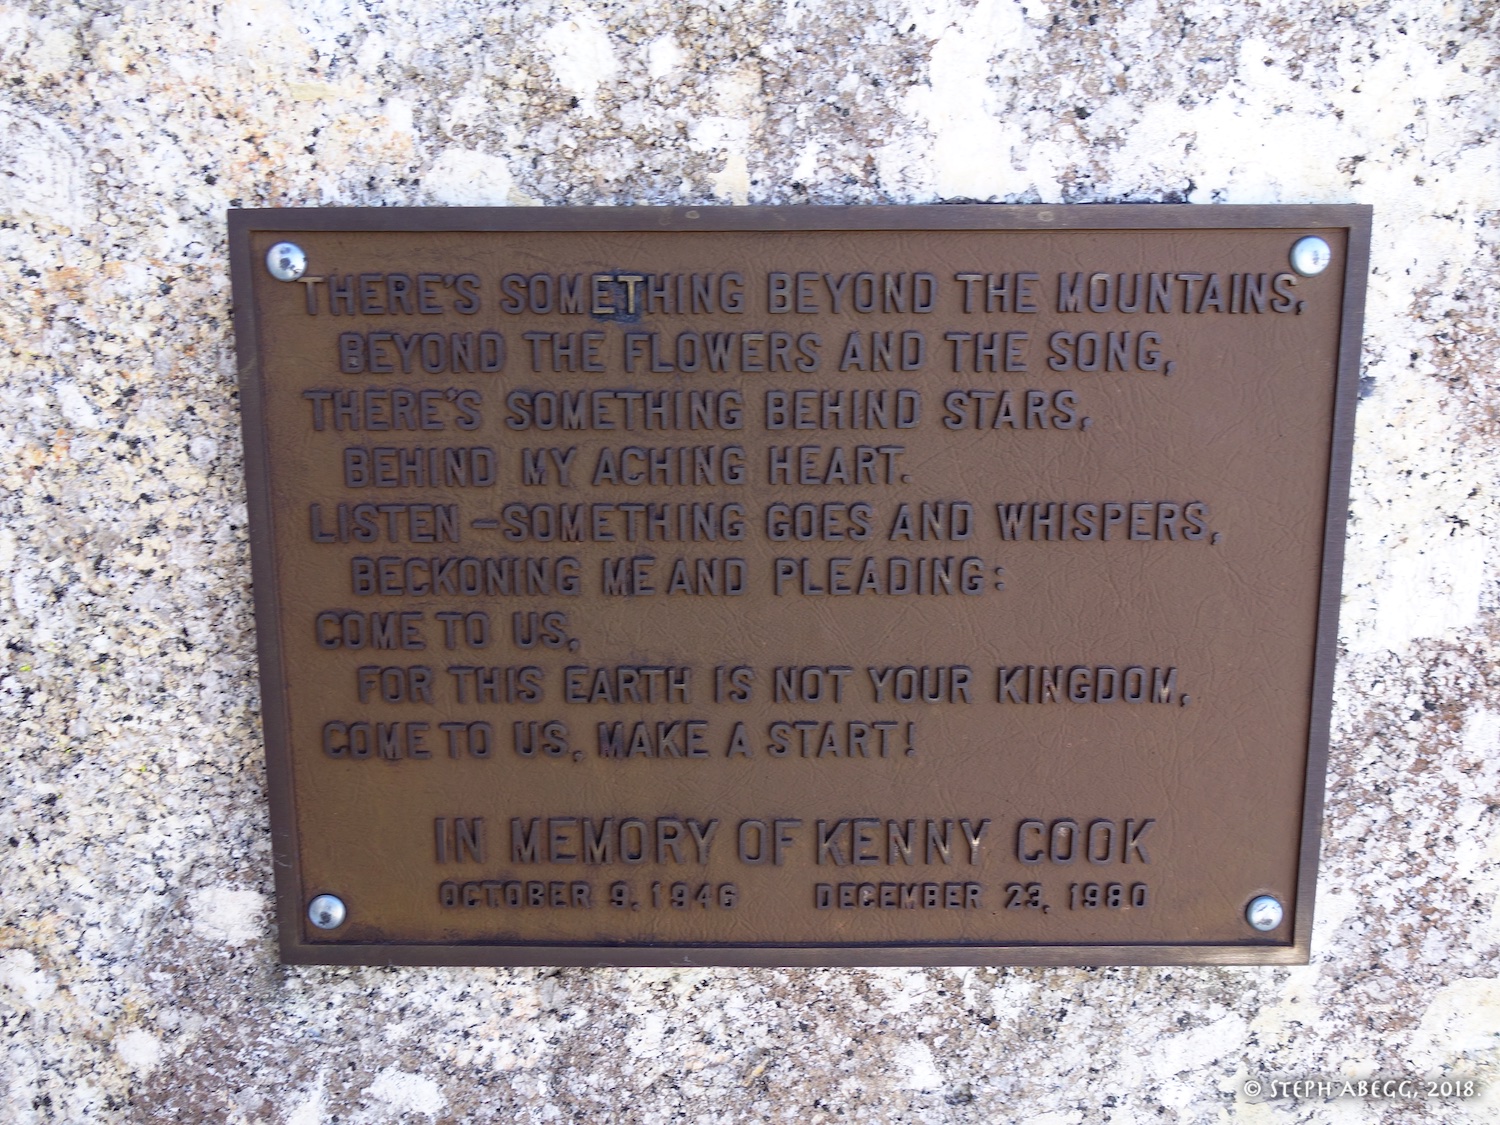
5.8(ish). If you traverse the large ledge as we did, then pick any of three chimney/crack systems off the ledge. We climbed the leftmost option since we spotted a fixed hex in it. This connects with the top of the "5.10 move, crack on left" option mentioned for Pitch 12 above. From here continue traversing right until you pass a memorial plaque, and then climb a short chimney to the left to the summit.
36.
37.
38.
36. We climbed this chimney/crack system up.
37. The traverse to the right. We had to kick steps through the snow, which wouldn't be there in later summer.
38. A memorial plaque just below the summit.
Top!
What a cool summit. Hope there are a couple of friendly Spaniards also on the summit and get them to take your photo! 14,260'
39.
40.
41.
42.
39.On top! This is the pair of Spanish-speaking climbers (Sol and Jaume) that also climbed the route the same day as we did. They were a fast and super friendly team.
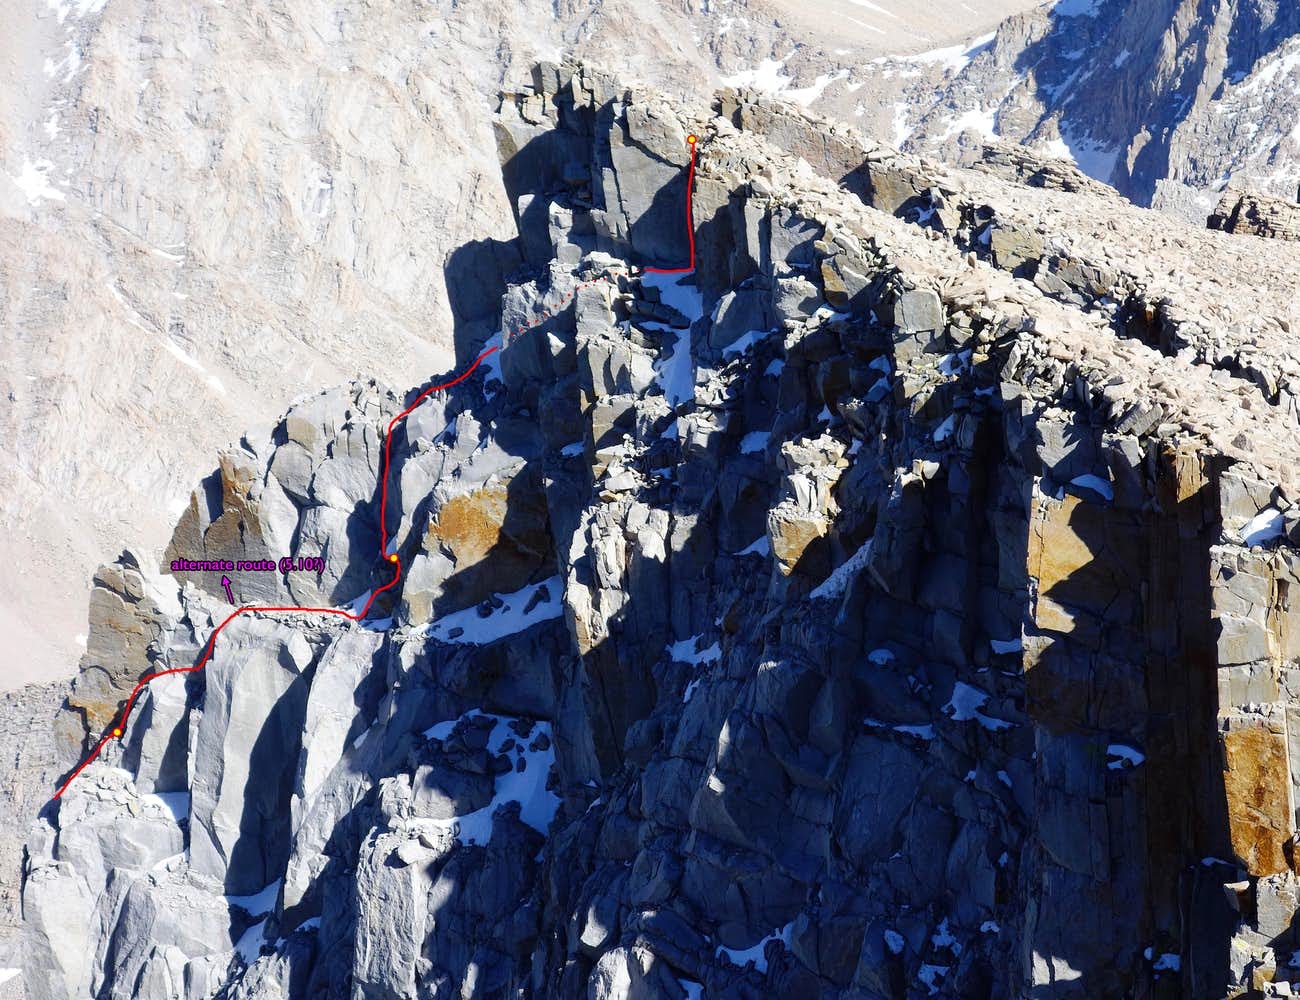
40. John and me on top. 41.Looking down at Iceberg Lake from the top of Keeler Needle. Notice the summit shadow on the right. 42.Our approximate route for the upper 2 pitches. Variations possible. (Photo taken from shoulder of Mt. Whitney. Zoom in for detail.)
Descent
Descend to the Whitney Trail, maybe 200’ elevation, turn right and hike to the summit of Mount Whitney, snap another summit shot for the easier-won summit of the day, then follow the ridge down a bit, identify the gully (cairn) that marks the start of the Mountaineers Route, and descend the Mountaineers Route back to Iceberg lake. It took us 2 hours from the top of Keeler to Iceberg Lake. We had a bit of snow in the Mountaineers Route gully but were able to avoid it by going down the right side of the gully. We never needed to rappel from any of the rap slings we saw.
43.
44.
45.
46.
47.
48.
43.Descending from the top of Keeler Needle to the Whitney Trail.
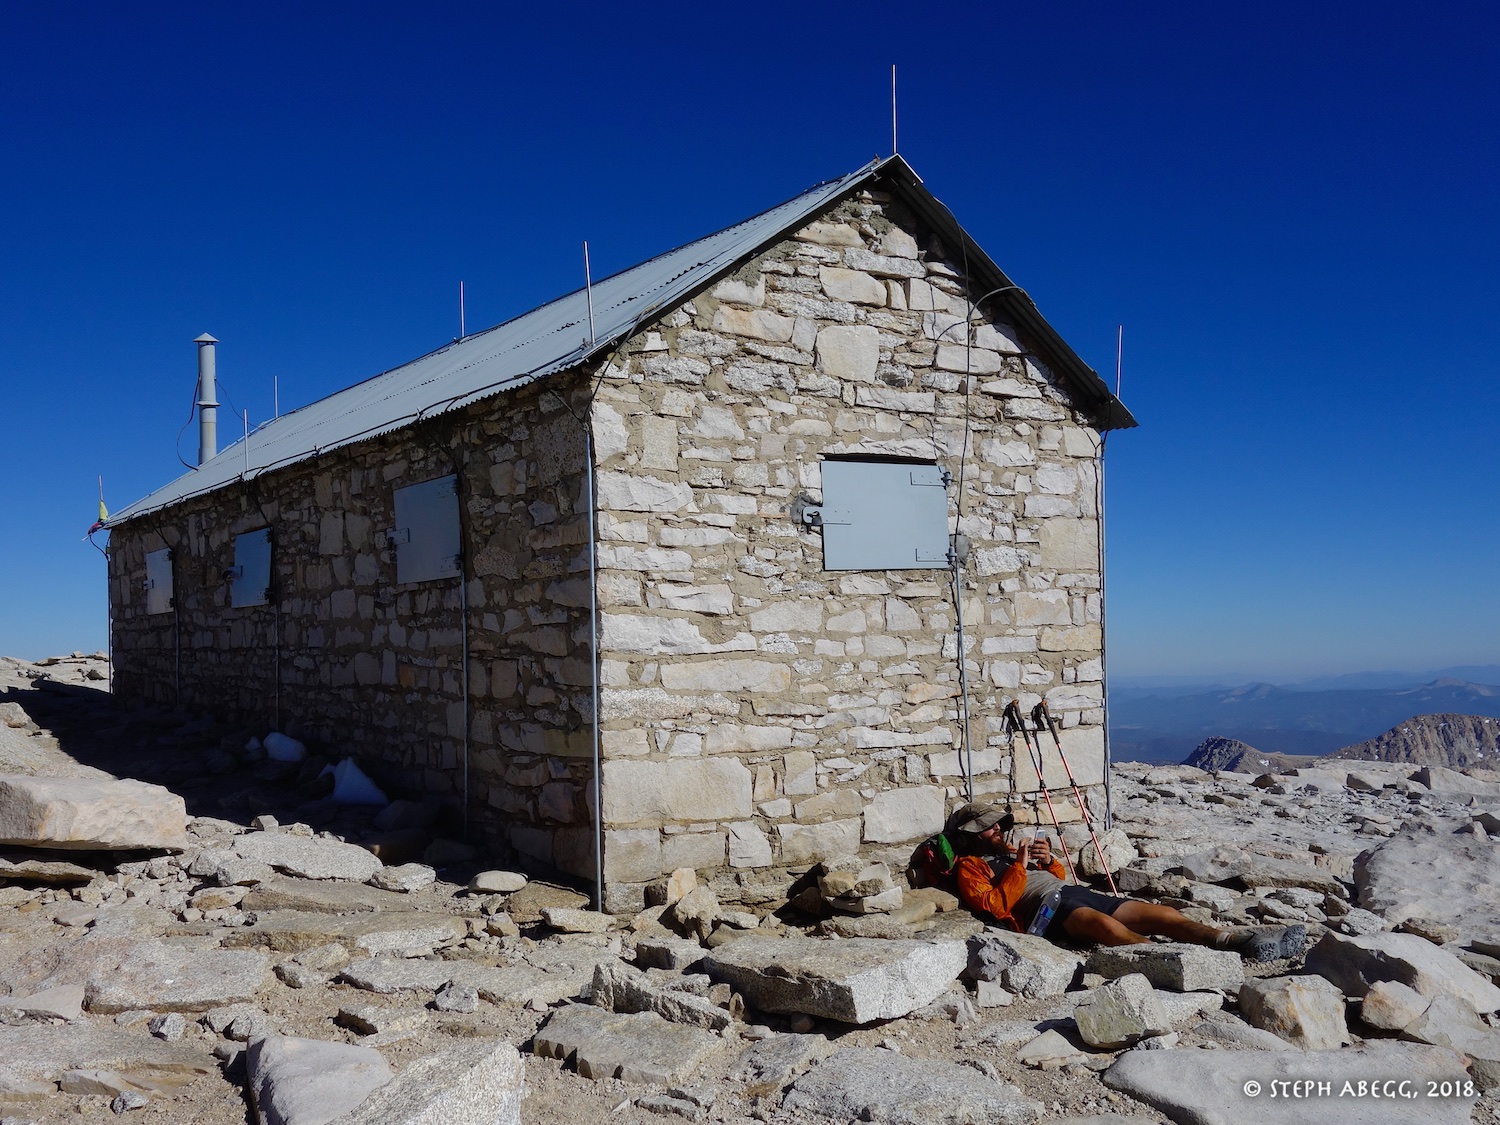
44. The hut on top of Mt. Whitney. I got a kick out of the modern version of the dirbag hiker: iphone, smartwater, and compressible trekking poles. 45.John enjoying the view of Mt. Russell from the top of Mt. Whitney.
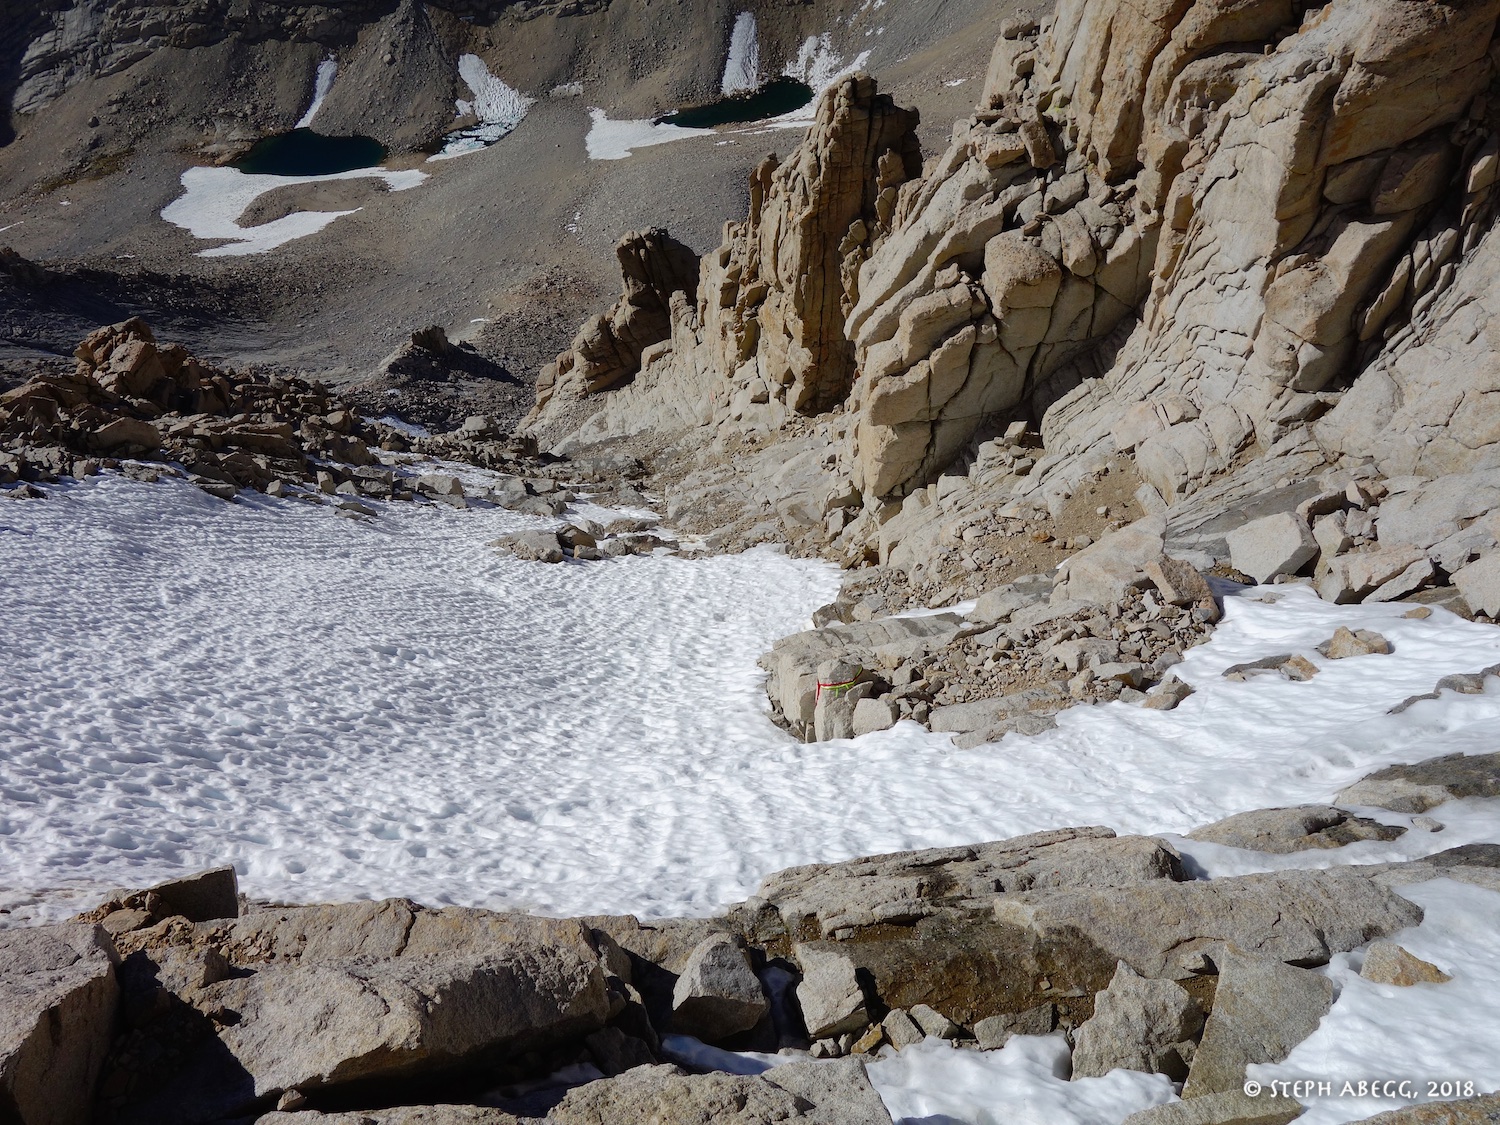
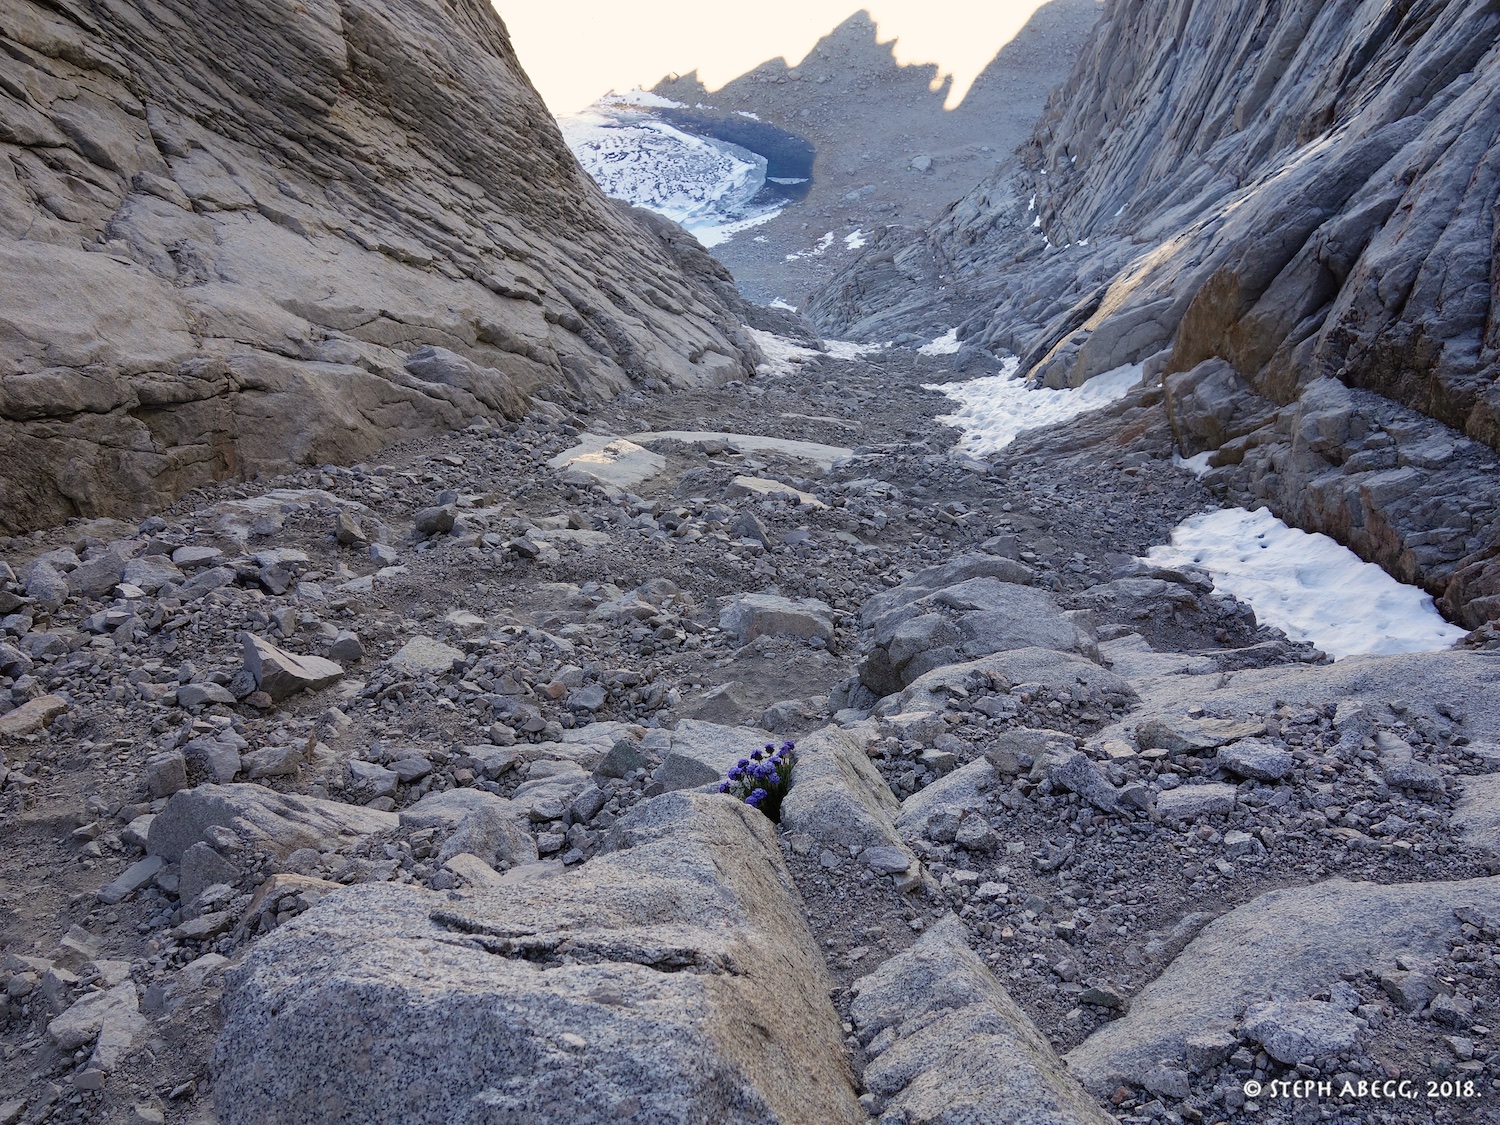
46. Looking down the Mountaineers Route. We found a snow-free path down the right side. We never needed to rappel although there were a few rappel slings we passed by which we might have used if there had been more snow or ice. 47.The slog down the lower Mountaineers Route back to Iceberg Lake.
48. Looking up at the Mountaineers Route from the base. We had plenty of time left in the day, so we packed up camp and hiked out, planning on a rest morning and then maybe an afternoon climb the next day!
Useful beta. Updated route information. Corrections. Historical notes. Interesting facts. No fluff please. Please do not put links in your comment, as my spam filter will filter those comments out.