After stubbornly waiting out a week-long deluge of thundershowers, the weather finally stabilized enough to head into the Whitney/Russell area for some climbing. I made two separate trips into the area with two different mountainproject-derived partners, and climbed 4 routes:
With Meg O'Neill:
July 21 - Hike in and establish camp at Upper Boy Scout Lake
July 22 - Mithral Dihedral on Mt. Russell (5.9+, 700') July 23 - East Buttress on Mt. Whitney (5.7, 1000'), Hike out
July 24 - Day in Lone Pine
With David Draper:
July 25 - Hike in and establish camp at Iceberg Lake
July 26 - Western Front on Mt. Russell (5.10+, 900') July 27 - East Face on Mt. Whitney (5.7, 1000'), Hike out
The following page gives a route overlay, pitch-by-pitch description, and photos for each of the climbs.
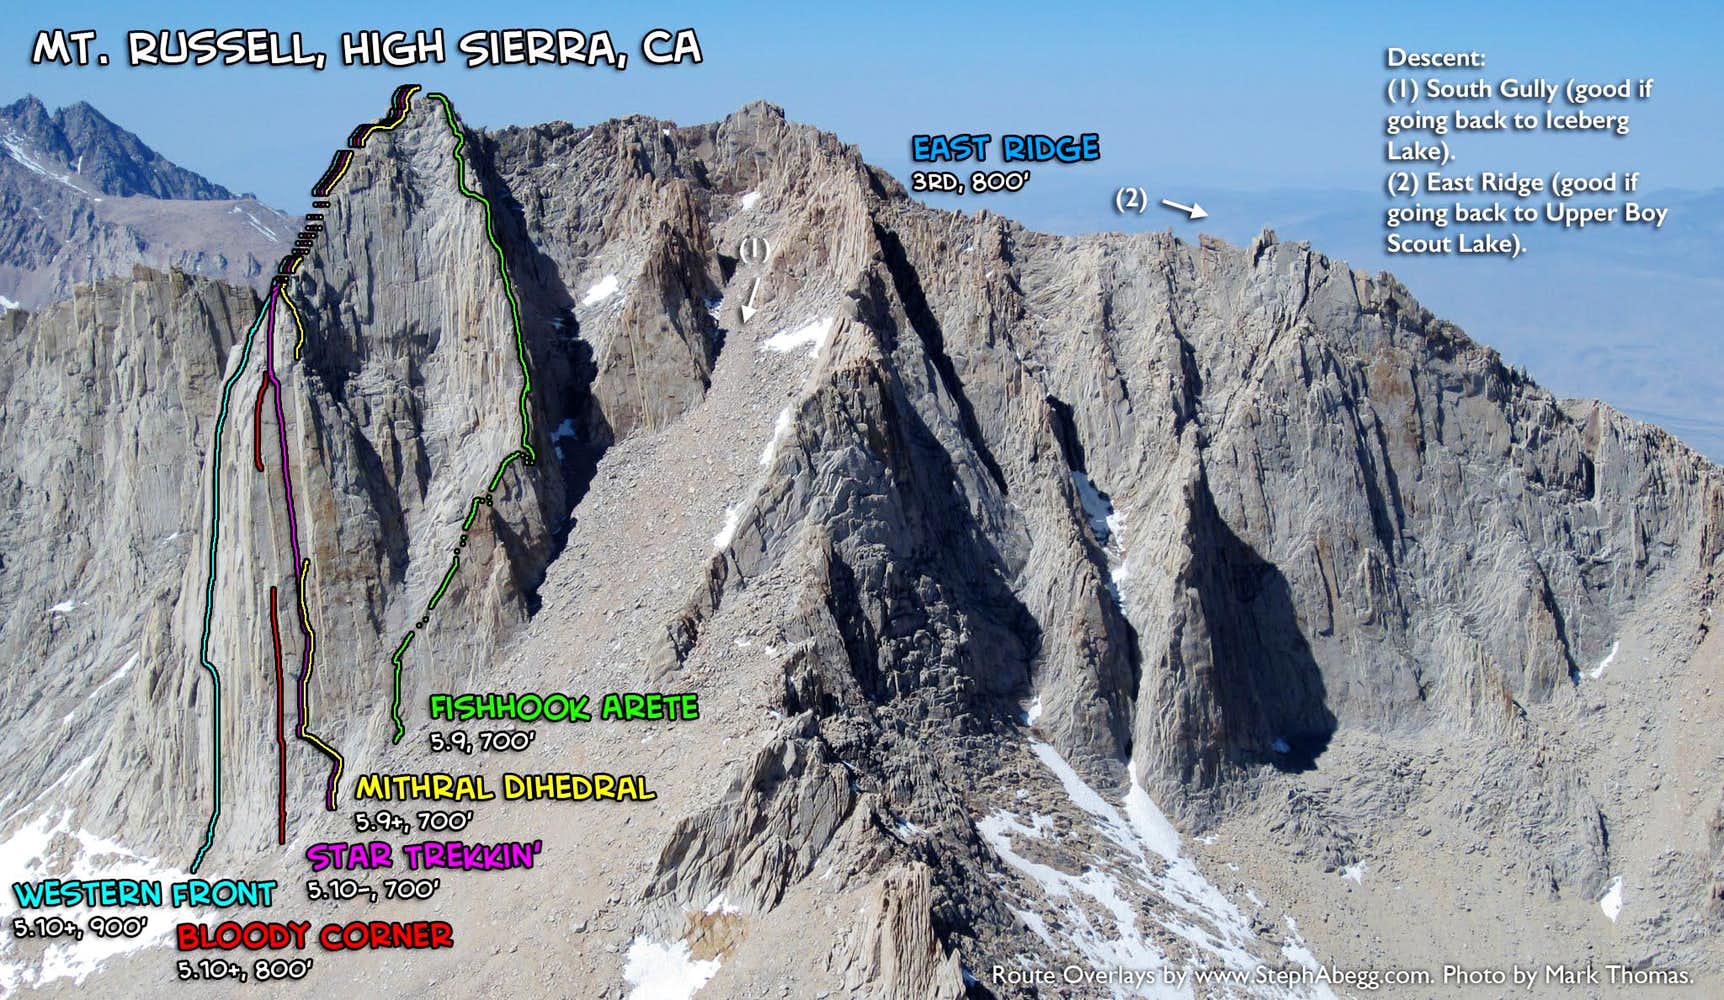
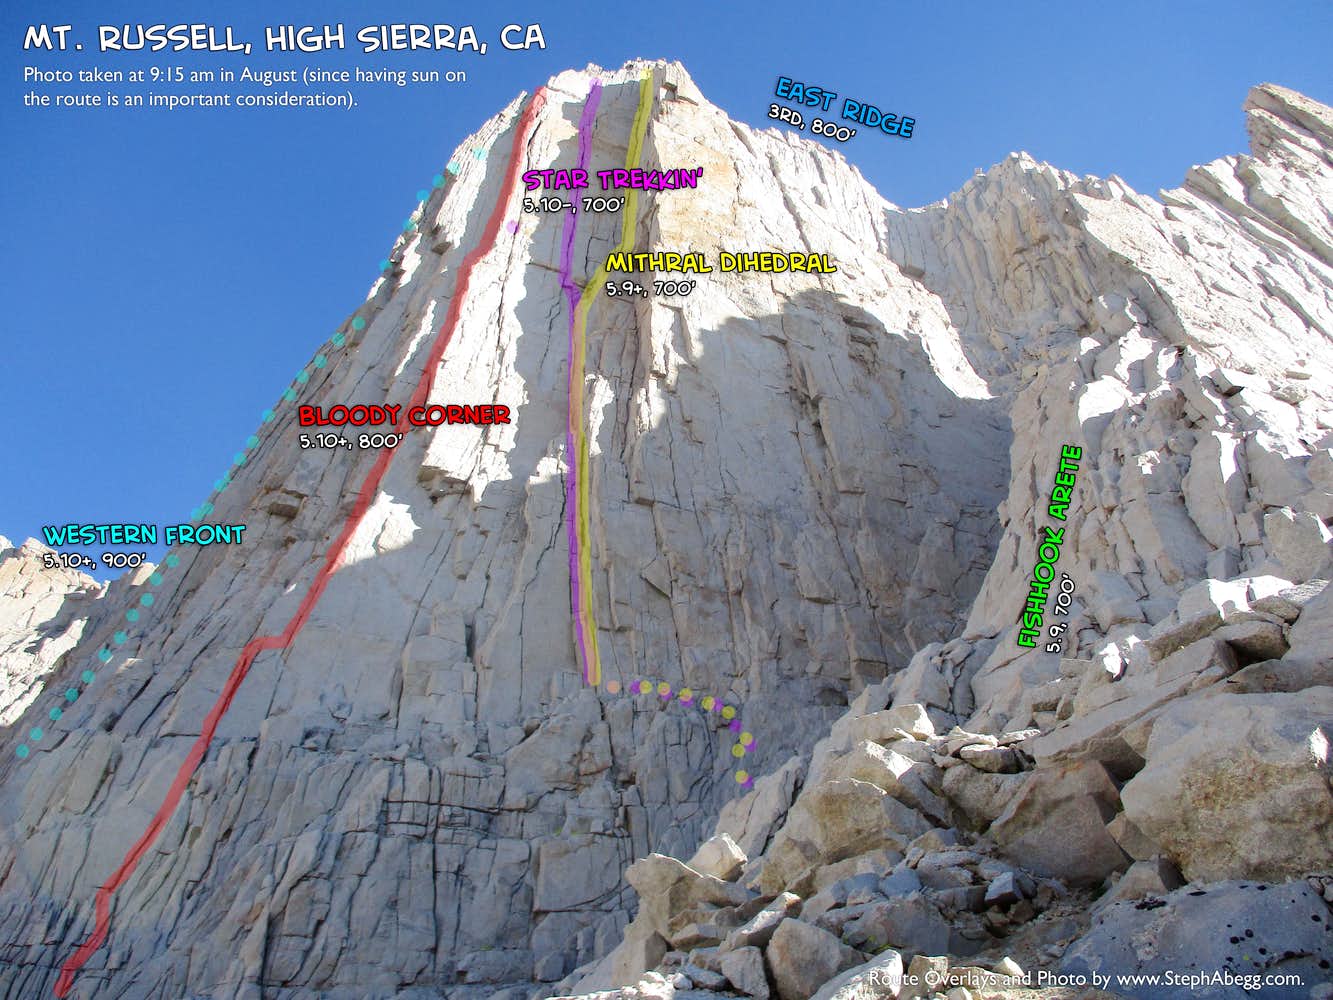
Update (Aug 2015): The rock on Russell is some of the best alpine granite I've climbed, and after this trip I was itching to return and climb Star Trekkin' and Bloody Corner, two remaining "popular" routes on Russell I'd not yet climbed. A month after this trip, in August 2015, I returned with my friend Dow to climb Star Trekkin' (5.10-, 700') and Bloody Corner (5.10+, 800') (click links for trip report). I had also climbedFishhook Arête (5.9, 700')in Aug 2013. All are excellent routes.
THIS TRIP REPORT IS STILL MOSTLY IN THE EMBEDDED HTML FORMAT OF MY OLD WEBSITE. MOBILE Tip: Try Landscape mode. It is generally more mobile friendly.
Climbs We Did
CLICK ON ROUTE TO DROP DOWN CONTENT
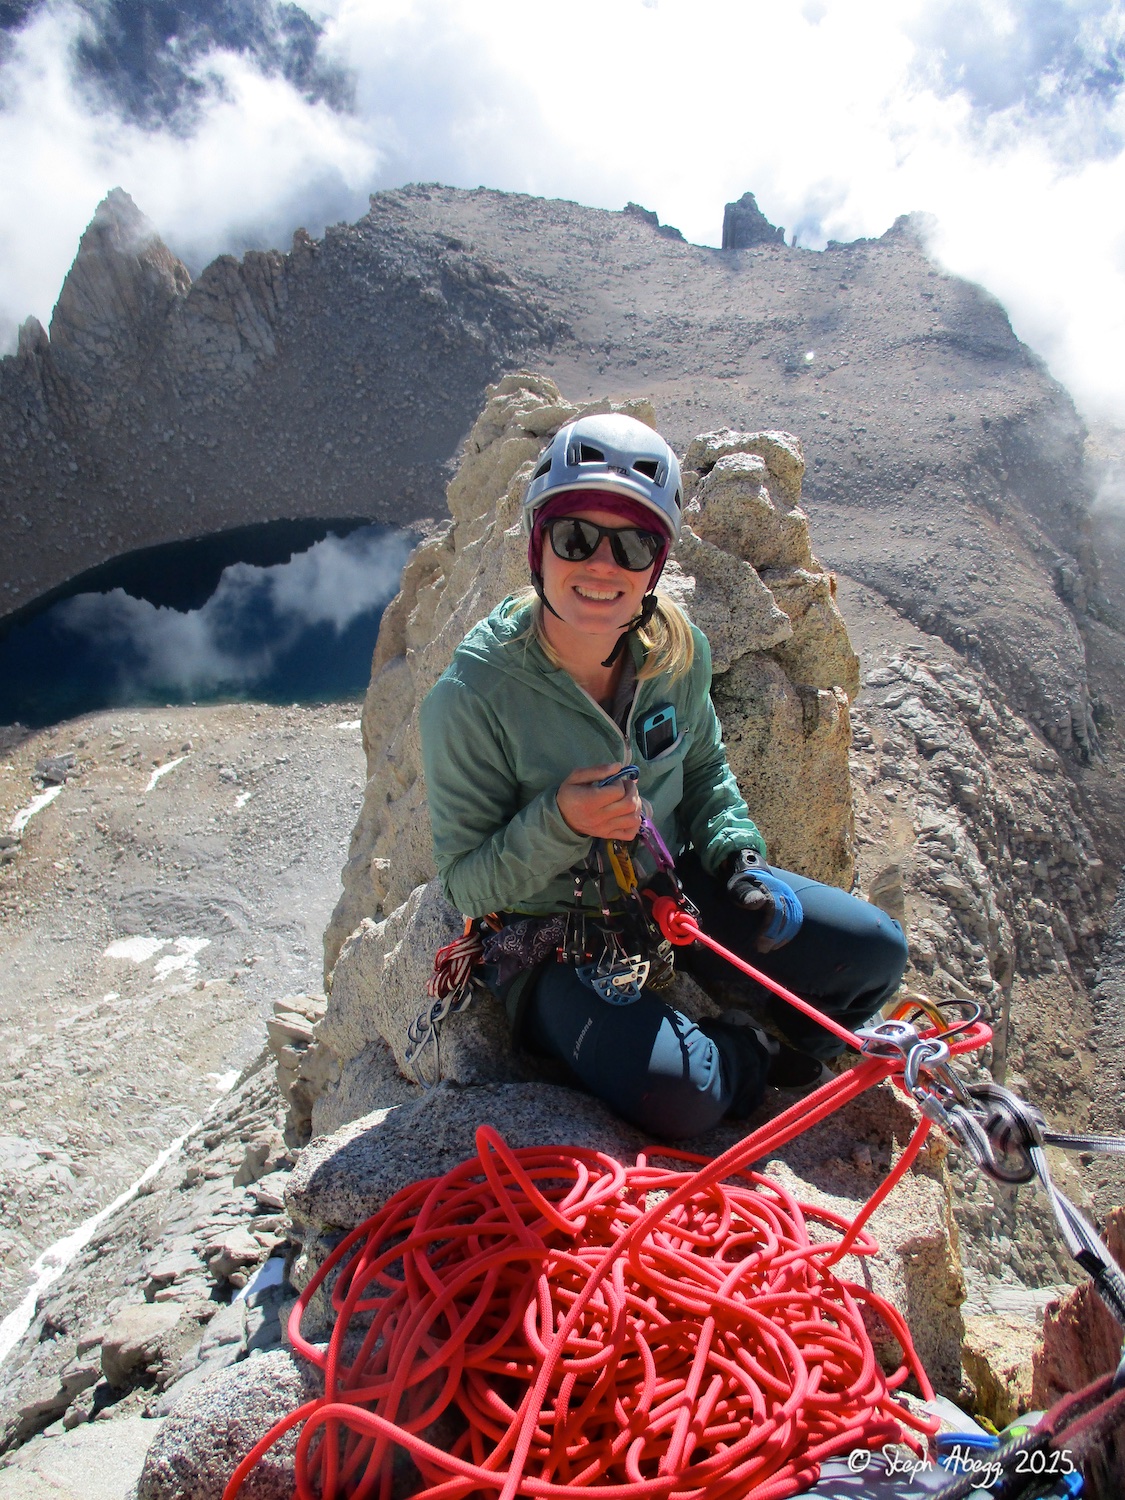
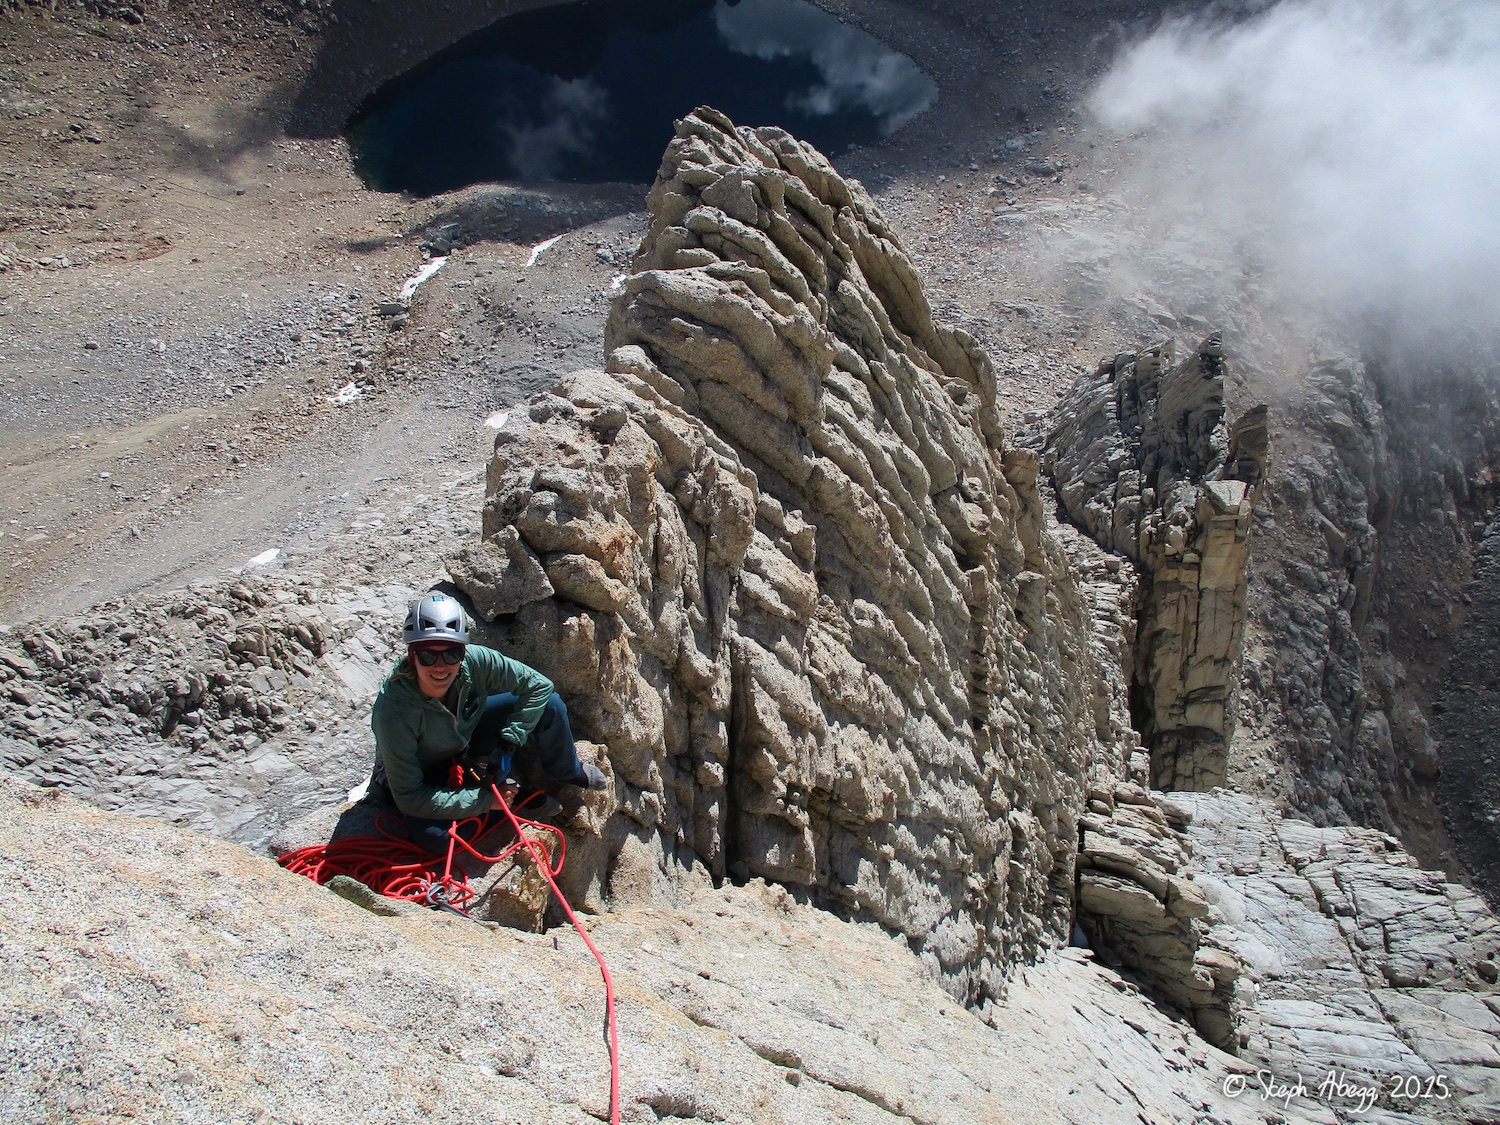
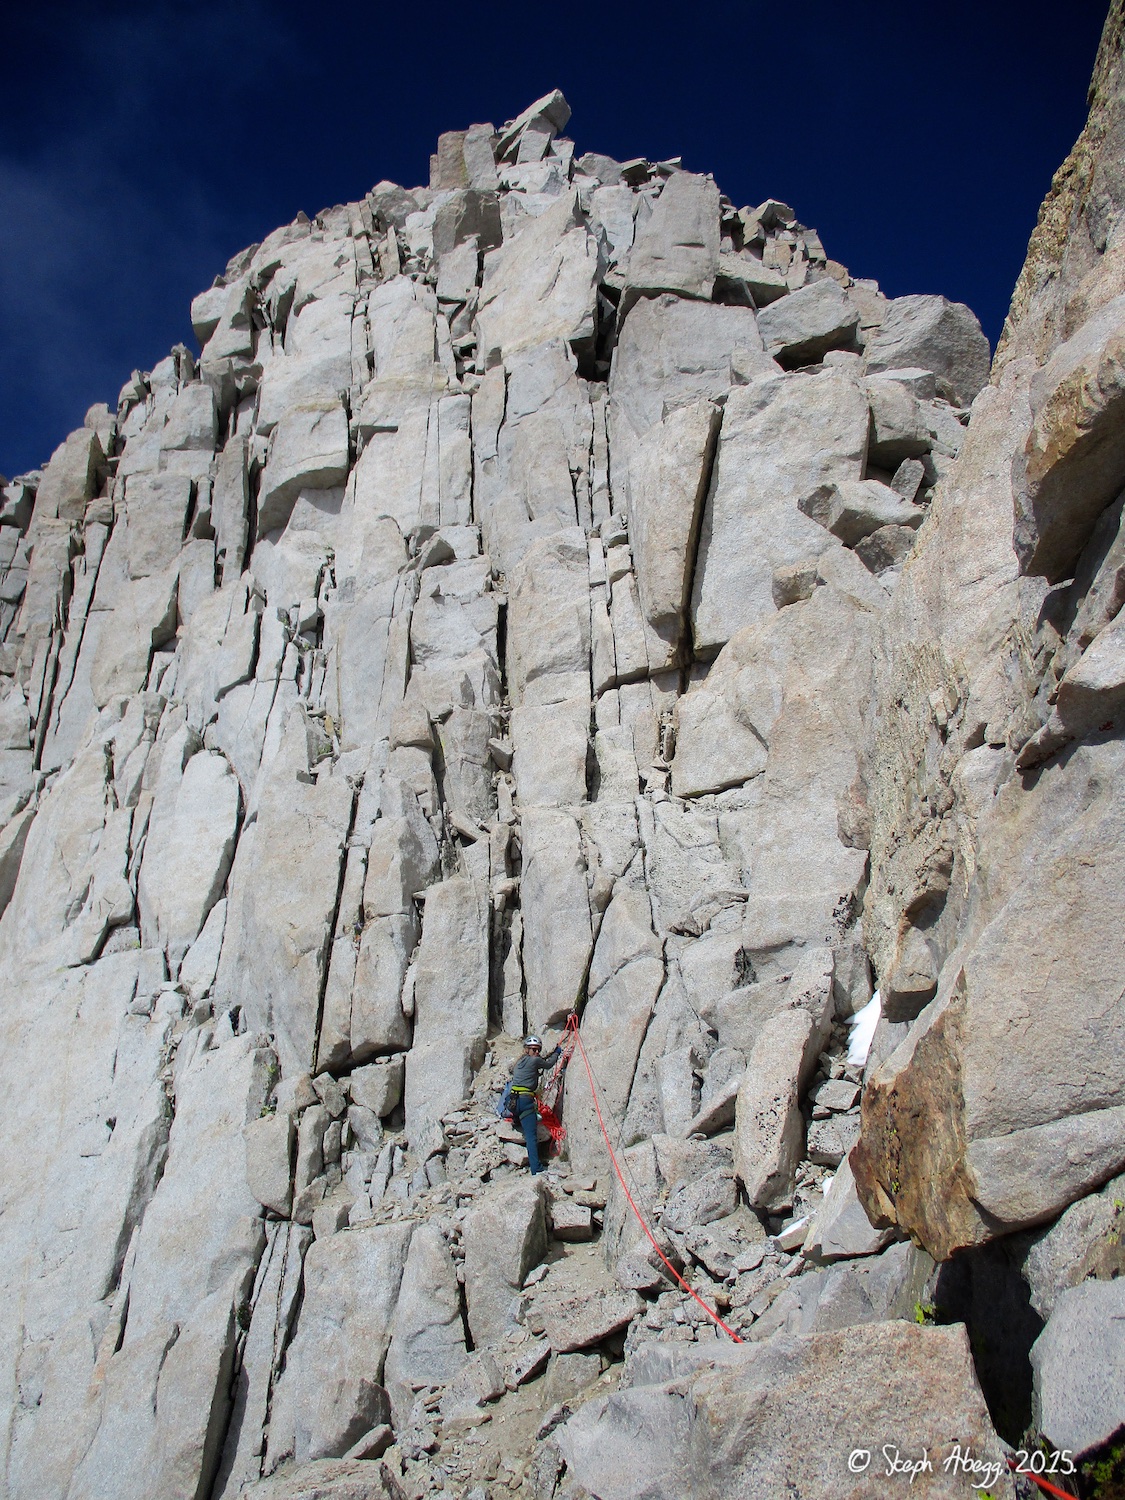
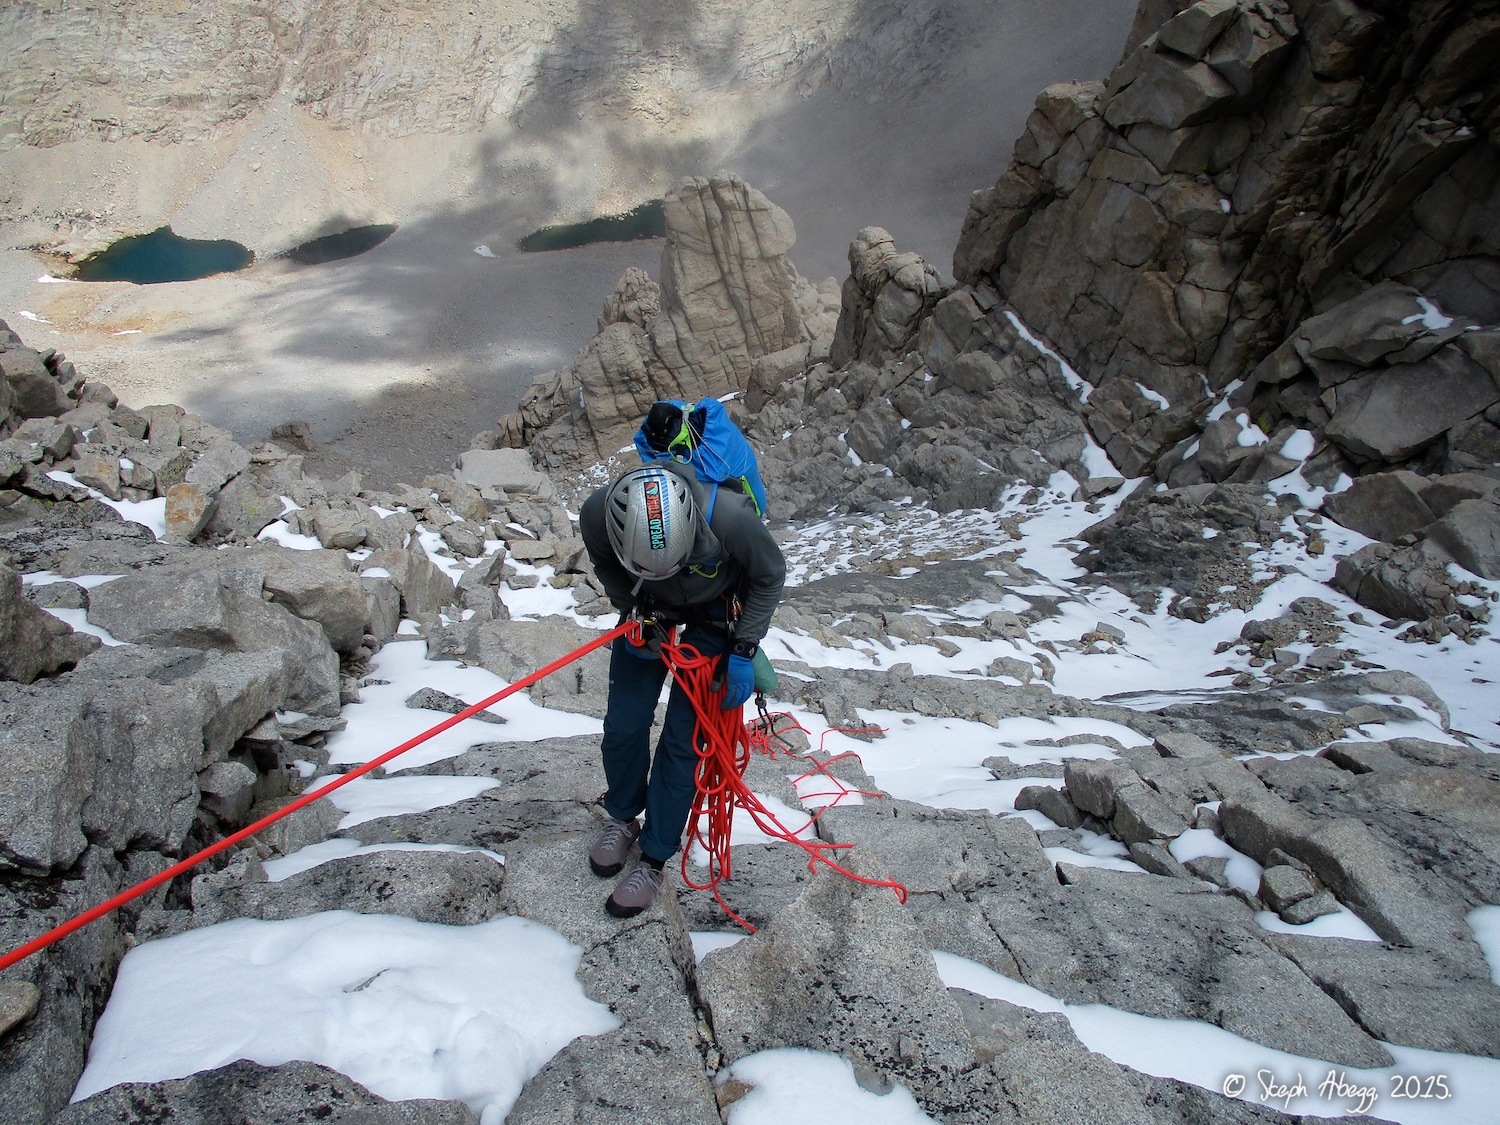
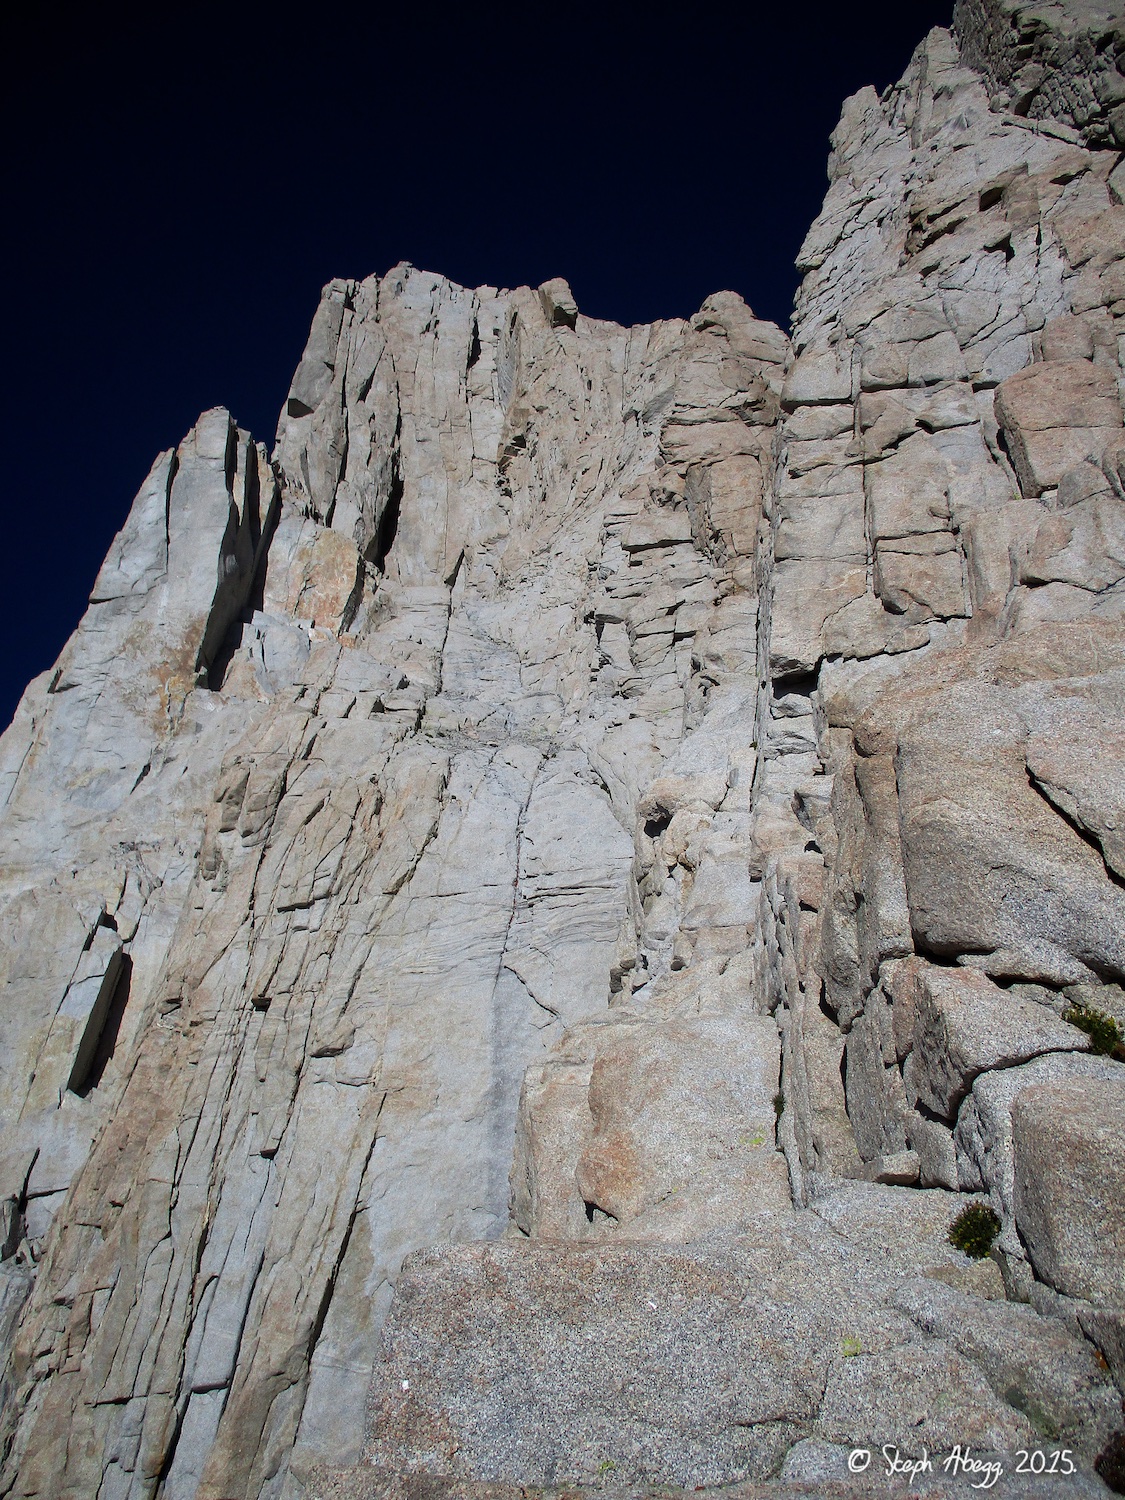
Spelled "Mithral" by Croft/SuperTopo and "Mithril" by mountainproject, this route climbs the obvious 250-ft left-facing dihedral on the southwest face of Mt. Russell. This is one of the more striking corners in the entire High Sierra. The climbing in the corner is sustained and vertical, rated somewhere between 5.9 to 5.10a to 5.9+ depending on the source. 5.9+ seems like a good it-might-be-5.9-but-it's-probably-gonna-feel-like-5.10 rating. The two pitches getting to the corner and the last half of the route to the summit are easier climbing, yet still challenging and high quality. The views are spectacular the whole way up.
The main disadvantage of this route is that the sun does not hit it until mid-day, and it can be quite cold in the shade at 13,000-14,000 feet elevation. A forecast of "40% chance of thudershowers after 11am" encouraged us to get on the route early; as a result we suffered through numb fingers for the first half of the climb, exasperated by the presence of snow on all of the ledges and a lengthy section of wetness in the corner due to recent storms. Despite the somewhat less than ideal conditions, I highly enjoyed this route. I'm not sure Meg enjoyed it as much as I did, but she gamely suffered through chilly lead belays and followed as I led upward. By the time we were on the summit, we were warm and happy in the sun. Since our camp was situated at Lower Boy Scout Lake, we descended the 3rd class East Arête/Ridge to make a nice loop trip out of the climb. All in all, a great day in the mountains.
Whitney Portal trailhead to trail up North Fork Lone Pine Creek to Iceberg Lake to Whitney-Russell Col to base of route below the obvious dihedral.
1.
2.
3.
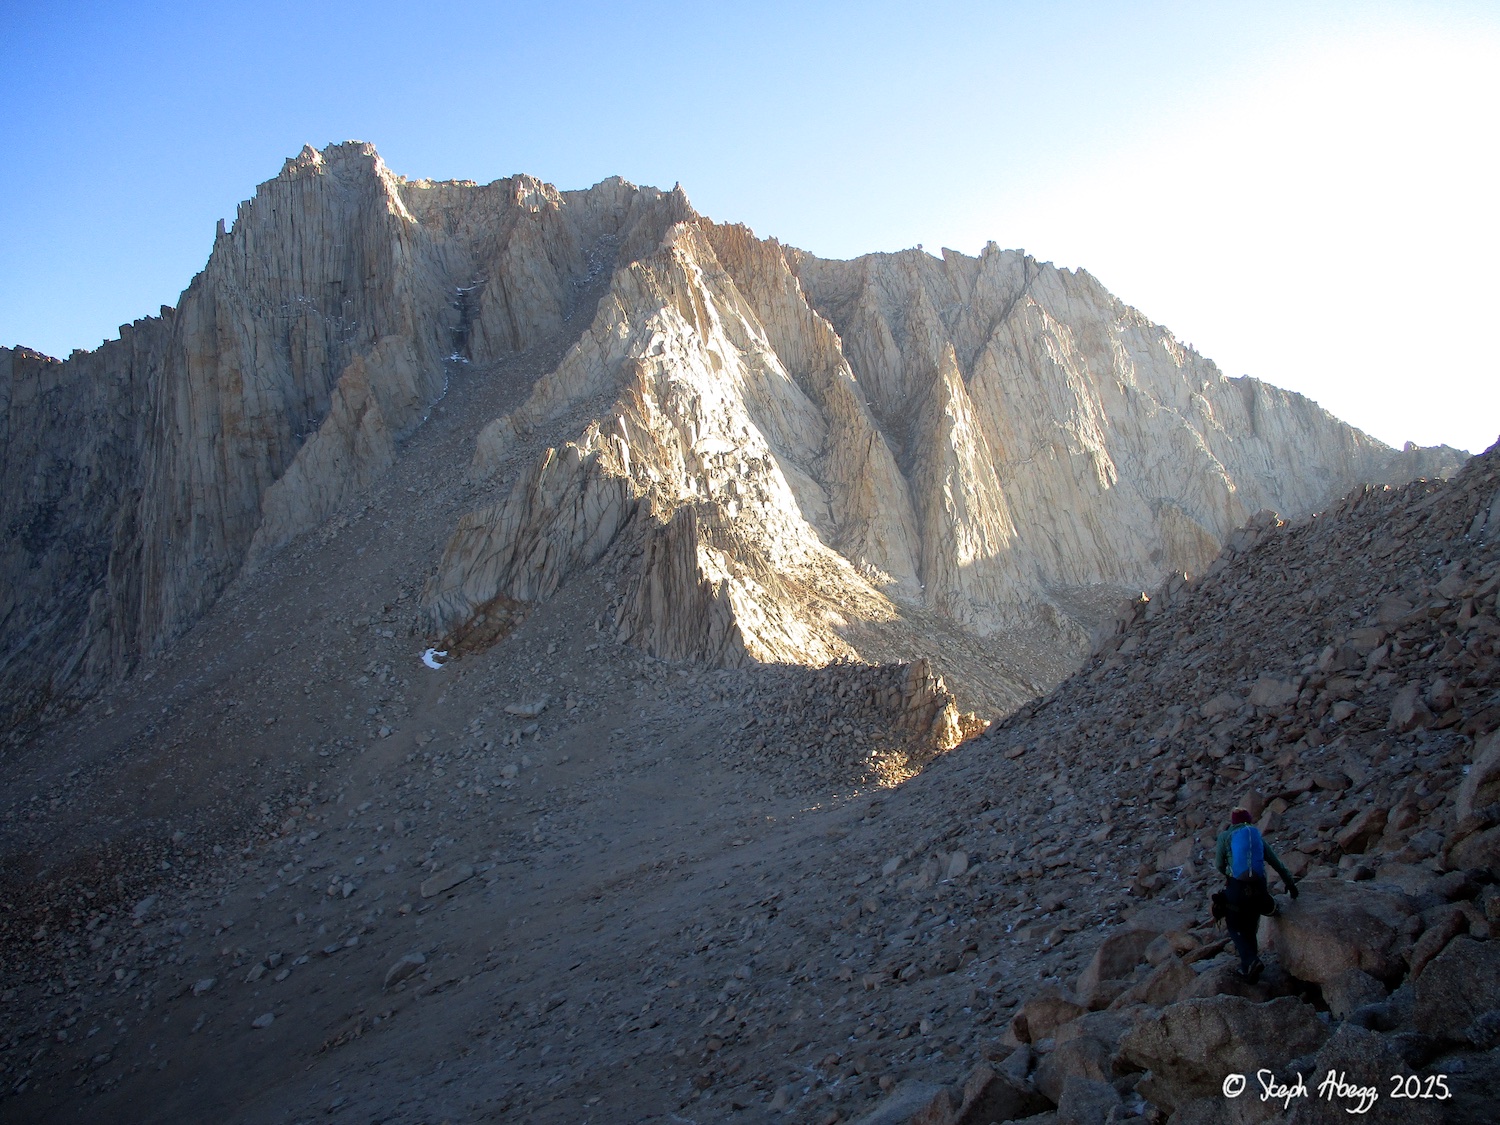
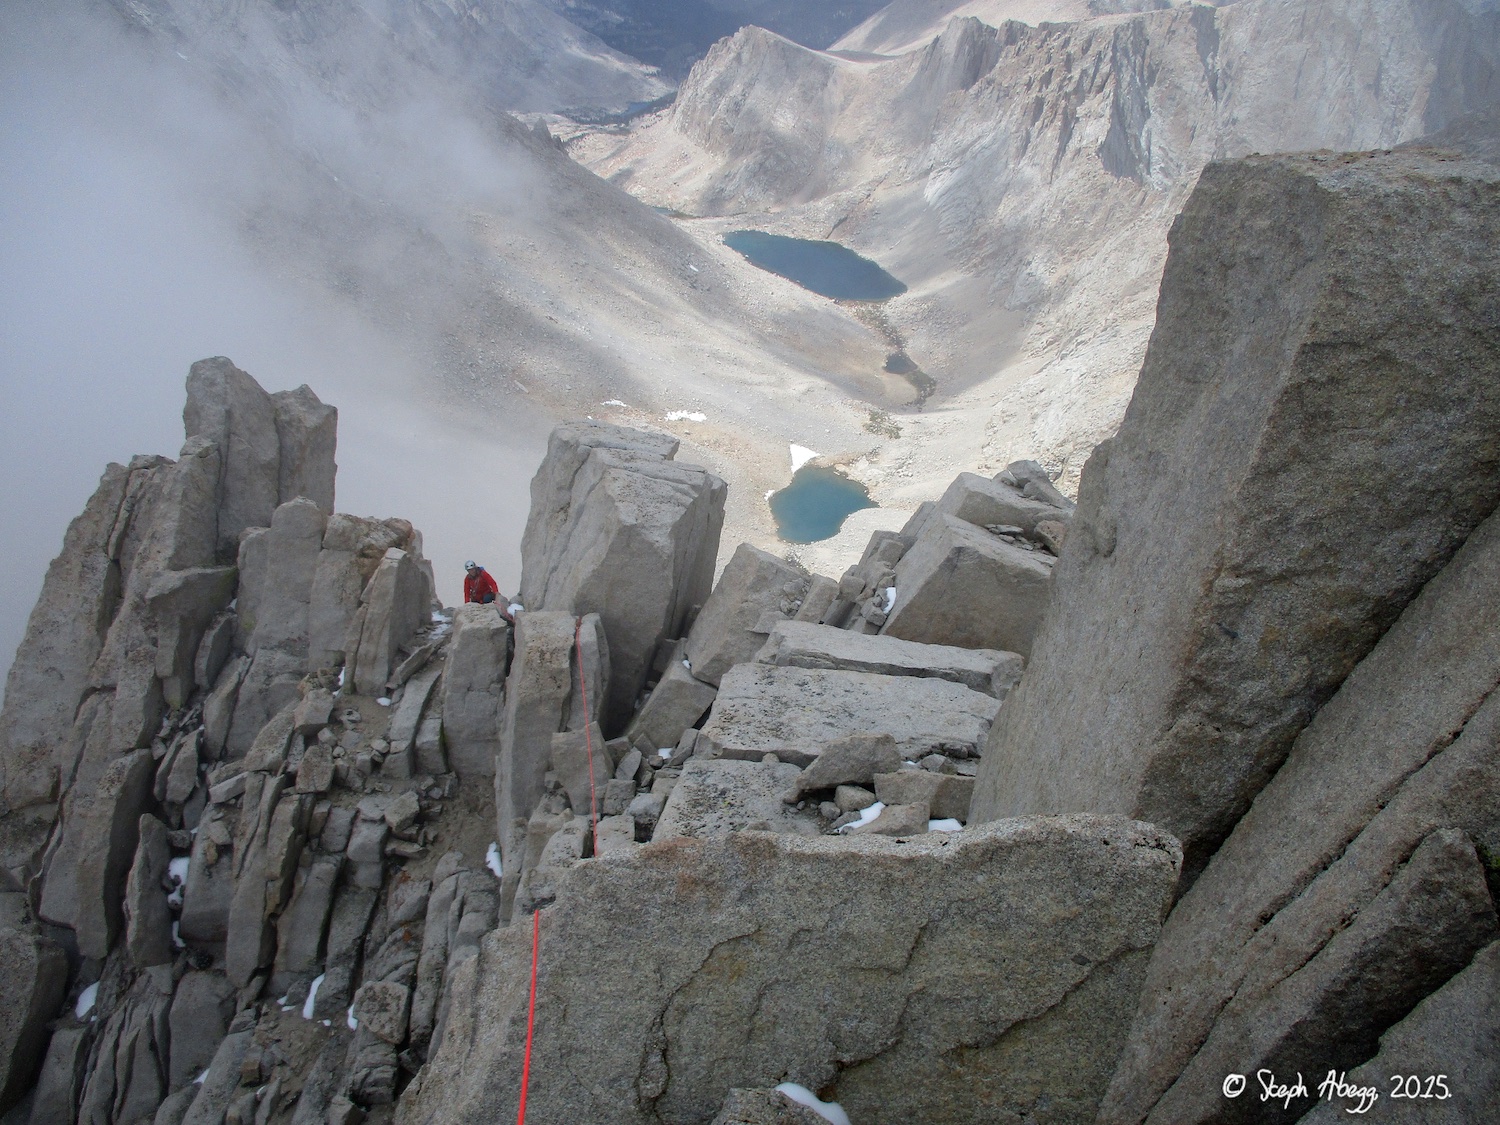
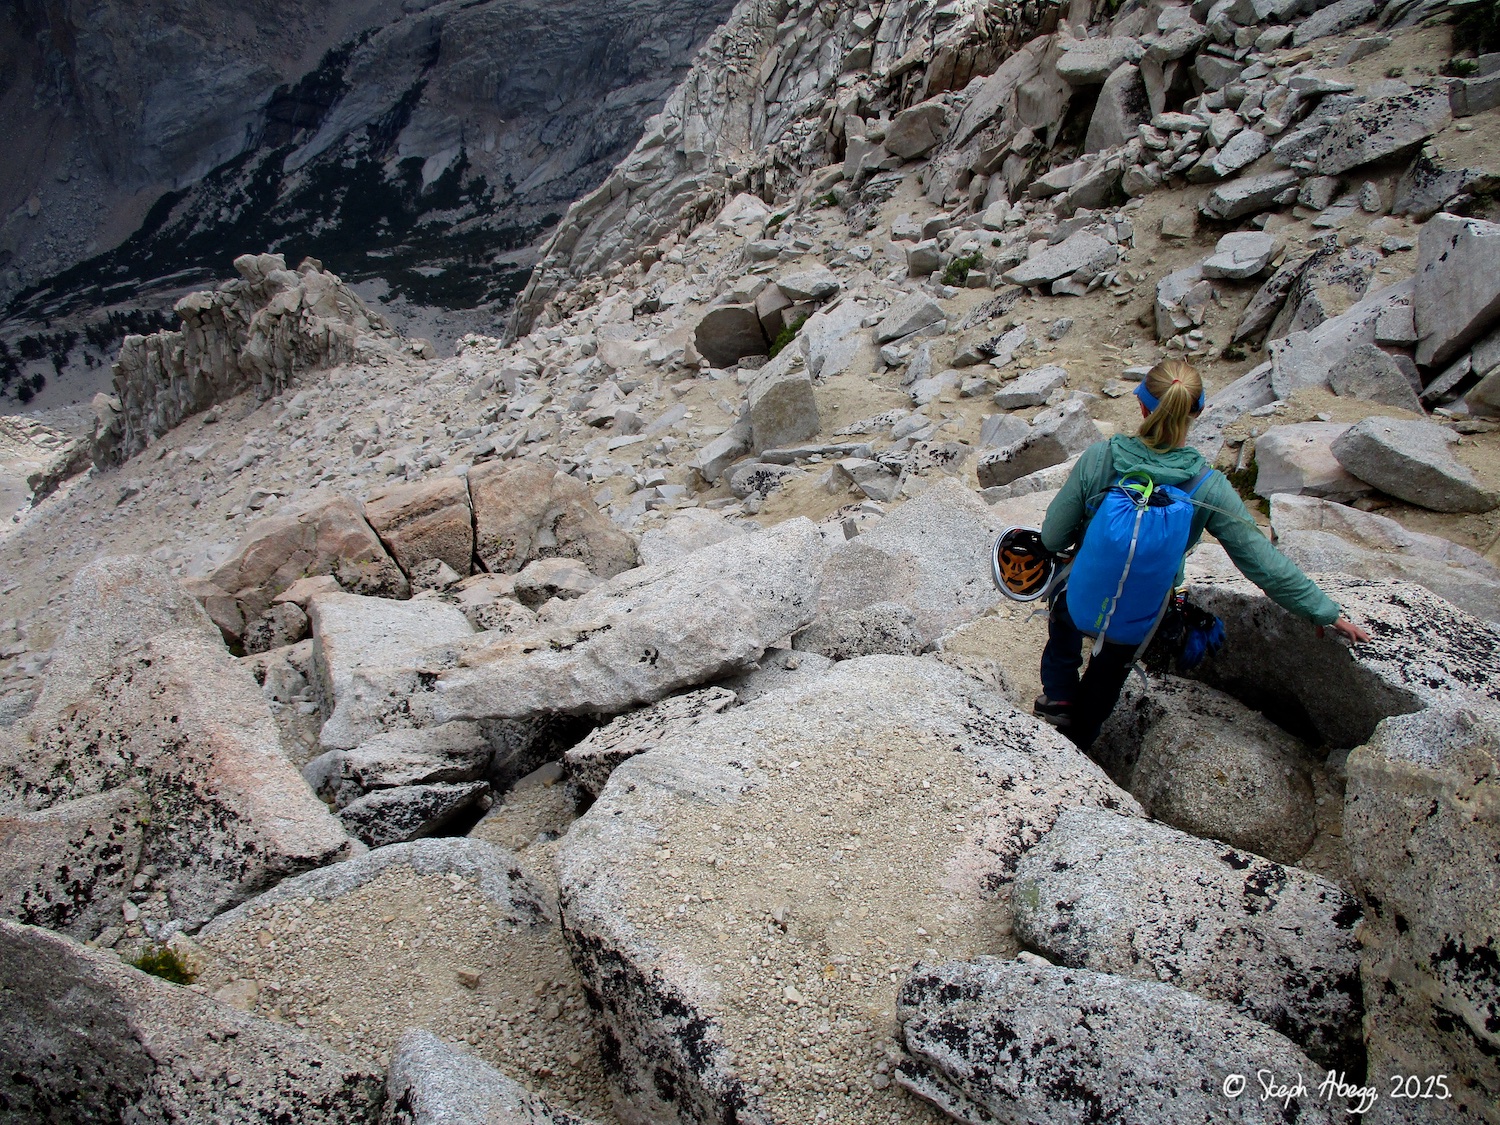
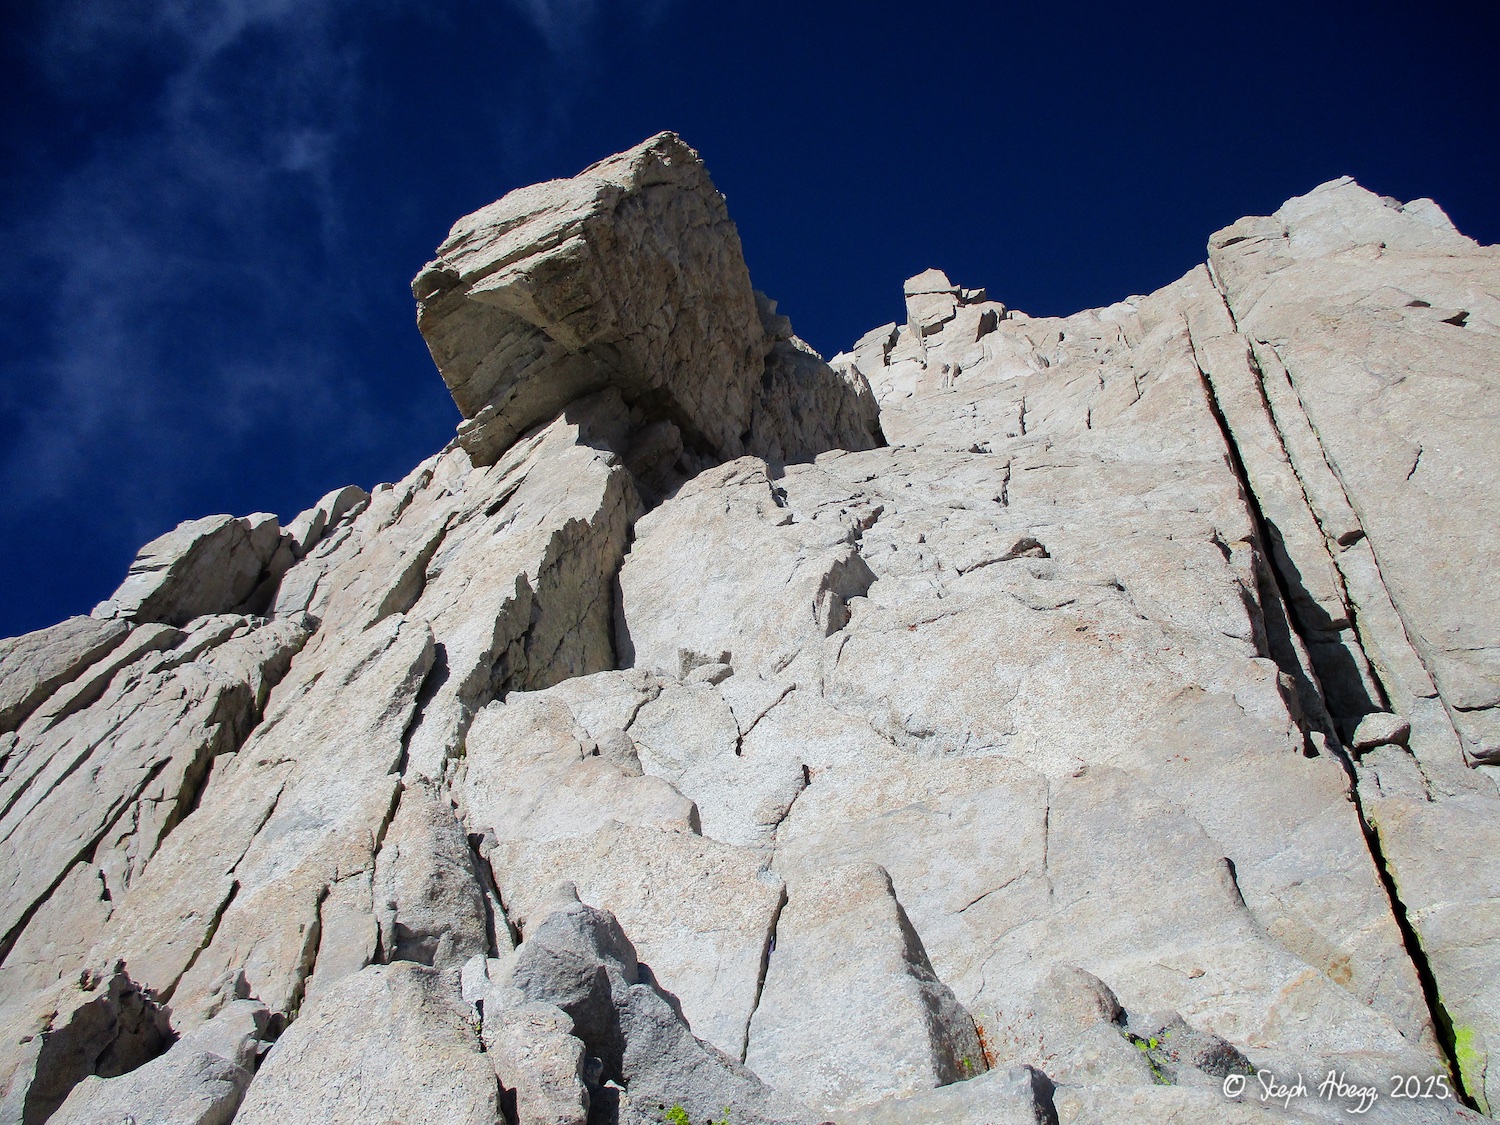
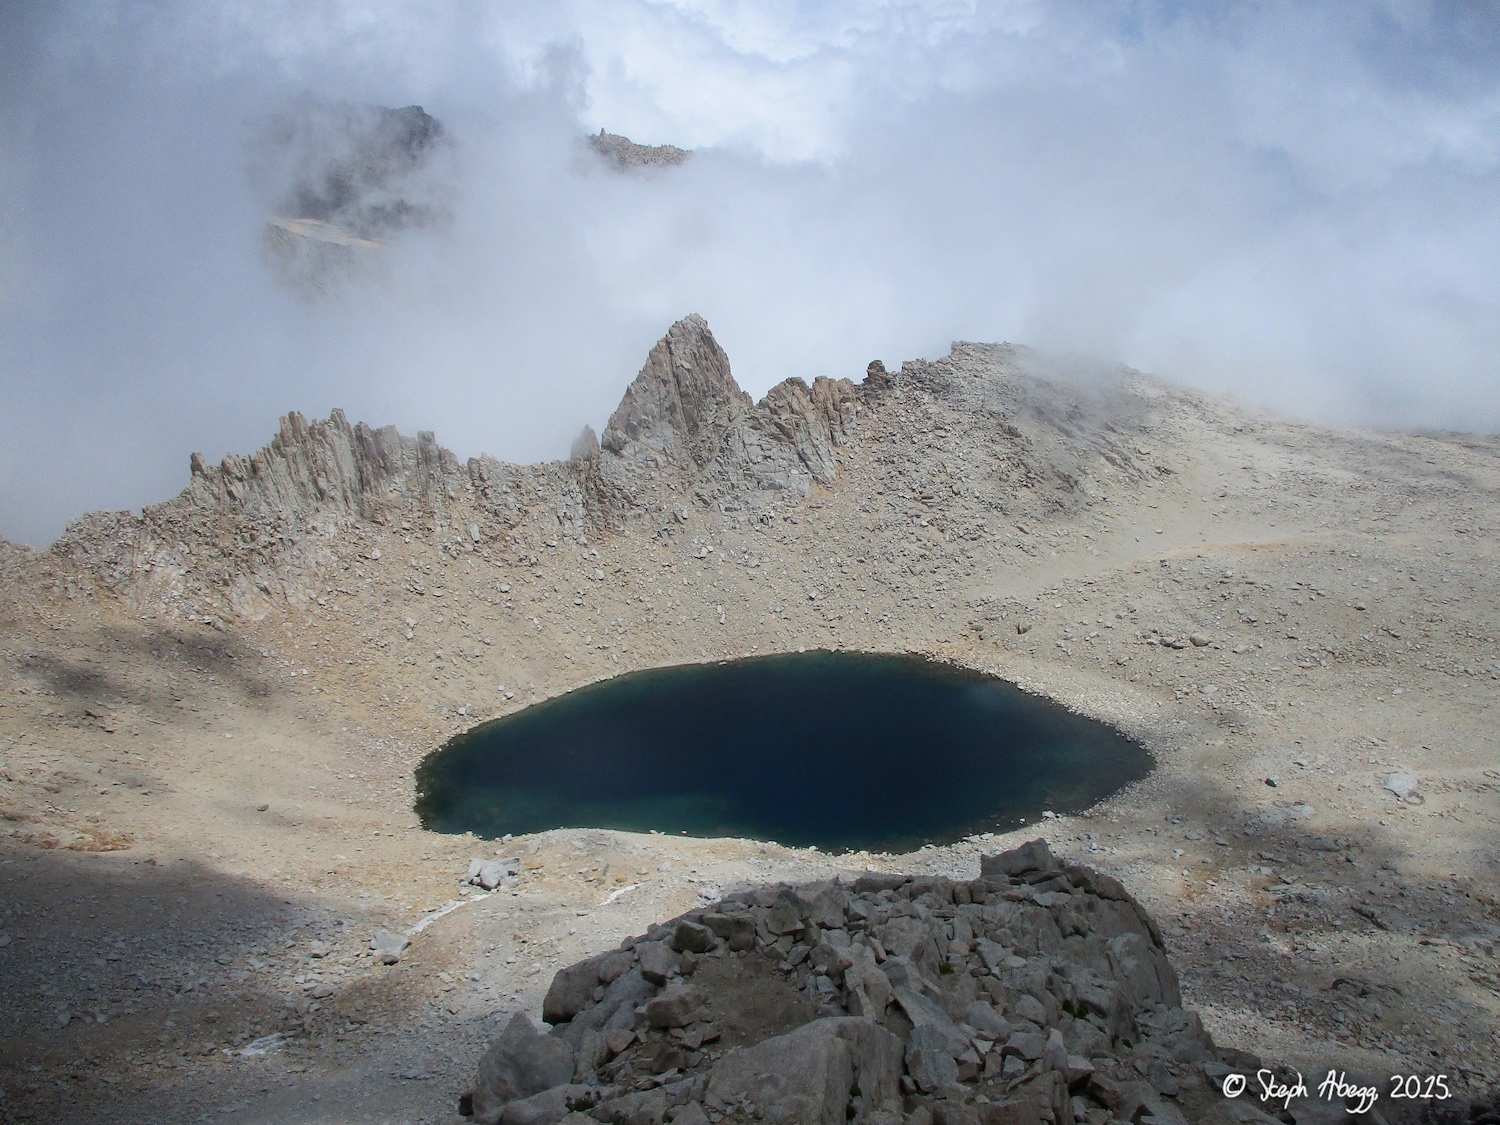
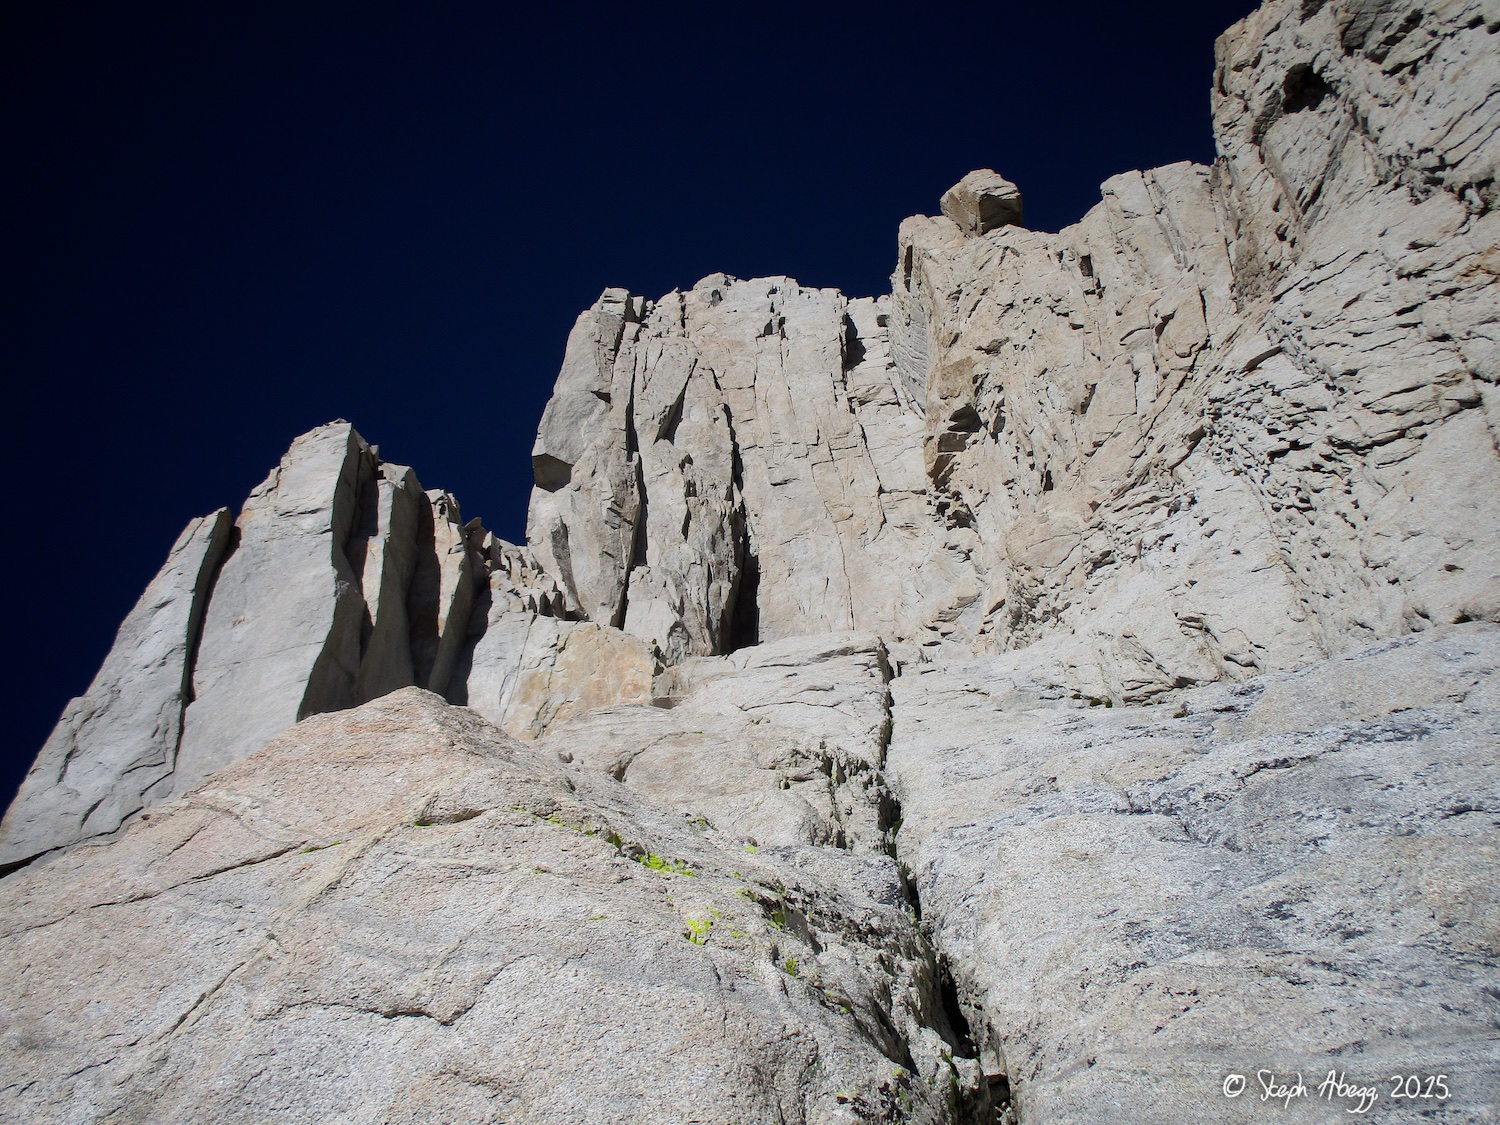
1. Whitney-Russell Col as seen on the approach from Iceberg Lake.
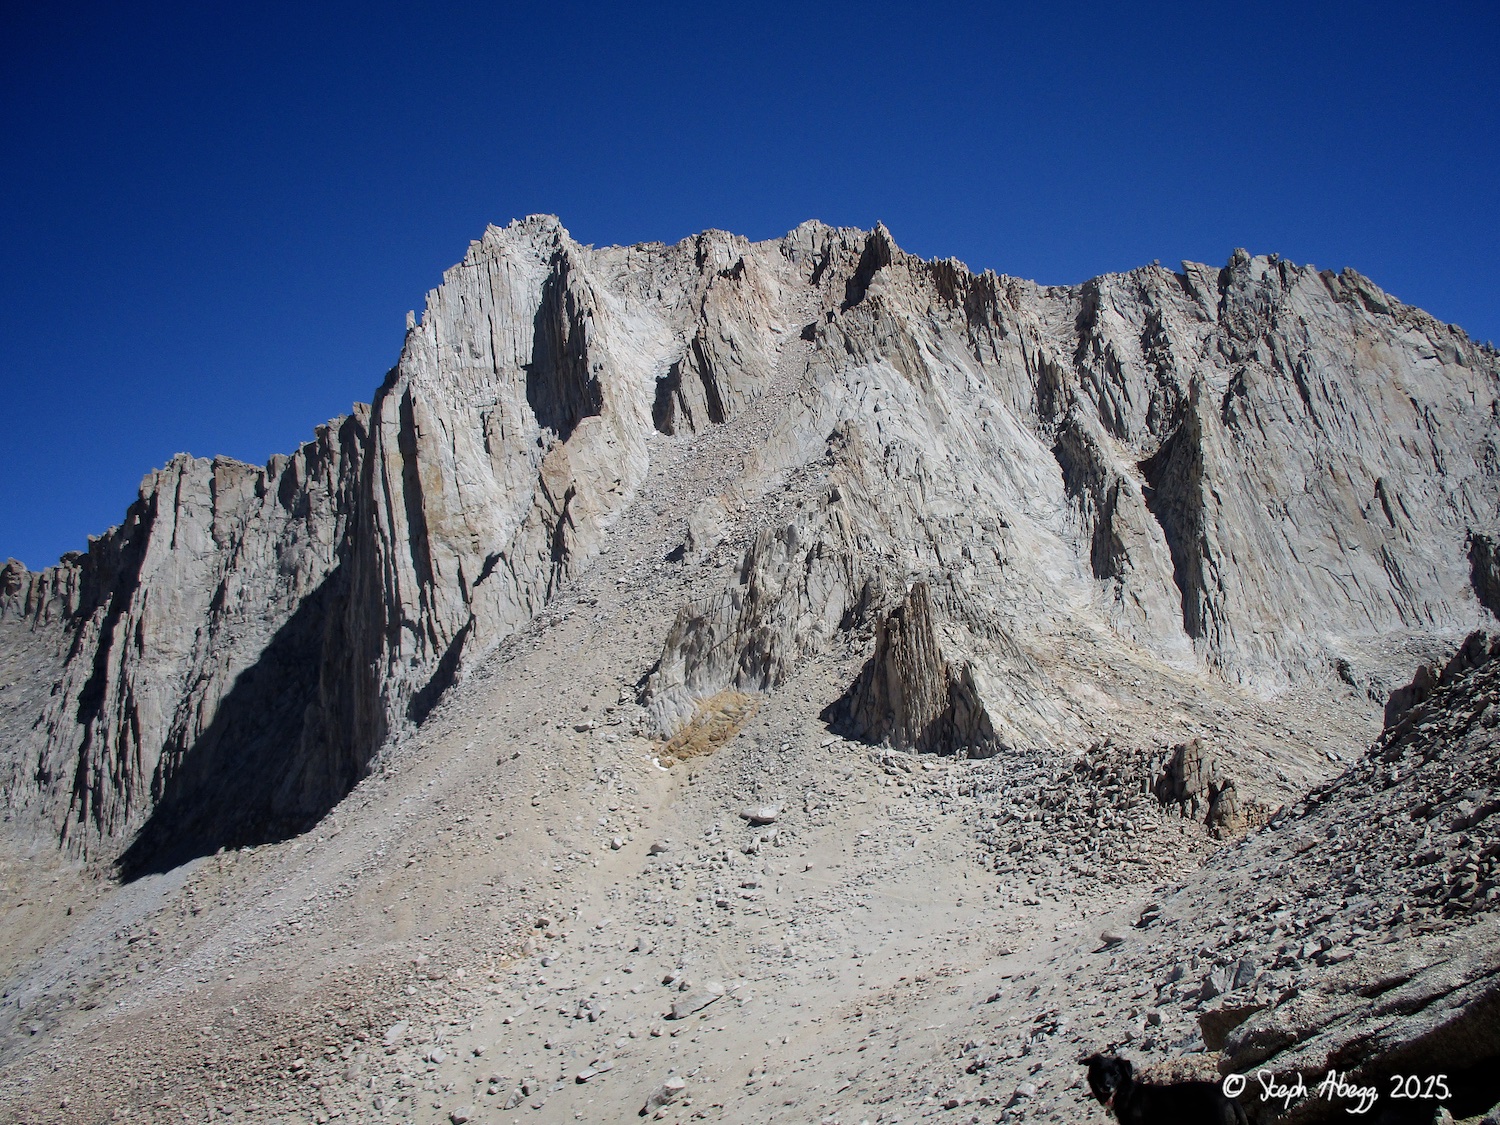
2. Approaching Russell from the Whitney-Russell Col. As evident in the photo, the route is in the shade for most of the morning. If the weather is stable and you're a reasonably fast party, it's a great route to climb in the afternoon.
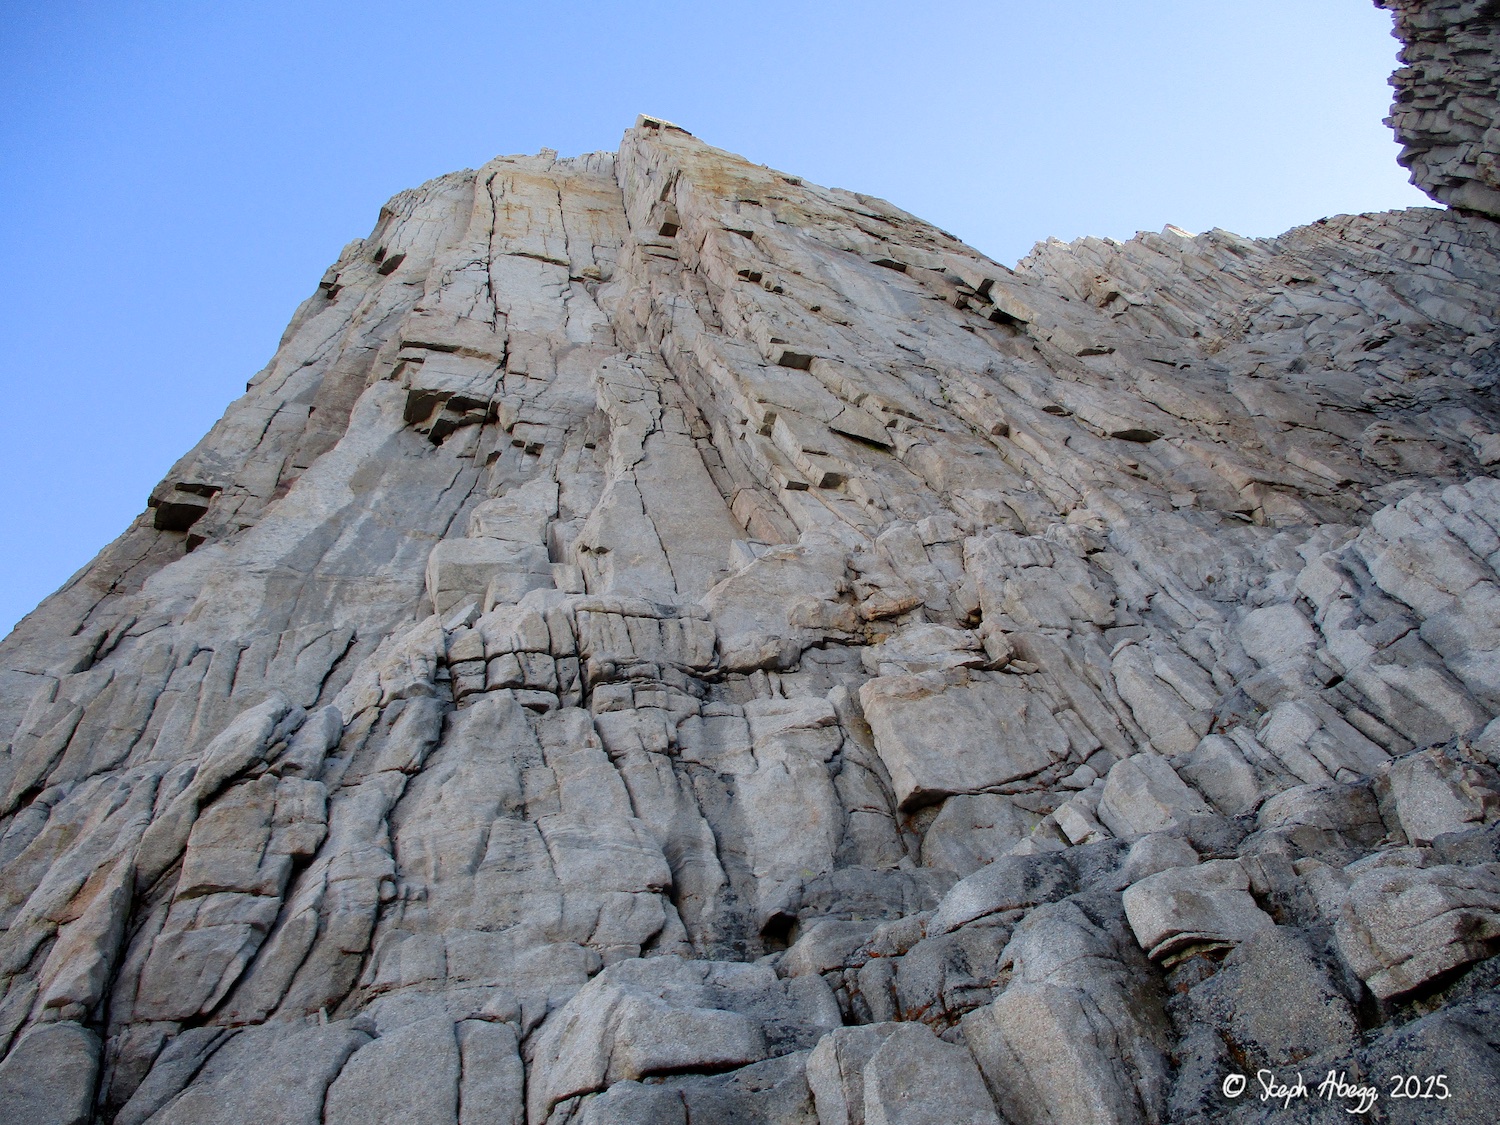
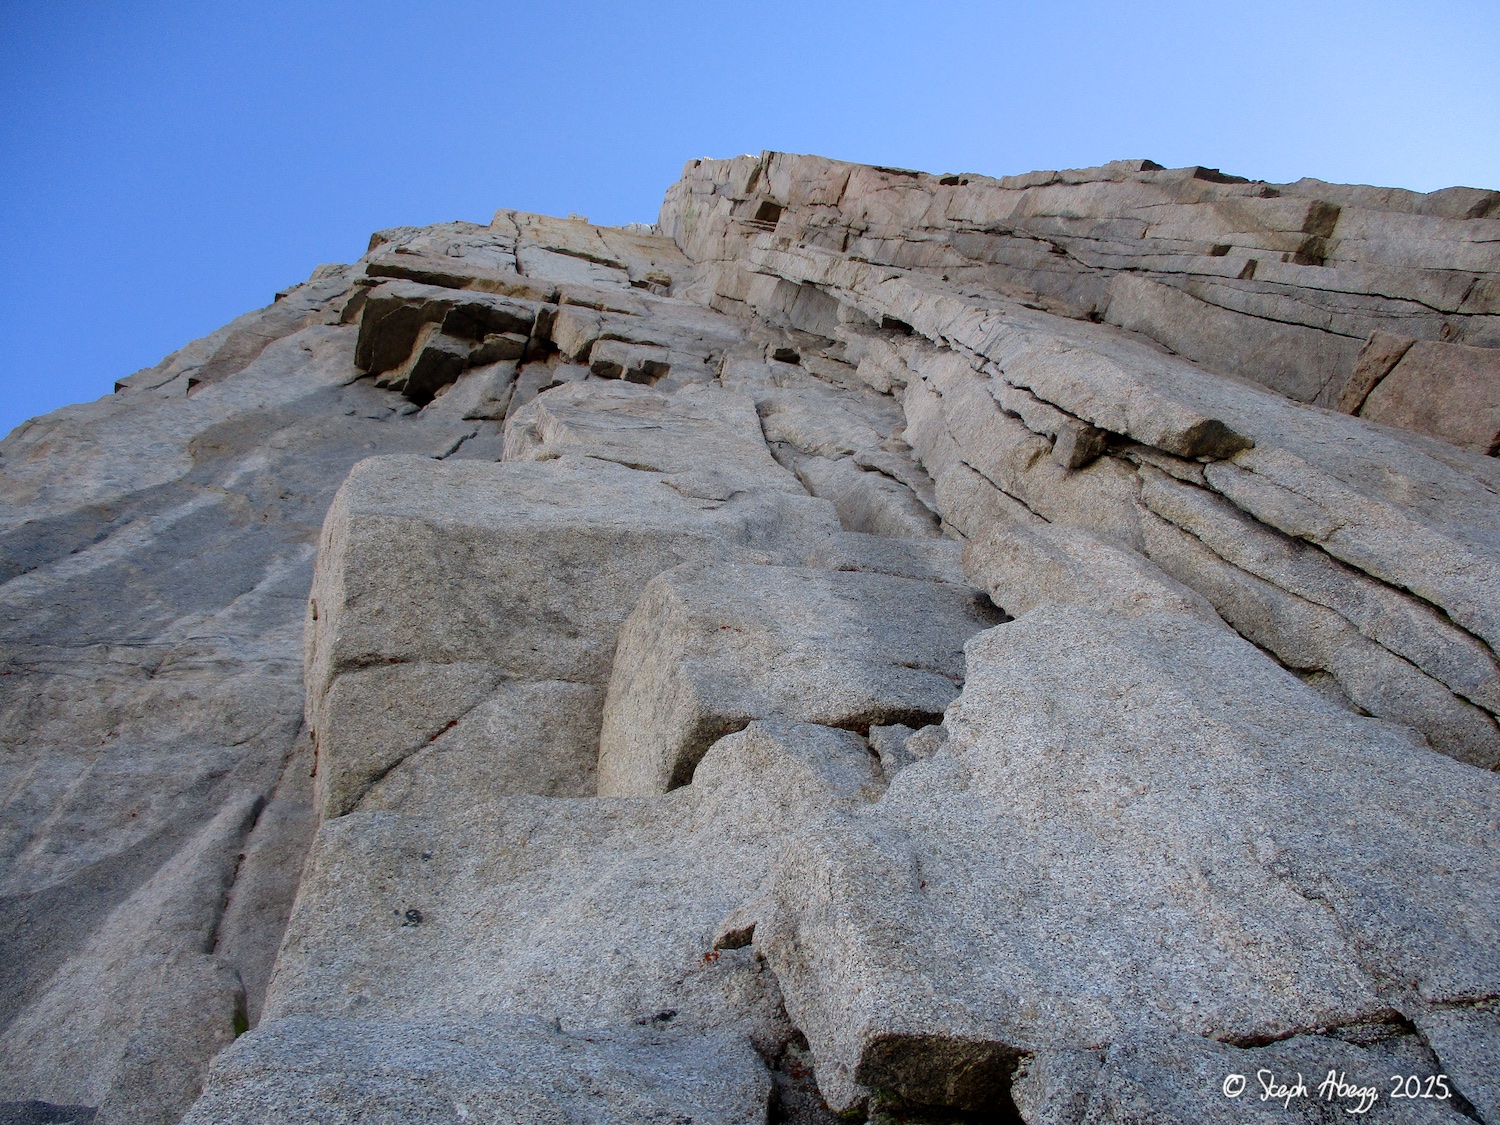
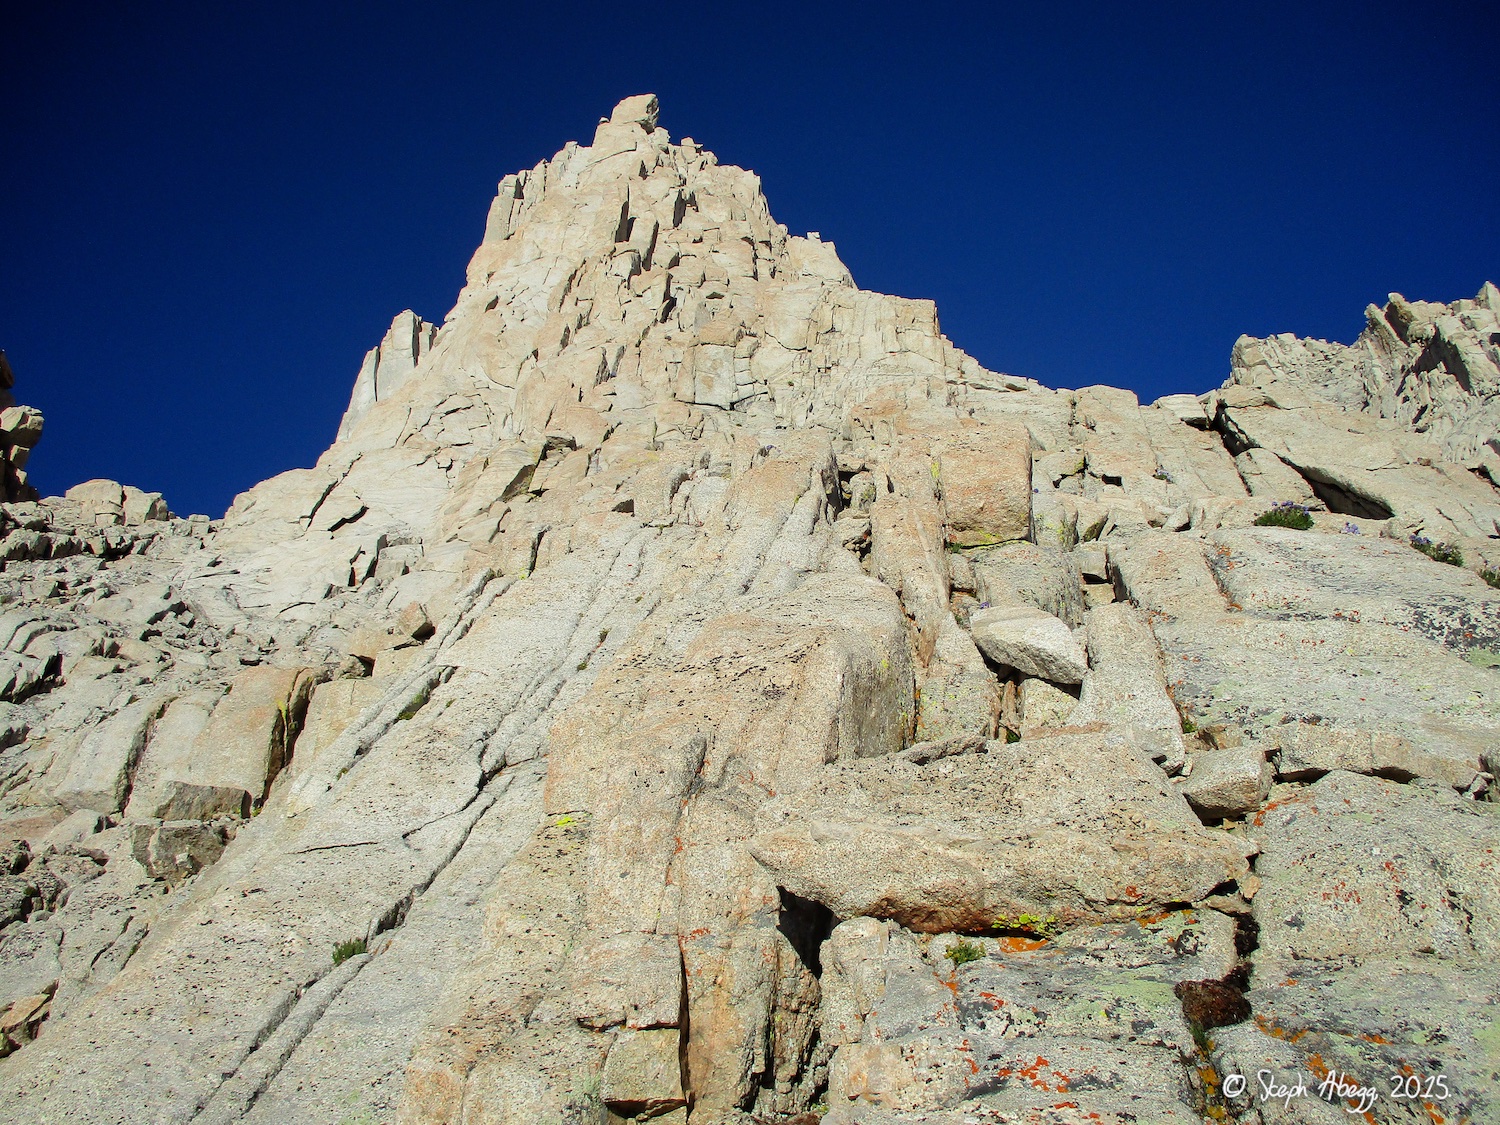
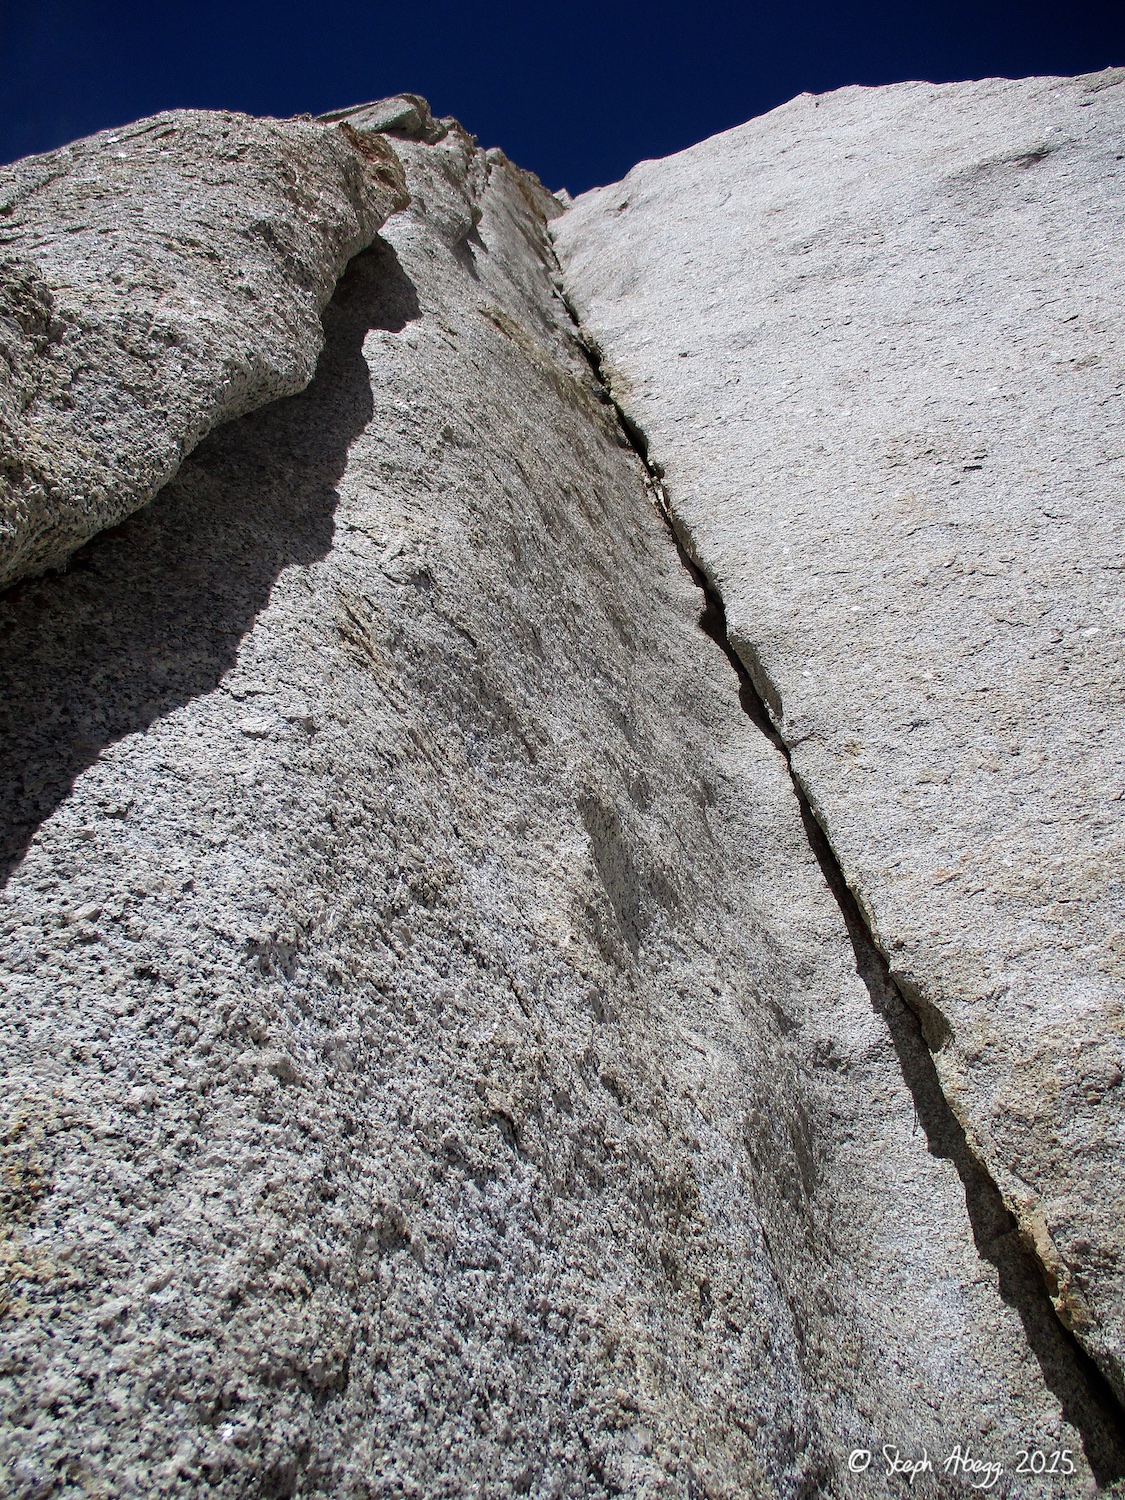
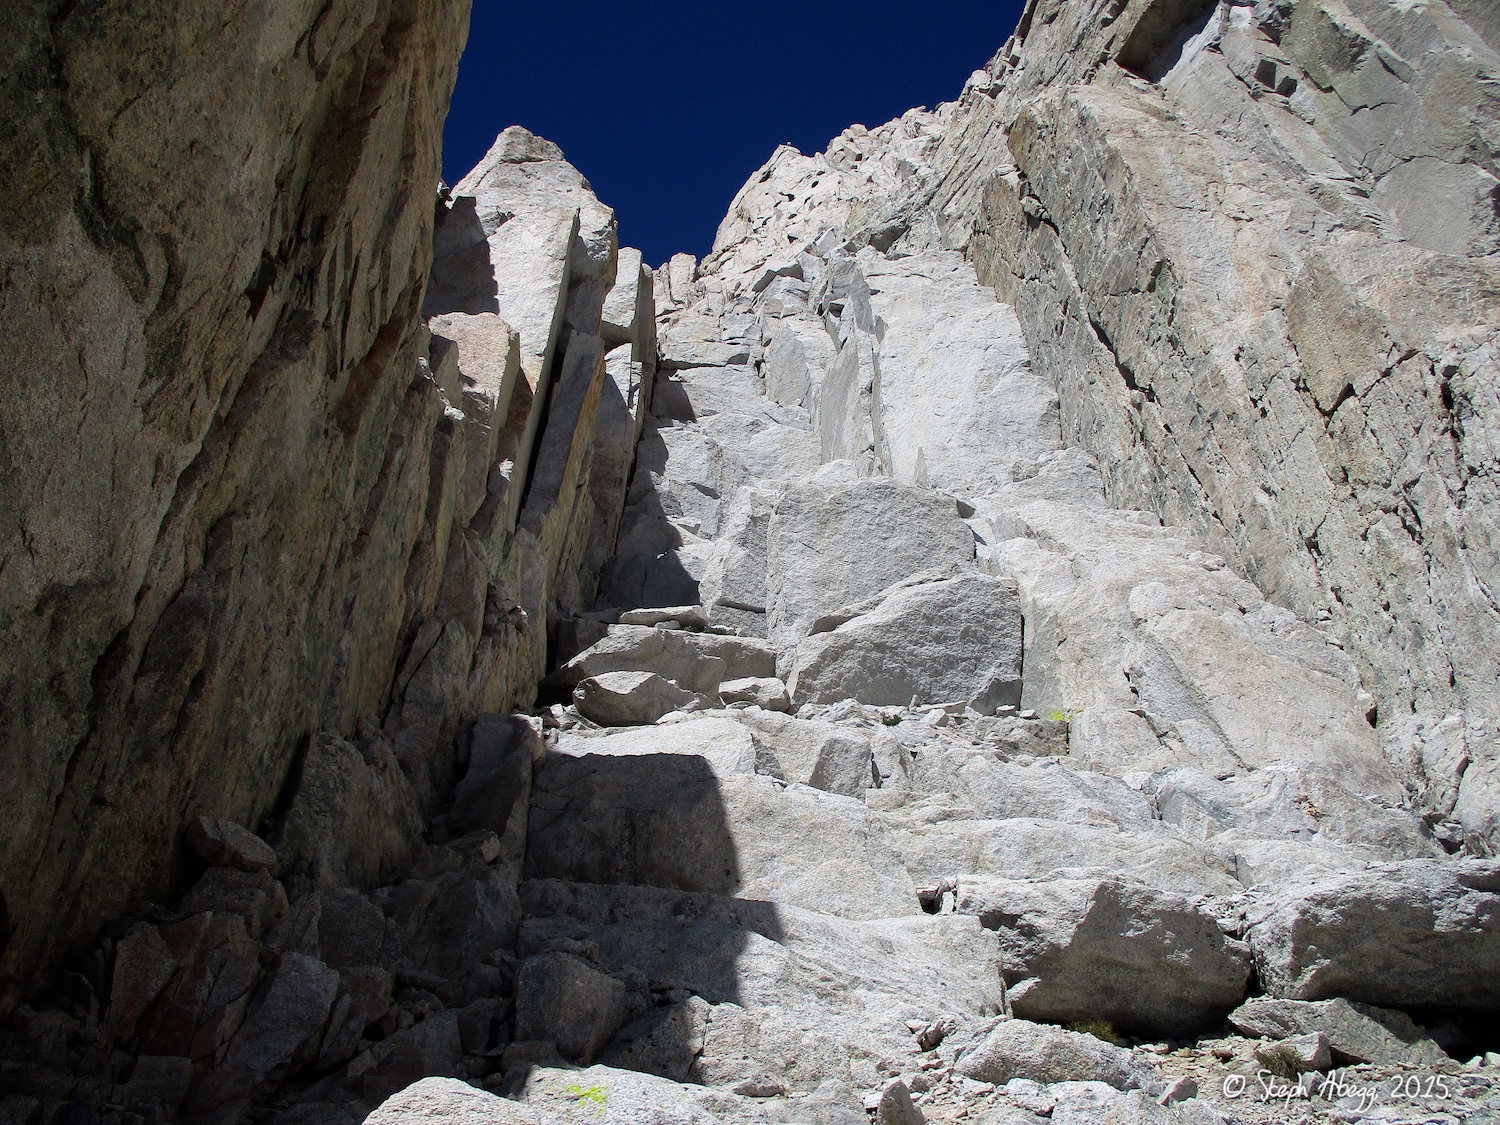
3. Looking up from the base of the route. The route climbs into the obvious corner above.
Pitch
1
5.7, ~110'
Follow cracks up to a ledge.
4.
4. Looking up from the base of Pitch 1. With our 70m rope, I was able to link Pitches 1 (5.7) and 2 (5.7-5.8) into a 200' lead. The climbing is sustained at the grade, and really fun.
Pitch
2
5.7, ~110'
A knobby crack to a ramp below the corner proper.
Pitch
3
5.9+, ~150'
Up the first half of the corner to a belay whenever you run low on gear.
5.
6.
7.
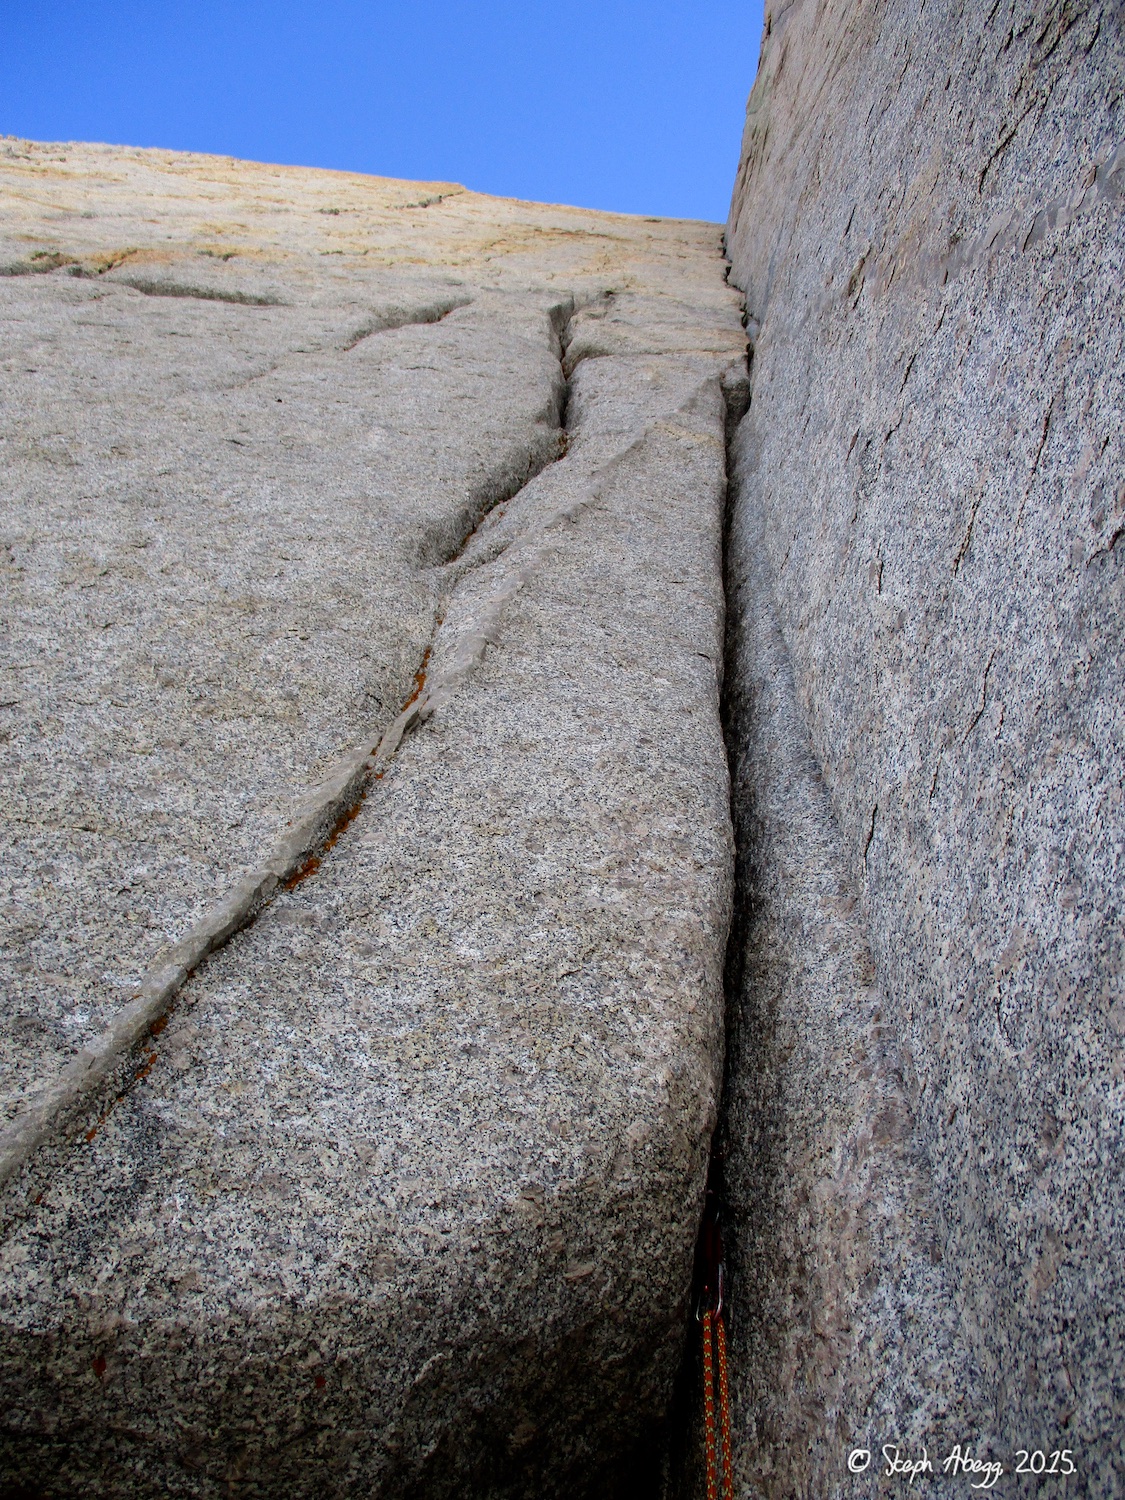
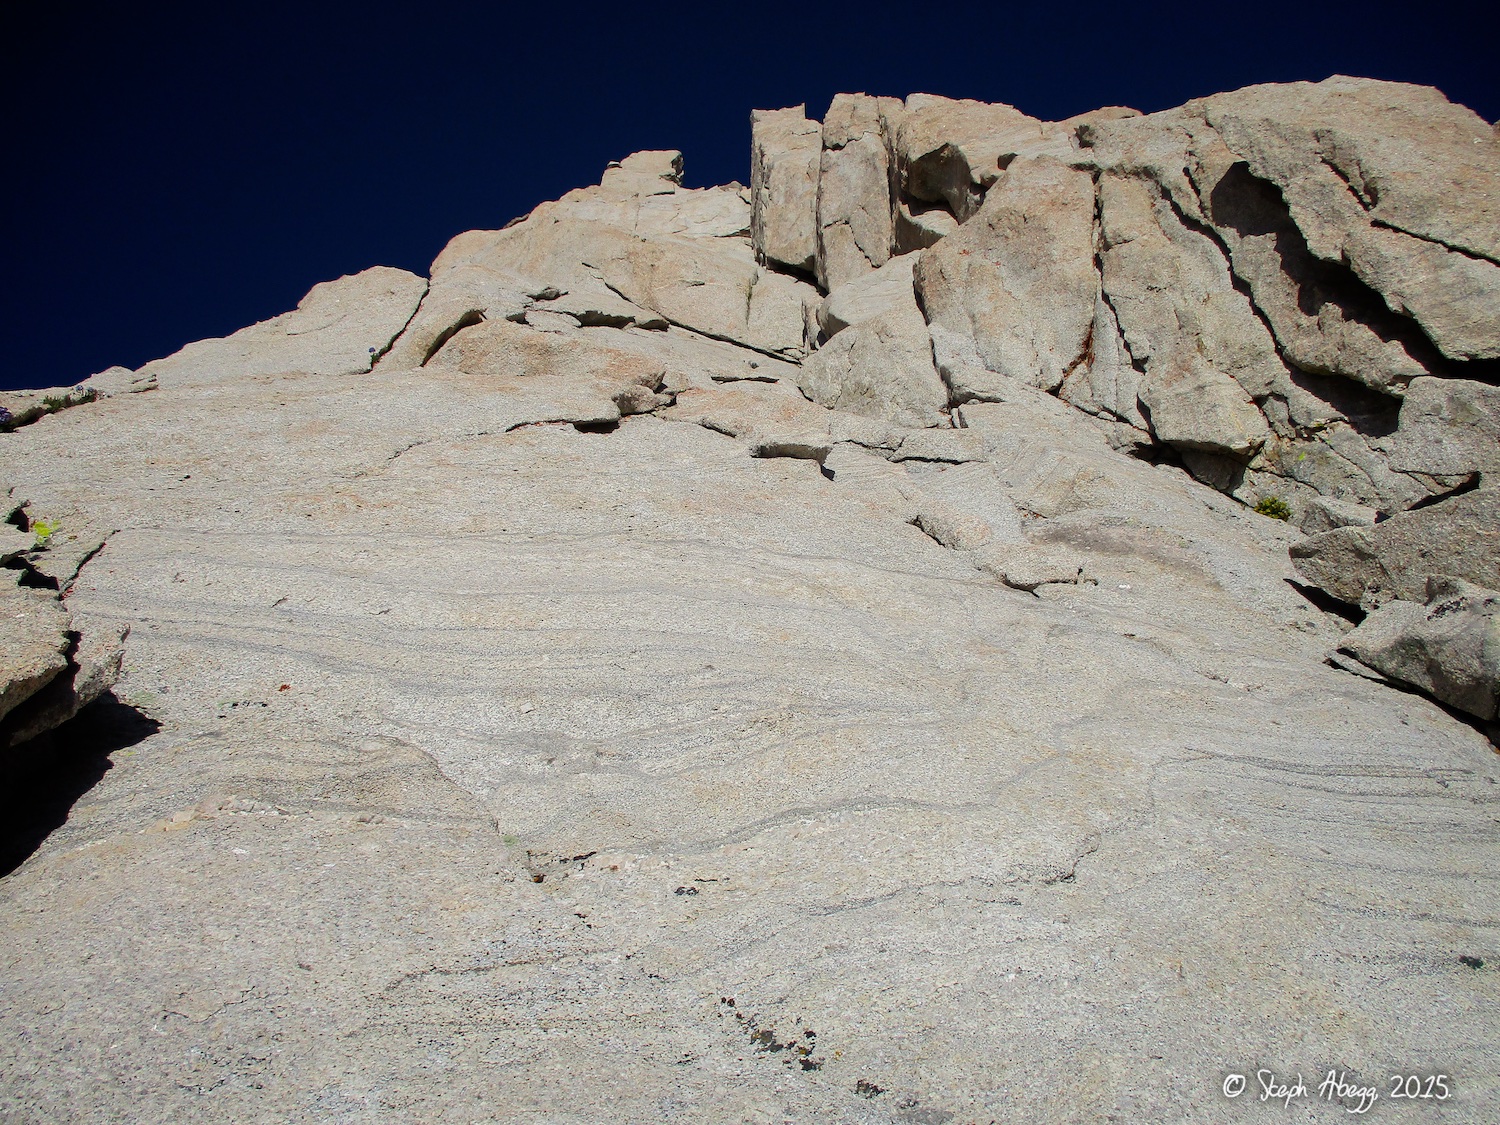
5. Looking up the 5.9+ corner. Sweet.
6. Near the top of Pitch 3 (depending on how long your pitches are), the corner widens into an offwidth section. Fortunately you don't need to bring big gear since there's a nice crack on the right that takes smaller cams and nuts. I found this section to be challenging to start, but once I got up a couple moves it wasn't too bad. But I sort of like offwidths.
7. Looking down the first half of the corner (Pitch 3) from my belay halfway up the corner. The corner is too long to climb in one pitch, so you need to set a belay somewhere. There are several options, so I just went until I didn't have much gear left and had a reasonably comfortable belay stance.
Pitch
4
5.9, ~150'
Up the second half of the corner, finishing with a steep section to exit right onto a ledge.
8.
9.
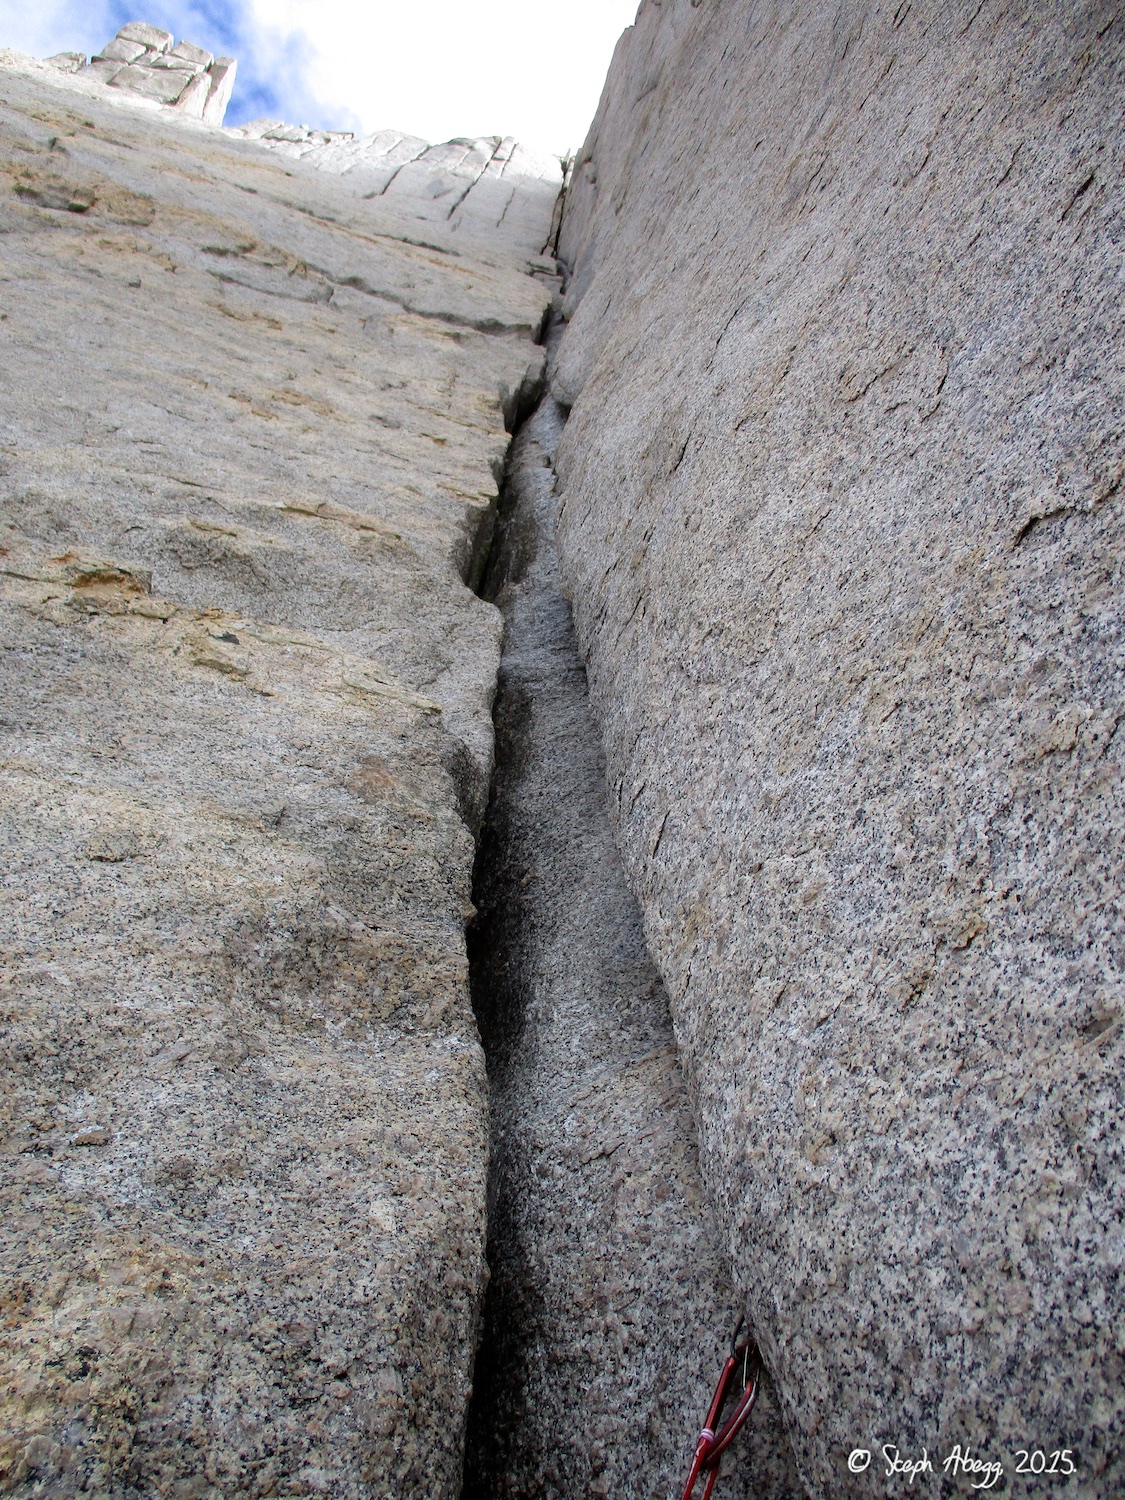
8. Looking up the second half of the corner (Pitch 4). Unfortunately the corner was pretty wet from recent rains, so the climbing was not as cruiser as I would have hoped, but it was still a great pitch. The final steep bit at the top was a nice slightly strenuous bit of climbing.
9. Looking west from the route at the lake basin below. The views from this route are great.
Pitches
5+
4th-low 5th, 100's'
A few hundred feet of 4th and low-5th class lead to the summit.
10.
11.
12.
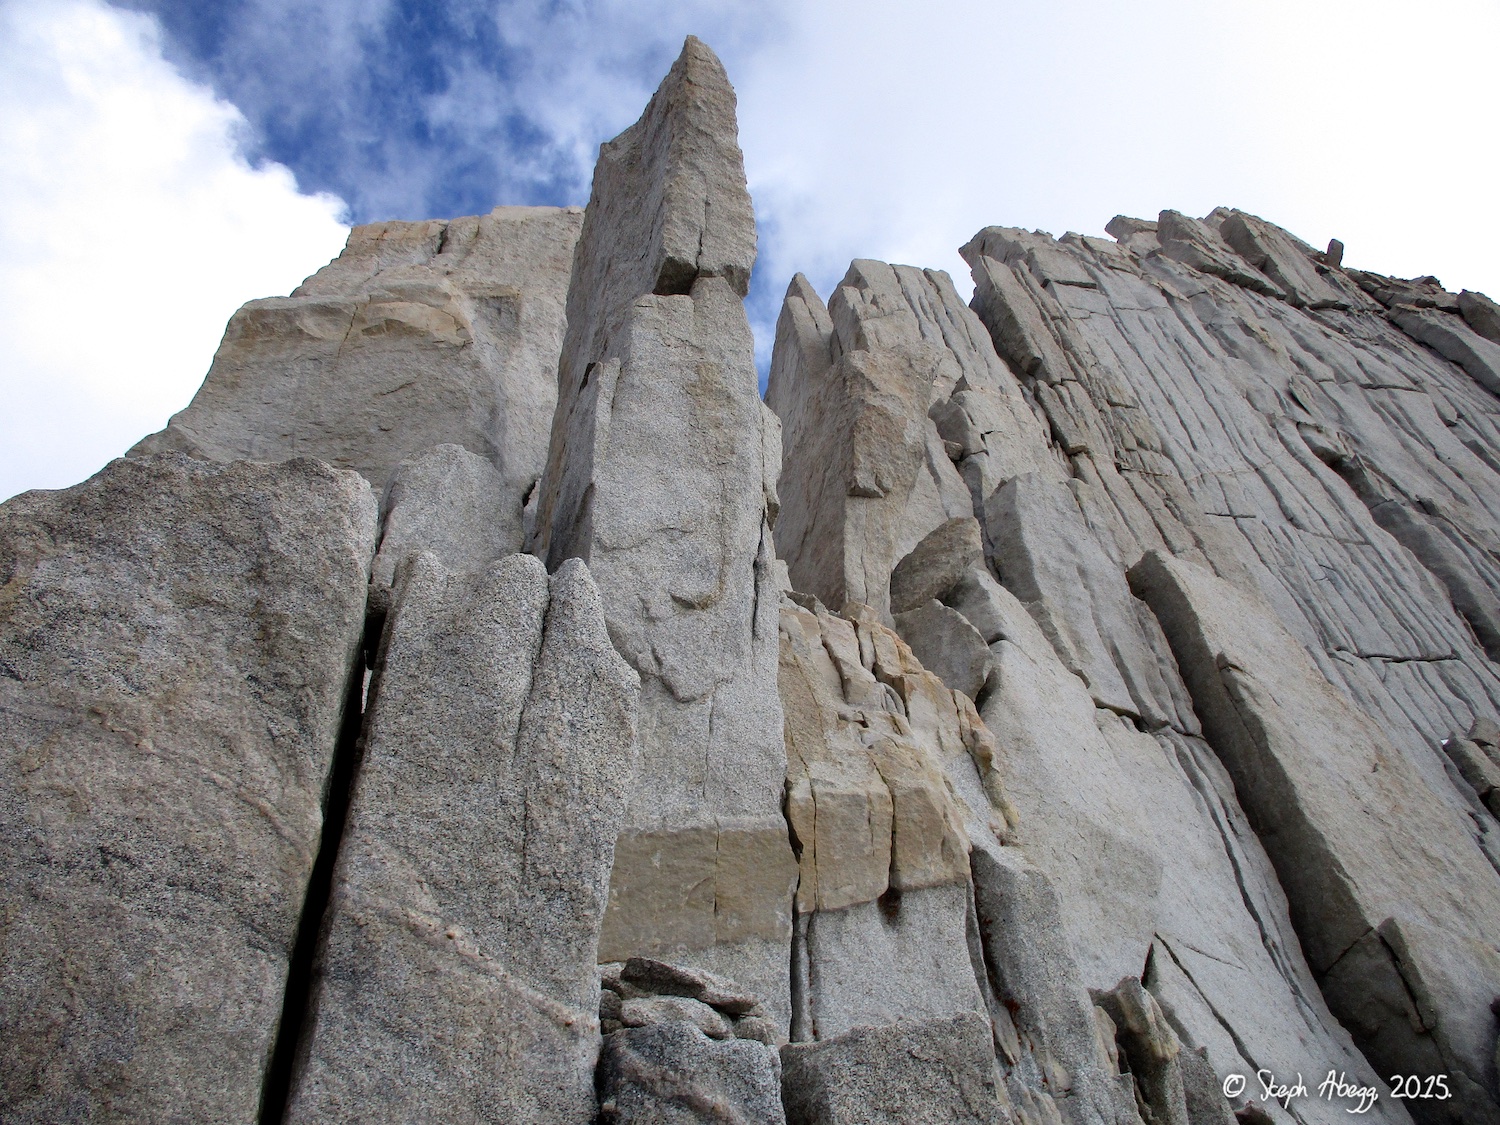
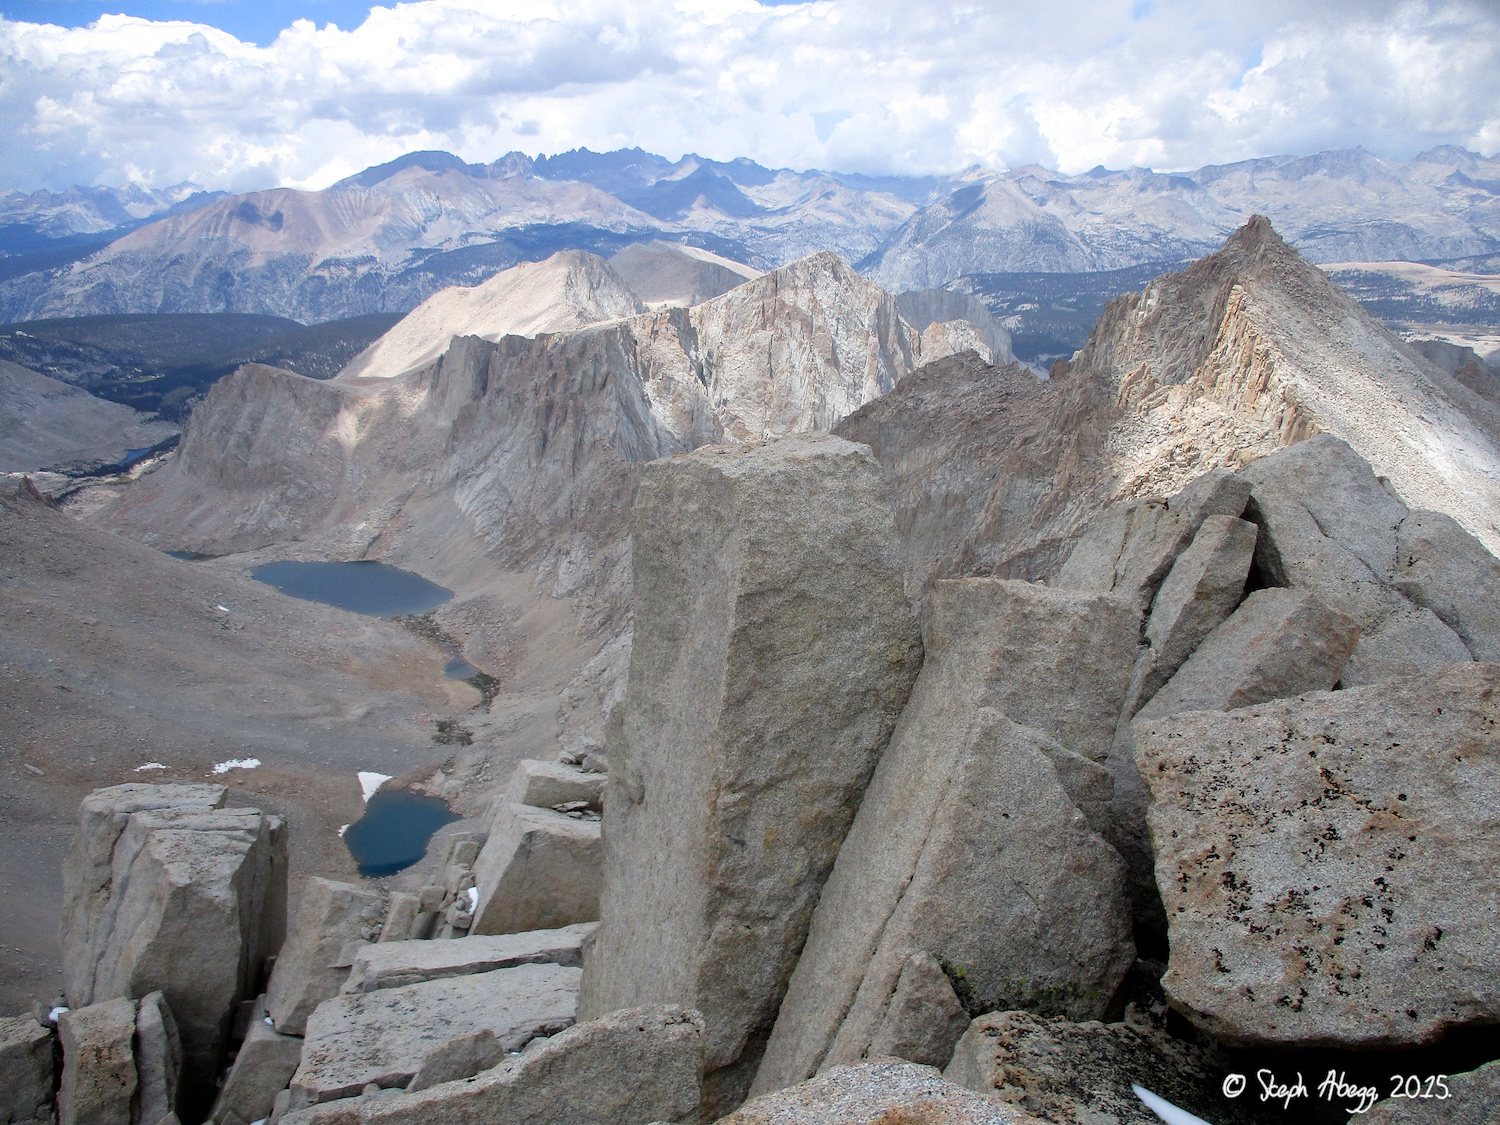
10. Looking towards the summit of Russell from the belay ledge at the top of the corner. At this point, you're only about halfway up the route, but the last half is a lot of 4th and low 5th and weaves around the ridge a lot, passing most difficulties on the left. We climbed this last half of the route in 2 long pitches with some rope drag and simulclimbing at the end of each pitch.
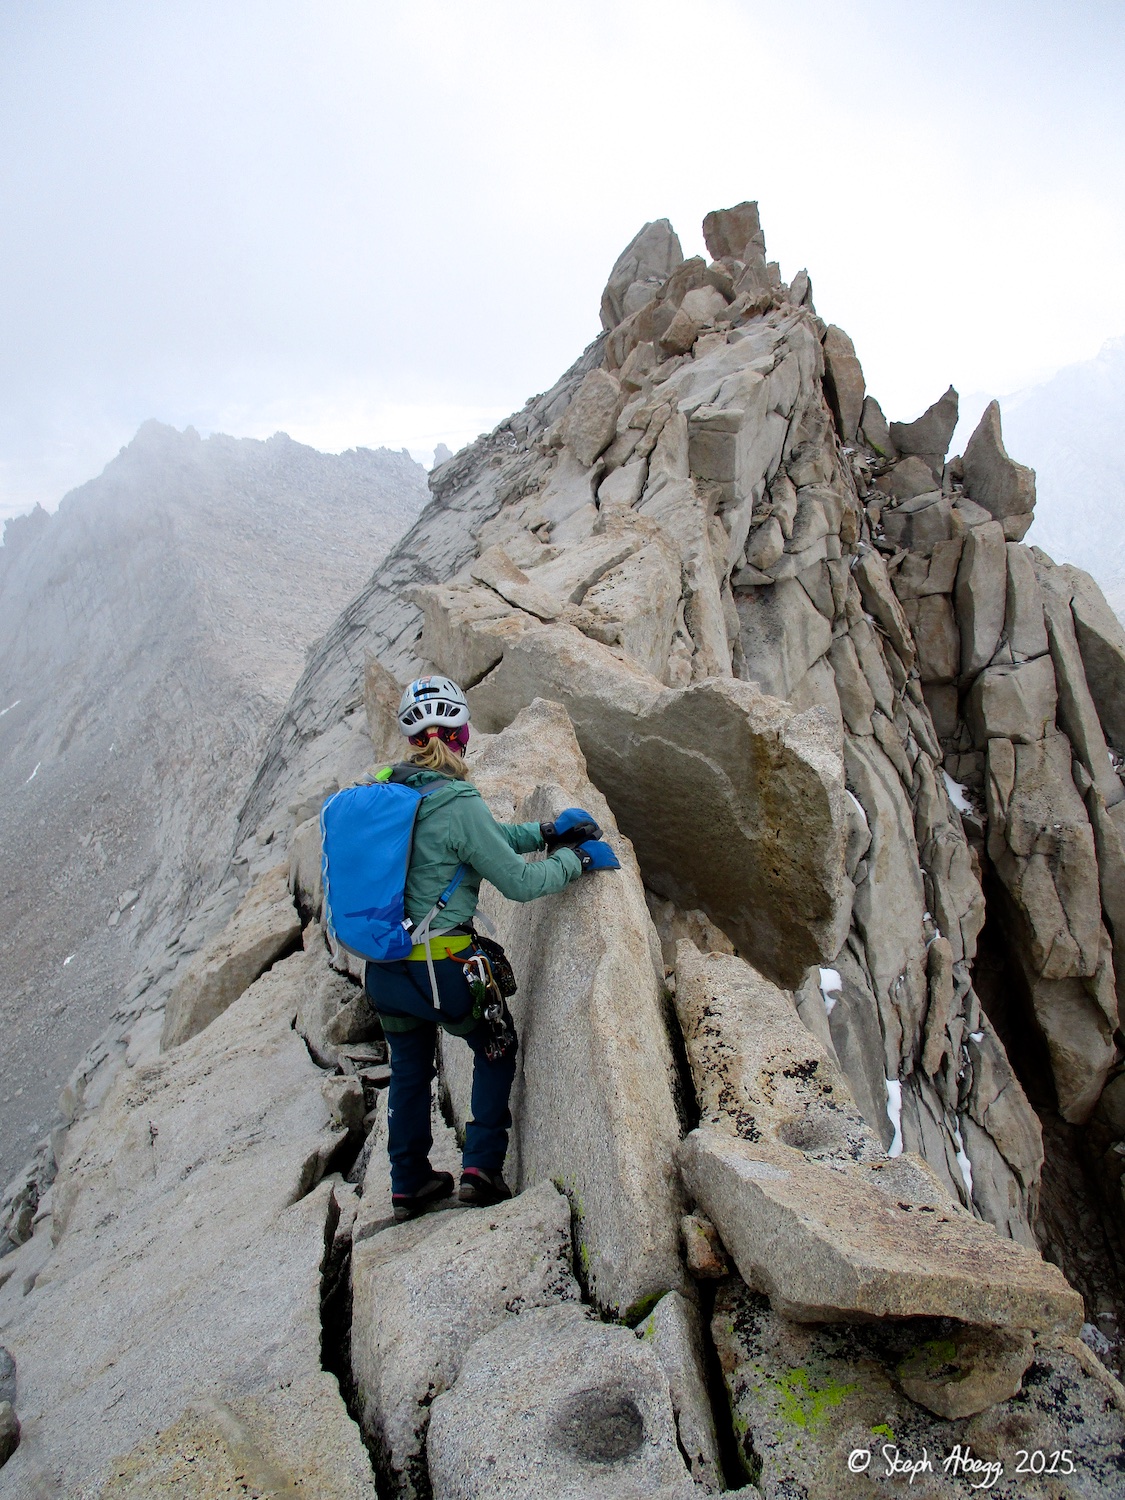
11. Meg nearing the top of our first pitch on the last half of the route. Looks like winter on this northern aspect!
12. Meg nearing the top of our second pitch on the last half of the route. Almost at the summit now!
Summit
You've arrived! Enjoy the view!
13.
14.
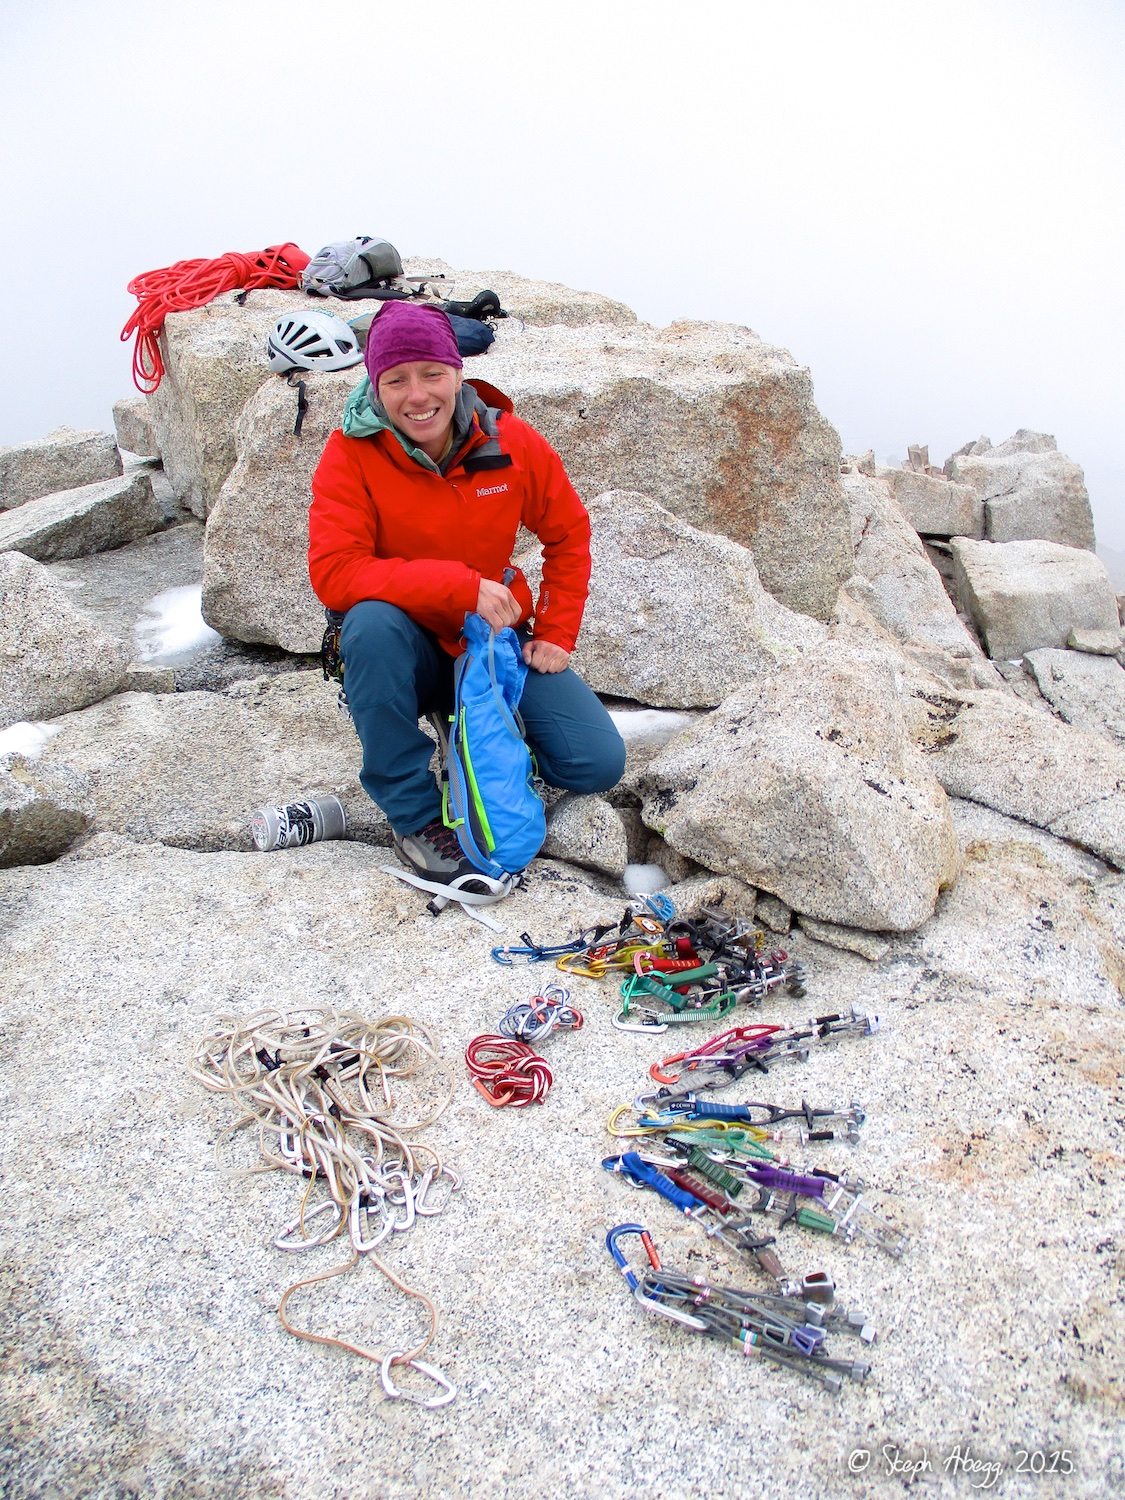
13. Meg on the summit. Also shown in the photo is our rack. As suggested by most route descriptions, we brought doubles to BD 0.5, triples of BD 0.75, 1, and 2, and one BD 3. Also a set of nuts, a dozen shoulder length slings, and two long slings. This was a good rack for the climb.
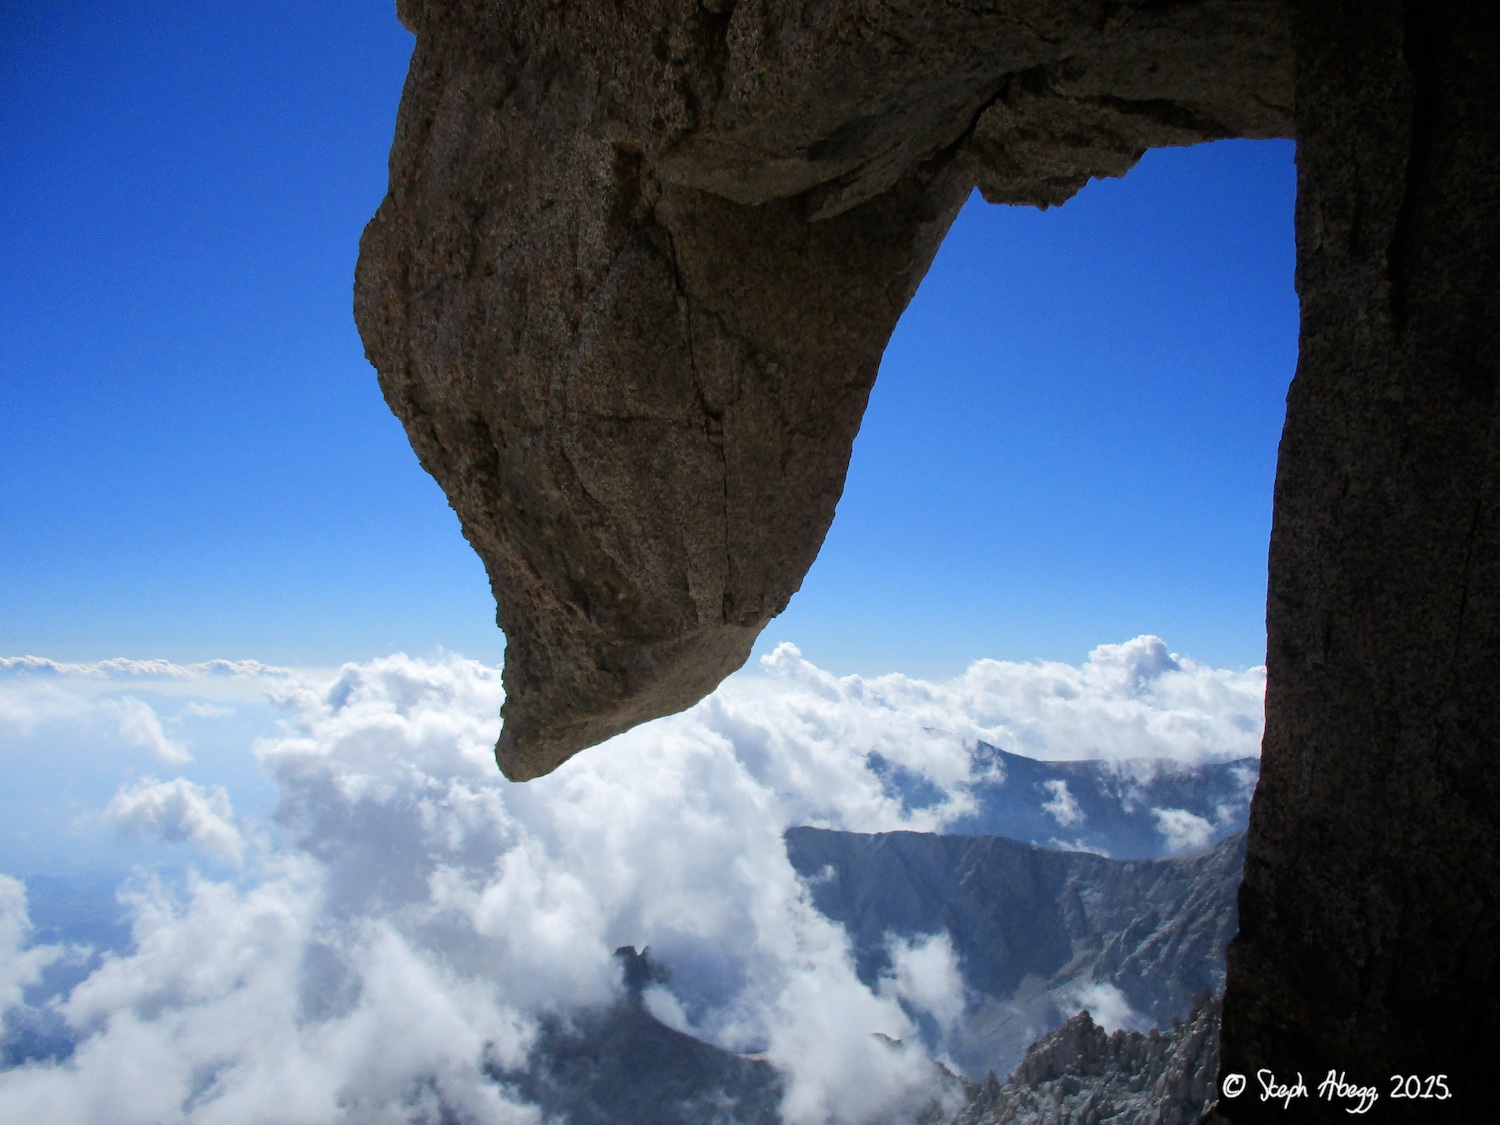
14. The view northwest from the summit.
Descent
Either descend the South Gully (if headed back to Iceberg Lake) or the East Arête/Ridge (if headed back to Upper Boy Scout Lake).
15.
16.
17.
18.
19.
20.
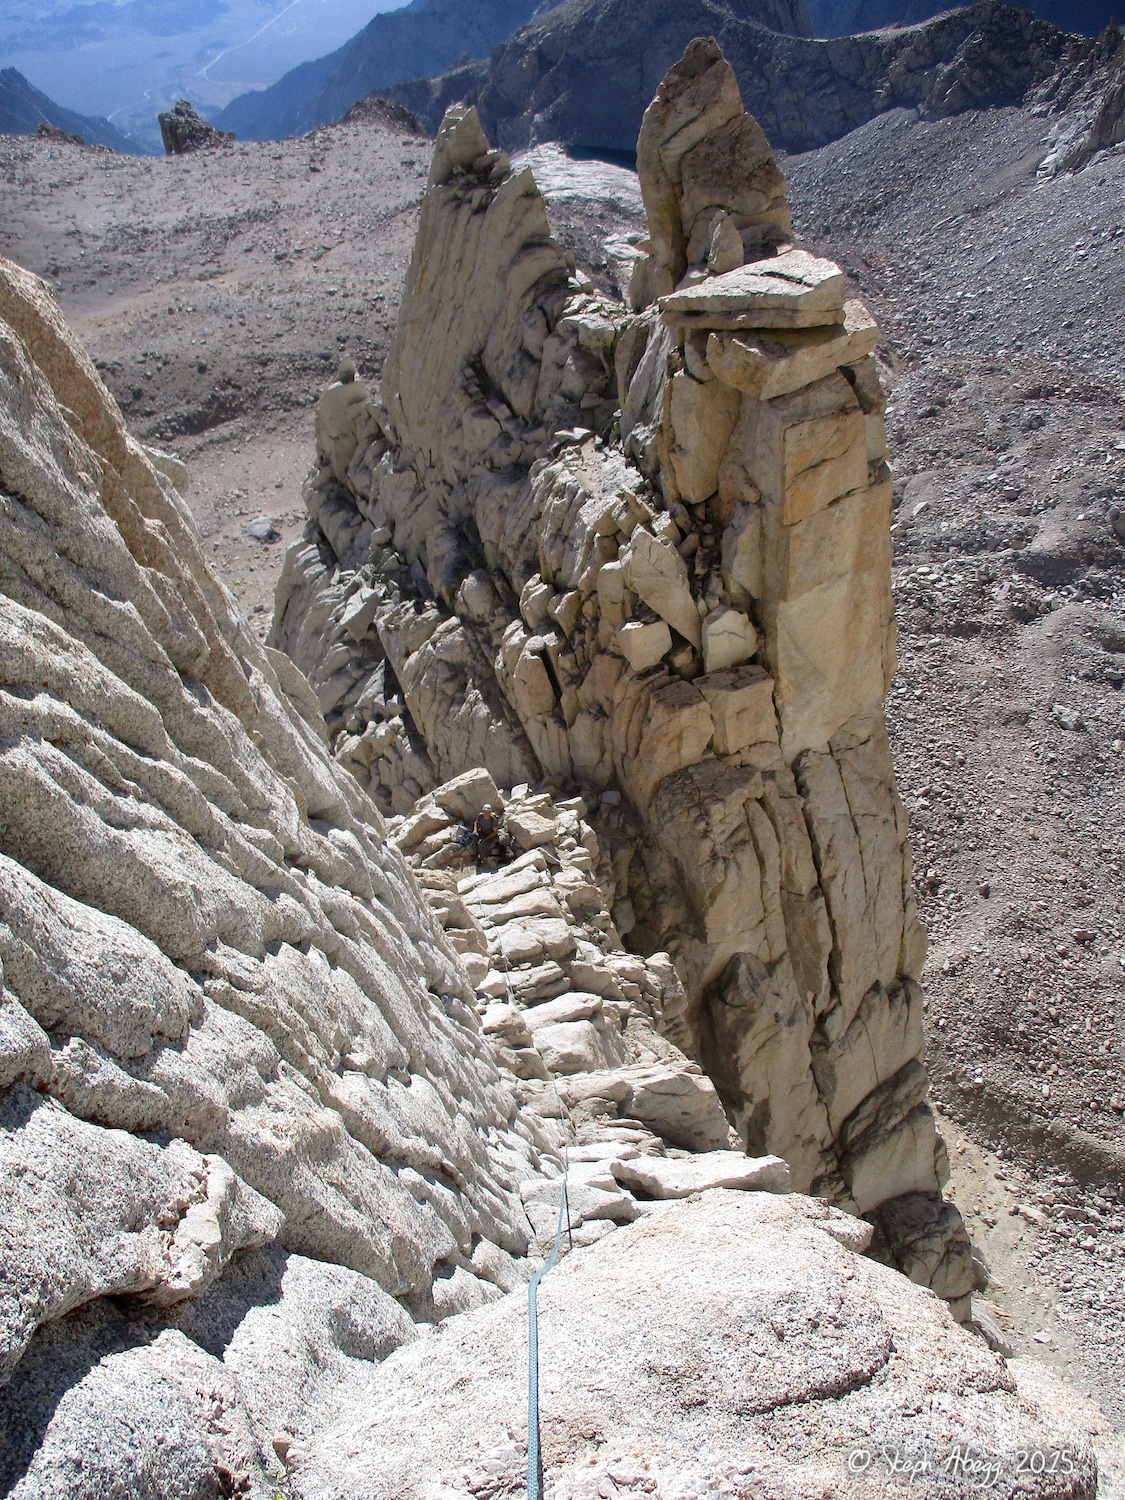
15. Looking over at the east summit. The South Gully descent goes right down a gully just before the east summit. The East Arête/Ridge descent goes over the east summit.
16. Looking down the South Gully. There's a 3rd class ramp into the gully off to the right side of the photo.
17. Meg on the East Arête/Ridge descent. This is a great descent option if you are camped at Upper Boy Scout Lake or are doing a car-to-car. The East Arête/Ridge involves a lot of exposed 3rd class on solid rock with great views, and known to be one of the best 3rd class ridge routes in the Sierras.
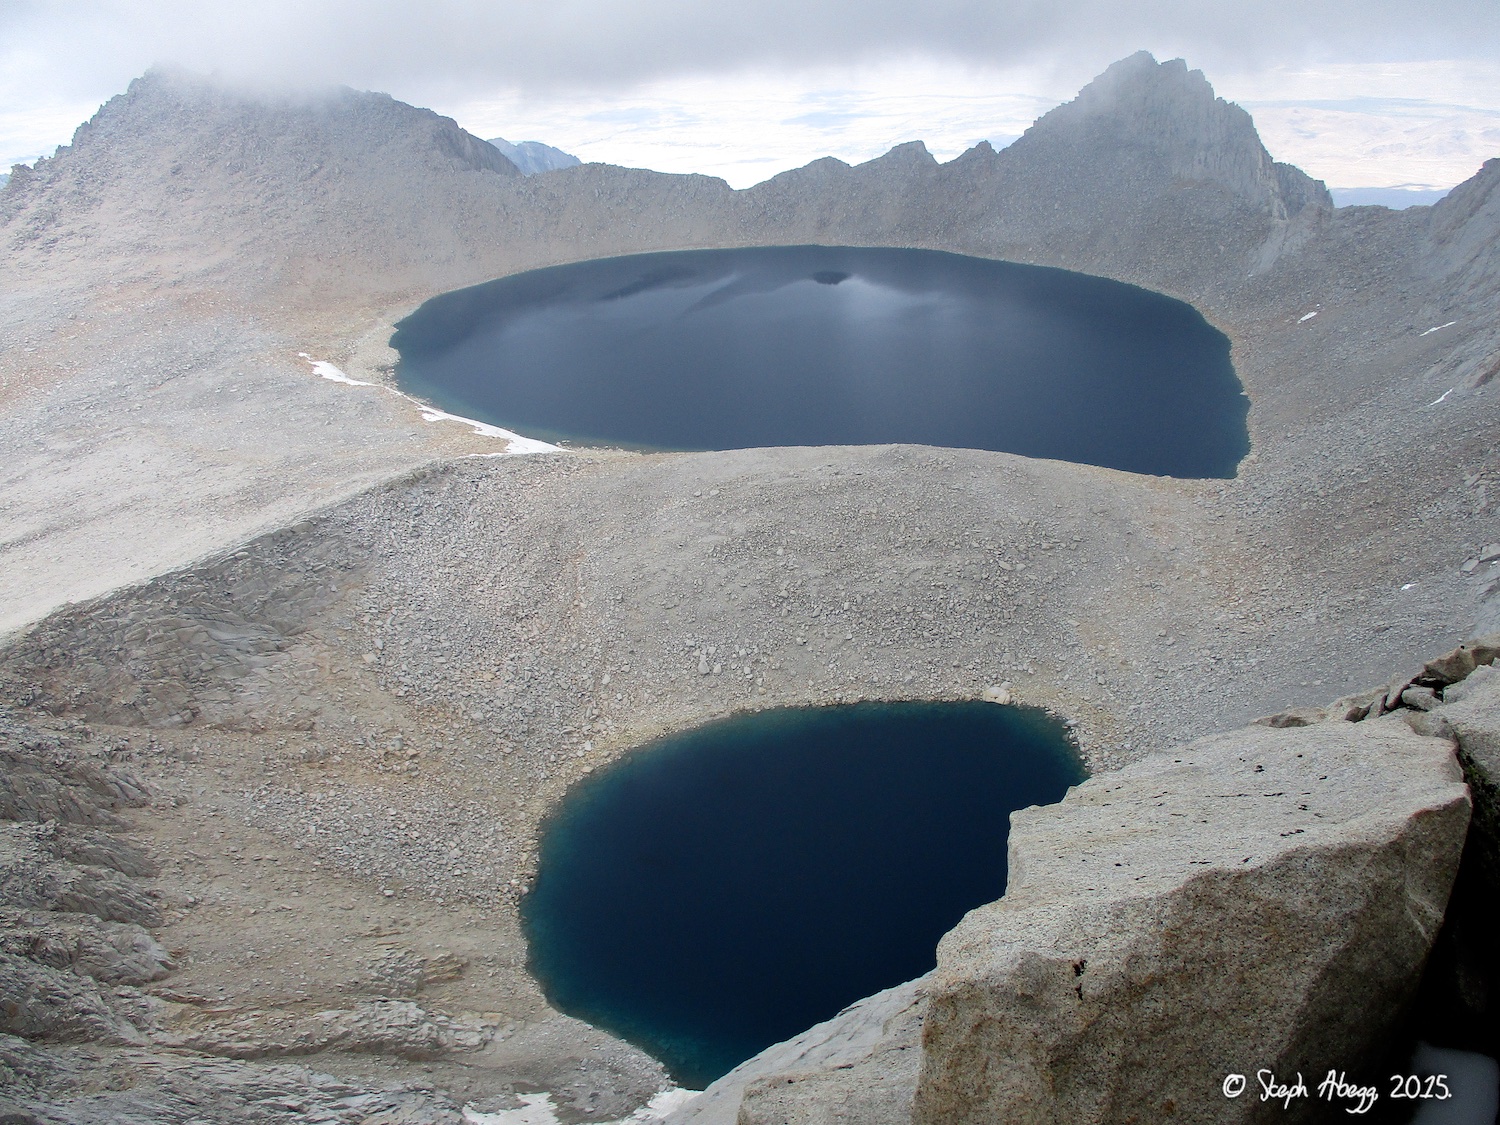
18. Looking down on the lakes to the northeast of Russell. The further lake is called Tulainyo Lake on the USGS map.
19-20. The easy scree descent between Russell-Carillon Pass and Upper Boy Scout Lake. We emptied out a significant amount of scree out of our shoes when we got back to camp.
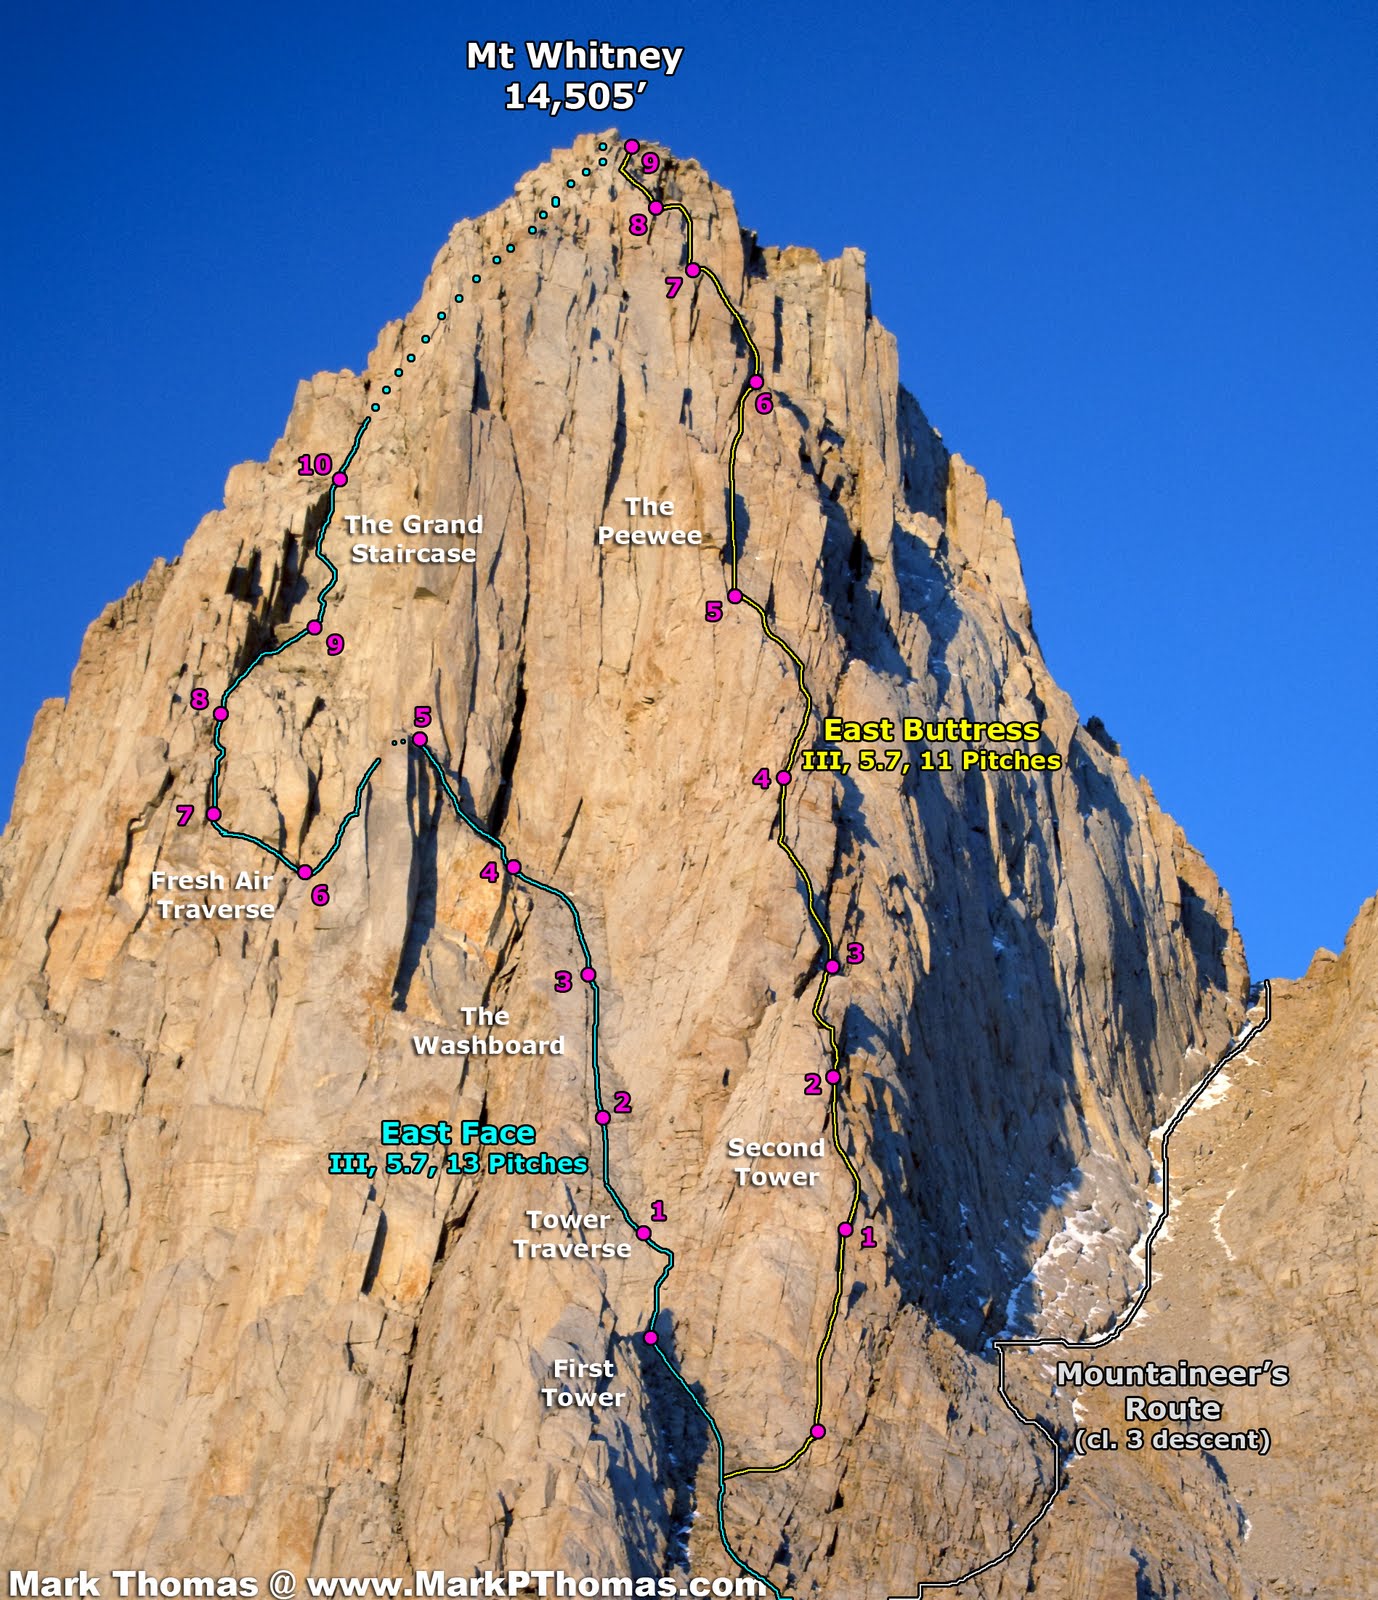
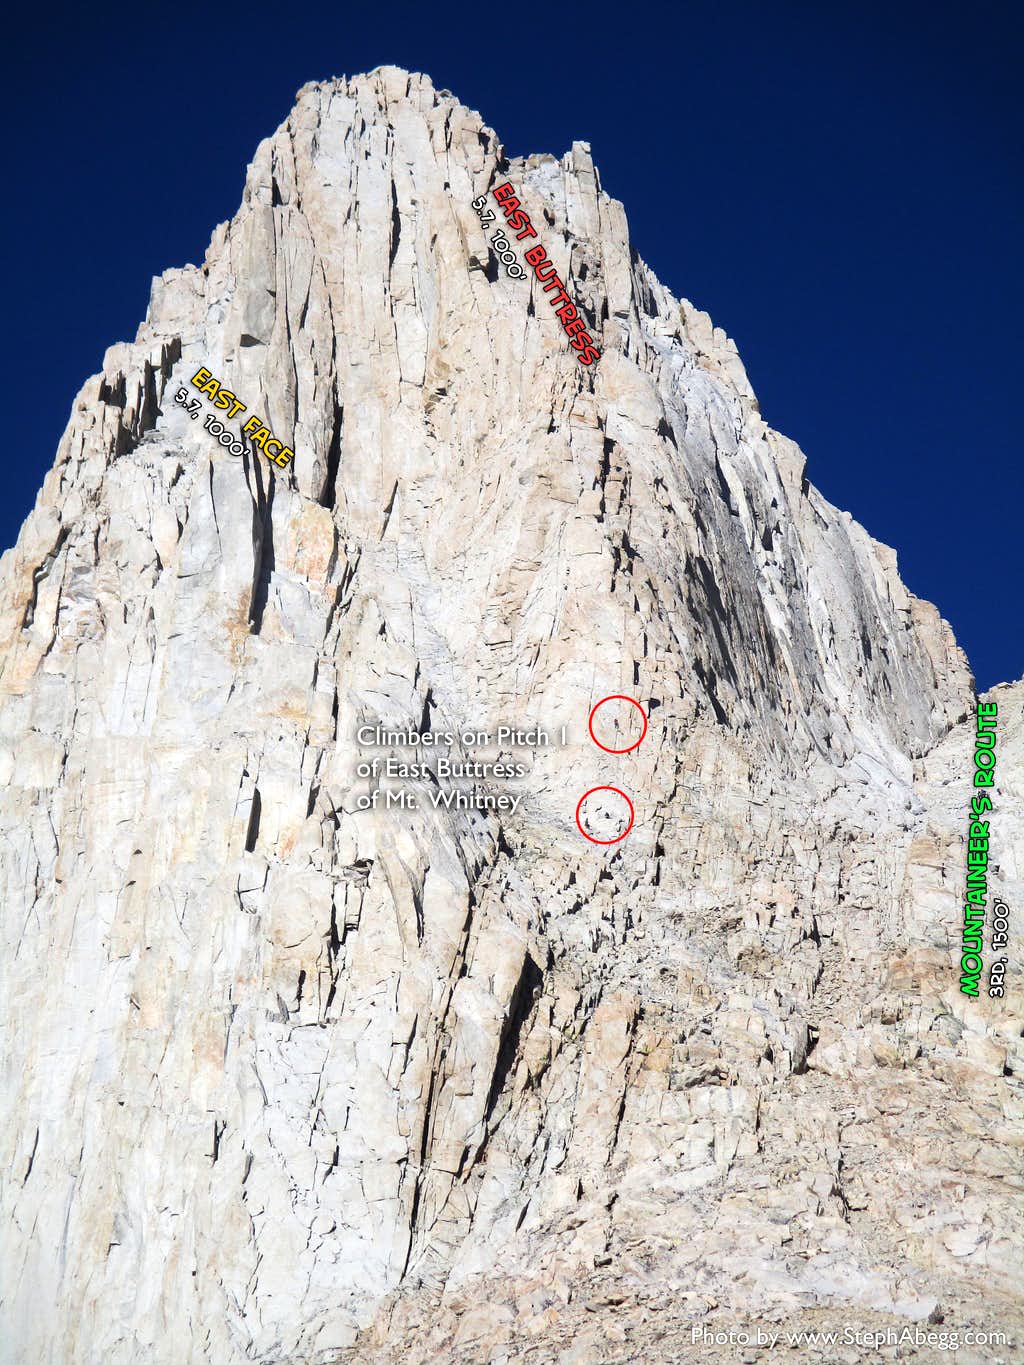
One of the more popular climbs in the High Sierra, the East Buttress climbs a sustained arete to the summit of Mt. Whitney. The route has excellent rock with short doses of steep and exposed 5.6 or 5.7 terrain on almost every pitch, between sections of ledgy climbing with comfy belay ledges.
I had long wanted to climb this route, and Meg was kind enough to agree to climb it with me, even though she had climbed it several years before. Meg and I swung leads and often combined two pitches into one with a bit of simulclimbing, making good time and reaching the summit by mid-morning. The sunny and moderate nature of this route made it a good follow-up to our rather chilly and more strenuous climb the previous day. We descended the Mountaineer's Route, which involved some rappelling to bypass some unseasonable ice in the first part of the gully. The entire climb, the clouds put on quite a spectacular show, rising out of the valley to the east and dancing in and out of the surrounding summits while maintaining sunny skies over Whitney itself. It was a really special day in the mountains. Thanks Meg for agreeing to do this climb again!
Route Overlays
First two overlays are by my friend and King-of-the-Route-Overlay Mark Thomas — why reinvent the wheel when a friend has already done as good a job as possible. Mark's trip report for the East Buttress.
1. Looking up the East Buttress from near the base of the route. Only 7am and already quite warm. No cold fingers today!
2. Looking up Pitch 1, which goes up the corner on the right.
3. Meg leading Pitch 3, on the aesthetic "5.7 poor pro" section.
4. Meg at the "first cool ledge on the arete" midway through Pitch 4 on the topo. She had linked Pitch 3 with the first half of Pitch 4.
5. Looking down at Meg at the aforementioned belay spot after starting off the next pitch, where I linked the last half of Pitch 4 with Pitch 5 on the topo. Below Meg stretches the lower part of the East Buttress and Iceberg Lake is on the left.
6. Looking up at "The Pewee" while nearing the top of Pitch 5. Pitch 6 goes up the right side of the Pewee from a belay just below.
7. "The Pewee". Kind of a cool feature.
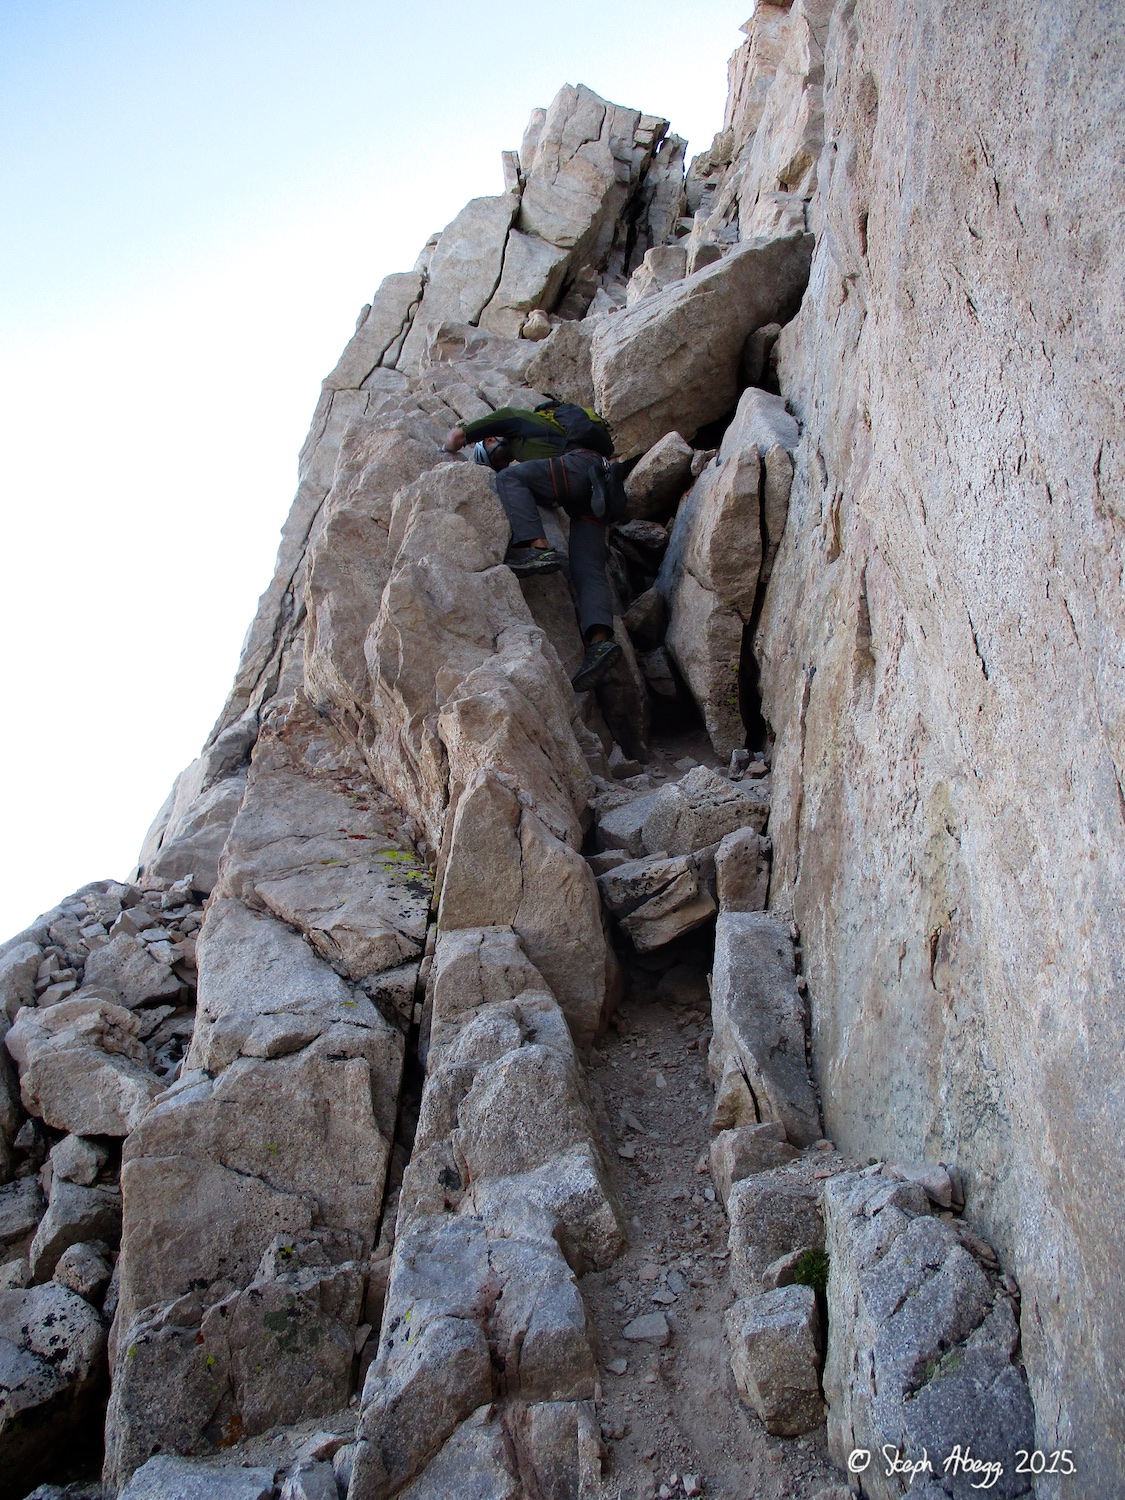
8. The 5.7 fingers at the start of Pitch 7 on the topo. I felt this was one of the more challenging sections on the route. There were enough of these sort of challenging/exposed 5th class sections on this route that I personally wouldn't have felt comfortable soloing this route.
9. Meg leading off Pitch 9 on the topo. On this pitch you can either go left on 4th to low 5th or go right into a 5.8 chimney. We went left. Notice the really cool fracture pattern in the rock on the left side of the photo.
10. Looking up the final part of the buttress, which is Pitches 10 and 11 on the topo. I tried to lead it as one big pitch, but ended up belaying about 50 feet below the summit due to two reasons: (1) wanting to climb a cool looking steep crack to the summit and having too much rope drag to lead it and (2) wanting to enjoy a moment of peace high on Mt. Whitney before topping out into the summit crowds.
11. Meg leading the final pitch to the summit. There are several options for this pitch. You can go around left on 4th class terrain, or choose one of many 5.6-5.10 options. This crack was perhaps 5.9.
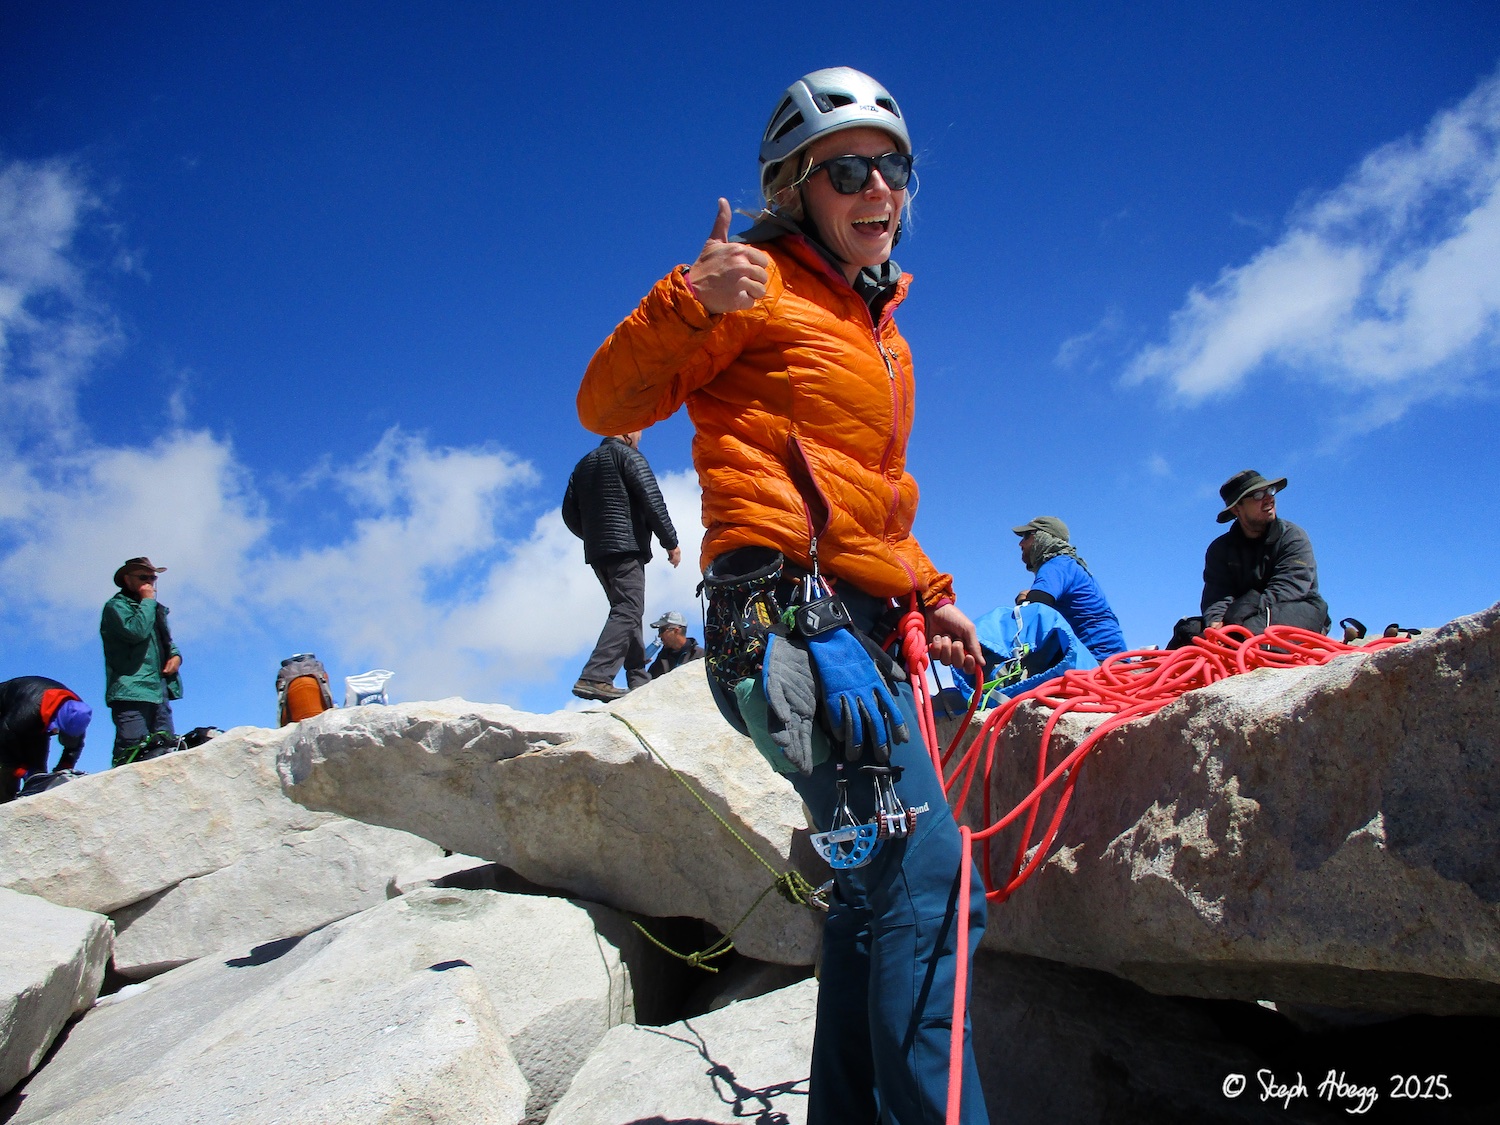
12. Meg on the summit! Summit crowds behind.
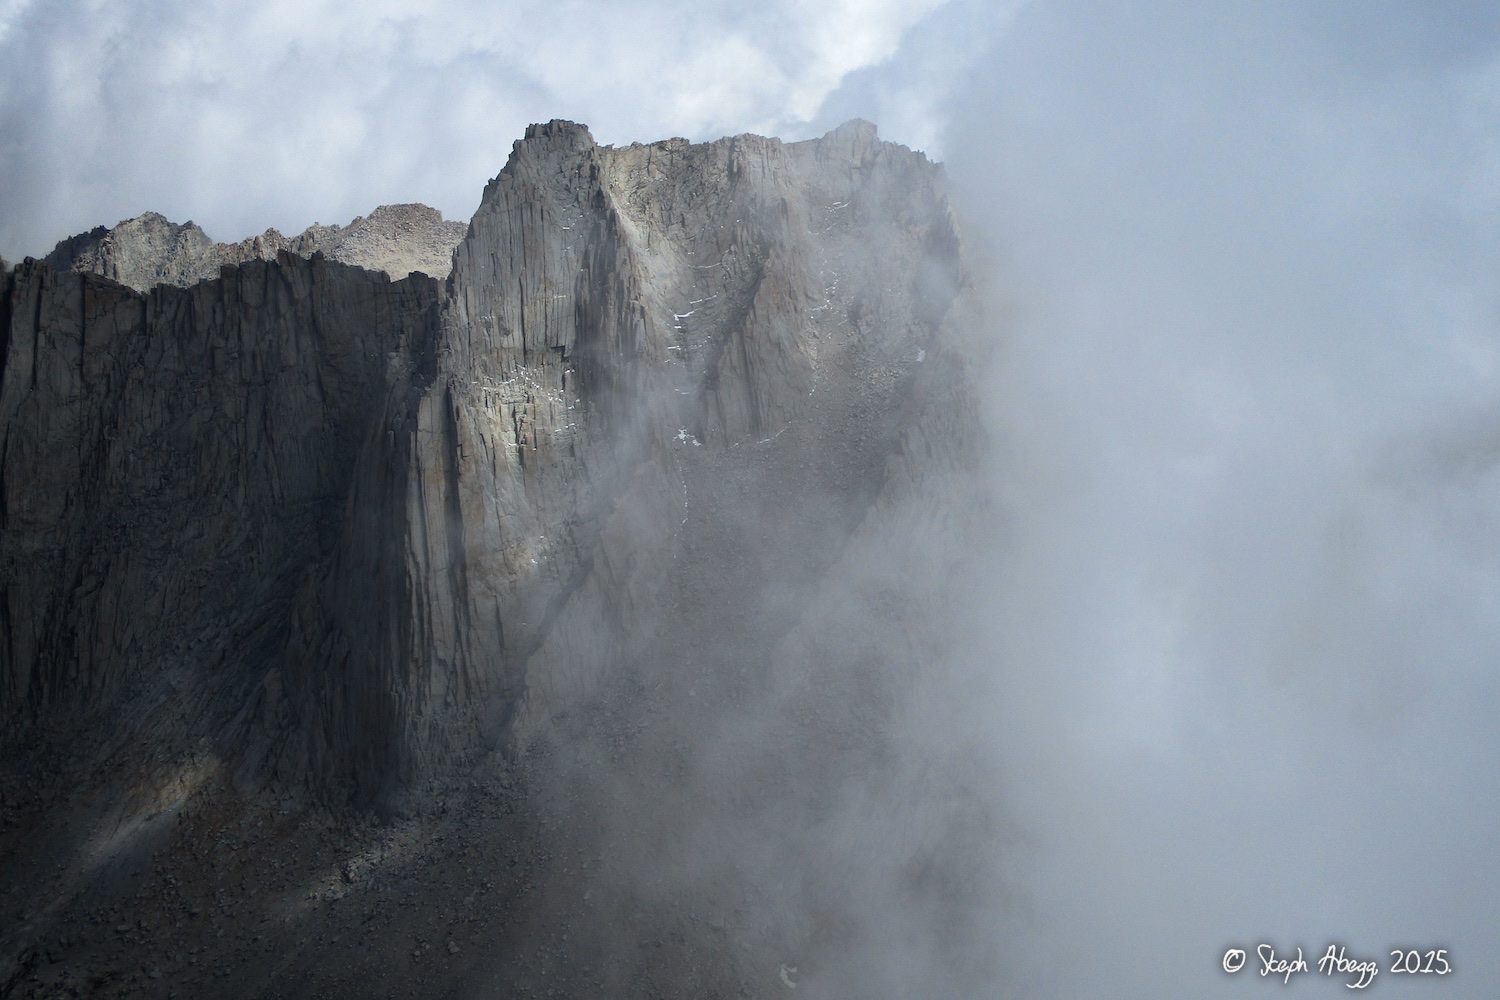
13. Mt. Russell shrouded in clouds.
14. Meg rappelling into the gully that marks the top of the Mountaineer's Route. Usually in the summer you can just scramble down 3rd class ramps and scree, but due to recent storms, there was quite a bit of snow and ice in the gully, so we did 4 rappels (single 70m rope) to get to the notch just behind and right of Meg's head in the photo. There was an established rap route on slings down the left side of the gully, which would work for a 60m rope as well. A 50m rope might involve having to do a couple of intermediate rappels or some downclimbing.
15. Looking up the Mountaineer's Route gully from near the base of the gully. The Mountaineer's Route comes down a gully just right of the East Buttress, so the start of the East Buttress route is actually not far off to the left from where I took this photo.
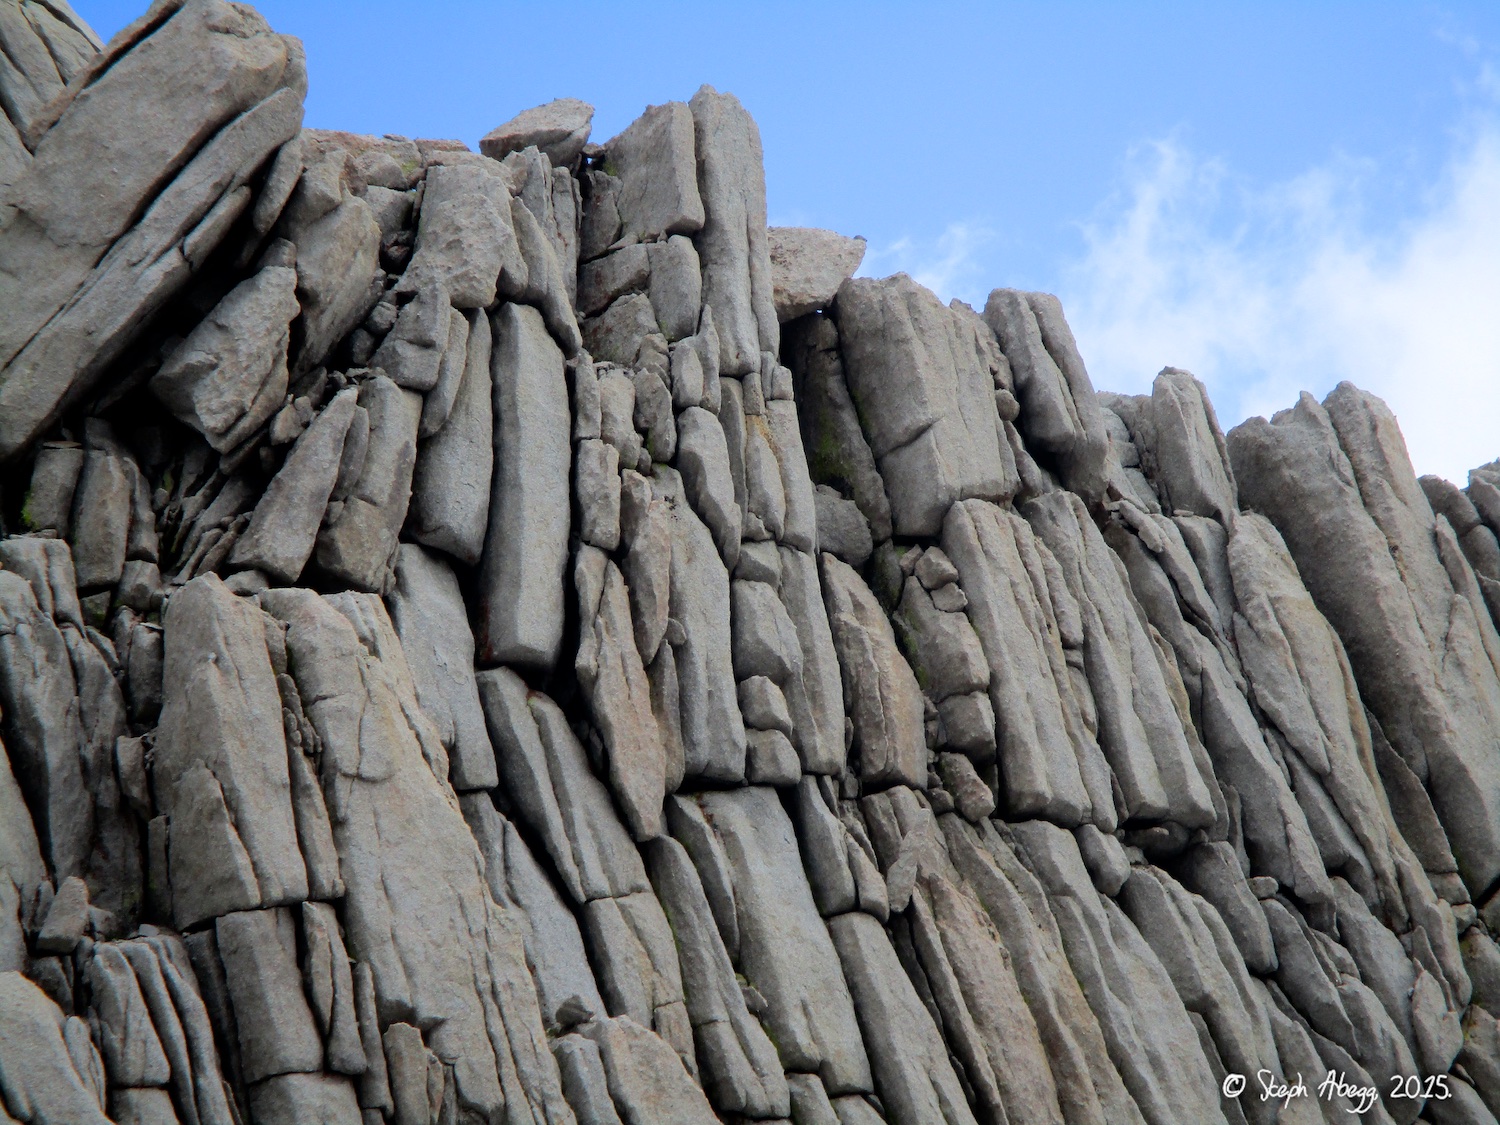
16. Some interesting jointing on the rock rimming the Mountaineer's Route gully.
17. Looking down on Iceberg Lake from the descent down the Mountaineer's Route. This descent brings you right back down to the lake (1-2 hours from the summit depending on speed and conditions), so if you're staying overnight and doing a few routes in the area, Iceberg Lake is a good place to camp.
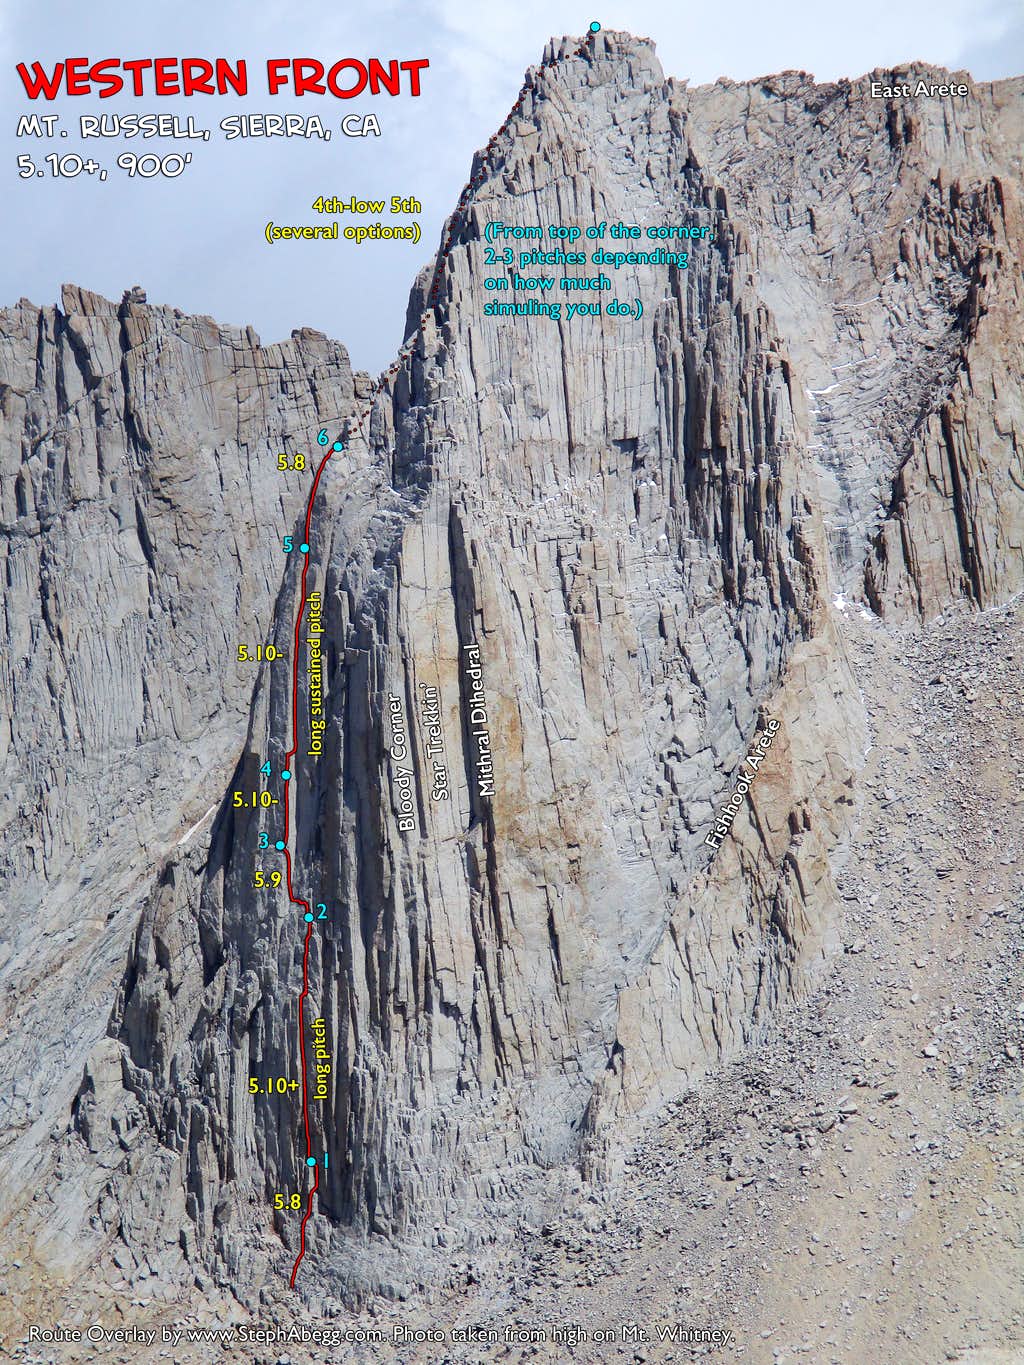
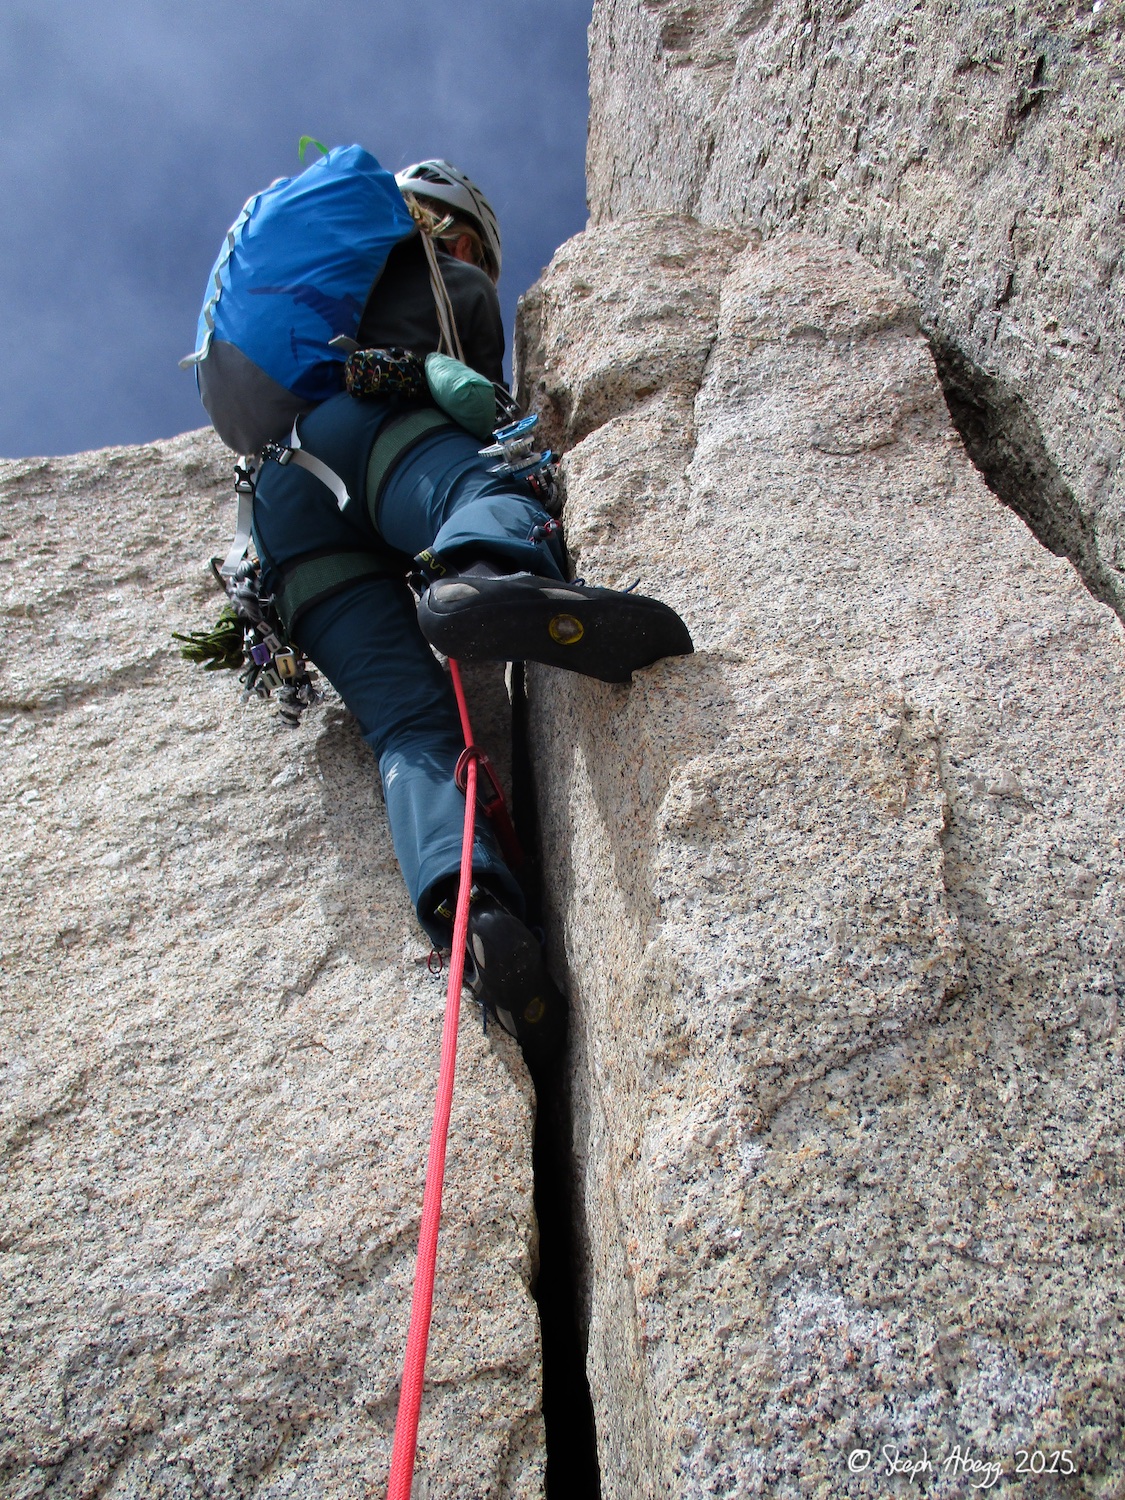
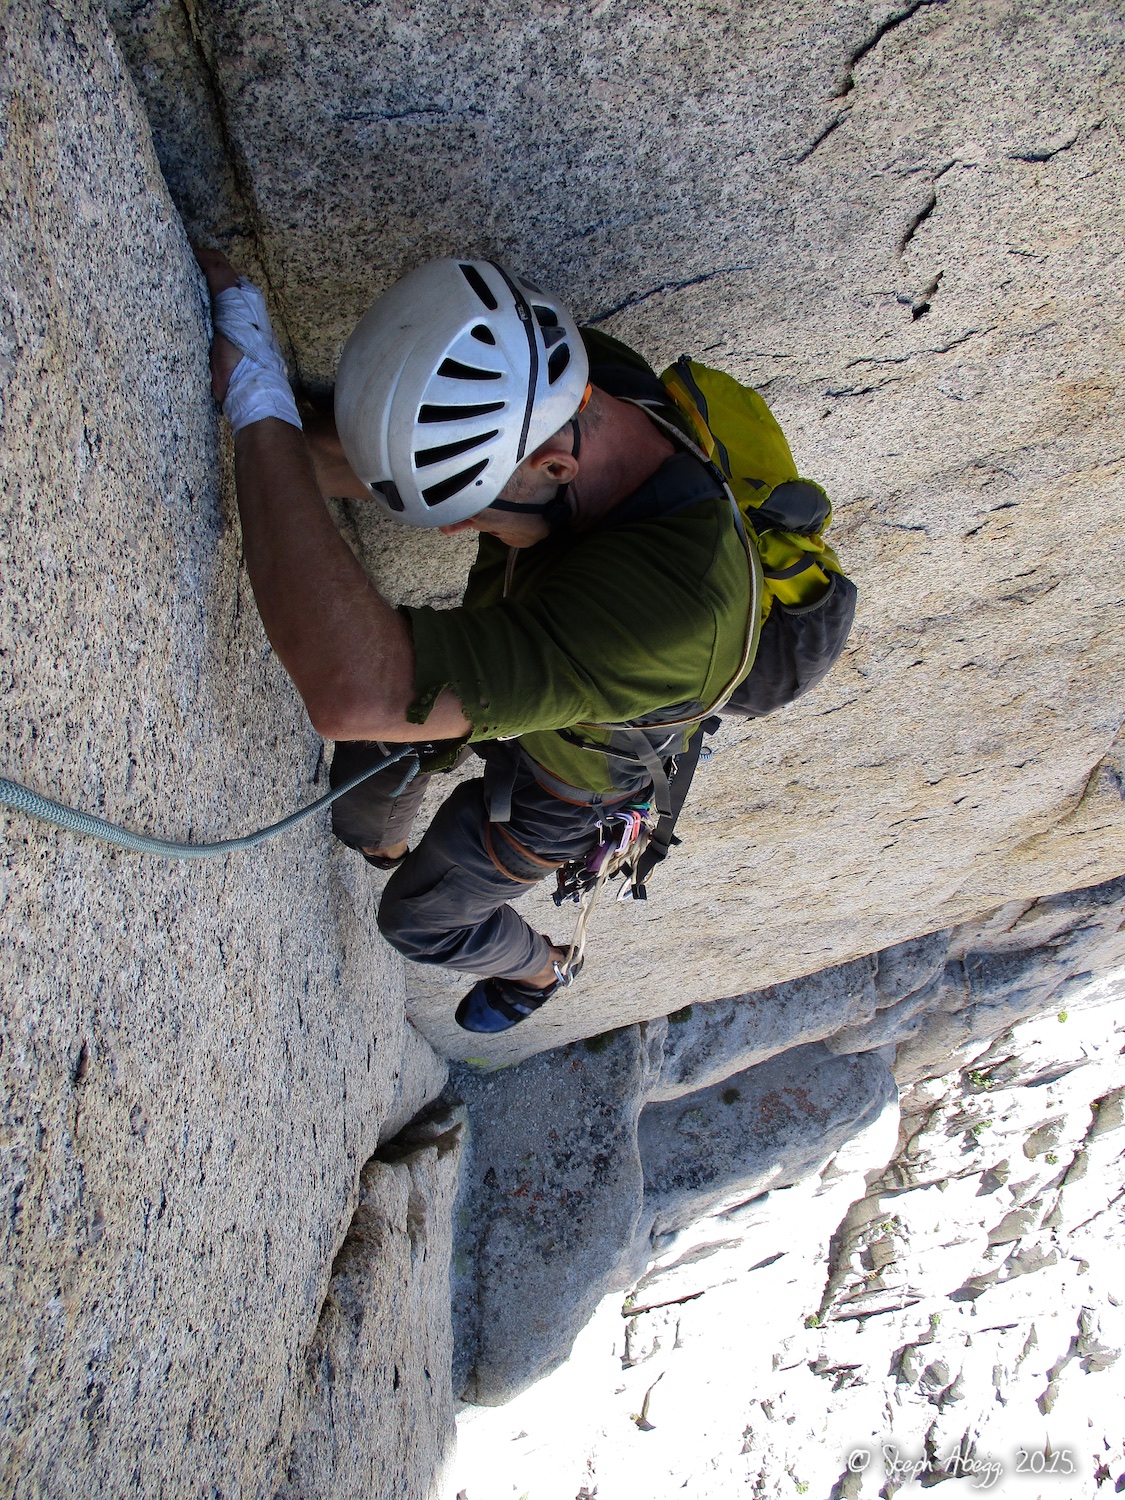
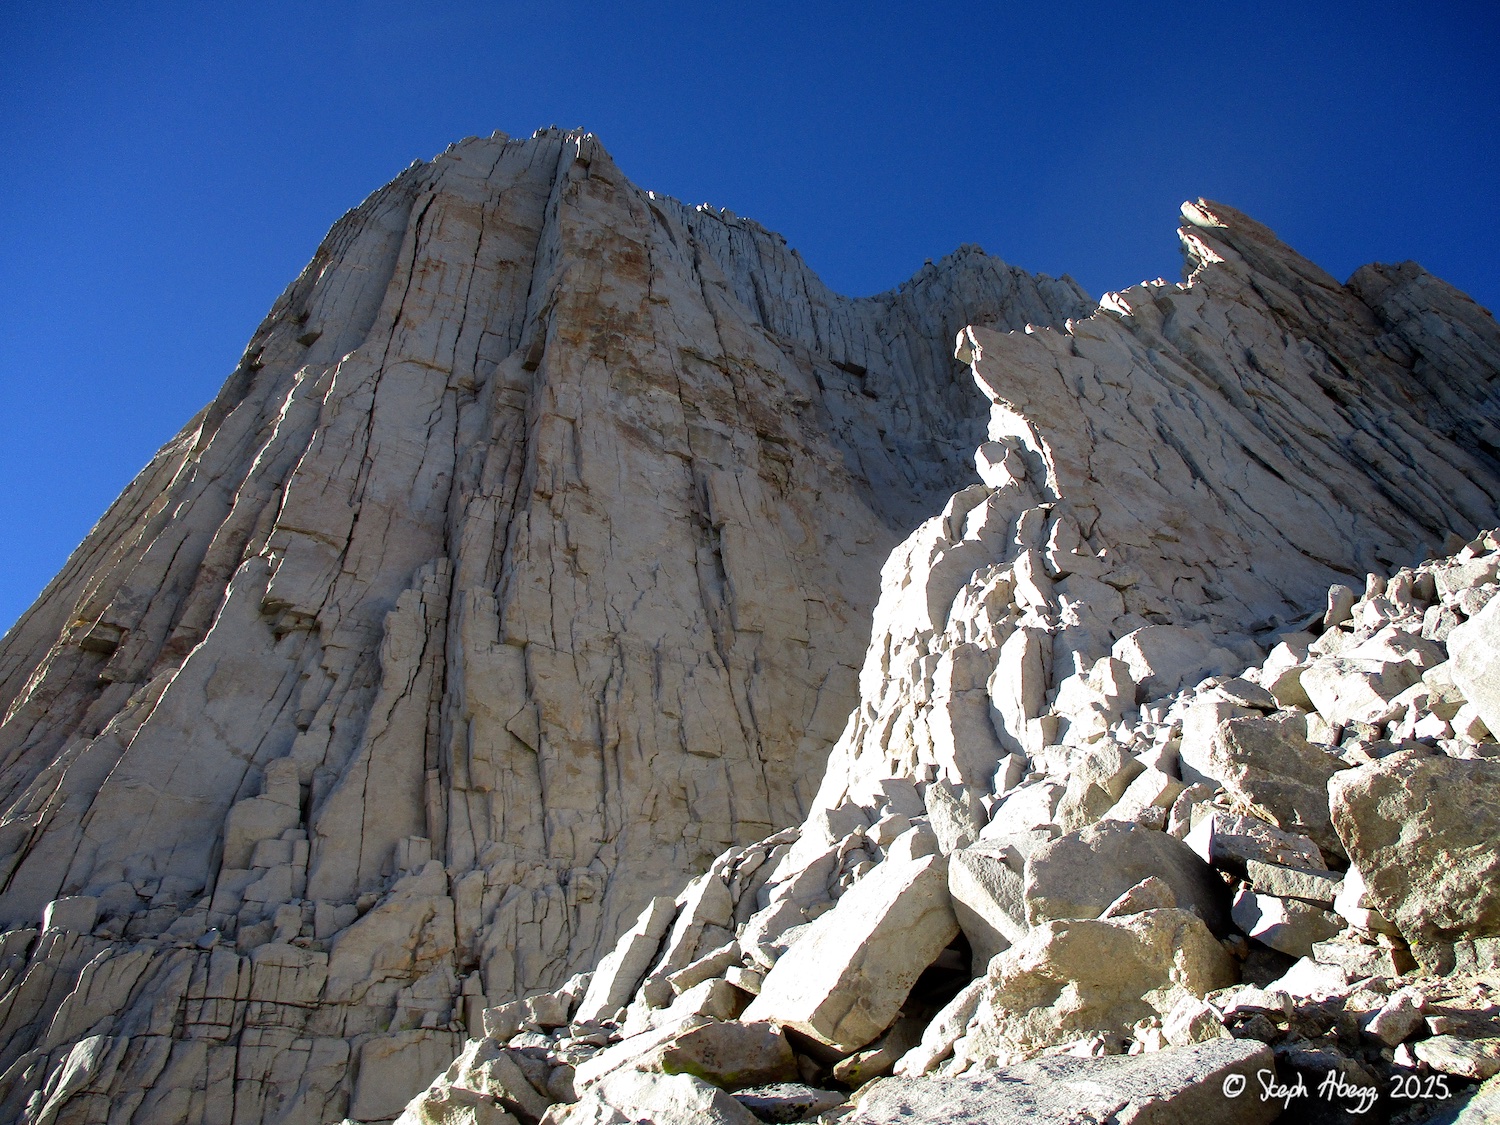
Around to the left of the Mithral Dihedral the cliff reaches its greatest height. This is the 900 foot west face. Western Front ascends directly up the center of this face. This route is actually a combination or two routes: the first half of the West Face by Rowell and Jones (1971) and the second half of New Era by Bartlett and Walker (1978). The main attraction is the 400' corner high on the route (you climb into and up the last half of this corner on Pitch 5).
After Meg and my experience suffering through cold fingers and chilly lead belays on Mithral Dihedral a few days earlier, David and I opted for a later start on Western Front. We timed it so that we started climbing at 11:30am, just when the sun was starting to reach the base of the west face. As a result, we enjoyed pleasant temperatures the entire climb. This route has a more grainy feel than Mithral Dihedral since it is not climbed as often, but nevertheless David and I found the climbing to be excellent and challenging. We swung leads until the last few hundred feet, when I took over since I was familiar with most of this part of the route because it intersects the same finish as Mithral Dihedral. Pitches 2 (David's lead) and 5 (my lead) were definitely the cruxes of the route—both are very long pitches; Pitch 2 has the 10c crux section of the route whereas Pitch 5 is the thuggisly sustained 10a corner.
Whitney Portal trailhead to trail up North Fork Lone Pine Creek to Iceberg Lake to Whitney-Russell Col to base of middle of west face.
1.
2.
3.
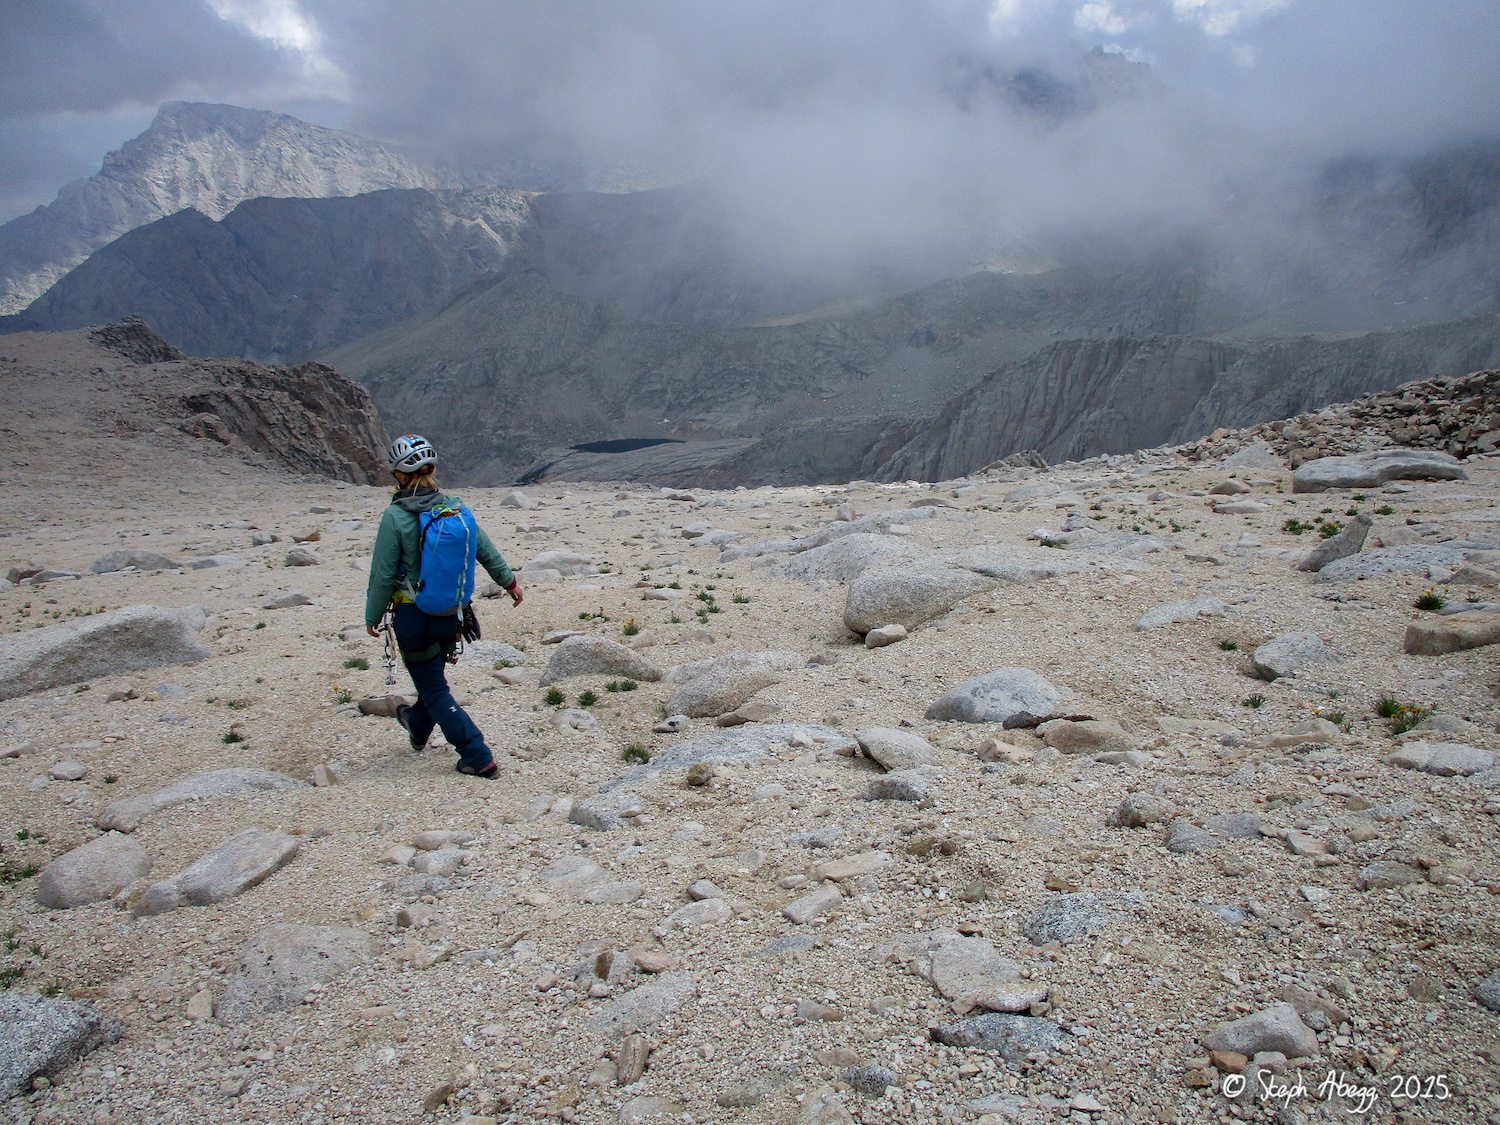
1. Looking down at Iceberg Lake from the Whitney-Russell Col. The col is less than 30 minutes from camp.
2. Russell as seen from the Whitney-Russell Col. The west face is still in the shade, but not for much longer (sun hit it just before noon). The base of the route is approximately 1 hour from camp at Iceberg Lake.
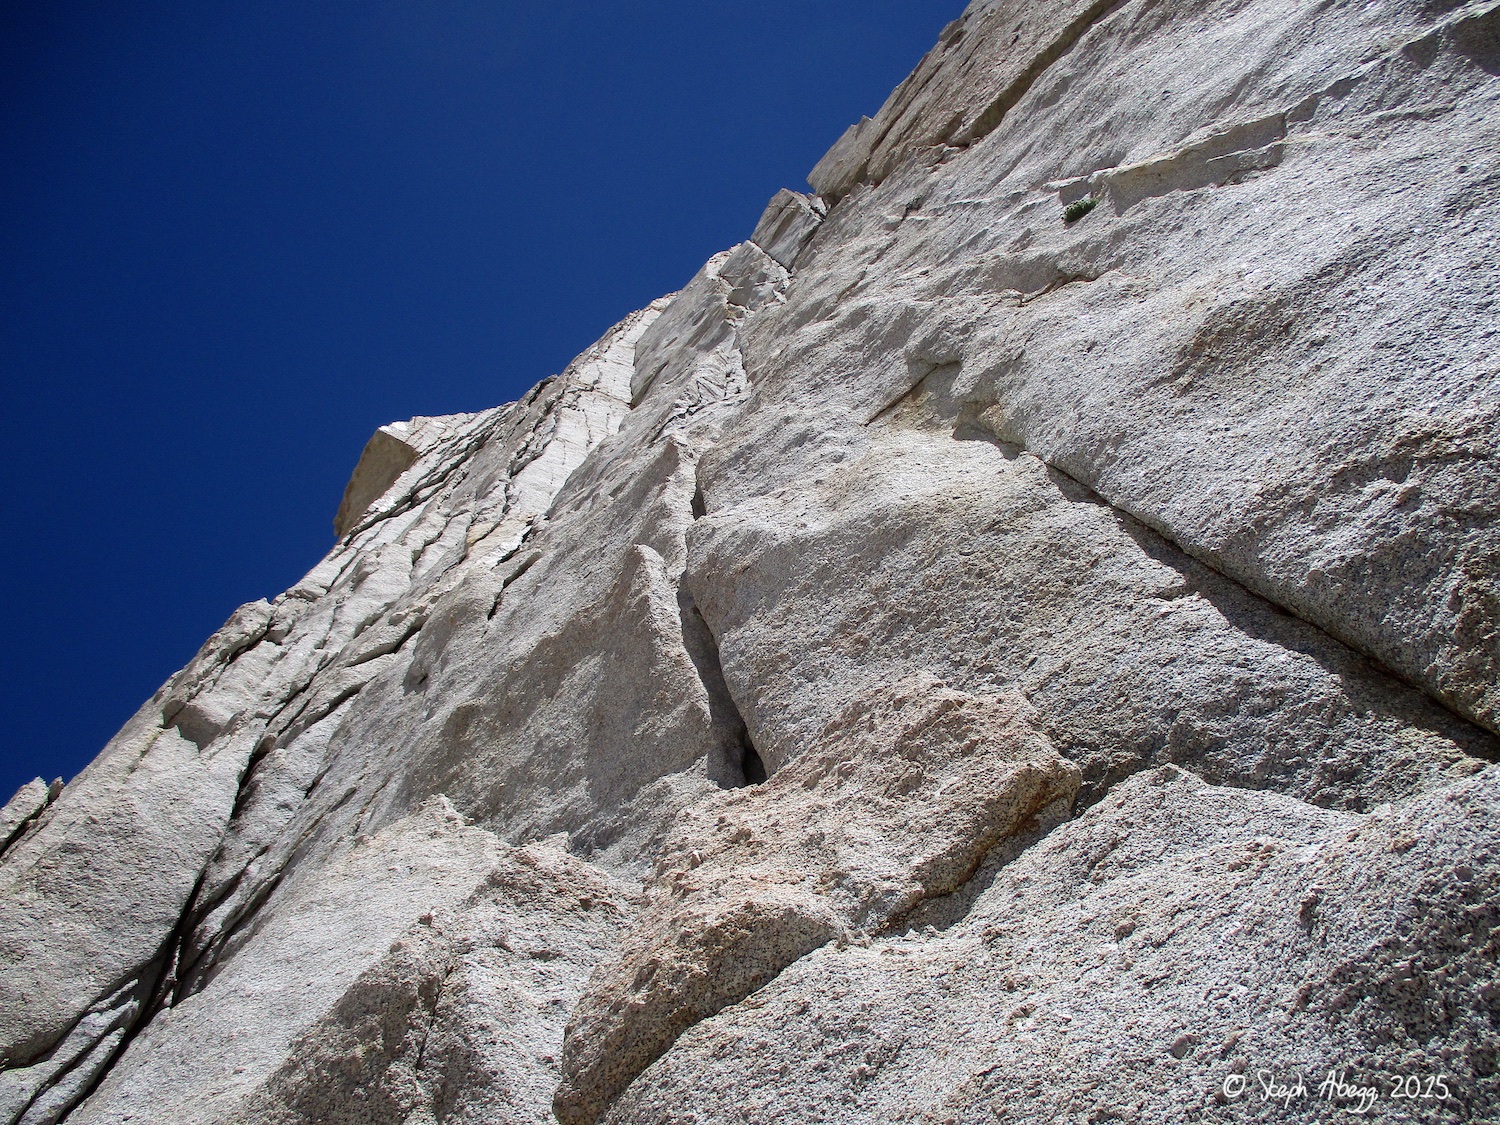
3. Looking up Western Front from the base of the route. The route goes up the crack system in the middle of the photo.
Pitch
1
5.8, ~80'
Just right of center there is a pretty obvious pedestal about 80' up. Climb the hand crack up its right side and belay on the ledge.
4.
4. David nearing the top of Pitch 1, climbing the 5.8 crack on the right side of the pedestal.
Pitch
2
5.10+, ~180'
The crux pitch, kinda flaky finger and hand jamming in a corner (5.10c), getting easier after the first 30' and finishing on a ledge. This is a long pitch.
5.
6.
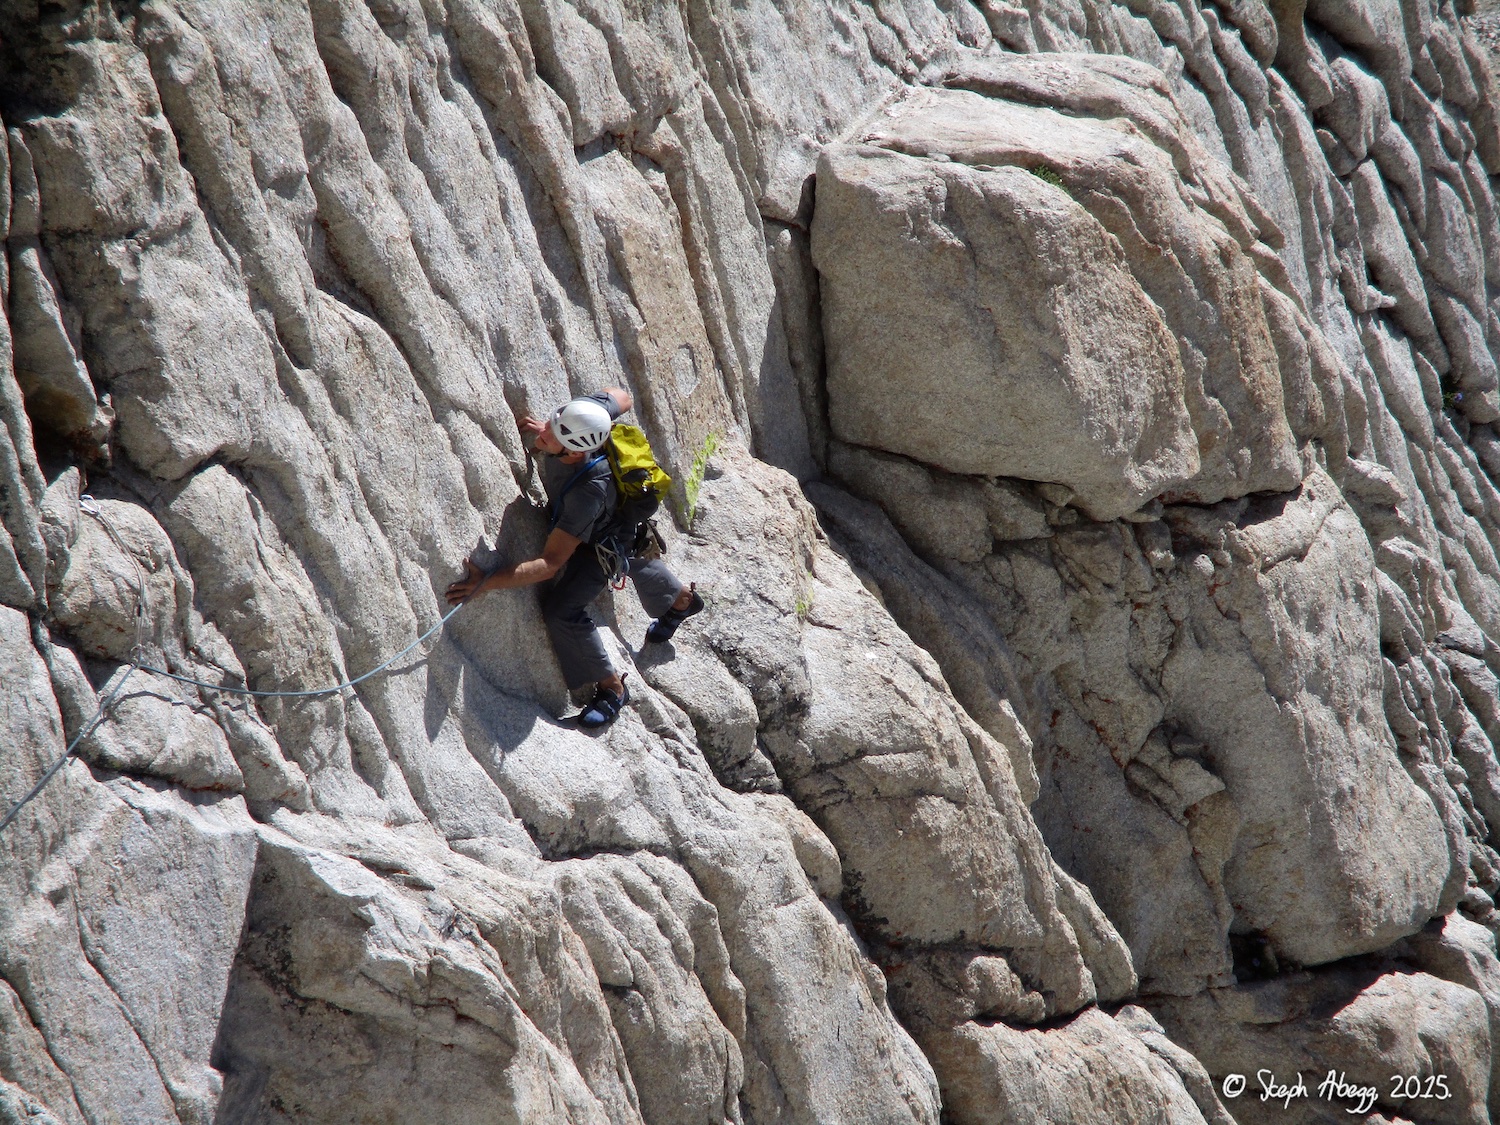
5. David leading off Pitch 2. This pitch starts with the fingery 10c crux of the route and then eases to 5.9 after the roof in the photo.
6. The 5.9 climbing on Pitch 2. This part is fun.
Pitch
3
5.9, ~140'
Go up and then left across easier ground to the obvious right facing corner, cross it and climb double/triple flaring cracks up the retaining wall of the corner to a ledge just left of the arete. From this belay it becomes obvious why you don't stay in the corner—the crack in the back is too thin for gear.
7.
7. Looking up Pitch 3. I went left along the top of the flake and finished on the cracks on the arete on the left side of the photo. On first glance it seems as if you should just climb the obvious corner, but it turns into a very fine seam for awhile, so that's the reason the route takes to the cracks on the arete for 1.5 pitches before transitioning into the corner on Pitch 5.
Pitch
4
5.10-, ~120'
Airy crack climbing p the arete to a small ledge. This belay has a hollow flake to sling—to back it up, go up a couple of moves, place a couple of thin TCU's and then step back down.
8.
8. Looking up from the bottom of Pitch 4. This is fun climbing up a series of branching cracks on the arete.
Pitch
5
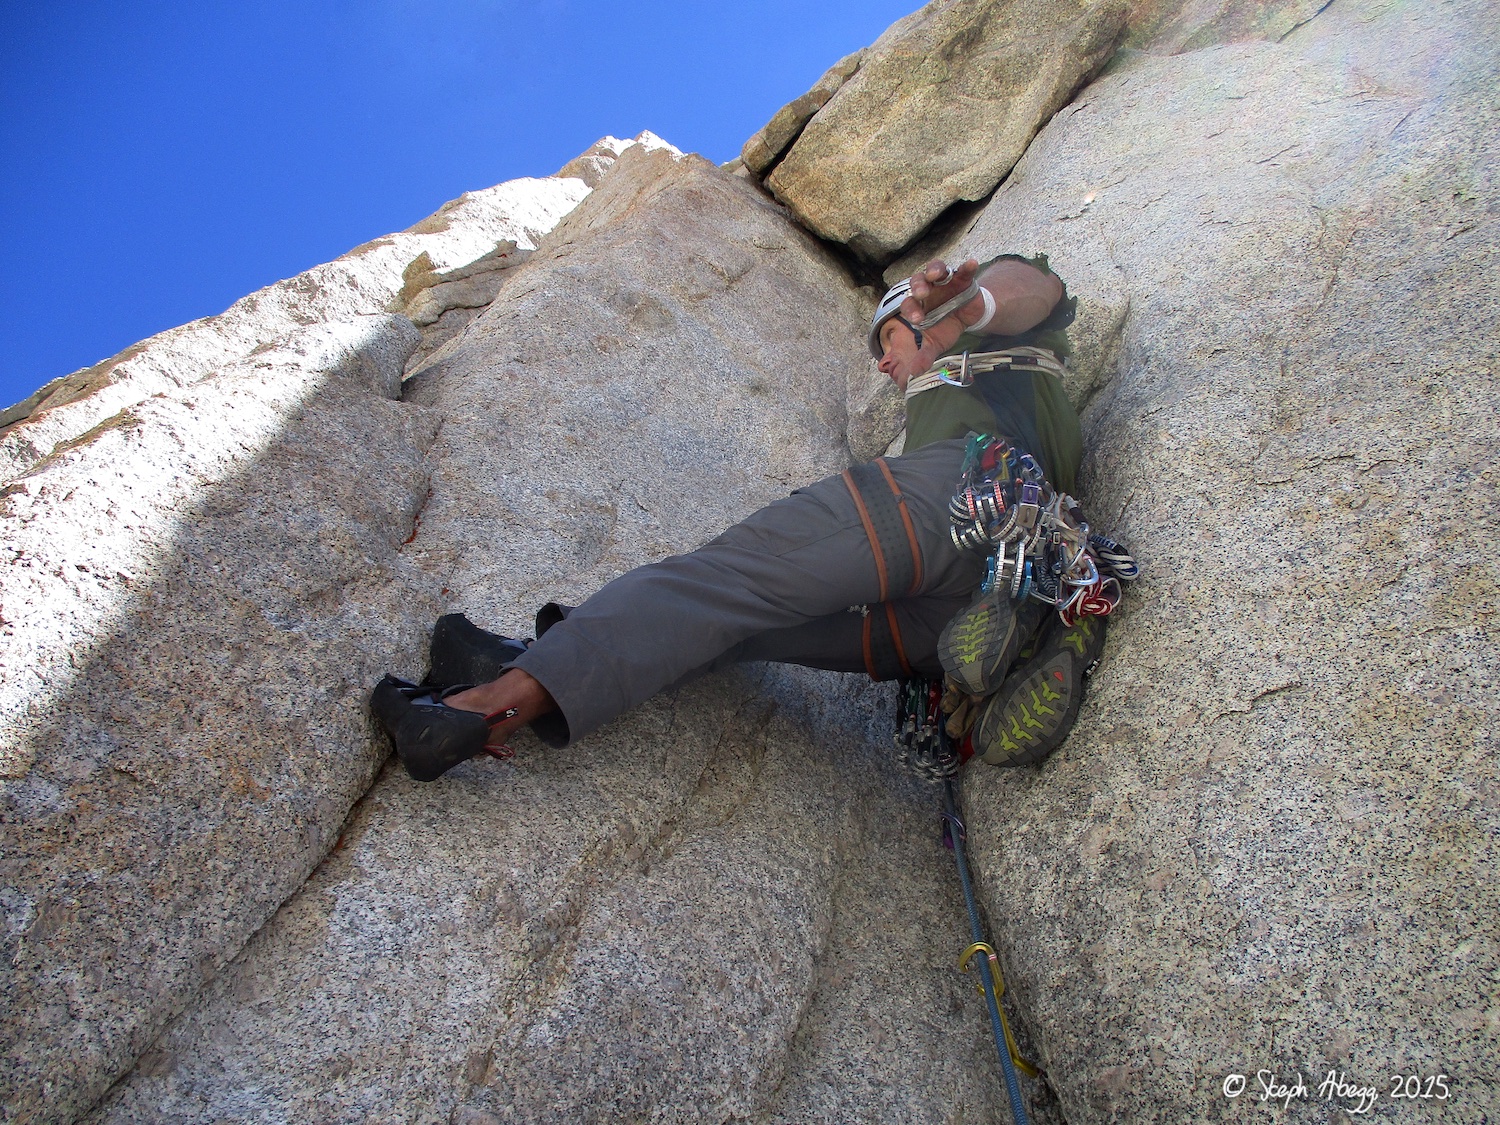
5.10-, ~200'
Climb up 20' or so and then step right onto an obvious green foothold. Use that to gain the corner crack that now opens up to finger and hand size and continue up this in one long pitch to a little belay ledge on the prow. This is a long and sustained pitch, very physical.
9.
10.
11.
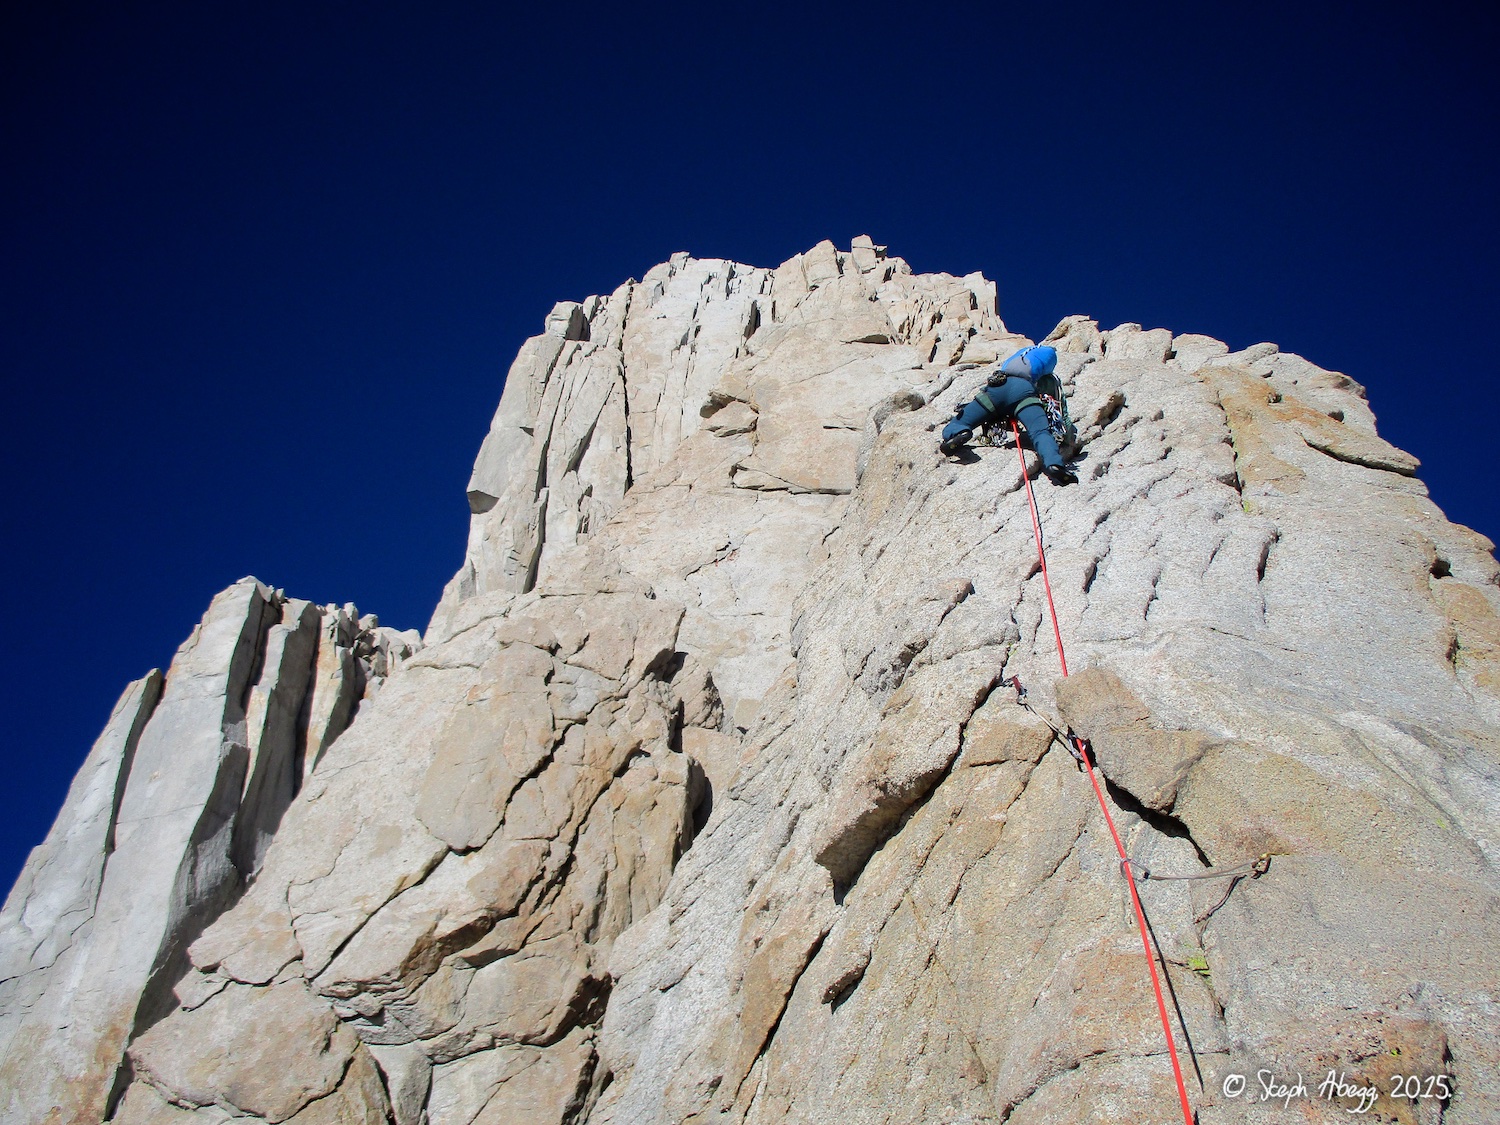
9. Looking up the amazing corner of Pitch 5. This is the money pitch of the route.
10. The "great big green wart" Peter Croft mentions in his route description. You use this as a foothold to transition from the arete into the corner. Its a bit of a balancy move above gear, so a bit heady.
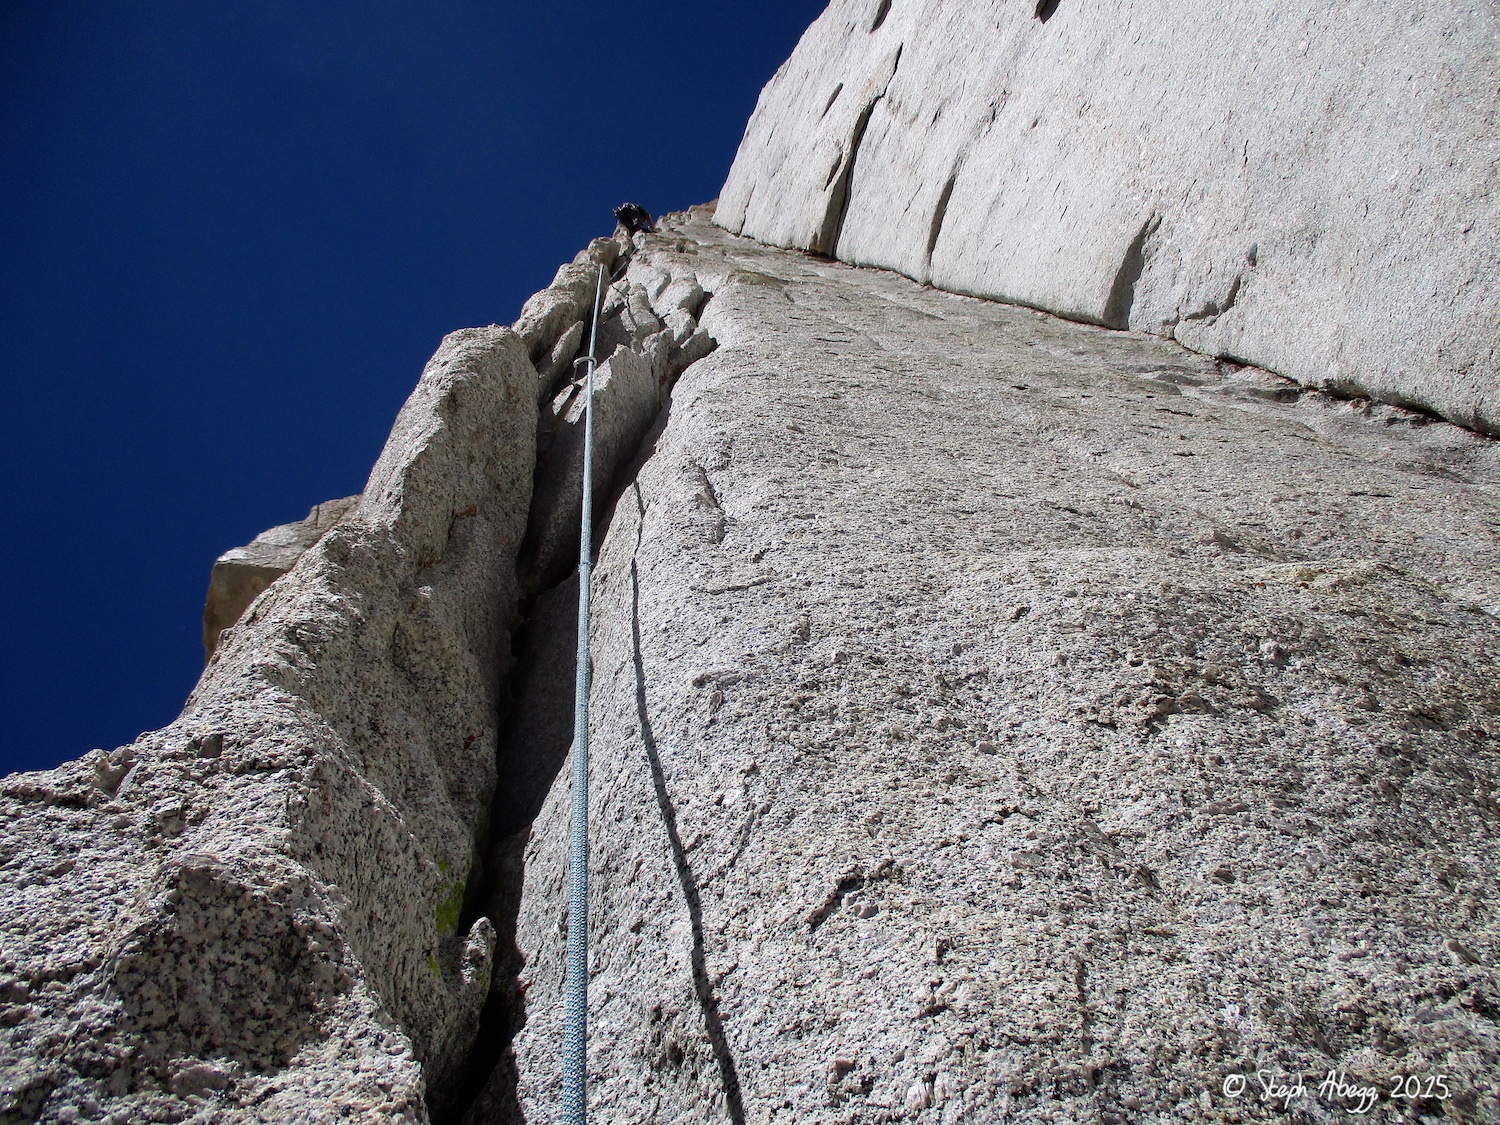
11. Looking down the corner pitch. This pitch is long and quite sustained, with mostly 10a climbing the whole way up.
Pitch
6
5.8, ~80'
Great hands and fingers up the crack leads to the easier blocky ground of the summit ridge.
12.
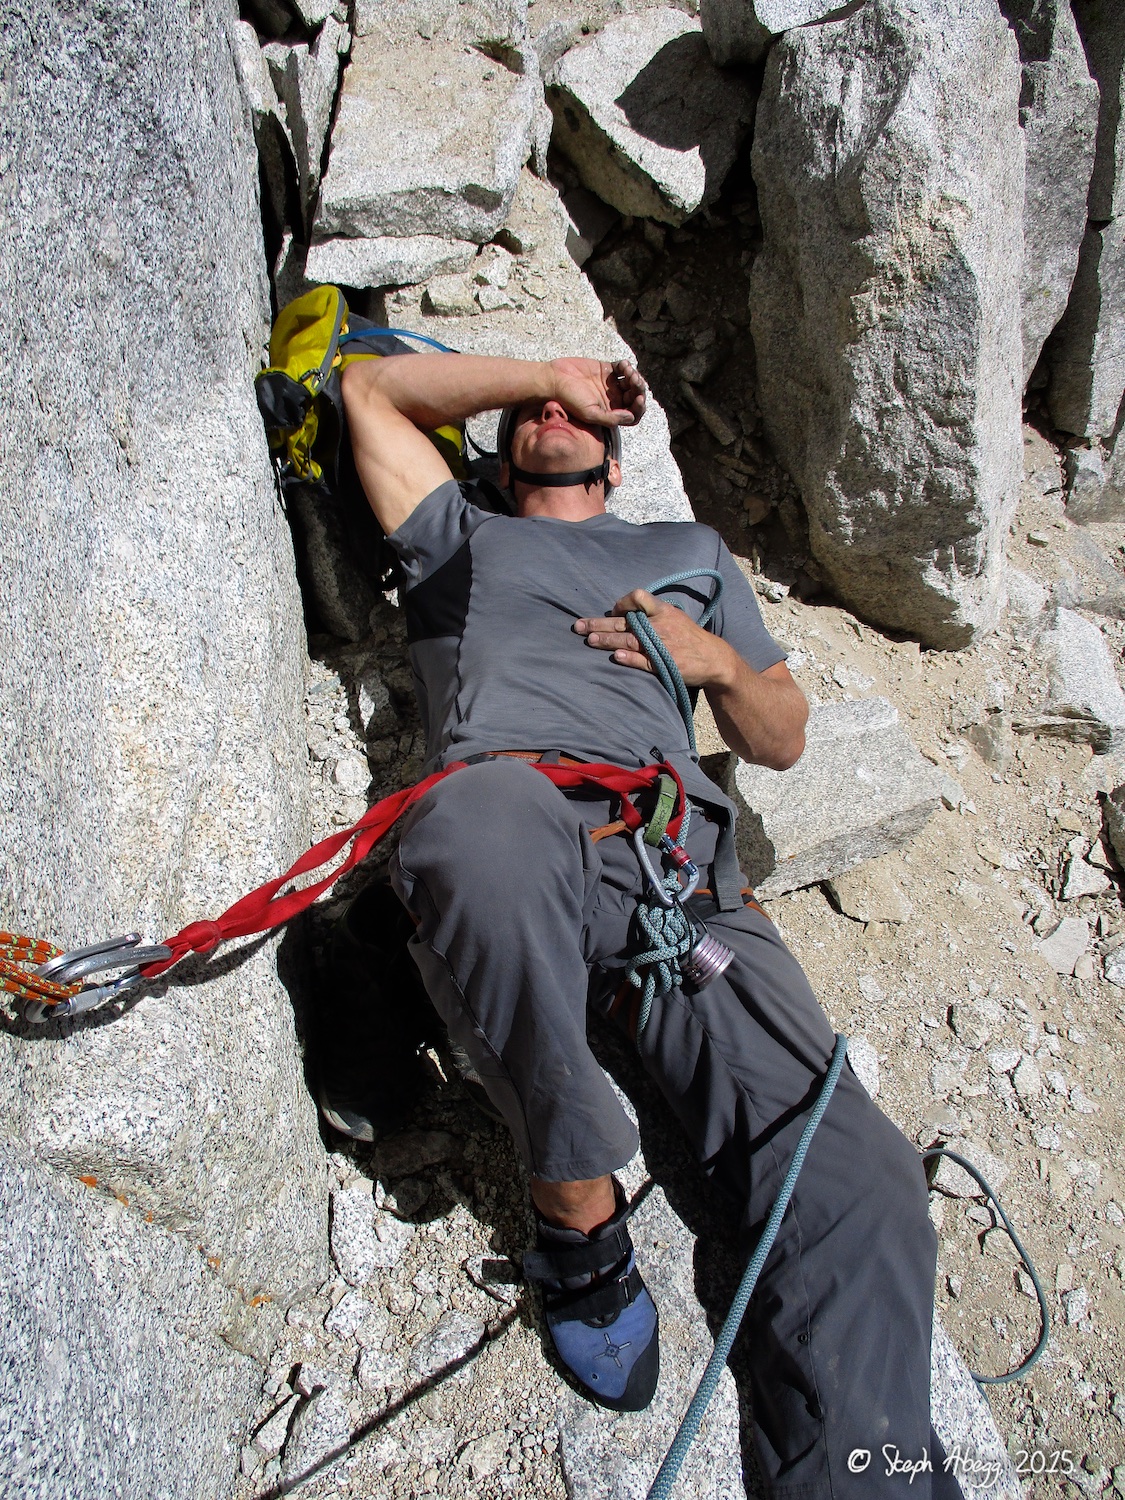
12. Looking down the 5.8 crack system of Pitch 6 at David at the belay. This was fun climbing with excellent hand jams.
Pitches
7+
4th-low 5th, 100's'
A few hundred feet of 4th and low 5th class lead to the summit.
13.
14.
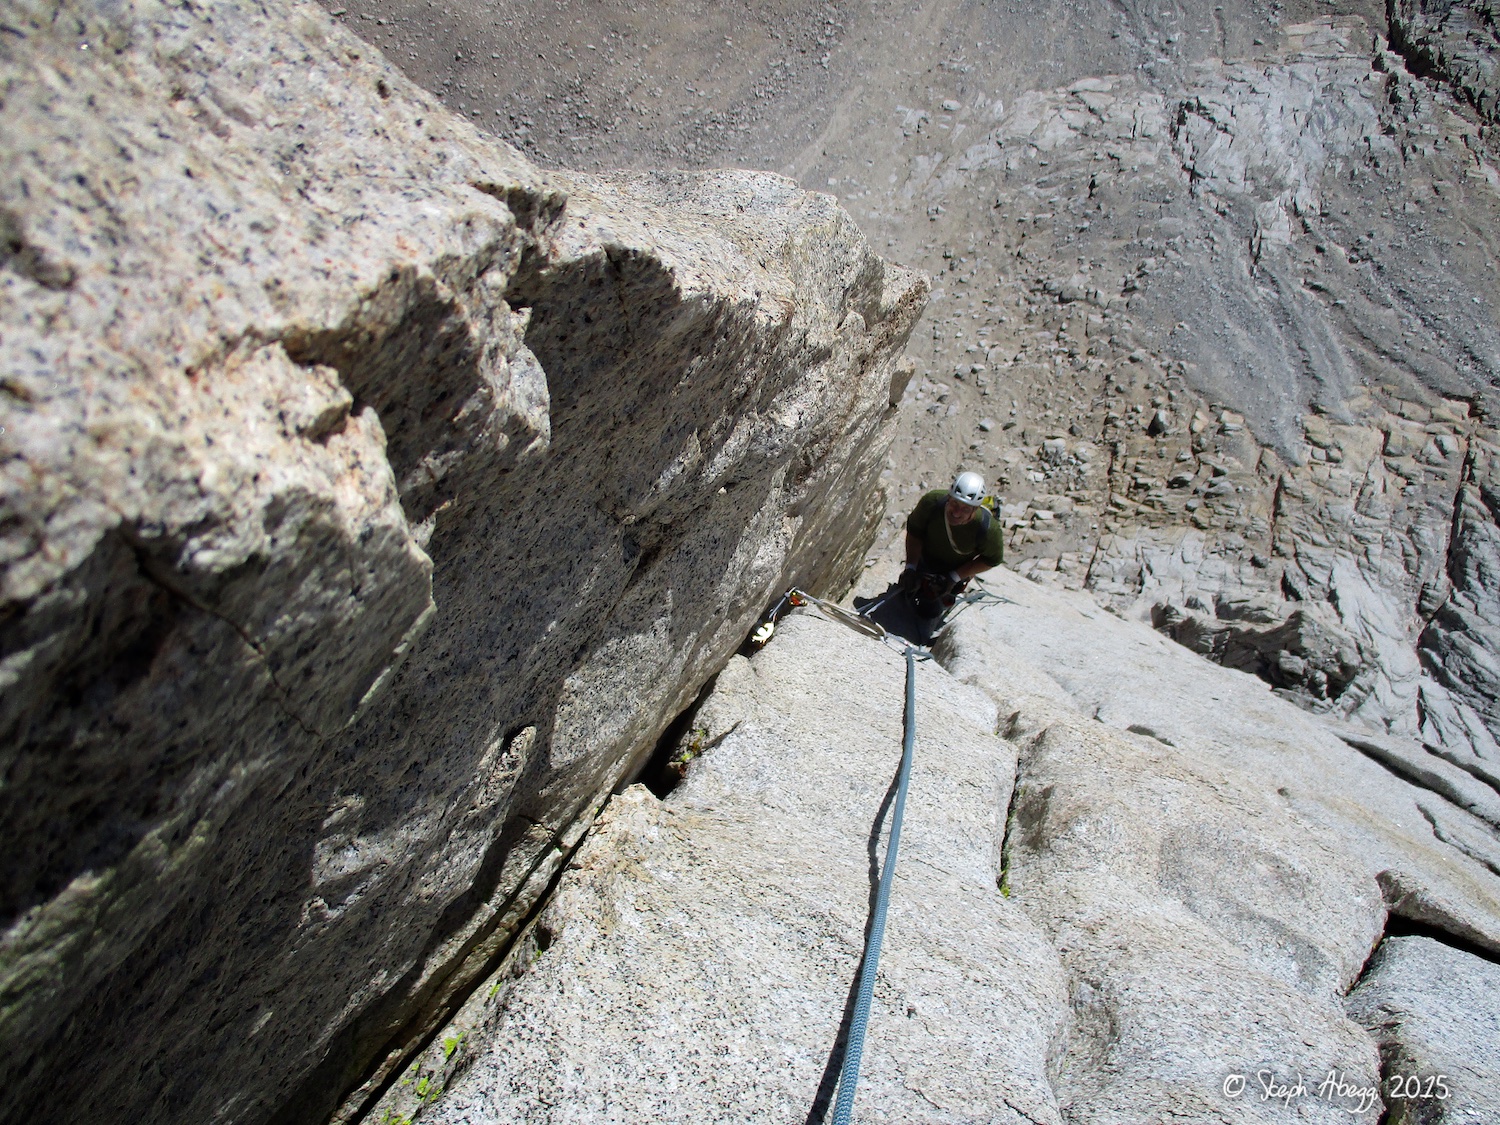
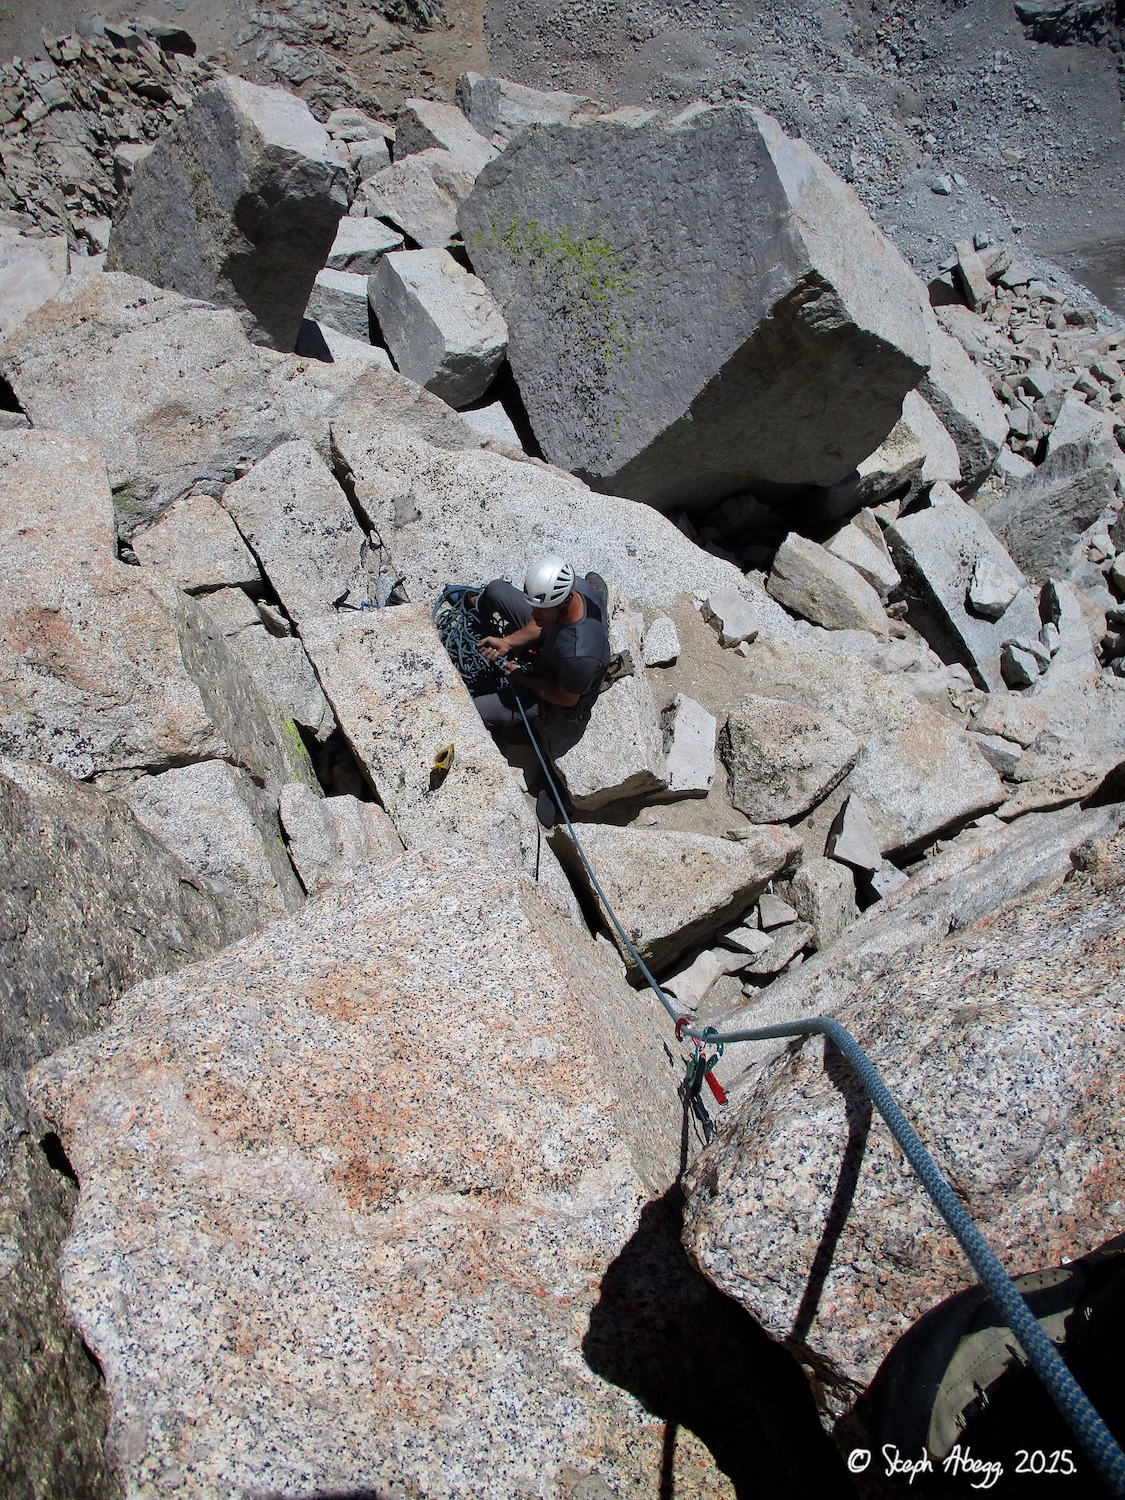
13. The easier climbing on the summit ridge. We did the final section in 2.5 pitches with minimal simulclimbing (the main reason I stopped to set belays rather than to simulcilmb the whole thing was because of heinous rope drag).
14. A tilted pillar on the summit ridge.
Summit
You've arrived! Enjoy the view!
Descent
Either descend the South Gully (if headed back to Iceberg Lake) or the East Arête/Ridge (if headed back to Upper Boy Scout Lake).
15.
16.
17.
18.
15. A photo showing the third class ramp into the South Gully, and its relation to the East Summit of Russell pictured in the photo. To get to the South Gully descent from the West Summit (where routes finish), you first need to scramble a bit along the East Ridge towards the East Summit and then locate this ramp down into the gully below the East Summit.
16. The 3rd class ramp into the South Gully, as seen from below.
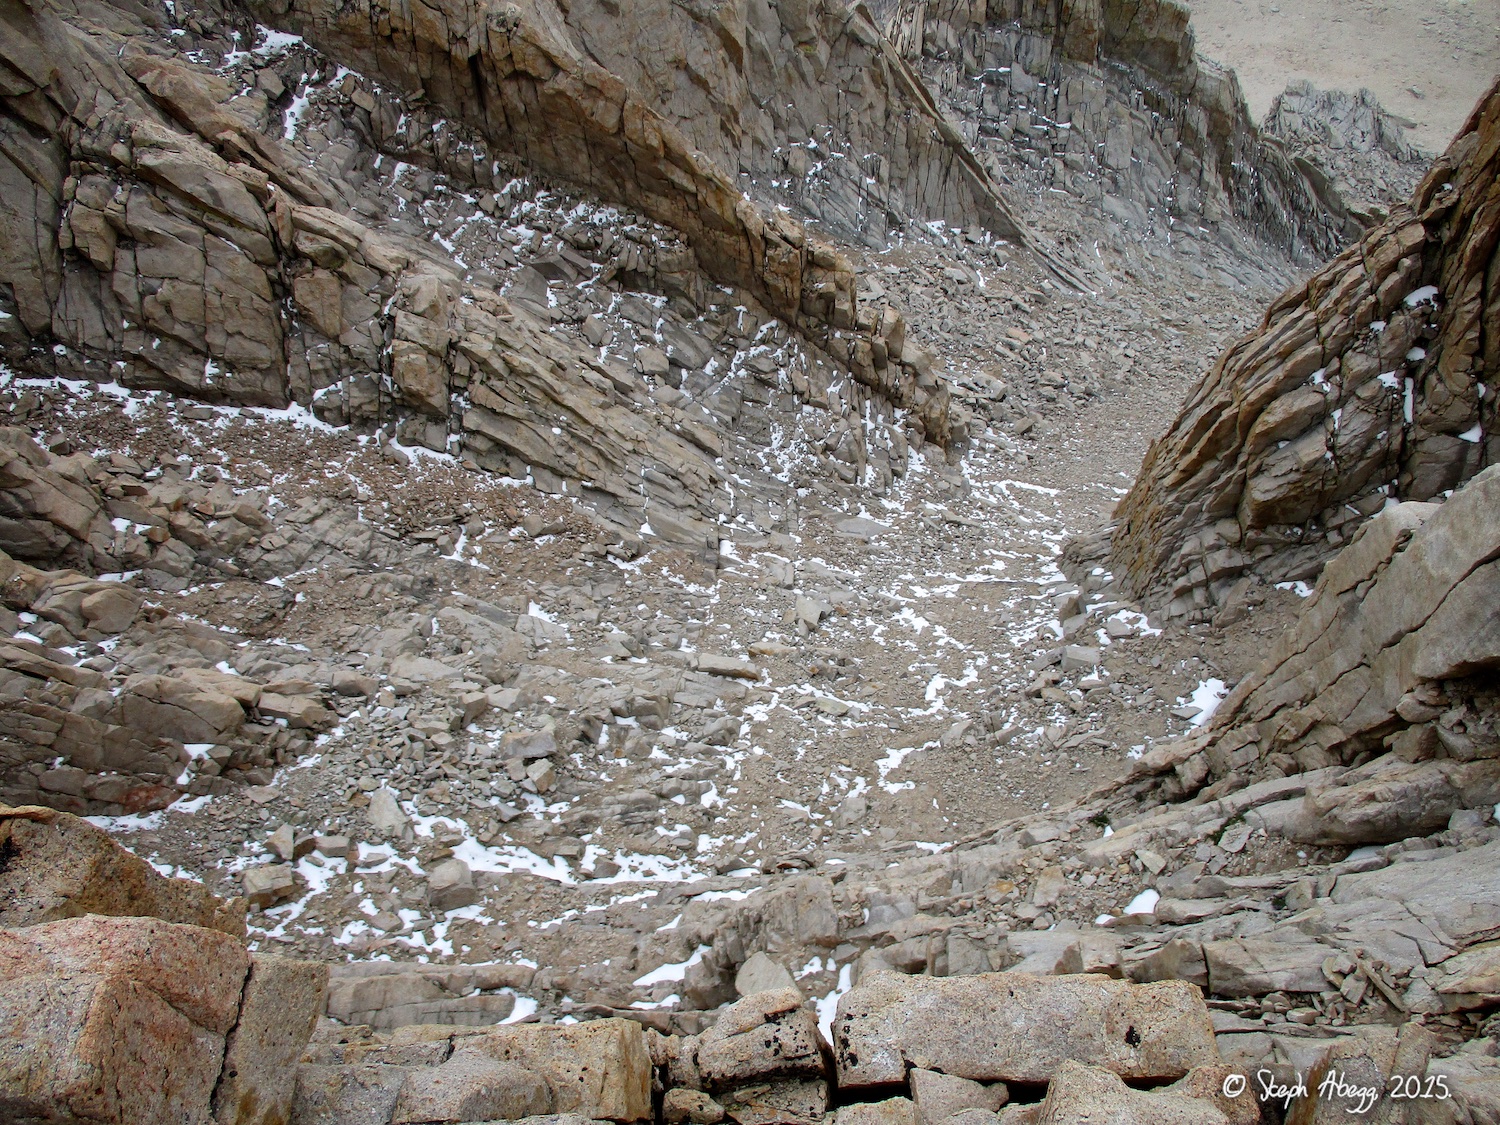
17. Looking down the South Gully. It's not too fun, but its a quick and easy way back down to the trail leading to Whitney-Russell Col. 18. Looking back up at Russell from the base of the South Gully. Fishhook Arête (5.9, 700') is in the sun. This is a cool route as well, which I climbed in August 2013 (click link for trip report).
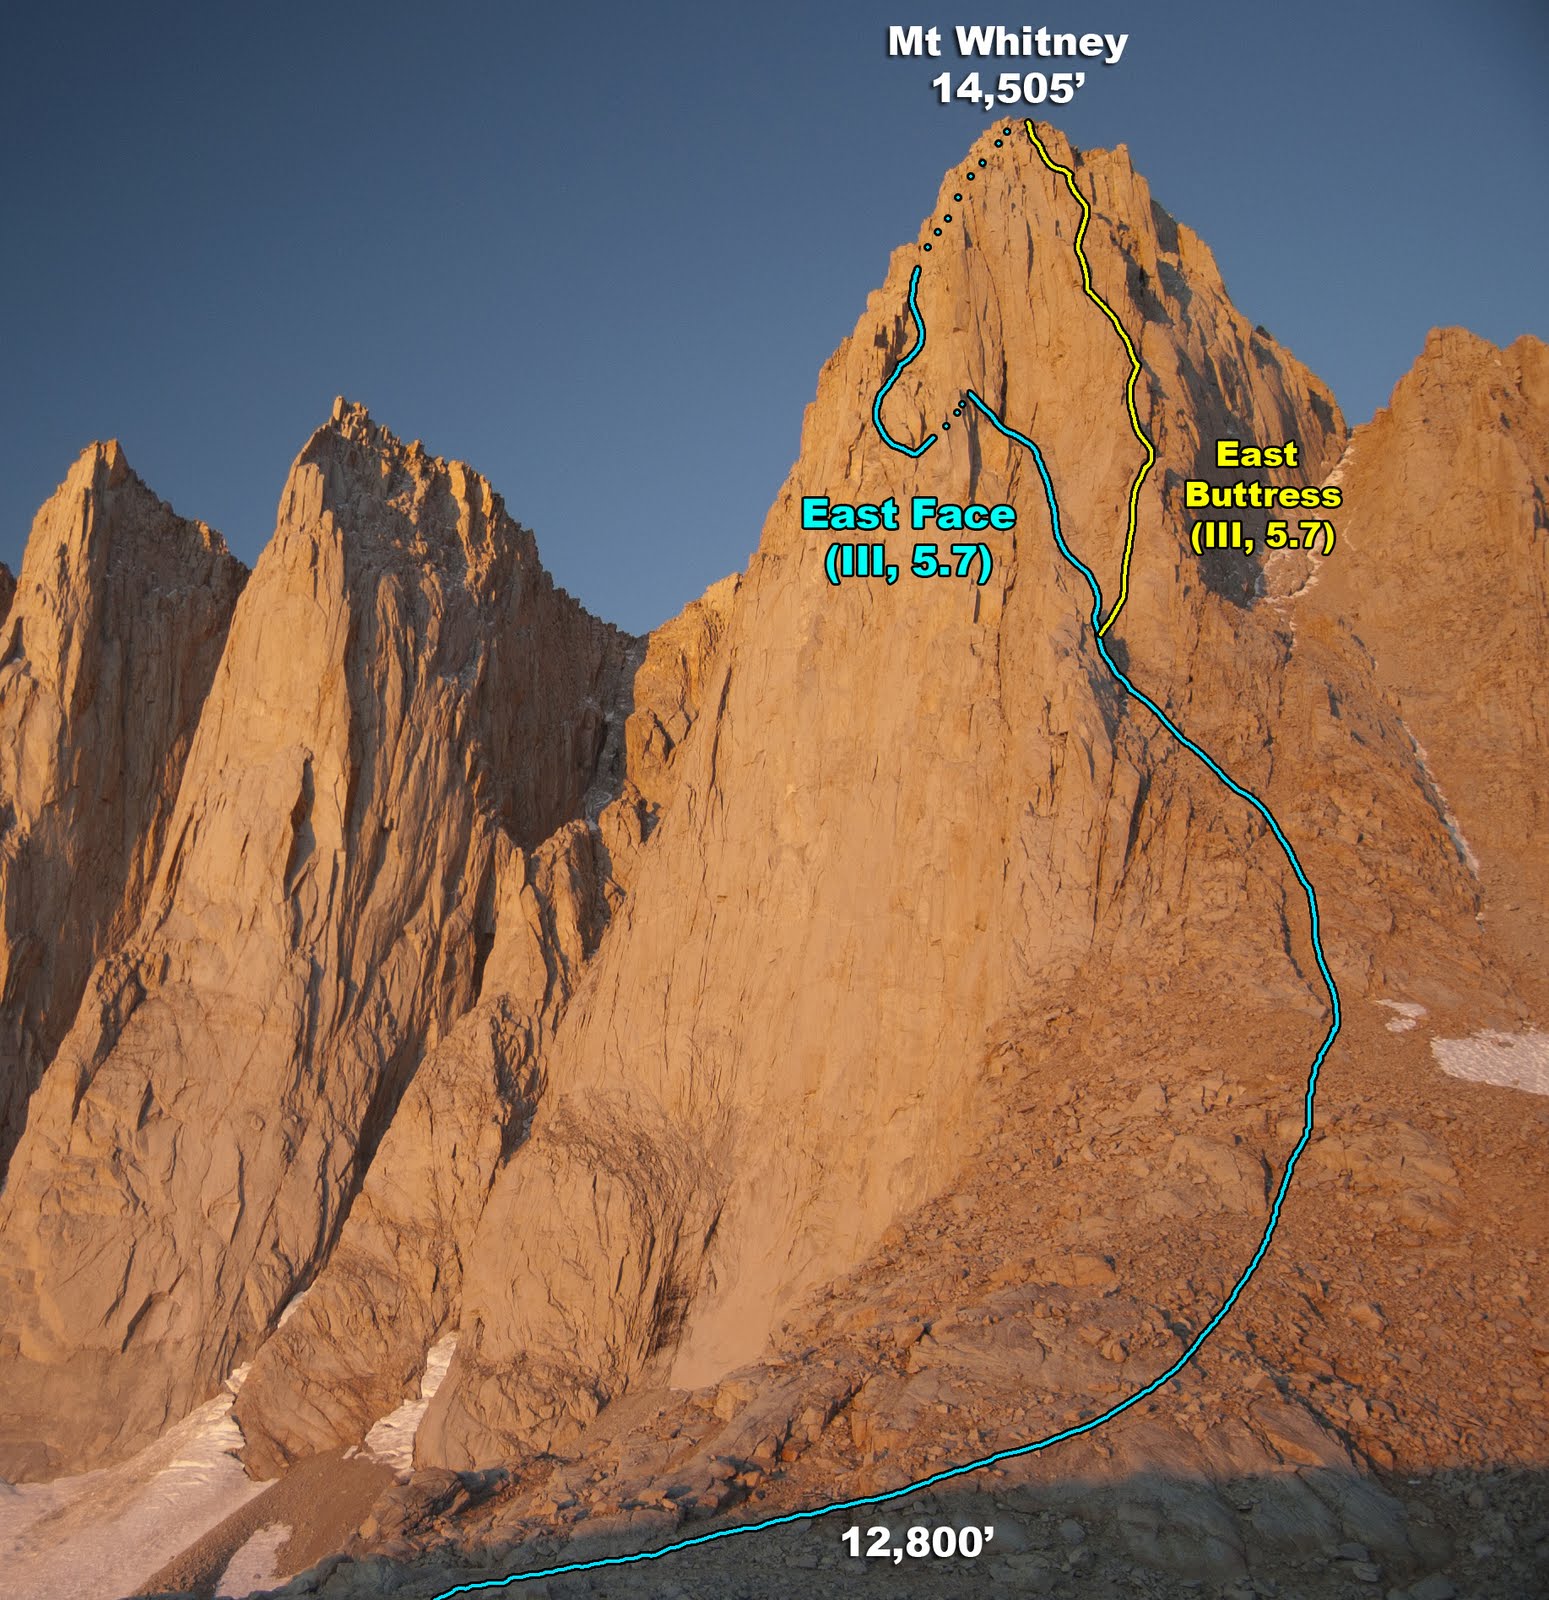
Even though the East Buttress is arguably the better route up the east side of Whitney, the East Face is the one included in Steve Roper and Allen Steck’s “50 Classic Climbs of North America.” The East Face has a rich history, being the first line that was ascended on Whitney's steep eastern walls, in 1931.
David and I had originally planned to climb the Harding Route on Keeler Needle, but David had been gamely enduring a minor case of altitude sickness since the first day of the trip, so we had bailed on our plans for Keeler Needle. In lieu of Keeler, we decided to run up the East Face of Whitney before hiking out. I led the entire route, battling with severe rope drag the entire way (it didn't help that the only rope we had was a 70m rope). There's a lot of 3rd and 4th class climbing on this route, and if I were to climb this route again, I would solo it with just a couple of slings and cams to protect a few of the 5.7 moves. I was glad for the opportunity to climb this route, since it gave me the opportunity to compare it to the East Buttress route I had climbed with Meg a few days earlier—in my personal opinion, I found the East Buttress to be the superior route in both rock quality and route line. But nevertheless the East Face is a worthy routes, some climbers might like it better due to its variety; and it's WAY better than hiking the trail to the top!
Route Overlays
First two overlays are by my friend and King-of-the-Route-Overlay Mark Thomas — why reinvent the wheel when a friend has already done as good a job as possible. Mark's trip report for the East Face.
1. The East Face route starts from the notch between the First Tower and the Second Tower. From Iceberg Lake the towers are not obvious but one you start to scramble up the east side they become quite obvious.
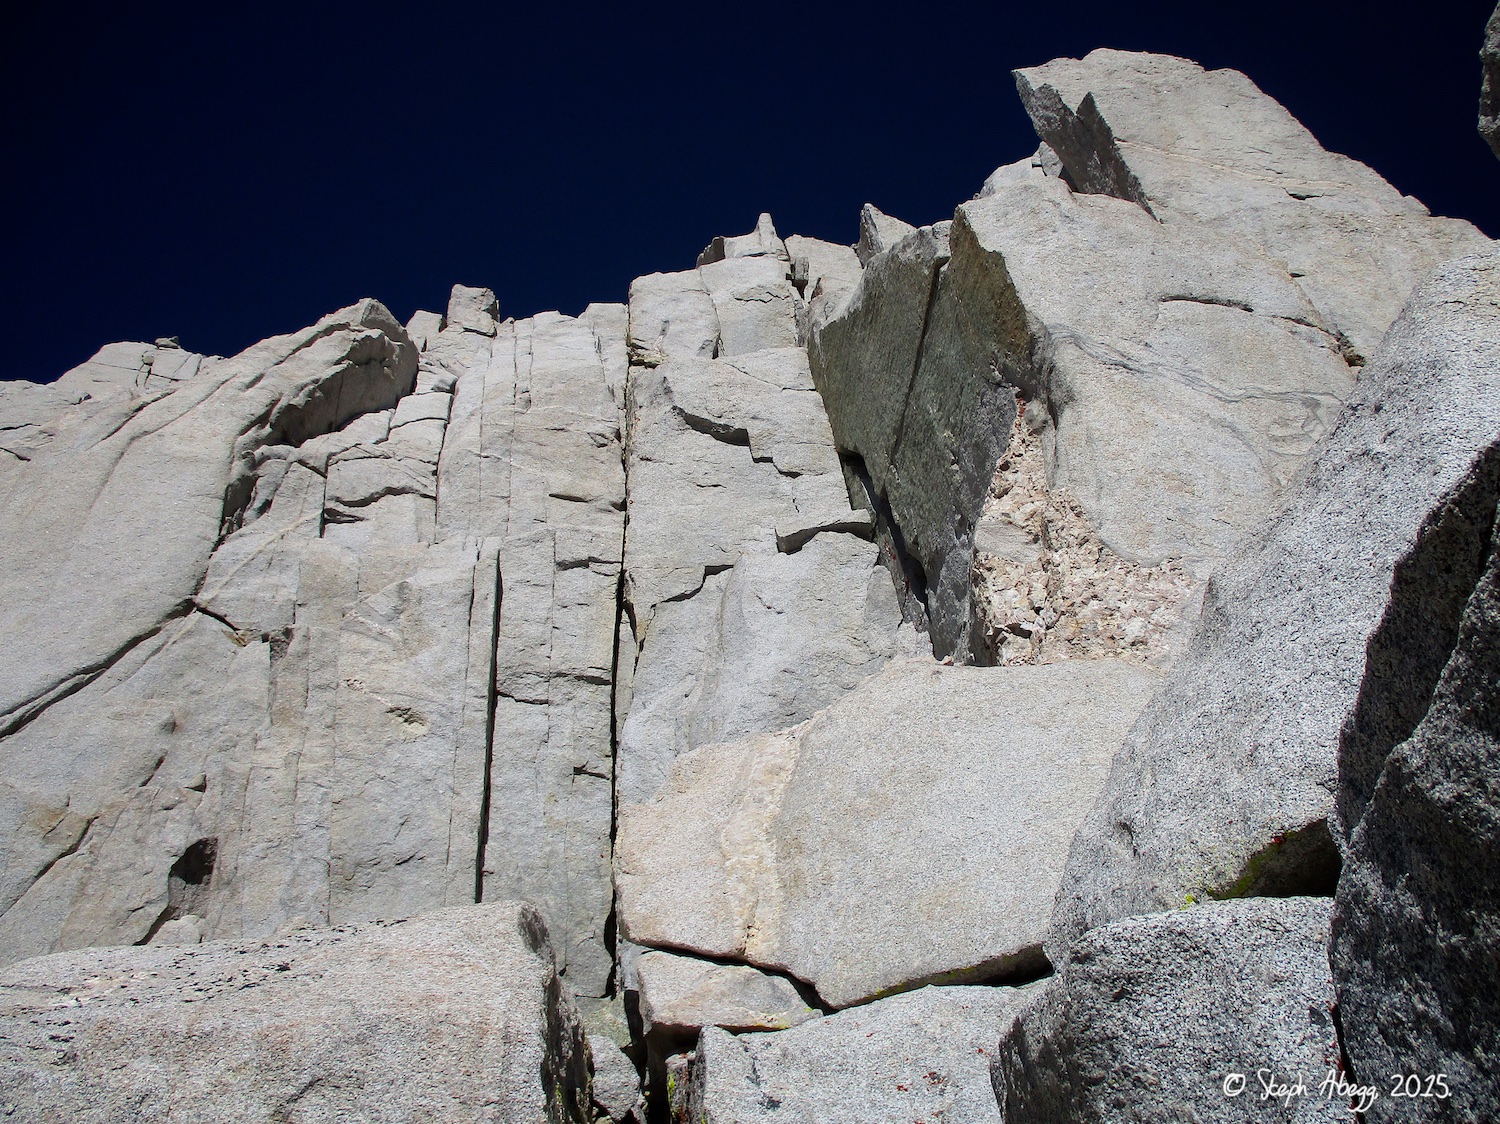
2. Looking at the East Face route from the base of the roped climbing. Pitches 1-5 can be seen in the photo, beginning on the ramp in lower right and finishing at the notch at upper left. We climbed this in two long pitches (1+2, 3+4+5).
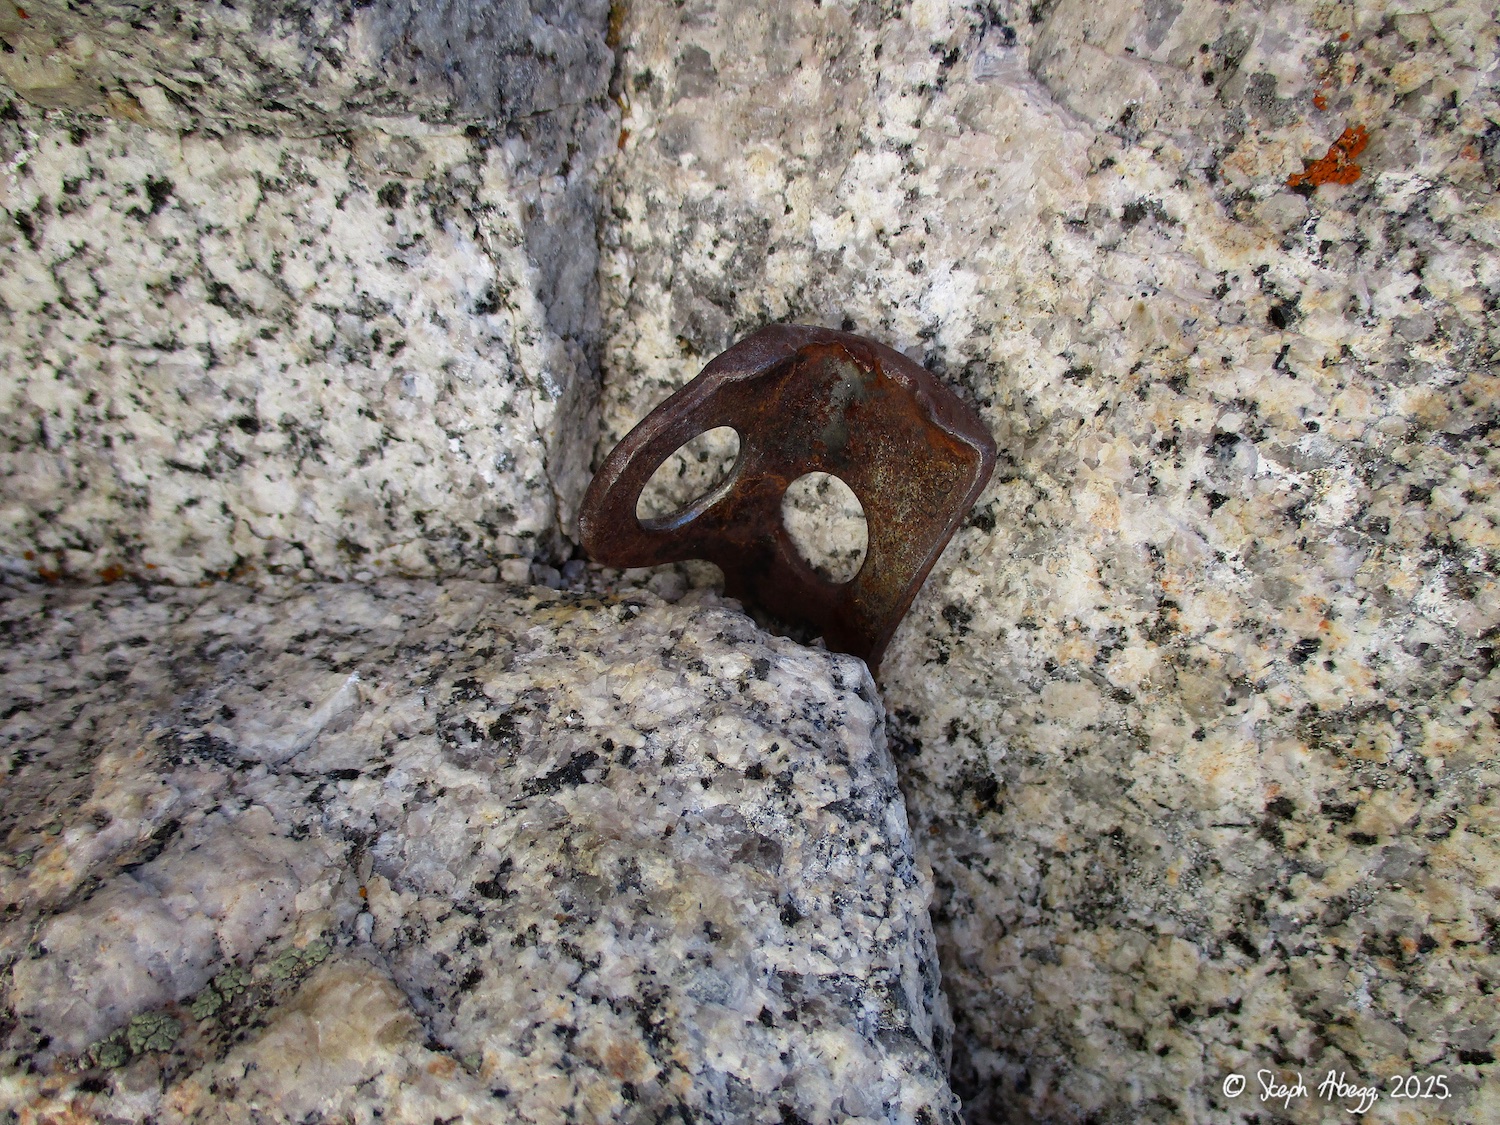
3. Looking down Pitch 1 while leading it. The First Tower is in the background. 4. Old piton on the 5.5 Tower Traverse on Pitch 1.
5. David on the 5.5 Tower Traverse on Pitch 1. The exposure here is fun.
6. Looking up Pitches 3-5 which I linked. Mostly 4th class. 7. Me leading the Fresh Air Traverse. I thought this section would be more exposed.
8. Looking up the Grand Staircase of Pitches 9 and 10.
9. David relaxing at the belay, battling off headache and nauseas (due to altitude) that nagged at him all three days of our trip. 10. Looking down from the top of the route. There are several variations for the final pitch—I chose a 5.9ish steep hand crack.
11. The summit crowds.
12. Looking down the Mountaineers Route which acts as the descent route back to Iceberg Lake. All of the ice that had been present when Meg and I had descended a few days ago had melted, so David and I did not have to do any rappels and we made it from summit to camp in just under 1 hour.
Photos:
Photo descriptions:
1.
2.
3.
4.
5.
6.
7.
8.
9.
10.
11.
12.
13.
14.
15.
16.
17.
18.
19.
20.
21.
22.
23.
24.
25.
26.
27.
28.
29.
30.
31.
32.
33.
34.
35.
36.
37.
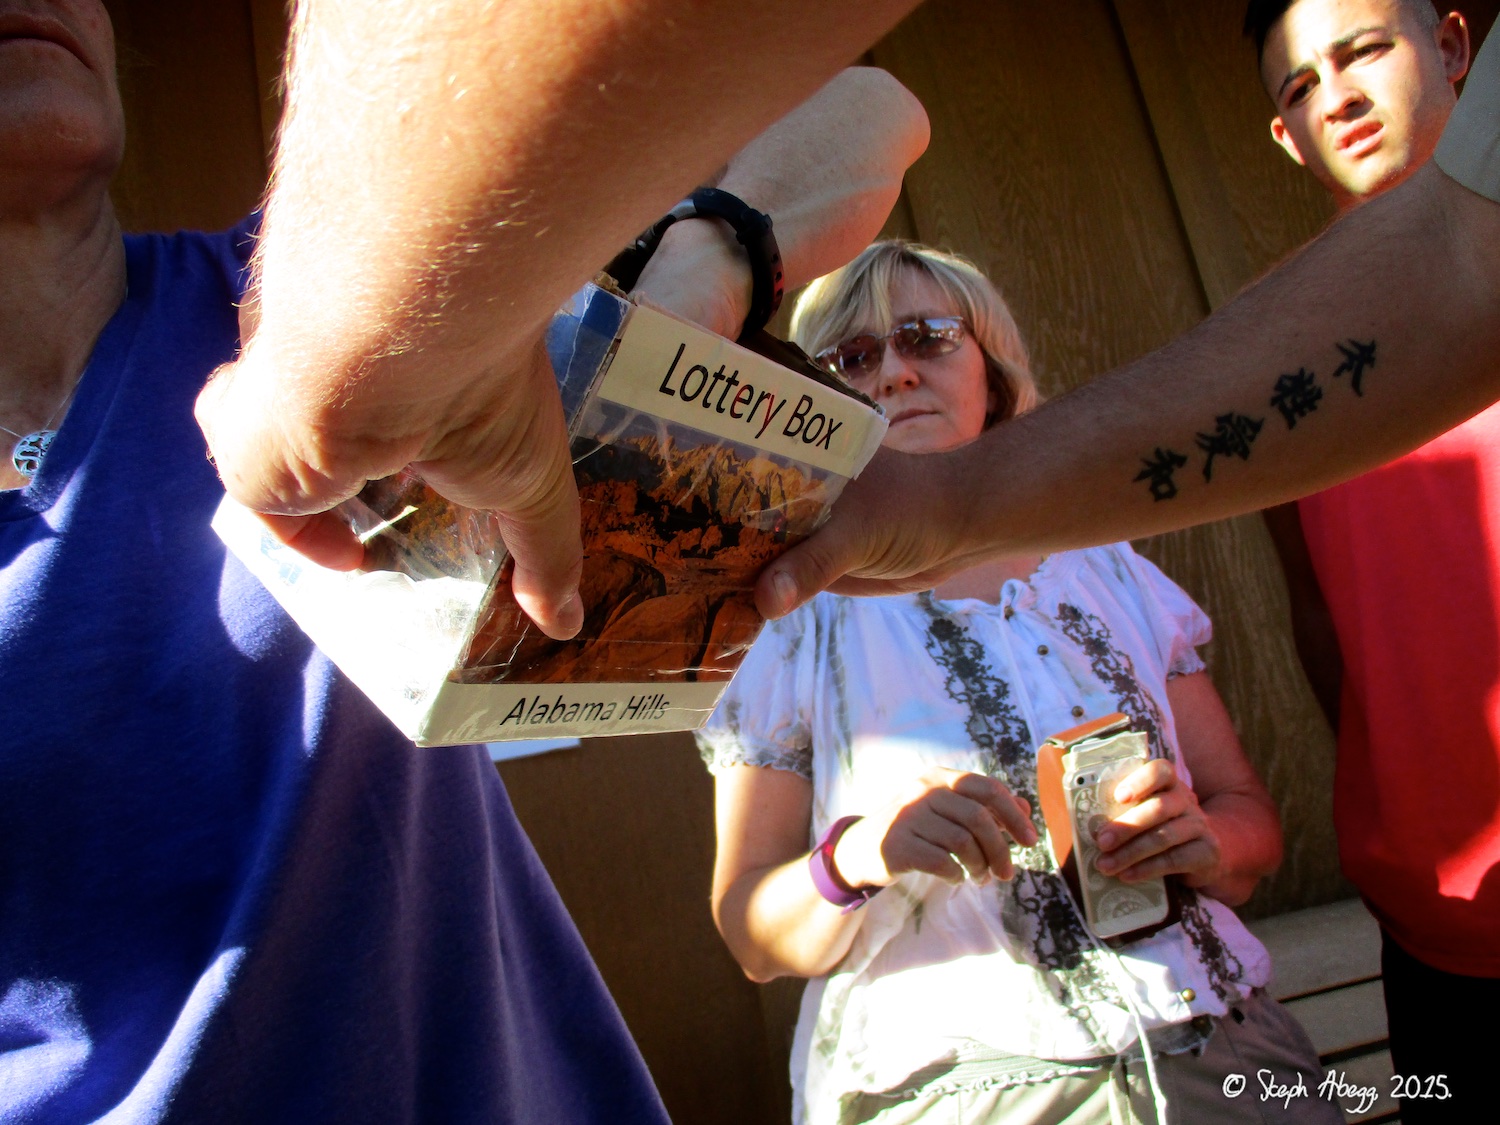
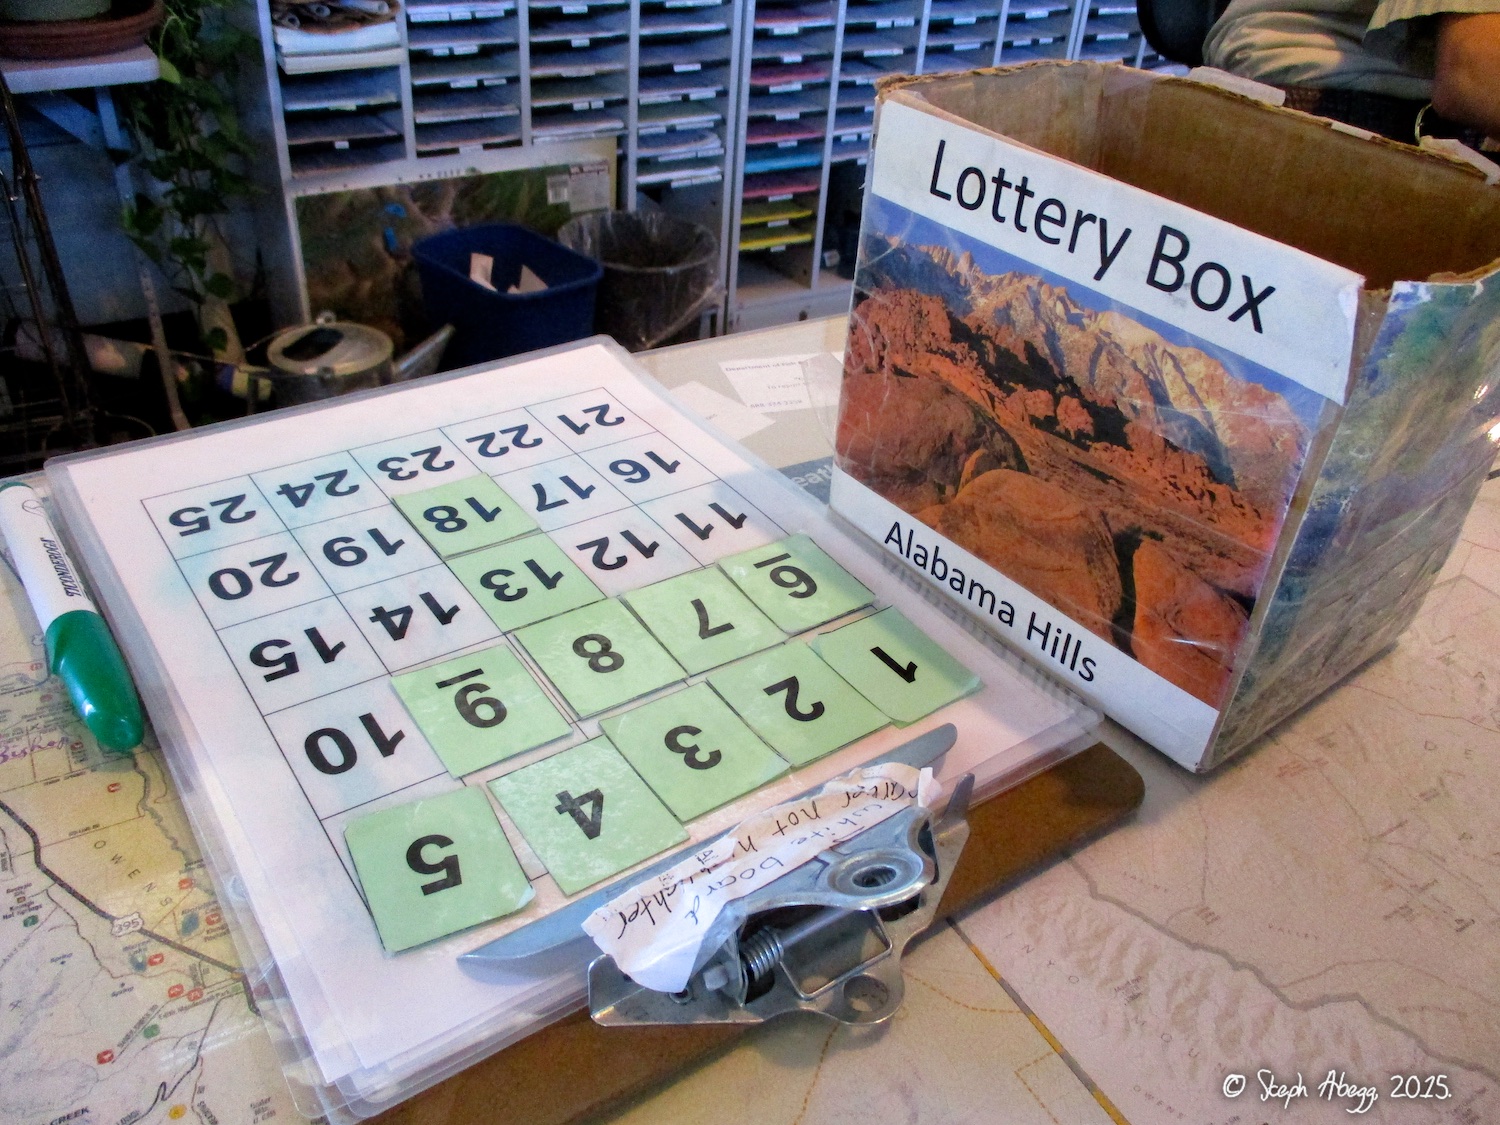
1-3. Unless you get your permits in March (and what climber does that?), you need to brave the daily lottery to try to get an permit to climb in the Whitney area. If staying overnight, you need an Overnight Permit and if car-to-car you need a Day Use Permit. There are more of the latter.
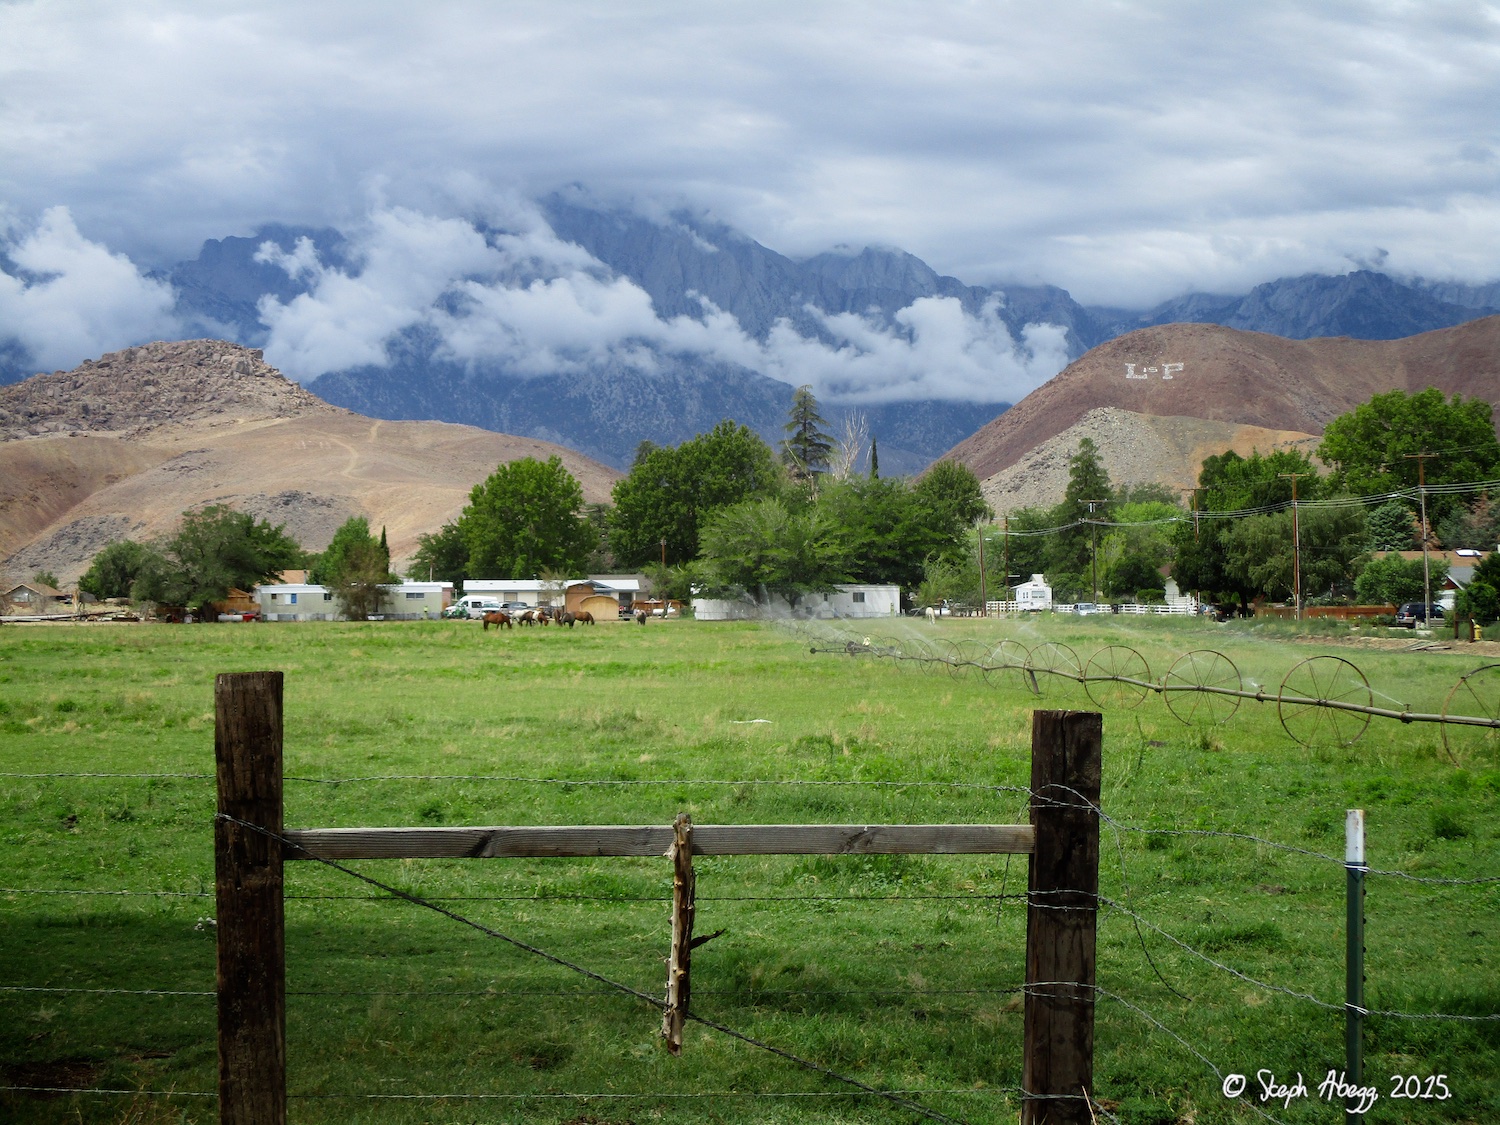
4. The view towards a drizzly Whitney from the town of Lone Pine, while I waited out the weather for nearly a week.
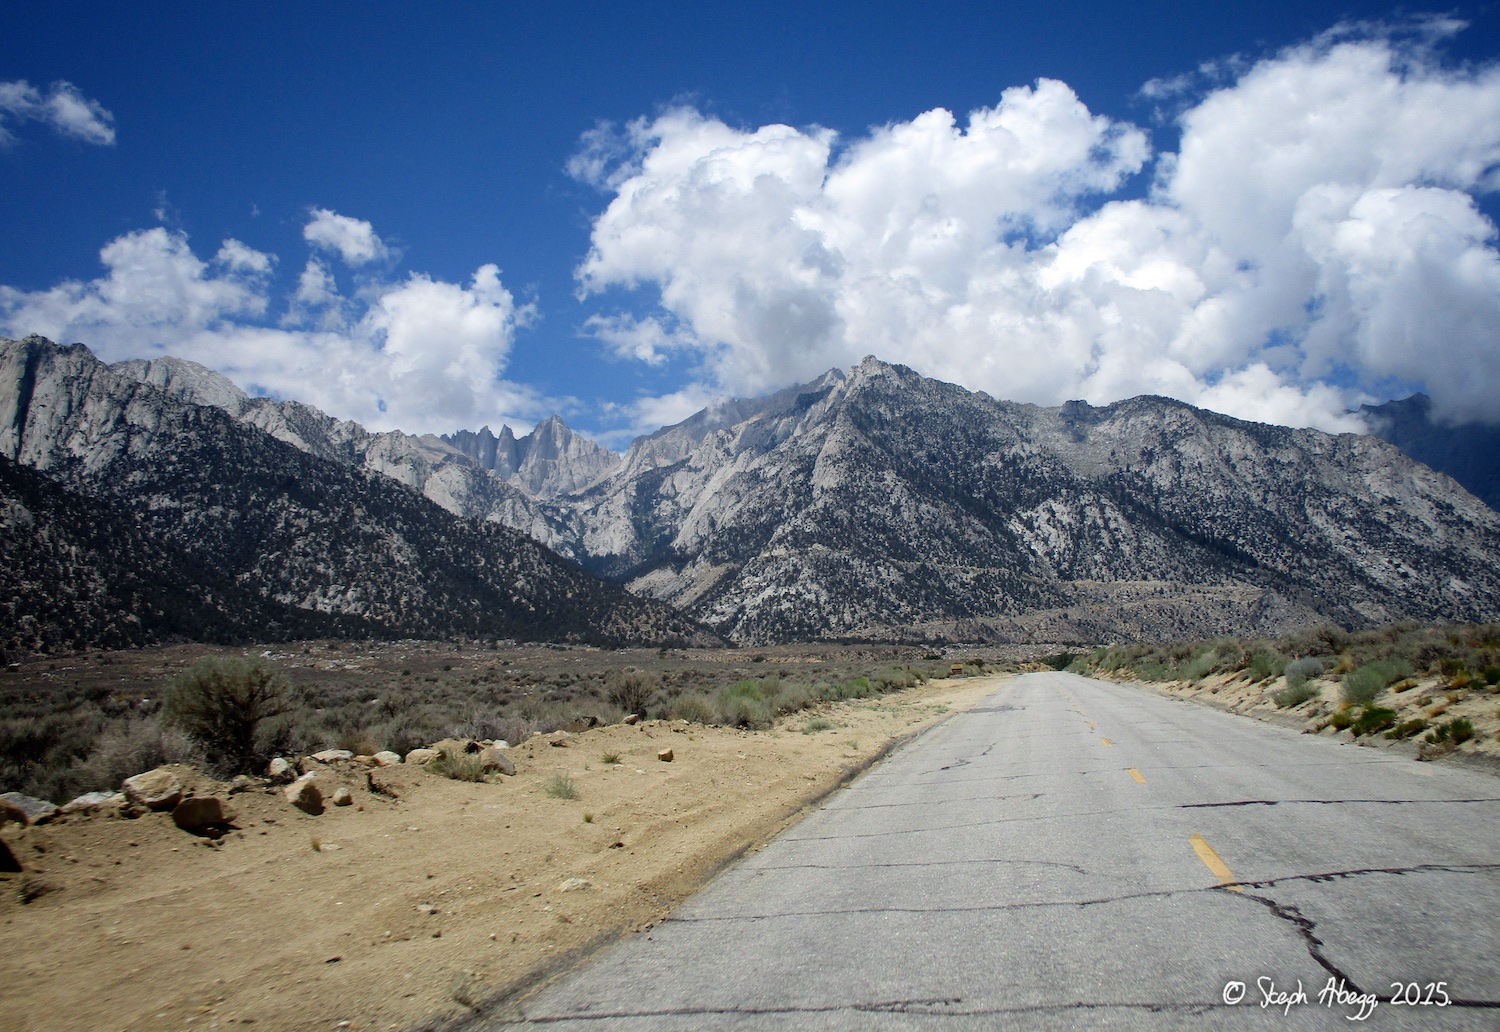
5. On the Whitney Portal Road towards the Whitney trailhead.
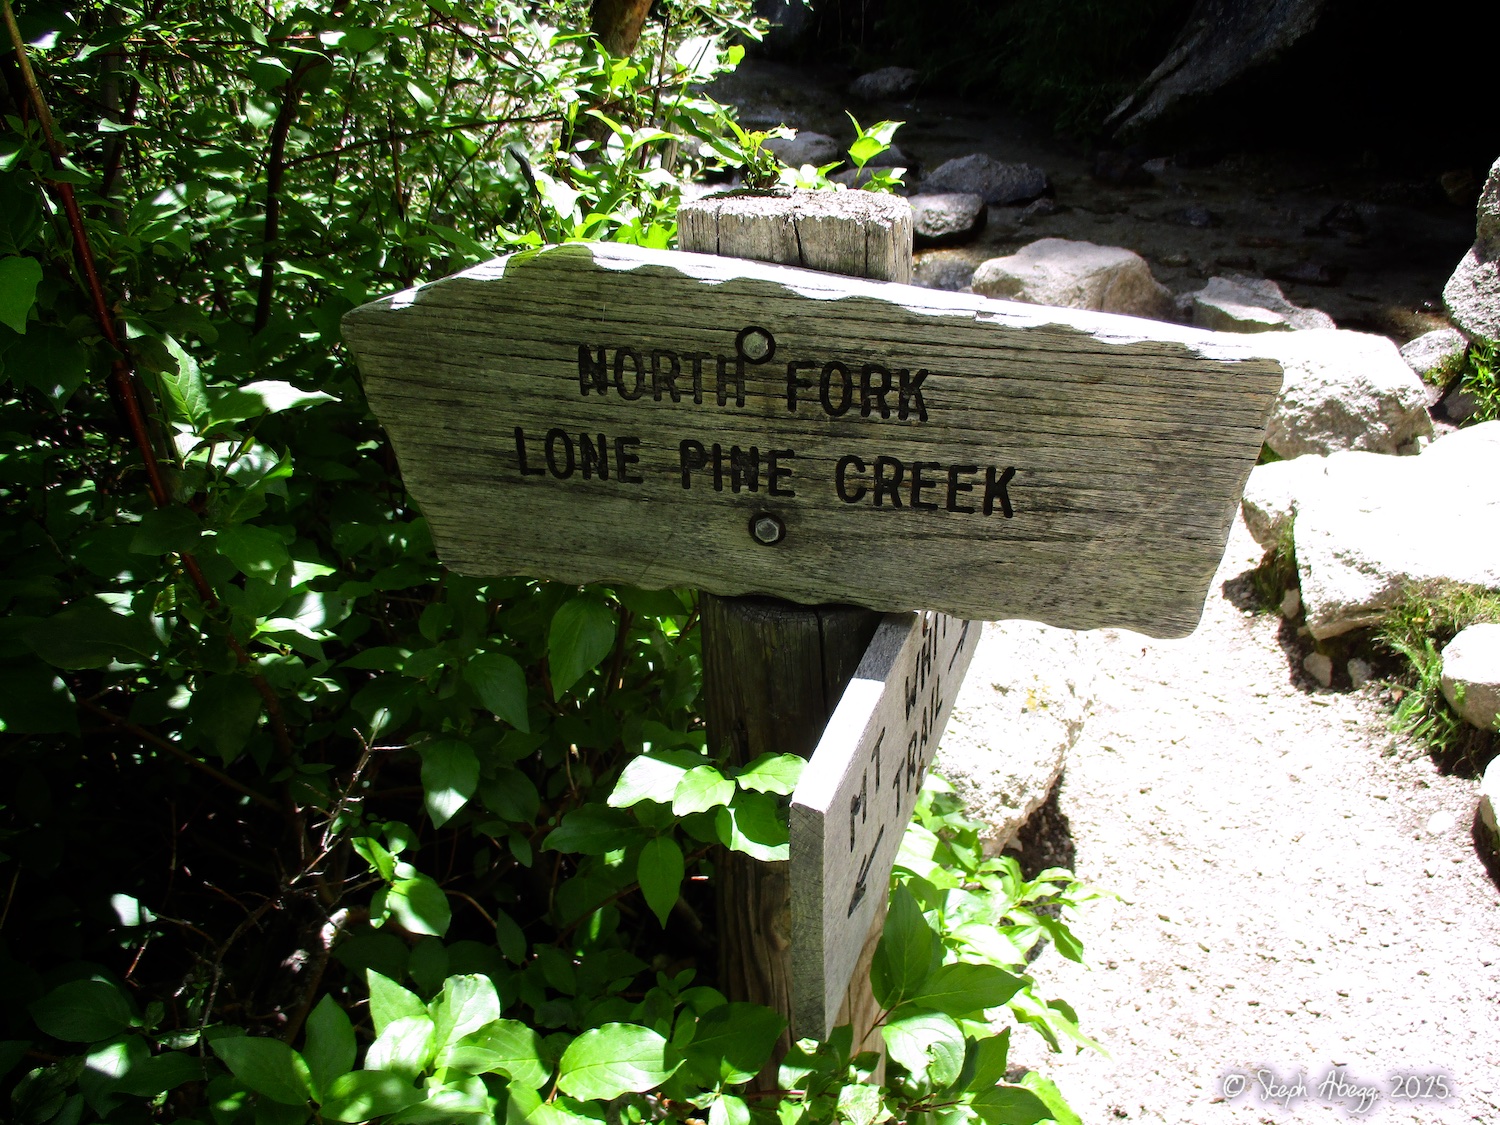
6. The climbers' trail up to Whitney/Russell cuts off just before the main Whitney trail crosses the North Fork of Lone Pine Creek.
7. Ebersbacher Ledges on the trail to Whitney/Russell along North Fork of Lone Pine Creek. This section zig-zags right and then back left up 3rd class. It's pretty well-travelled and marked by cairns.
8. The view up towards Day Needle, Keeler Needle, and Mt. Whitney from Lower Boy Scout Lake.
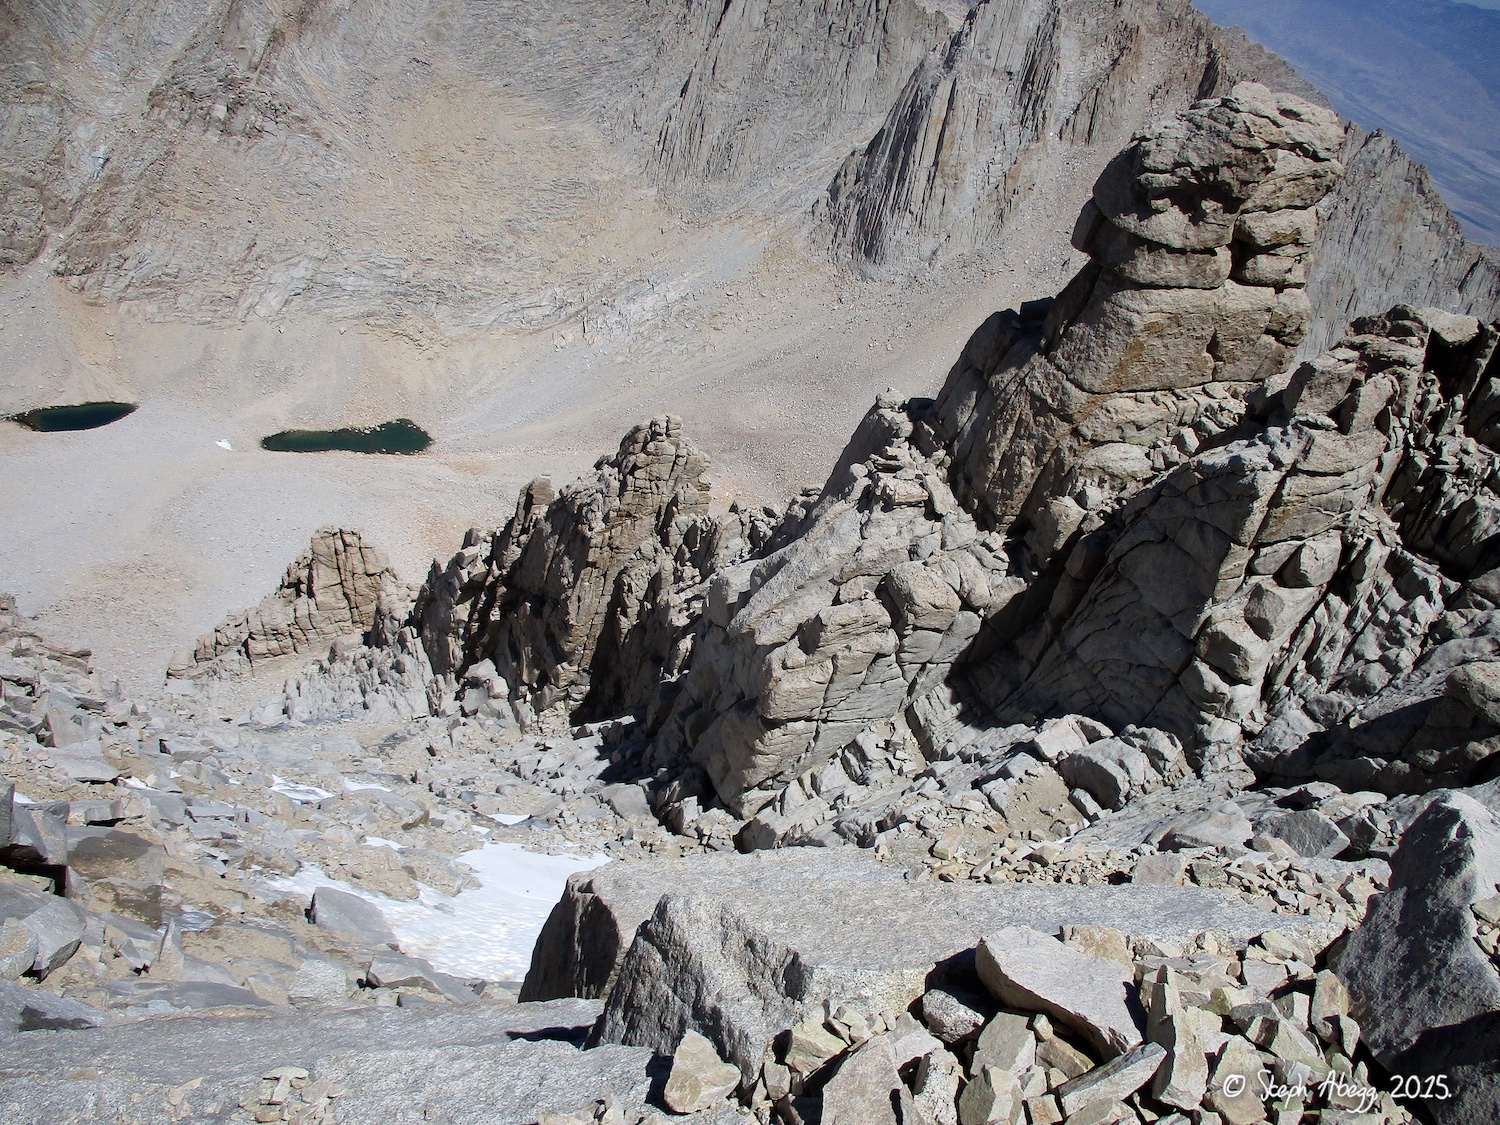
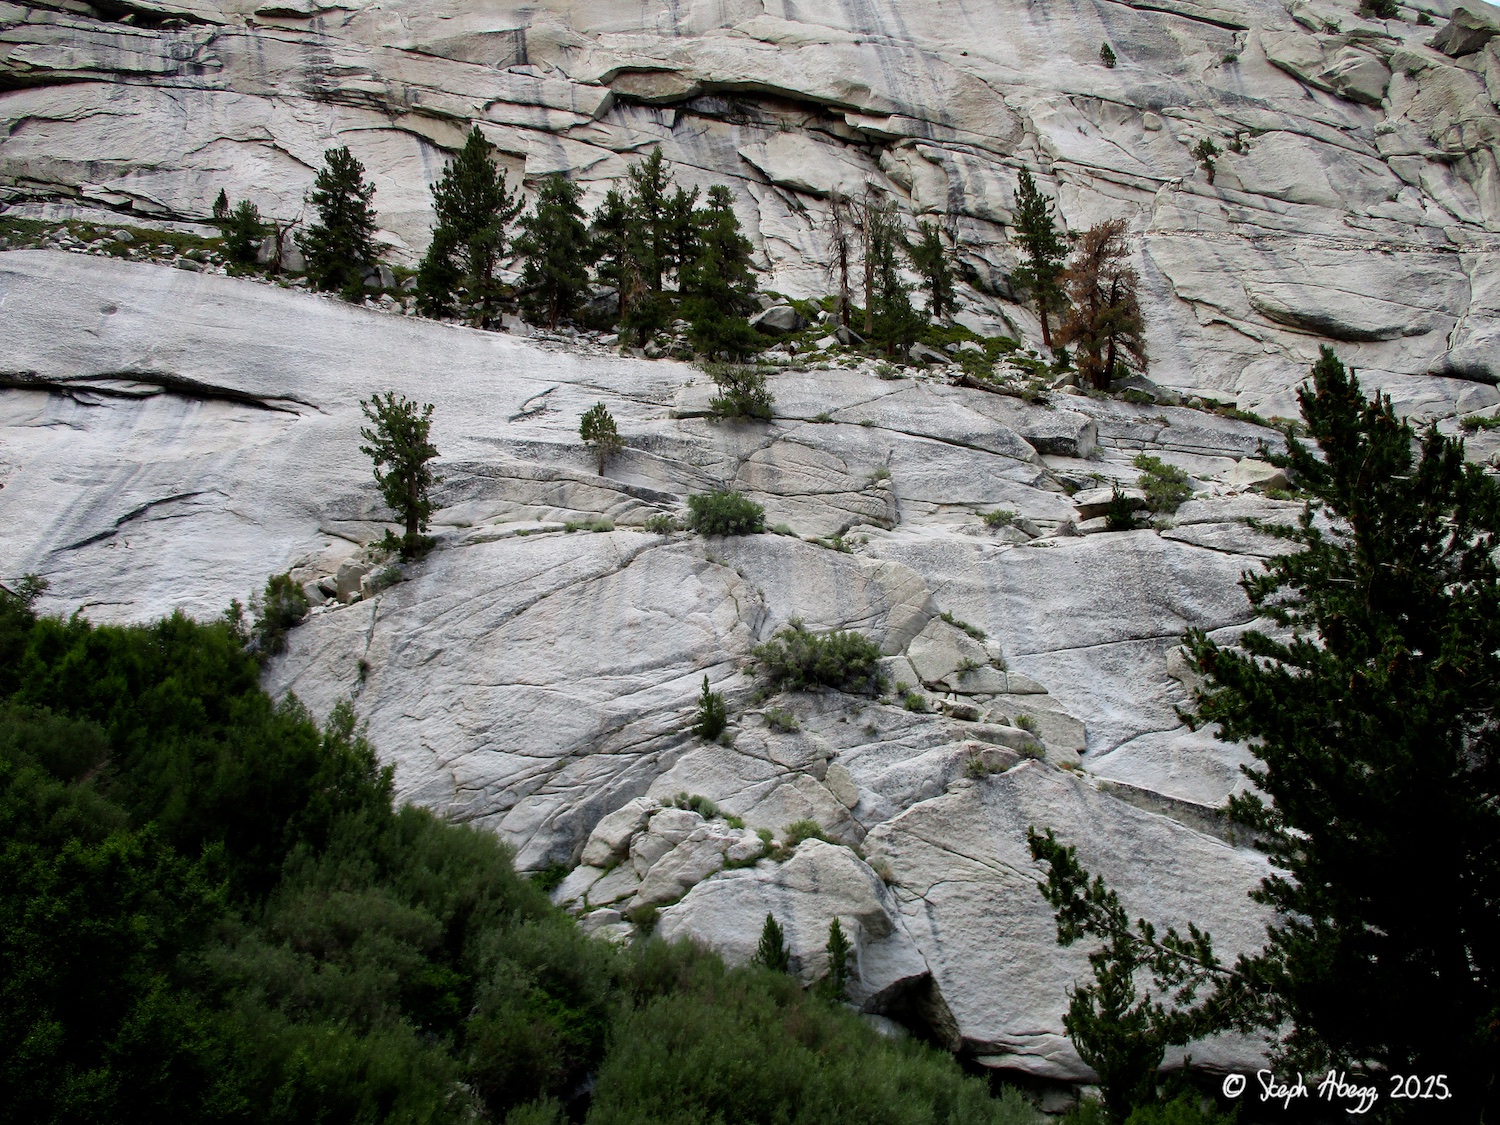
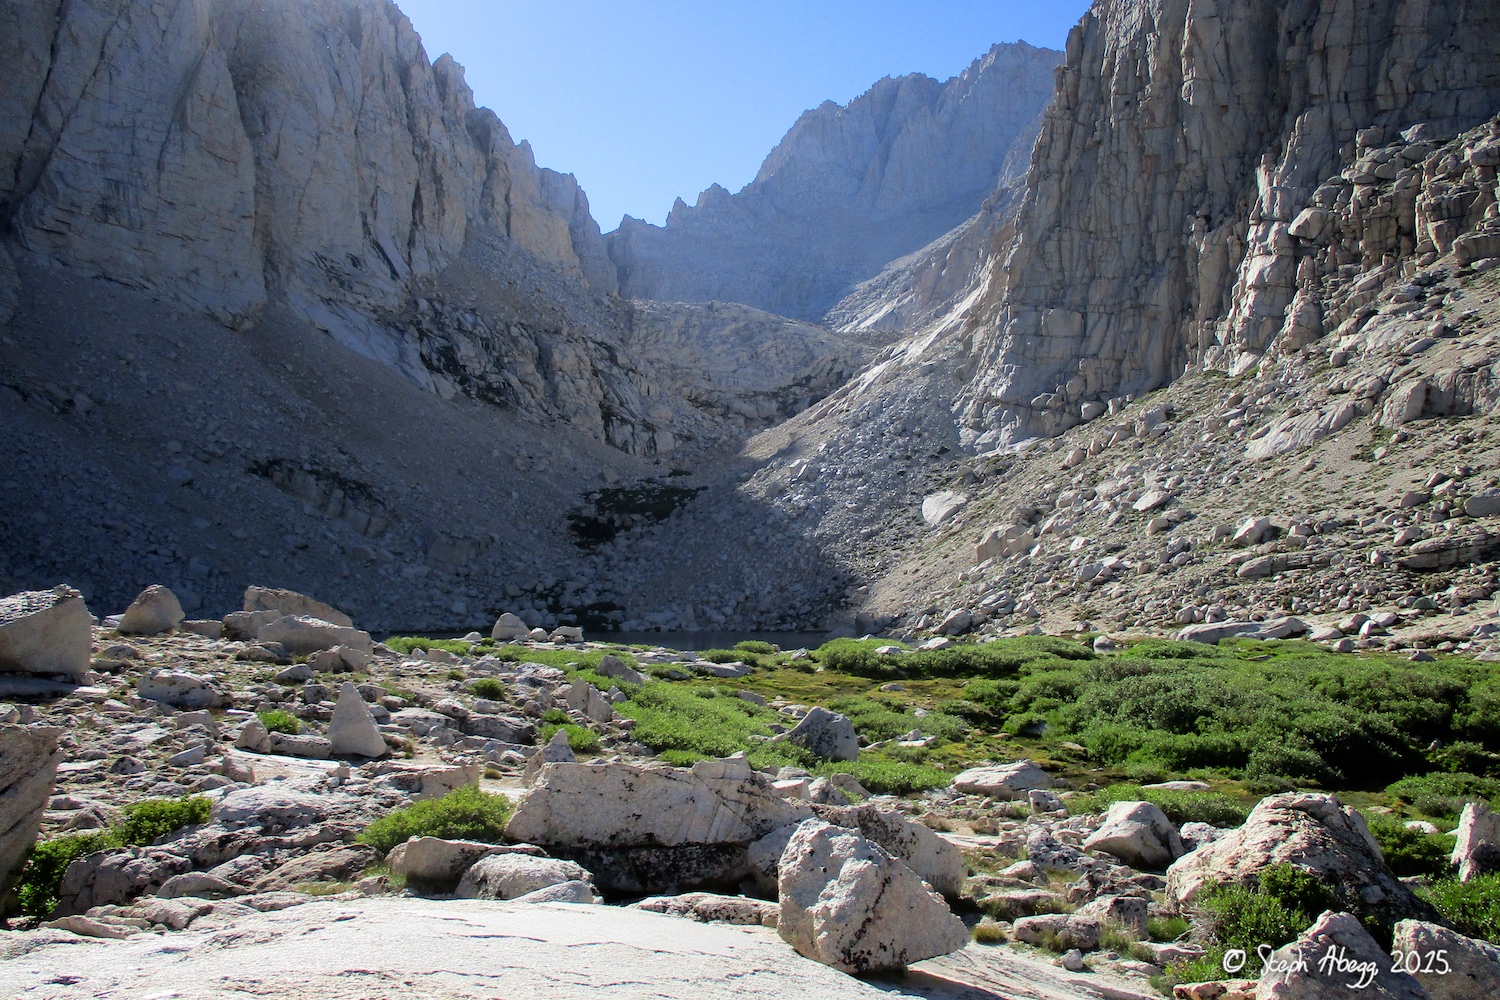
9. The slabs just before getting to Upper Boy Scout Lake. 10. Upper Boy Scout Lake.
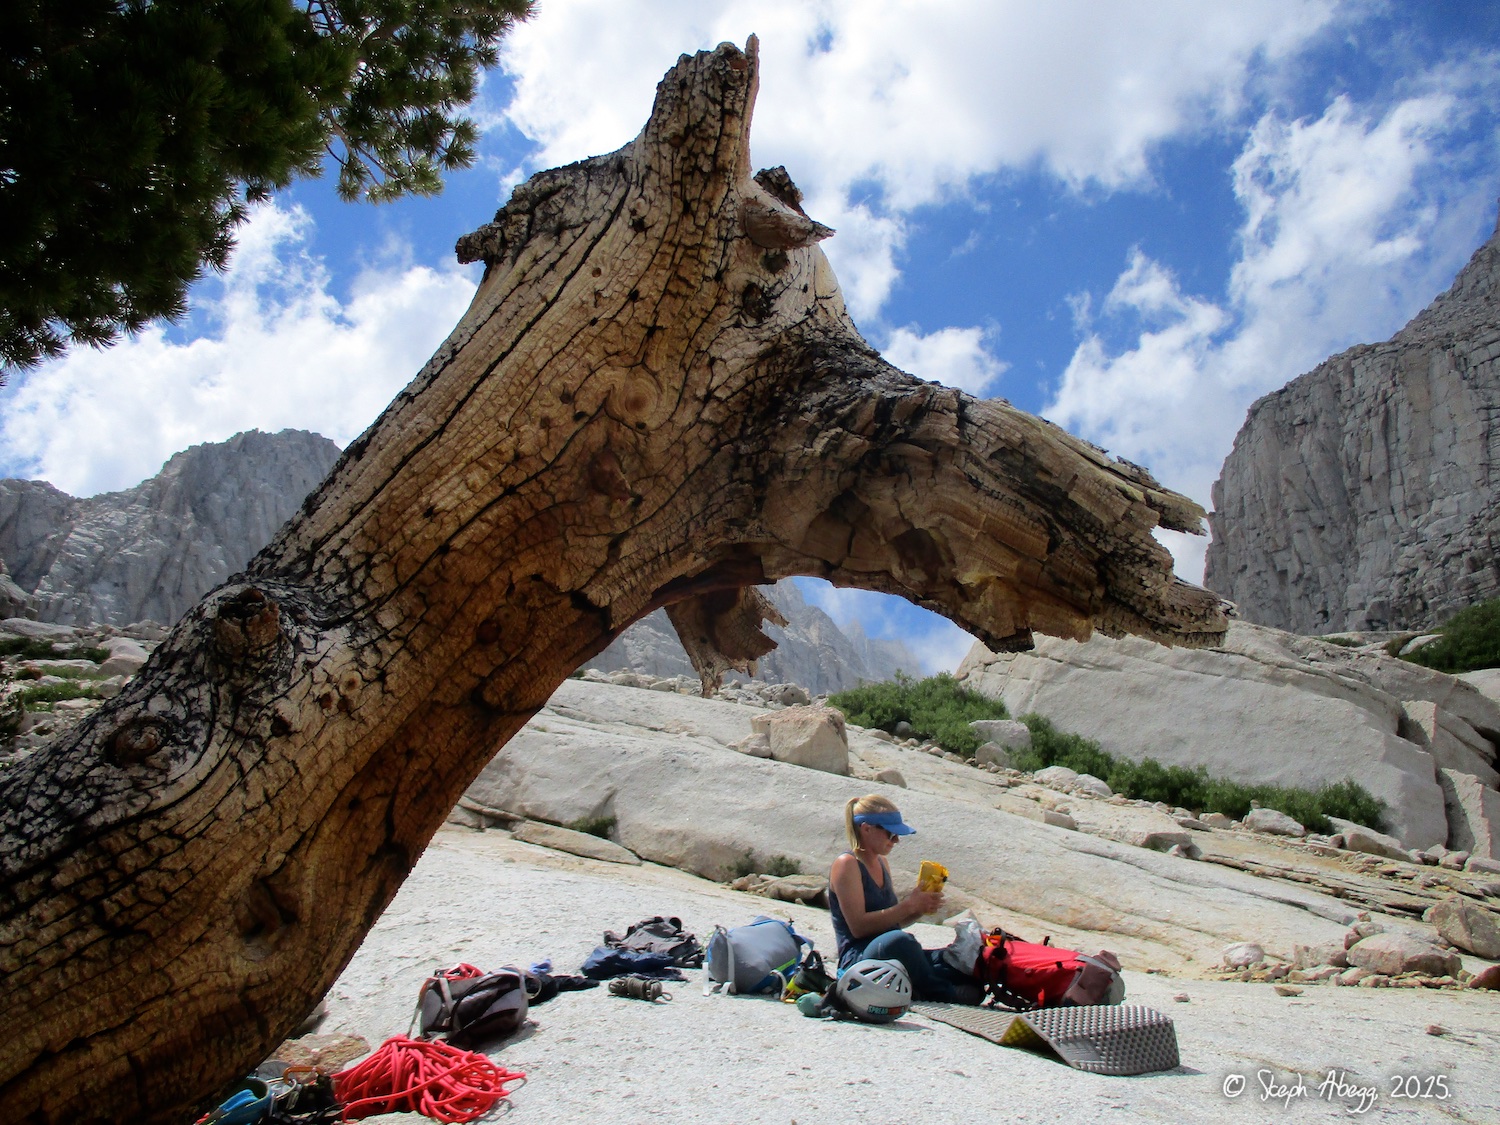
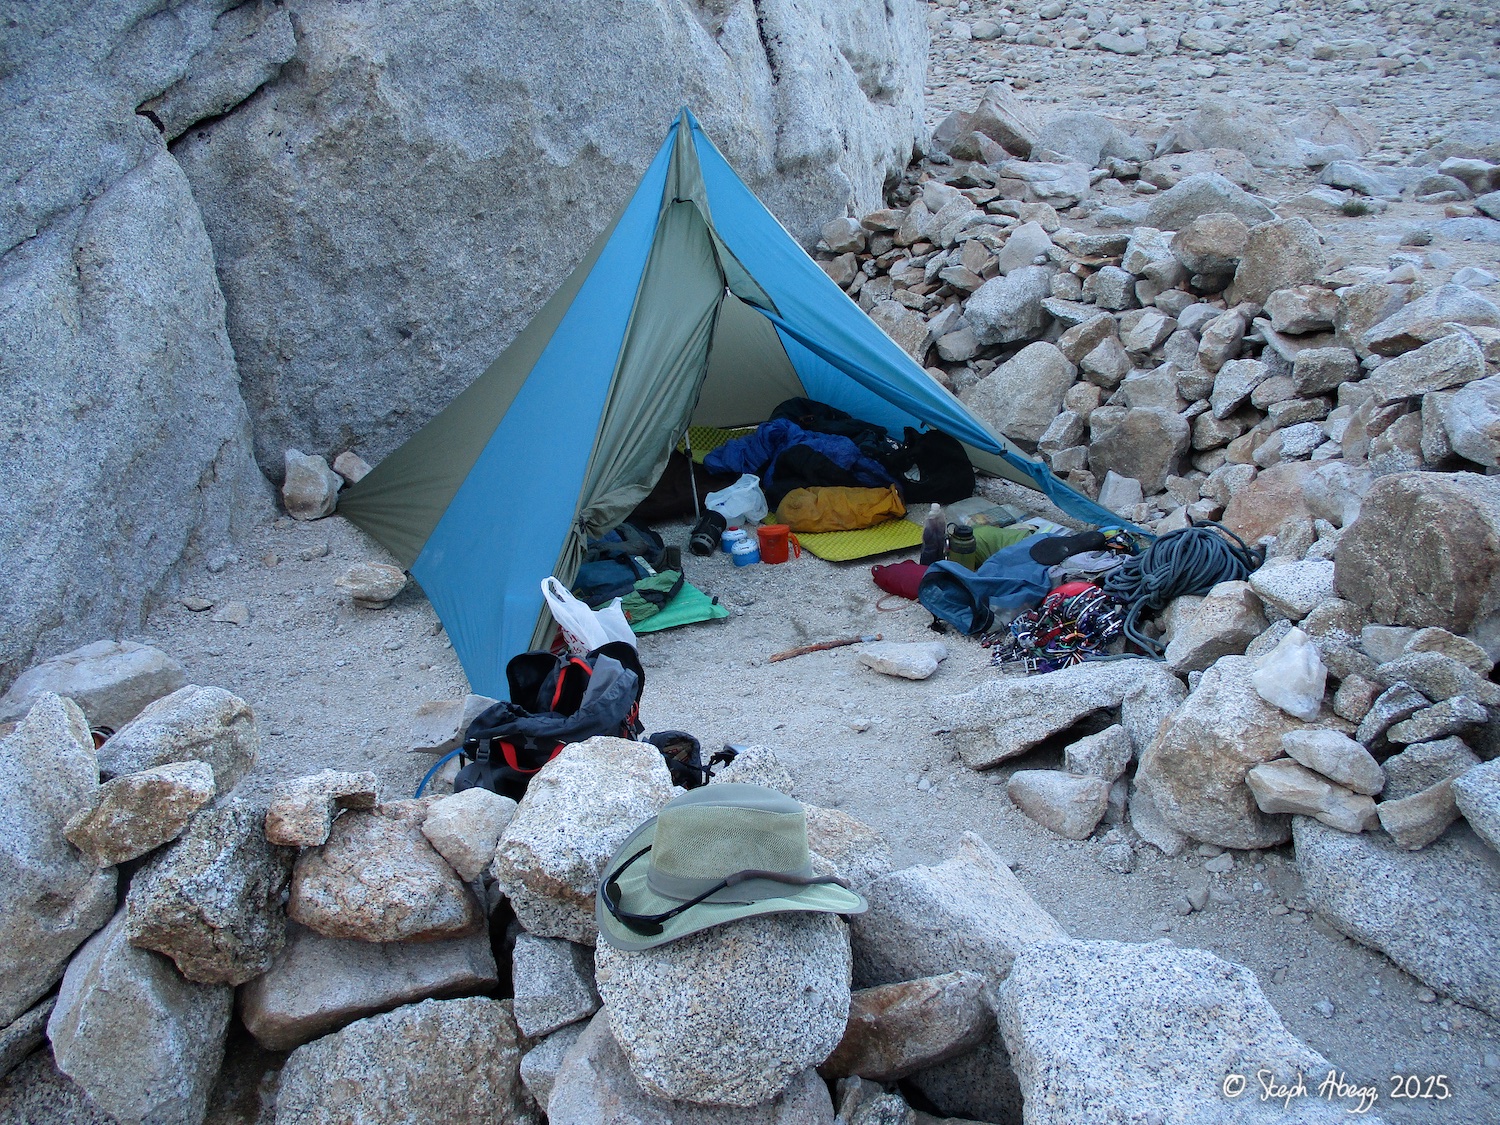
11. Meg and I camped in a stand of trees at Upper Boy Scout Lake. We had initially planned on camping at Iceberg Lake, but just as we arrived at Upper Boy Scout Lake it started to hail and we scrambled to quickly set up a tent to keep our stuff dry. 12. A stump at our camp just below Upper Boy Scout Lake that we affectionately named "Larry the Llama".
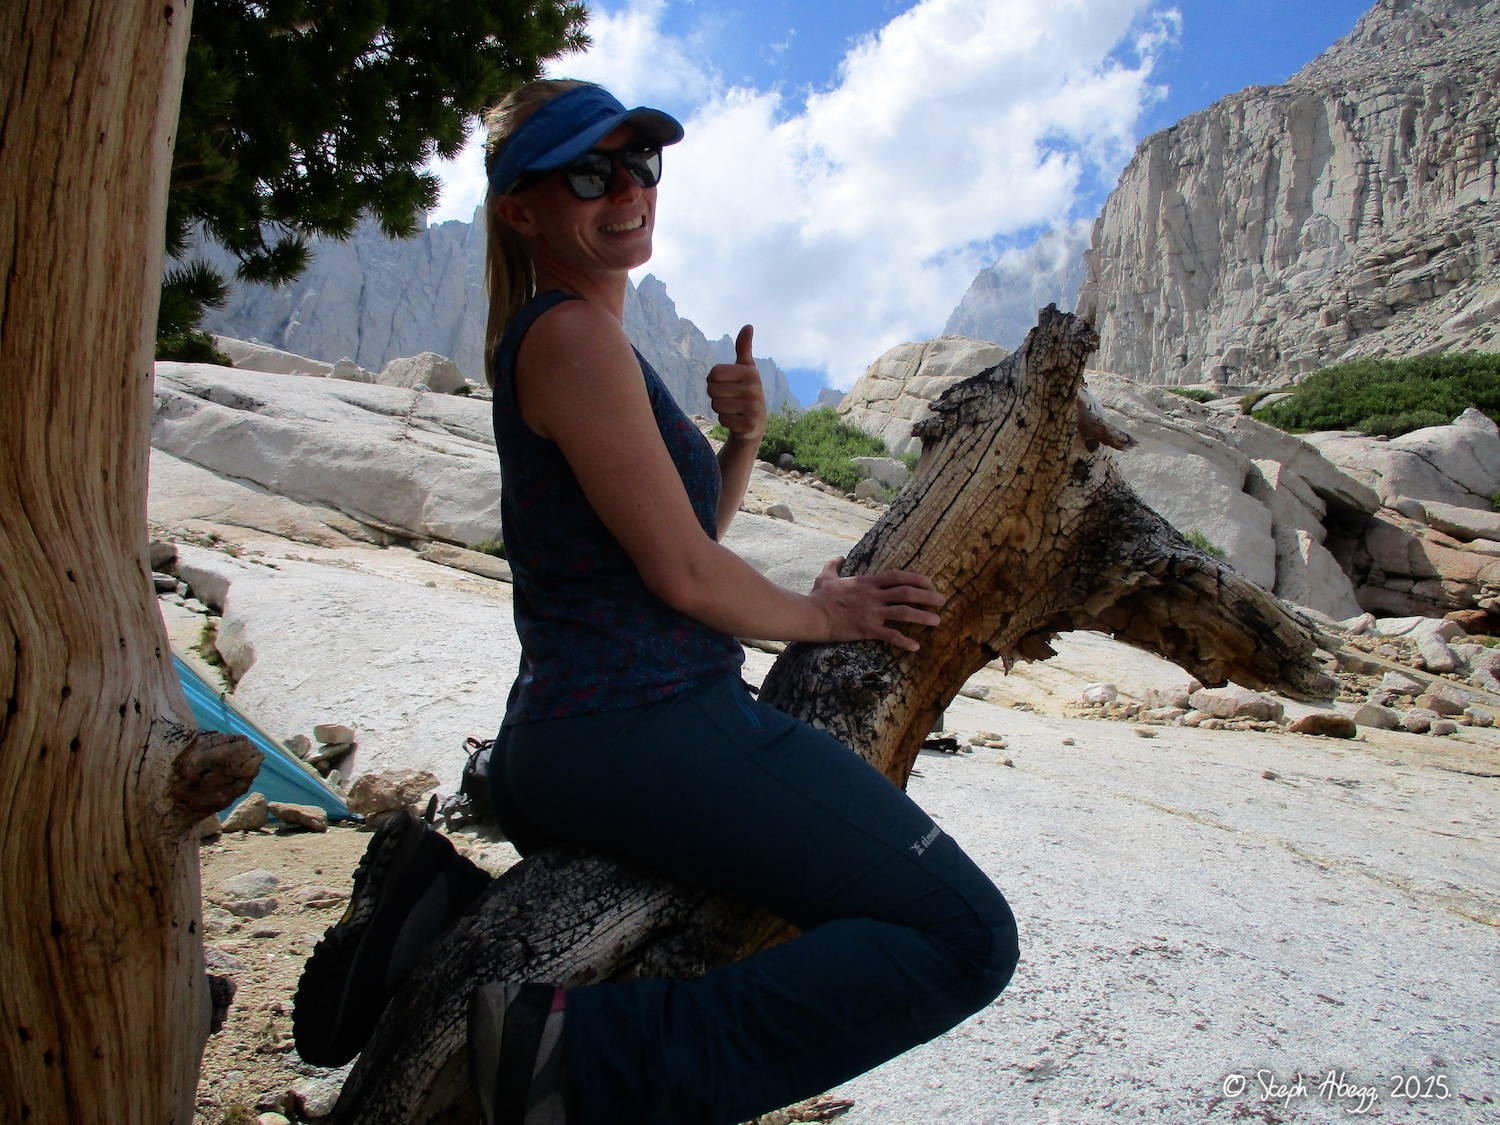
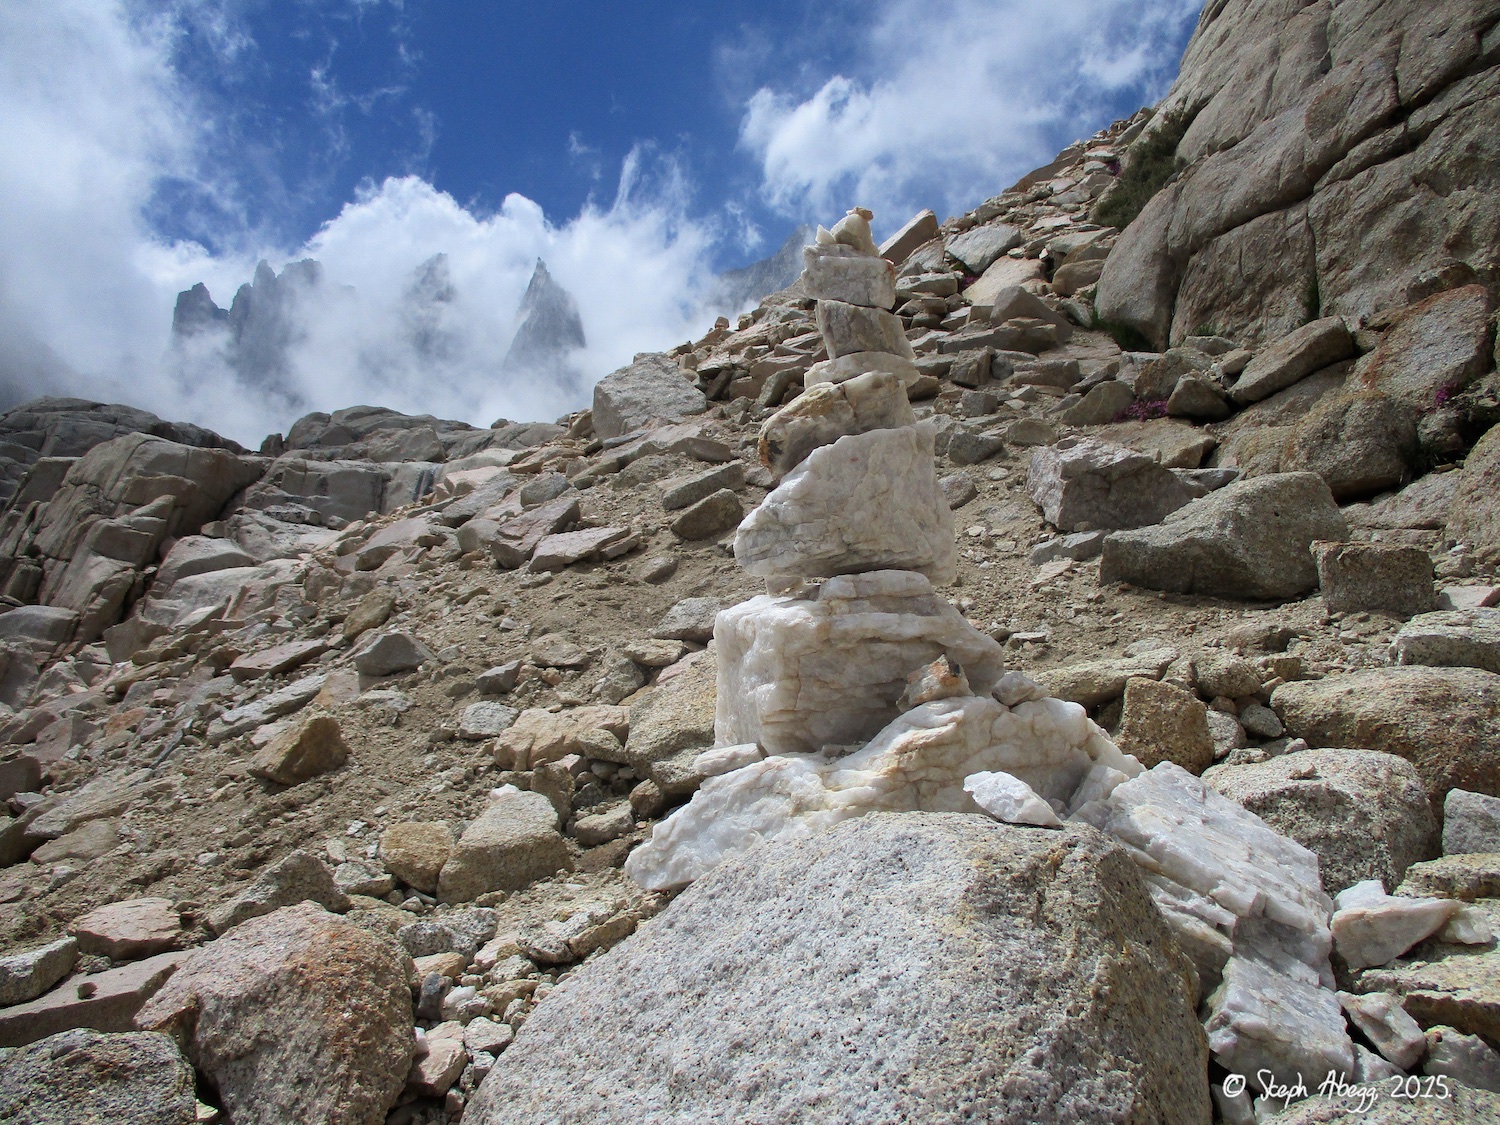
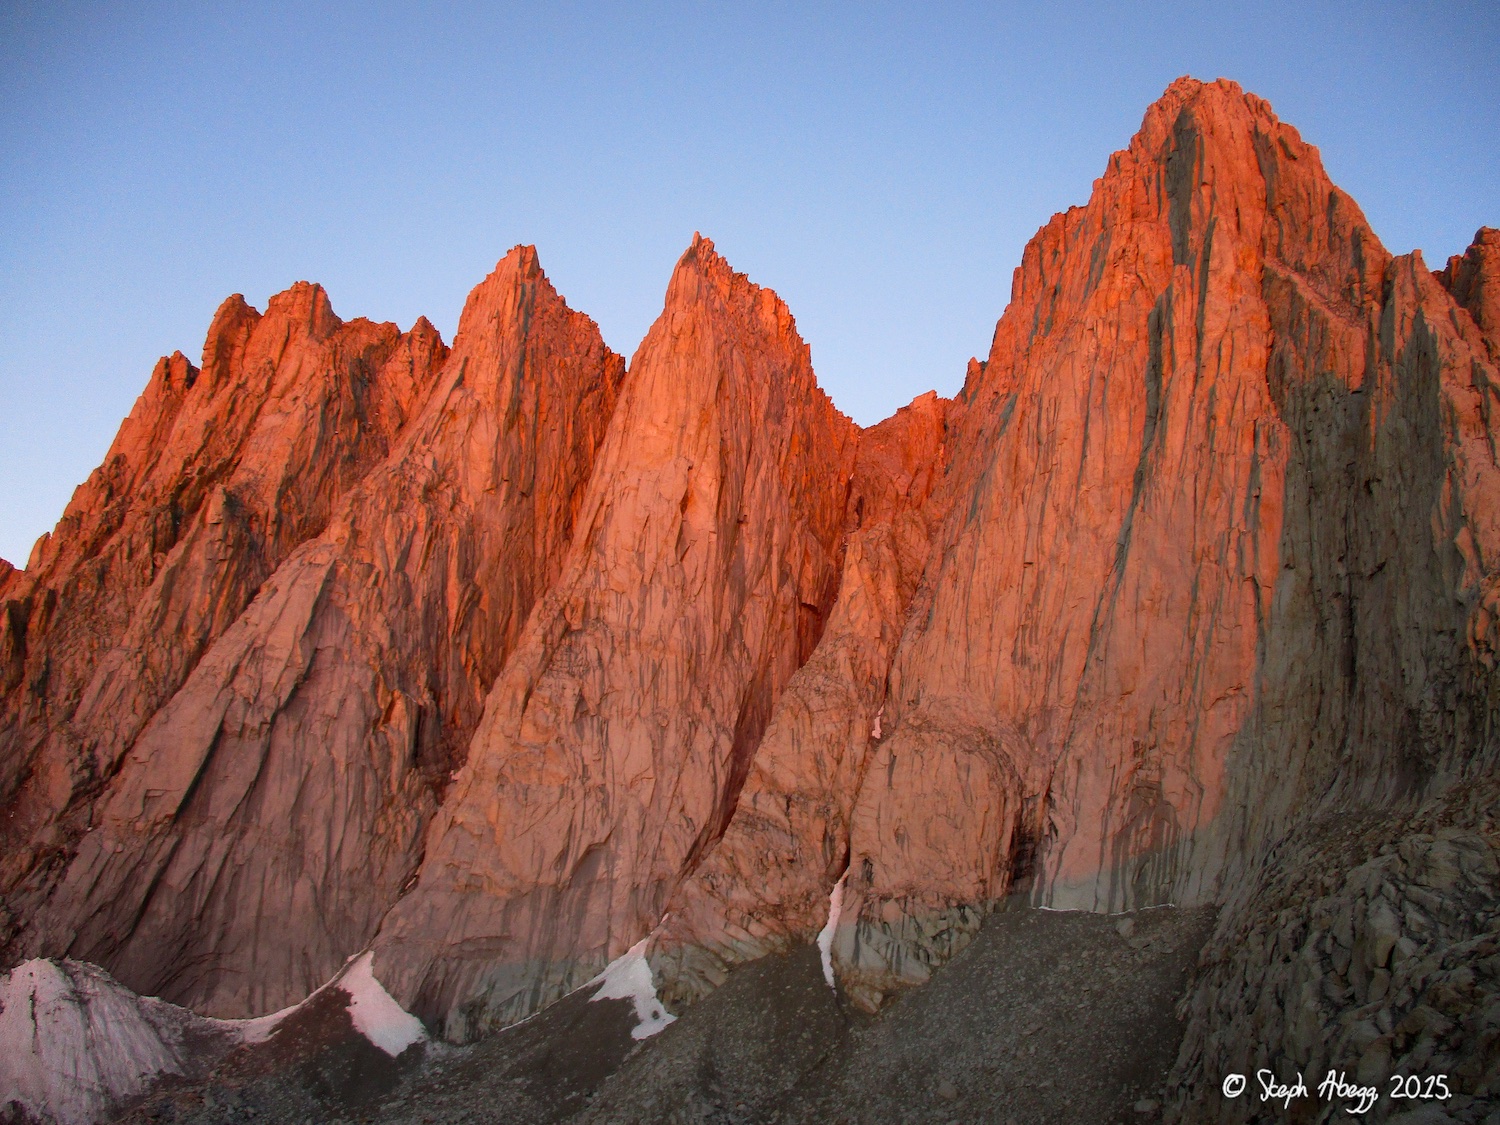
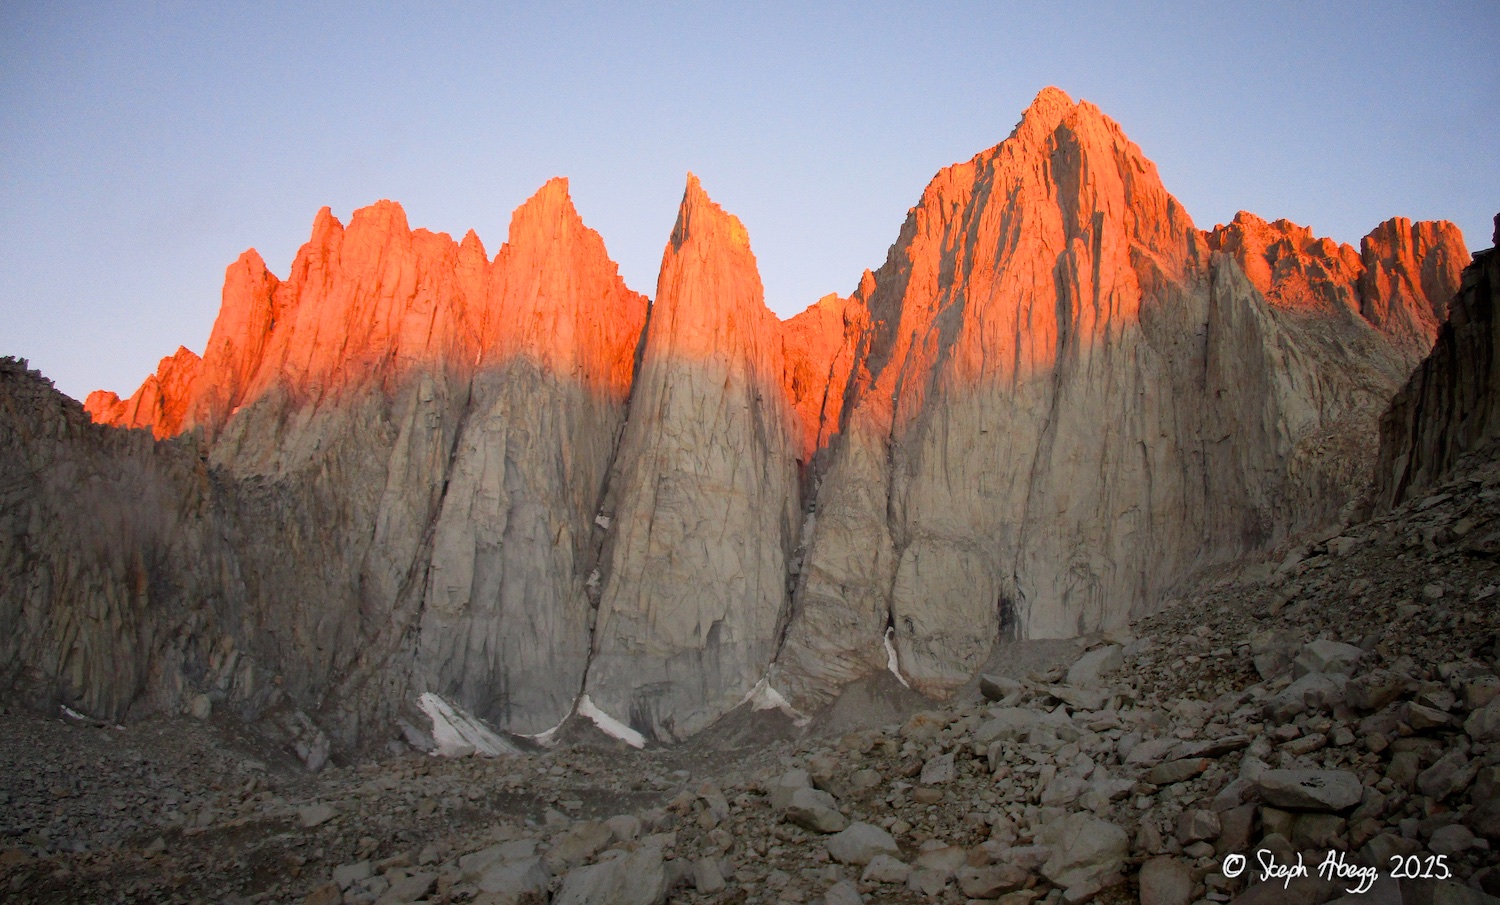
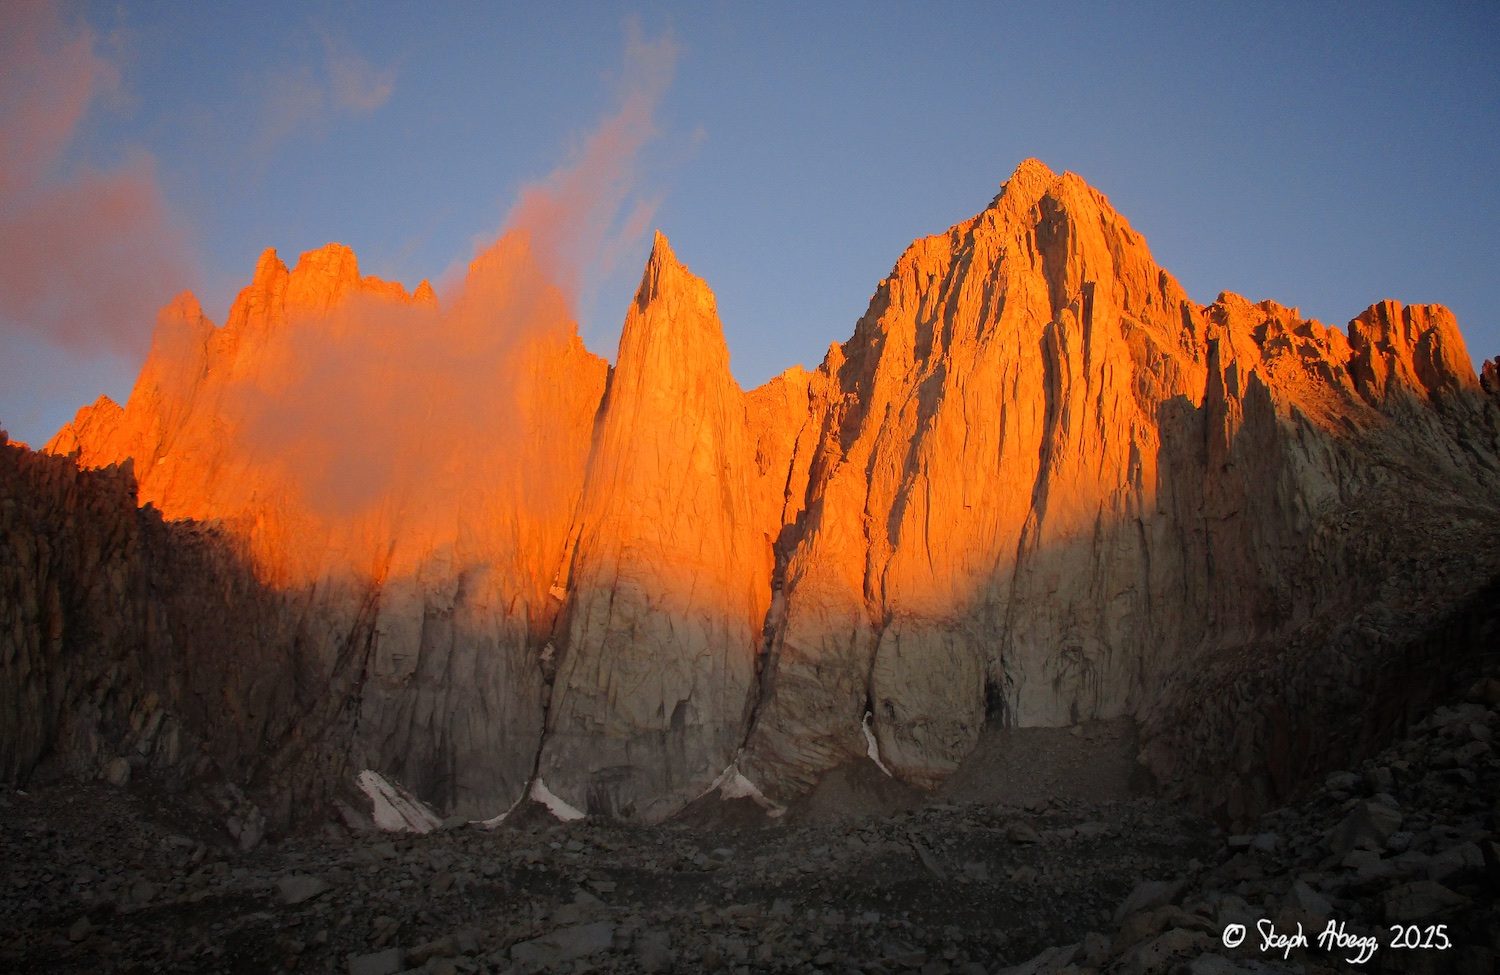
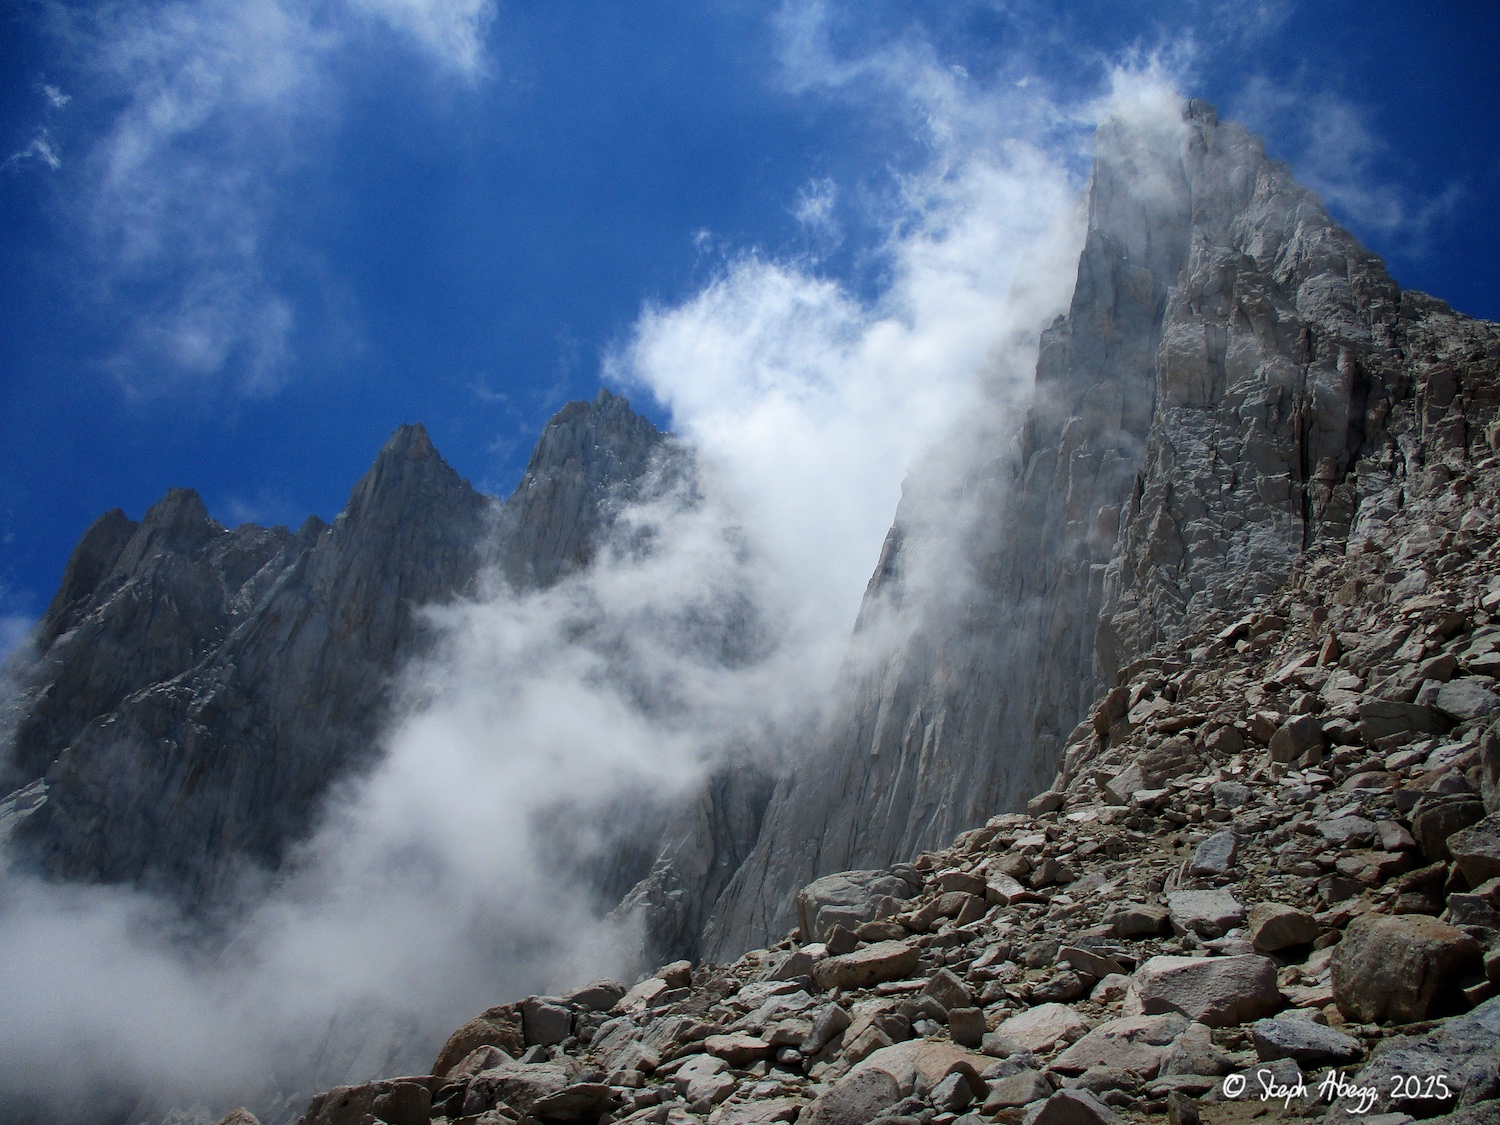
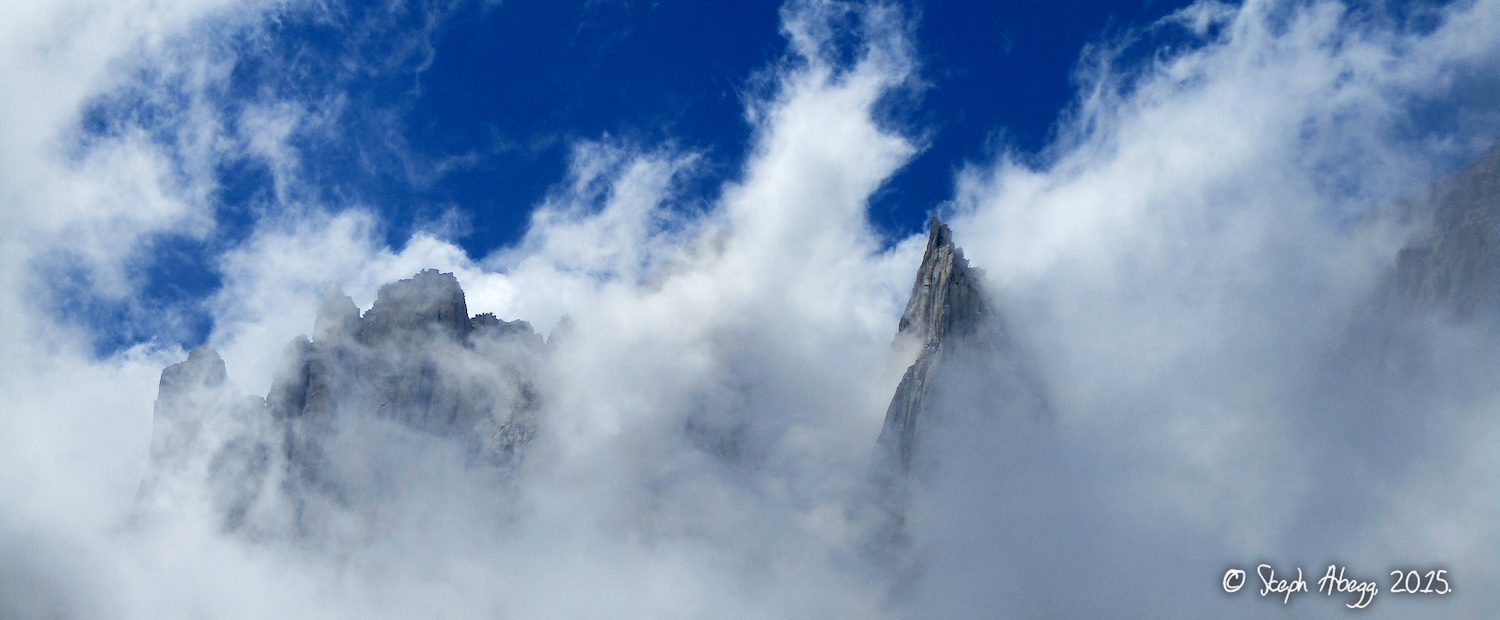
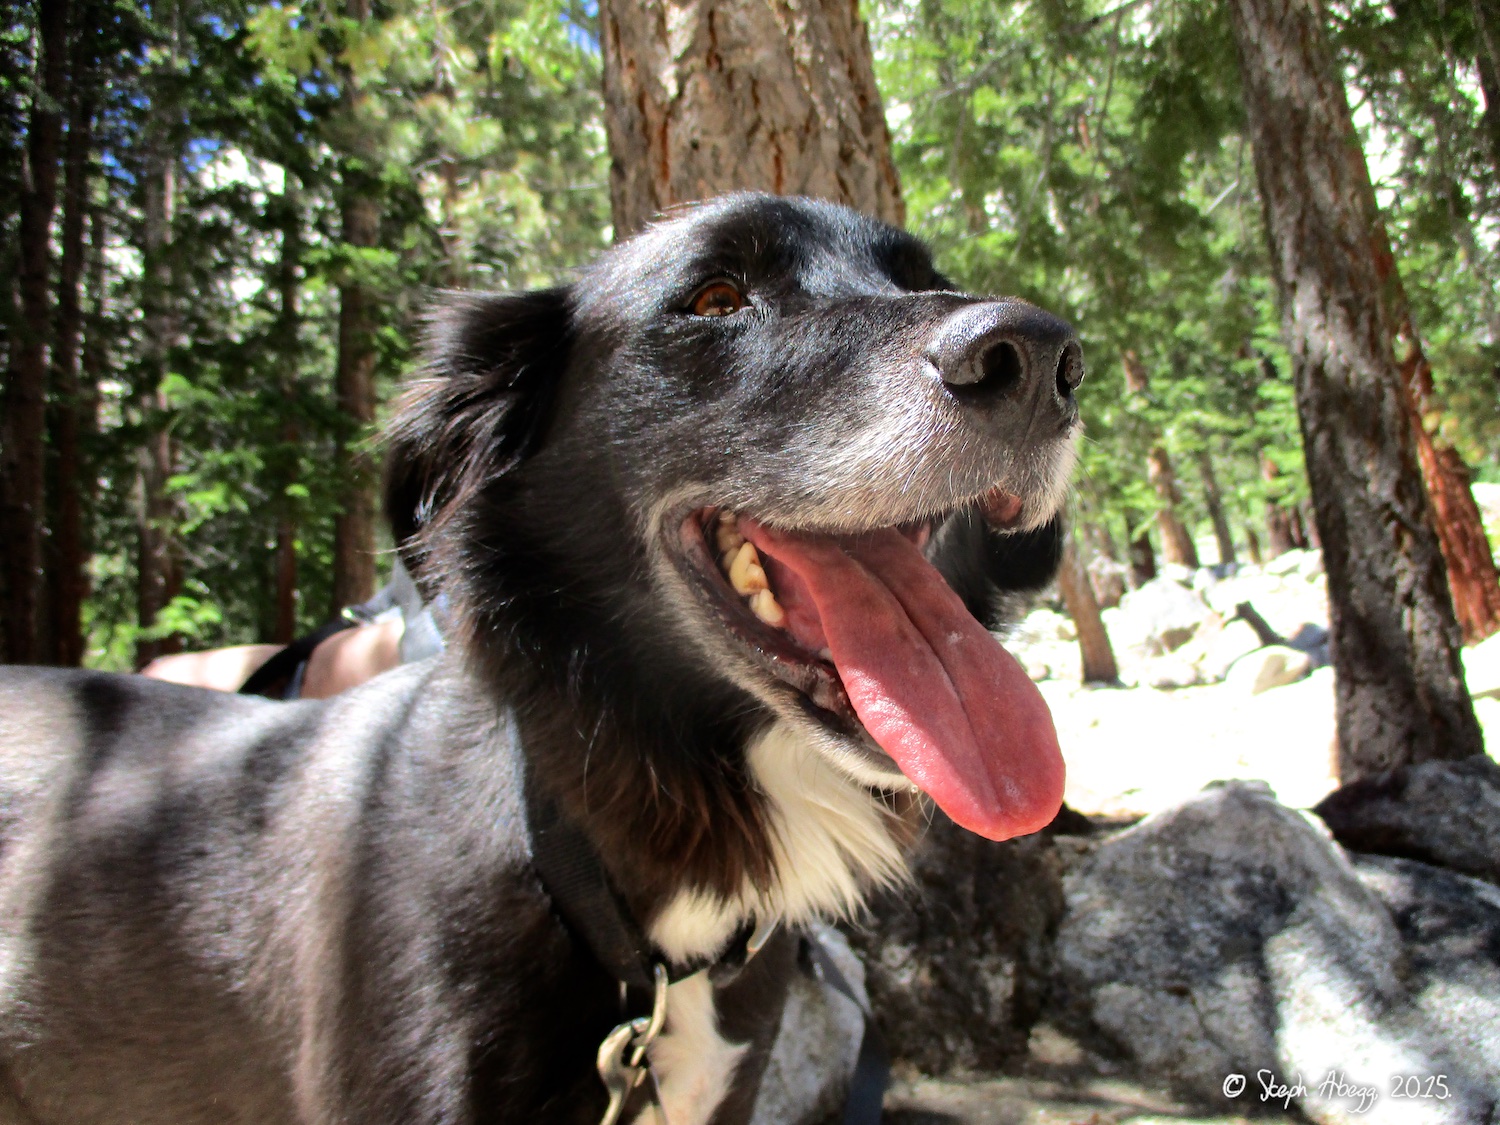
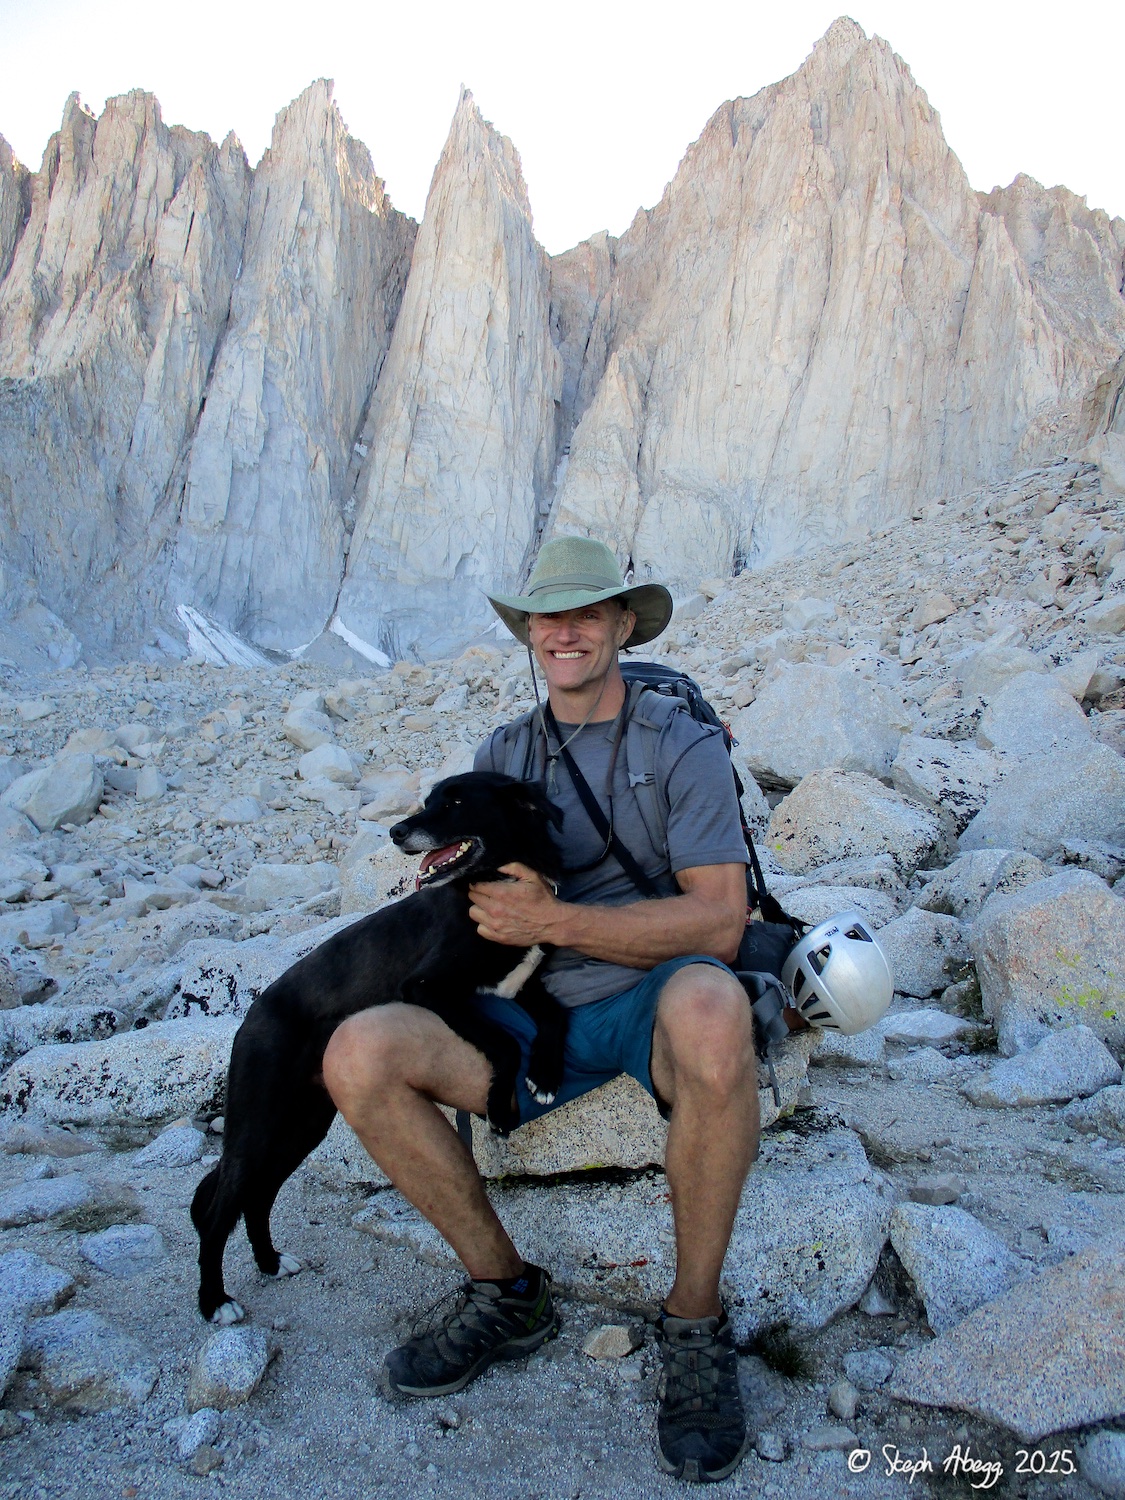
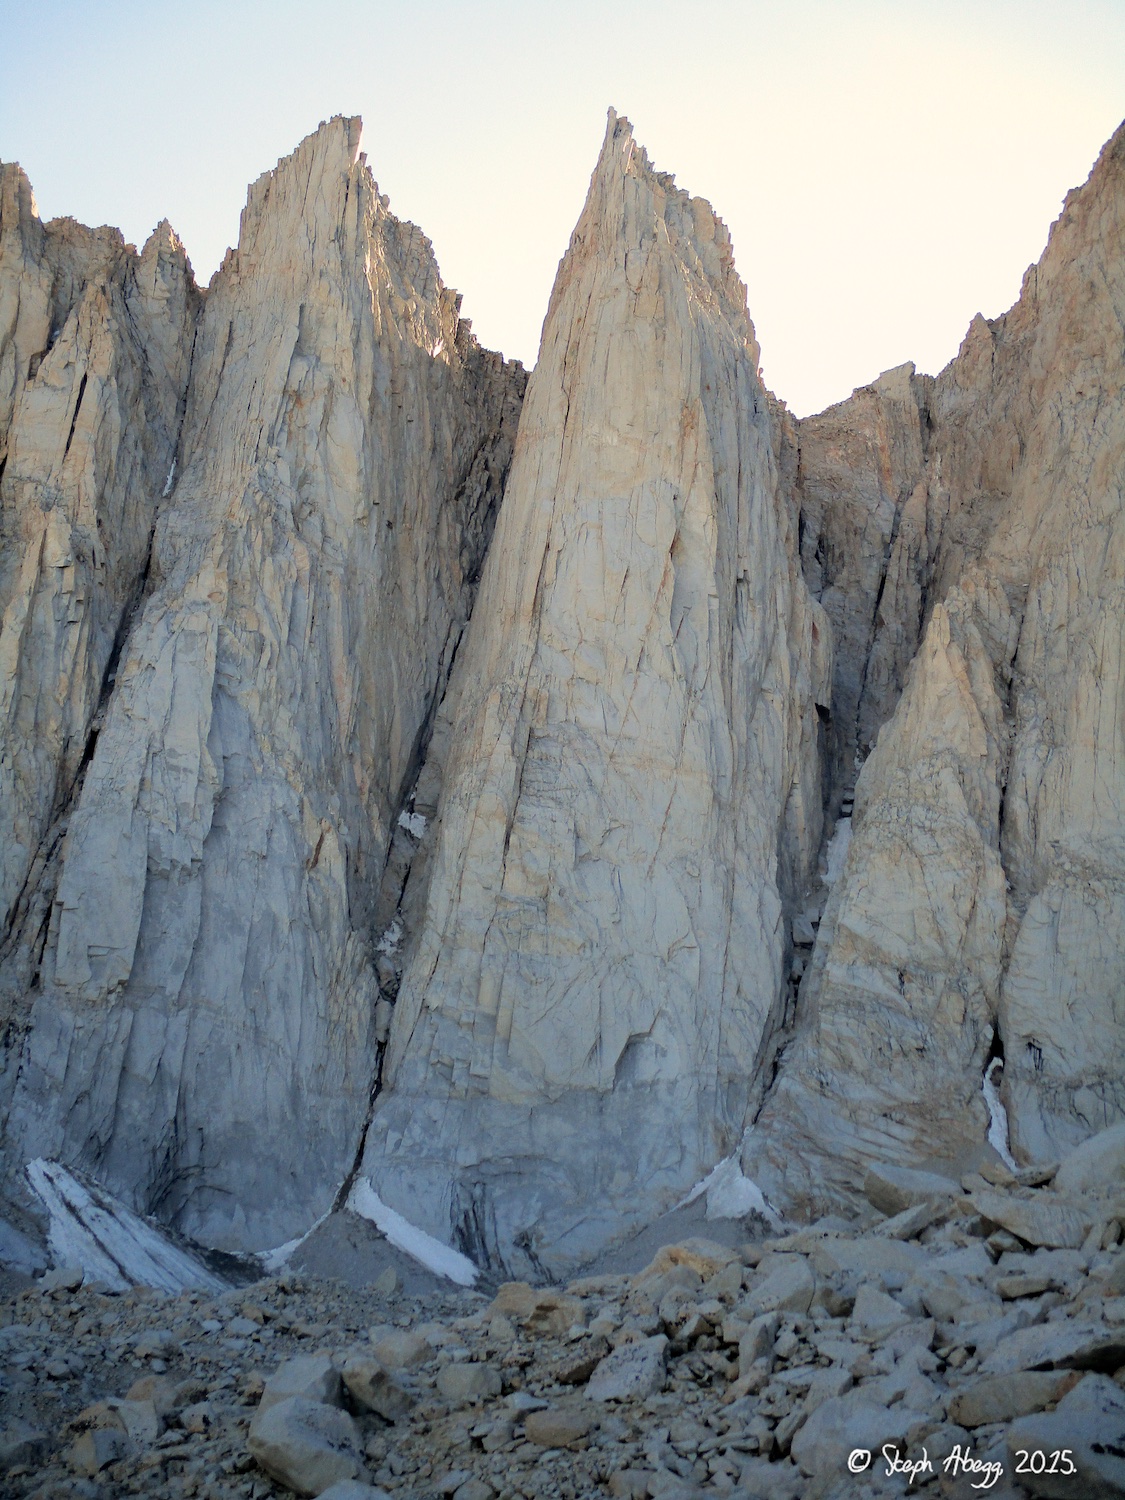
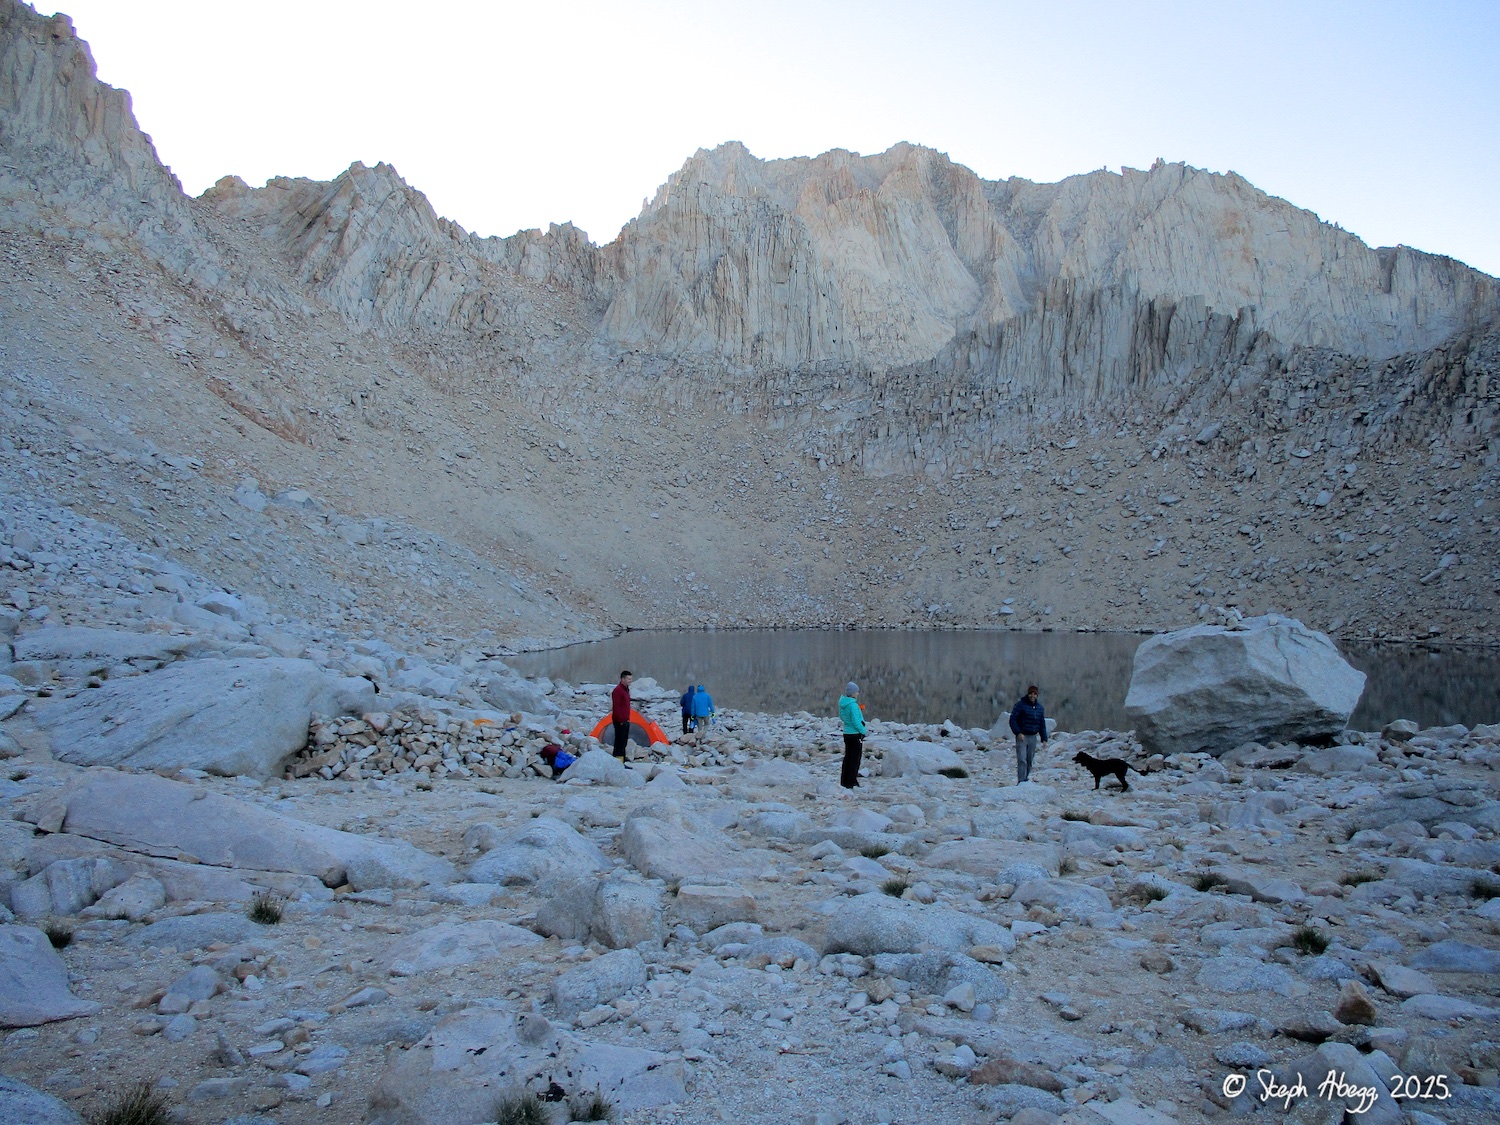
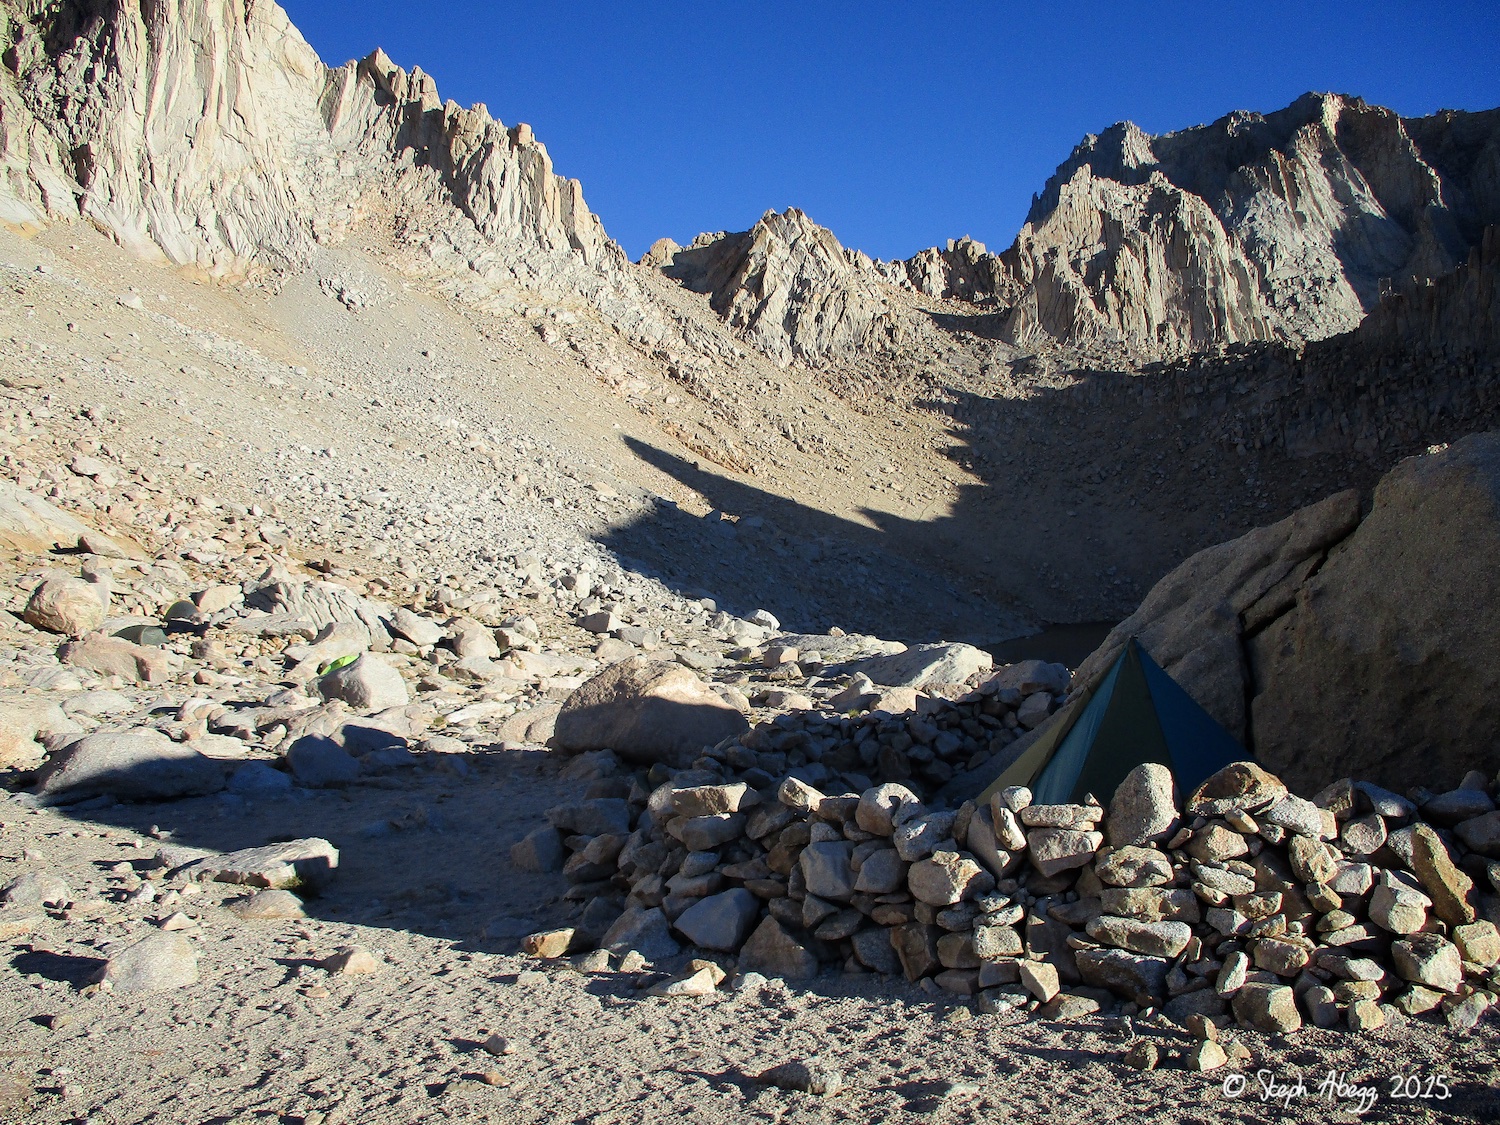
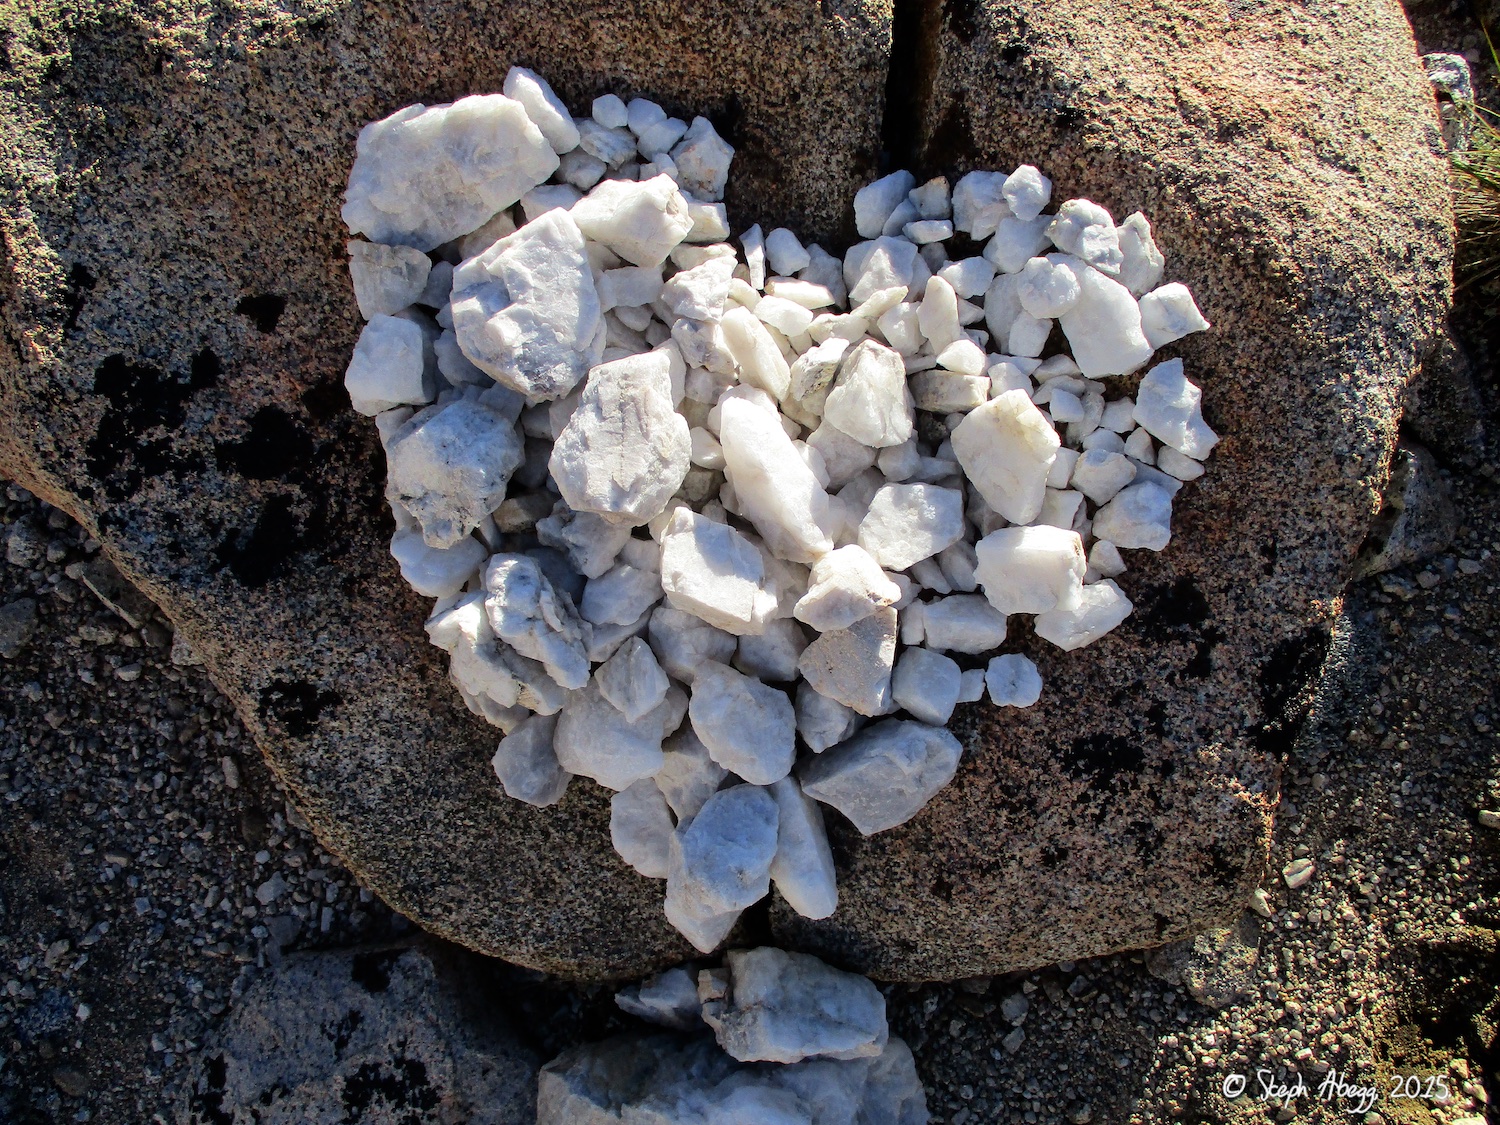
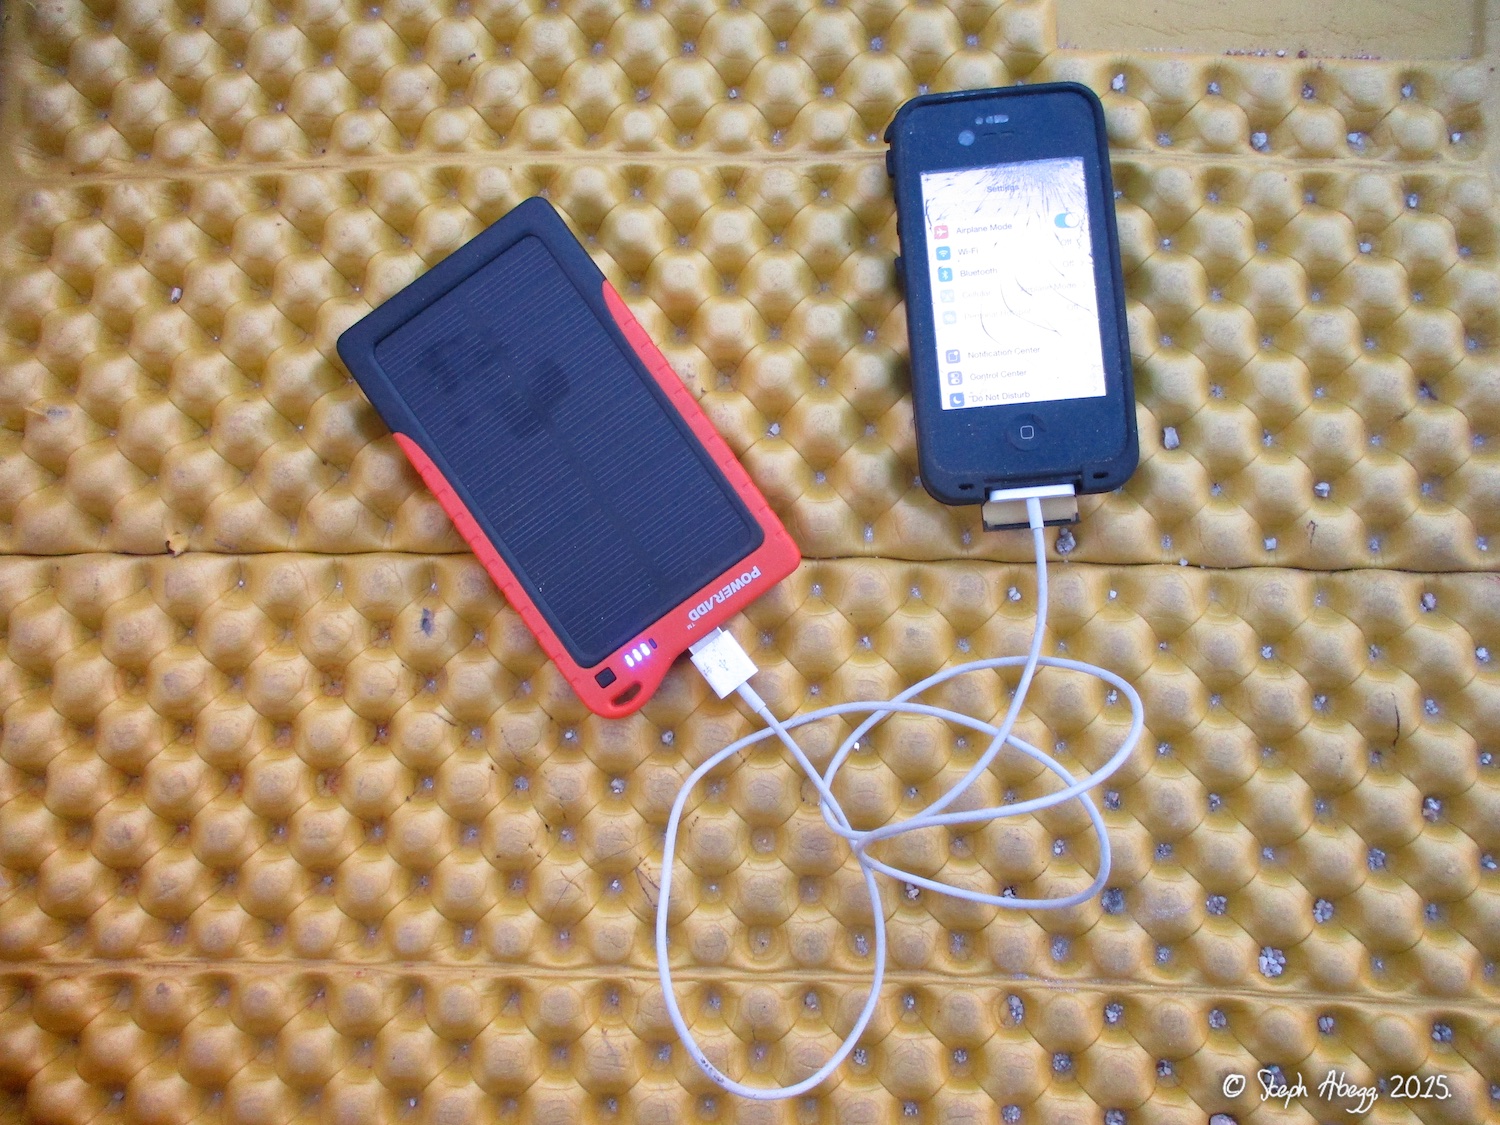
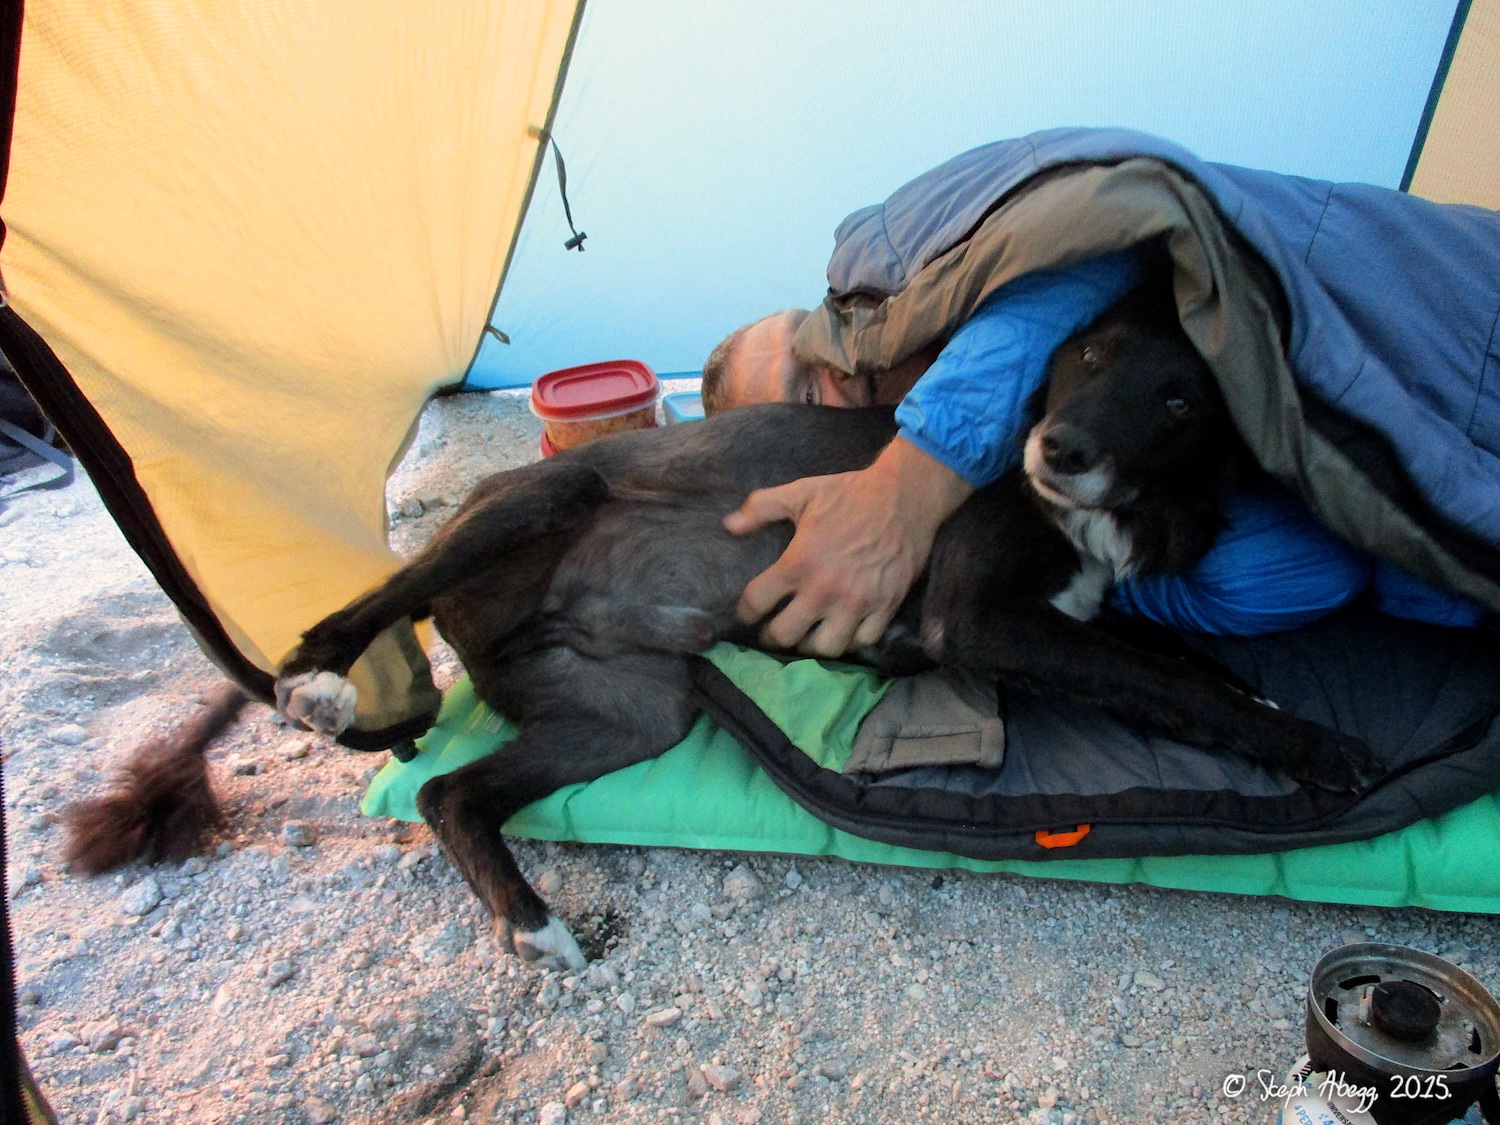
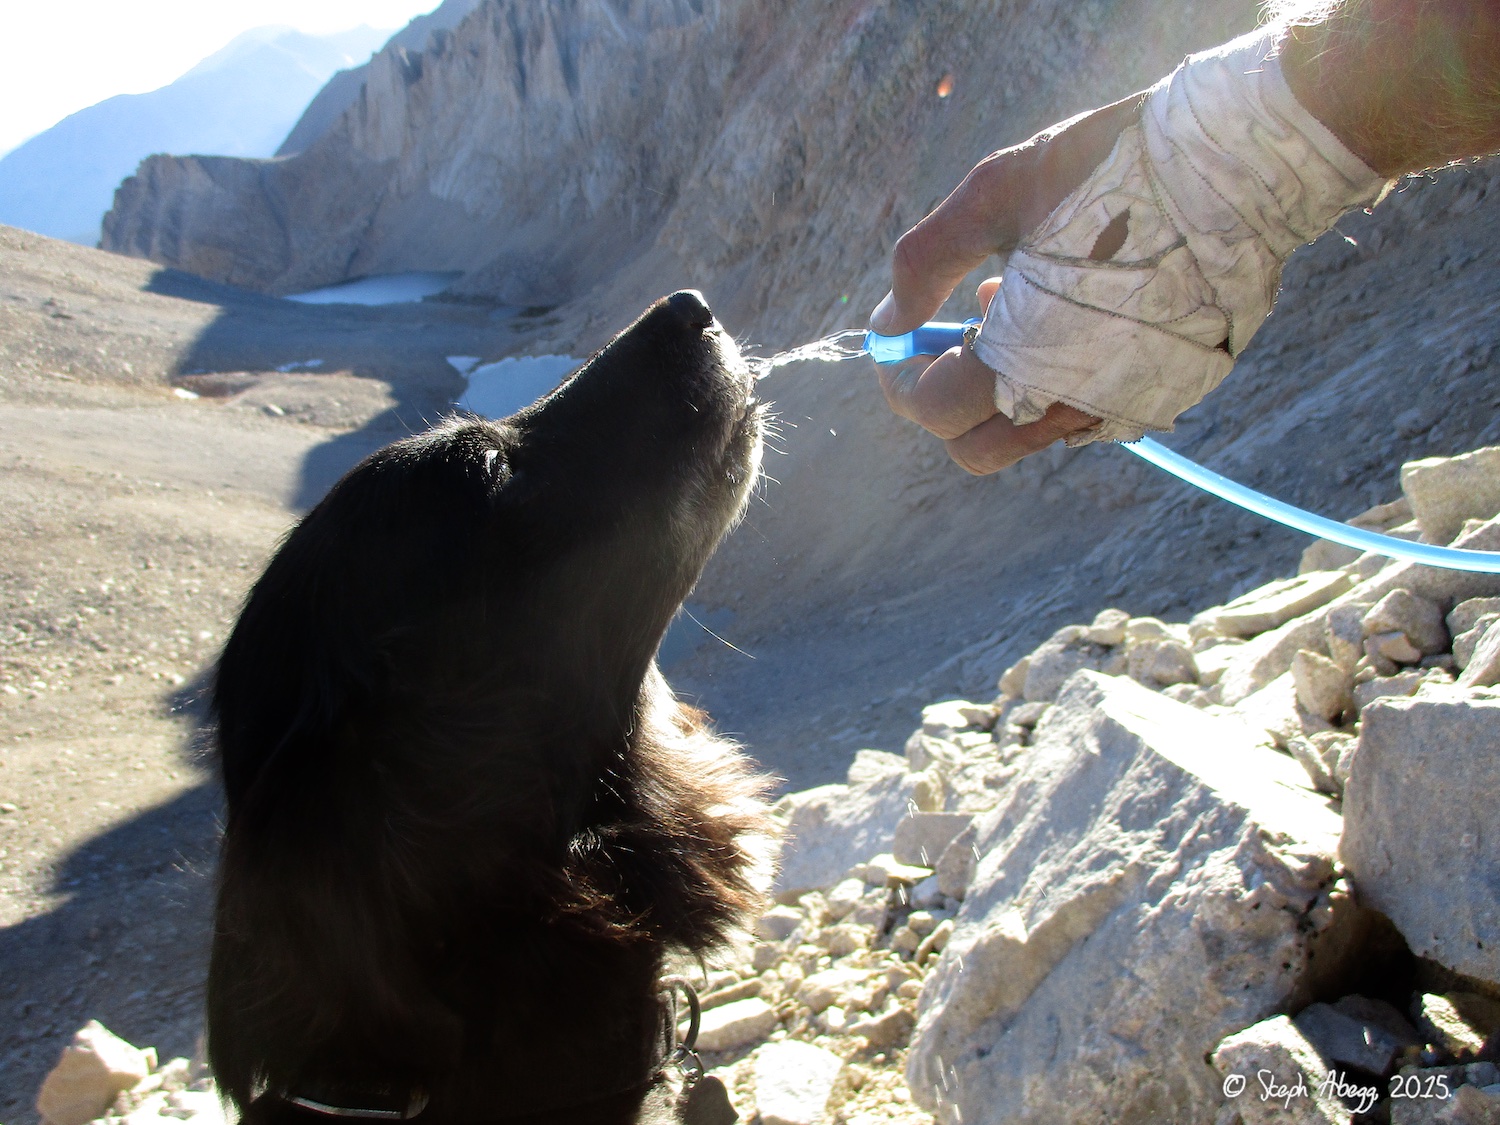
13. Meg taking a ride on Larry. 14. A quartz cairn on the trail between Upper Boy Scout Lake and Iceberg Lake. Day Needle, Keeler Needle, and Mt. Whitney in the distance. 15. Between Upper Boy Scout Lake and Iceberg Lake, the climbers' trail splits. The right split goes up to these cliffs which present a short bit of grungy 4th class to the Iceberg Lake basin. The left split continues on at a level grade for a couple of football fields and then takes a 3rd class trail up to Iceberg Lake basin. Right is quicker with day packs, left is better with full packs. This photo shows Meg on the 4th class step of the right option. 16-18. A morning light show on Day Needle, Keeler Needle, and Whitney, taken on the approach between Upper Boy Scout Lake and Iceberg Lake. 19-21. An afternoon cloud-and-mountain show around Day Needle, Keeler Needle, and Mt. Whitney. 22-24. David's dog JB joined us on my second trip up into the area (dogs are allowed as long as they don't go across the crest). For 11 years old, JB has a phenomenal amount of energy and stamina. With all his running around on the trail, he probably hiked 5x as far as we did, and at 10x the speed. 25-26. Day Needle and Keeler Needle as seen on the approach to Iceberg Lake. David and I had planned to climb the Harding Route on Keeler, but we decided to forgo this climb when David was battling with nagging altitude sickness. Someday I'll be back to climb it... 27-29. David and I camped up at Iceberg Lake. It's a great base for climbing Whitney or Russell. 30. David hauled up several pounds of pre-cooked pasta. And dog food as well. 31. Morning alpenglow on Day Needle, Keeler Needle, and Mt. Whitney, as seen from our camp at Iceberg Lake. 32. Heart of quartz crystals. 33. You can get cell service (Verizon at least) up near Iceberg Lake and at Upper Boy Scout Lake, so my solar charger came in handy. 34. JB is a good alarm clock since he likes to cuddle in the sleeping bags in the morning cold. 35. JB is fanatical about sticks. 36. JB hydrating. 37. JB was the only one of us brave enough to swim in Iceberg Lake....multiple times.
Useful beta. Updated route information. Corrections. Historical notes. Interesting facts. No fluff please. Please do not put links in your comment, as my spam filter will filter those comments out.