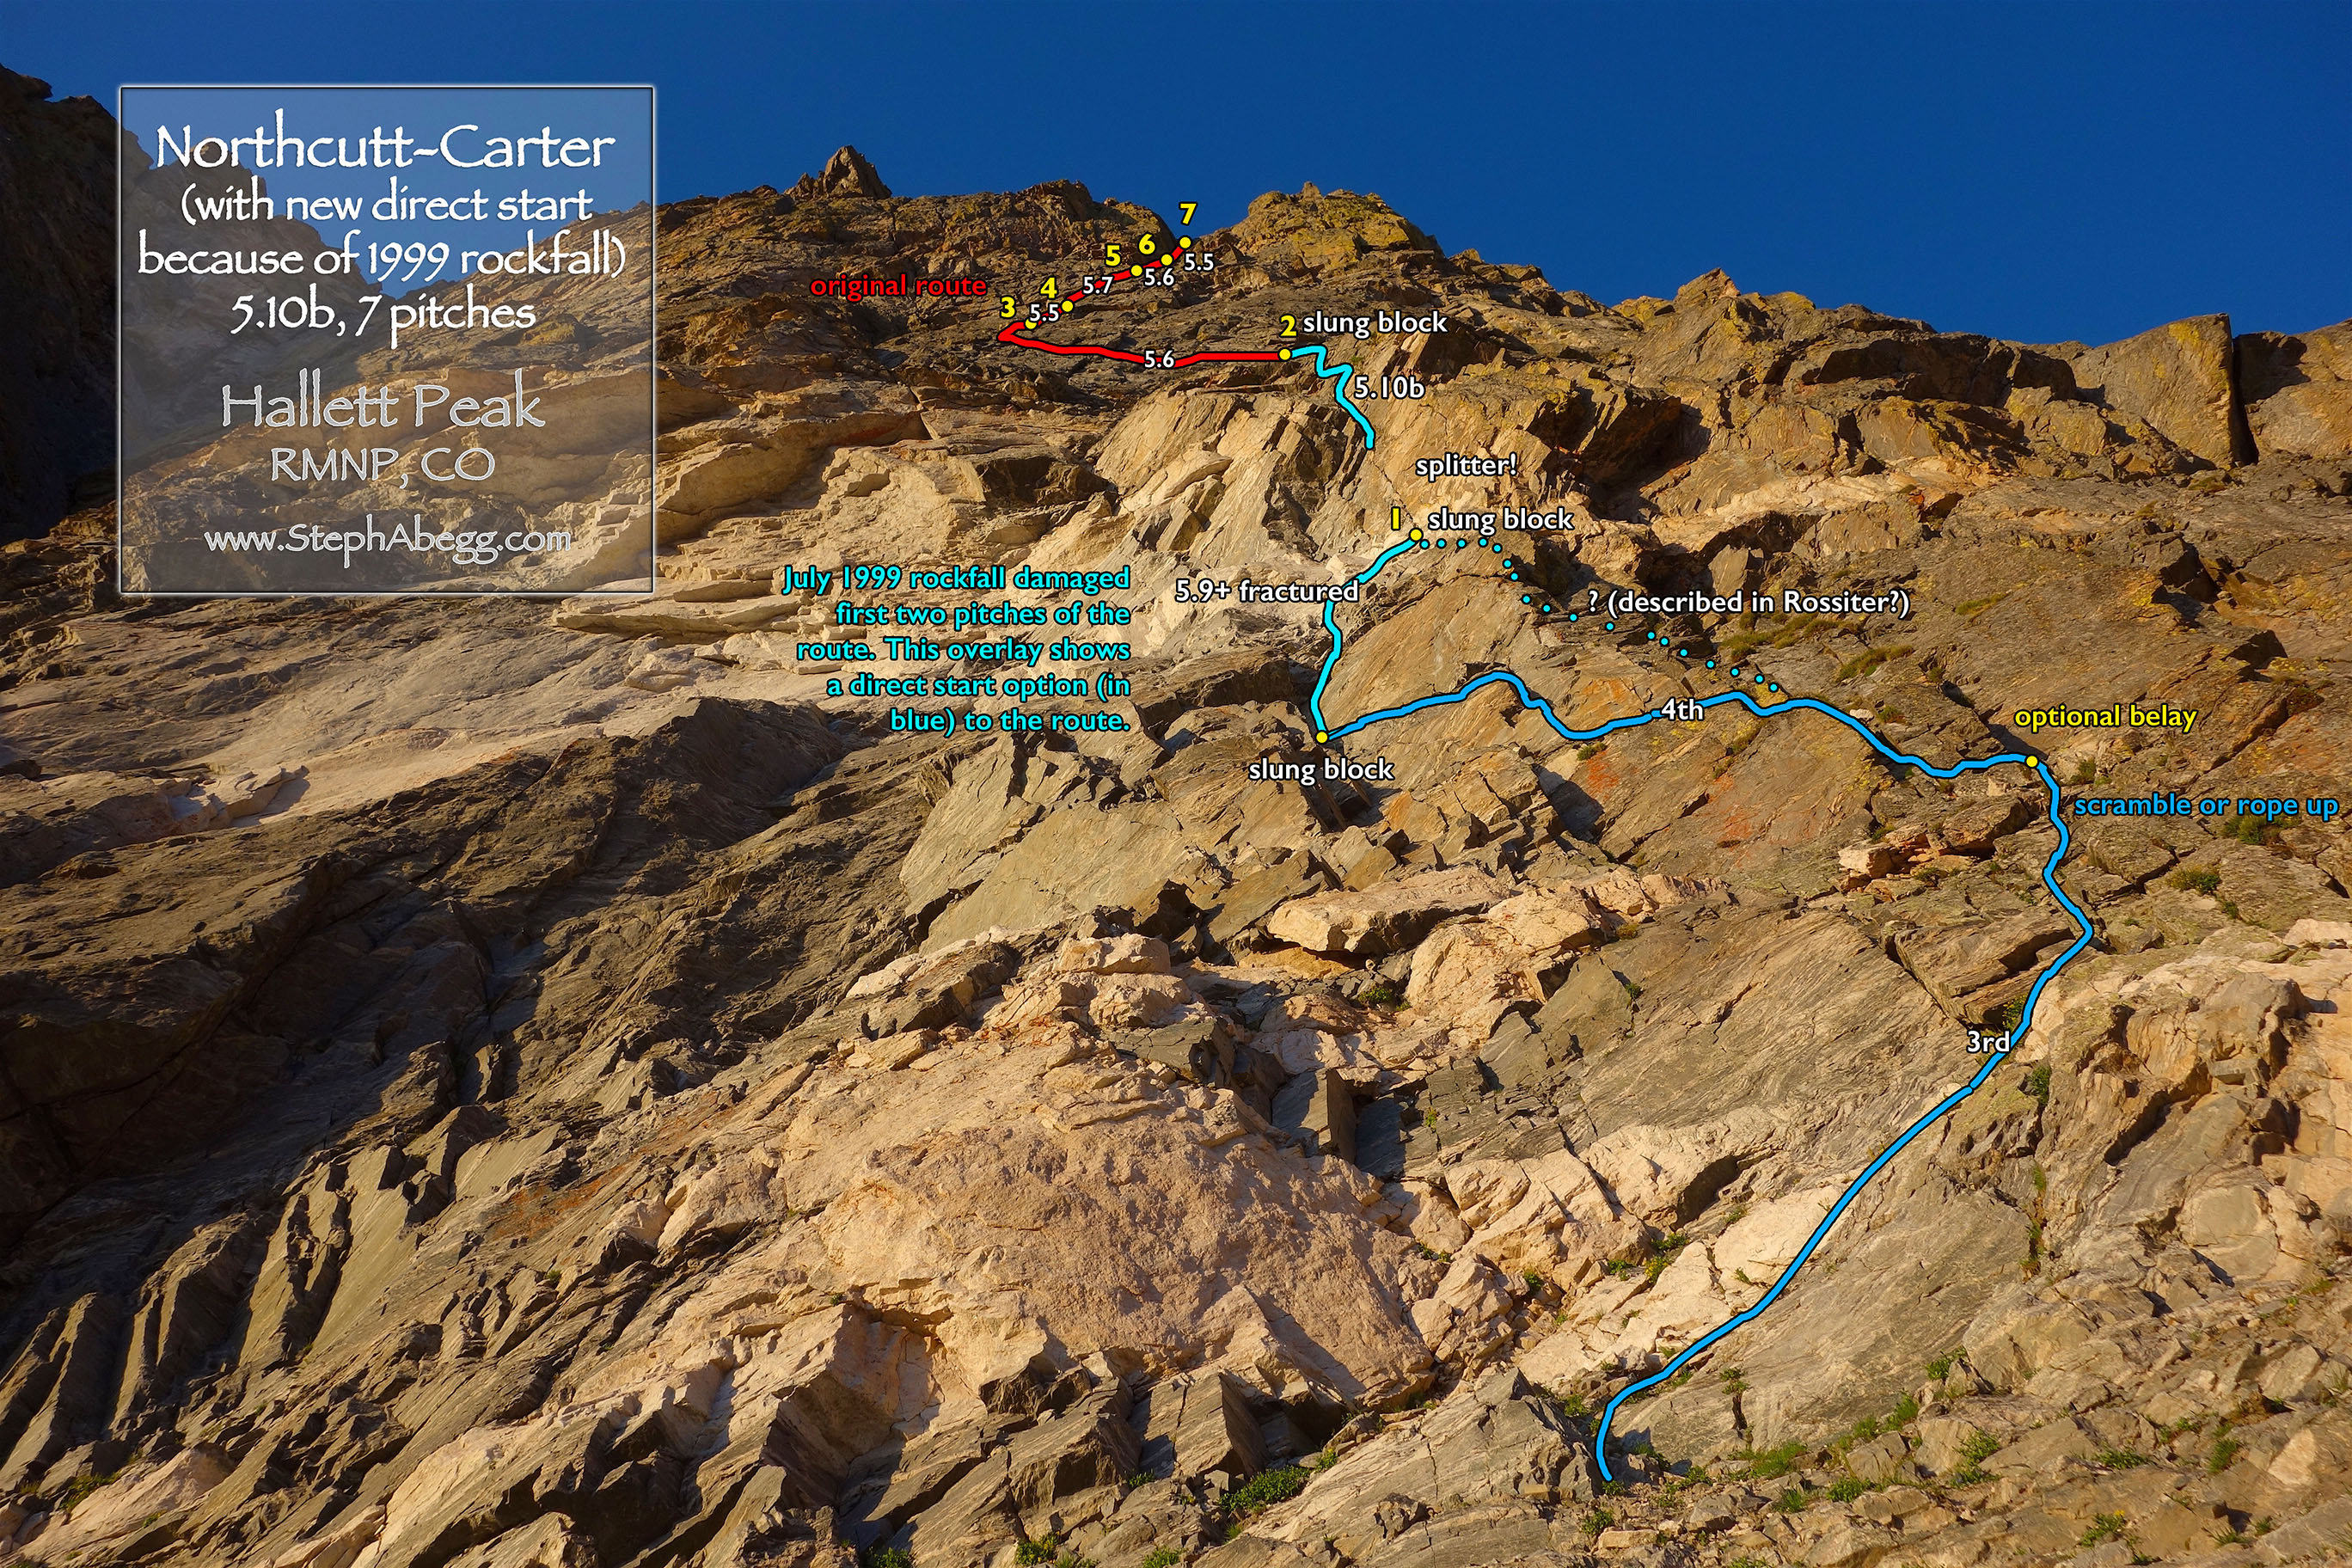
The Northcutt-Carter route on Hallett Peak was the first major route completed on the North Face. For awhile, it was touted as the hardest climb in America (this was soon dispelled). The route became especially popular after it was included in Fifty Classic Climbs of North America. But the popularity took a drastic decline in July 1999, when rock fall obliterated the lower two pitches of the route.
There have been various schemes to reach the belay at the top of the original second pitch. At the writing of this trip report, there seem to be two major schemes start the route: (1) A direct start along the right margin of the rock-fall, involving 5.9+ to 5.10b climbing in somewhat fractured rock or (2) Climbing the first pitch (5.7) of the Kor-Van Tongeren route and then make a rising leftward traverse (5.9). There was some discussion about the two start options on mountainproject and a couple of photos of the Kor-Van Tongeren start, but no photos of the direct start.
This is the type of climb that intrigues me. Not only is it a Fifty Classic, but there seemed to be an opportunity to collect some beta. So when Annabelle and I were trying to choose a climb to do together, I suggested Northcutt-Carter on Hallet might be a fun adventure. She had not climbed Hallett yet, so this sounded like a good plan!
We ended up doing the two-pitch 10b direct start to the right of the rockfall scar. Pitch 1 was indeed a bit spooky just given the fractured nature of the rock beside the rockfall scar (the rock was not loose exactly, just highly fractured and it made you wonder if the entire chunk could pull off, but everything I touched felt pretty solid). I felt I was able to find fairly decent gear placements and the climbing was no harder than 5.9. I'll agree with the 5.9+ given on mountainproject because of the nature of the rock. Pitch 2 was the best pitch on the route, starting with a splitter crack with juggy edges and finishing with a steep crimpy crux on good rock. I'd agree with the 10b rating given on mountainproject. After this we were on the original Northcutt-Carter route. The climbing was typical Hallet—5.6-5.8 climbing on featured rock with heads-up route-finding and thoughtful gear placements. Very enjoyable.
We were surprised to find that we were not the only party on the route. Another party started up the route just as we reached the top of Pitch 1. Perhaps it is true that this climb is being done more often as it has become public that it is possible to find a way past the rockfall zone.
We topped out at around 1pm, as we had erred on the side of an early start despite the sunny forecast. But as is often the case in the mountains, our adventure for the day was not yet over even though we had finished the route. Thunder started to boom around us (moderately scary) and we saw some flashes of lightning (okay, that's terrifying), and within minutes we were running down the West Gully descent being bombarded with icy pellets of hail. We found a boulder to duck under for cover (which wouldn't do much good to protect us from lightning, but would keep us from getting wet and cold from the driving hail). Within 10 minutes, the hail had passed but the dry rock in the gully had been replaced by an inch of dip in dots. In our relative safety of being on a 3rd class descent and finding a shelter, we actually sort of enjoyed the storm and seeing how quickly the conditions changed around us. The storm was a good reminder that it always pays to get an early start in Colorado, even when the forecast shows a sunny day. As we hiked out along the base, a second hail storm hit and it began to rain more consistency. We noticed a party bailing from midway up the Culp-Bossier route and were glad we were not in their shoes. Given it was a Saturday, surely there were other parties still midway up routes on Hallett when the storm hit, and we hoped they all weathered the storm safely. But we did pass a mountain rescue team hiking in as we hiked out...uh oh....
Overall, it was another awesome day of climbing in Rocky Mountain National Park, which has quickly become one of my favorite places to be. Thanks Annabelle for being such a fun and super solid partner. The following page gives a trip report, along with some overlays and photos, for the Northcutt-Carter route via the two-pitch 10b direct start to the right of the rockfall. Enjoy.
Pitch-by-Pitch Photos
THIS TRIP REPORT IS STILL MOSTLY IN THE EMBEDDED HTML FORMAT OF MY OLD WEBSITE. MOBILE Tip: Try Landscape mode. It is generally more mobile friendly.
Photos:
Photo descriptions:
Approach
From Bear Lake Trailhead, follow the trail to Emerald Lake. Go left around the lake, scrambling through talus and then on a climbers' trail under the base of the wall. Hike up snow or talus beneath the North Face to the Third Buttress to the face just right of the obvious white rock scar.
1.
2.
3.
4.
5.
1.Scrambling along the base of the north side of Hallett. A beautiful morning!
2. There was a bit of snow left at the base, but it was easy to avoid. We scrambled between the rock and the snow.
3. The Third Buttress. You can clearly see the rock scar from the 1999 rockfall.
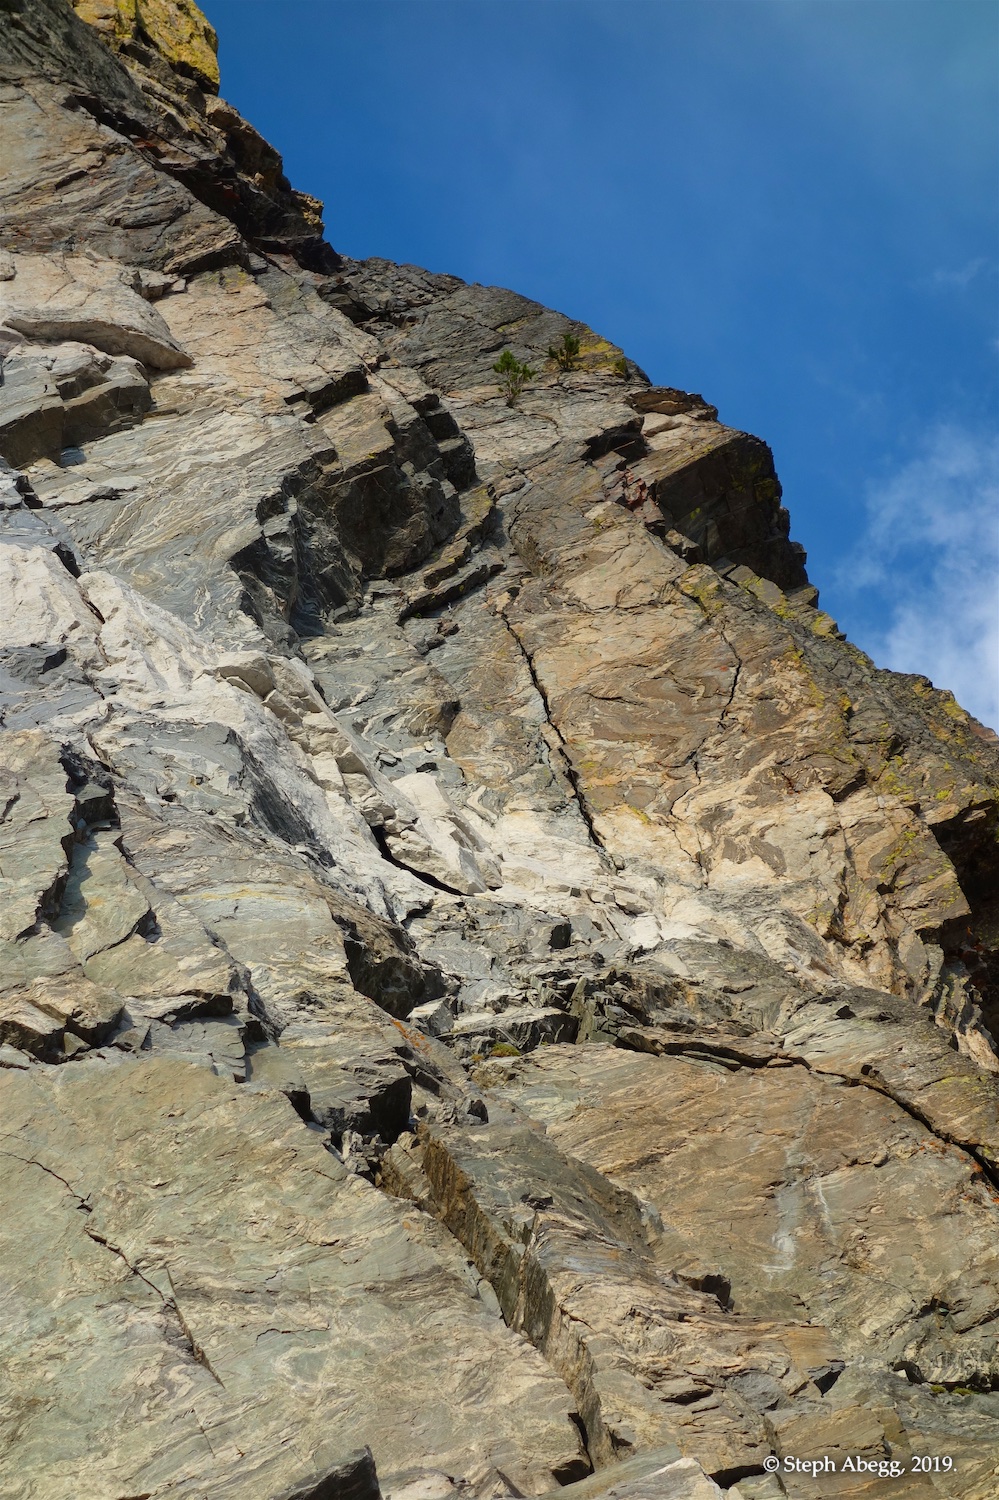
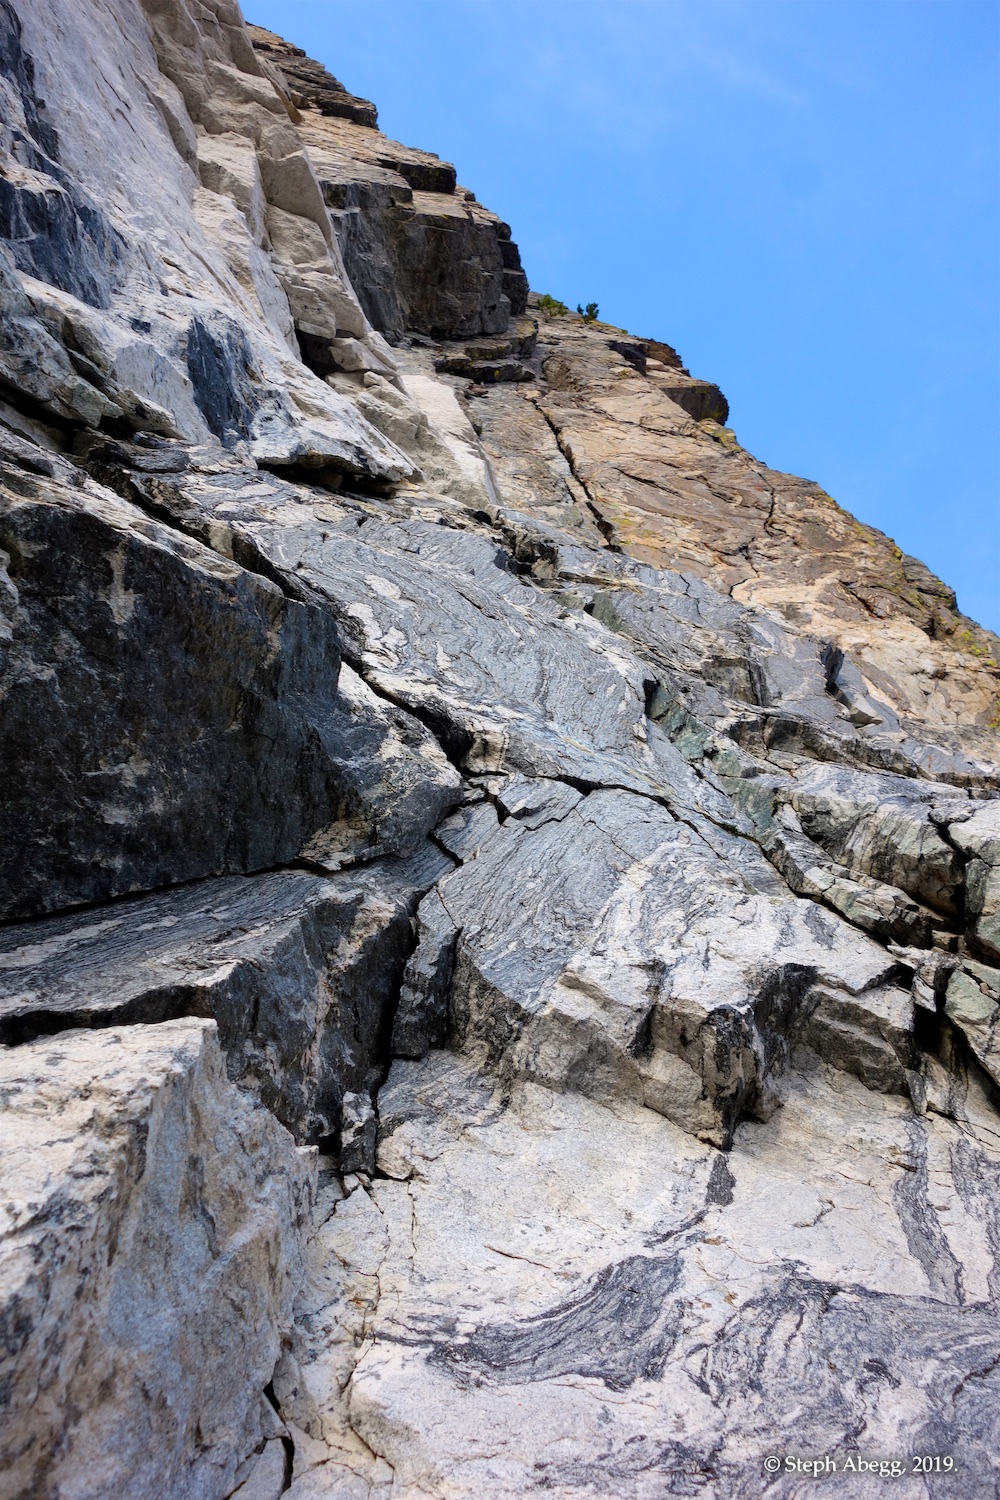
4. Looking up from the base of the route, underneath the rockfall scar.
5. Look for the obvious splitter to the right of the rockfall scar. This splitter marks the start of Pitch 2. The goal of Pitch 1 is to get to the base of the splitter.
Pitch
1a
&
1b
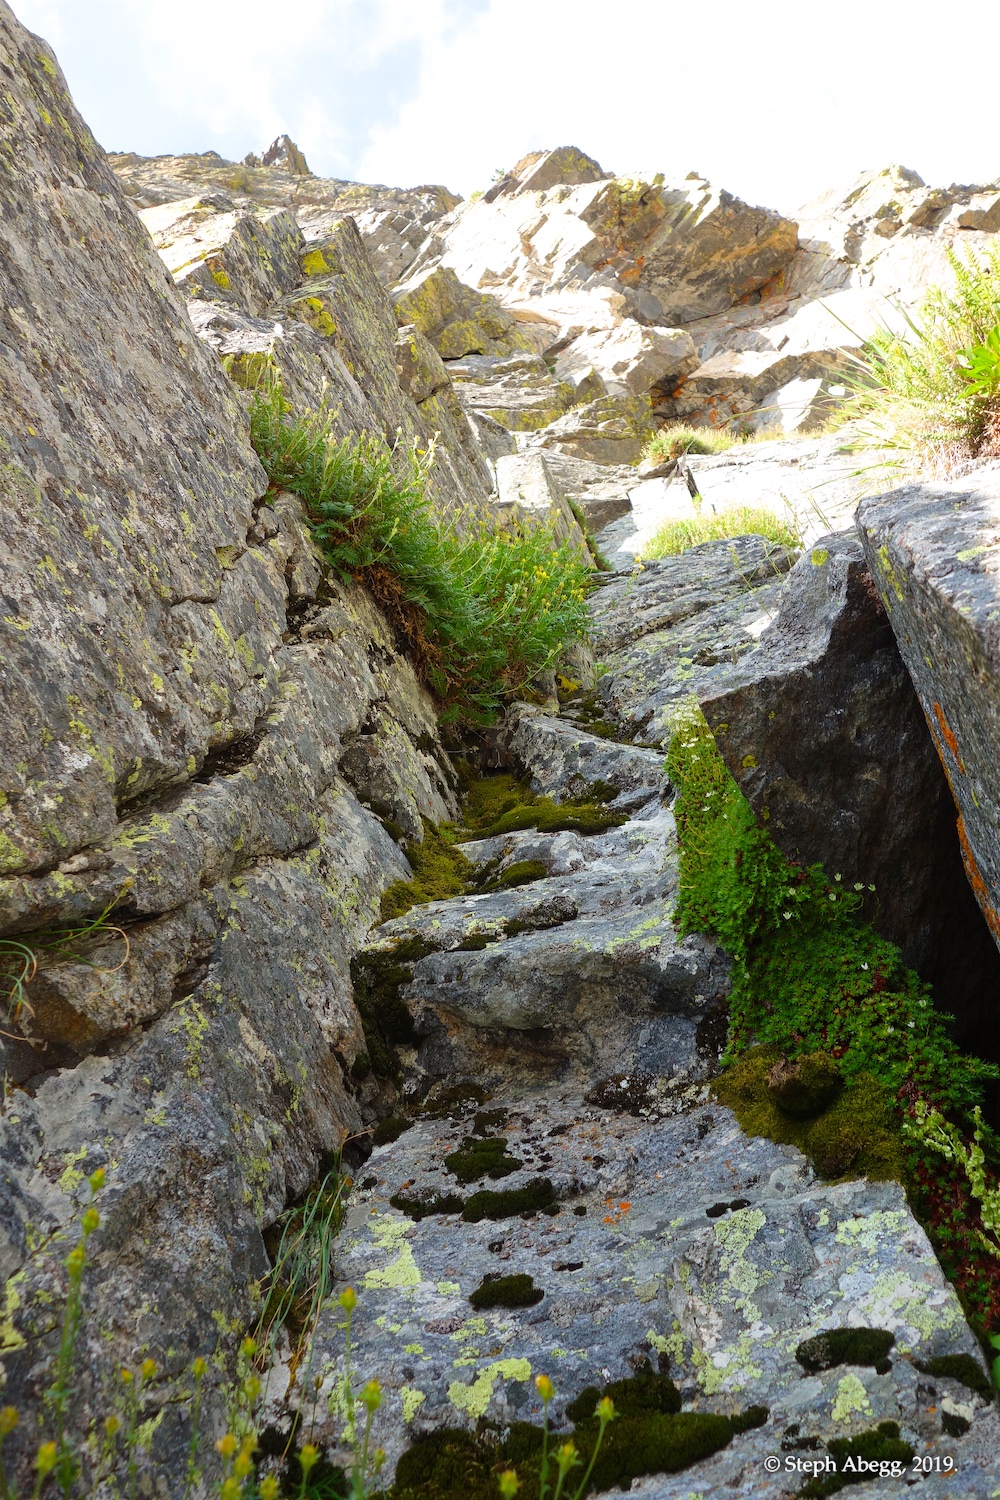
A bit of variation in guidebook and mountainproject beta for this pitch. This describes is what we did. It seemed to work pretty well. 5.9+, 120'. Pitch 1a: Start in a mossy slot, working up left to a ledge with a slung boulder at the end. We belayed at this slung to break Pitch 1 into two pitches. This seems like a good idea, as it gives the belayer visual on the leader for the friable crux of the pitch, and also puts the belayer to the left and out of zone of rockfall if the leader happens to dislodge any rocks. This part of the pitch is also mostly 4th, so you could solo up to the slung block and rope up there.Pitch 1b: For the second half of Pitch 2, pull through a roof and work up and right through first dark rock and then white rock. End at a slung block between the obvious hand crack splitting the face. Be careful on this section since the terrain is quite fractured. Kor-Van Tongeren start. 5.7, 180'. Climb the first pitch of Kor-Van Tongeren route (well to the right of the direct start) to the bottom of a prominent "V". We did not go this way so I cannot comment on it and am not exactly sure where it starts.
6.
7.
8.
9.
10.
6.Mossy slot at the start of the pitch. C
7. Slung block at the start of the 5th class climbing on Pitch 1.
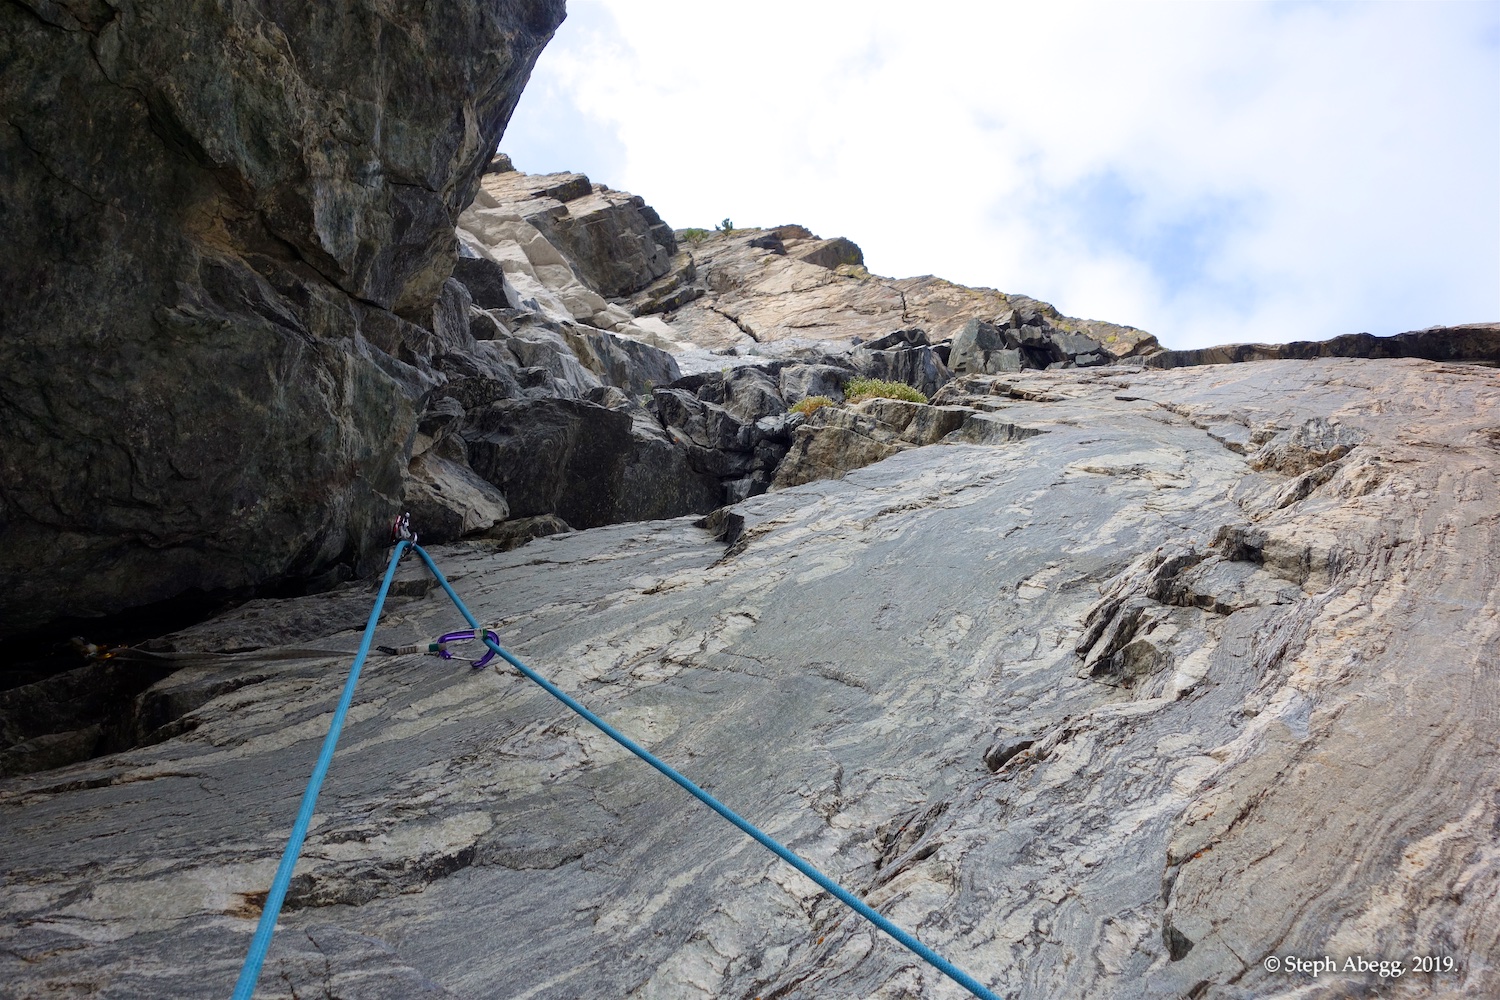
8. Looking up above the slung block.
9. The gneiss in this section seems pretty good, but it's hard to be completely confident in the rock so close to the rock scar. I was able to get some pretty good cam placements and trusted the rock for the most part. 10. Annabelle nearing the top of Pitch 1. This section is fractured white rock from the rockfall so tread carefully.
Pitch
2
Seems a general consensus for what to do on this pitch. 5.10b, 150'. This hand crack is apparently an old variation to the original second pitch. Jam the hand crack past the right side of a roof. Either continue up an open-book dihedral to a double overhang or traverse slightly right to a tree and climb a thin crack back leftwards towards the double overhang. Pull around the right side of a double overhang (crux), the go up and slightly left to the ledge at the top of the original second pitch.This pitch is excellent climbing, perhaps the best pitch on the route. Kor-Van Tongeren start. 5.9, 165'. Take the left hand option of the "V" past a short, but difficult crux. Now climb down and left past loose blocks and flakes to the old fixed pin anchor atop Pitch 2 of the standard line. We did not go this way so I cannot comment on it and am not exactly sure where it starts.
11.
12.
13.
14.
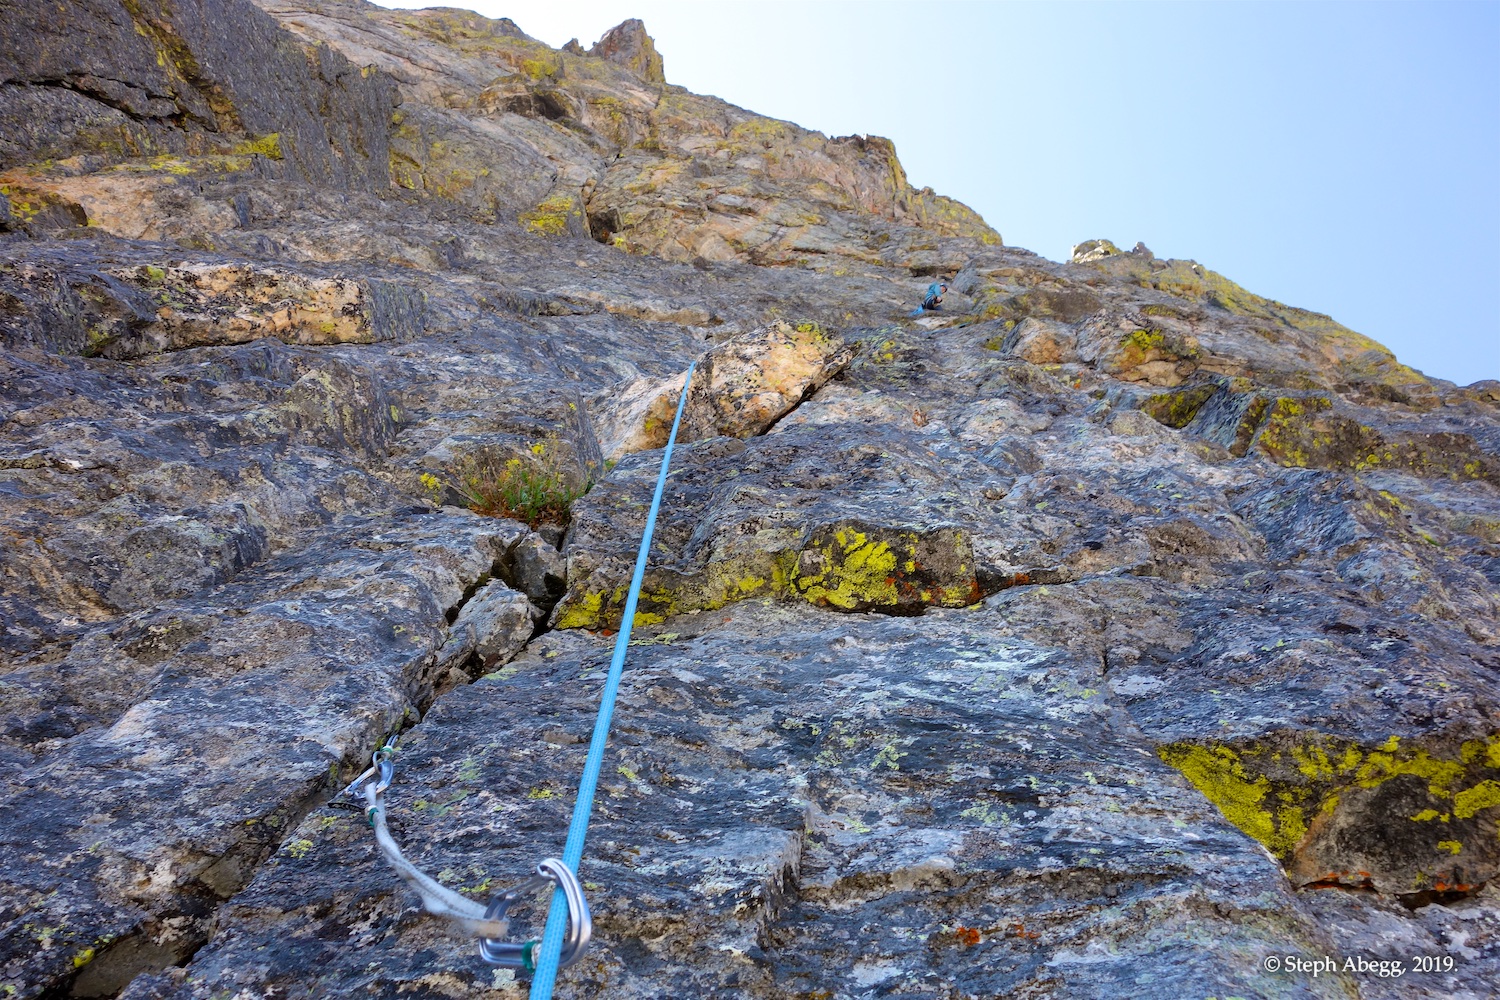
11. Looking up the Pitch 2 splitter. Best section of the climb in my opinion!
12.Pitch 2 above the roof. Just clip the rap anchor and keep going.
13. The 10b crux of the pitch is pulling through the double overhang in some way. After the last camp placement, Annabelle went right while I went left. Nice lead Annabelle!
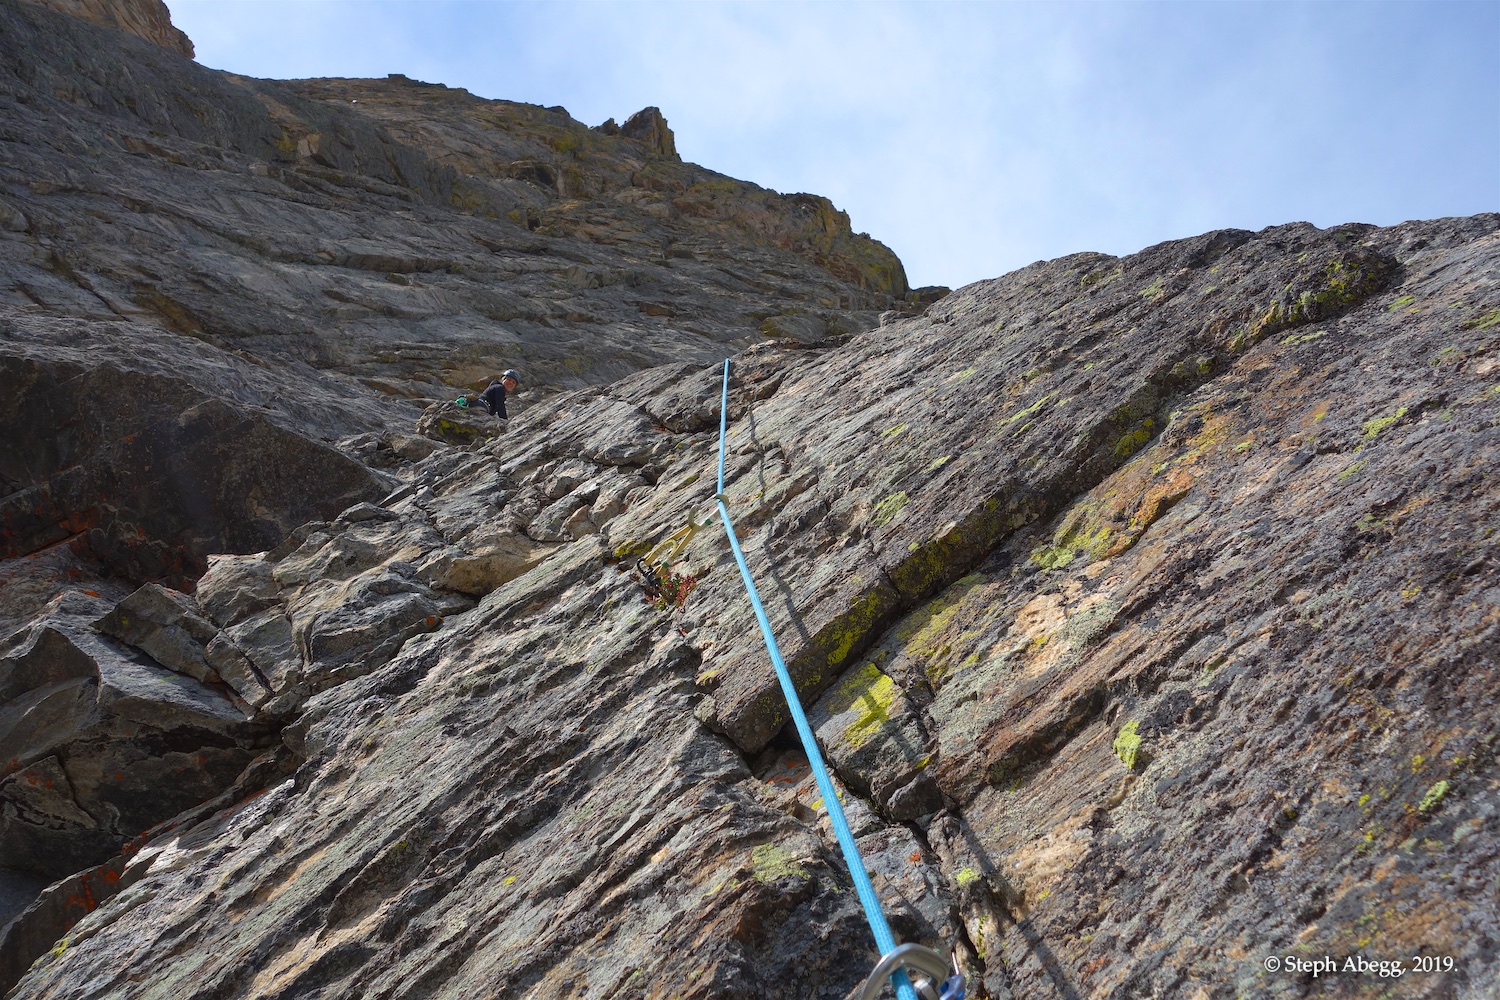
14. Looking down on the team below us leading the finish of Pitch 2. We had not expected to see another party on the route, but perhaps it is true that this climb is being done more often as it has become public that it is possible to find a way past the rockfall zone.
Pitch
3
5.6, 150'. Go up a bit, then traverse left about 50 feet to a weakness on the right side of a pillar (we made a horizontal traverse, but one description I read mentions making a rising traverse). Climb to the top of the pillar and belay at its top. I ended up moving up and down a bit during the traverse and placed enough protection that I had a fair bit of rope drag when I tried to climb up the right side of the pillar. So I belayed about 50 feet below the top of the pillar. We combined the last section to the pillar with Pitch 4.
15.
16.
17.
15. Looking at the terrain to be traversed from the belay at the top of Pitch 2. 16. Pitch 3 beta.
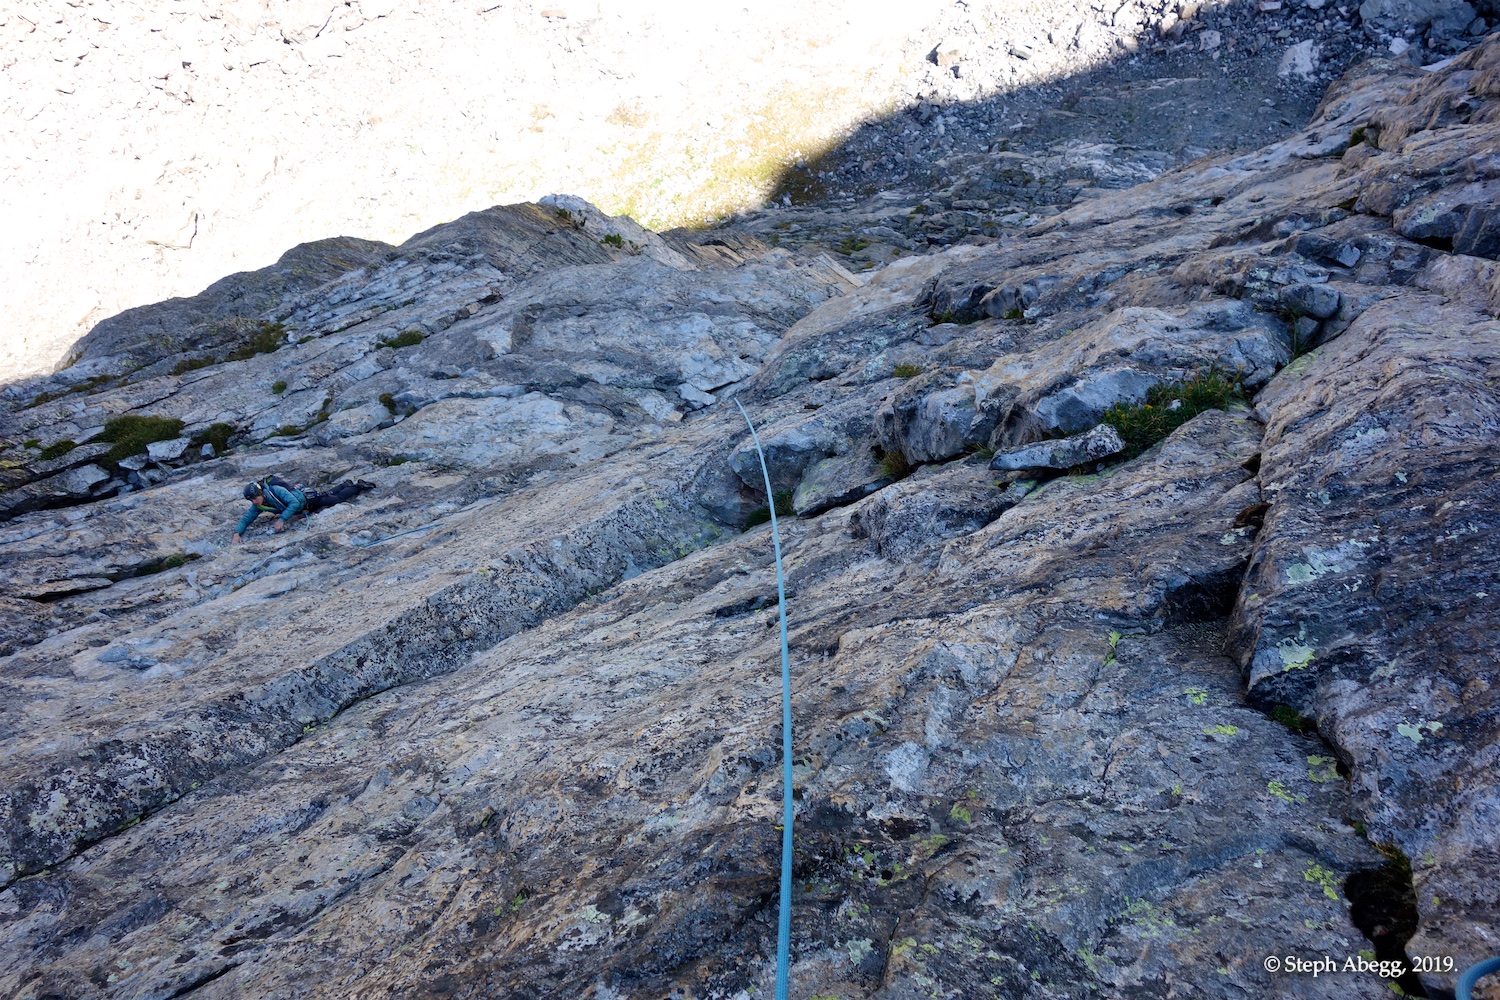
17. Looking down at the traverse from the belay at the end of the traverse. Annabelle is at the belay at the top of Pitch 2.
Pitch
4
5.5, 140'. From the top of the pillar, follow easy cracks straight up to a belay alcove below a roof. Note that we started from about 50 feet below the top of the pillar, but we were able to link this part into Pitch 4.
18.
19.
20.
21.
18.Annabelle starting the pitch. This is actually the end of Pitch 3 as described in the guidebook.
19. Pitch 4.
20. The final section of the pitch. You can see the alcove below the roof.
21. An old pin.
Pitch
5
5.7, 160'. Climb through the right side of the roof, and then climb straight up steep cracks for 100 feet to a grassy ledge then go up and right to a larger grassy ledge. I led through the roof, but then traversed rightward since the topo showed this as an option. It was pretty gritty and unprotected over there, so I traversed back. I wasn't clearly seeing where to go so I set a belay above the roof and gave Annabelle a shot at the pitch. She led easily straight up. Straight up seems to be the best way to go.
22.
23.
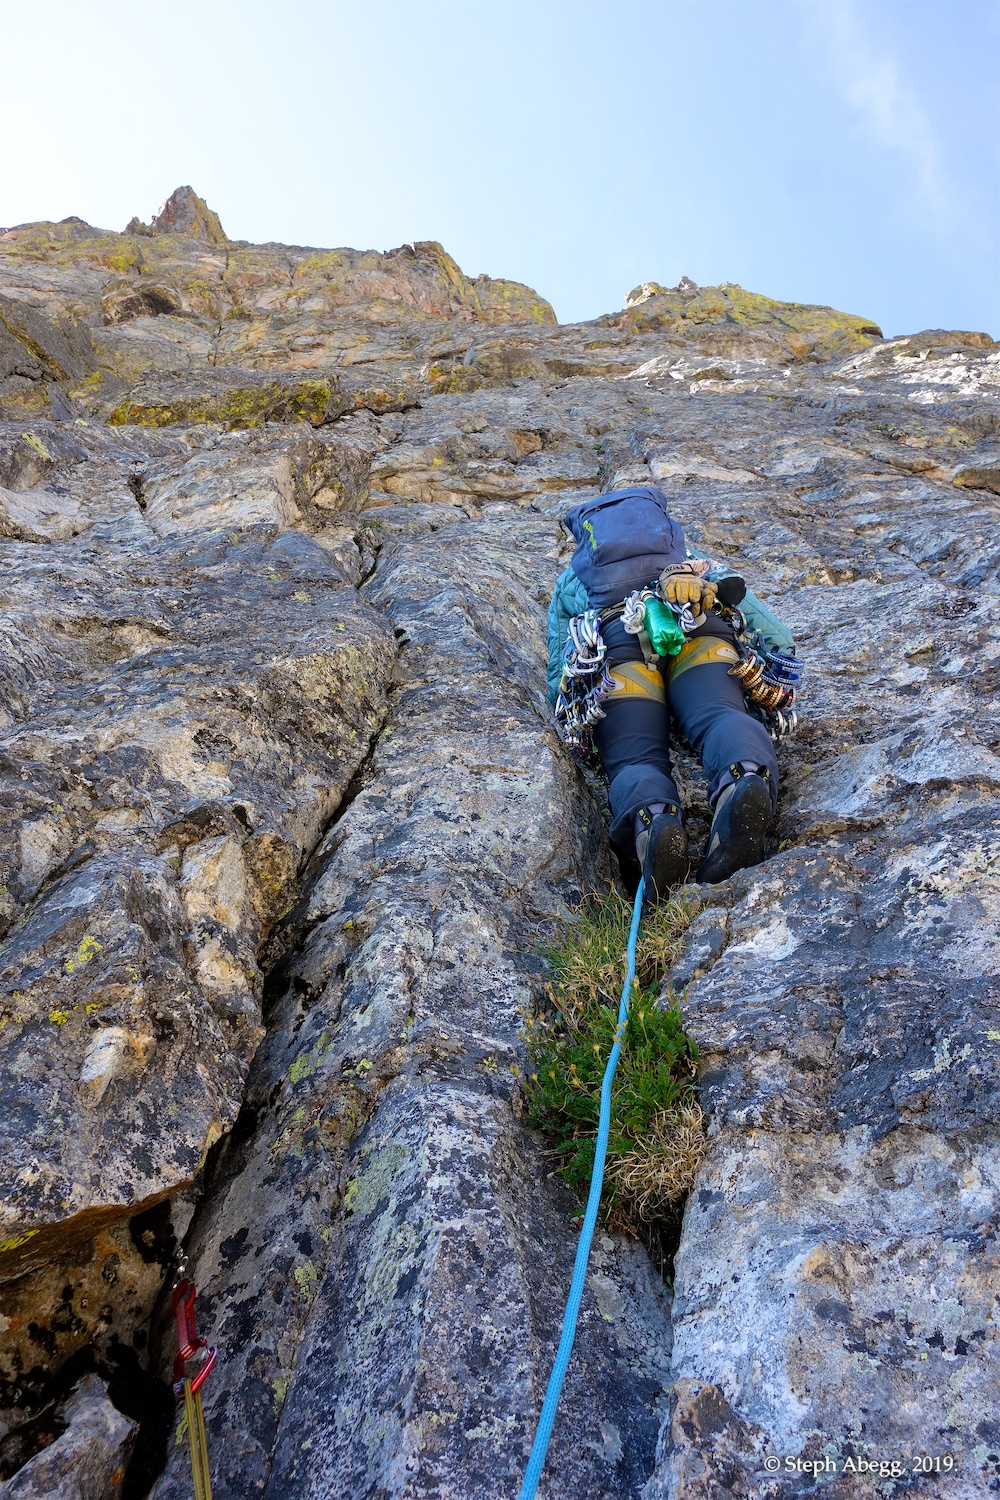
22. Annabelle pulling through the roof at the beginning of the pitch. It's pretty juggy and a fun section of climbing.
23.Annabelle leading up the cracks.
Pitch
6
5.6, 160'. Climb straight up from the belay to a section of blocky red rock. Climb past a detached pillar (either right or left works), and continue up a steep chimney and belay on a small platform below a roof.
24.
25.
24.Looking up the pitch from the belay at the top of Pitch 5.
25. The section of red rock.
Pitch
7
5.5, 150'. Climb through the left side of the roof and follow the broken chimney to the notch at the top.
26.
27.
26.Lookin gup the pitch from the belay at the top of Pitch 6.
27. Some nice gneiss.
Top!
Yay!
28.
29.
28.Top of the route!
29. A storm cell brewing to the north. Thunder was rumbling, so we quickly switched into our approach shoes and headed southwest towards the descent gully.
Descent
West Gully descent (3rd)
30.
31.
32.
33.
34.
35.
36.
37.
38.
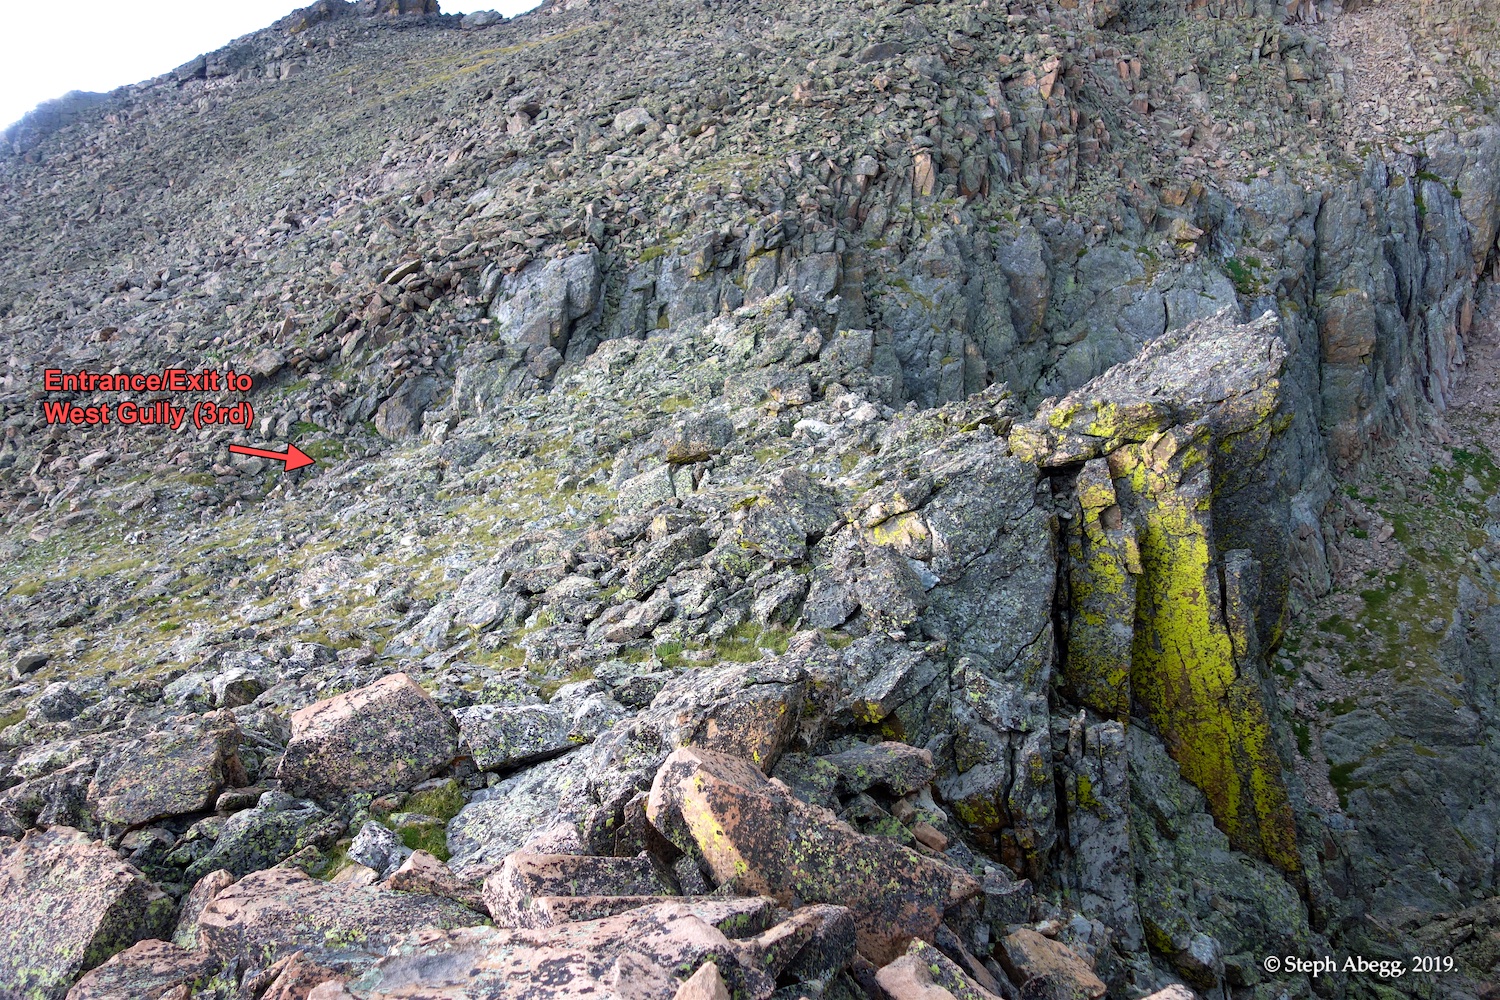
30.The entrance to the descent gully. It's just a minute or two from the top of the route.
31. Annabelle adding some blocks to the cairn at the entrance to the gully.
32. If you look closely you'll see its starting to hail!
33. Fortunately we found some cover beneath a large boulder. We doubted this would do much good to protect against a lightning strike, but it protected us from getting quite wet and cold from the icy pellets of hail. The hail lasted about 10 minutes. 34. Continuing the descent after the hail stopped.
35. Another view down the gully.
36. Go to the left of the tower in the photo.
37. This is the key notch. Head left through this notch or you will cliff out.
38. Scrambling down the talus back to the base of the Third Buttress. The descent is fairly quick and direct.
Useful beta. Updated route information. Corrections. Historical notes. Interesting facts. No fluff please. Please do not put links in your comment, as my spam filter will filter those comments out.