Blodgett Canyon 2018: Shoshoni South Face, Flathead Buttress My Mom’s Muscle Shirt, Horsehead Arch (& Mountaineer’s Route Lost Horse Canyon)

3 Climbs in Blodgett Canyon

Routes:

- Shoshone Spire, South Face (5.8+, 5-6p)
- Flathead Buttress, My Mom's Muscle Shirt (5.10+, 8p)
- Horsehead Arch, North end (5.7 R, 2p) & South end (5.9+, 2p)

+ 1 Climb in Lost Horse Canyon: Main Wall, Mountaineers Route (5.10b, 3-4p)

My first climbing trip to Montana!

Region: Montana
Elev: ~6,000-7,000 ft
Rock type: Granitic
Type: 
Date(s): August 30 - September 3, 2018 (Thu-Mon)
Partner(s): Chad Hiatt

Route Overlays & Map

CLICK TO ENLARGE

Intro

THIS TRIP REPORT IS STILL MOSTLY IN THE EMBEDDED HTML FORMAT OF MY OLD WEBSITE.

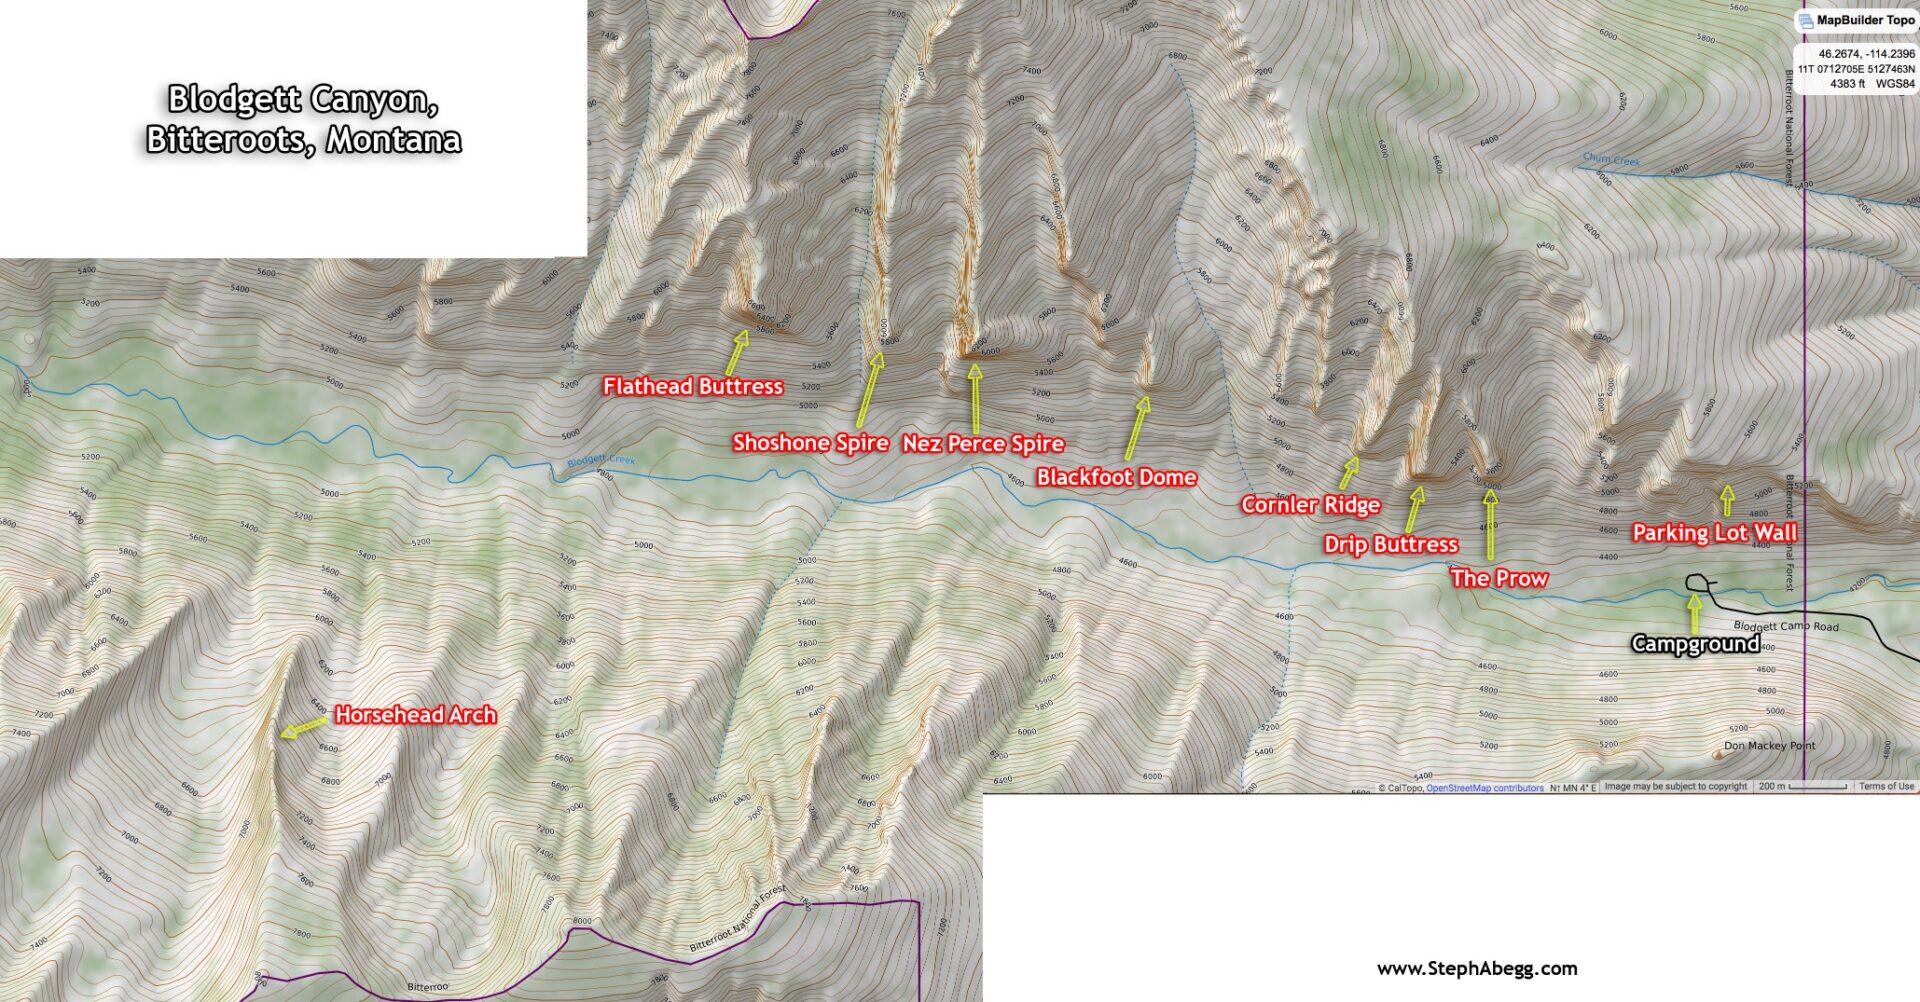
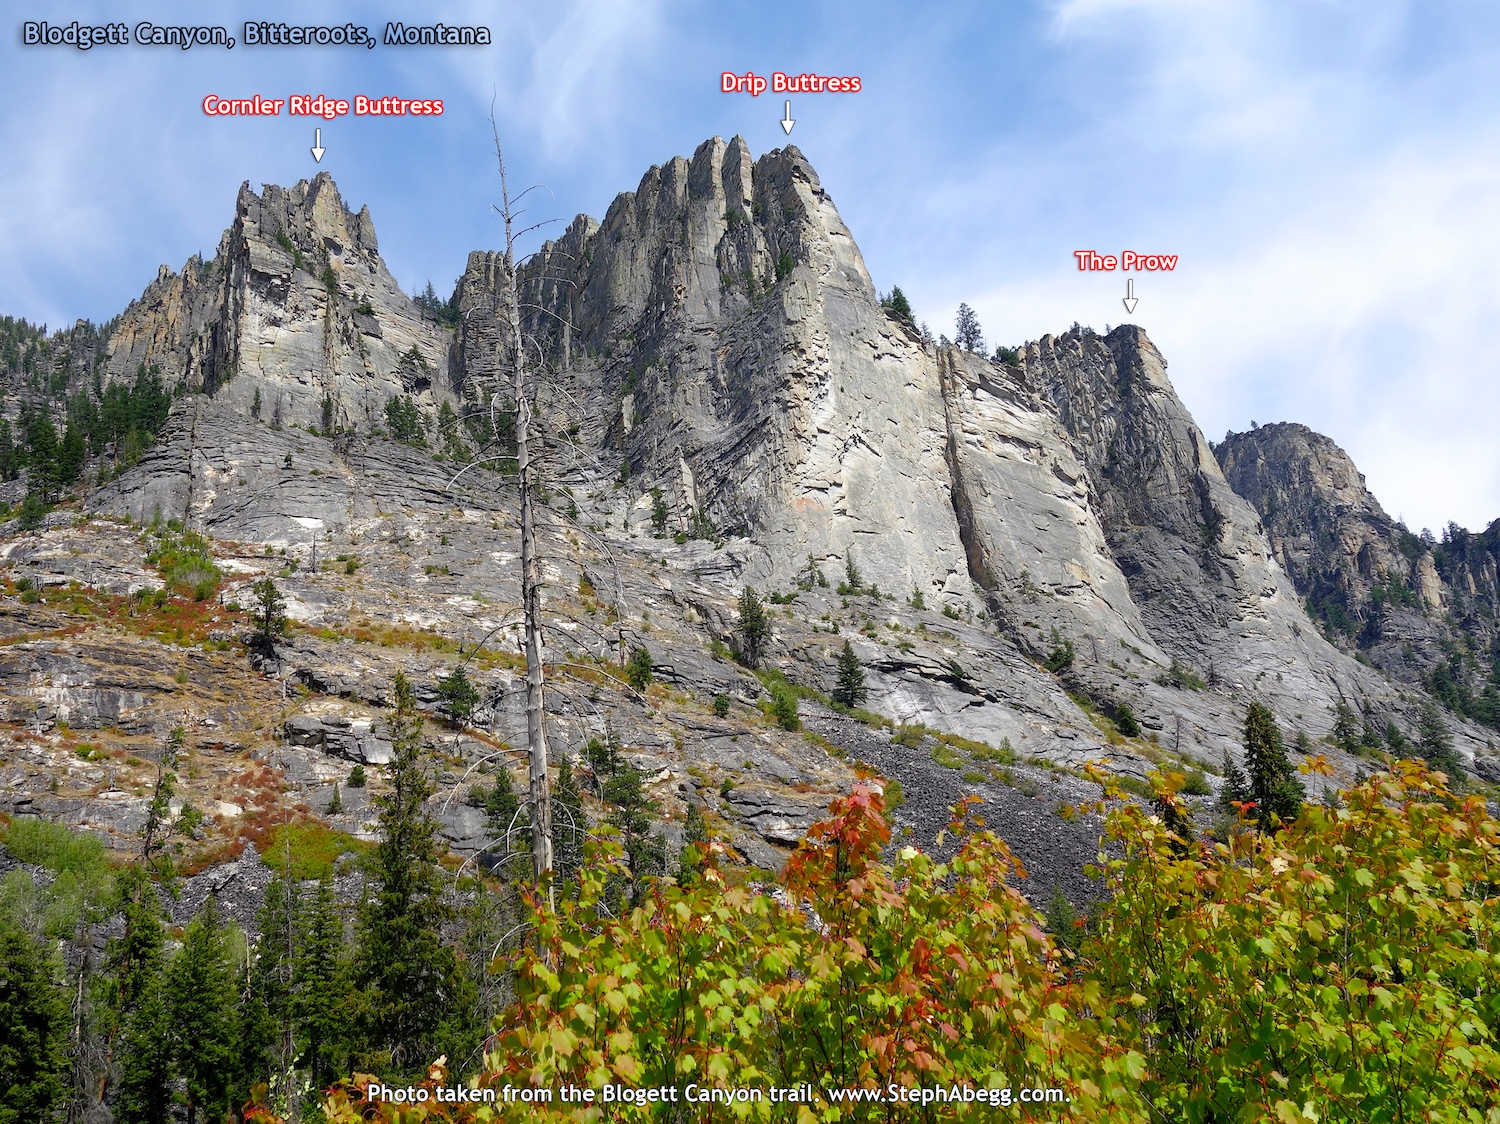
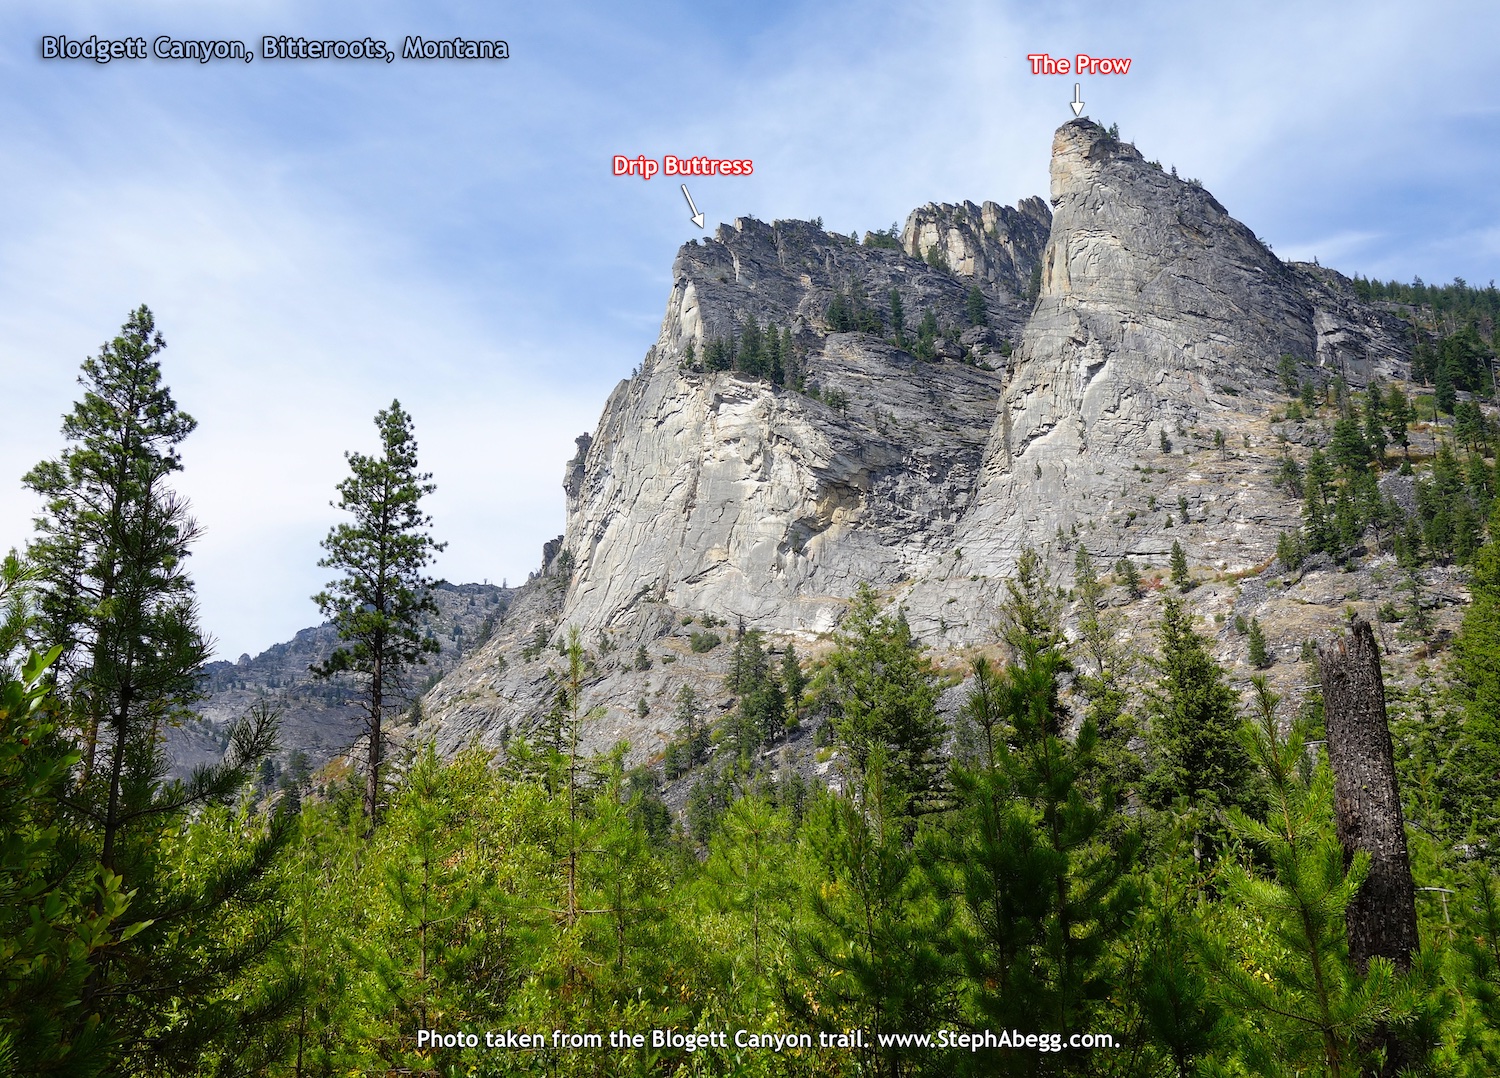
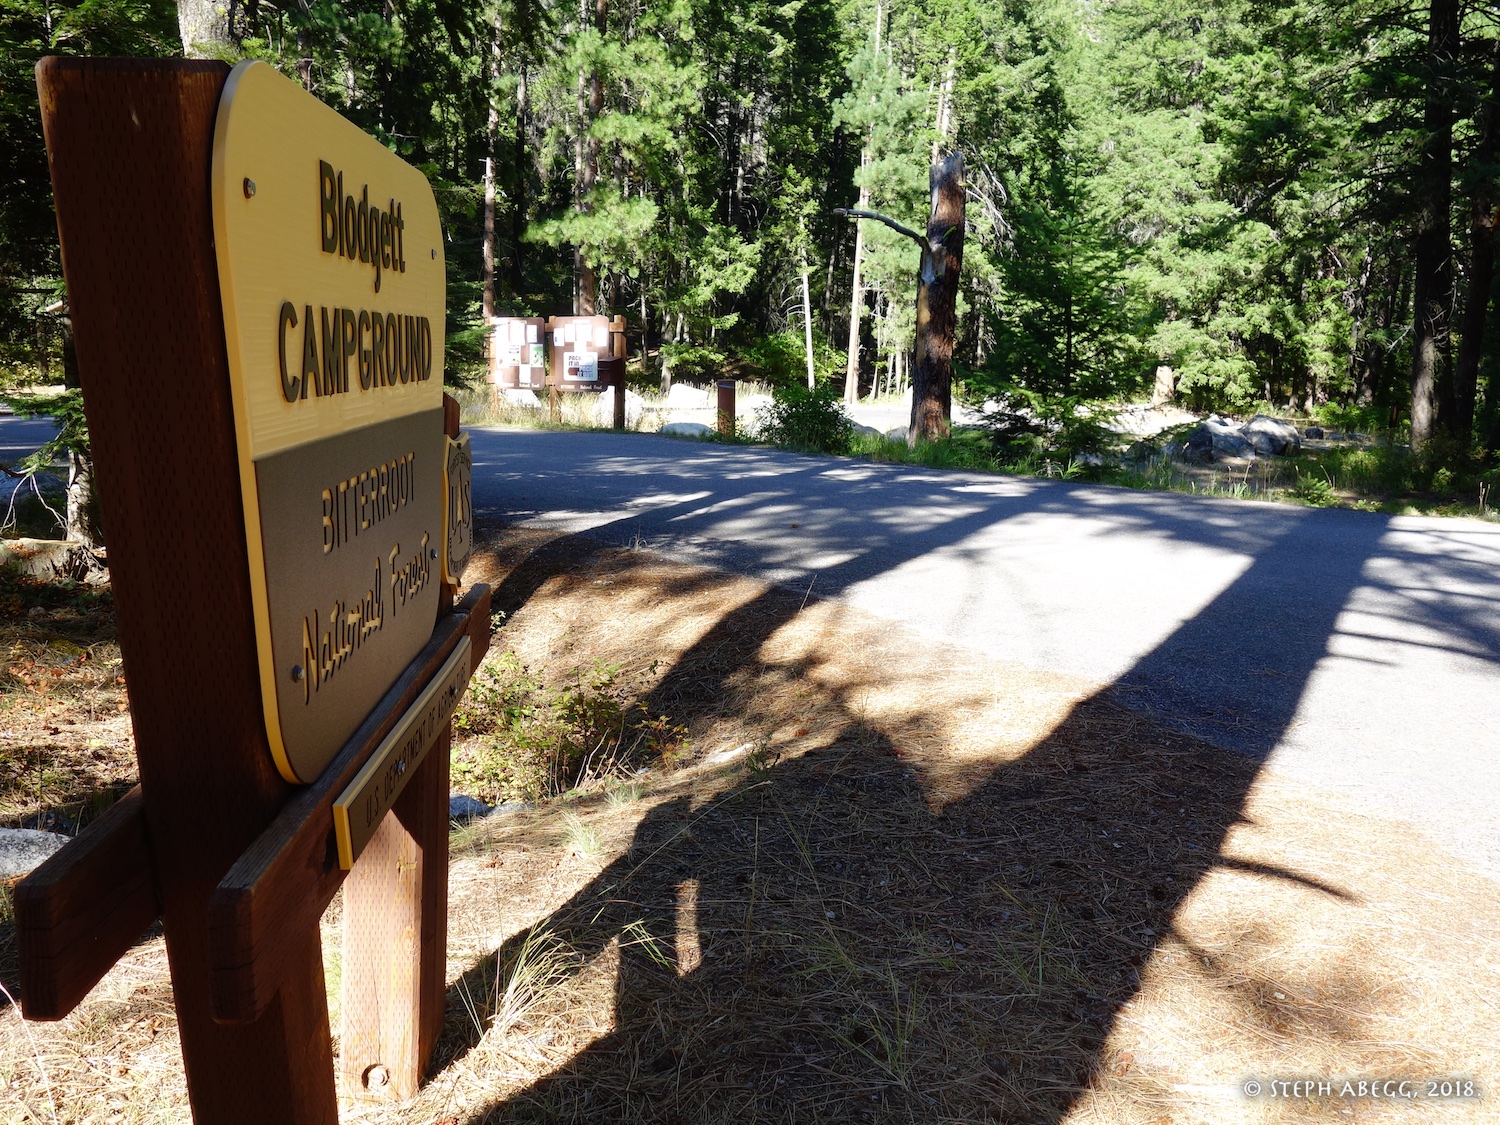
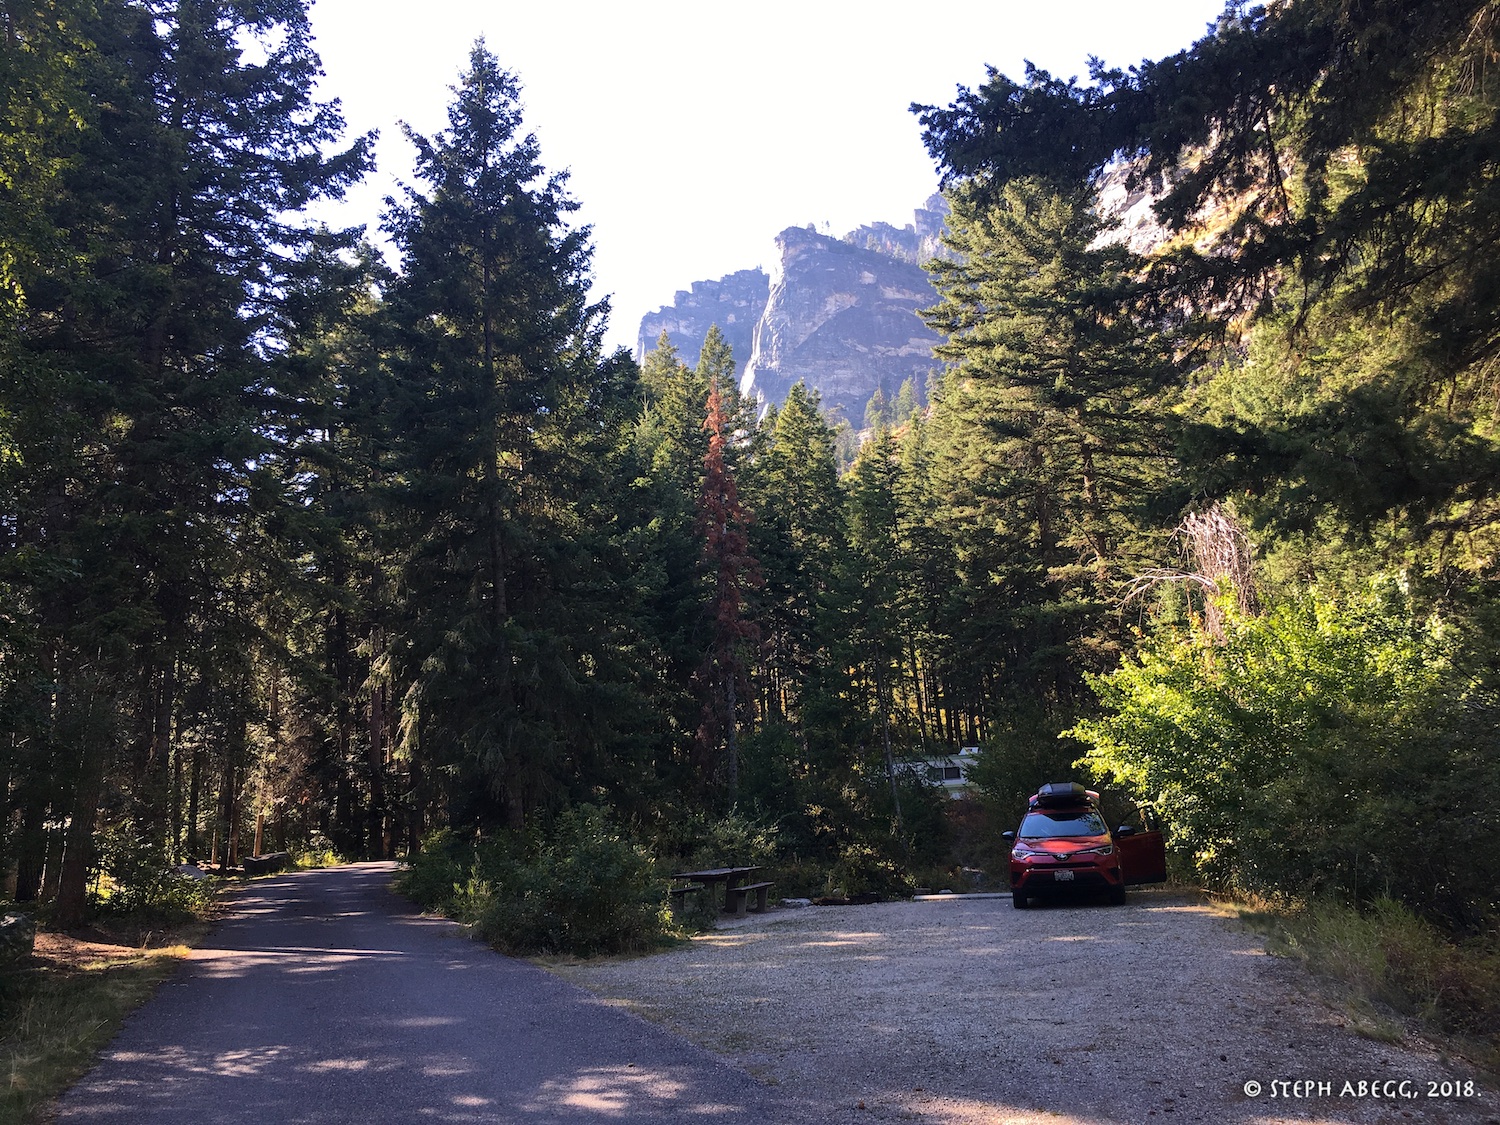
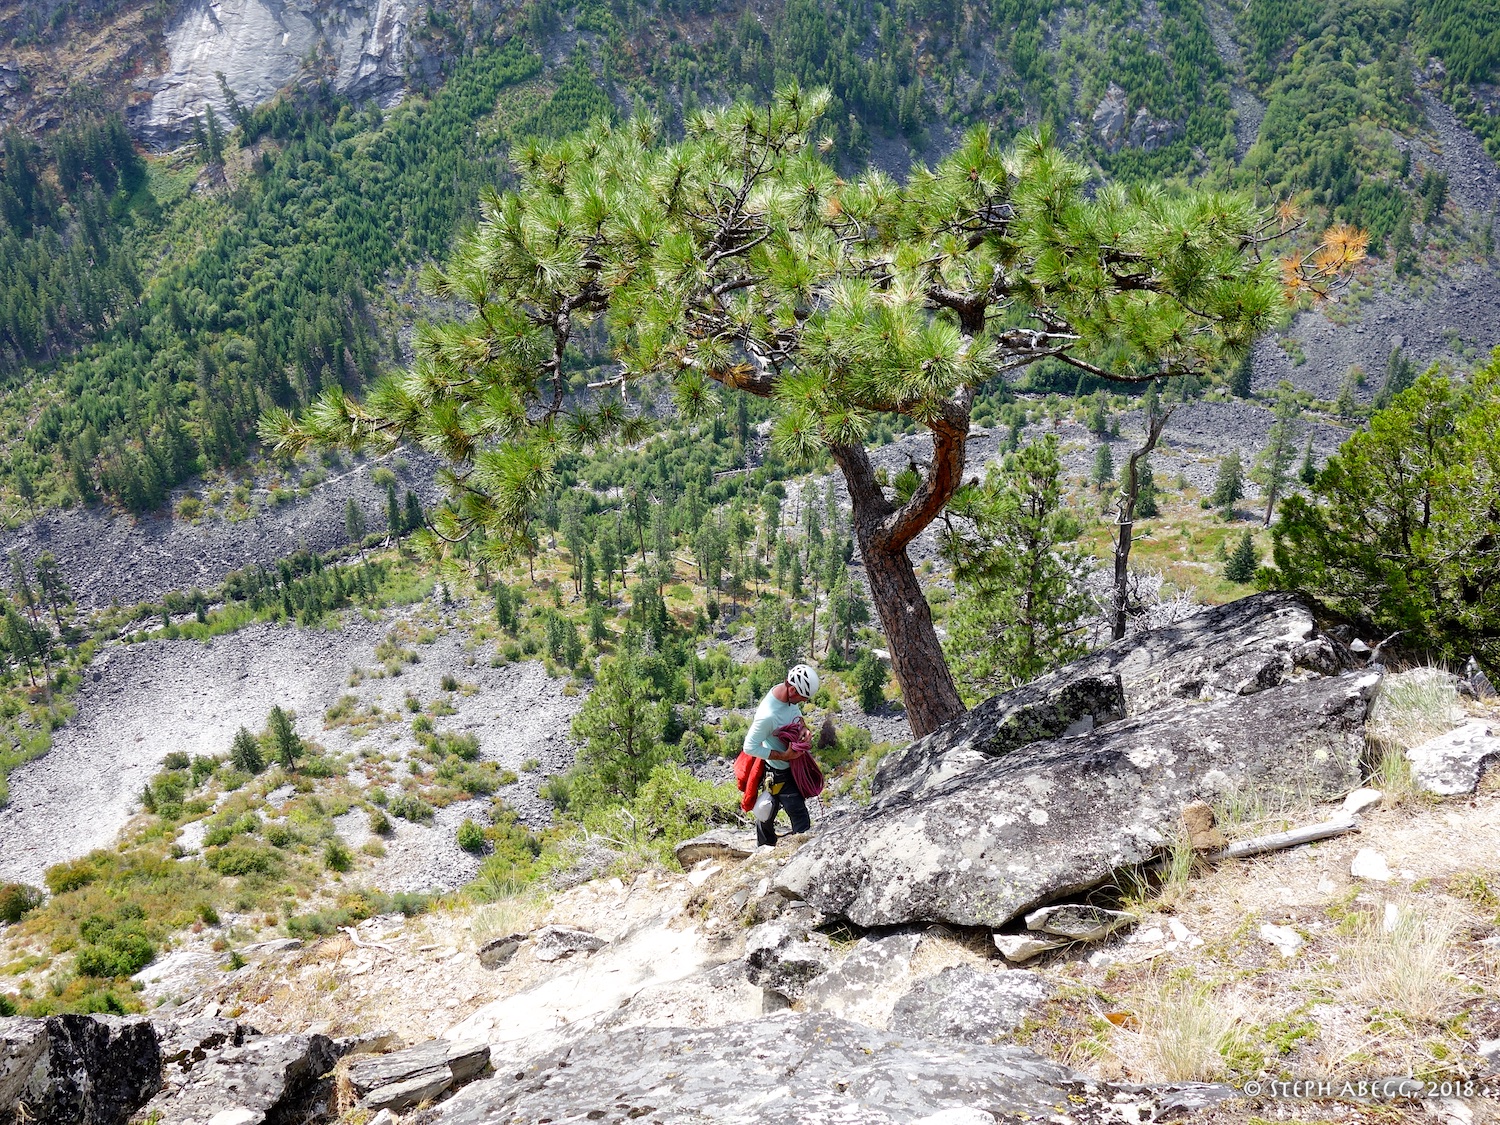
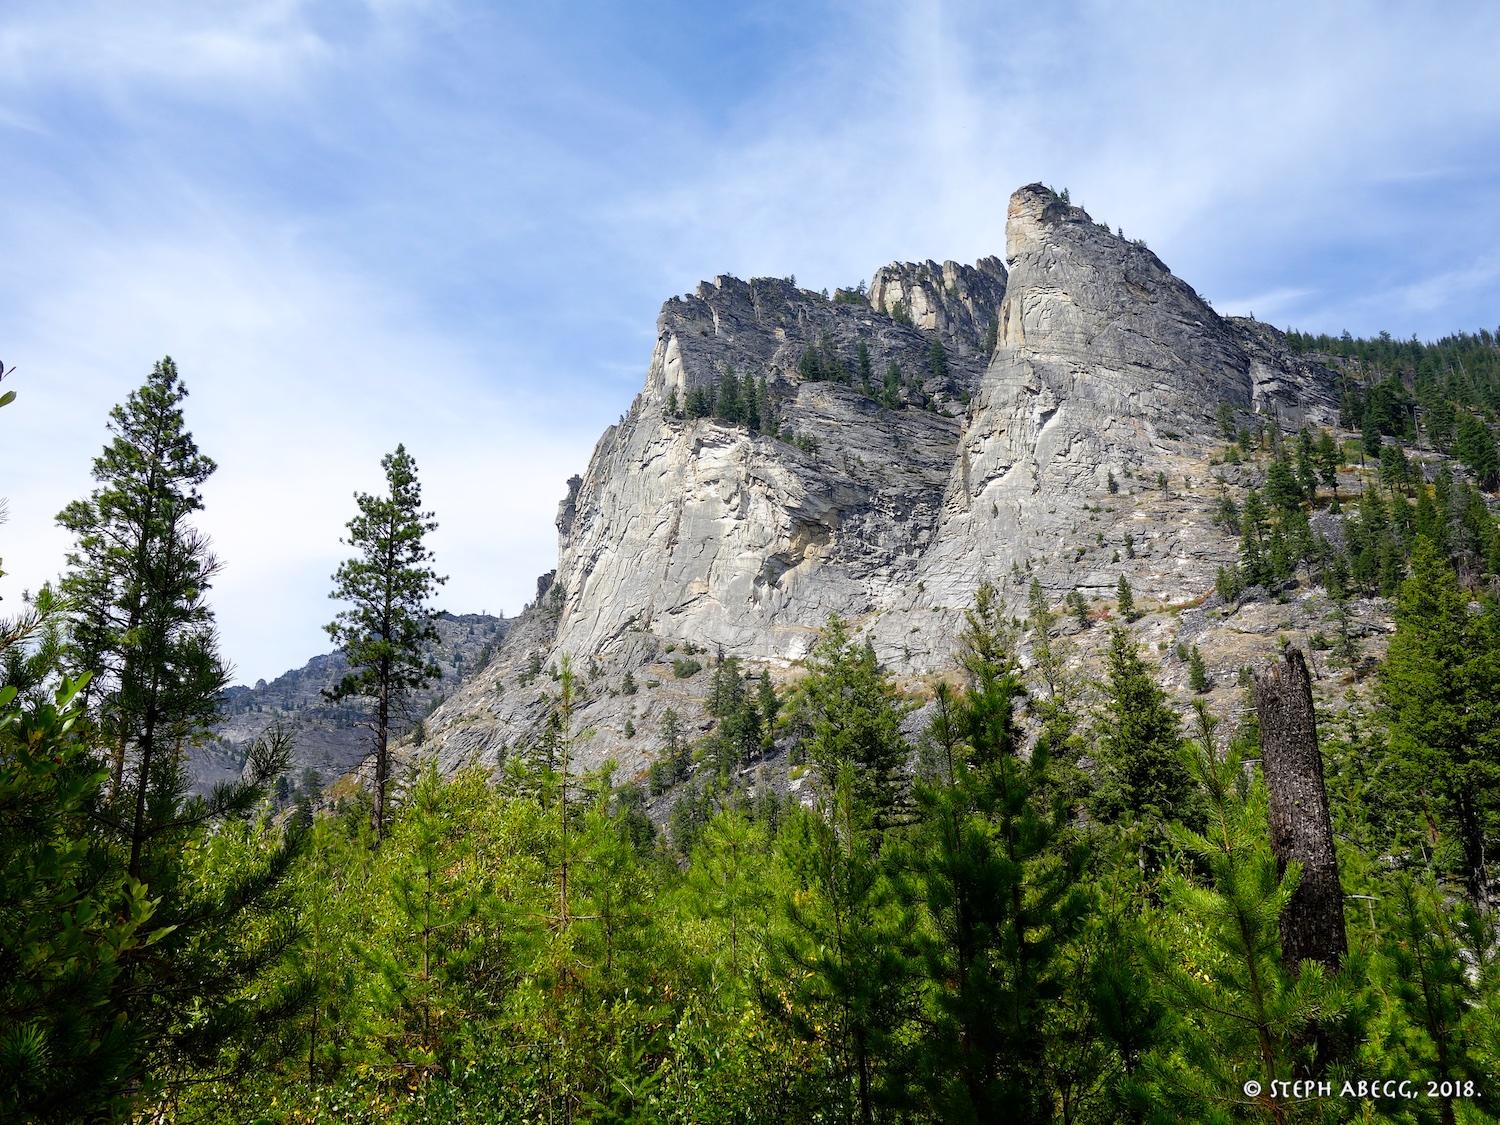
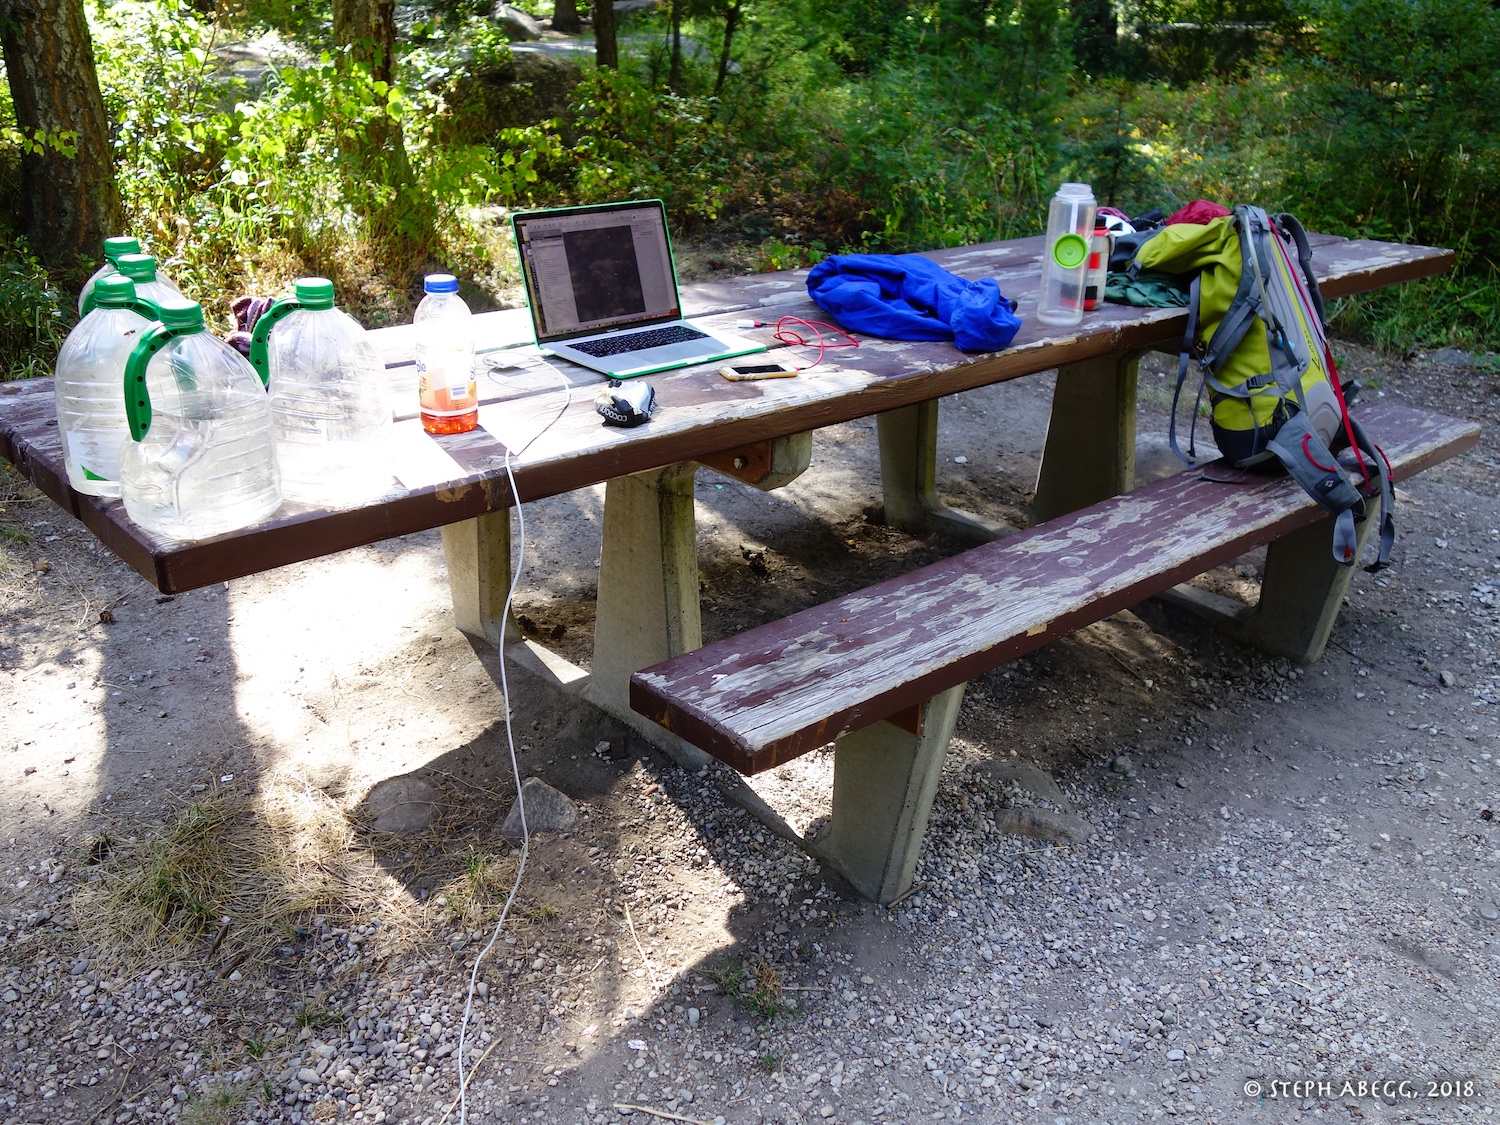
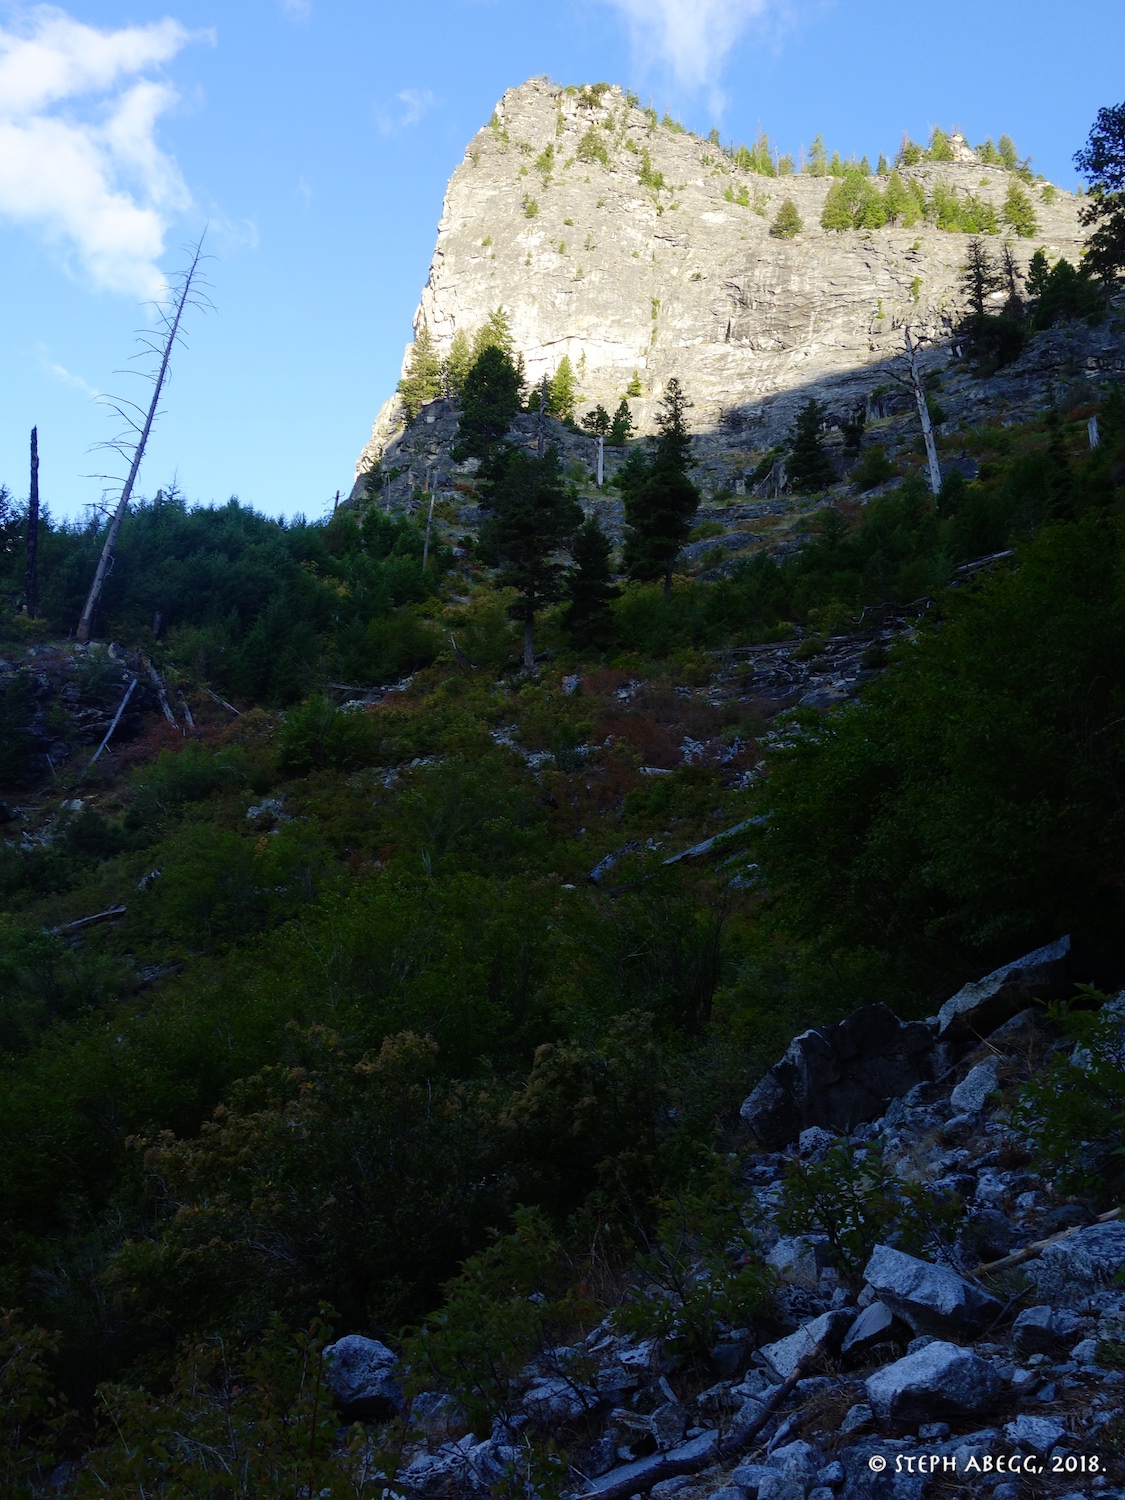
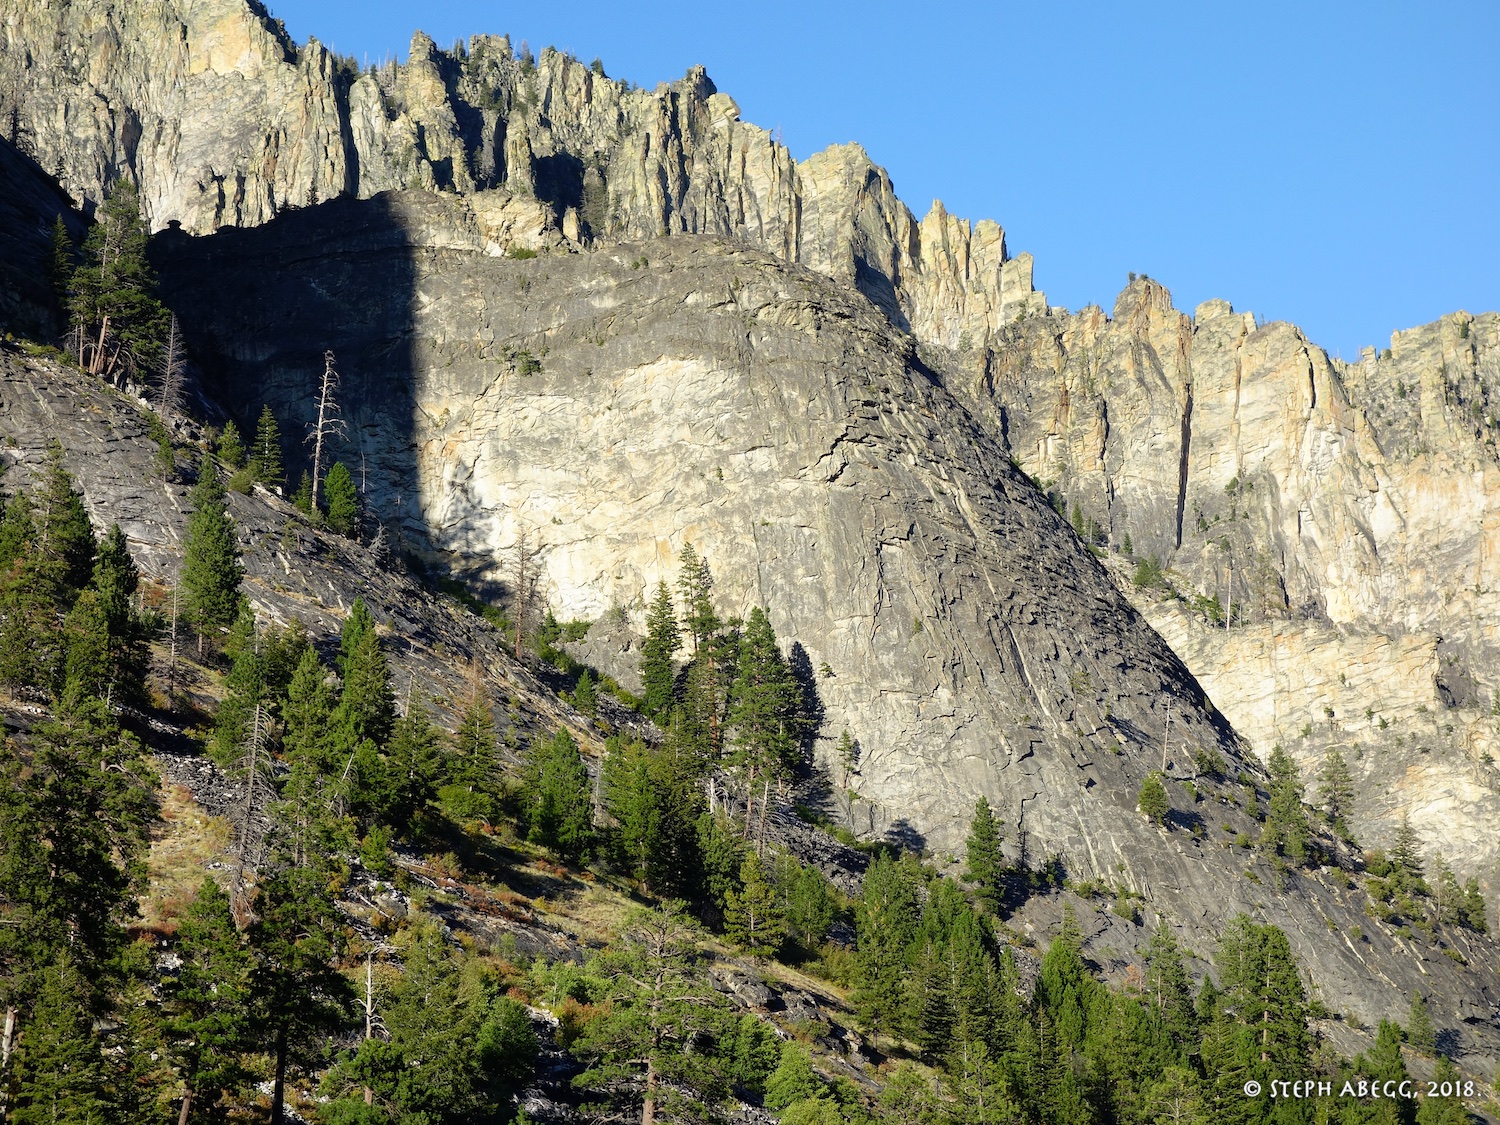
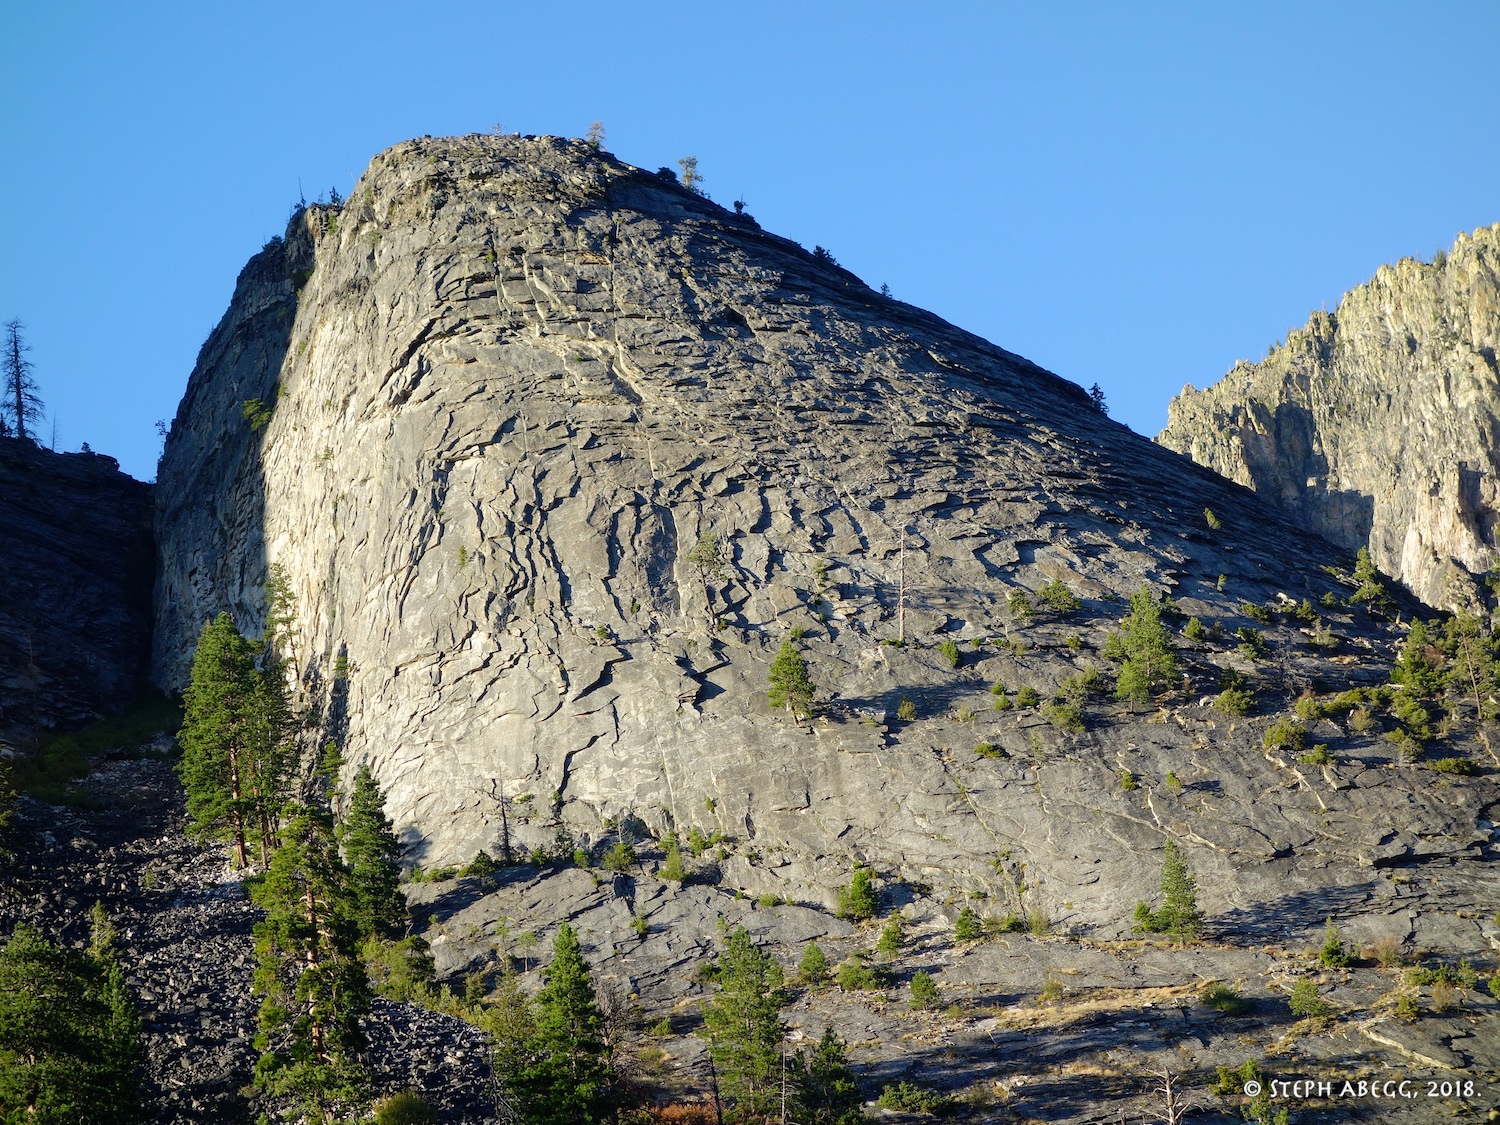
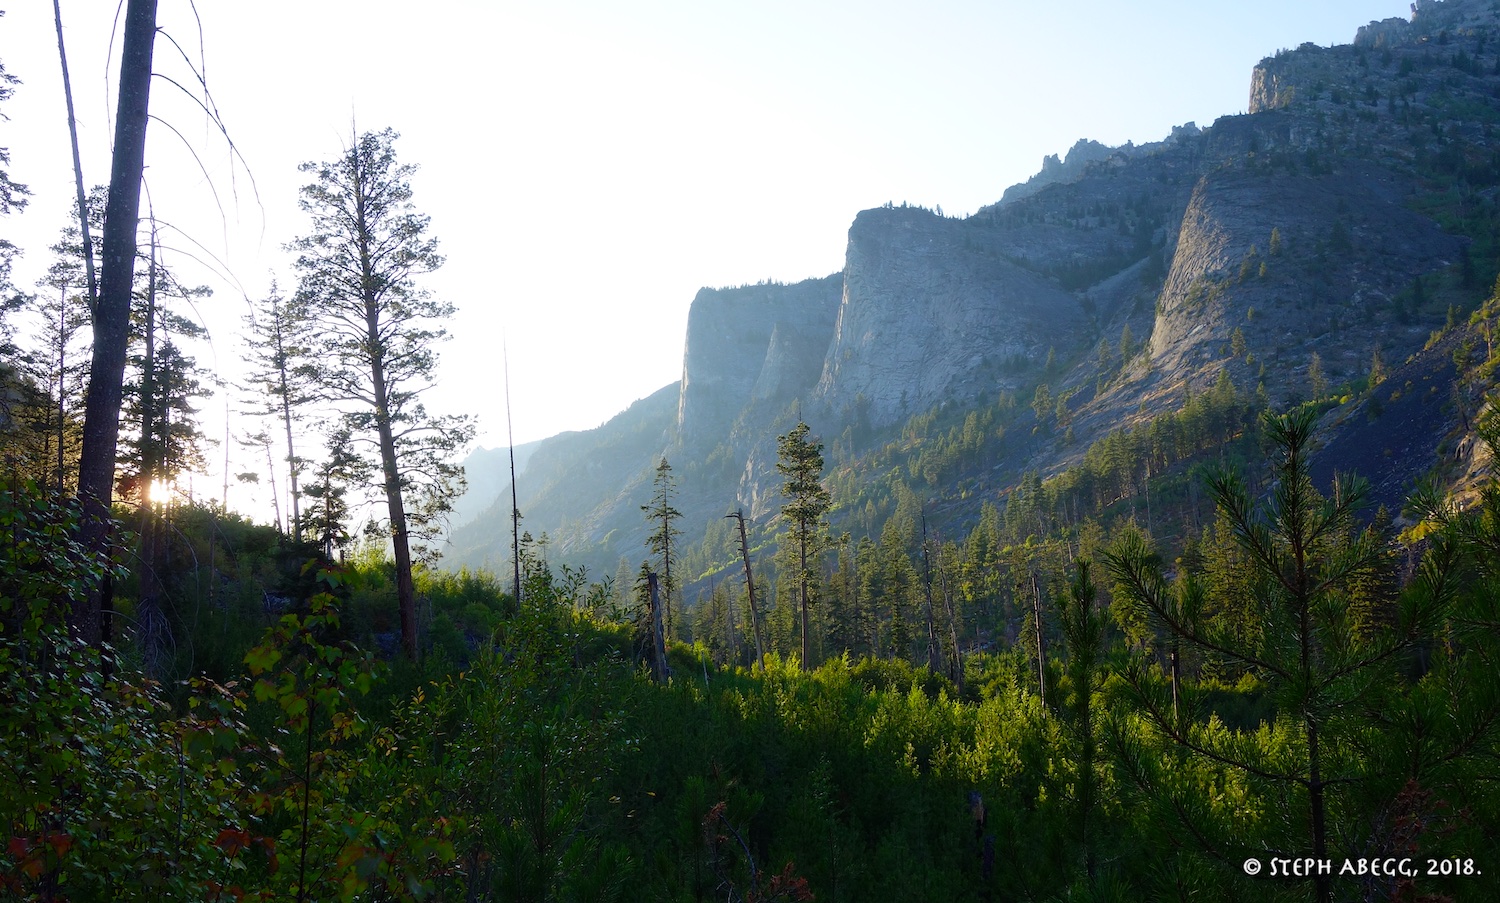
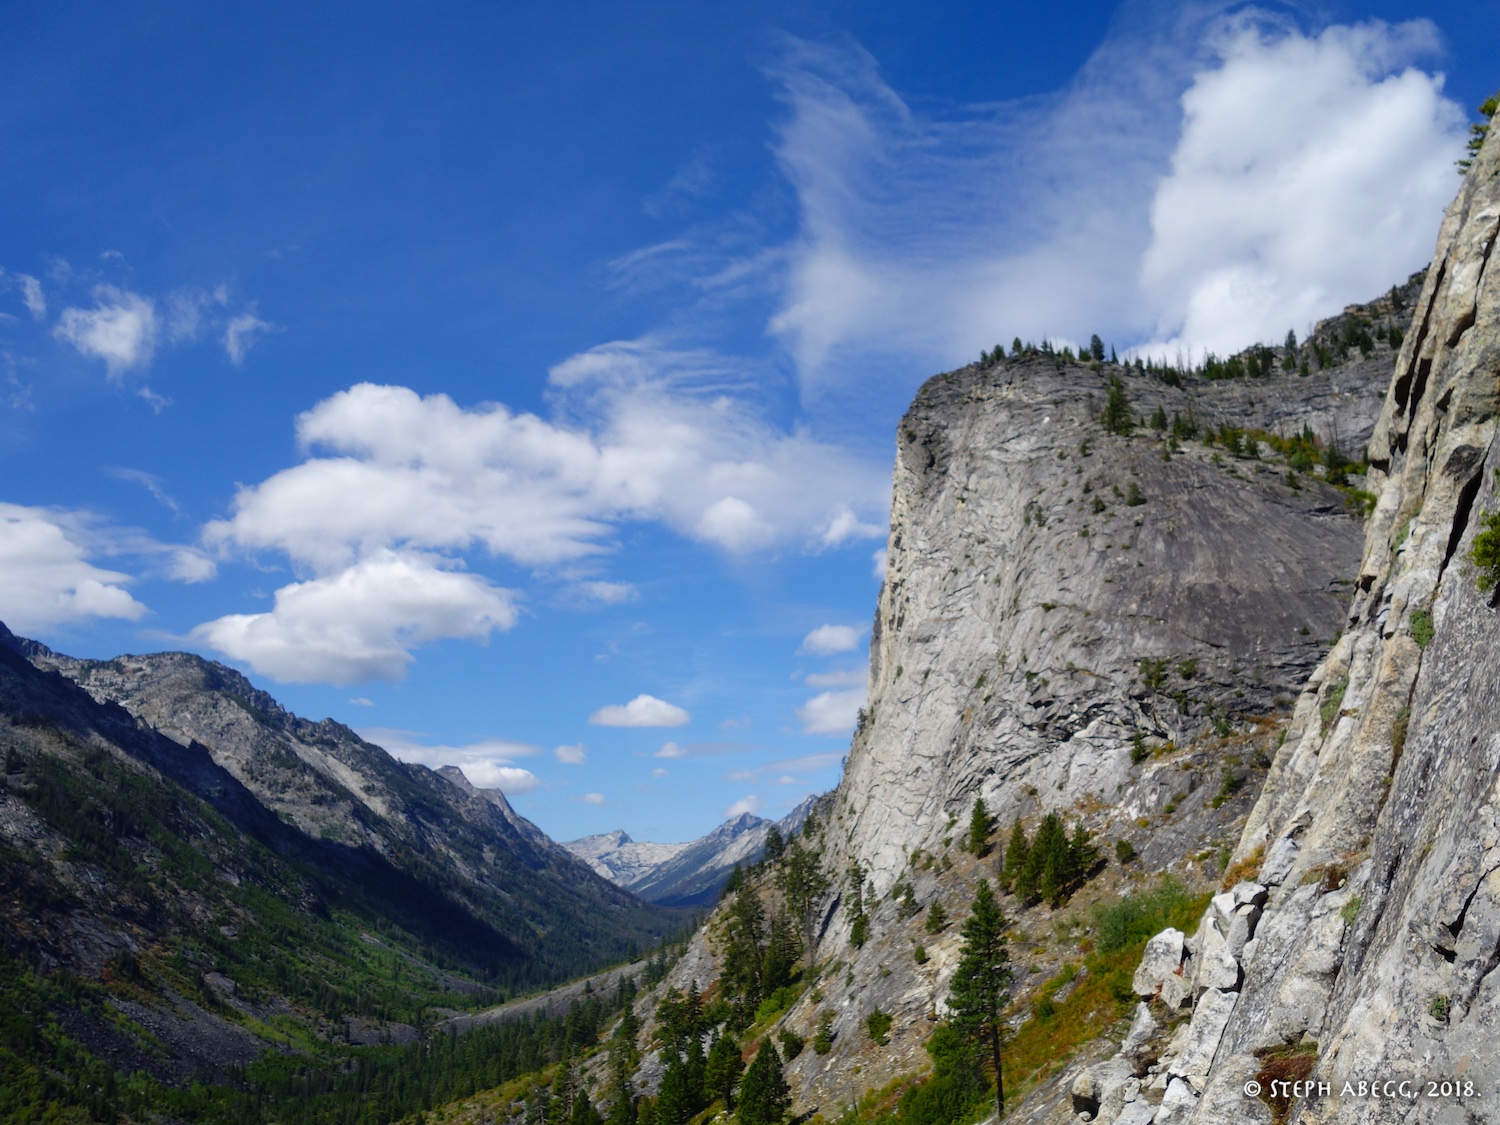
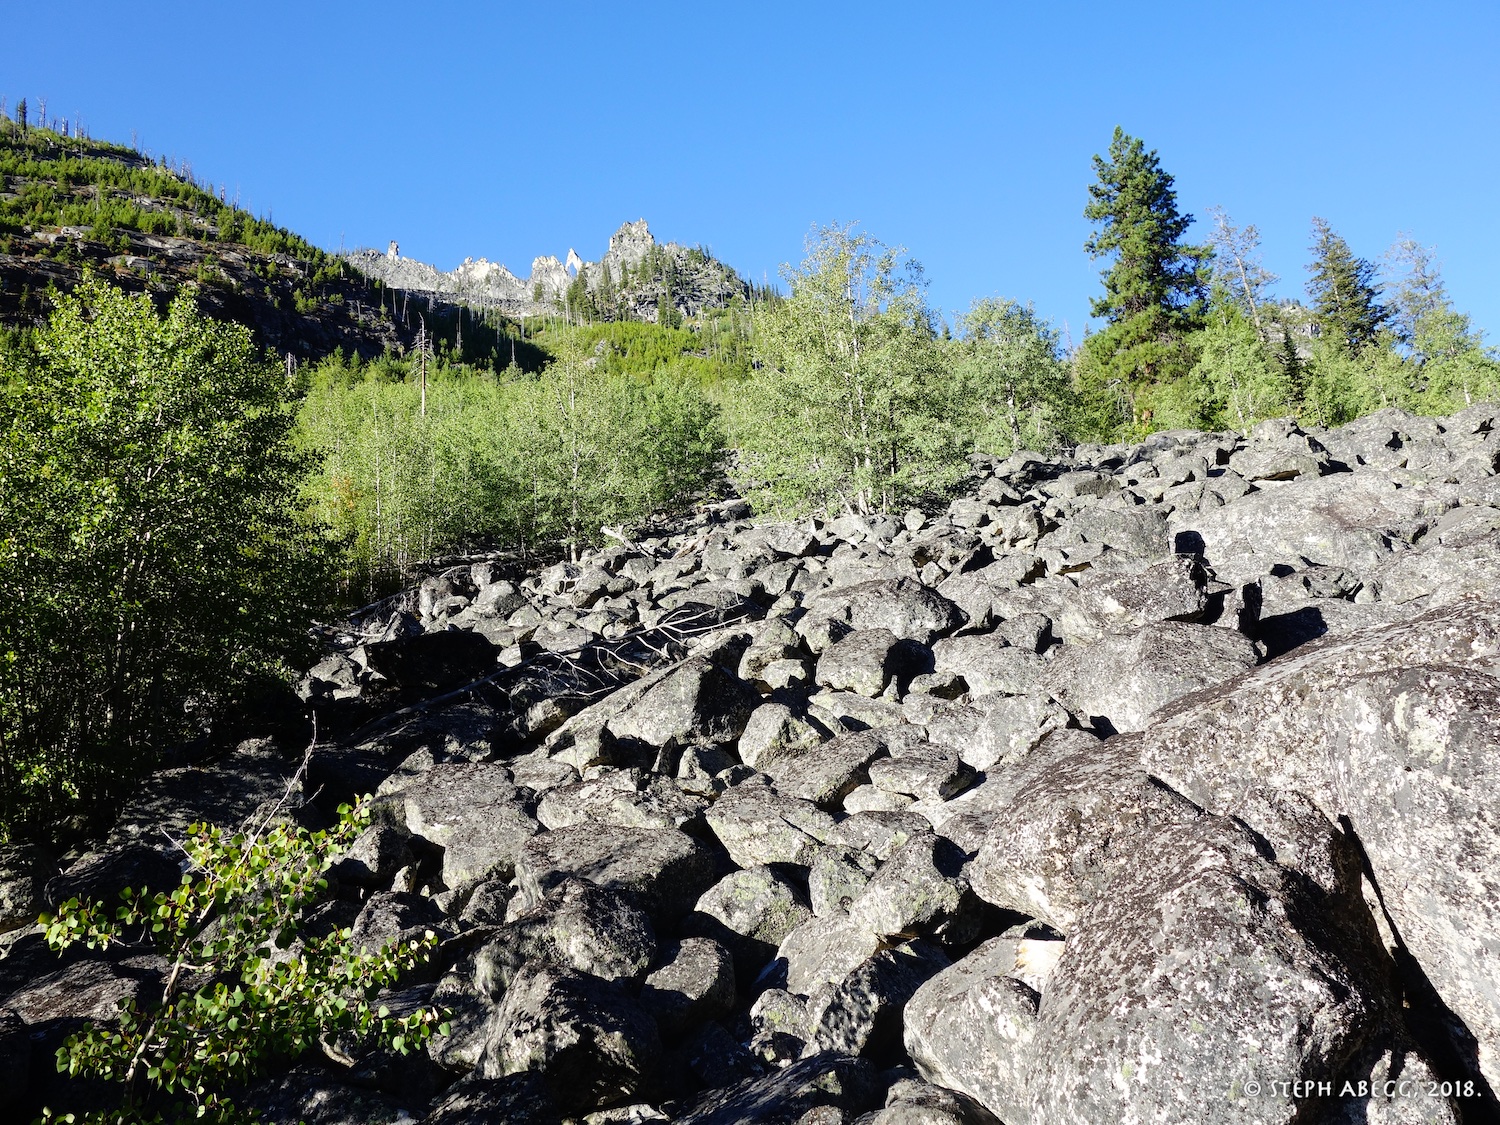
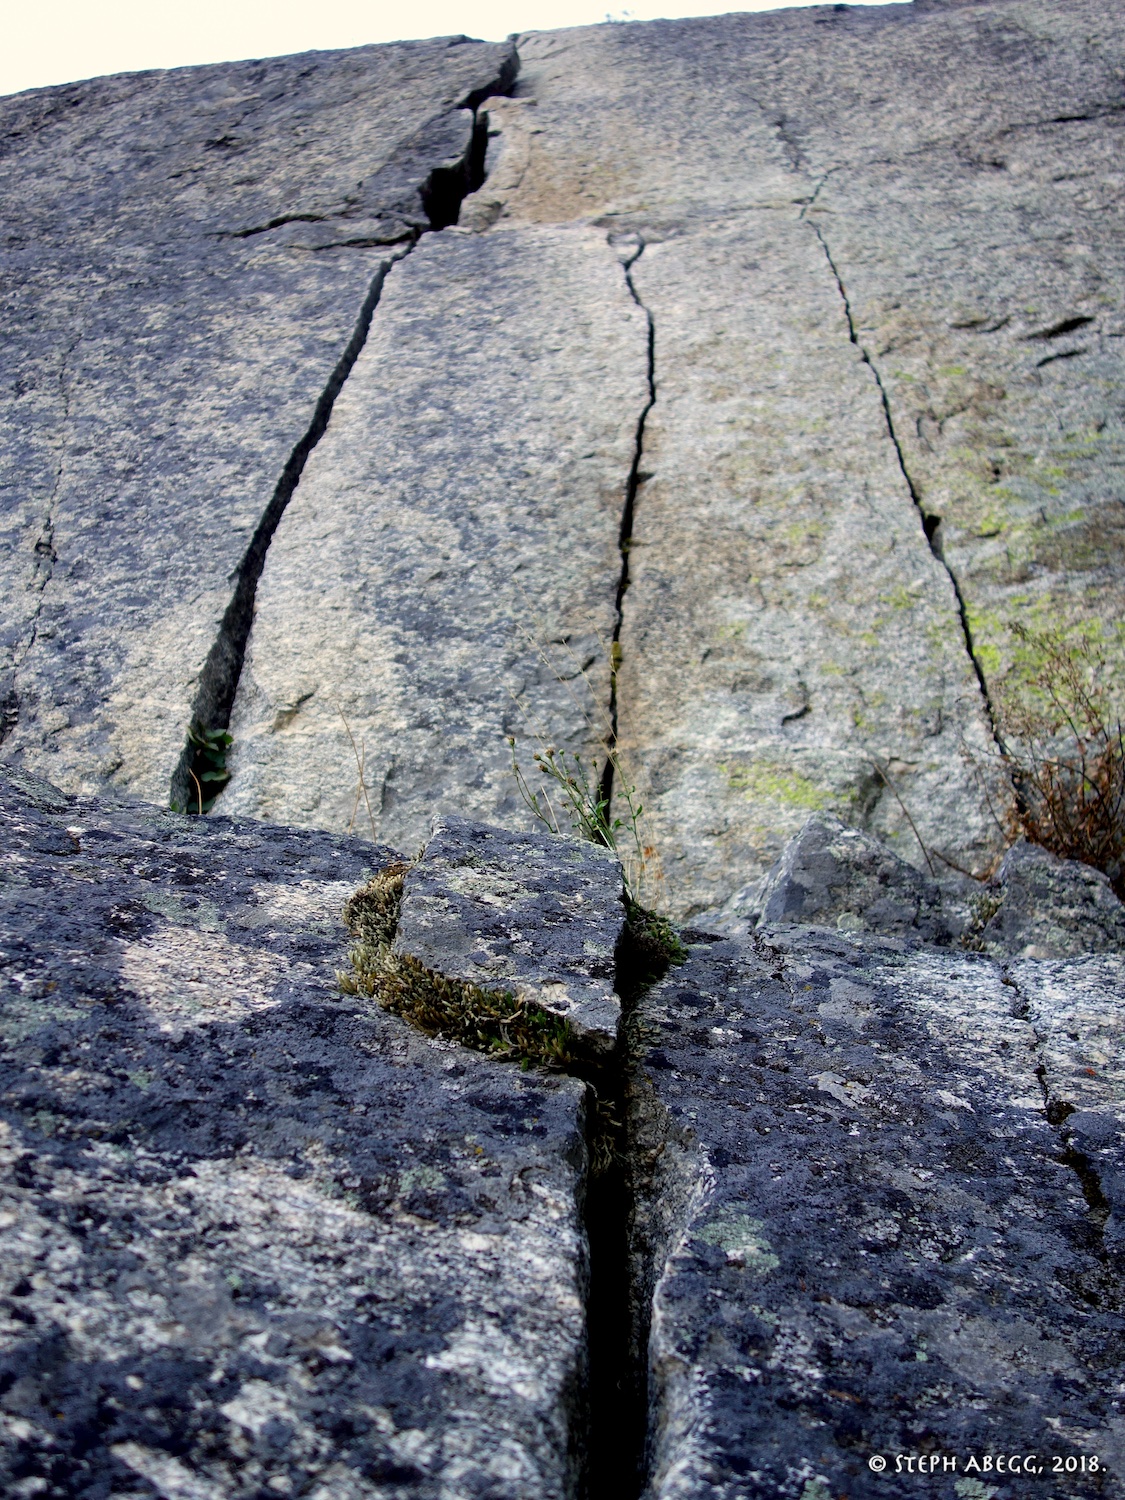
At some point in the last few years, I caught wind of this place called "Blodgett Canyon". Situated in the middle of the Bitterroots of Montana, Blodgett Canyon was apparently littered with granite cliffs and spires, offering several multipitch south-facing routes featuring everything from large dihedrals to jam-cracks, chimneys to featured face. Plus, there was supposedly a free campground right next to the trailhead, from which approaches to climbs were 1-2 hours, mostly on flat trail and open terrain. I had to check it out someday!

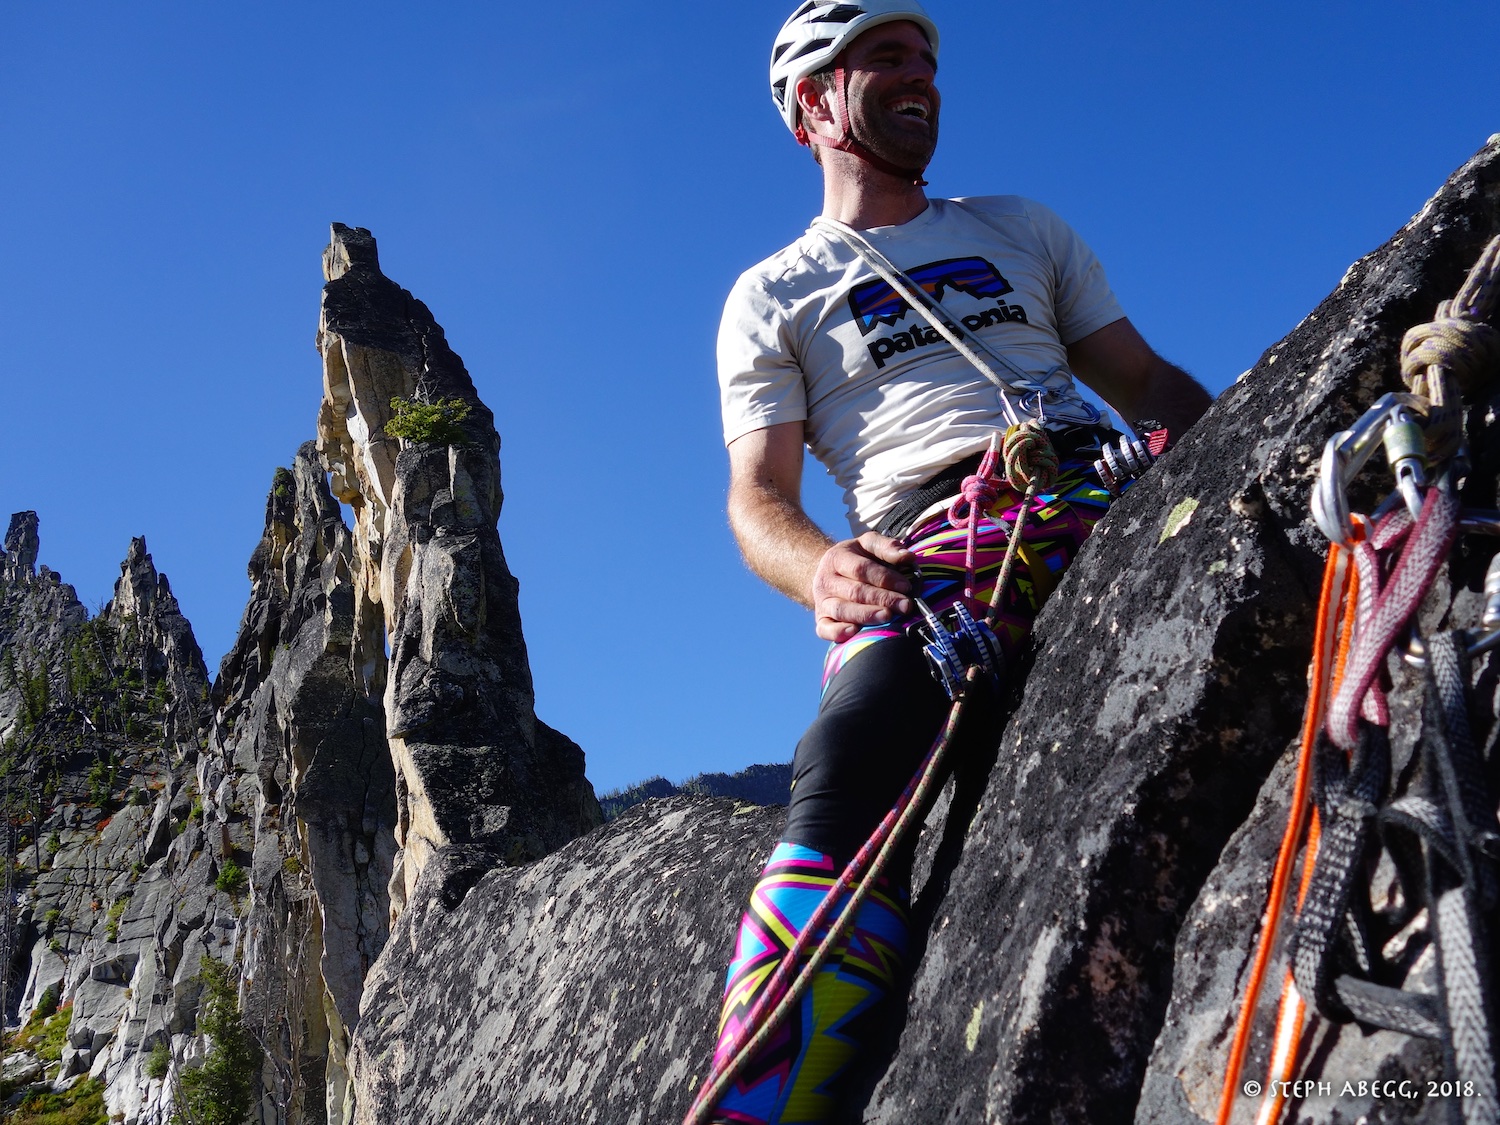
In June 2018, Chad Hiatt emailed me asking about some aerial photos I had taken of Mt. Queen Bess in the British Columbia Coast Range. At some point he mentioned he was from Montana, I mentioned I really wanted to check out the climbing there someday, and we ended up planning a 5-day trip to Blodgett Canyon for early September.  The trip almost didn't happen, when I strained an intercostal muscle in late August and Chad's summer was plagued with a cracked sesamoid bone in his left foot; but in the end we decided to go for it, groan and limp our way up moderate routes and maybe even some harder routes, and have fun.

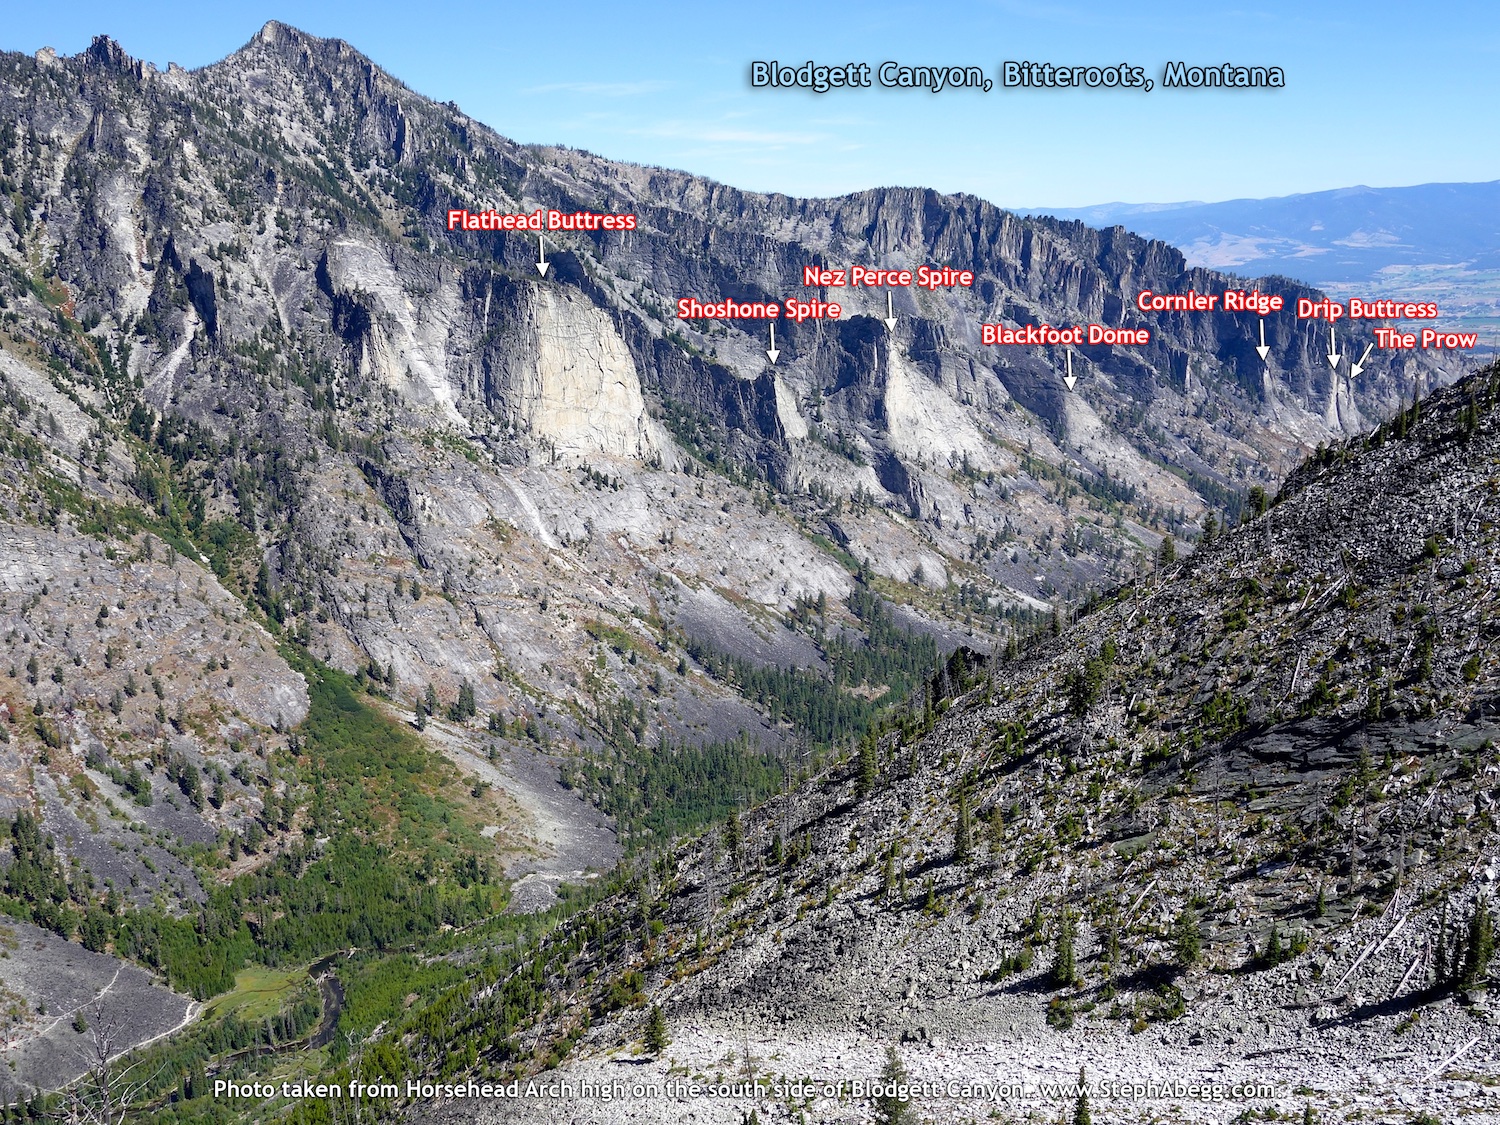
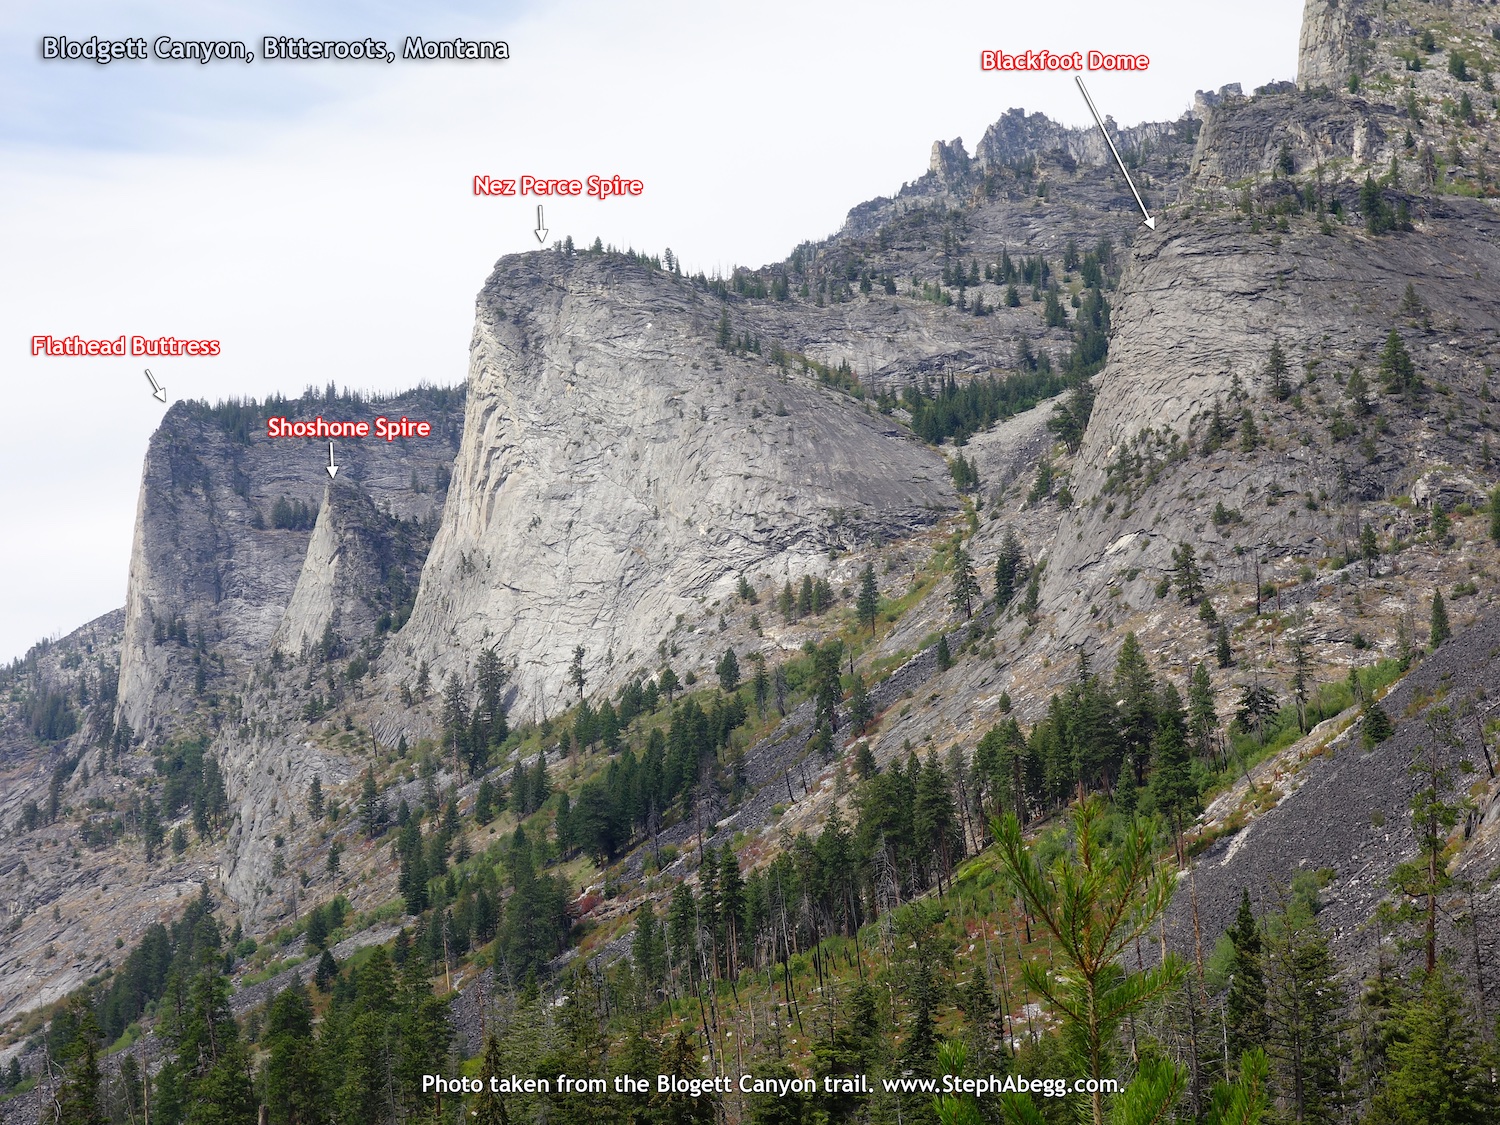
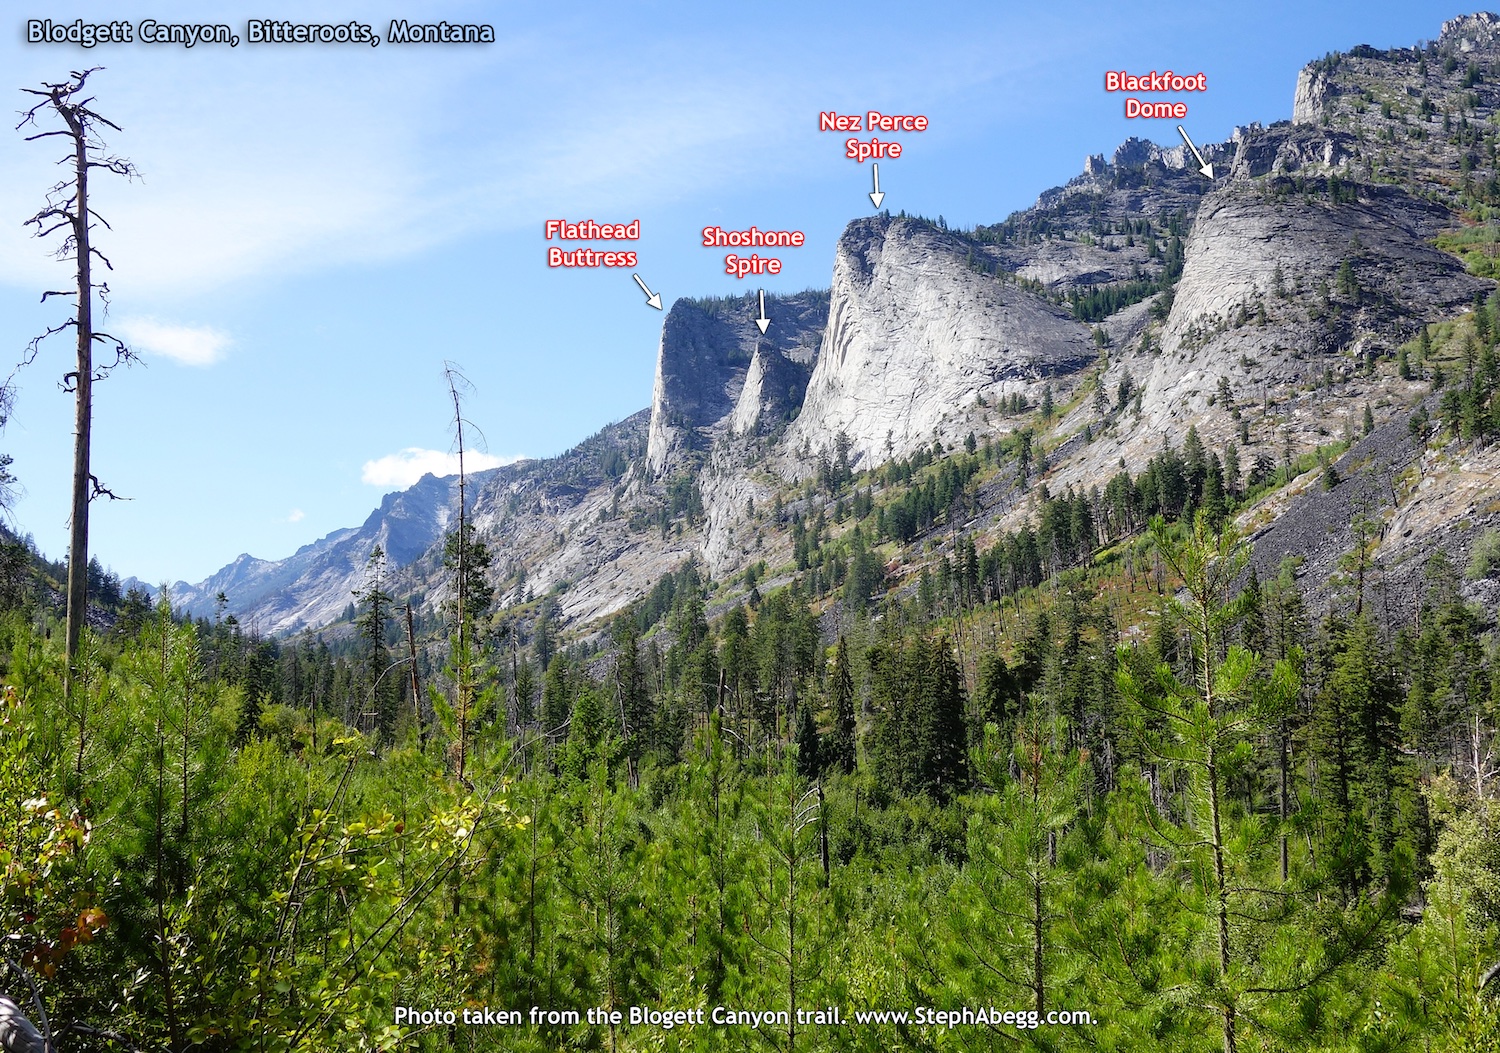
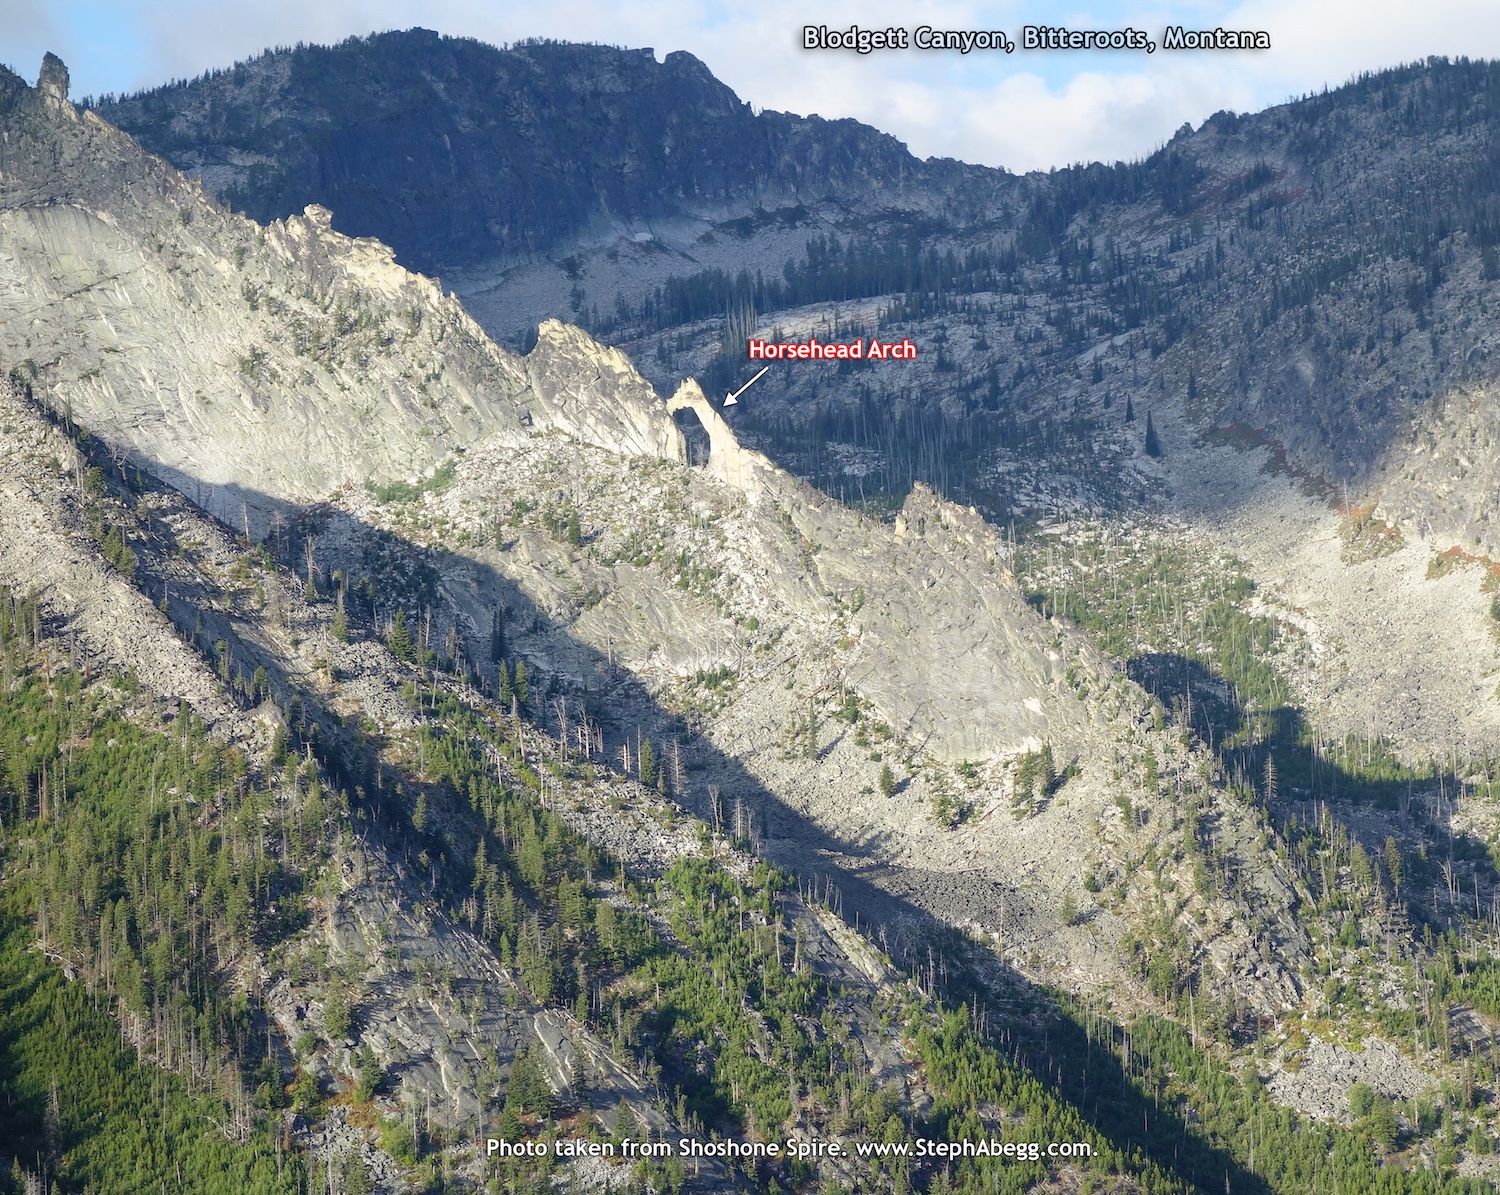
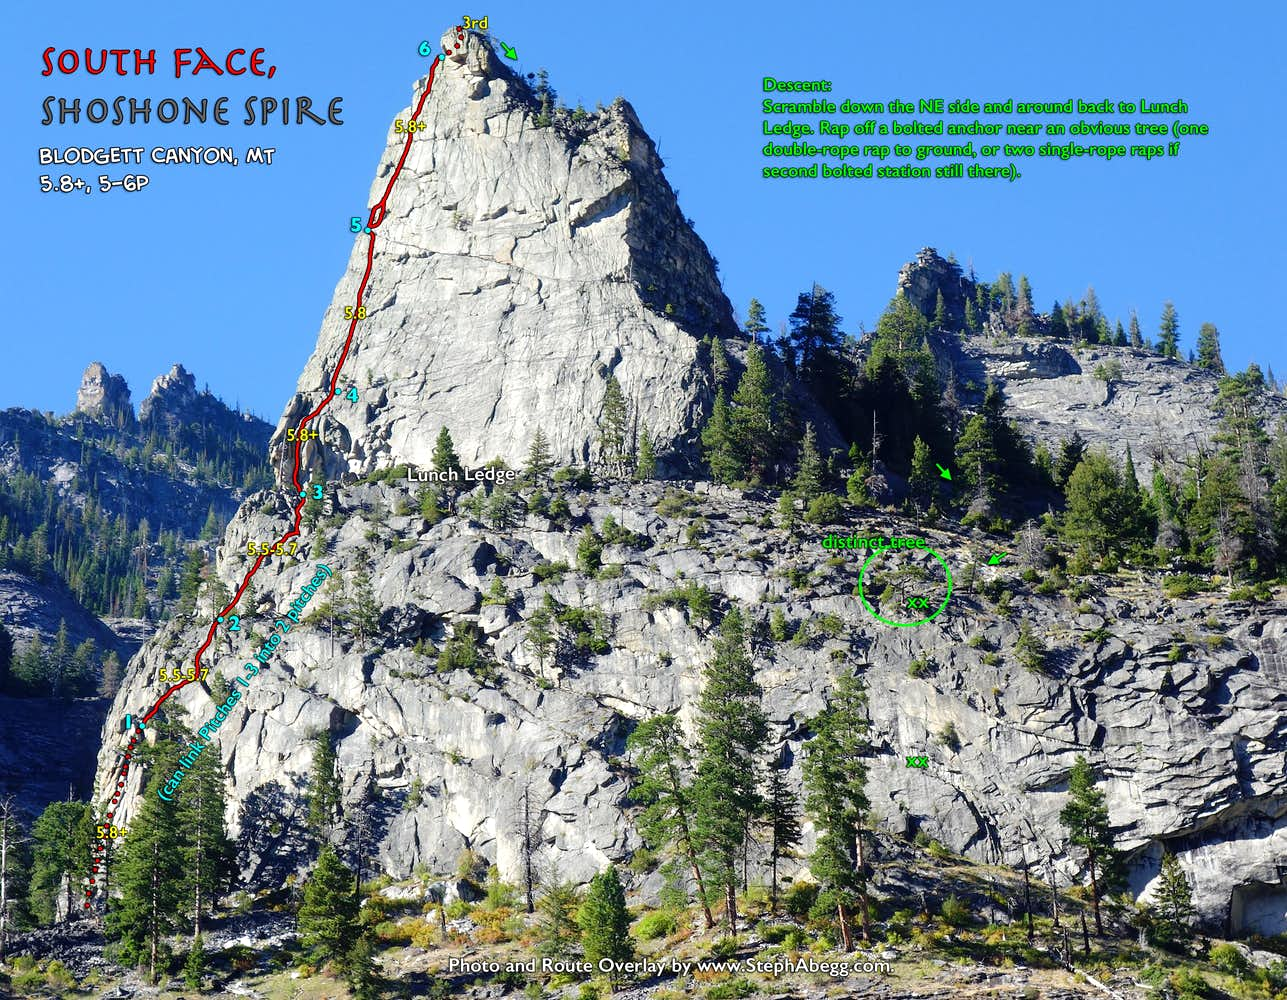
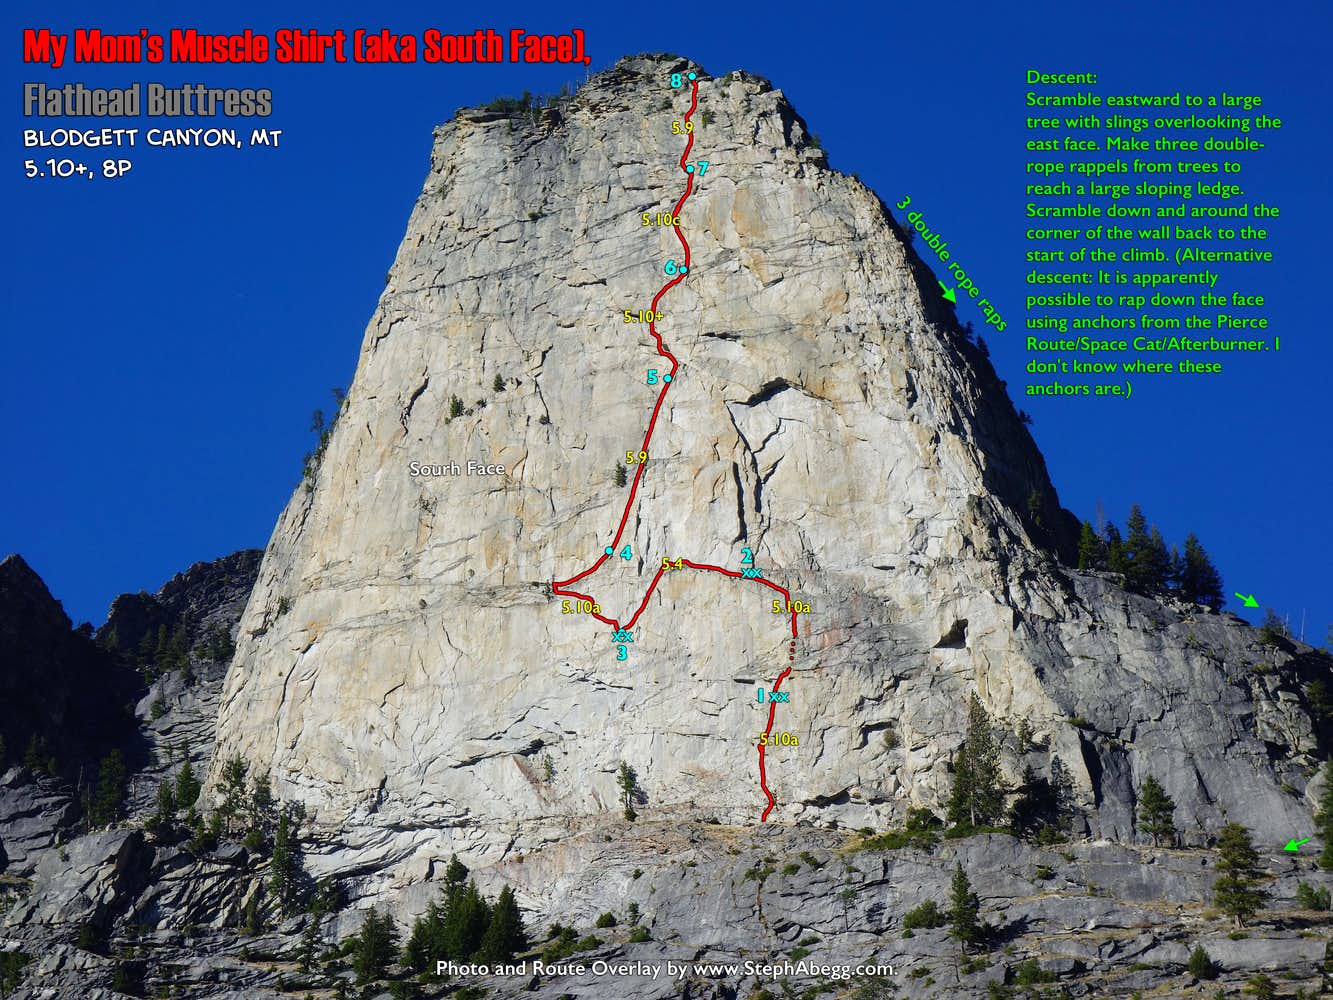
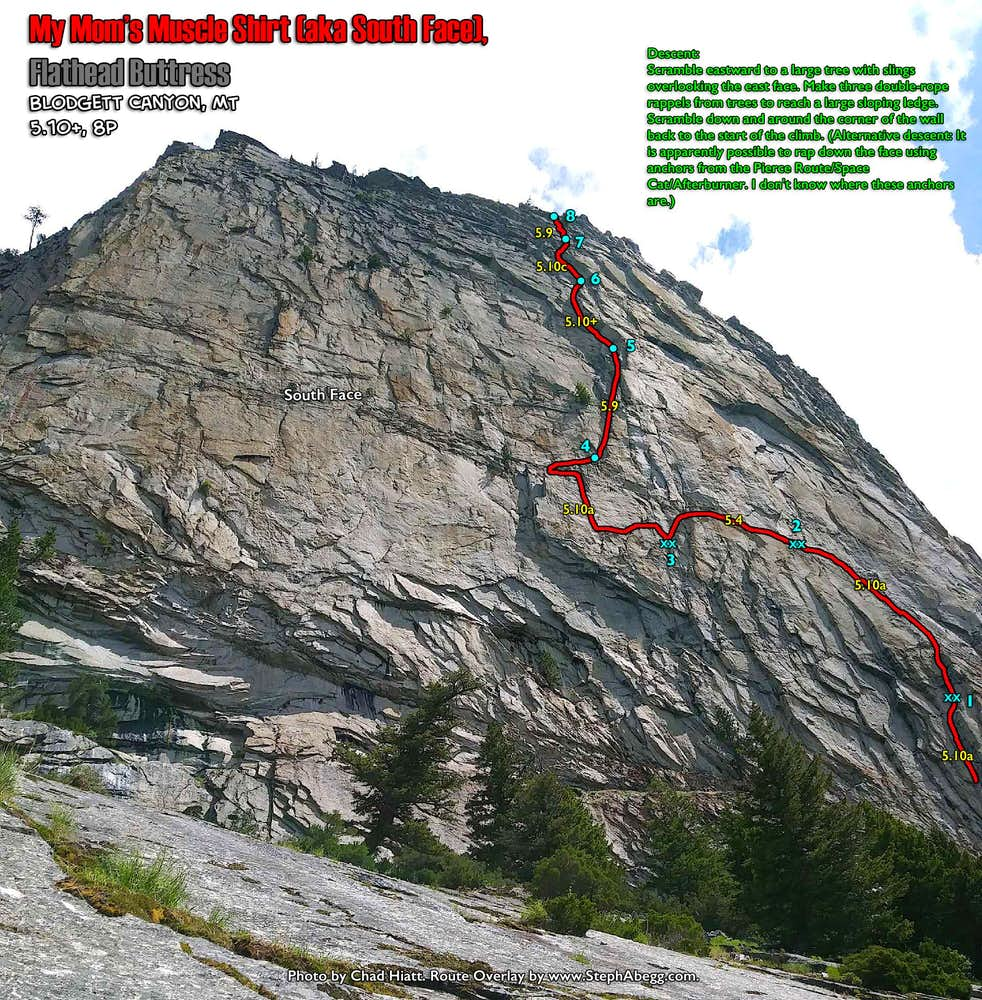
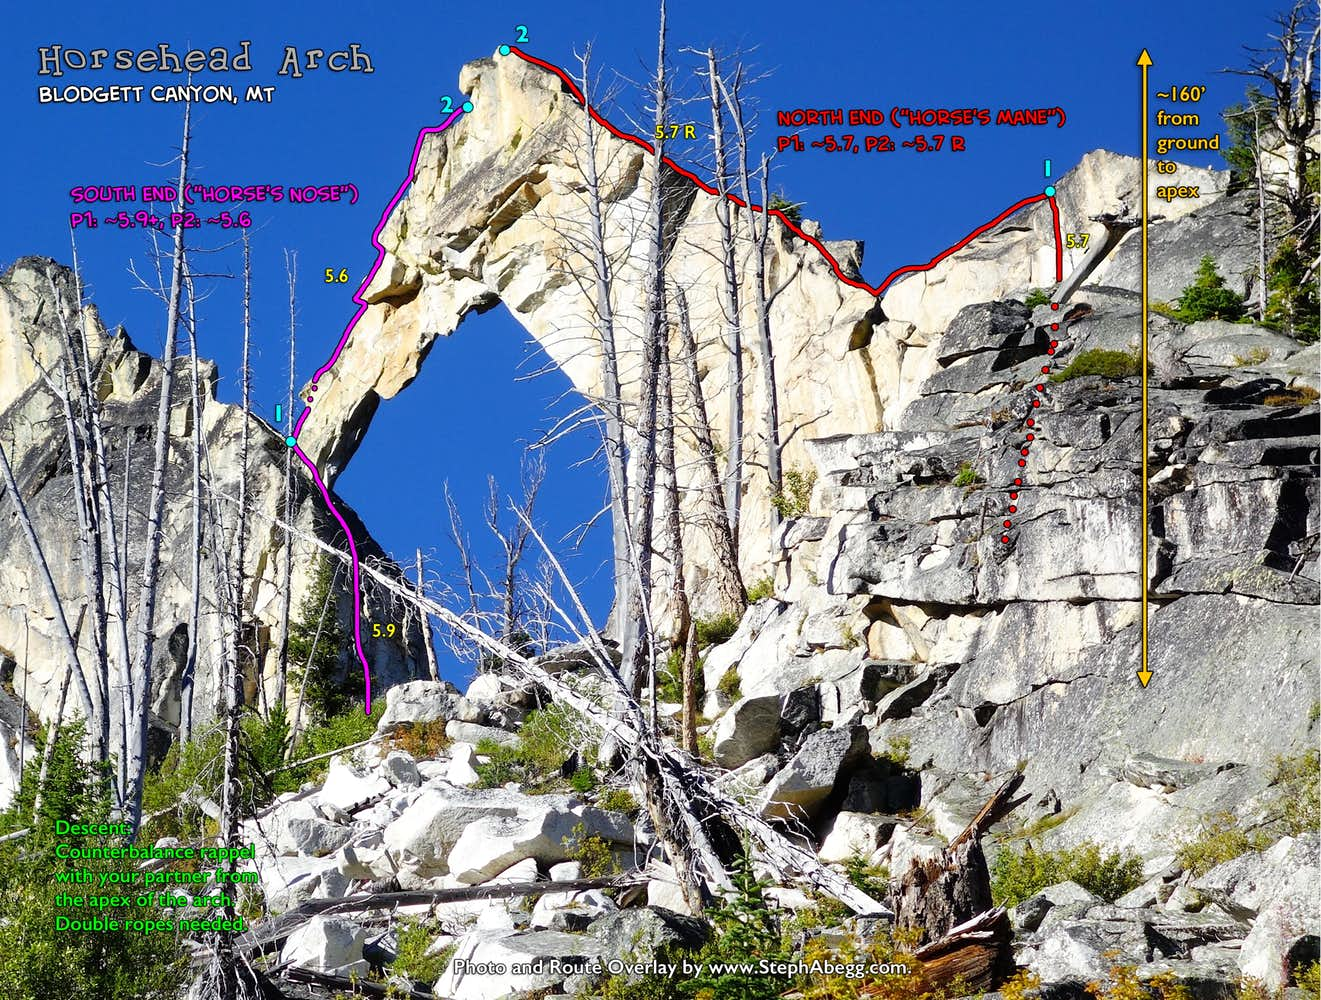
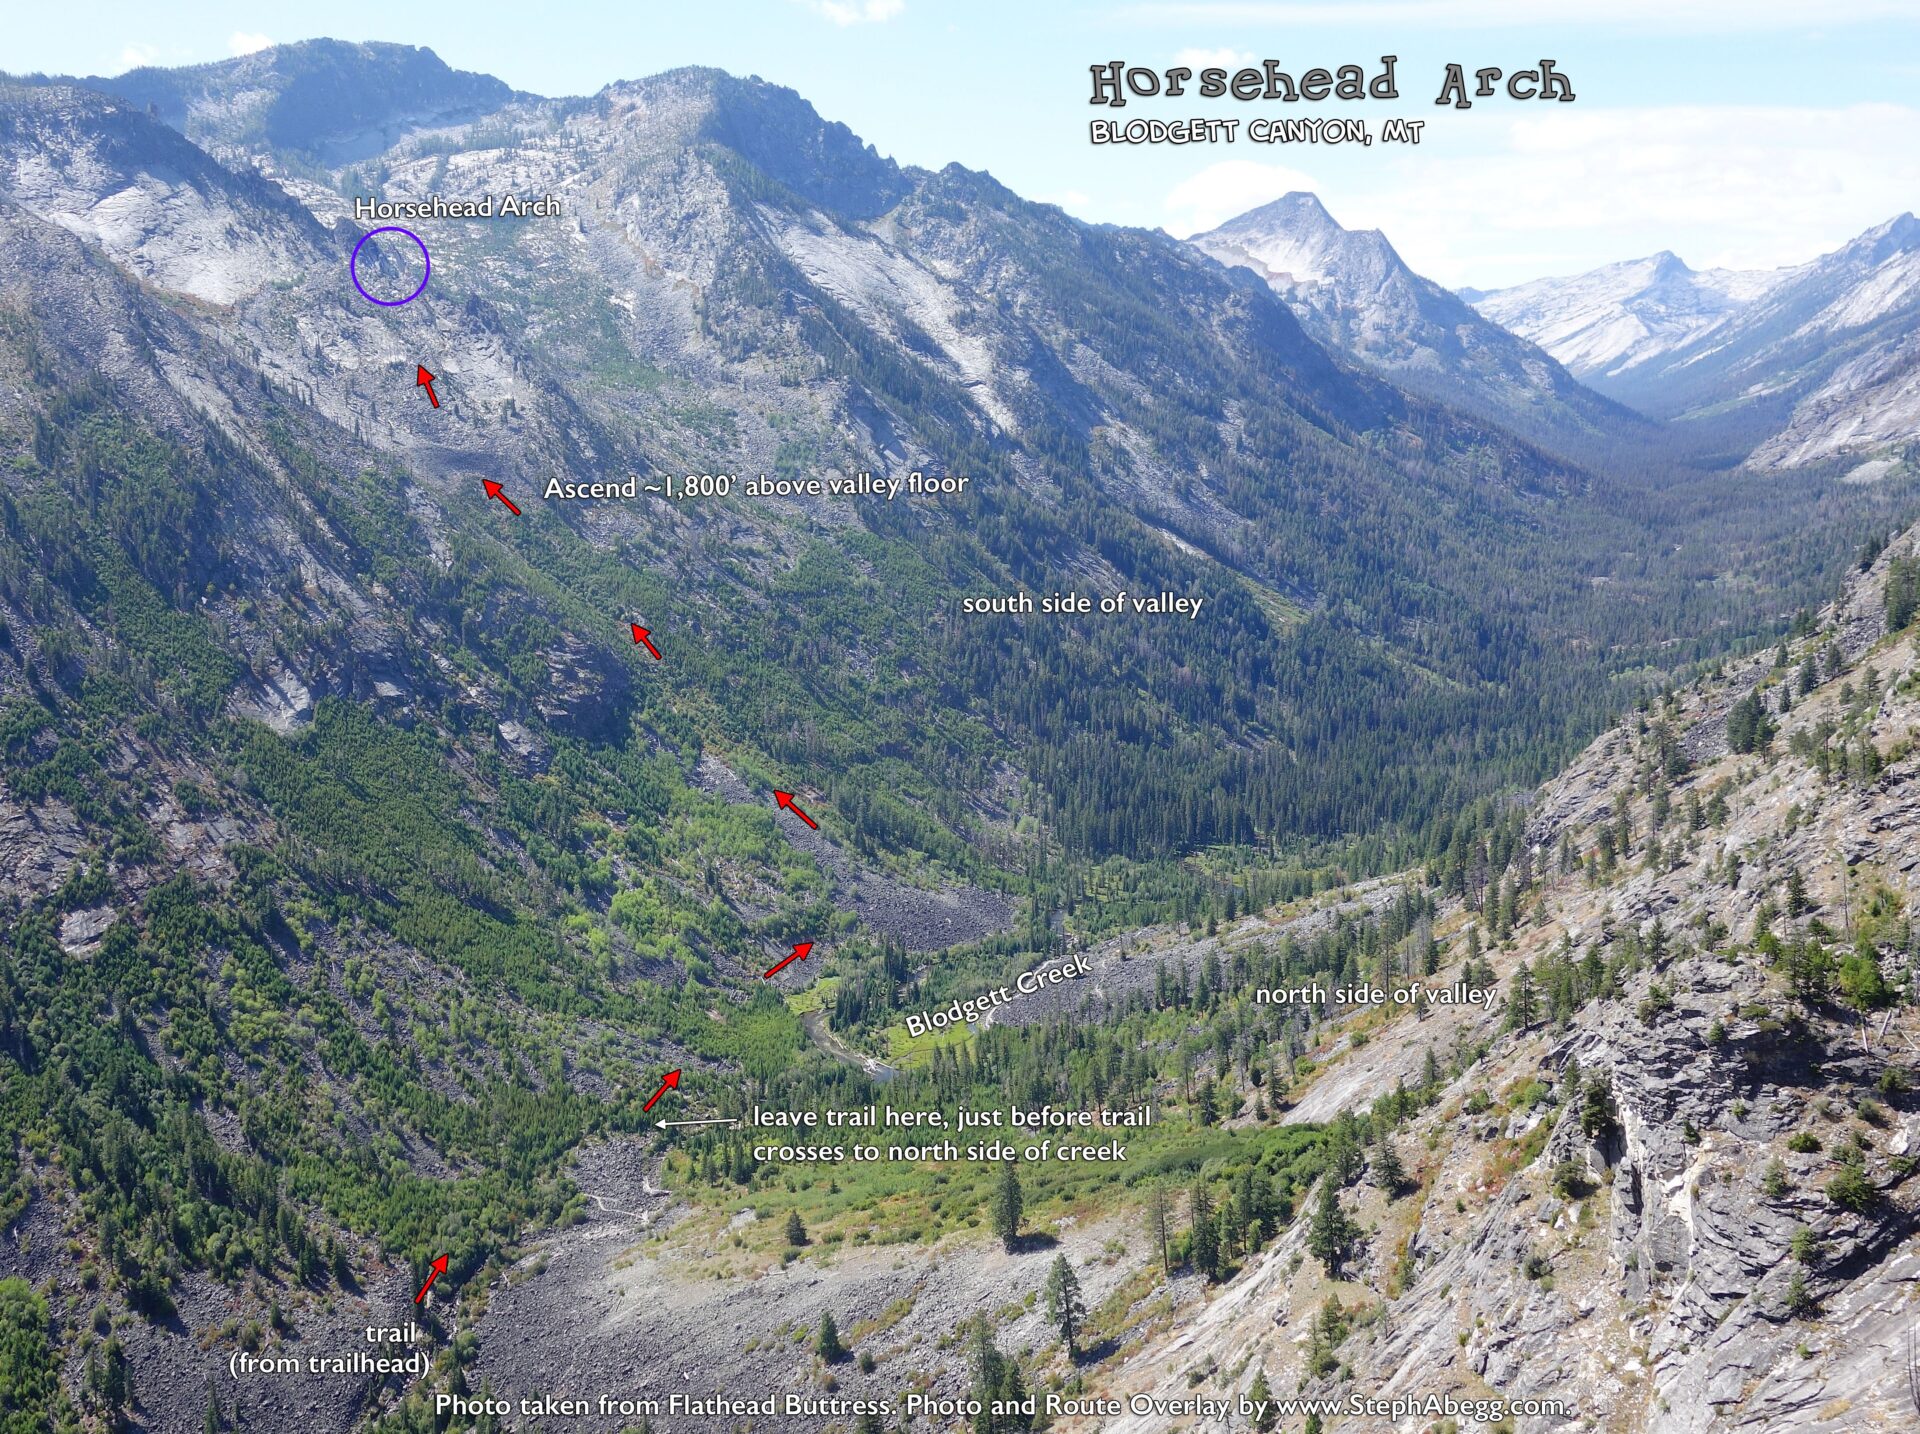
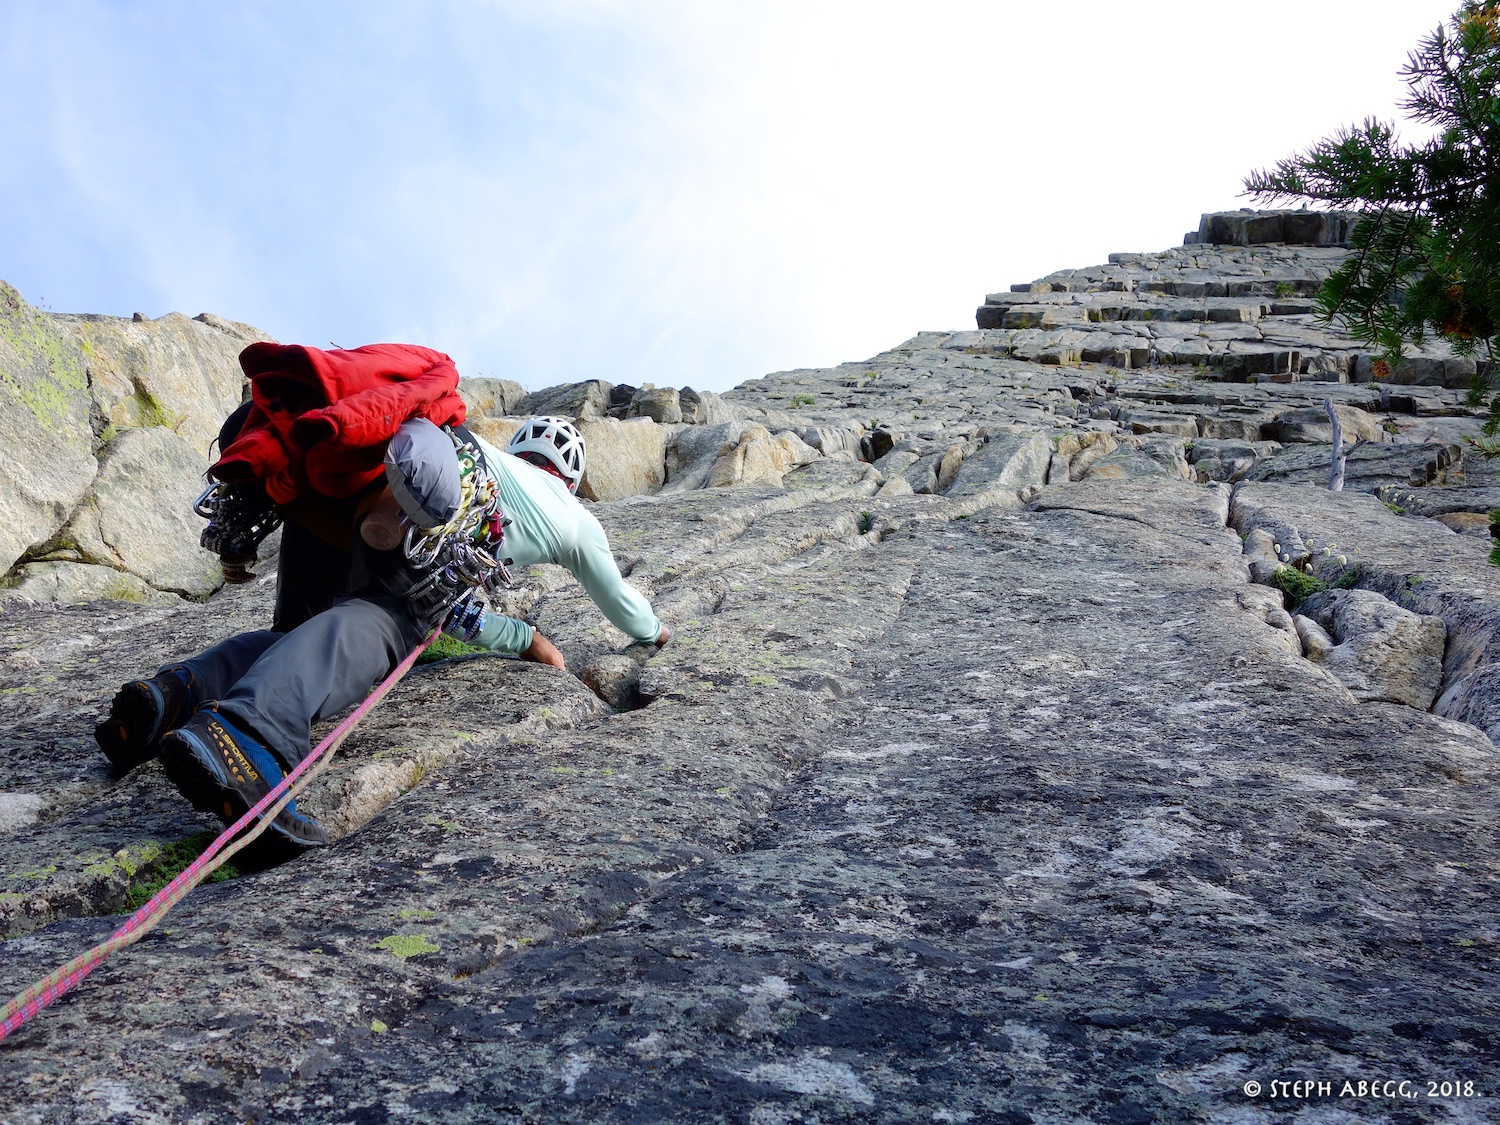
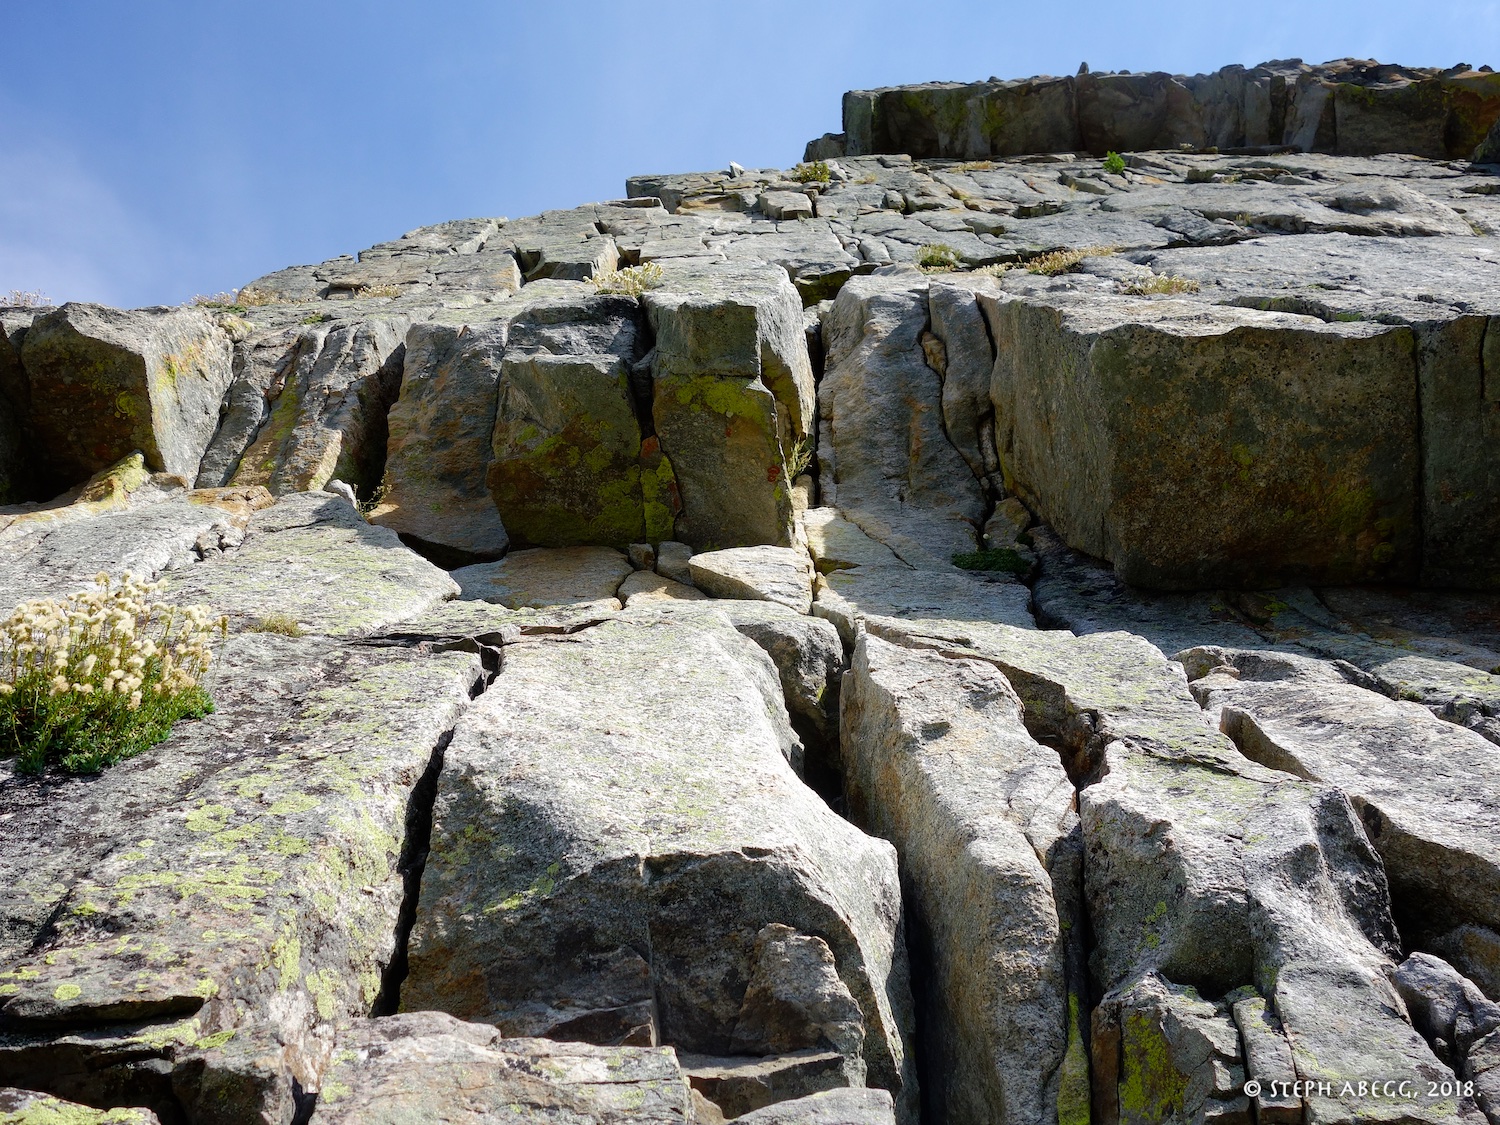
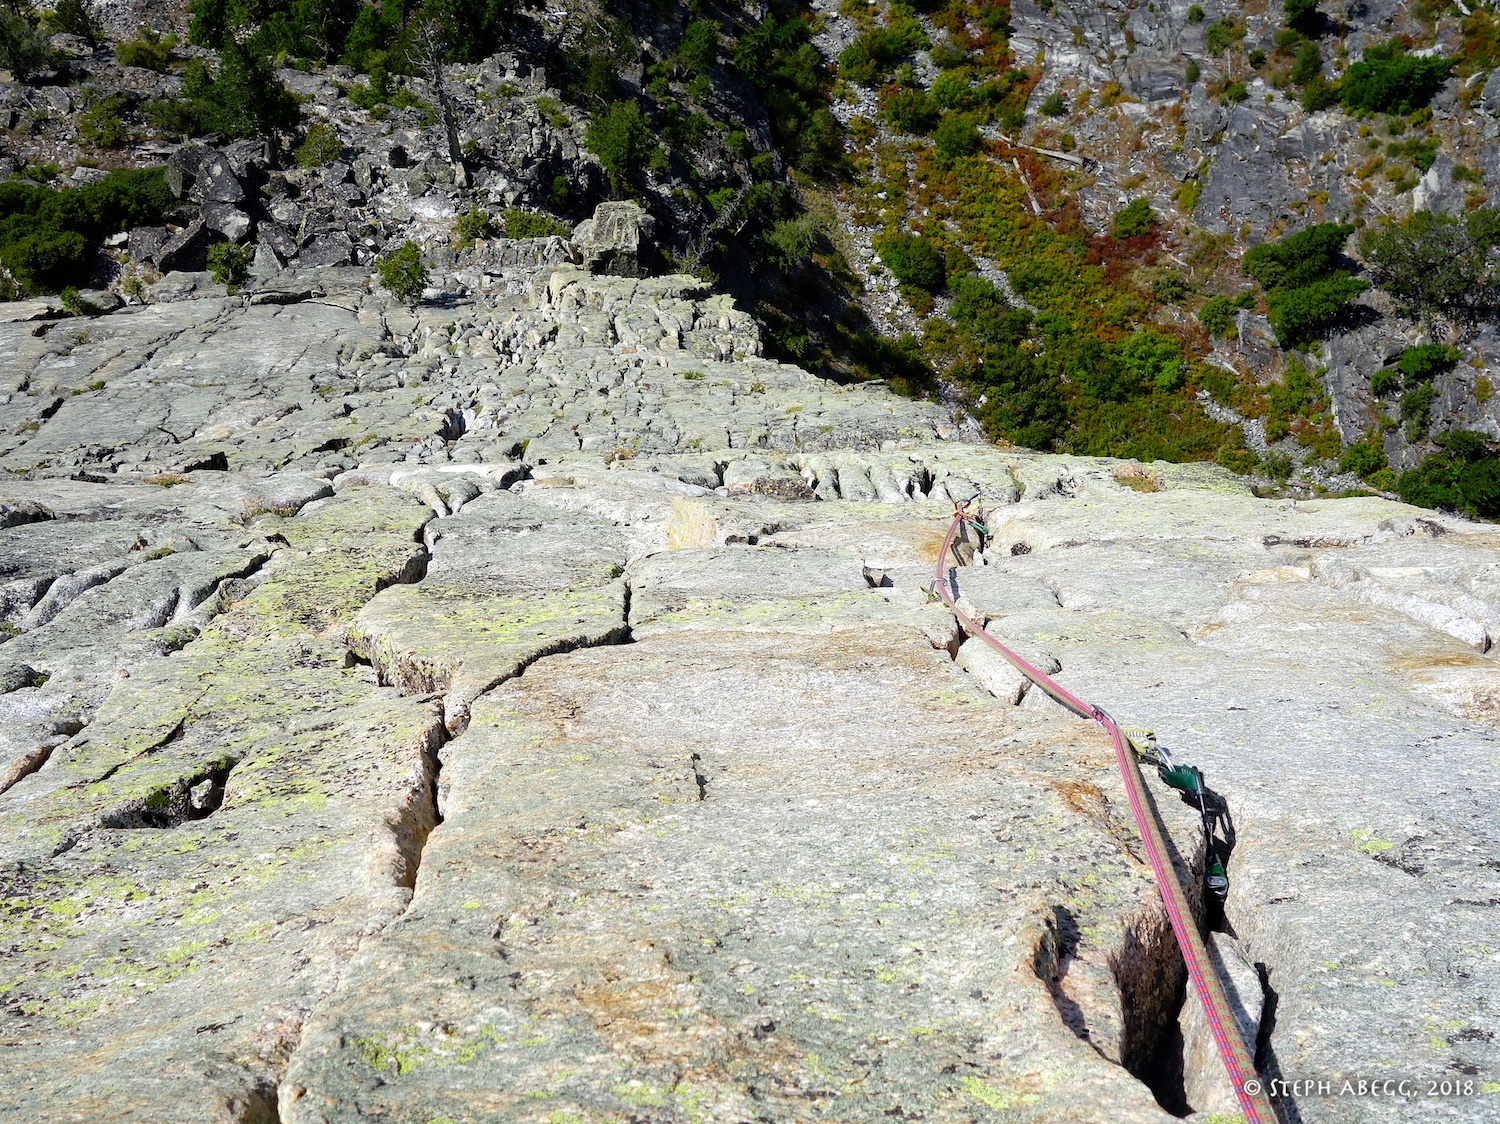
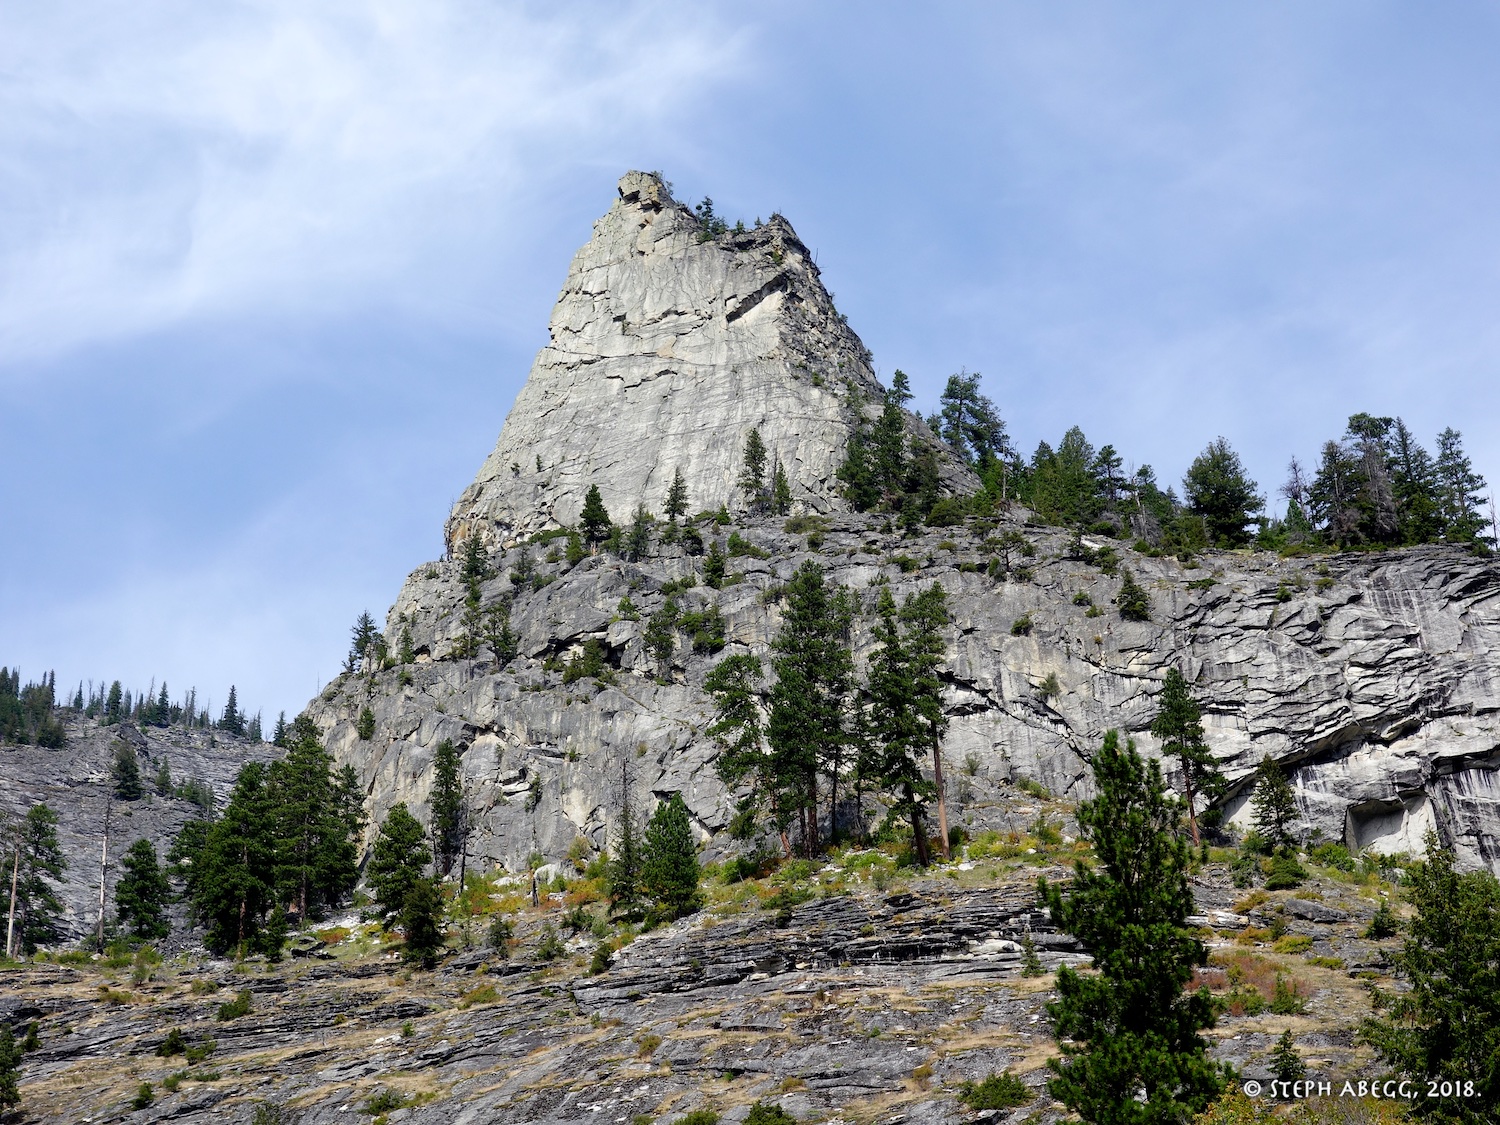
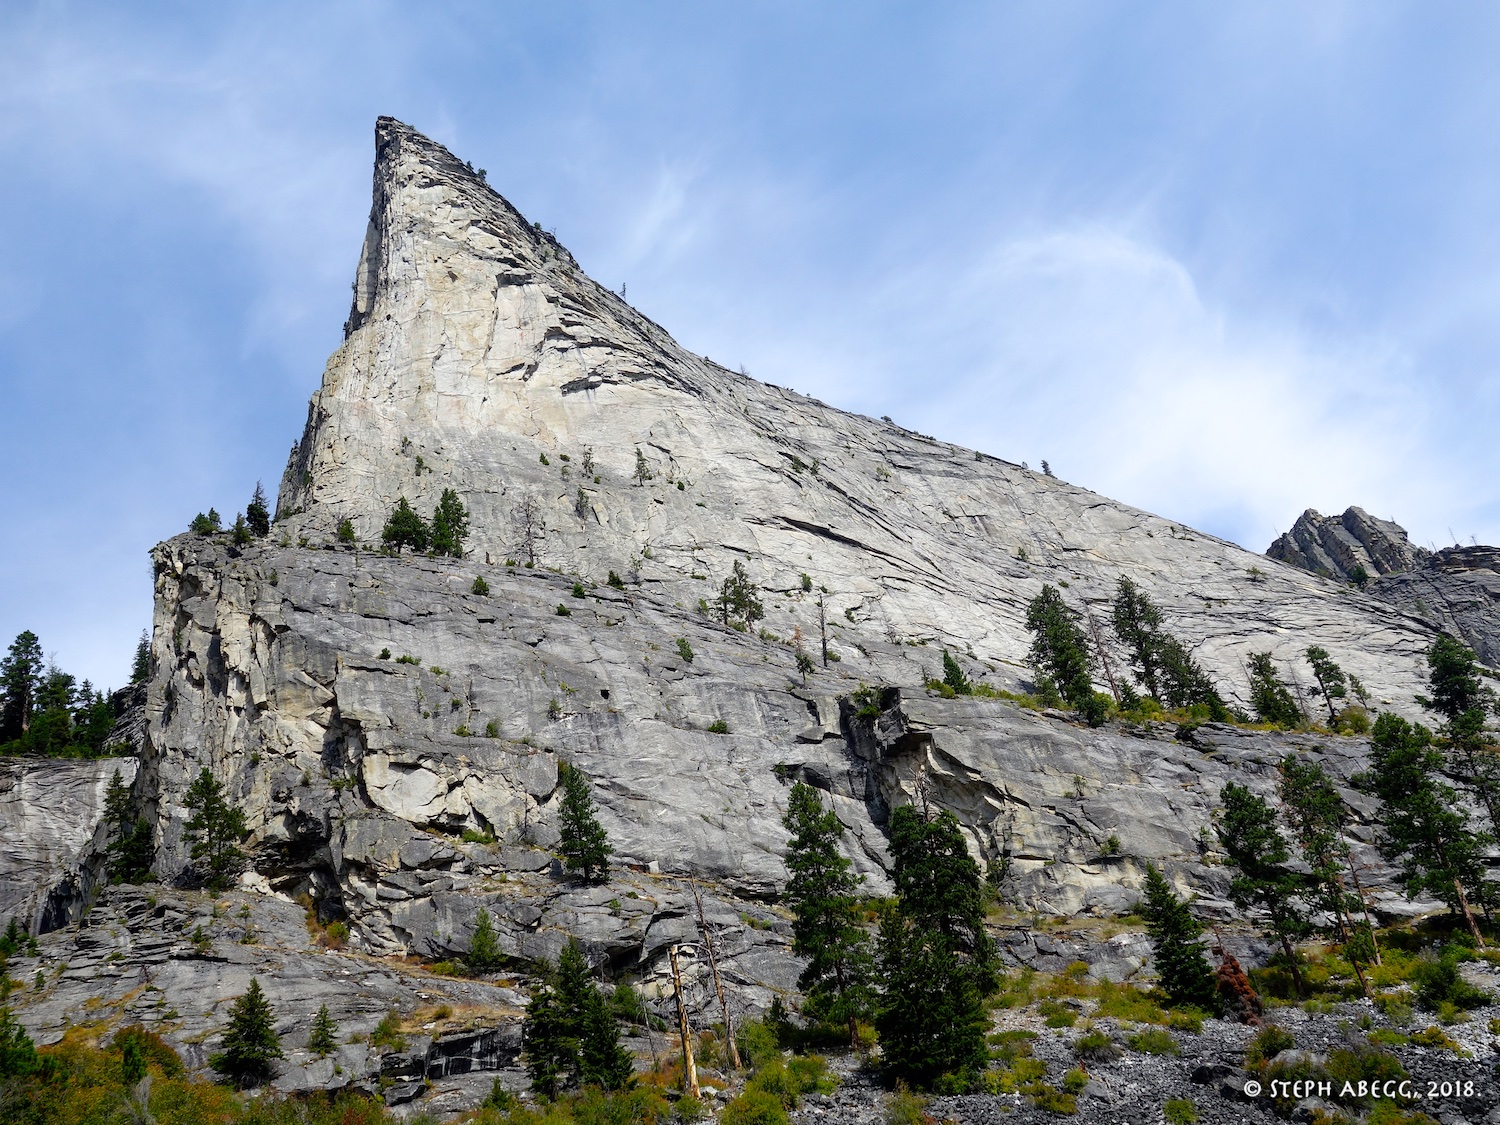
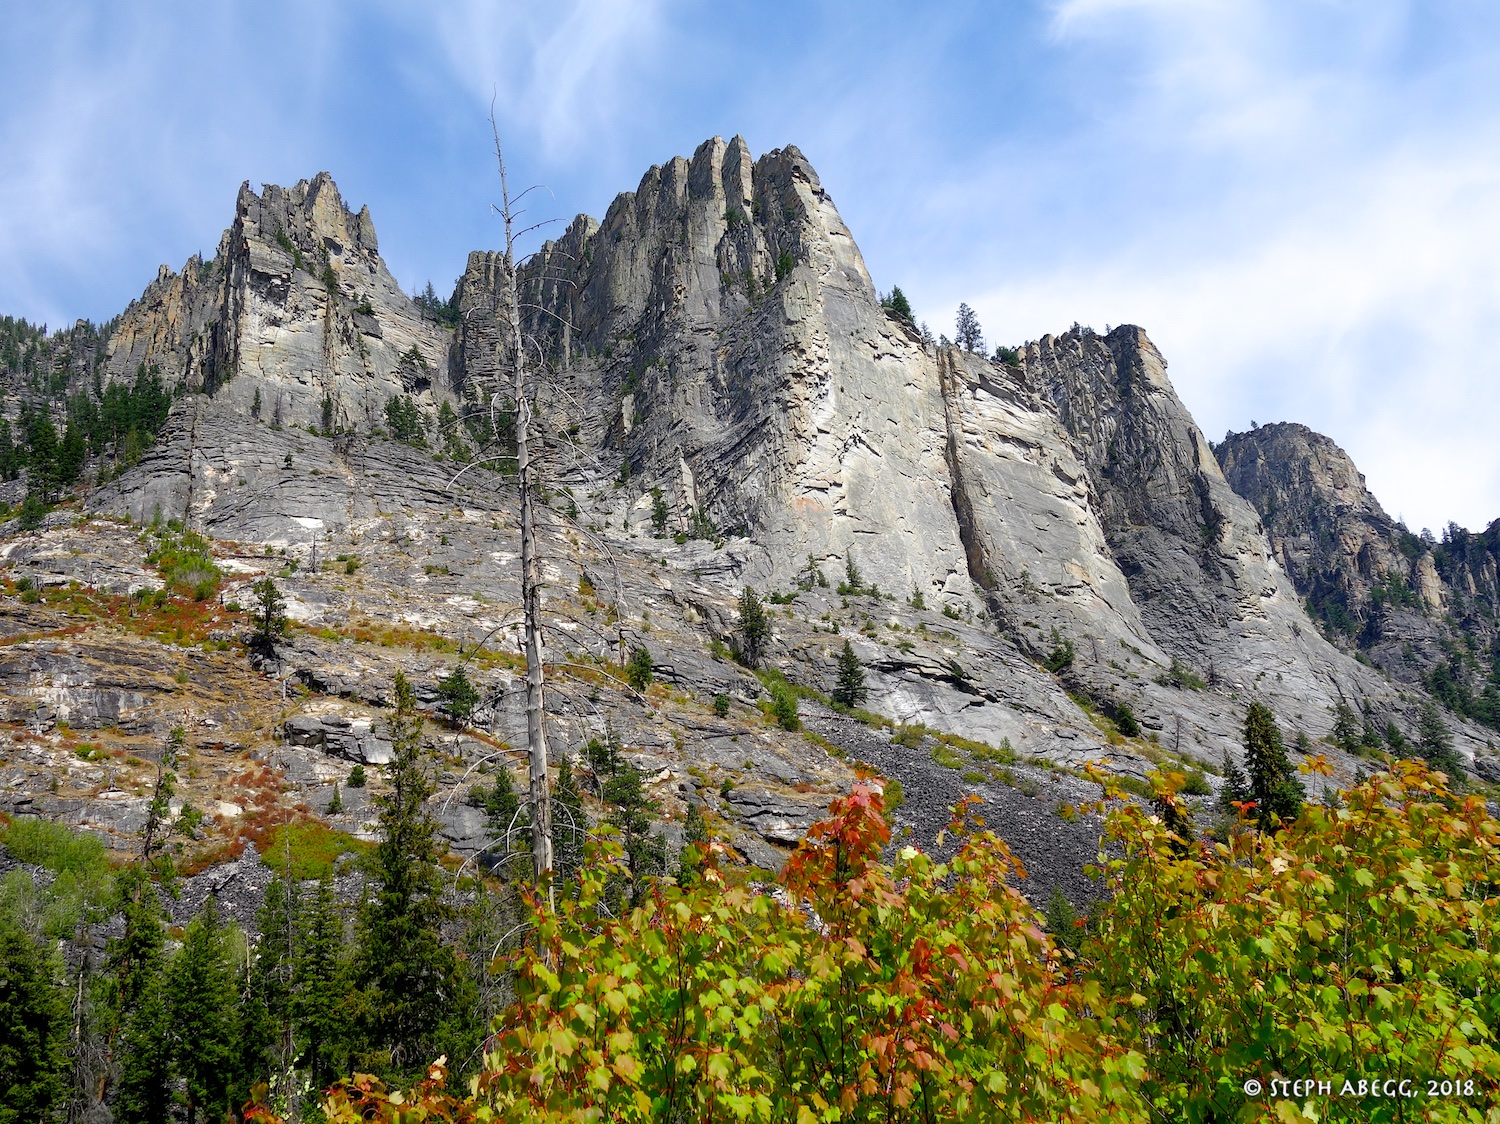
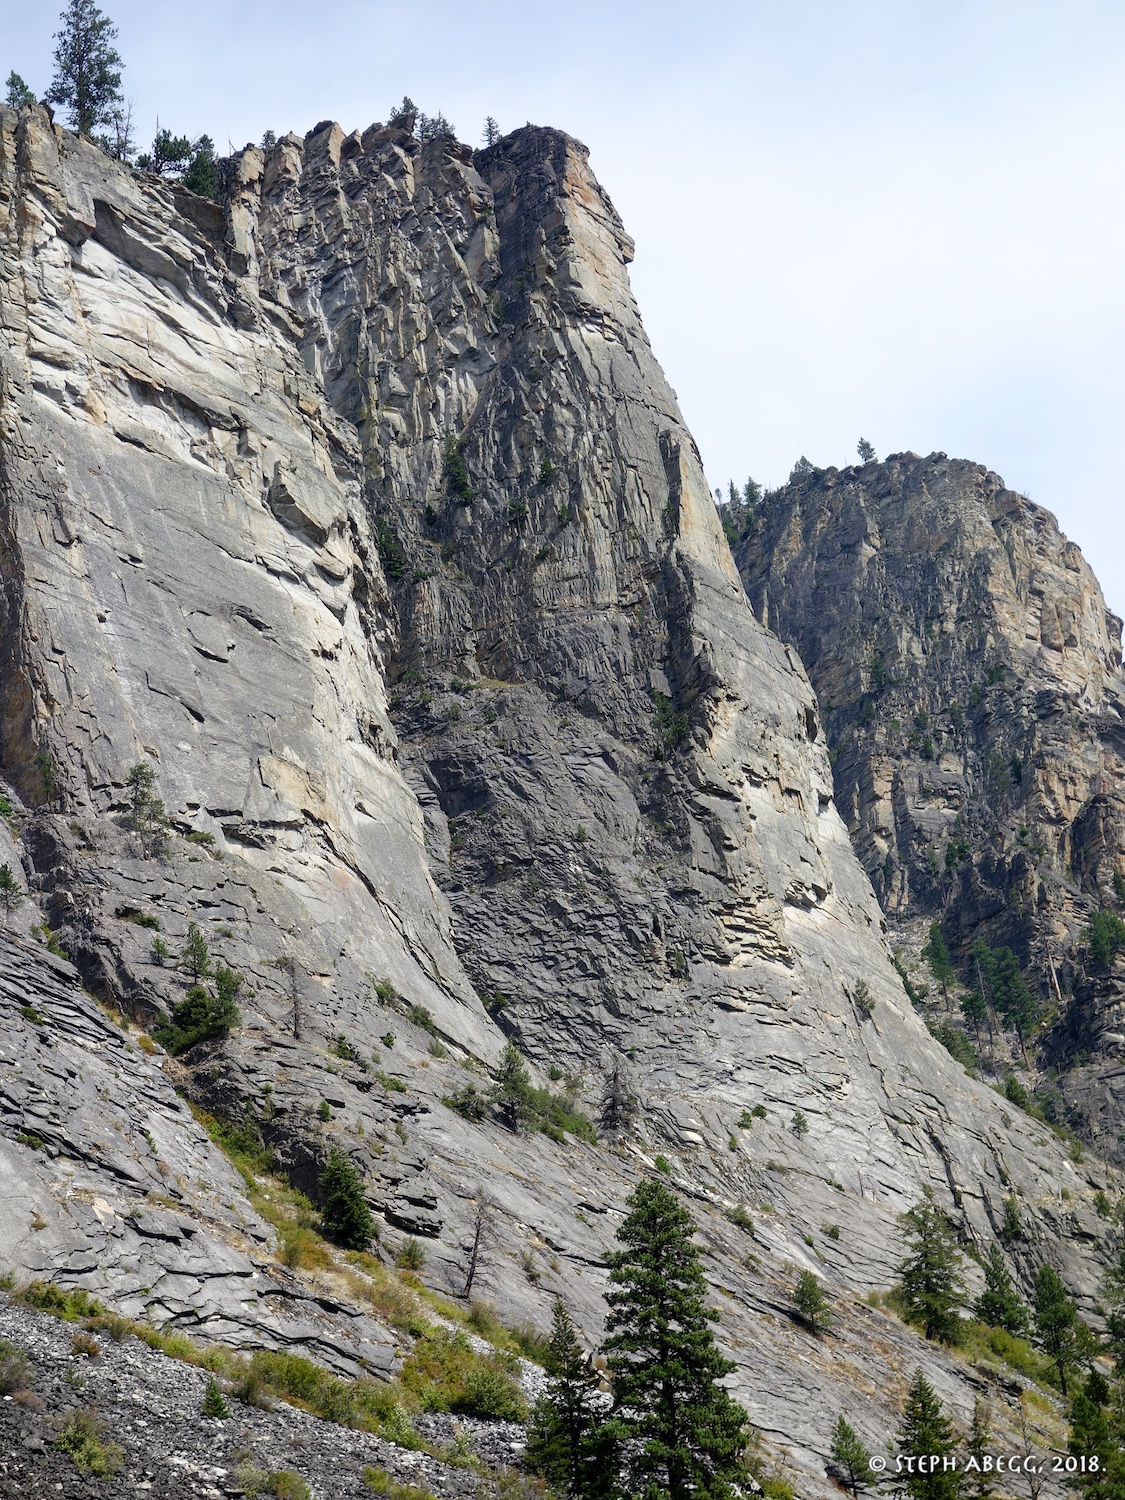
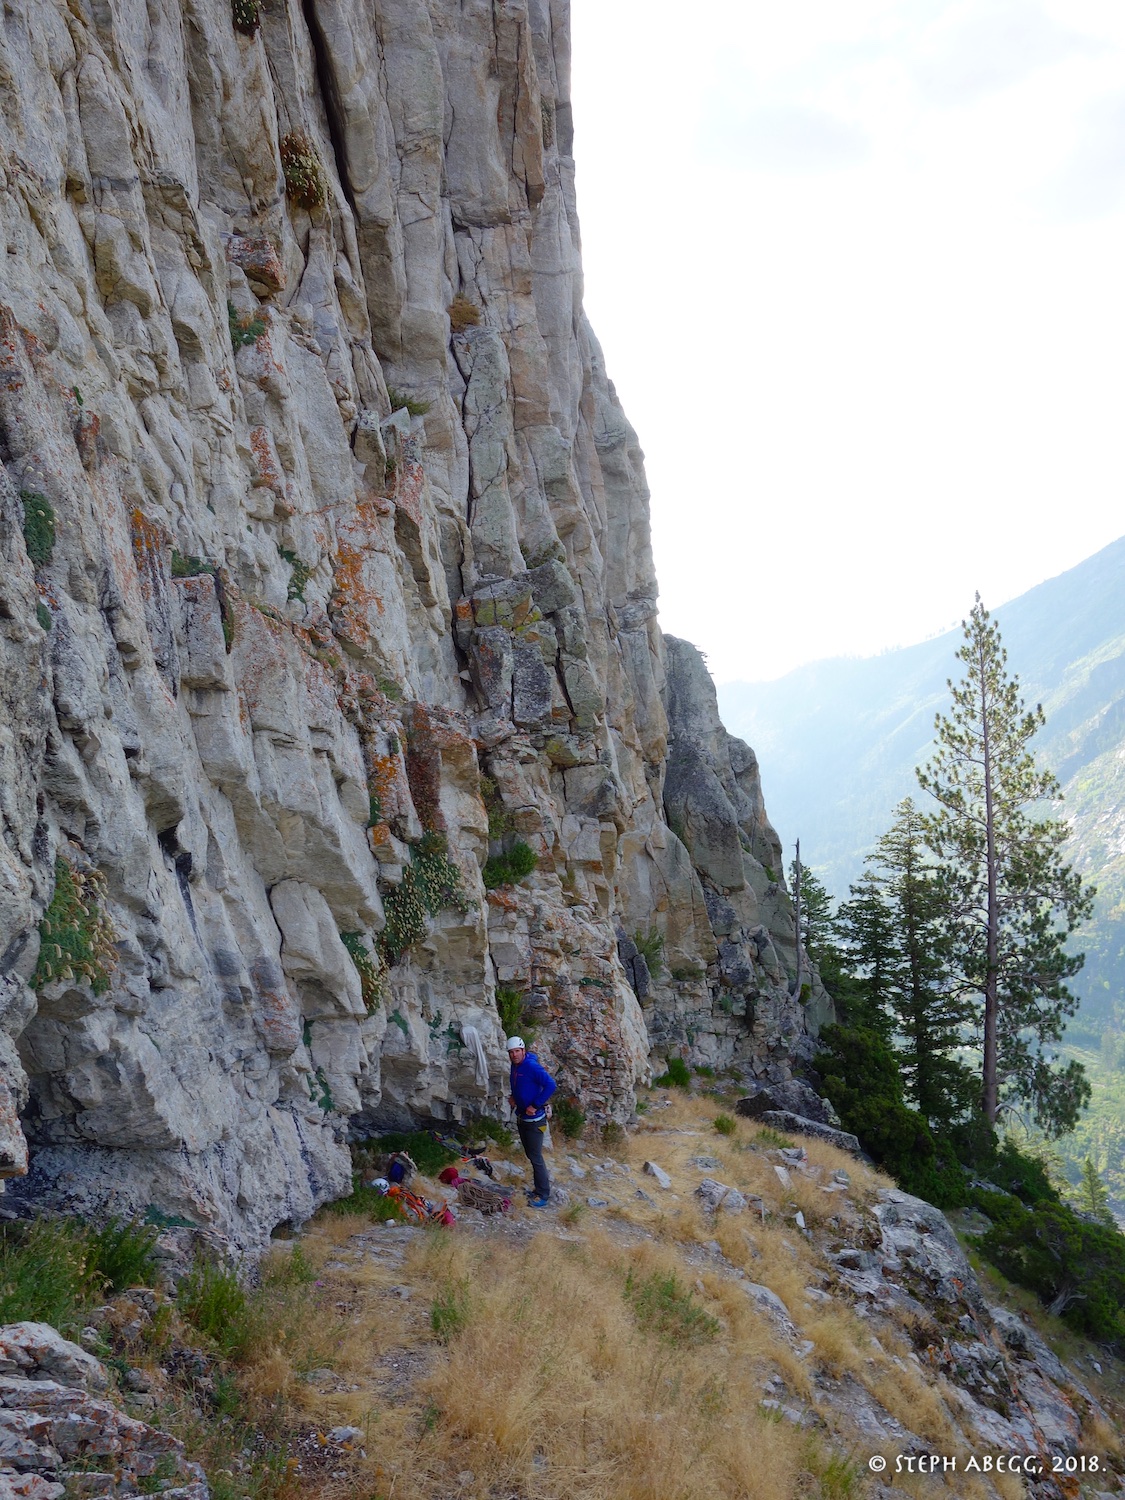
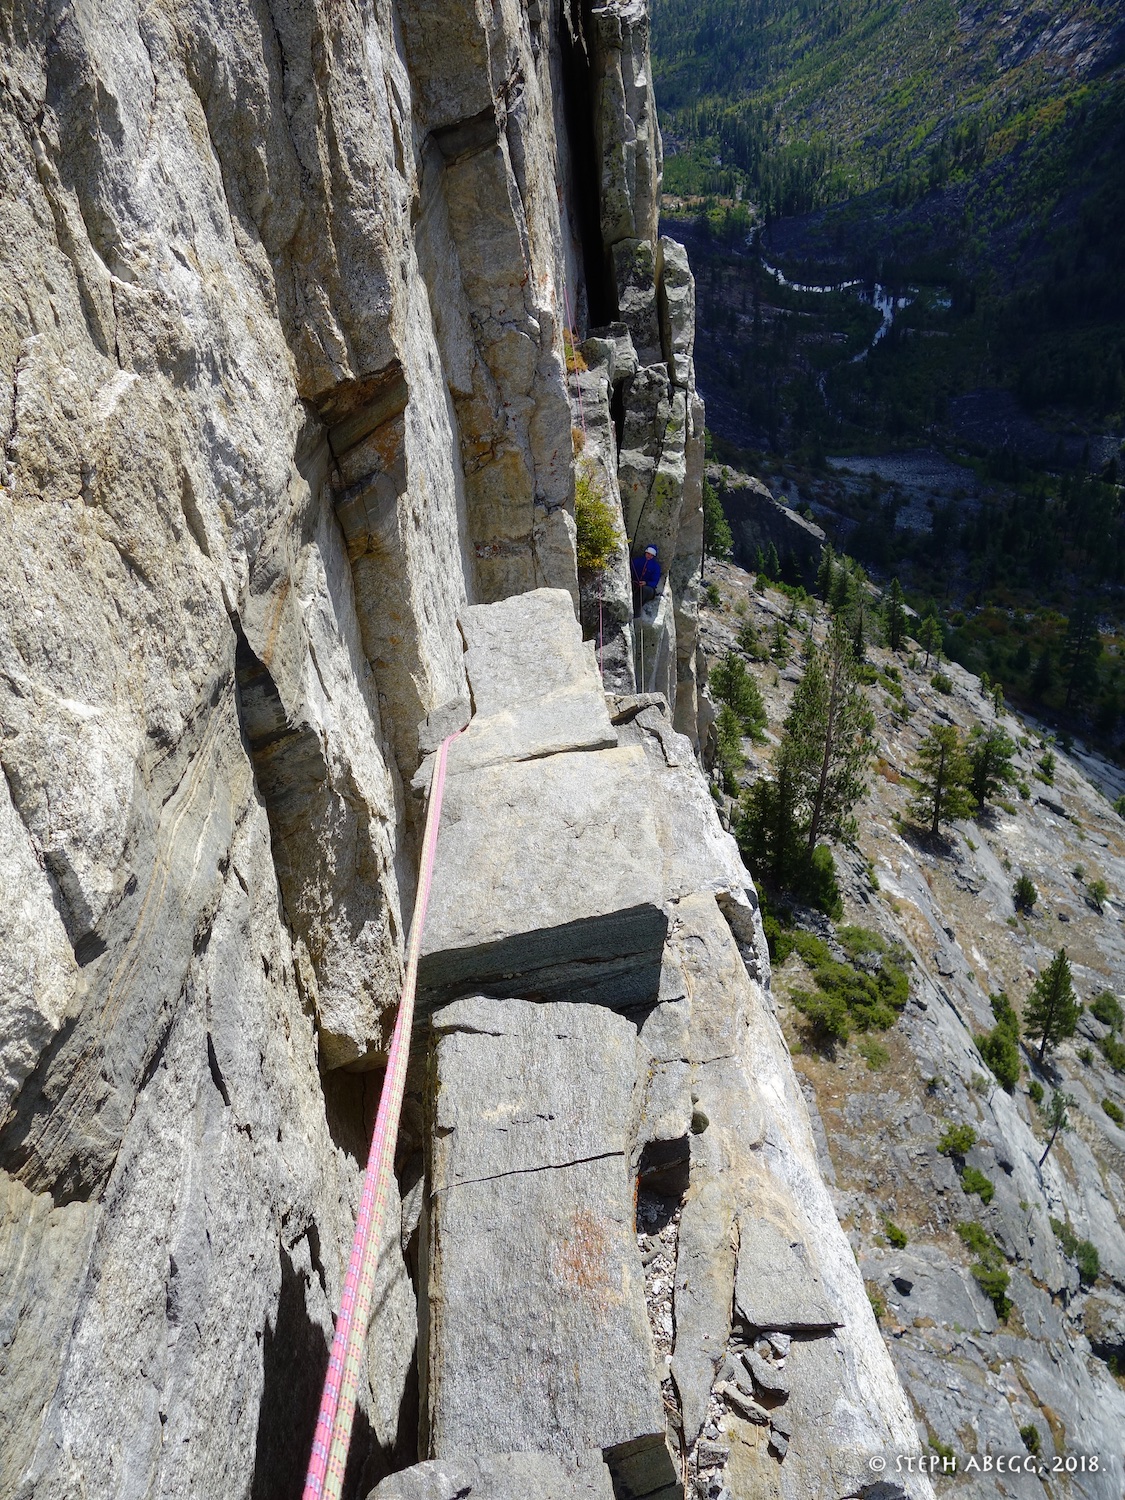
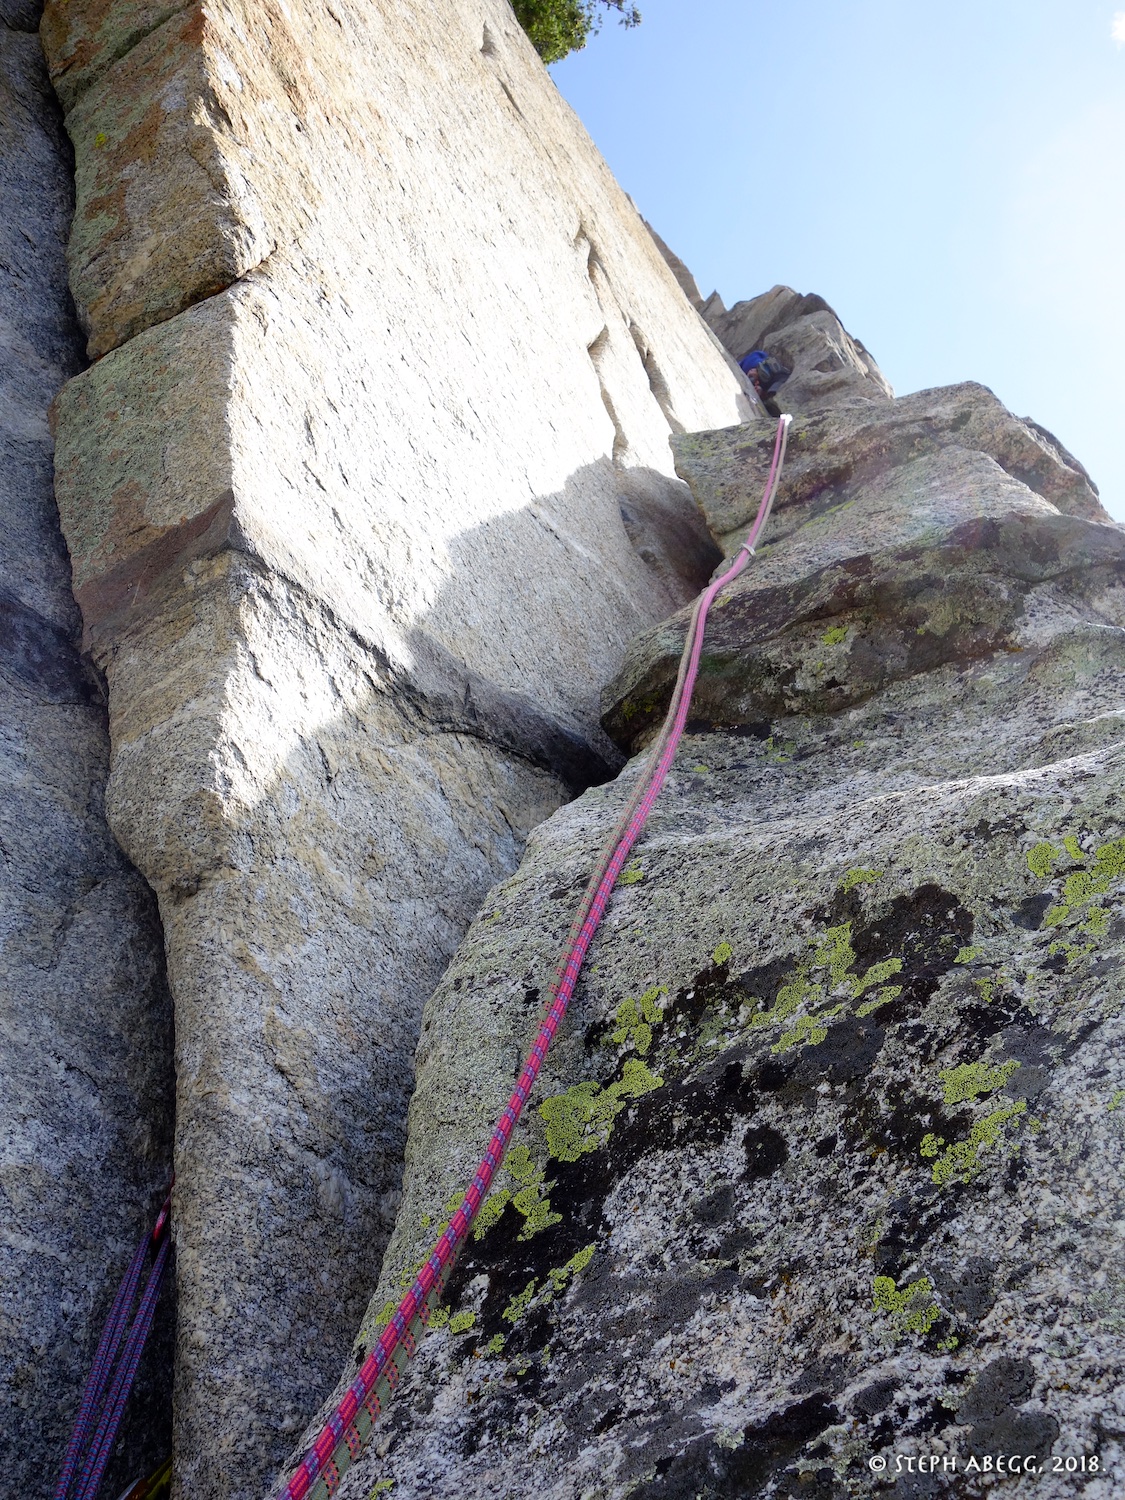
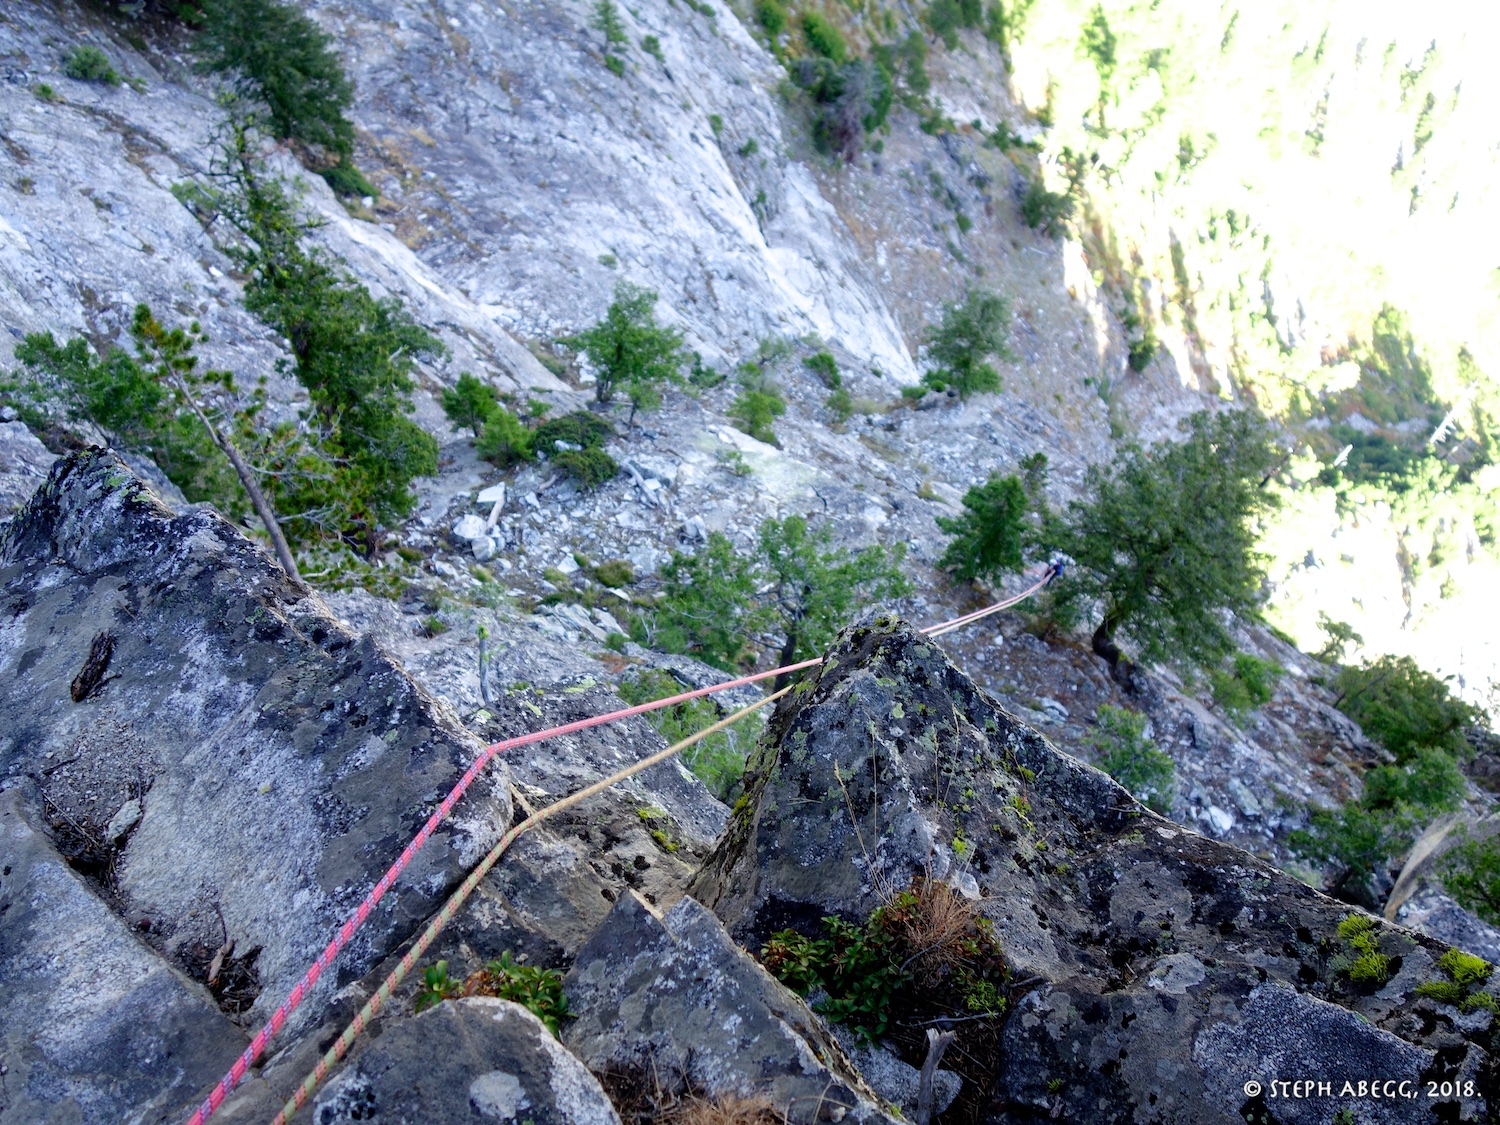
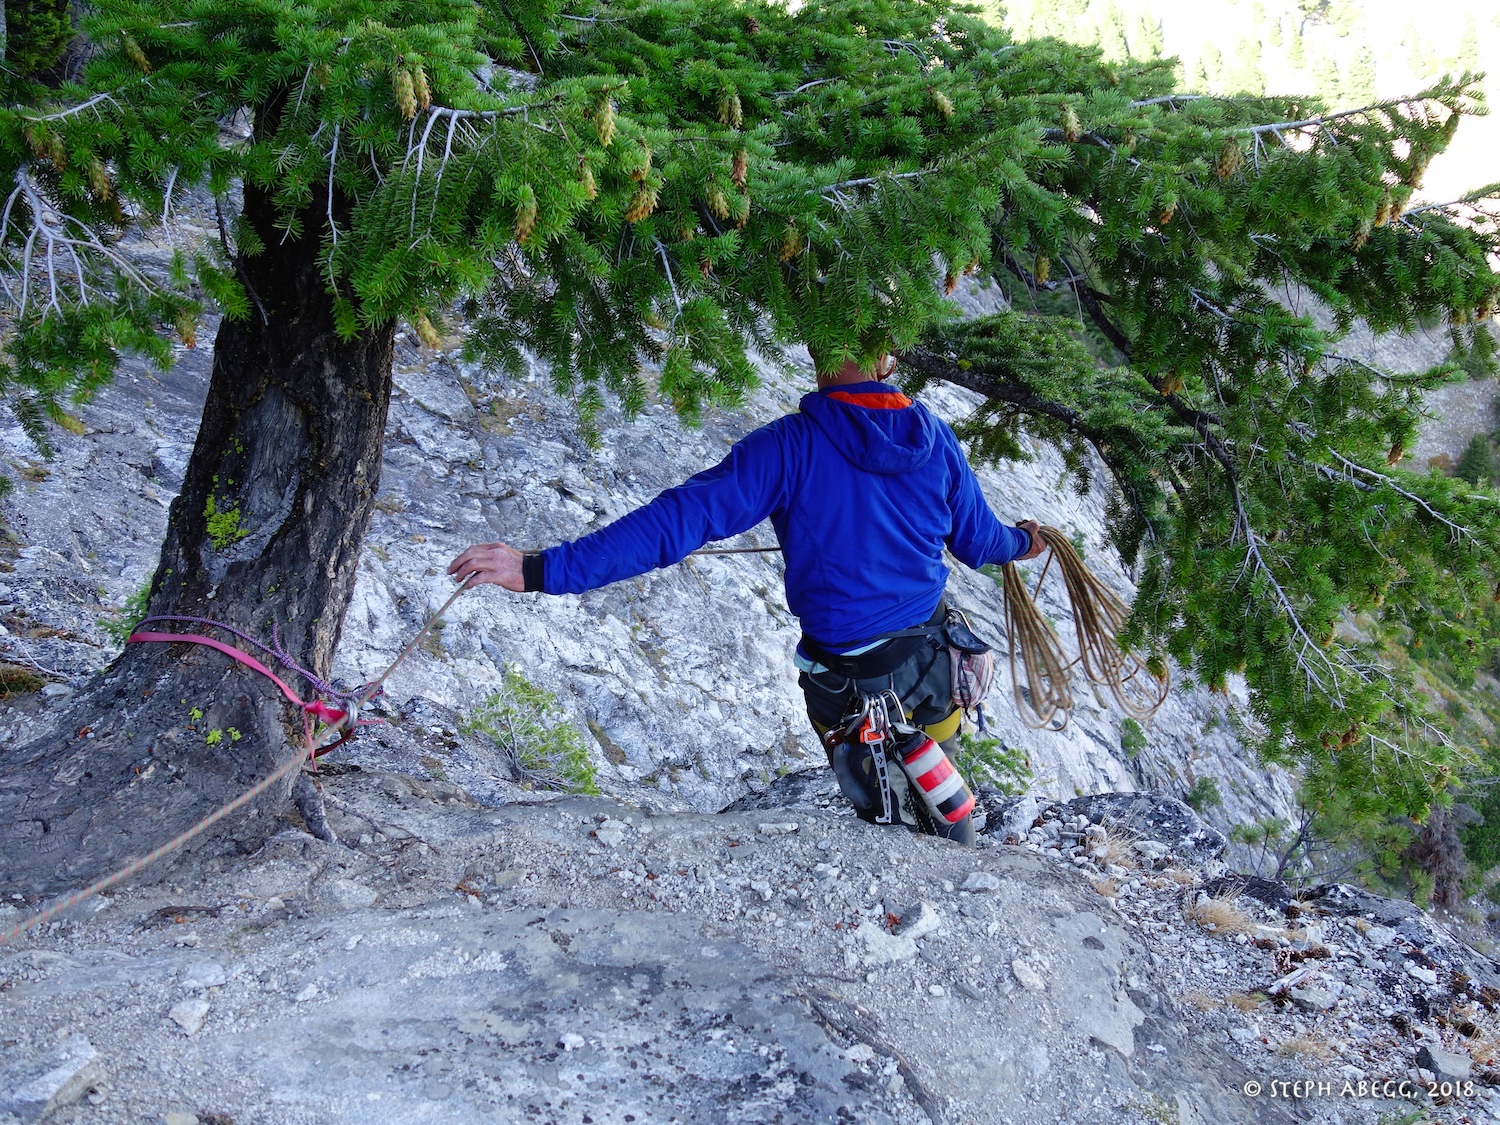
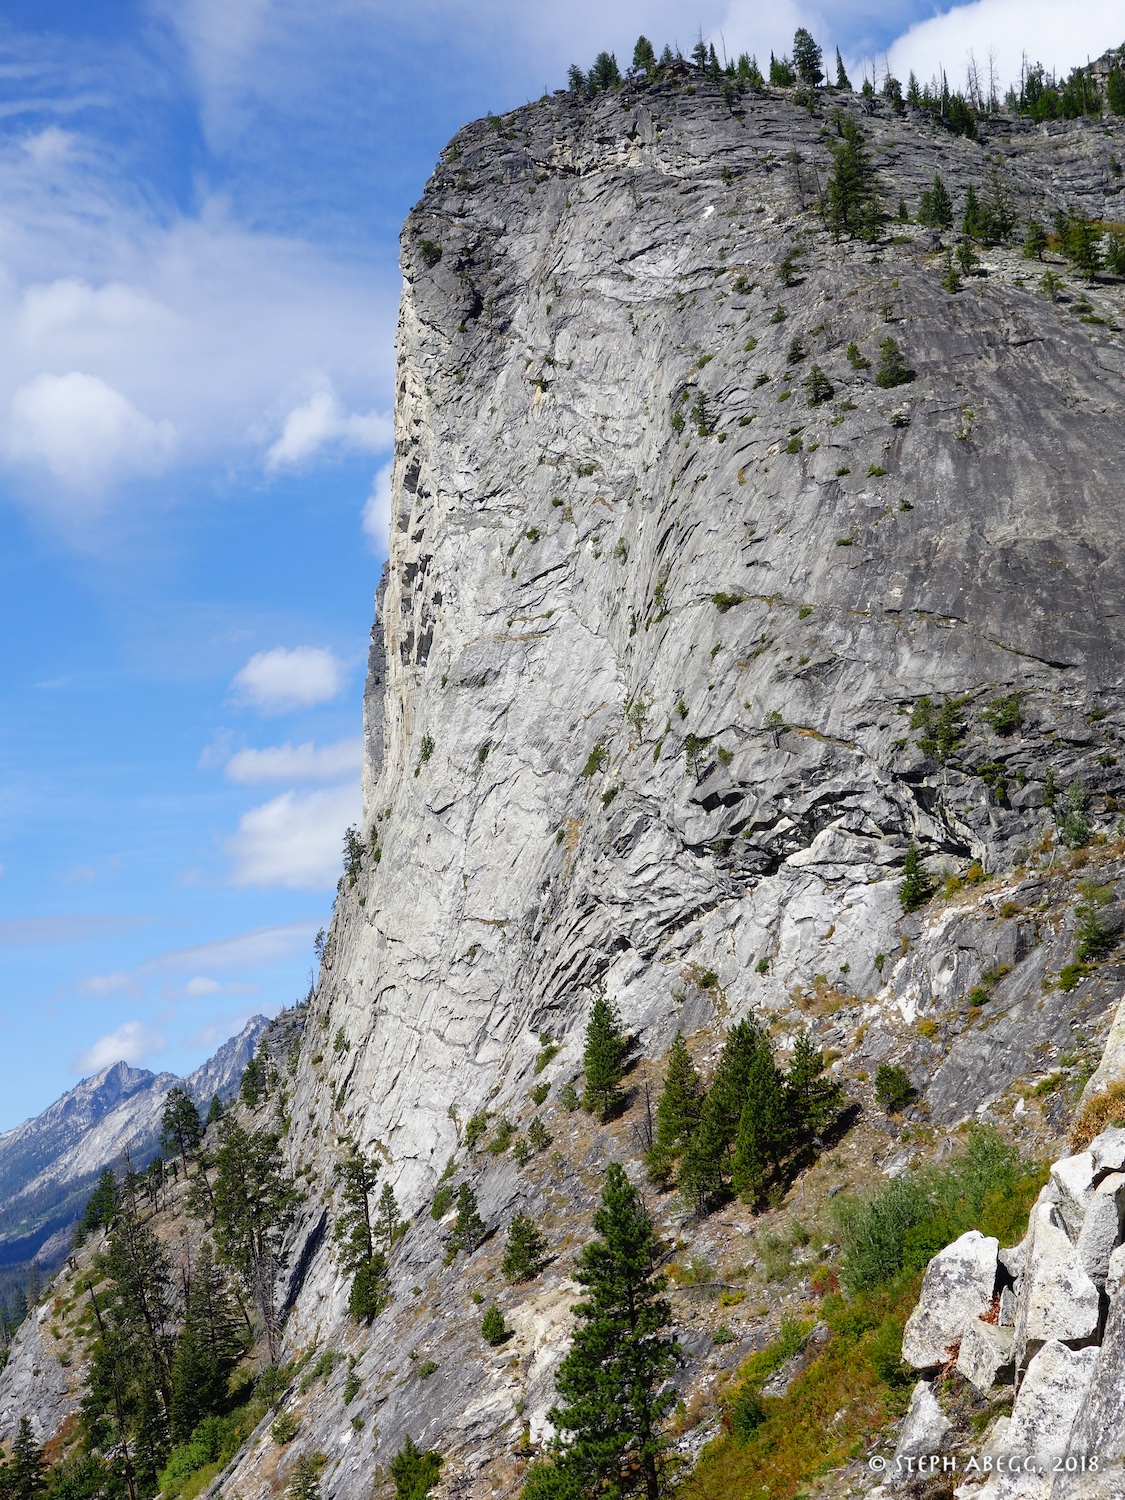
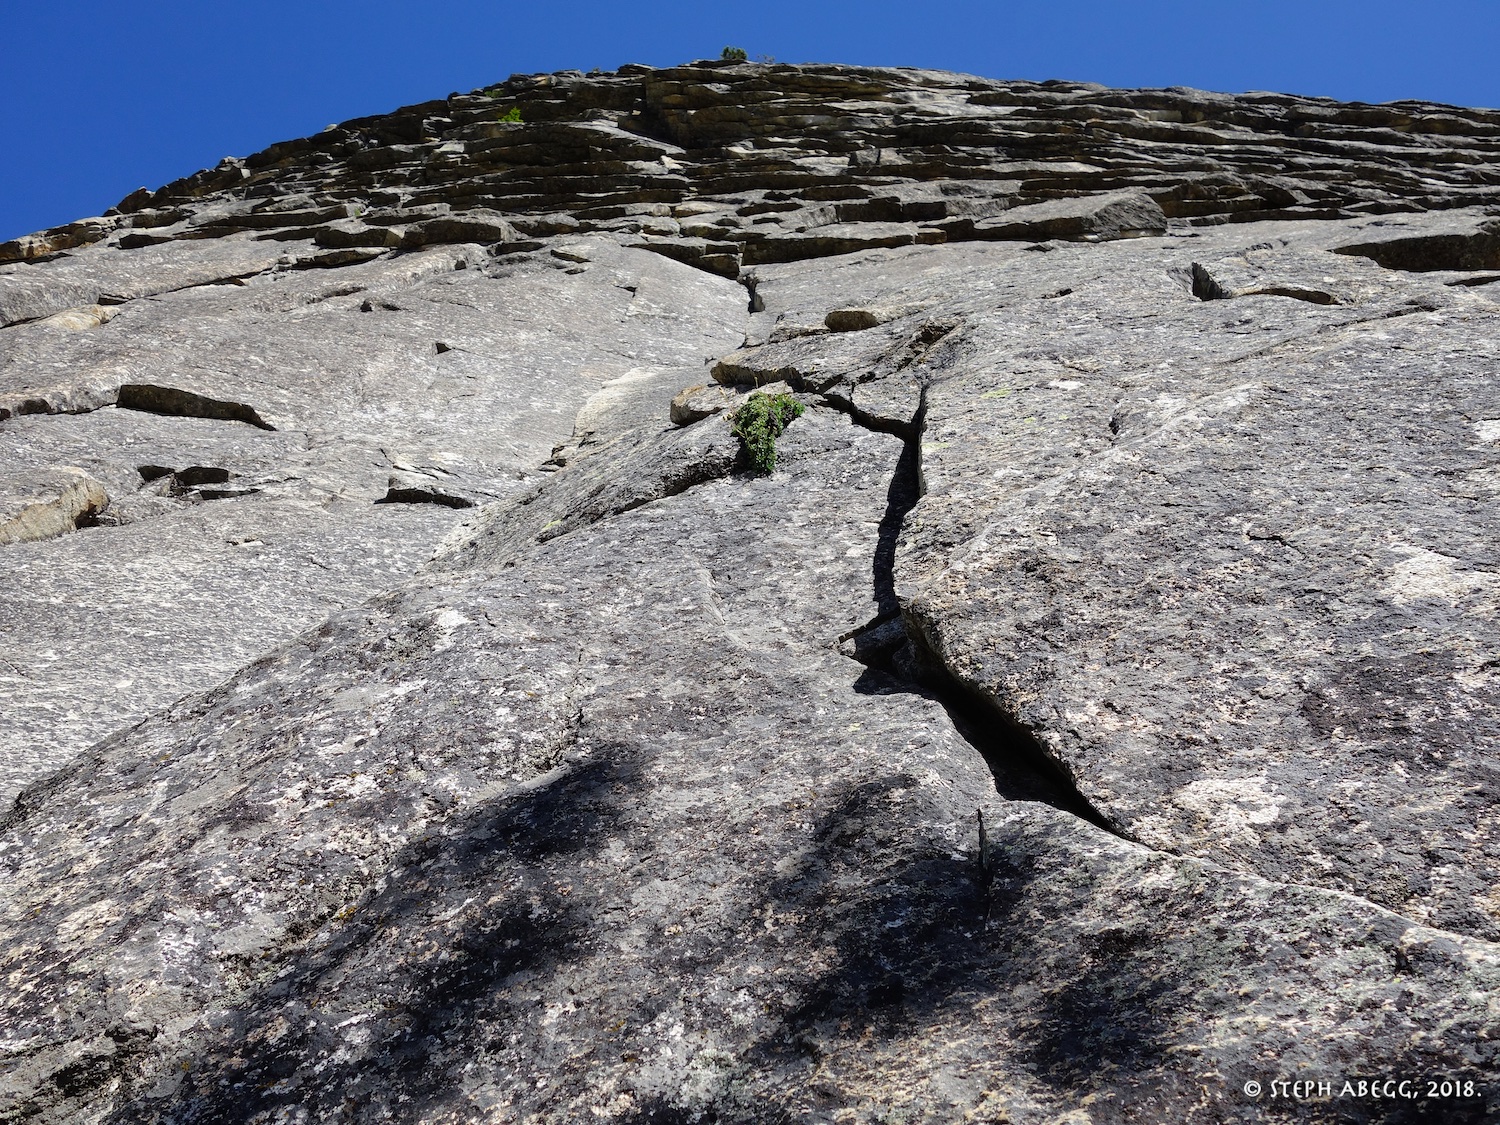
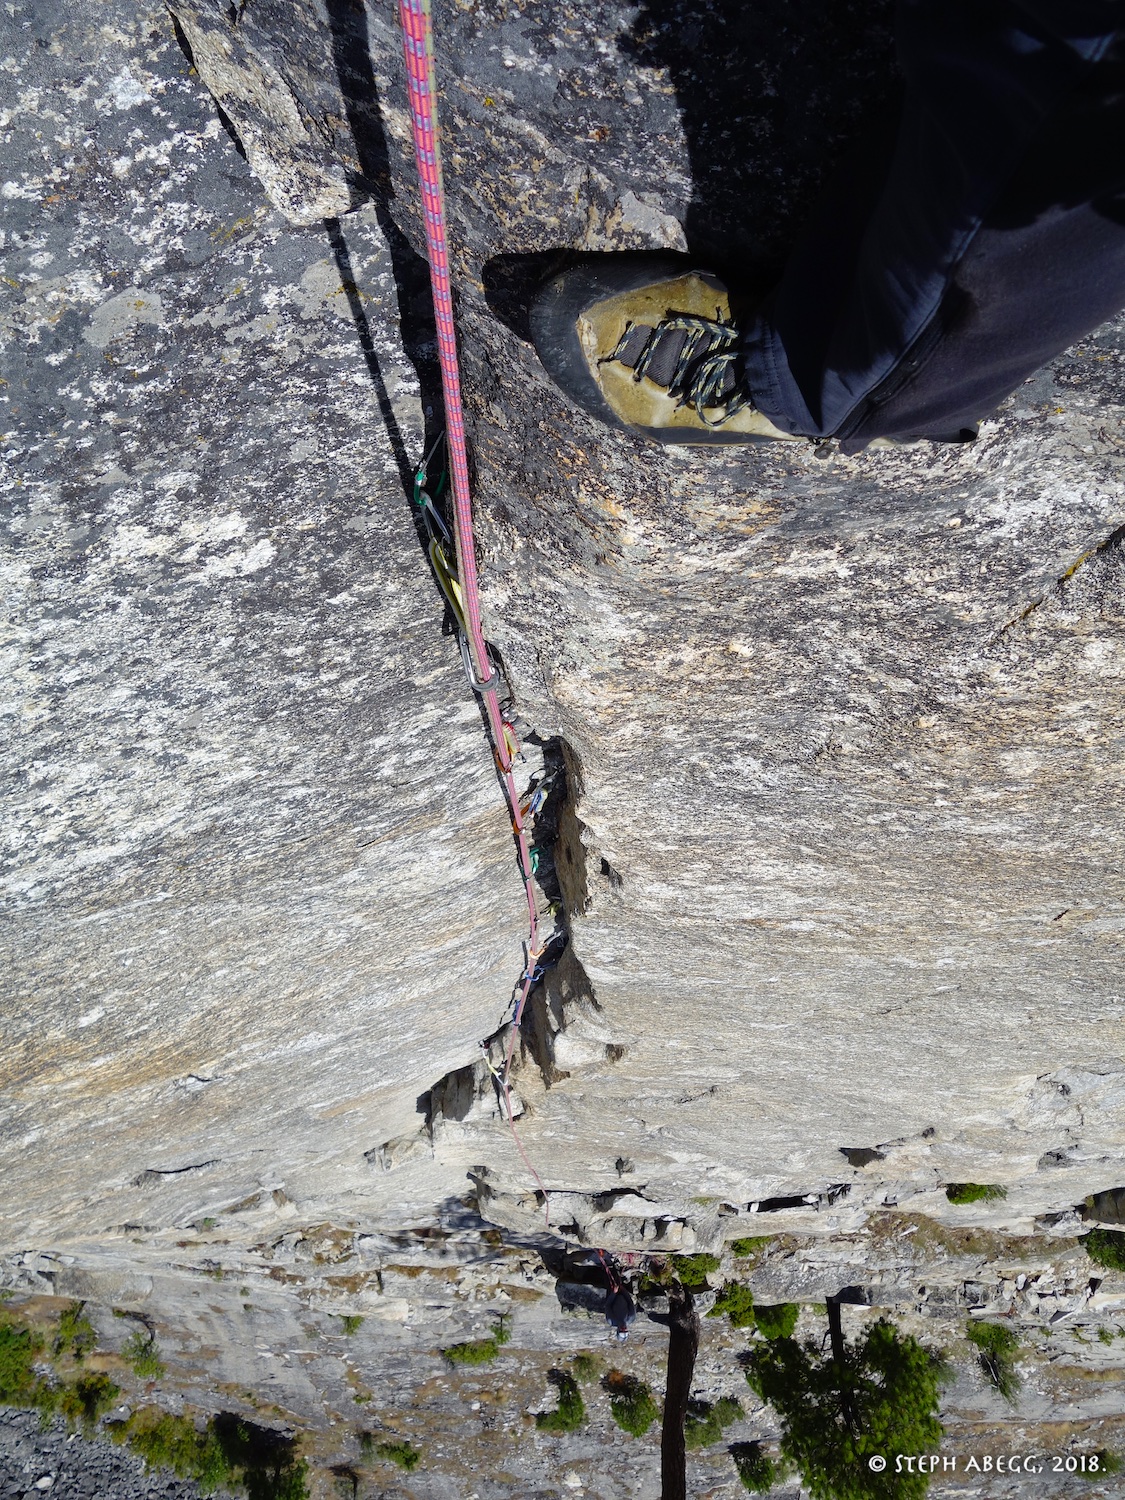
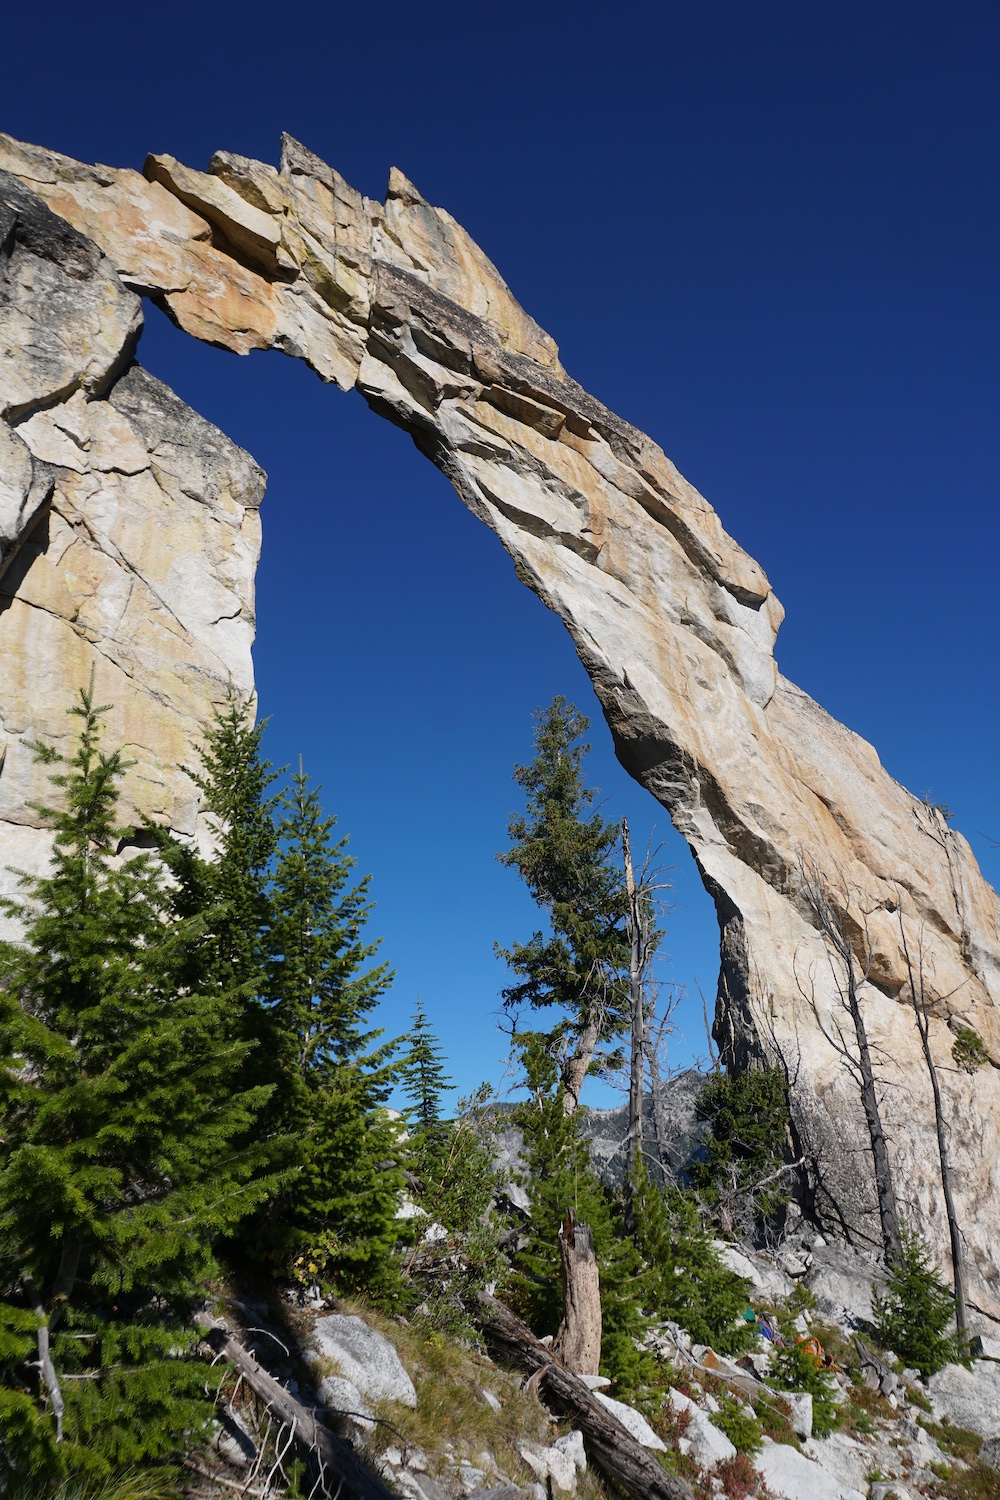
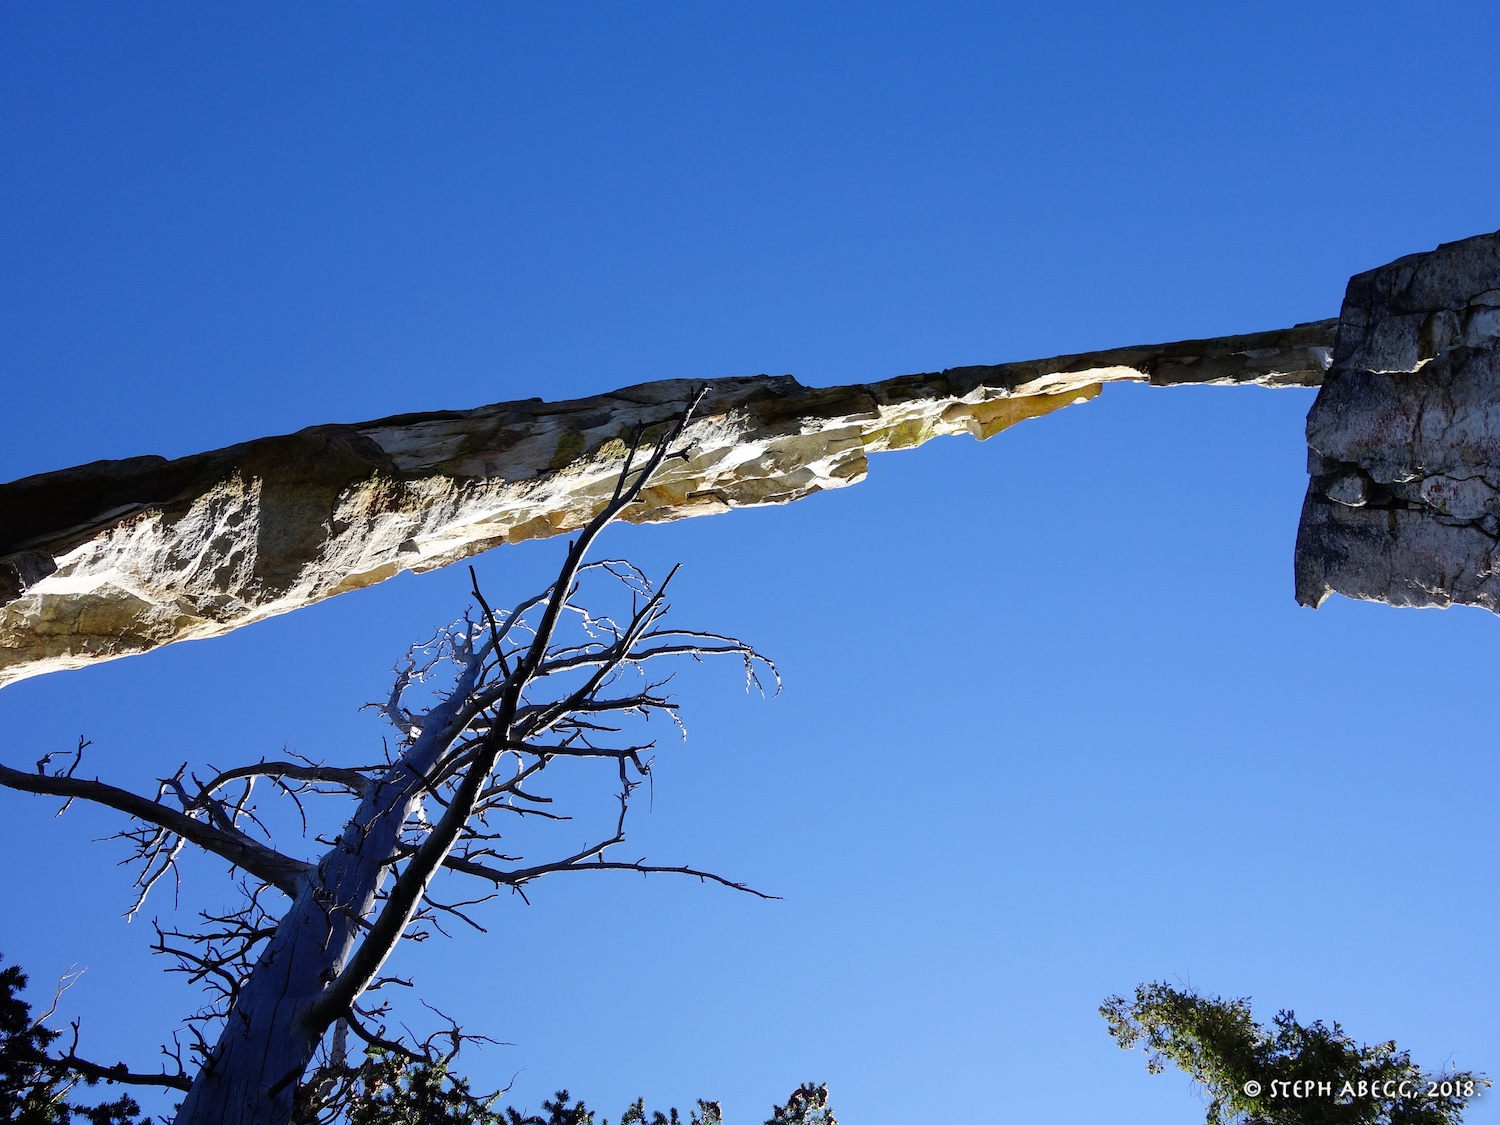
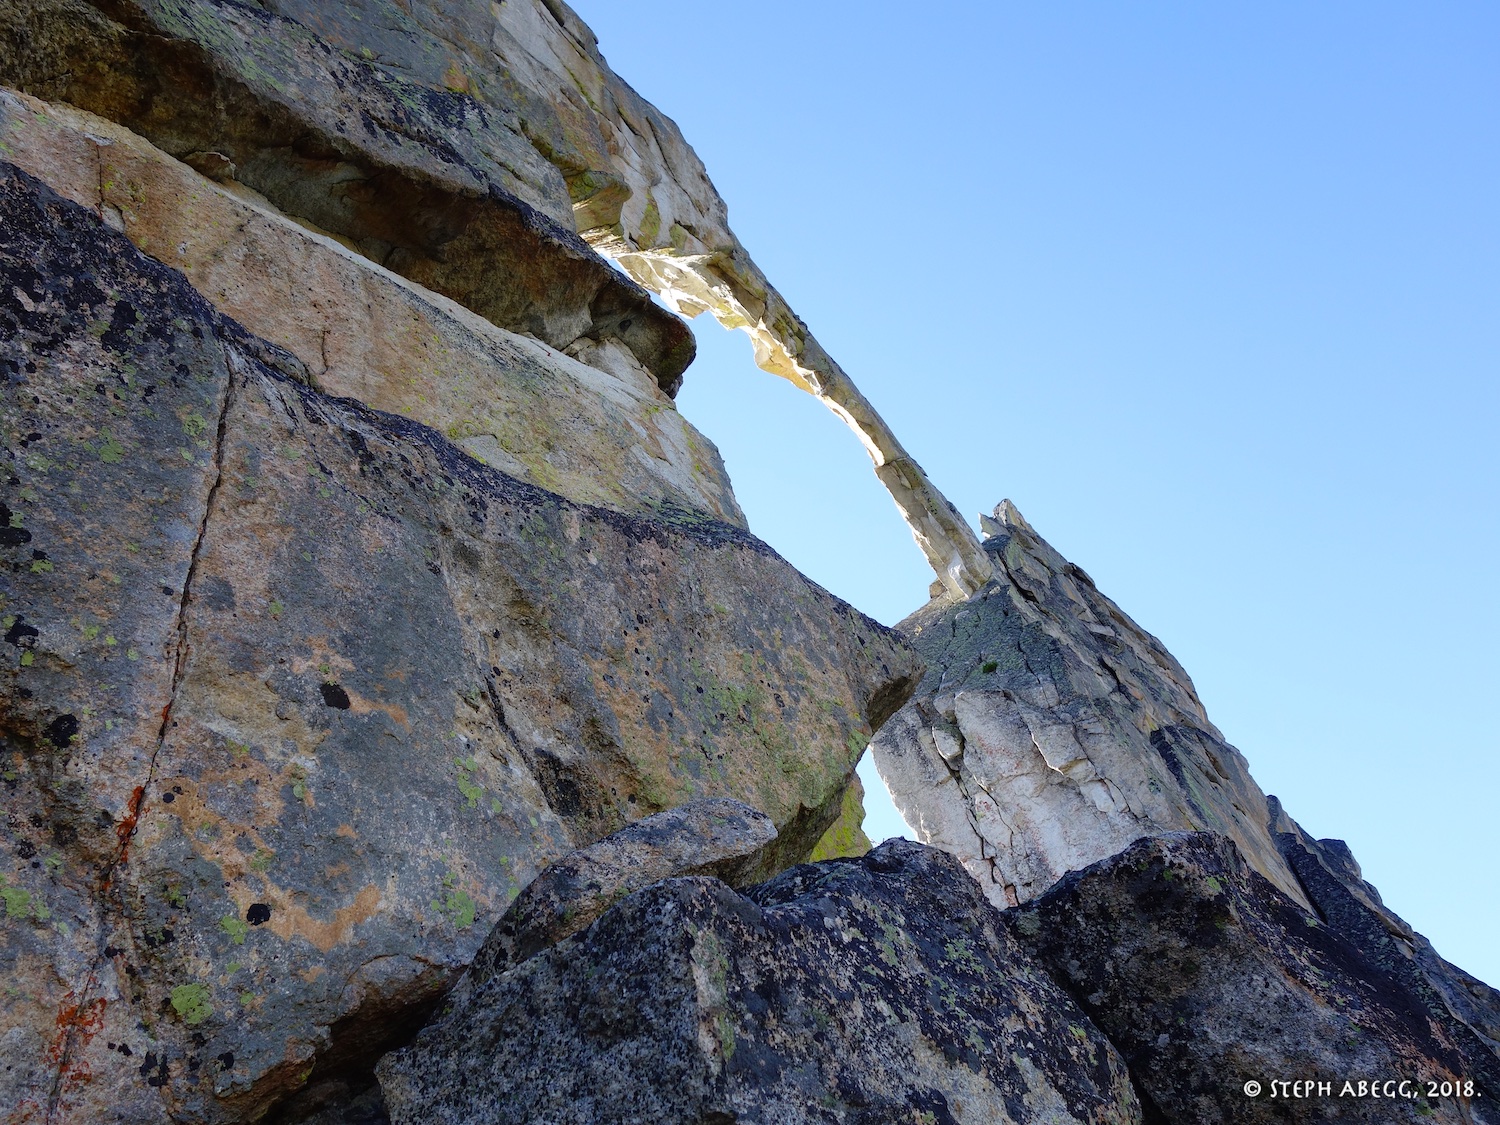
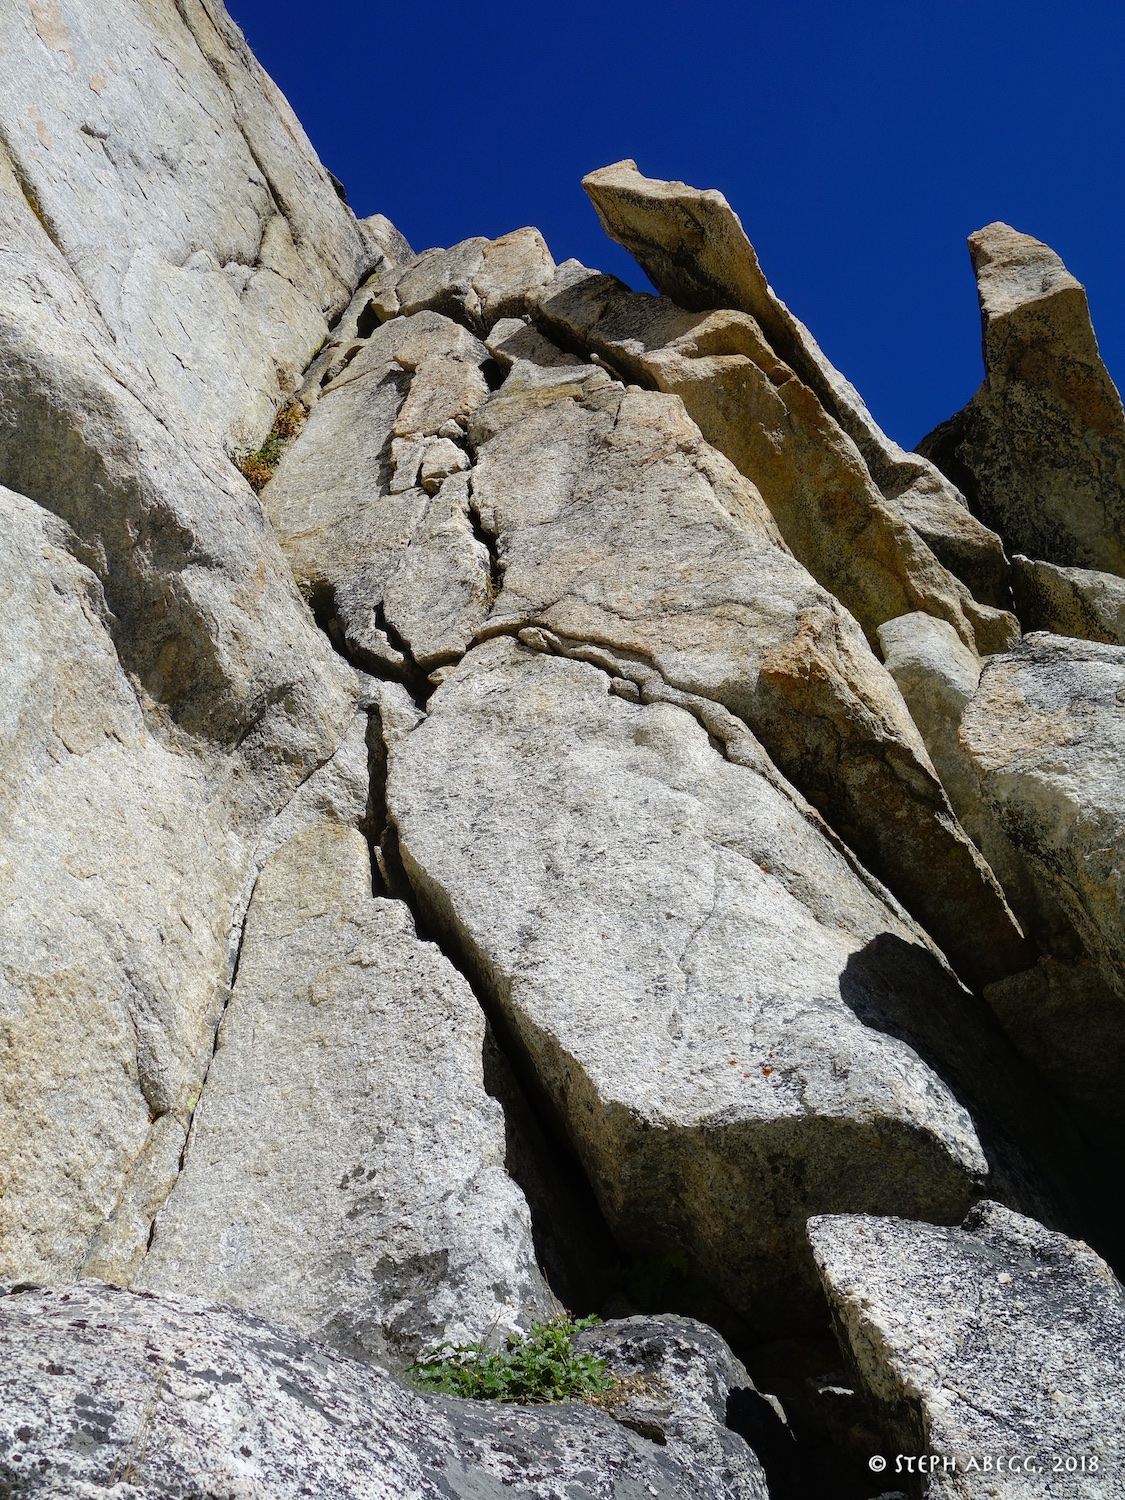
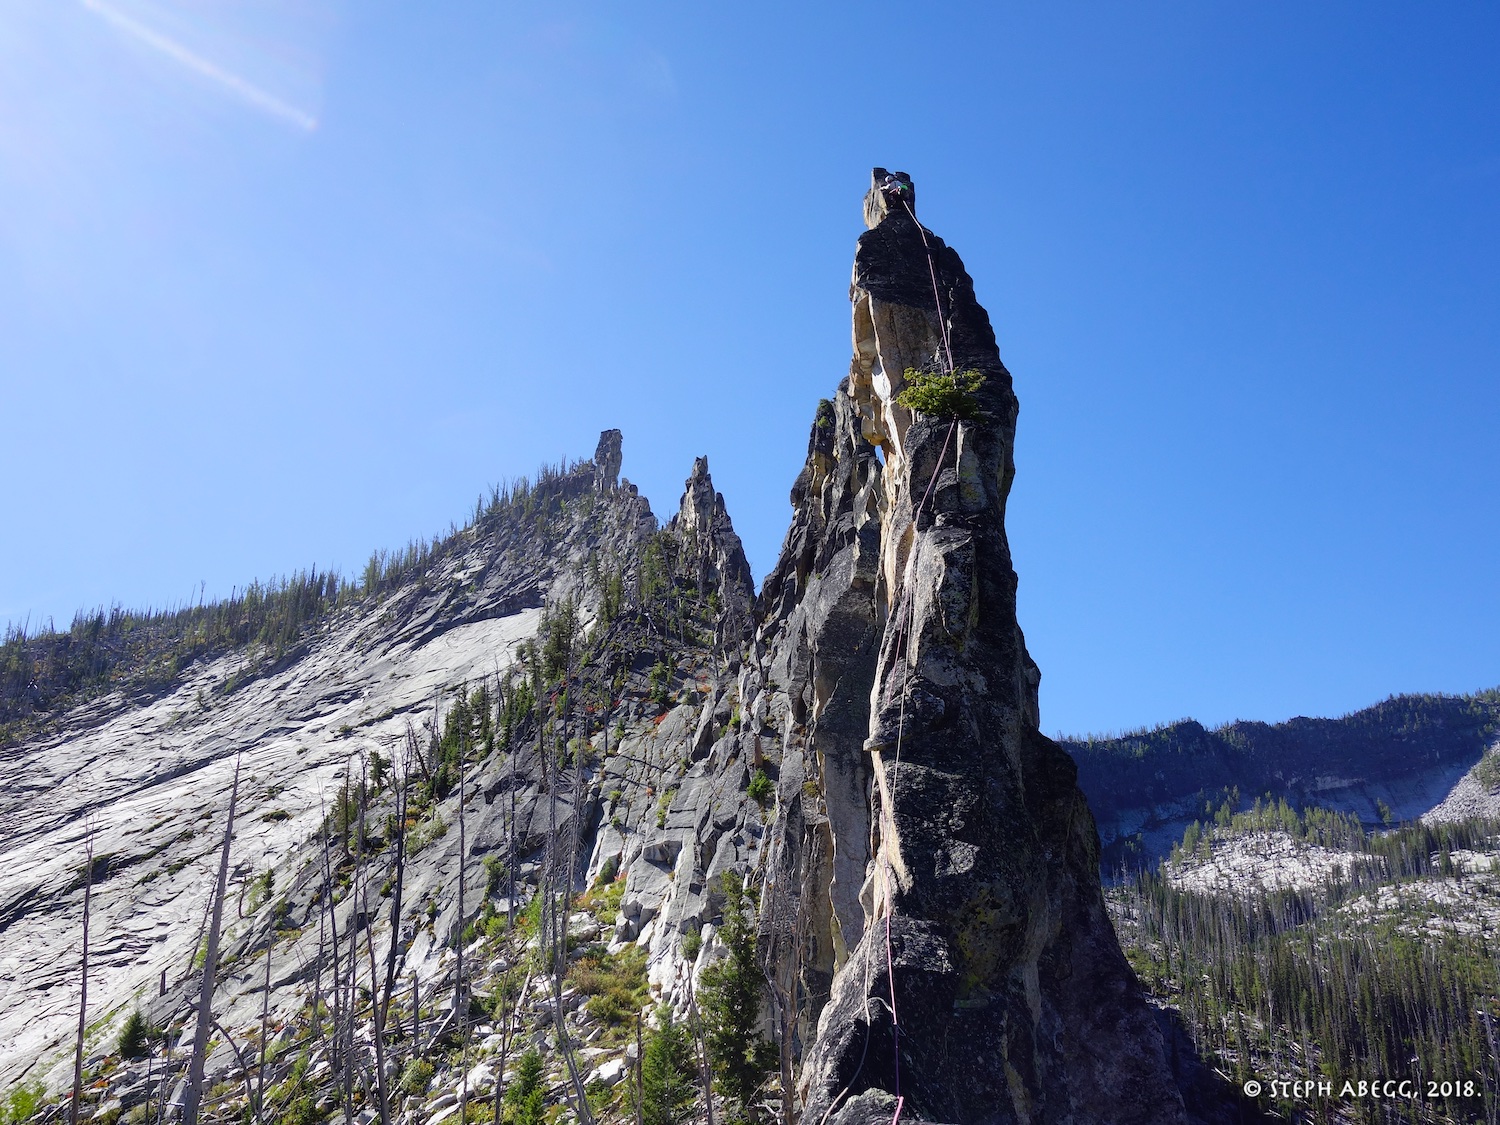
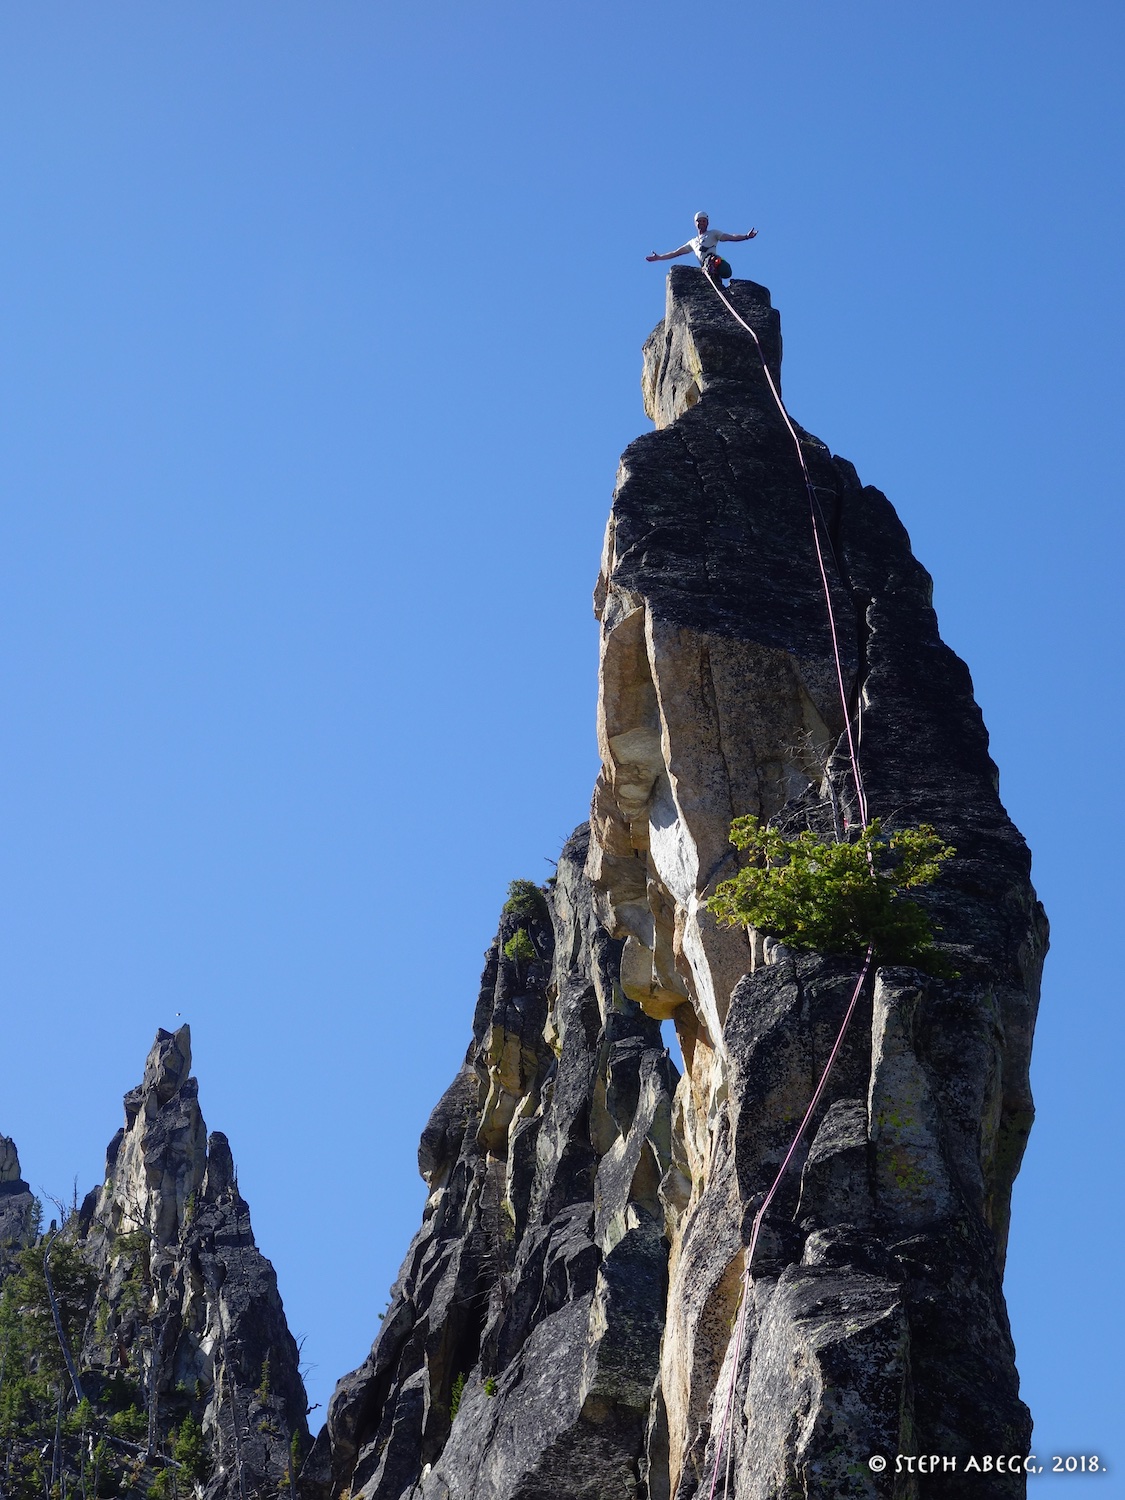
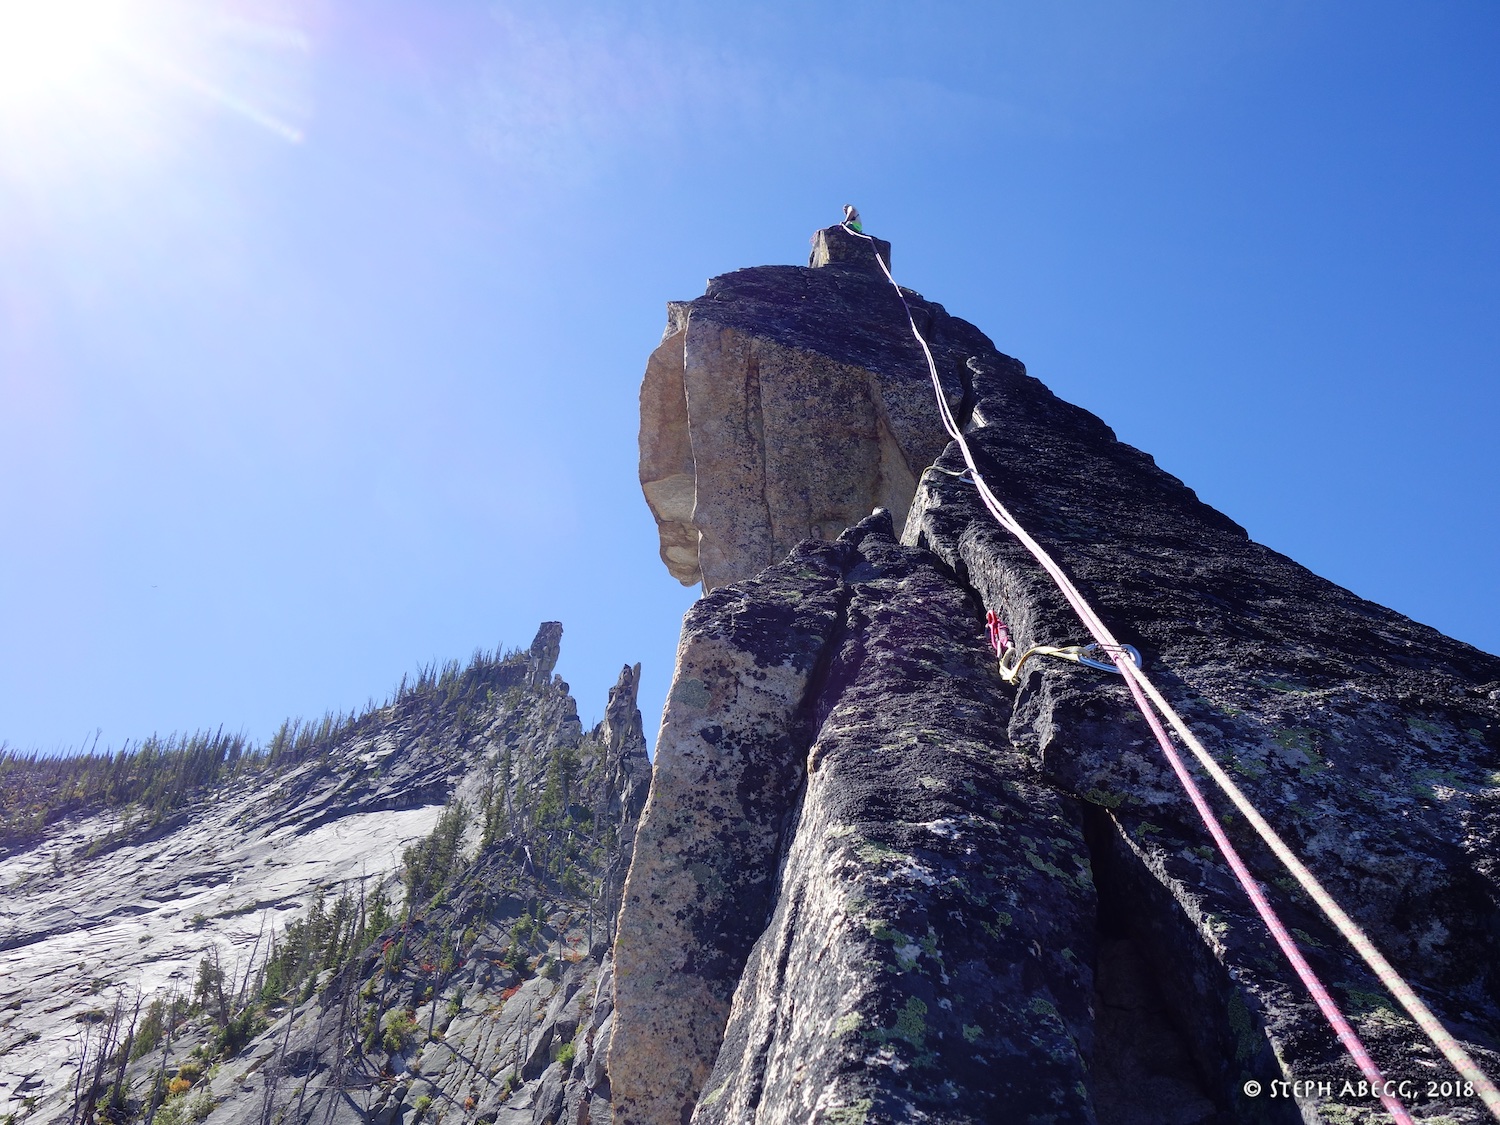
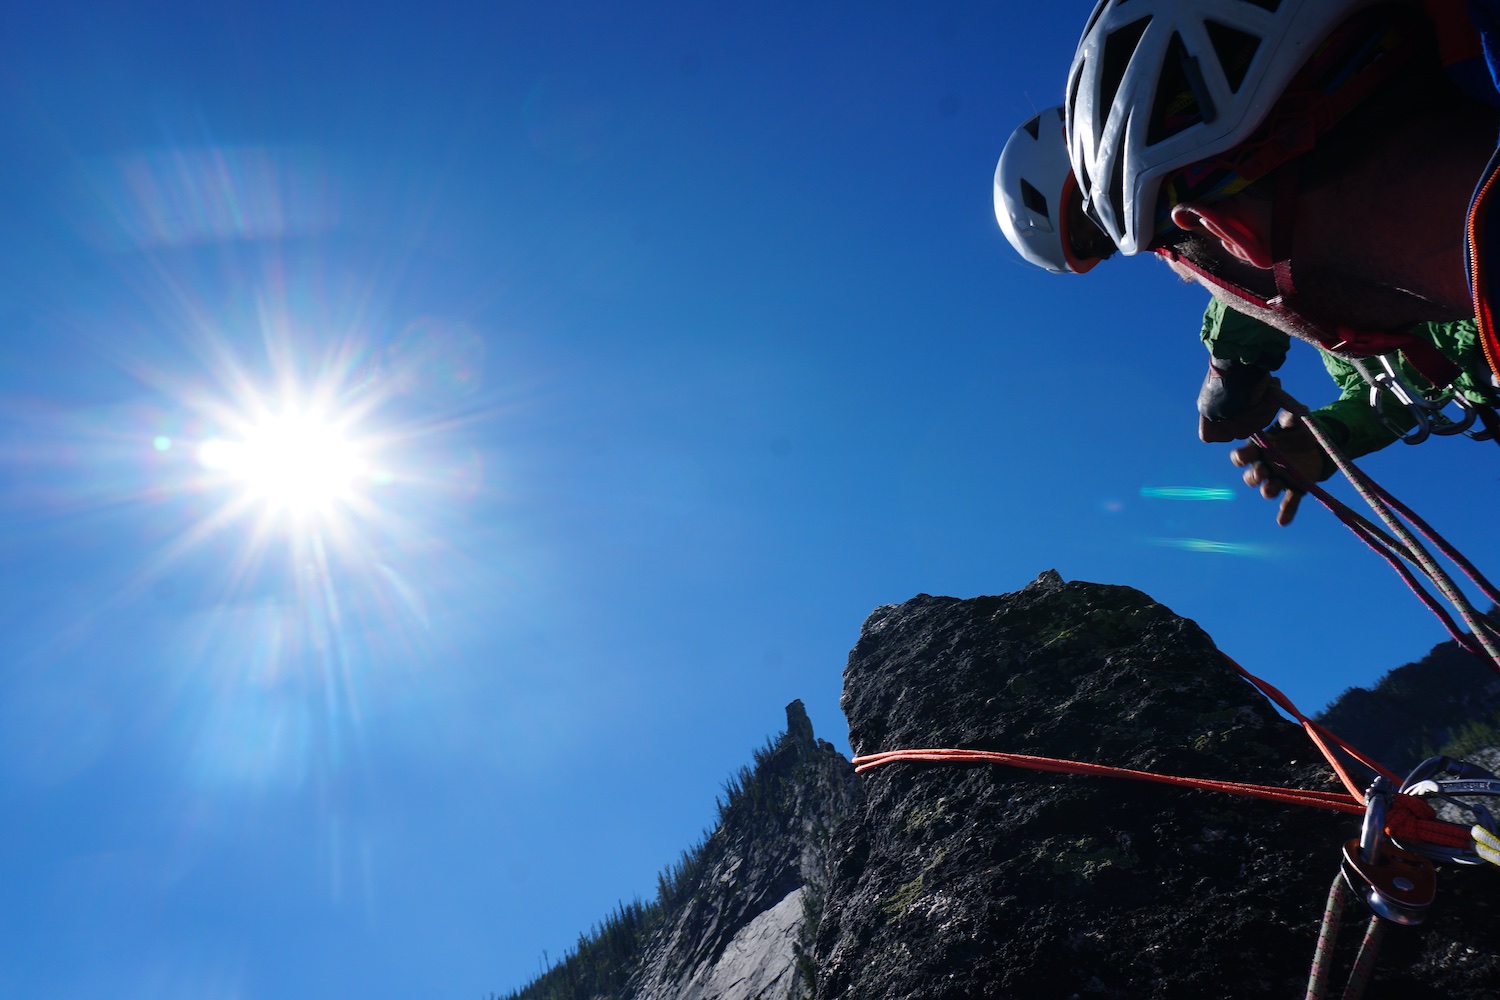
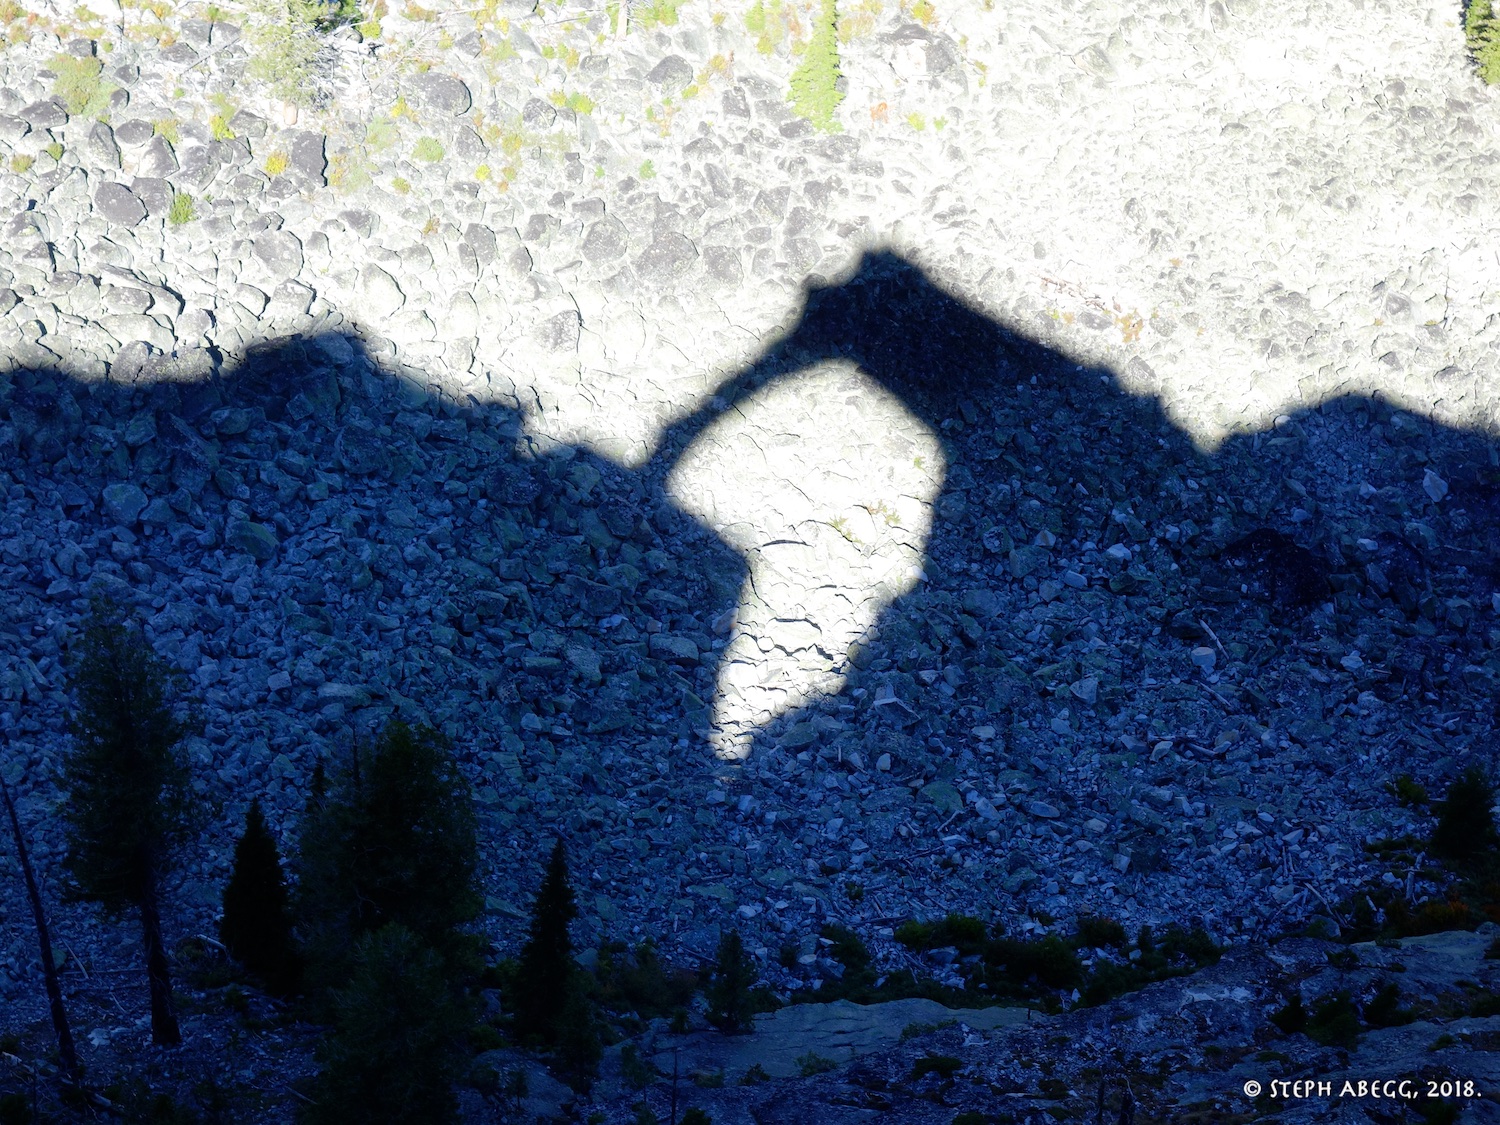
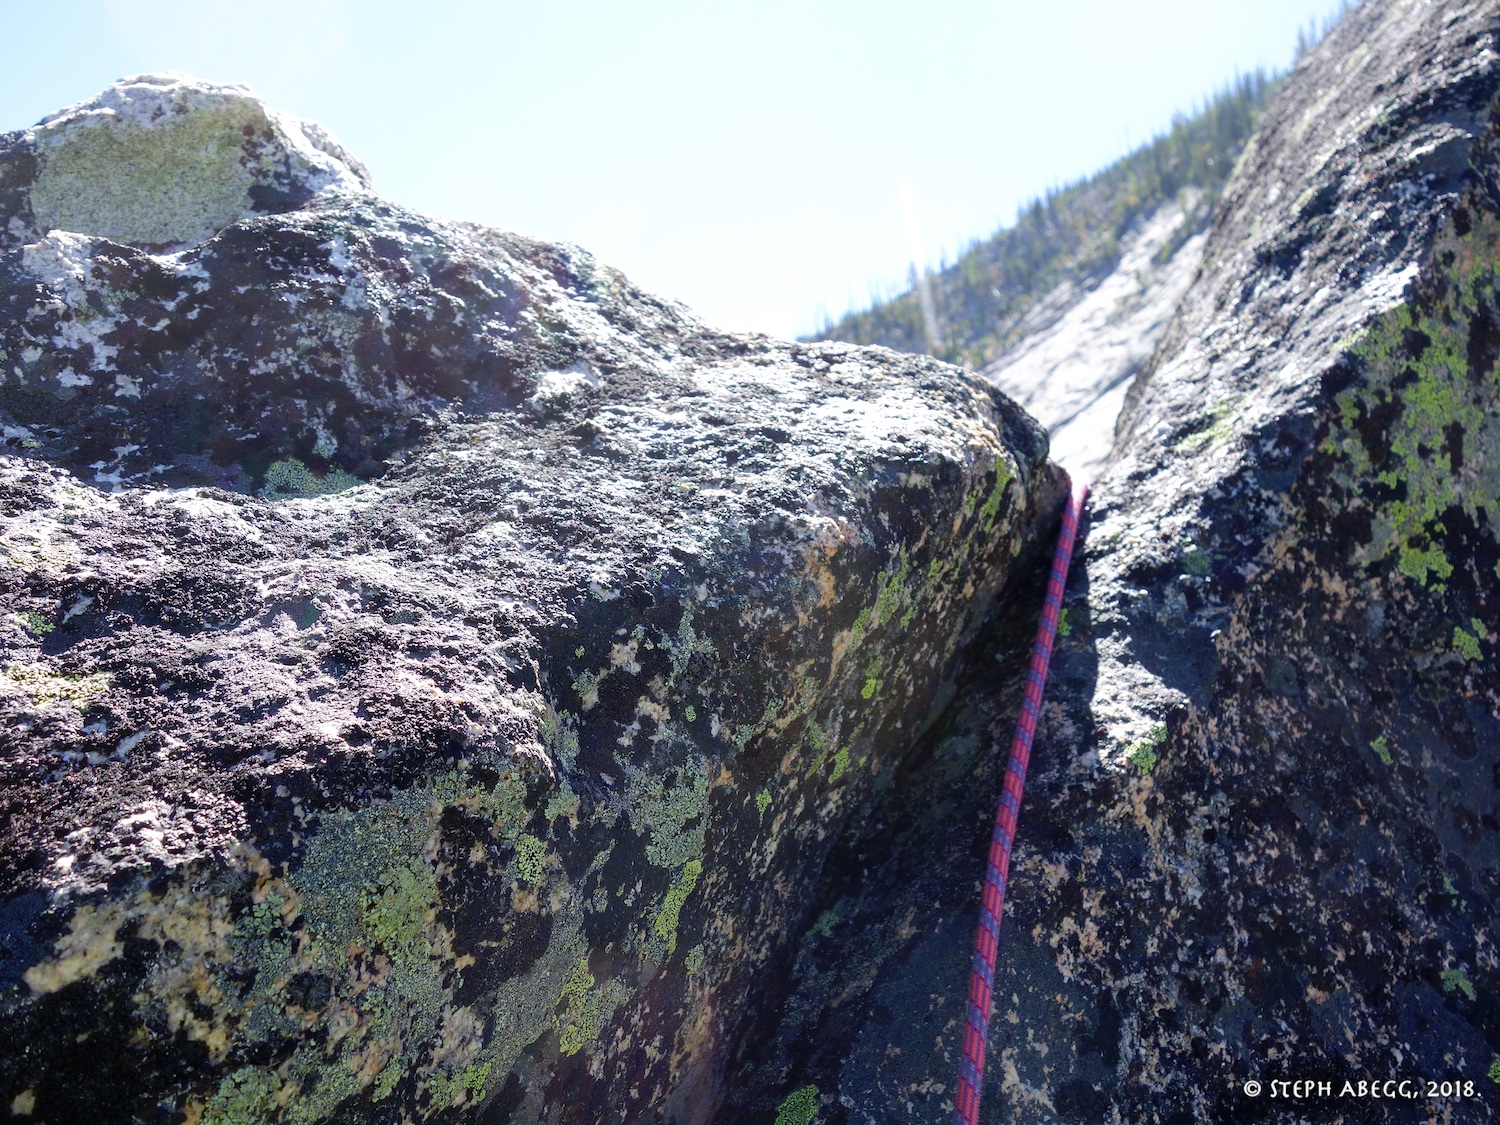
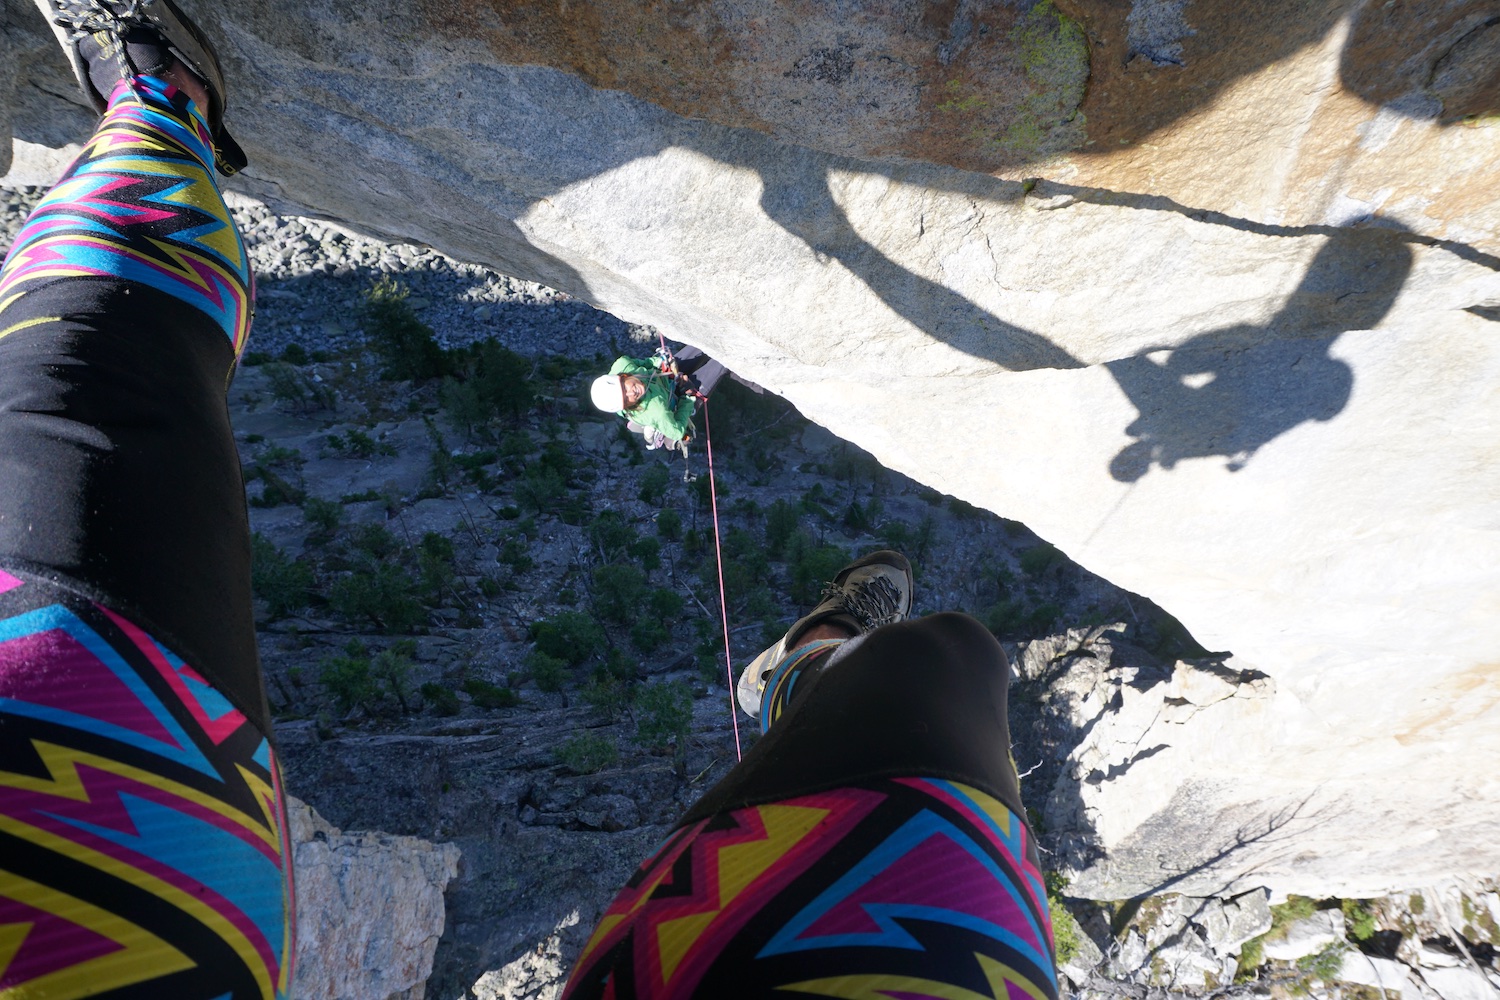
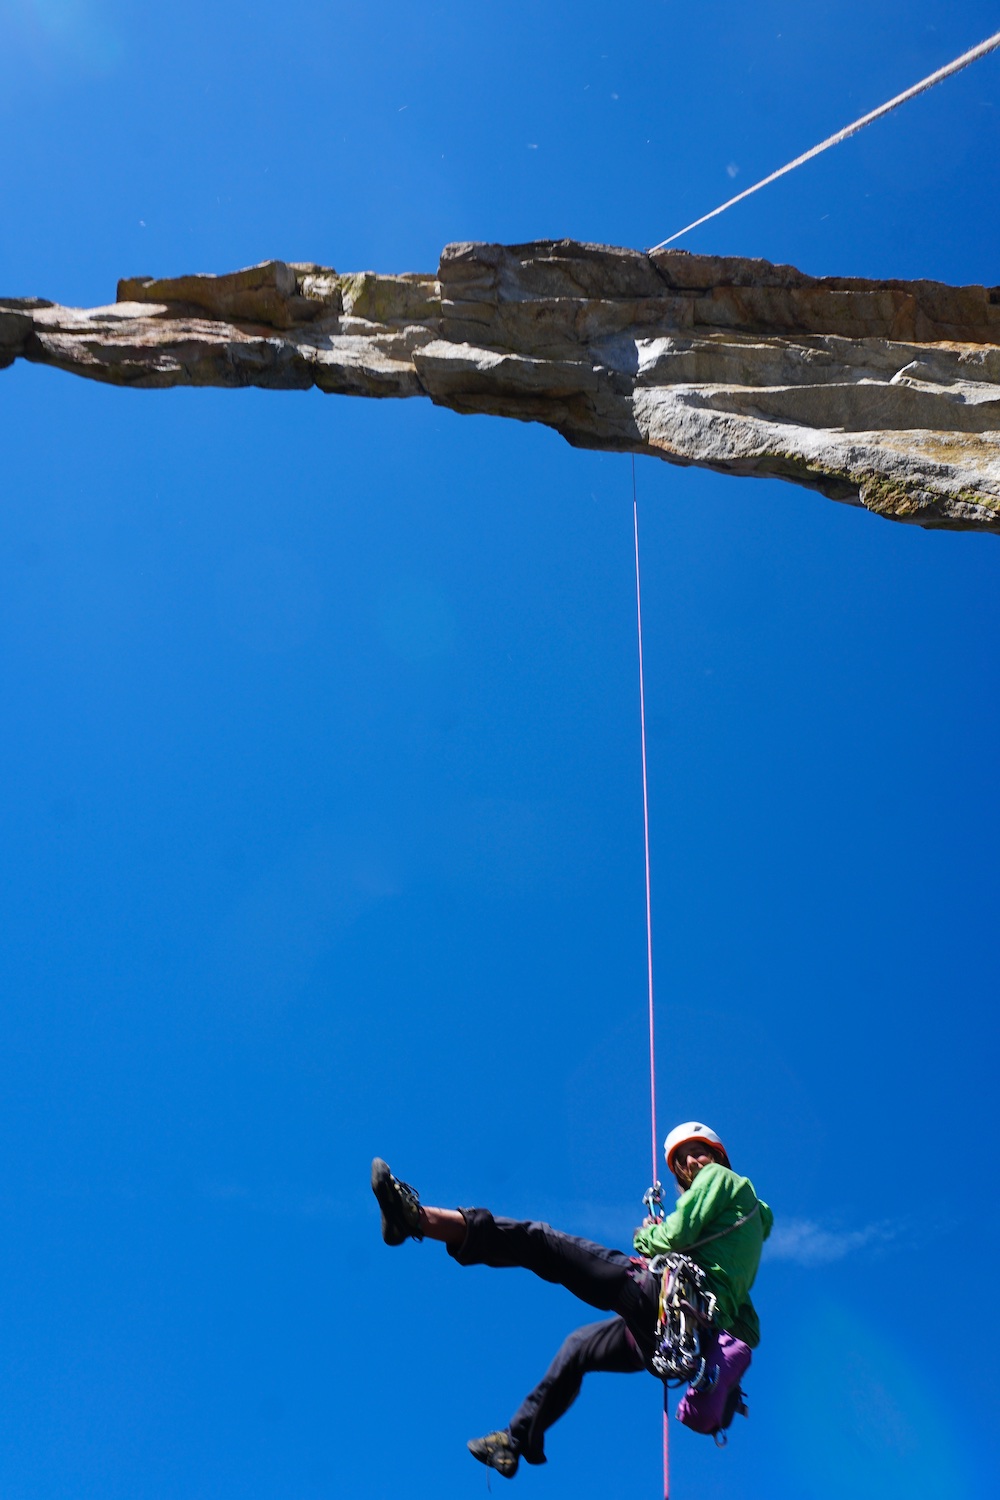
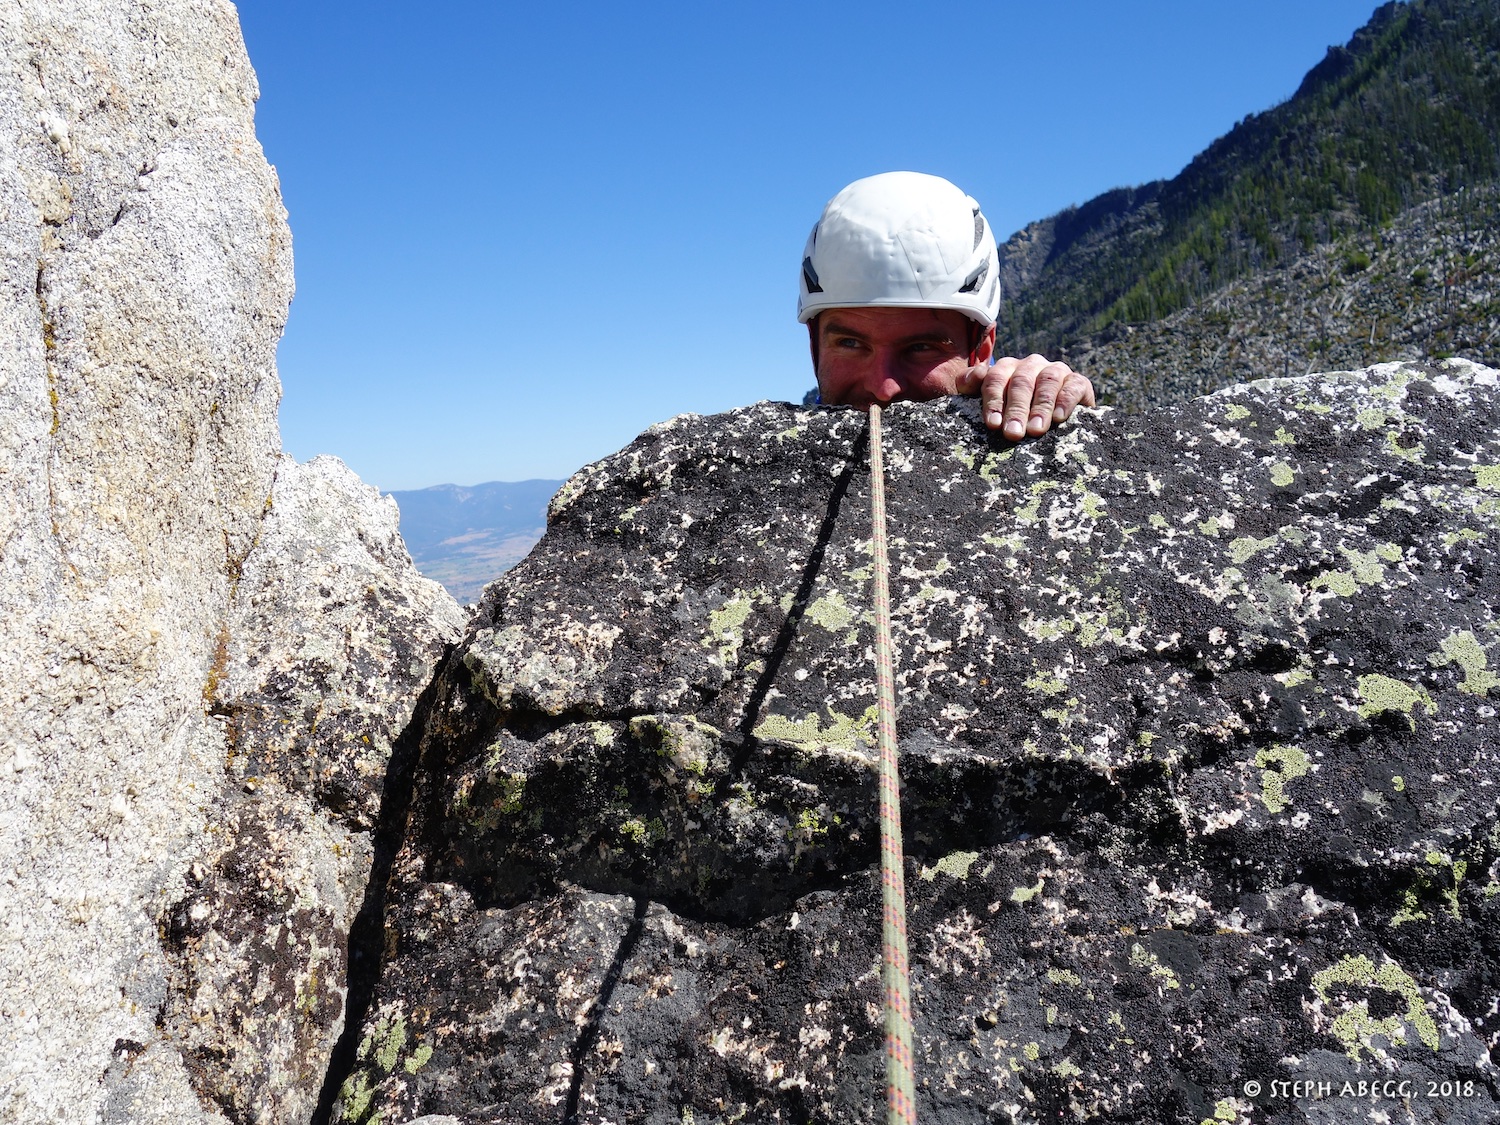
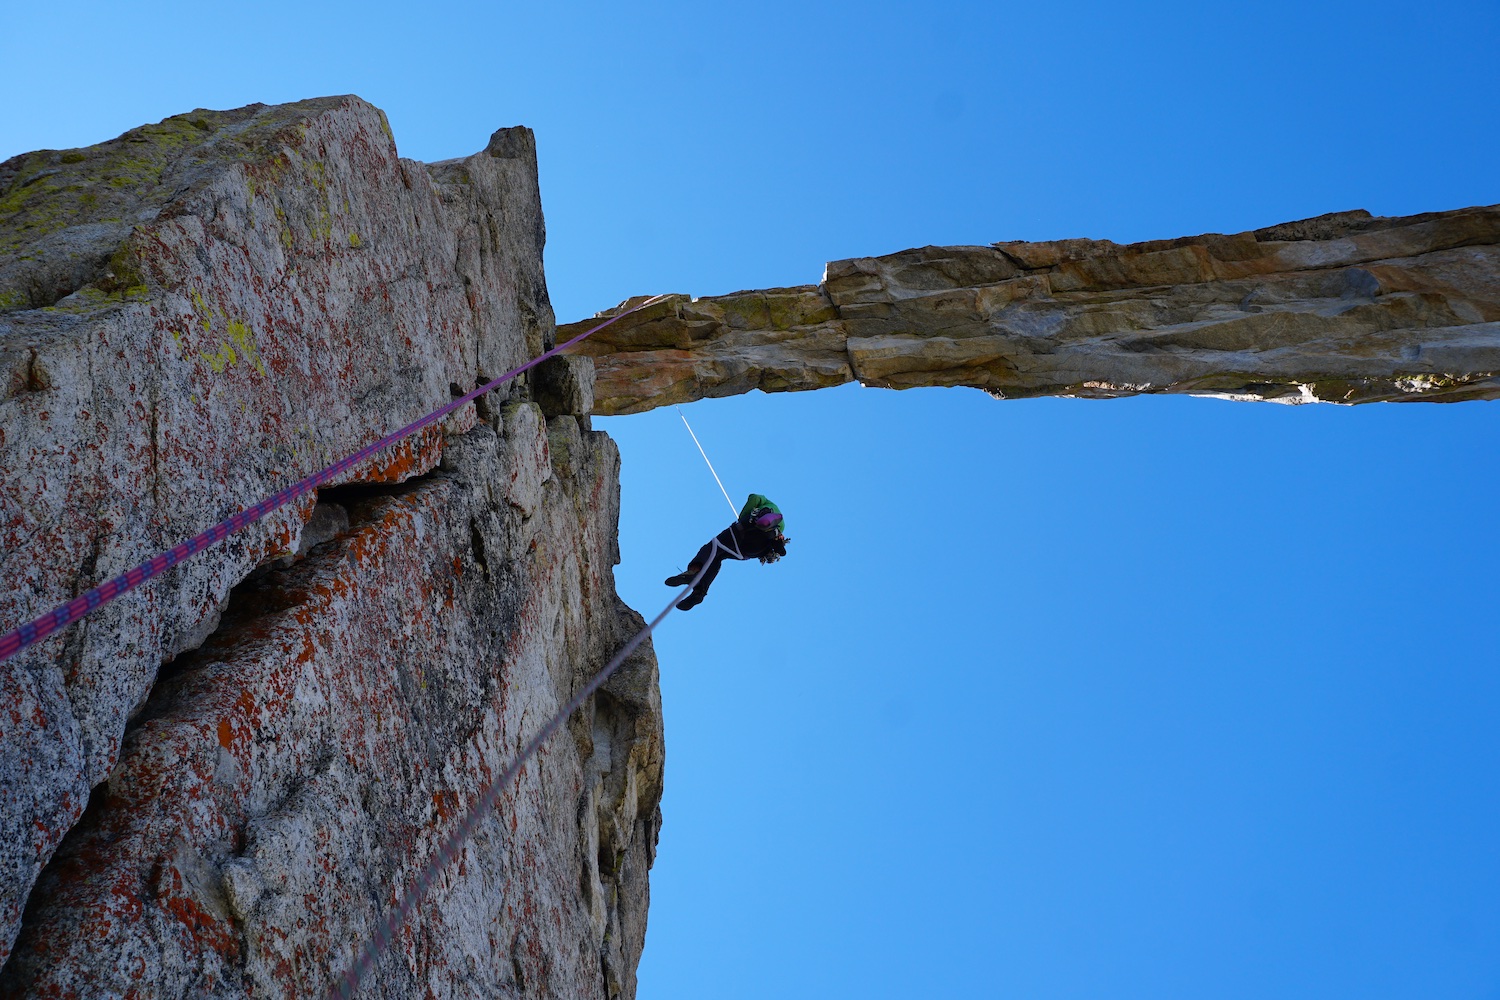
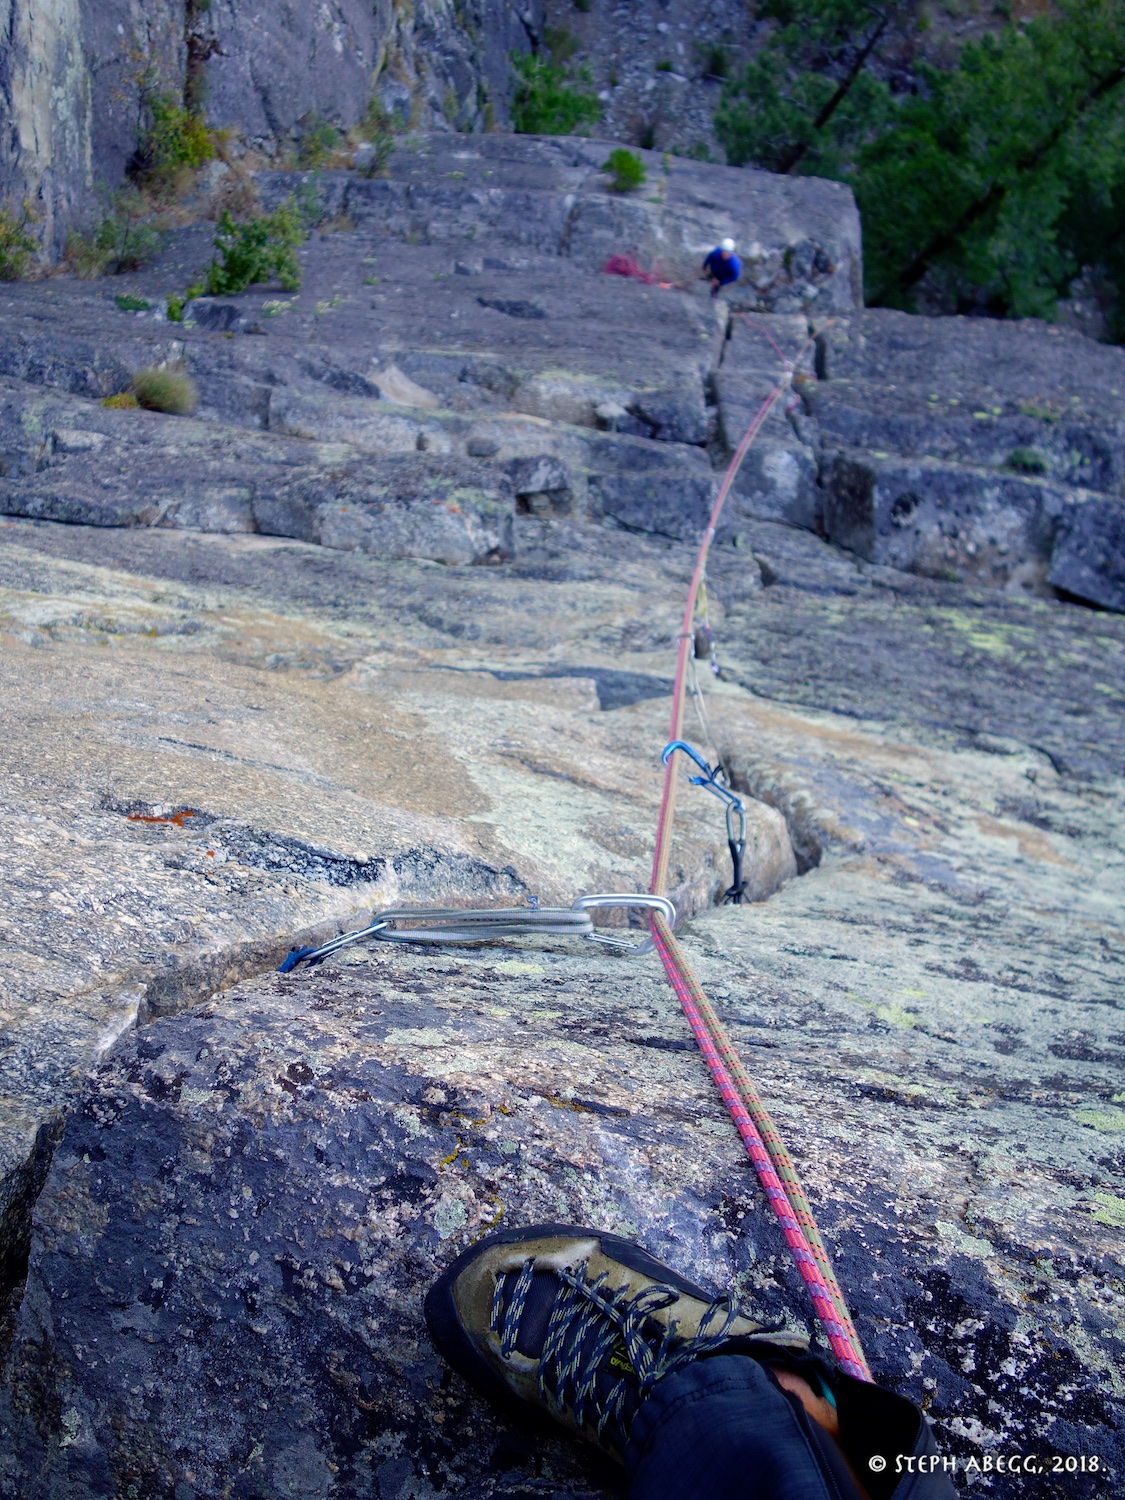
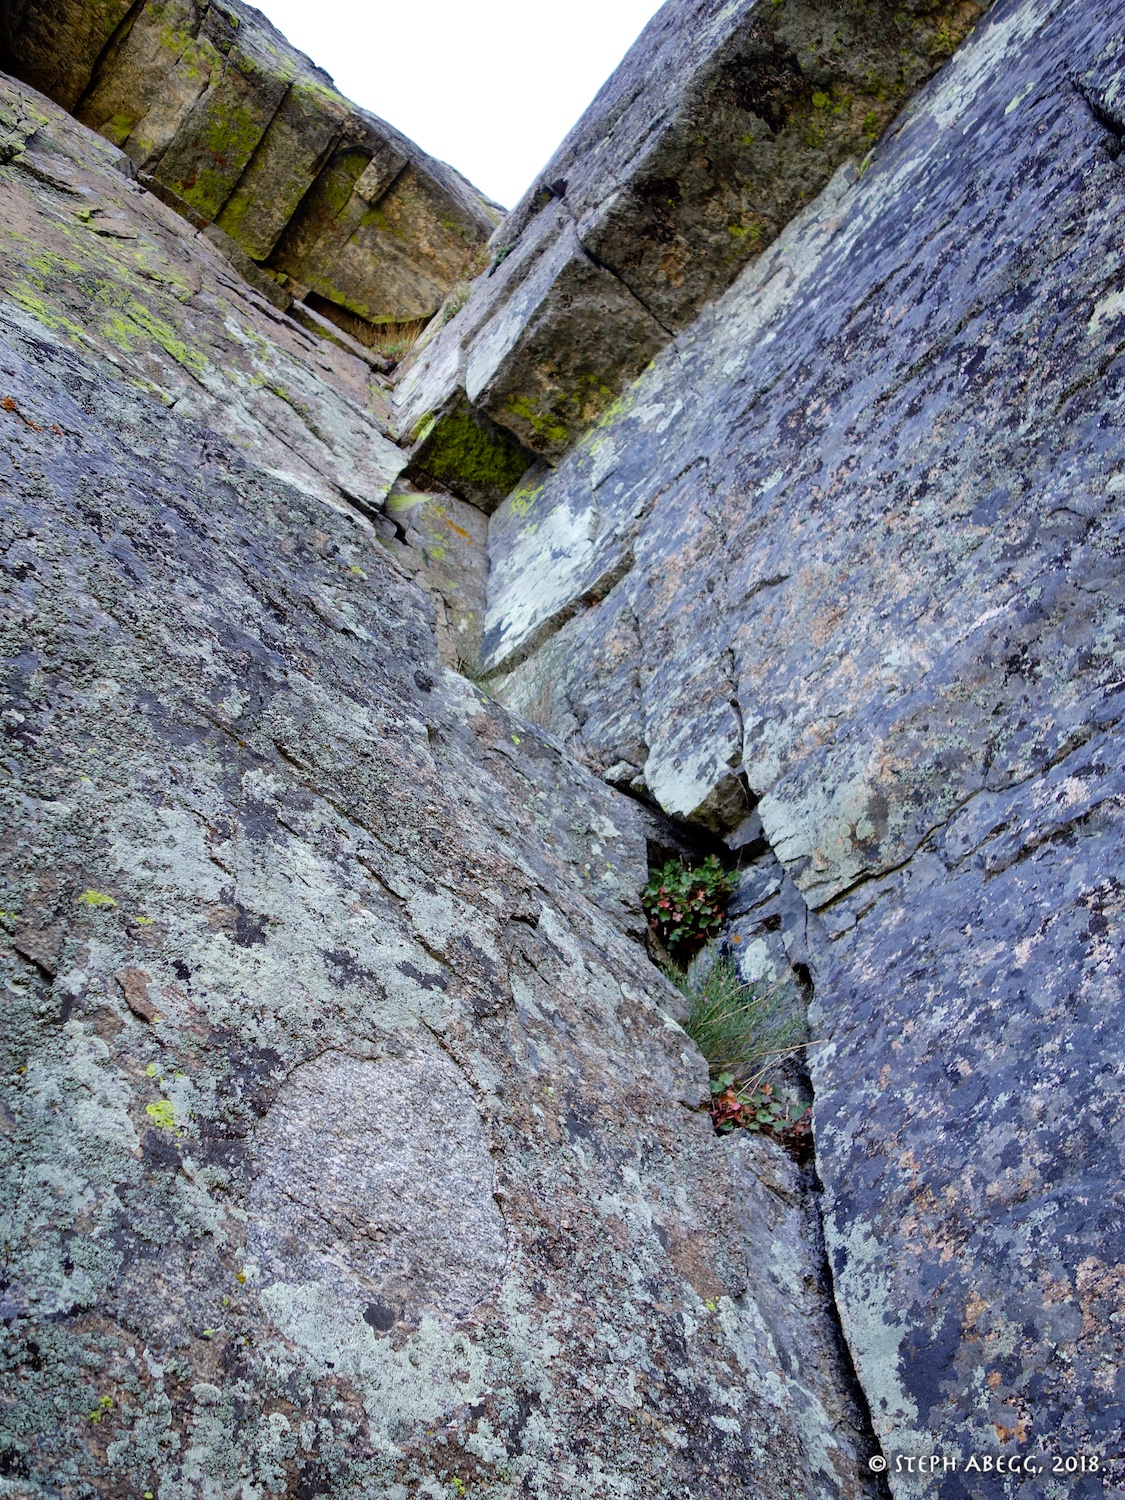
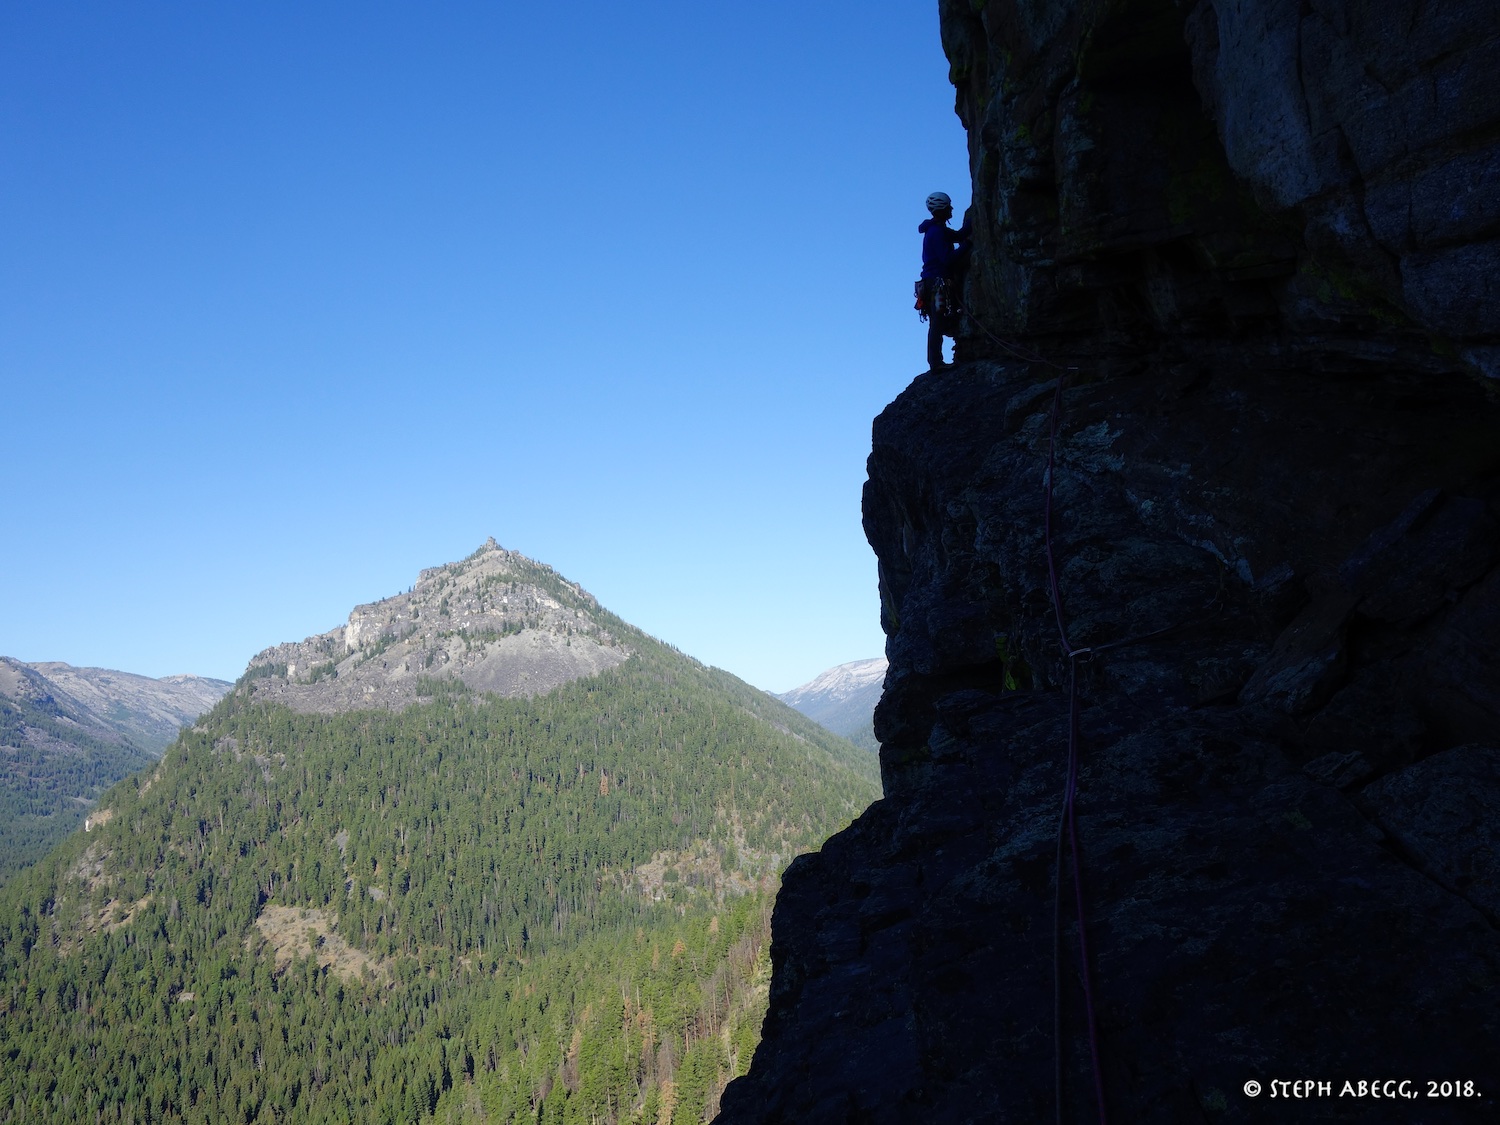
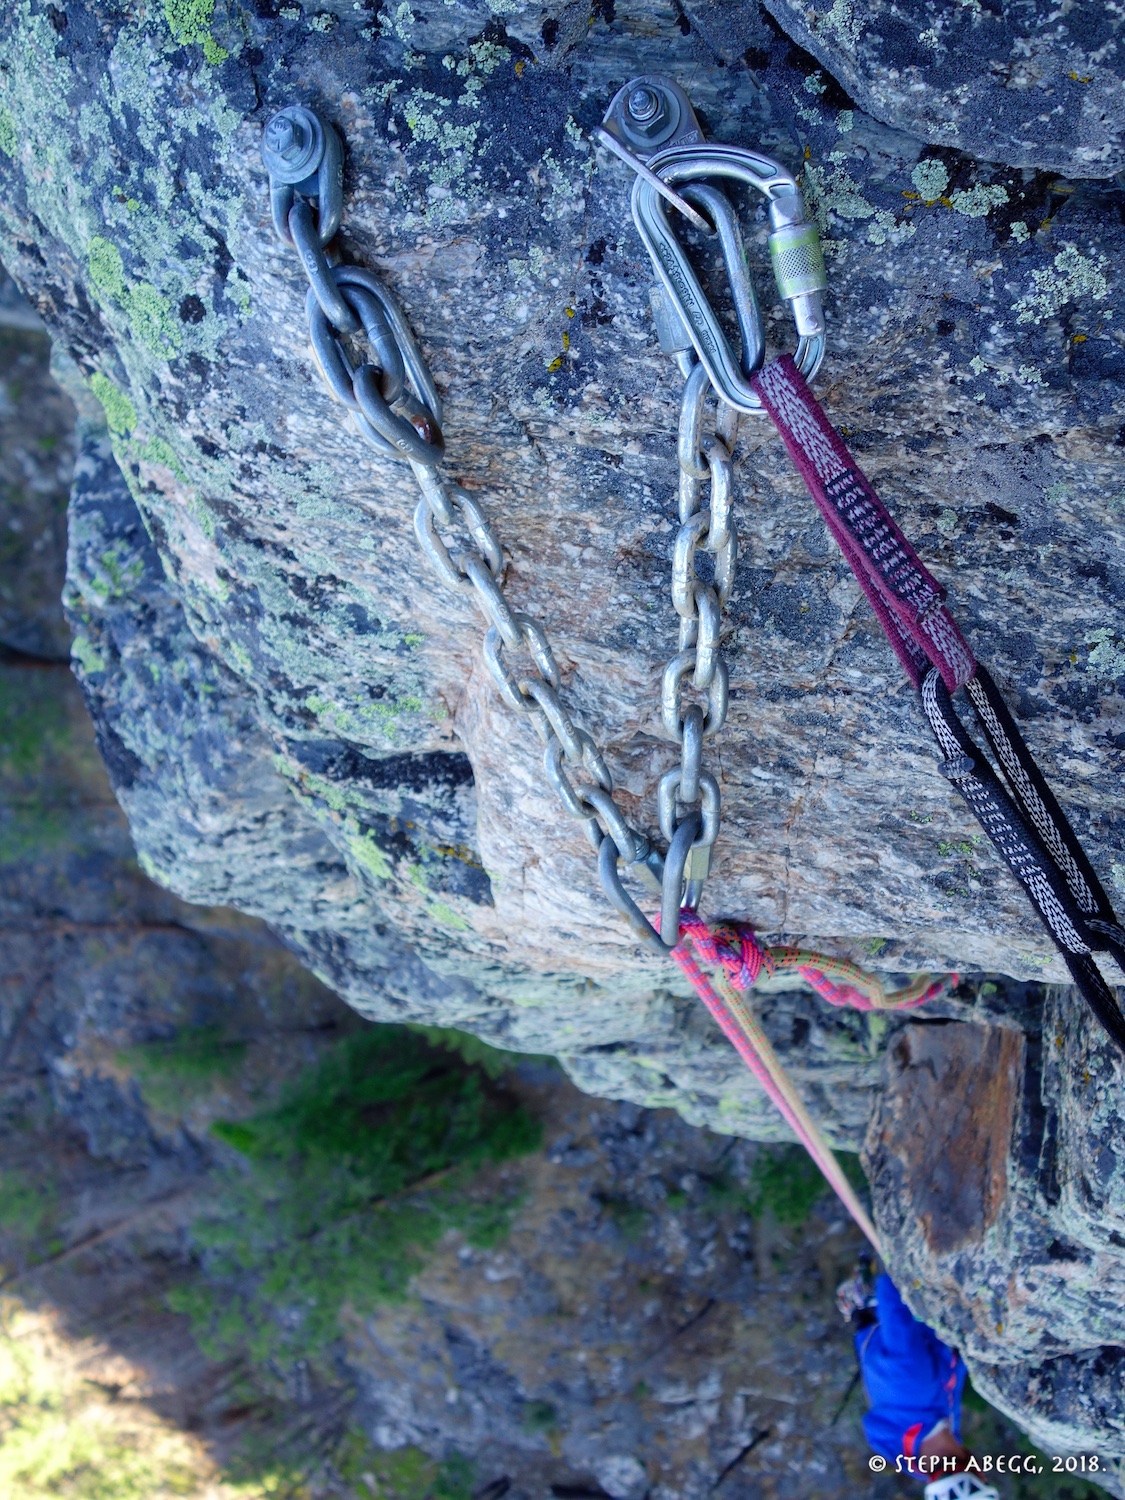
The first day, Chad and I climbed the South Face of Shoshone Spire (5.8+, 5-6p), perhaps the most popular route in the canyon (and no wonder, with its great exposure, continuous maze of cracks on solid rock, and moderate grade). The route took us about 7 hours camp-to-camp, and we were both feeling like we could climb reasonably well through our injuries, so we planned for something bigger the second day: My Mom's Muscle Shirt on Flathead Buttress (5.10+, 8p), a 5.10 testpiece climbing up the center of the steep south face. This climb offered pitch after pitch of challenging, varied, and awesome climbing. The third day, we set out for our third major objective in the canyon: the Southwest Ridge (5.10 R, 8p) of Nez Perce Spire, ascending the beautiful sweeping ridge of Nez Perce and known to be a bit more of an adventure route than our previous two climbs. But the few and flaring gear placements and in-obvious route-finding got the best of us, and we decided to bail one pitch up, and head instead to next-door Blackfoot Dome and climb The Free Lament (5.9+ R, 3p). We climbed the first two pitches, but again the runout climbing and tricky gear was getting the best of us and neither one of us was feeling super confident given our injuries, and we decided to call it a day. The fourth day, our last day in Blodgett, we decided to go check out Horsehead Arch, a cool-looking arch feature we had spotted high on the south side of the valley across from Flathead Buttress. From what little beta we could glean off of the internet, it sounded as if you could climb to the apex of the arch via two pitches of 5th class climbing, and then descend via a counterbalance rappel with your partner over the apex of the arch. Sounded pretty cool. And indeed it was! We first climbed to the top via the north end of the arch—we called this route "Horse's Mane" (~5.7 R, 2p)—and had so much fun doing the climb and rappel that we decided o see if we could get to the top via the south end of the arch—we called this route "Horse's Nose" (~5.9+, 2p). It was one of those rare awesomely fun and super memorable days of adventure, the kind where various episodes from the day play out in your mind for several days to come. The fifth day of the trip was Labor Day Monday, and since Chad needed to be back at work the following day and I was curious to check out the nearby Lost Horse Canyon (located about 12 miles south of Blodgett), we decided just climb for the morning at Lost Horse Canyon. Lost Horse's granite crags offer a plethora of incredible cracks and crisp edges, towering over the peaceful river valley below; there are nearly 100 pitches of high-quality crack climbing at all grades, mostly single pitch, with scattered 2-4 pitch routes. We climbed The Mountaineers Route (5.10b, 3-4p) on Main Wall, which is one of the more popular routes at Lost Horse.

This first climbing trip to Montana exceeded my expectations in every way. Chad was an awesome partner and I enjoyed climbing with him. Despite my rib and his foot injury, it never once detracted from our fun. I thought the Blodgett rock was good and the climbing was challenging and enjoyable, and the locations superb. I just loved Montana in general. There is no doubt I will be back to climb in Montana again. And again. 

(Update: When I wrote this trip report, I had planned on driving back to Washington the next day. But the weather looked a bit unstable in Washington, and I felt like exploring Montana some more, so the 4-day trip to Blodgett evolved into a 2-week effort to climb as many classic routes in Montana as I could. It was an awesome trip.)

Climbs We Did

CLICK ON ROUTE TO DROP DOWN CONTENT

Perhaps the most popular route in the canyon. A Blodgett classic.

Route Overlay

CLICK TO ENLARGE

Pitch-by-Pitch Photos

Photos:
Photo descriptions:
Approach
Hike about 2.5 miles up the Blodgett Canyon Trail, until just across the canyon from the drainage separating Nez Perce and Shoshone Spires. Cross the creek, slog up the talus, and hike up a left-slanting ledge system to the base of the lower left side of the face. (There is a way top skip the lower pitches and start the route at Lunch Ledge, but why hike uphill when you can climb fun rock?!) It took us 1 hour and 20 minutes from the trailhead to the base of the route.
1.    
2.    
3.    
4.    
5.    
6.    


1. Campground sign.
2. Our campsite. The Prow can be seen through the trees. This is the closest Spire to the campground.

3. Trailhead sign. The trailhead is 1 min from the campground.
4. A big pile of bear scat. We saw bear poop on occasion, but no bears.
5. Crossing the creek. With the late-summer low water, the creek is easy to cross by stepping on boulders. Hardly even have to hop.
6. Pretty much head up the talus and then cut left to the base of the ridge on the left skyline. 
Cross the talus up and left to find a nice climbers' path that leads you all the way to the base of the route.
Pitch 
1
5.8+, ~100'. From the lower left corner of the southwest buttress, climb short and steep corners to a ledge.
7.   7. Looking up Pitch 1. 

Pitches 
2-3
5.5-5.7, ~280'. Several variations. Mid-5th climbing to end at the big open ledge ("Lunch Ledge") beneath the upper headwall. If you set a high belay on Pitch 1, you can link Pitches 2-3 into one pitch and hence reach Lunch Ledge in two full pitches without any simul-climbing.
8.    
9.   
8. Looking up Pitch 2. I continued Pitch 1 up into part of Pitch 2, which allowed us to link the rest of Pitch 2 with Pitch 3 and reach Lunch Ledge in two full pitches without any simul-climbing.
9. The crux (~5.7 or 5.8 ish) on Pitch 3. Might be avoidable to the left or right, but it was fun.
Pitch 
4
5.8+, ~100'. Several variations. A common option is to stem up the the "chimney" on the far left side of the ledge using thin cracks, then climb through and overhang and then back right to belay at a tree. Variations to the right are apparently in the 5.9 range.
10.    
11.   
10. Looking up from Lunch Ledge. There are several options.
11. The "chimney" option. No chimney climbing, just stemming.

Pitch 
5
5.8, ~150'. Continue straight up following cracks and flares to the notch on the skyline to the left.
12.   12. Chad starting up Pitch 5. There are a lot of cracks to choose from, so choose a good adventure! 

Pitch 
6
5.8+, ~160'. Move right and pull through a roof (harder than 5.8+?) or go around the roof (easier perhaps), then continue up through face and crack to the large ledge on the left below the summit. 
13.    
14.    
 
13. Looking up Pitch 6. Another choose your climbing adventure kind of pitch.
14. Looking down while leading Pitch 6.

Top!
From the large ledge, walk north and around to top out. Yay! 
15.  15. The summit is on the left. The ledge on the right is where Pitch 6 tops out.

Descent
Scramble down the NE side and around back to Lunch Ledge. Rap off a bolted anchor near a distinctly-shaped tree (one double-rope rap to ground, or two single-rope raps if second bolted station still there).
16.    
17.    
18.    
  
16. The bolted anchor is next to this distinctly-shaped tree.
17. Bolted rap station by the tree. The tree thanks whoever put this in. Otherwise it would be choking on slings.
18. Looking up at the rappel from below. One double-rope rappel gets you down (tip: rack up and leave your packs here on the approach). There actually is an intermediate bolted rap station that would allow you to rappel with a single 70. it's located in a black water streak in the middle of the photo, i.e. here. (However, in Blodgett, "unnecessary" anchors are known to disappear, so all I can say is that it was there in August 2018.)
Hike back to camp-ground
It's a pleasant hike in a gorgeous area, so enjoy the scenery.
19.    
20.    
21.    
22.    
23.    
24.    
25.    
26.    
27.    
19. Southwest Buttress of Nez Perce Spire as seen from the base of Shoshone Spire.
20. Flathead Buttress.
21. Shoshone Spire.
22. Nez Perce Spire.
23. Nez Perce Spire.
24. Cornler Ridge, Drip Buttress, and The Prow. Notice how the foliage is already starting to turn to its beautiful fall colors.
25. The Prow.
26. Drip Buttress and The Prow.
27. We got back to the campground around 2:15pm, so I set up my office.....I had power from Chad's solar panel setup on his van and internet (too weak to upload photos though) from my phone's hotspot, and with the enormous picnic table it was the best office ever.

Flathead is home to some of the best and longest free climbs in this part of the state, as well as some serious mix aid routes. My Mom's Muscle Shirt is the classic 1,200' test piece of Blodgett Canyon, climbing steep cracks and dihedrals up the center of the south face. An all around excellent line in an amazing location.

Route Overlays

CLICK TO ENLARGE

Pitch-by-Pitch Photos

Photos:
Photo descriptions:
Approach
Do the same approach as for the South Face of Shoshone Spire, but instead of stopping when at the base of the South Face Route, continue on a faint path across the drainage between Shoshone and Flathead. Continue beneath the south face of Flathead until at the base of the route, which starts on the right side of the south face. It took us about 1 hour and 40 minutes from the trailhead to the base of the route.
1.    
2.    


1Approach.
2. At the base of the route.


Pitch 
1
5.10a, ~100'. Climb up through blocky terrain to gain a steep left-facing corner. Belay at a nice ledge with a bolted anchor.
3.    
4.    
5.   
3. Looking up Pitch 1.
4. The corner on Pitch 1.
5. Nearing the top of Pitch 1.


Pitch 
2
5.10a, ~120'. Climb through an overhang and then go up a chimney. Continue up a face, following a flaring seam to a large ledge. Traverse left to a bolted anchor.
6.    
7.    
8.    
9.   
6. Start of Pitch 2.
7. Chimney on Pitch 2.
8. The flaring face cracks. This was a heady section but gear could be found if you worked for it.
9. The first three pitches of the route had a bolted belay anchor. After that, it was all gear belays.


Pitch 
3
5.4, ~80'. Traverse left on a nice ledge and then downclimb a flake chimney to a stance with a bolted anchor. You can also continue traversing further left to another bolted anchor. 
10.    
11.    
10. The ledge on Pitch 4.
11. Climb down the other side of the flake.


Pitch 
4
5.10a, ~100'. From the first belay option at the end of Pitch 3, climb up and right, then left along a ledge to a large horizontal flake. Hand traverse the flake to a vertical finger crack. From the ledge at the top of the finger crack, wander left and then back right to belay at the base of a large left-facing corner/OW. Climb up and left to gain a finger crack and onto a ledge in about half a rope length until just below a left-facing dihedral.
12.    
13.    
14.    

12. The hand traverse along a horizontal flake.
13. Me leading Pitch 4. Photo by Chad.
14. Pitch 4 ends with some wandering back and forth on a cool ledge system atop a giant flakes.
Pitch 
5
5.9, ~170'. Climb the dihedral to a ledge below a roof. The first section has a 5-inch crack where a #5 would fit, but you can find other gear and sling a chockstone, so a #4 is sufficient.
15.    
16.    
17.   
15. Chad leading the left-facing dihedral.
16. Looking down while climbing.
17. The upper section of climbing on the pitch. Steep and awesome.

Pitch 
6
5.10+, ~100'. Move left around the roof, and continue up through another more strenuous roof and cracks via jams and layback moves. Belay at a small ledge below a left-angling crack. 
18.    
19.  
18. Looking up Pitch 6.
19. This roof is strenuous since there are no great feet. My rib didn't like this section so I aided through this part.
Pitch 
7
5.10c, ~120'. Climb the tricky left-angling crack (fingers/hands). At the top of the crack, climb up and right through featured terrain. 
20.  20. The left-angling crack on Pitch 7. It is a bit tricky.
Pitch 
8
5.9, ~100'. Climb cracks and corner to the top. Many variations. Top out near a large dead tree.
21.   21. Pretty much a choose your own adventure pitch. We went this way.
Top!
Yay!
22.    
23.    
22. The dead tree at the top of the route. I belayed off this tree, but as I was belaying I was thinking about dead trees eventually fall over, and I got really weirded out. You can find an alternative belay nearby.
23. Looking out of the canyon. Can see the profiles of Shoshone, Nez Perce, and Drip Buttress.
>
Descent
Scramble eastward to a large tree with slings overlooking the east face. Make three double-rope rappels from trees to reach a large sloping ledge. Scramble down and around the corner of the wall back to the start of the climb. (Alternative descent: It is apparently possible to rap down the face using anchors from the Pierce Route/Space Cat/Afterburner. I don't know where these anchors are.)
24.    
25.    
26.    

24. Rap 1.
25. Rap 2.
26. Rap 3.


Hike back to camp-ground
It's a pleasant hike in a gorgeous area, so enjoy the scenery.
27.    
28.    
29.    
30.  
27. Shoshone Spire in profile.
28. Blackfoot Dome.
39. Blackfoot Dome.
30. Sublime late-afternoon light on the hike out.


Pitch 1 of Southwest Buttress (5.10 R) of Nez Perce Spire & Pitches 1-2 of The Free Lament (5.9+ R) on Blackfoot Dome (& bailing due to runnout climbing and flaring gear placements)

Photos

Photos:Photo descriptions:
1.    
2.    
3.    
4.    
5.    
6.    
7.   
1. Morning routine: Hydration and vitamin-I.
2. Looking up the Southwest Buttress of Nez Perce Spire. It's difficult to pick out a distinct line in this terrain.
3. Looking over towards Nez Perce Spire from Blackfoot Dome. The Southwest Buttress is on the left skyline (this photo shows how steep it is).
4. Closer view of the Southwest Buttress of Nez Perce Spire.
5. Pitch 2 of The Free Lament on Blackfoot Dome.
6. Higher on Pitch 2. The crack is flaring and you really have to work for the gear on this pitch (I sewed it up, but partly because I didn't trust many of the placements).
7. Chad following Pitch 2 of The Free Lament. It is very good climbing, just heady to lead.

A cool feature we spotted on the south side of the canyon. Had to check it out!

North end ("Horse's Mane") (P1: ~5.7, P2: ~5.7 R)
South end ("Horse's Nose") (P1: ~5.9+, P2: ~5.6)

Route Overlay

CLICK TO ENLARGE

Geology Lesson

I asked my friend and geologist Doug McKeever if he knew how an arch like Horsehead Arch formed. Here was his response: "How it formed....arches in granitic rock usually form by a favorable set of joints that allow progressive collapse of blocks once an opening occurs below while maintaining enough rock to be self- supporting. Obviously arches eventually collapse, and one that has evolved to the thinness and apparent delicacy of Horsehead is doomed, perhaps a week from next Tuesday! The final cause of failure will most likely be a bit more ice wedging in cracks, or less likely, an earthquake, which do occur in Montana (1959, near Yellowstone, magnitude 7.1). Or maybe two really stout climbers."

Disclaimer

The internet has very little information on Horsehead Arch other than a few vague accounts of it being climbed in some way and at some doable grade. I cannot find any route descriptions for the arch published in any guidebooks. Since climbers like route names and ratings, I have taken the liberty of creating route names and assigning approximate grades to the routes my partner and I did up either side of the arch. Please consider the ratings to be +/- a grade of accuracy and feel welcome to post comments about whether or not you felt the pitches were easier/harder than my assignments. Thanks!

FA Update

Posted on mountainproject in June 2021 by Keith Schultz: "I free soloed this in mountain boots in 1976. Then rappelled down the arch for the shameless photo op. I still have that photo somewhere in my dusty stacks. While there was a lot of activity in the Bitterroots in those days, very little outside of Blodgett and Kootenai was documented. This was on purpose. Alex Lowe, Marvin McDonald, Mike Kellog and more were in agreement that "It is wilderness. Leave no trace and let others have the same pristine adventure." It was not a law or even a rule, just an elegant local ethic very loosely encouraged."

Photos

Photos:
Photo descriptions:
Approach
Hike about 3 miles up the Blodgett Canyon trail. Leave the trail just before it crosses to the north side of the creek. Traverse to the large boulder/talus field and ascend about 1800 vertical feet up talus and hillside to the arch. It took us about 3 hours from the trailhead to the base of the arch.
1a.   
1b.   
2.    
3.    
4.    
5.    
6.    
7.    
8.    
9.    
10.   
1a. Strava track for the day.
1b. Photo overlay of the approach, from a photo taken from Flathead Buttress a couple of days earlier.
2. The first view of Horsehead Arch, from the trail just before the trail crosses the creek at a bridge. Looks a bit more like a giraffe from this angle. 
3. Turn off the trail just before the trail crosses the creek at a bridge. It's a very nice bridge.
4. Pretty much just head straight up the drainage. It's a mix of boulders, bushes, and downed timber, but overall not too bad. About 2 hours from the trail to the base of the arch.
5. Heading up.
6. There's a bit of 'schwacking, but it's pretty short-lived and tame by North Cascades standards.
7. Nearing the arch. It looks even cooler up close. The dead trees are a result of the South Canyon Fire that swept through the area in 1994 and killed 14 fire fighters.
8. Looking up at the arch from below. It is about 160 feet from ground to the apex of the arch (based on how much rope we had pooling on the ground on our rappel from the apex).
9. Thin!
10. Looking up at the arch from the west side. This side has more lichen than the east side.

North end ("Horse's Mane")

Pitch 
1
~5.7, 100'. Climb a corner crack system up to the crest. 
11.    
12.    
13.   
11. Corner crack system.
12. There was an anchor already at the top of this crack, created from three nuts and a piece of cord. The cord was in decent enough shape. I suspect it was a bail anchor.
13. Chad straddling the horse's back. Oops, riding the horse backwards.
Pitch 
2
~5.7 R, 200'. Walk/crawl/smear/whimper your way along the narrow ridge to the top. There is pretty decent gear (from green alien to #4) until the final 20 feet, which is runout lichen-covered slab, with just enough quartz crystals for the feet to keep the climbing at 5.7.  A heady pitch.
14.    
15.    
16.   
14. Chad making the final exposed moves to the summit. No backing down at this point.
15. On top!
16. Taken while climbing. The crack up ahead is #4-sized (we didn't bring a #4, but it would be nice to have).
Top!
Sling part of the ridge for an anchor. It's best to keep the sling weighted.
17.    
18.    
17. On top! Note the slung ridge, which was our anchor.
18. Shadow of the arch below.

Descent
Counterbalance rappel with your partner from the apex of the arch just north of the summit block. Double ropes needed (double 50's would reach).
19.    
20.    
21.    
22.   
19. We tied the two ropes together, draped over the arch with one rope hanging on either side. Then we got on opposite sides of the arch, both keeping the rope weighted on our side, and then rappelled together, using friction and each other's weight as the anchor. Not every day you get to do this sort of rappel! (Just before we rapped, we actually shifted the rope a few inches to the left of where it is in the photo, to avoid it getting pinched and stuck.)
20-22. Photos taken during the rappel. The rappel was so fun and unique we wanted to do it again. So we decided to see if we could climb up the other end of the arch (the south end)...

South end ("Horse's Nose")

Pitch 
1
~5.9+, 100'. Jam up the steep splitter in the inside of the arch and then slab up the cracks to the base of the arch. The blocks are a bit worrisome but seem pretty solid.
23.    
24.    
25.    
26.  
23. This crack looked too appealing not to climb.
24. This photo shows how thin the arch is on this side.
25. Looking up the crack. A bit dirty, but pretty good climbing.
26. There was a sling around a block where the arch started. So others have climbed this way already, no surprise. I reinforced it with my own for the belay.
Pitch 
2
~5.6, 50'. Make an airy bouldery move around left onto the top of the arch, then crawl along to the base of the summit block. There are a few places for medium-sized cams.
27.    
28.    

27. The airy bouldery move at the start of Pitch 2.
289. Looking along the ridge. There is a pretty good belay spot just below the summit block. Awesome exposure!
Top!
There is a pretty good flake just below the summit block to set a belay anchor. Enjoy the view!
29.   29. The view out towards Blodgett Canyon from the top of Horsehead Arch. A labeled version is given at the beginning of this trip report.

Descent
Counterbalance rappel with your partner just below the south side of the final summit block. Double ropes needed.
30.    
31.    
32.    
30. Chad disappearing over the other side.
31. Our second counterbalance rappel. We had it dialed this time.
32. Horsing around. (I couldn't resist fitting this pun in somewhere.)
Hike out
Reverse the approach to the arch. We decided to cross the creek on the hike out rather than 'shwack to the bridge. This might be harder to do in earlier season when the water is flowing higher/faster.
33.    
34.    
35.    
36.   
33. Descending the boulder field. I was enjoying the breeze rustling the aspens so much that I almost wished the boulder field was longer. 
34. Moose poop! 
35. Crossing the river on a log. Chad pranced across in a couple of seconds, whereas I almost fell off, ripped my pants, and got a foot wet. I can be a real klutz with a pack on.
36. The Strava track again - note on the way back we avoided some 'shwacking by crossing the creek on a log. Which might not be feasible if the water is flowing higher/faster.
One climb is Lost Horse Canyon (about 12 miles south of Blodgett Canyon) immediately after Blodgett Canyon:

One of the most popular routes at Lost Horse Canyon . Over the years, it has turned from a loose 5.8+ to a beautiftul 5.10 classic. Lost Horse Canyon is about 12 miles south of Blodgett Canyon.

Photos

Photos:
Photo descriptions:
Approach
~20 min uphill hike
no photos
Pitch 
1
5.10b. Climb past a tree, up a splitter off-finger crack, followed by a fist crack. Belay at a bolted anchor. 
1.    


1. Splitter off-finger crack on Pitch 1.

Pitch 
2
5.10a. Climb a hand crack to a bolted belay at a ledge with a tree. 
2.    
3.    
4.    
2. Pitch 2. (Photo taken by Chad from the belay.)
3. This photo was taken by me around the same time as Chad was snapping the previous photo.
4. Steep but great jams and feet.
Pitch 
3
5.8. Climb the corner to the right, ending at a big ledge. Gear belay.
5.   5. Corner on Pitch 3. Better than it looks.

Pitch 
4
4th or exposed 3rd. Traverse left along the exposed but easy ledge to a chain anchor.
6.   6. The ledge traverse on Pitch 4. Not really a pitch, but its exposed enough it makes sense to keep the rope on.
Descent
Two double rope rappels off chains.
7.    
7. Looking down from the top rappel.

Comments Pertaining to this Page / Trip Report

Useful beta. Updated route information. Corrections. Historical notes. Interesting facts. No fluff please.
Leave a Reply

Your email address will not be published. Required fields are marked *