Spring Break 2018 was my seventh trip to Red Rocks, and another great one. I climbed for all seven days I was there. I had been unable to find a partner to go with, but I managed to string together a trip with a few different partners. The first 3 days I climbed with Kevin from Colorado, who had responded to my mountainproject partner post; we did three awesome full-day multipitch routes that had been on my ticklist: Myster Z + Armatron link-up, Dark Shadows (Full), andGinger Cracks. The 4th and 5th days of my trip I climbed with Randy from Washington, who was part of the Wenatchee bunch of climbers I was staying with; Randy and I squeaked ahead of the crowds and had a blast on the moderate uber classics Birdland and Frogland. The 6th and 7th days I capped off my trip by climbing with one of my favorite climbing partners ever, Danny Urioste; we climbed Inti Watana and RefriedBrains — both of these were excellent routes, coincidentally (and pretty cool) that these routes were both put up by Danny's parents Jorge and Joanne (Refried Brains had been put up by both Jorge and Joanne, but Inti Watana had been Jorge's project, while Joanne was at the time putting up Women of Mountain Dreams, another excellent route I hope to climb someday).
The following page gives photos from each of the climbs.
THIS TRIP REPORT IS STILL MOSTLY IN THE EMBEDDED HTML FORMAT OF MY OLD WEBSITE. MOBILE Tip: Try Landscape mode. It is generally more mobile friendly.
Climbs We Did
CLICK ON ROUTE TO DROP DOWN CONTENT
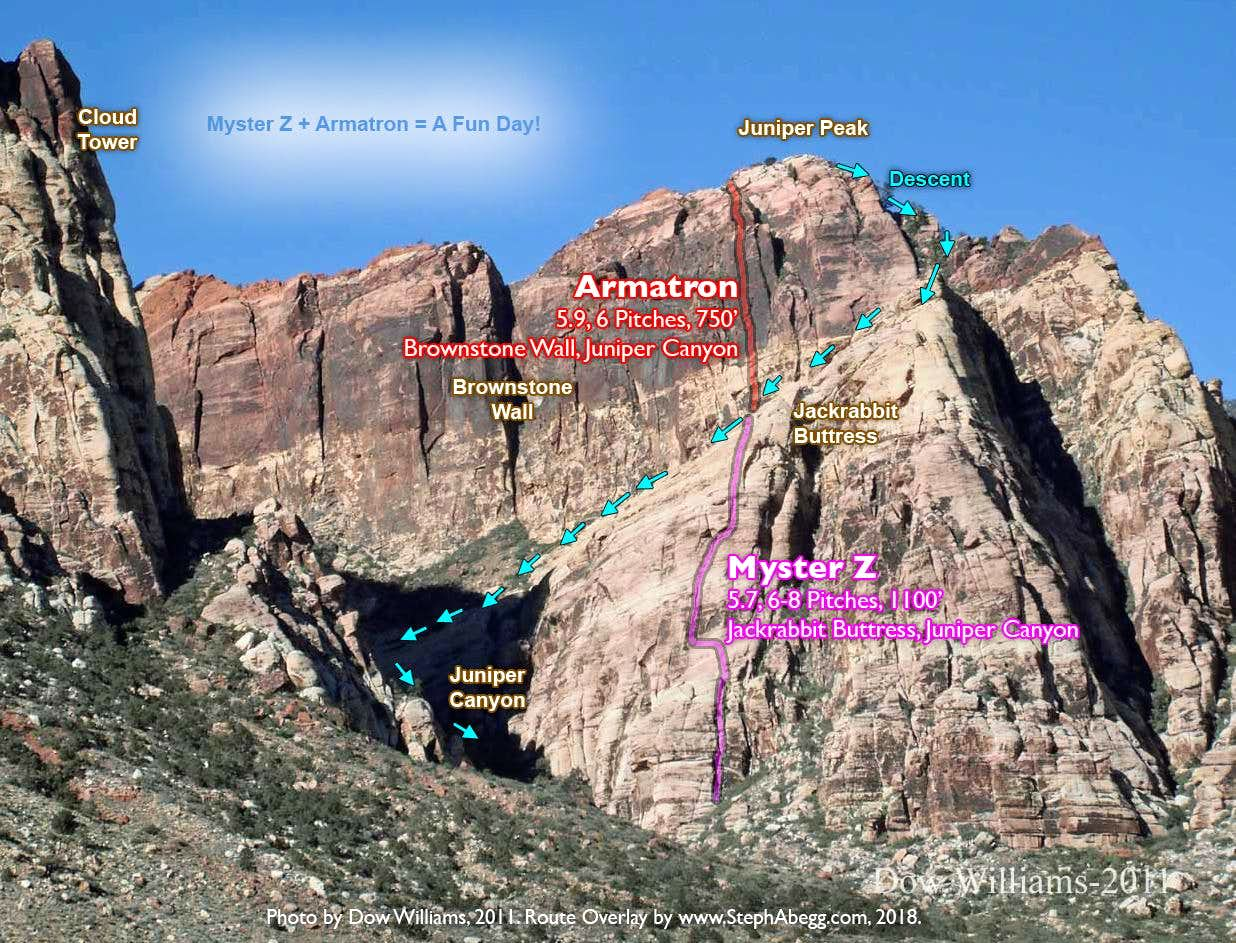
Myster Z is a great way to avoid 1000 feet of hiking to the base of Brownstone Wall and make for a really fun 14+ pitch - 1800+ foot climbing day.
Armatron is an awesome, open climb on great rock, whose 3rd and 4th pitch climb up a beautiful web of Brownstone bricks. The route name comes from a robotic toy popular in the 80's. They were a lot of fun. So is this climb.
FA (Myster Z): Jimmy Newberry, Phil Broscovak, 2003. FA (Armatron): Geoff Conley, Jimmy Newberry, Joanne and Jorge Urioste, Jeffre Johnson, 2003.
Route Overlay
Pitch-by-Pitch Photos
(Pitches as per Handren guide)
Photos:
Notes:
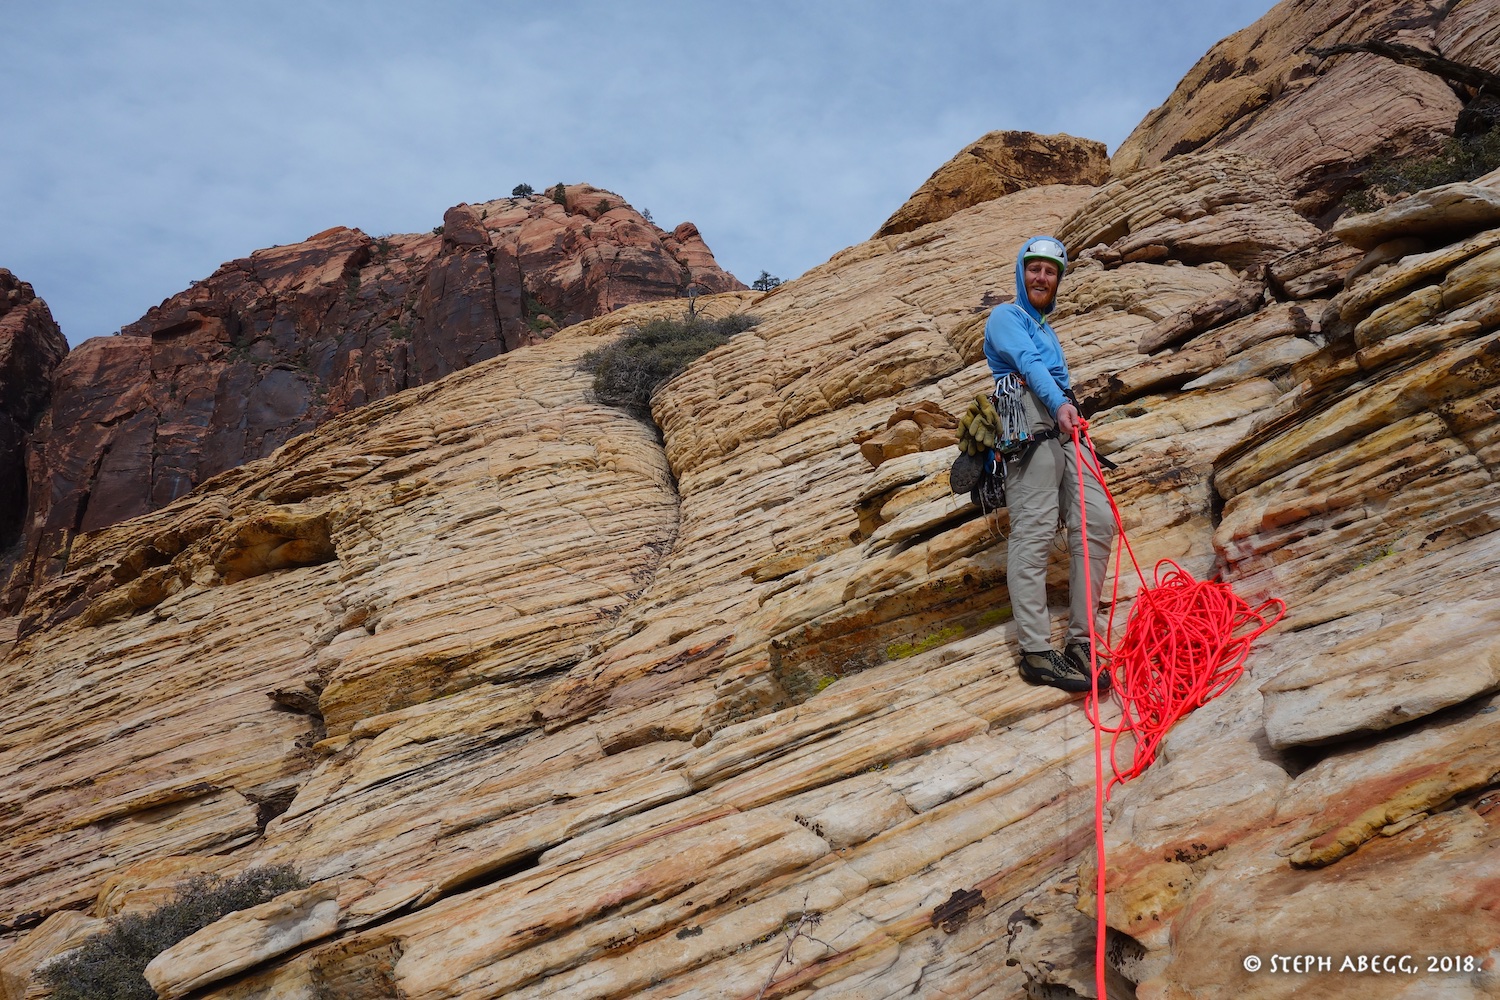
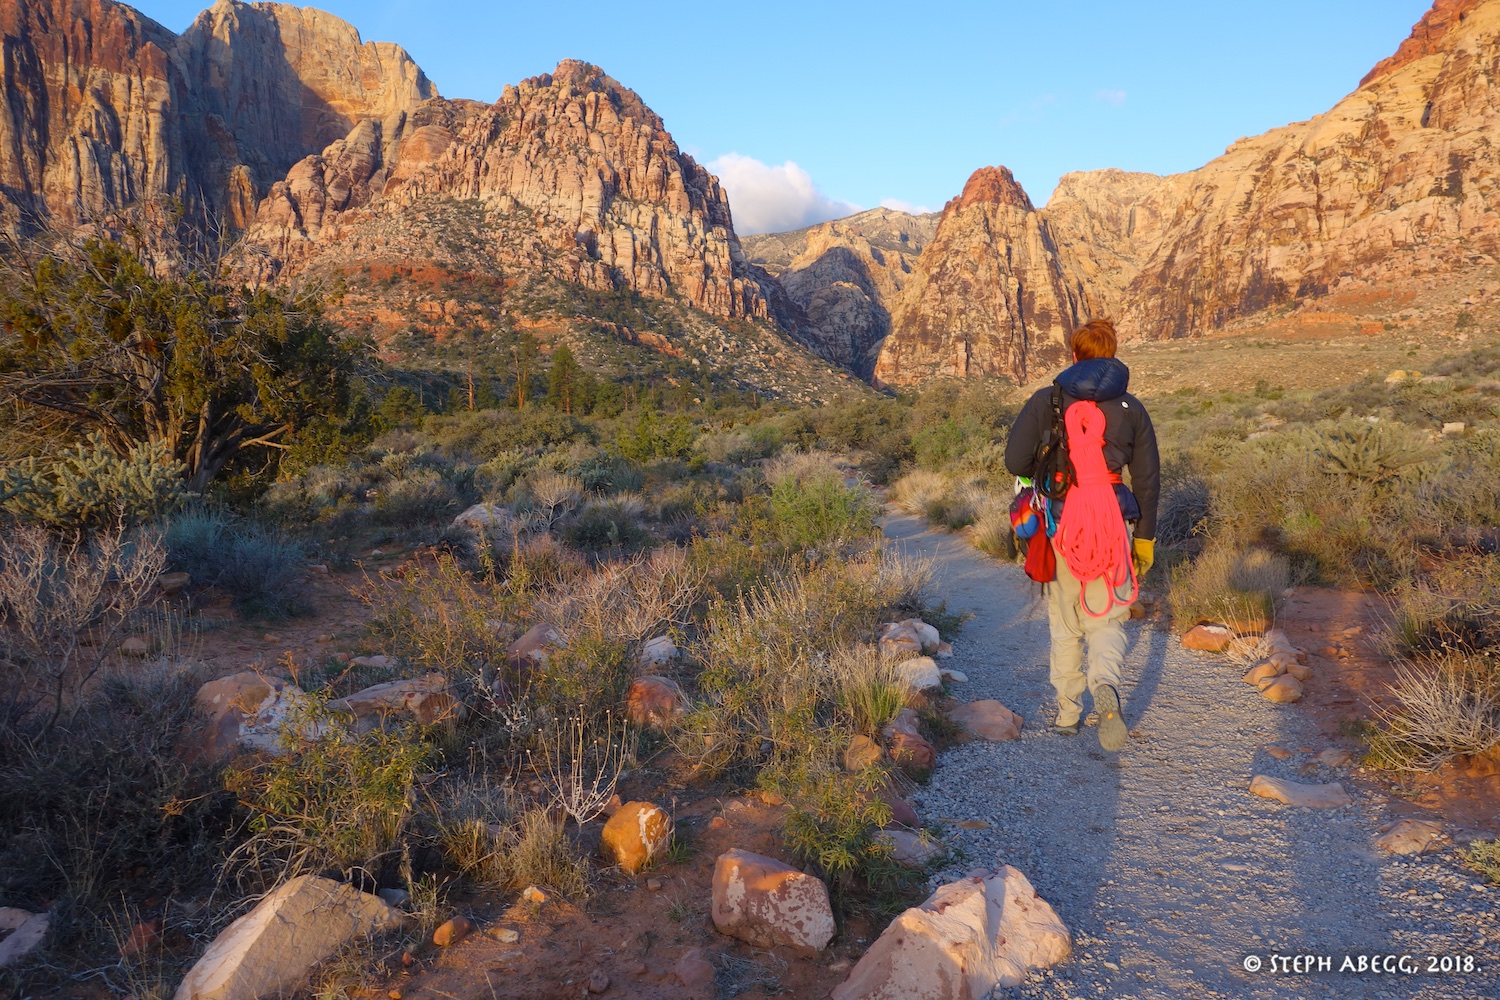
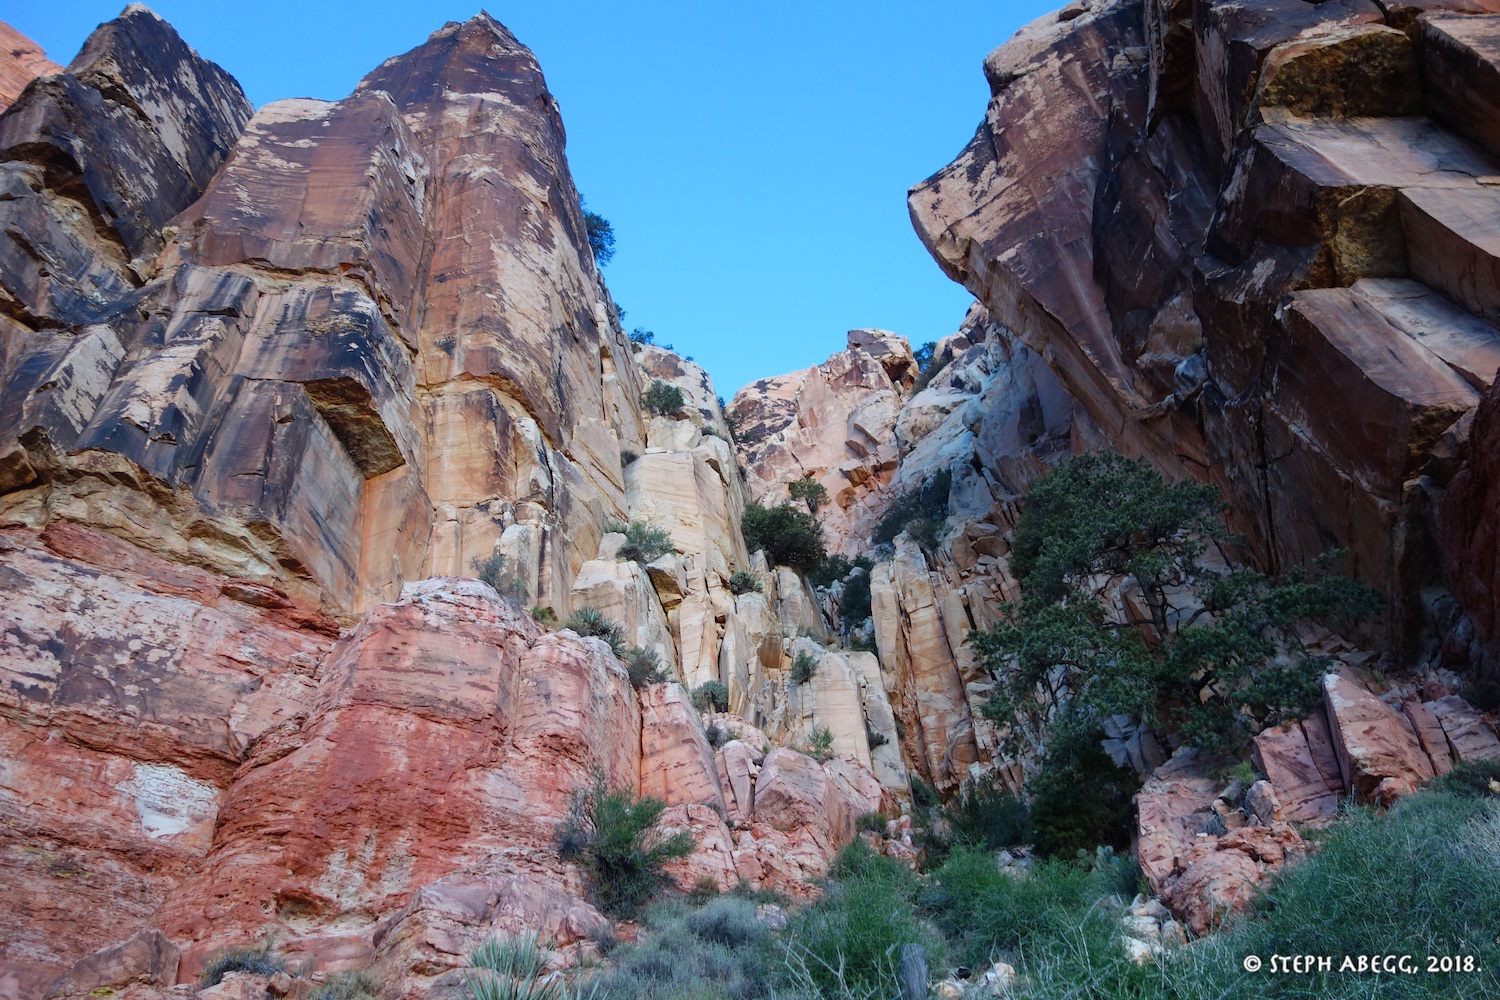
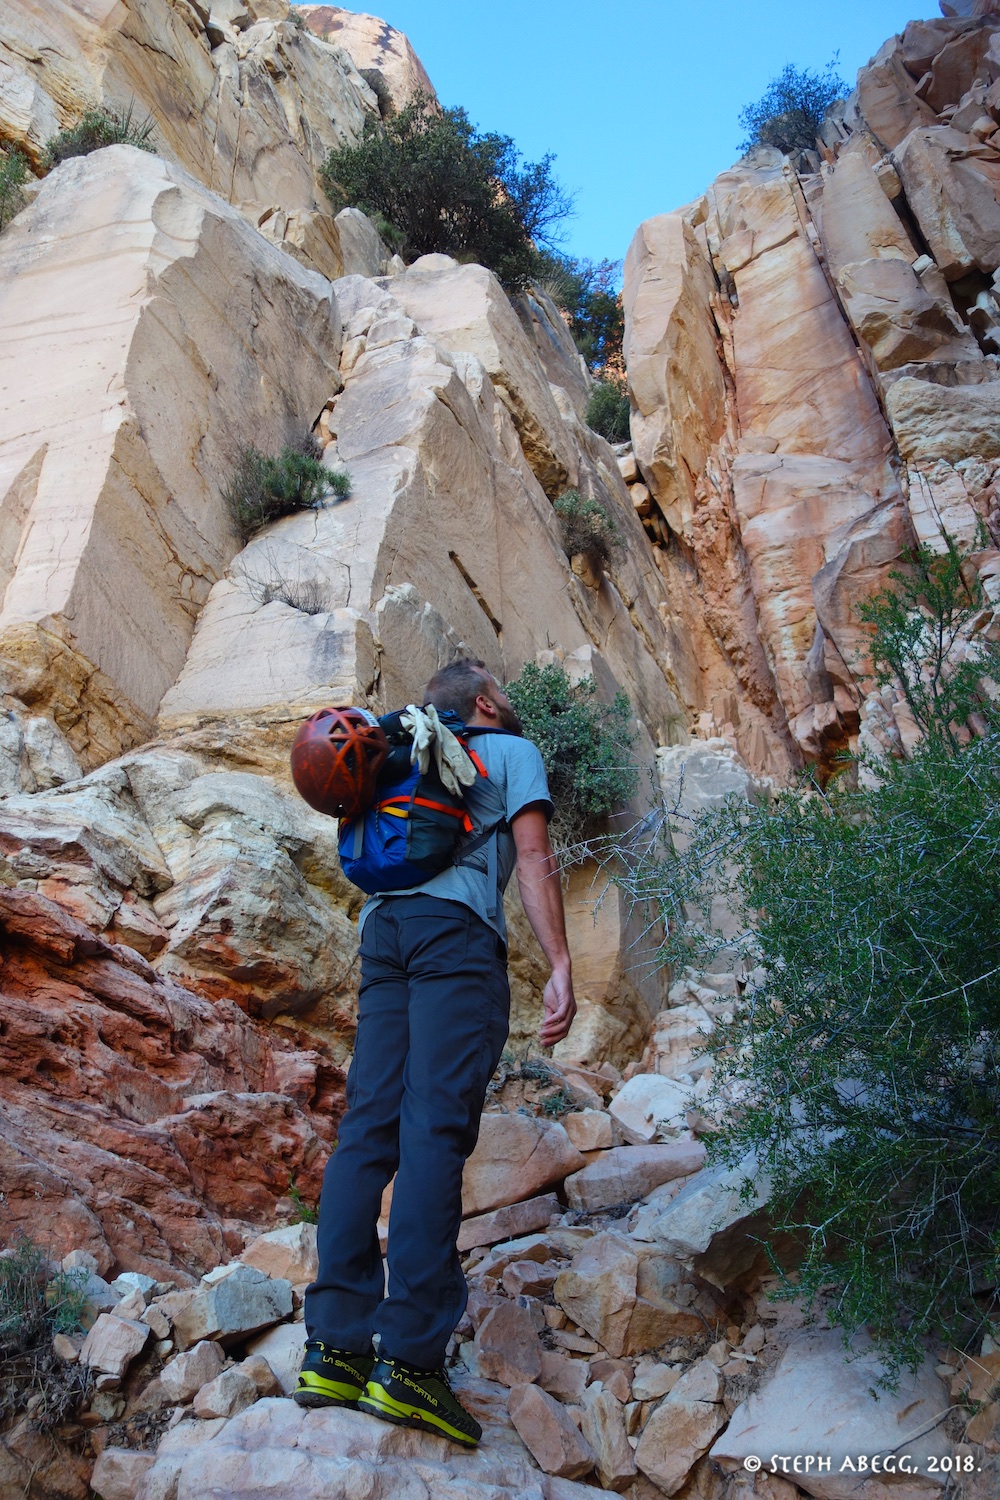
APPROACH
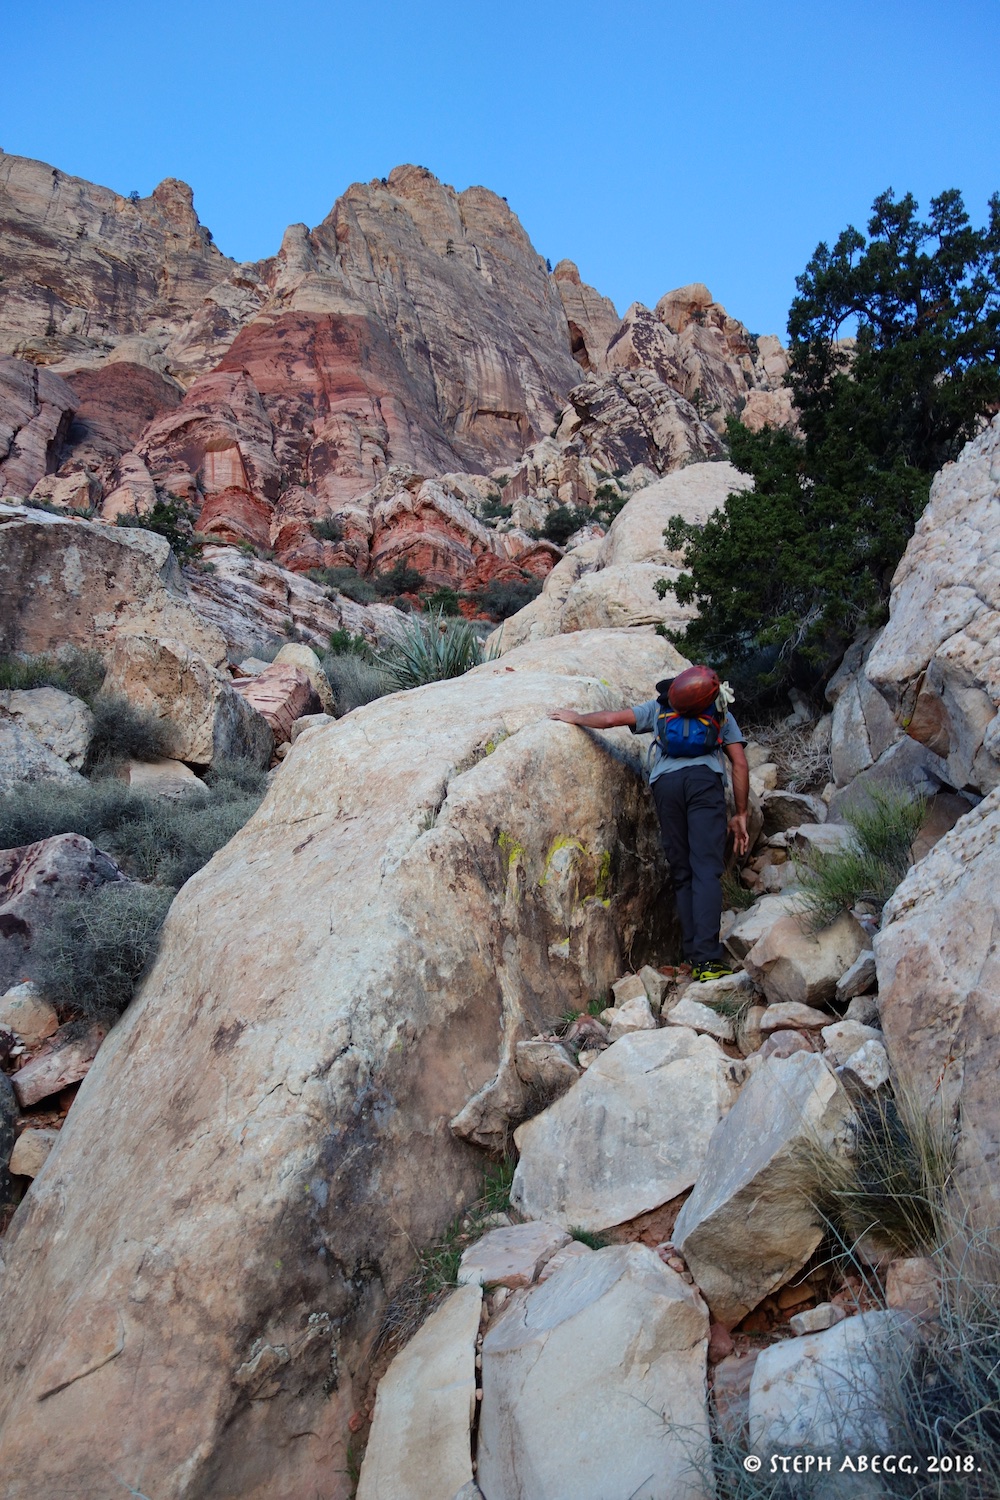
Approaching Juniper Canyon. It took roughly 1 hour to get to the start of Myster Z.
MYSTER Z
PITCH
1 (5.6, 160')
Pitch 1 is perhaps the most sustained pitch of the route, climbing up a wide crack system with plenty of jugs. The gear is not quite trivial, making it a bit more involved than a standard 5.6 pitch. Fun pitch.
MYSTER Z
PITCH
2 (5.6, 145')
Up cracks and slab, a bit runnout but easy. We linked this with Pitch 3.
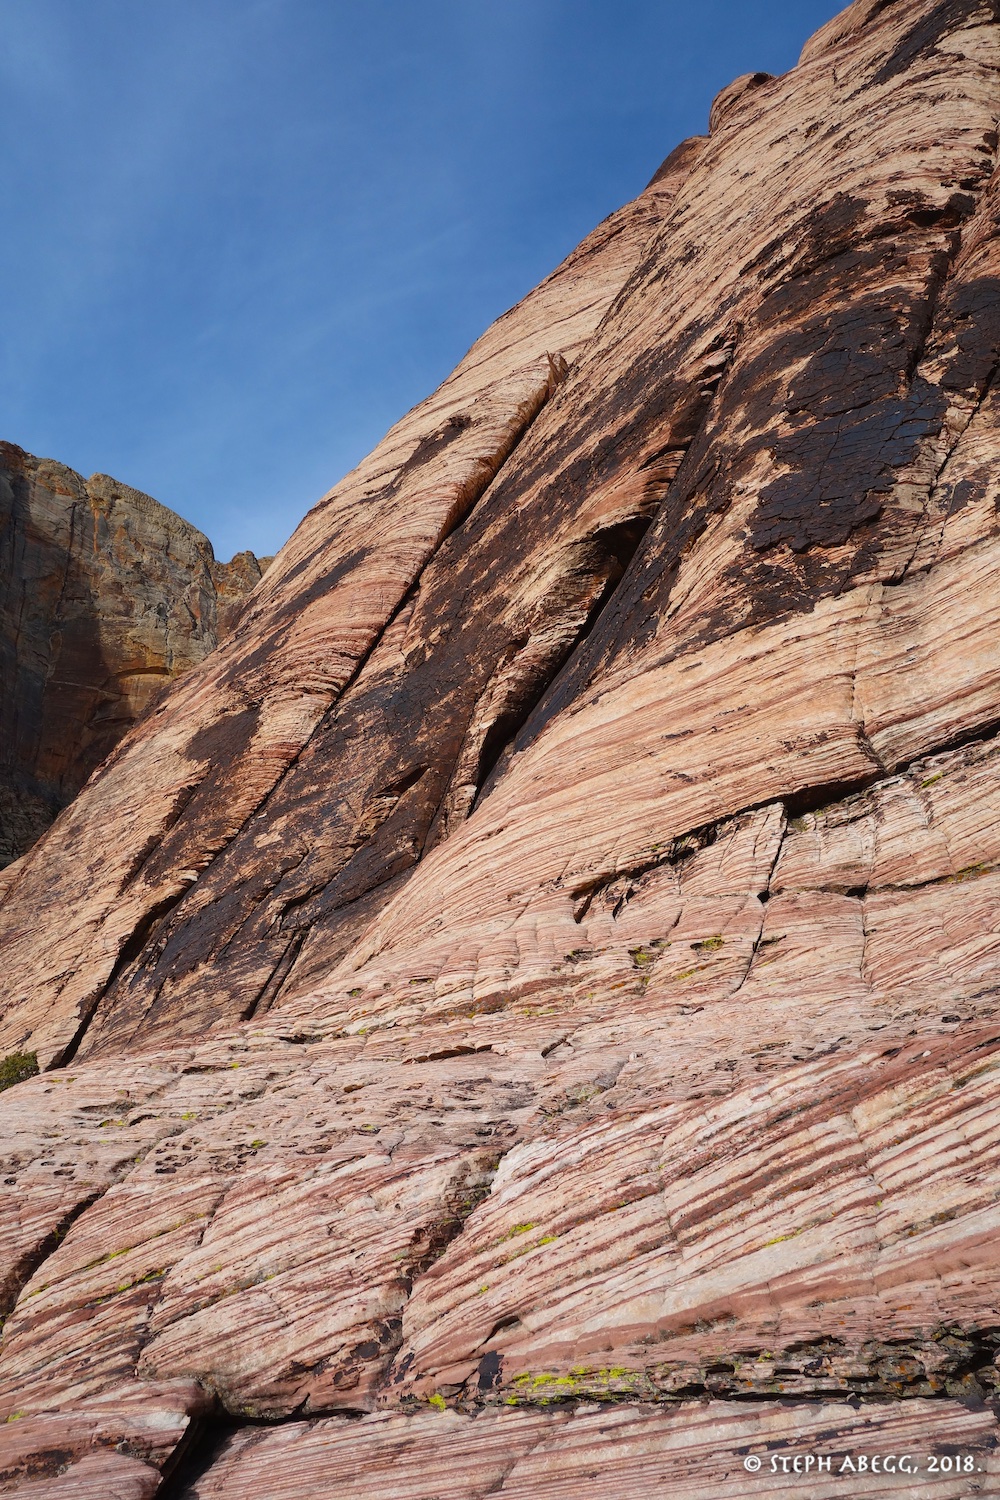
MYSTER Z
PITCH
3 (3rd, 190')
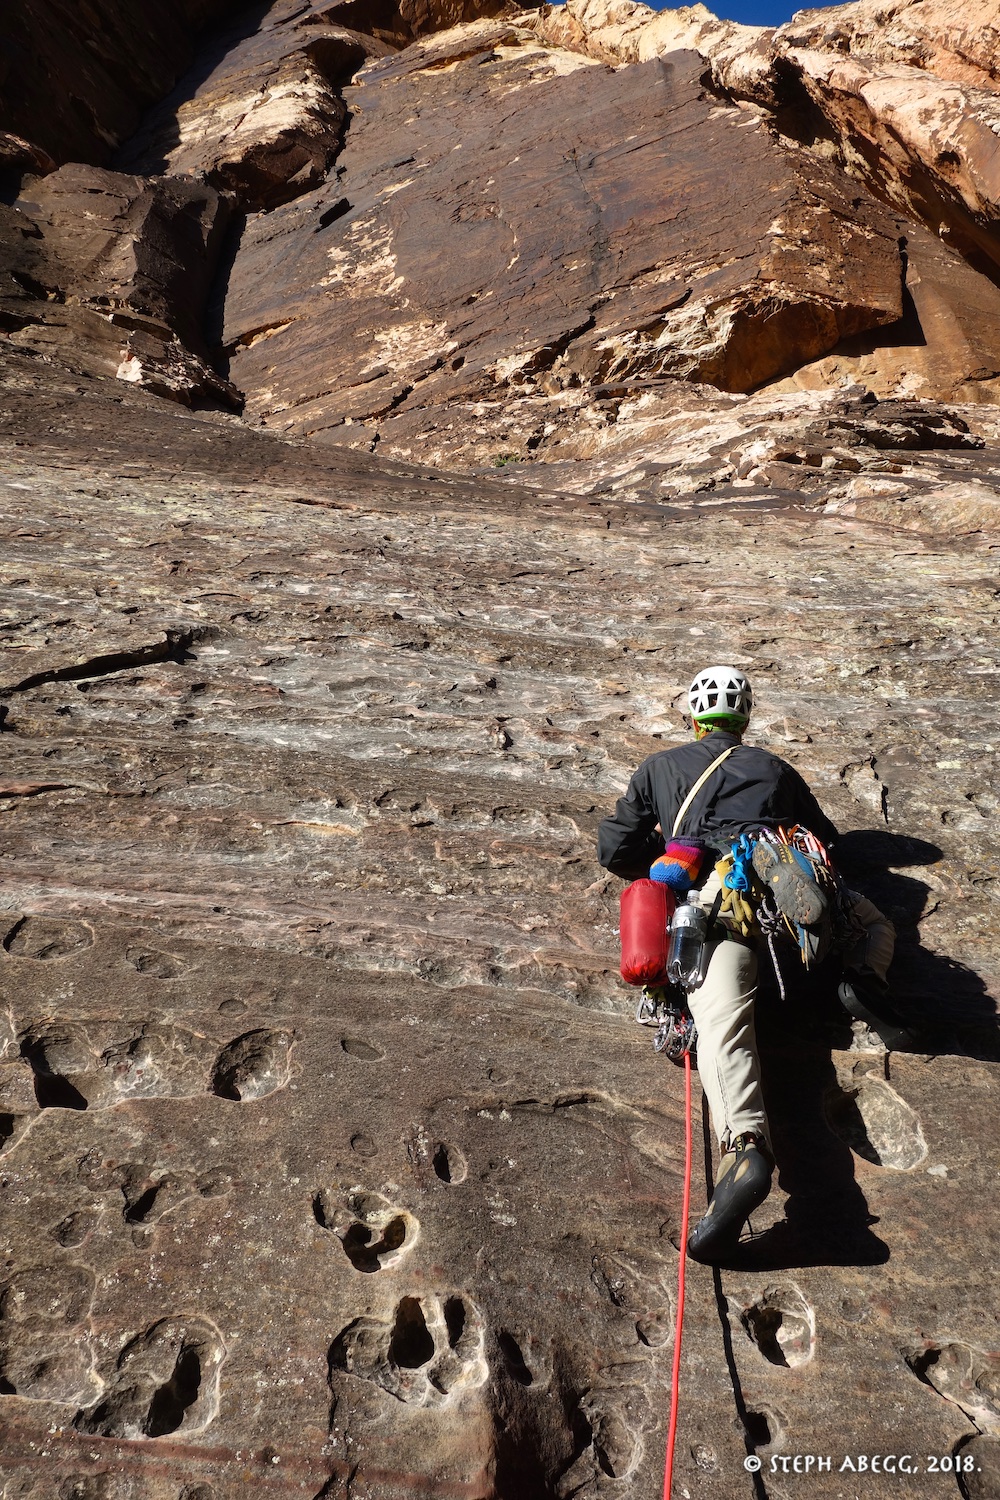
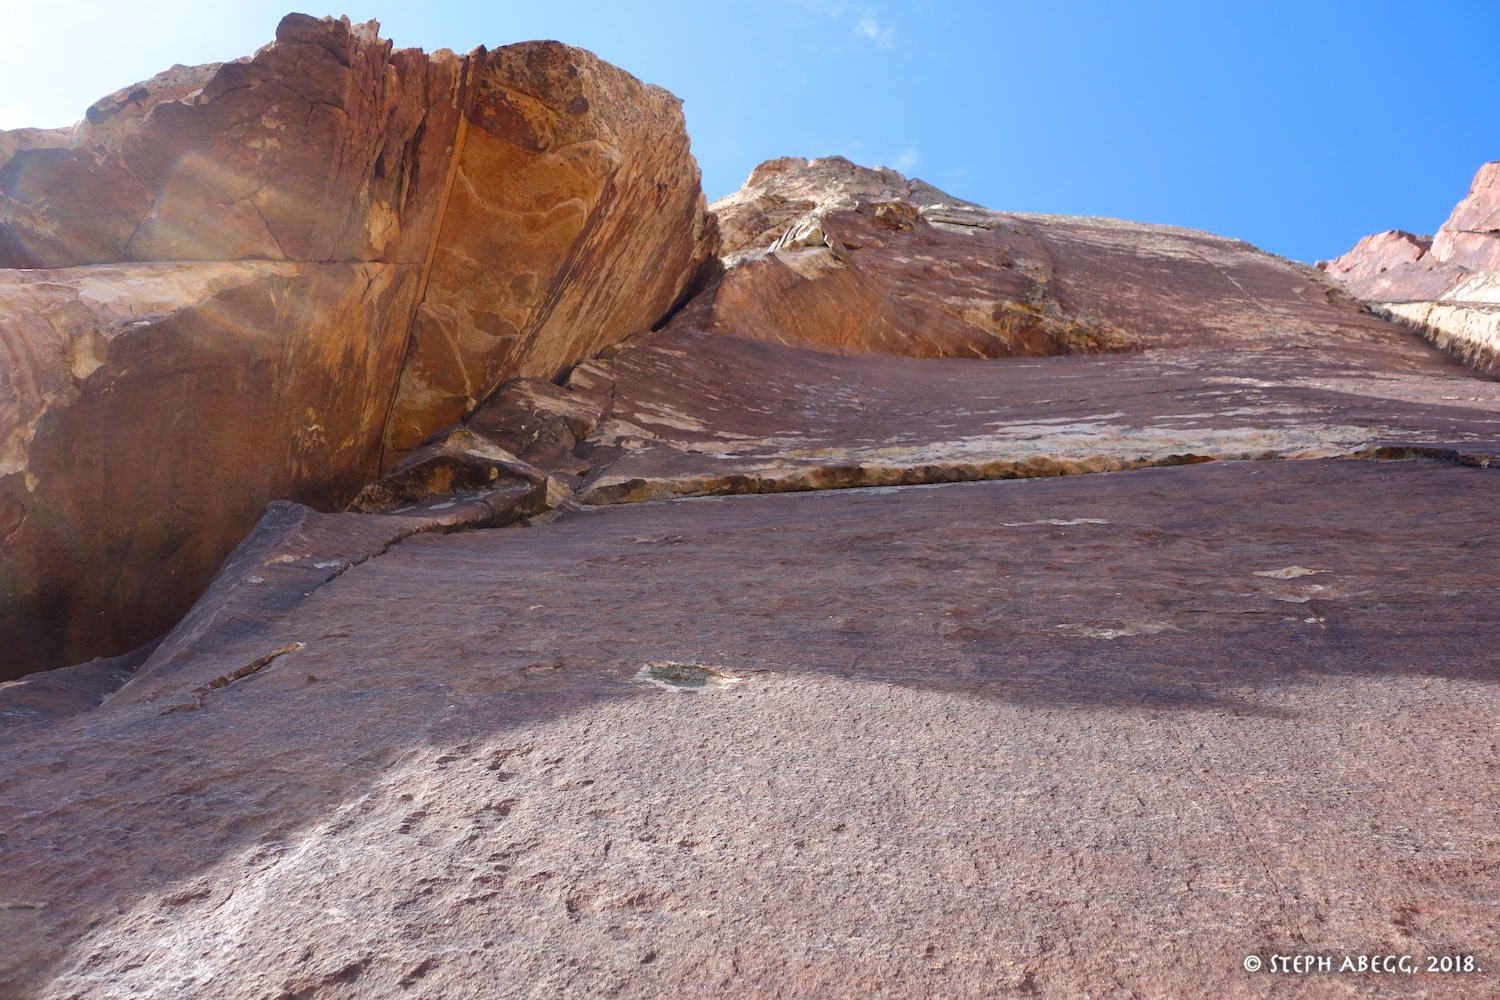
Beautiful striped rock on the easy Pitch 3 traverse to the base of the crack on the left side of the photo.
MYSTER Z
PITCH
4 (5.6, 170')
Up the crack. Pretty straightforward and fun.
MYSTER Z
PITCH
5 (5.7, 170')
The crux move of the route is on this pitch near the top, at the black varnished crack. This pitch was pretty fun, and would have been even more fun had the varnished crack not been so short!
MYSTER Z
PITCHES
6-8 (5.6, 400')
(we linked these pitches by simulclimbing)
We linked Pitches 6-8 to the top. From the top of the route it was a 5 minute romp to the base of Armatron. With great views of Rainbow Wall to the left.
ARMATRON
PITCH
1 (5.8, 100')
A fun pitch off the deck. 5 bolts and no gear.
ARMATRON
PITCH
2 (5.9, 165')
Pitch 2 is the crux pitch of the route, probably at the fingercrack about 20 feet above the belay. Another great pitch.
ARMATRON
PITCH
3
(5.6, 160')
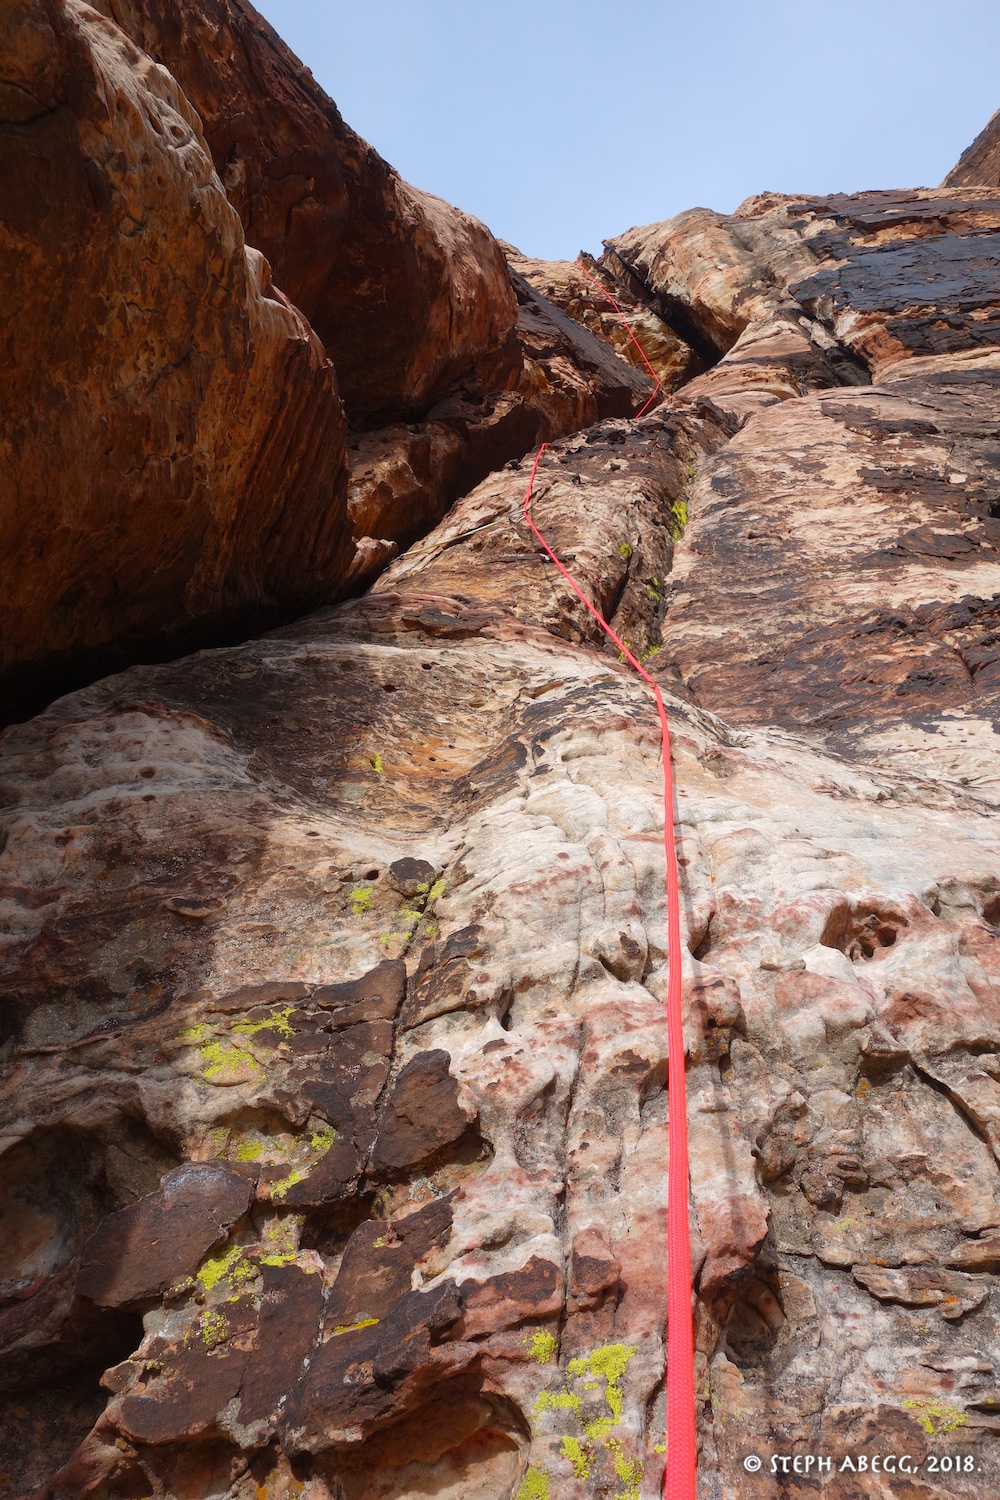
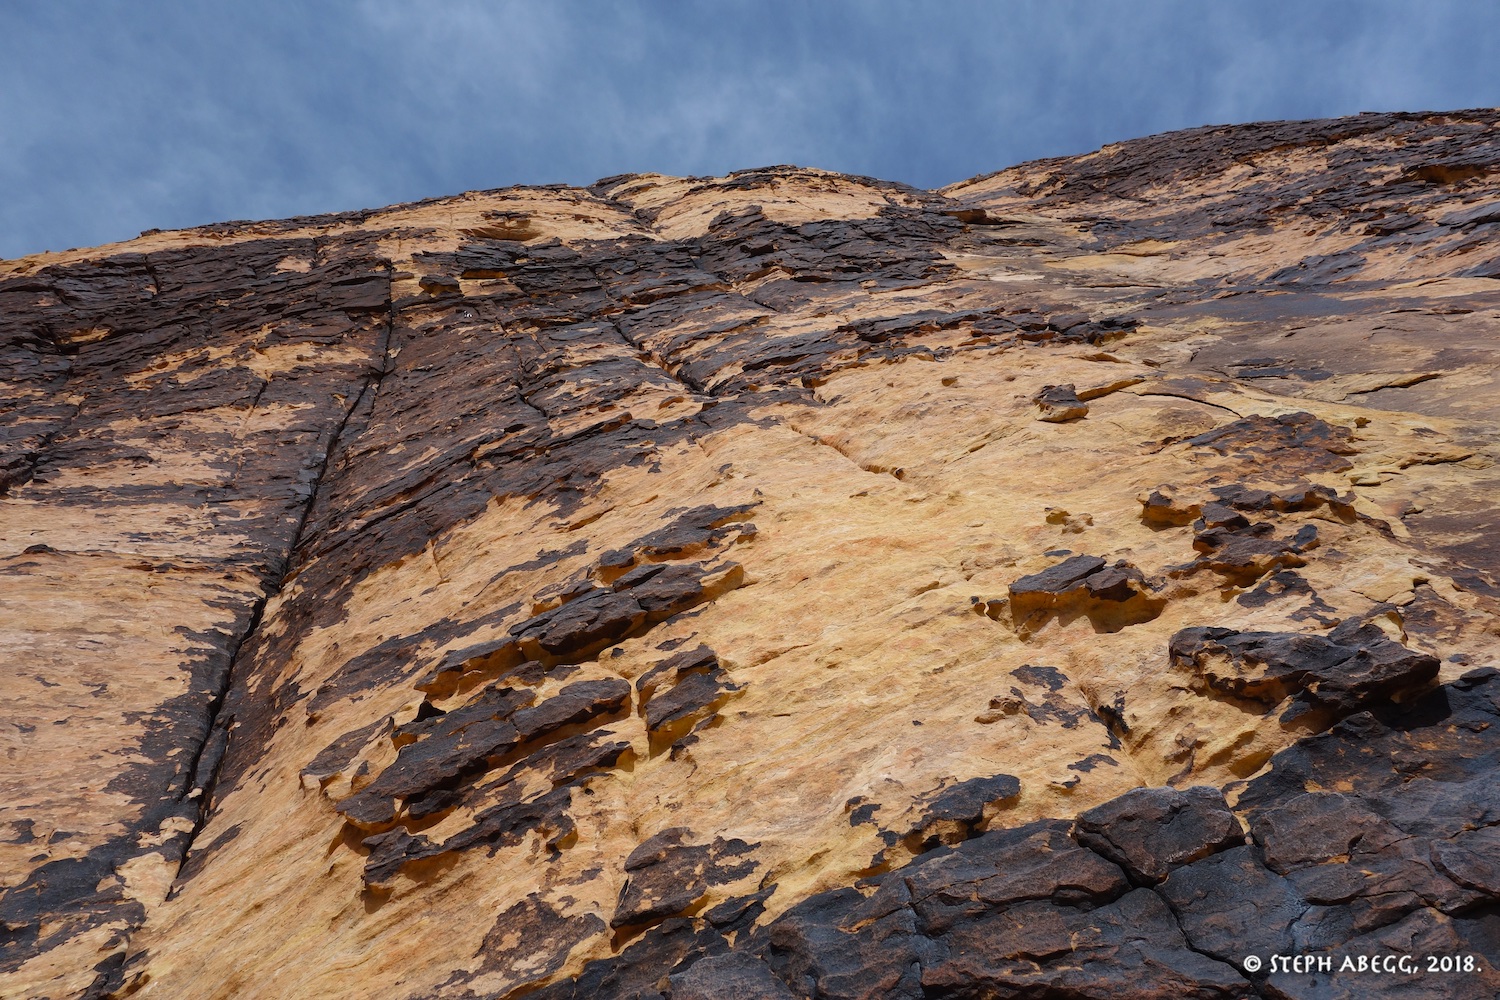
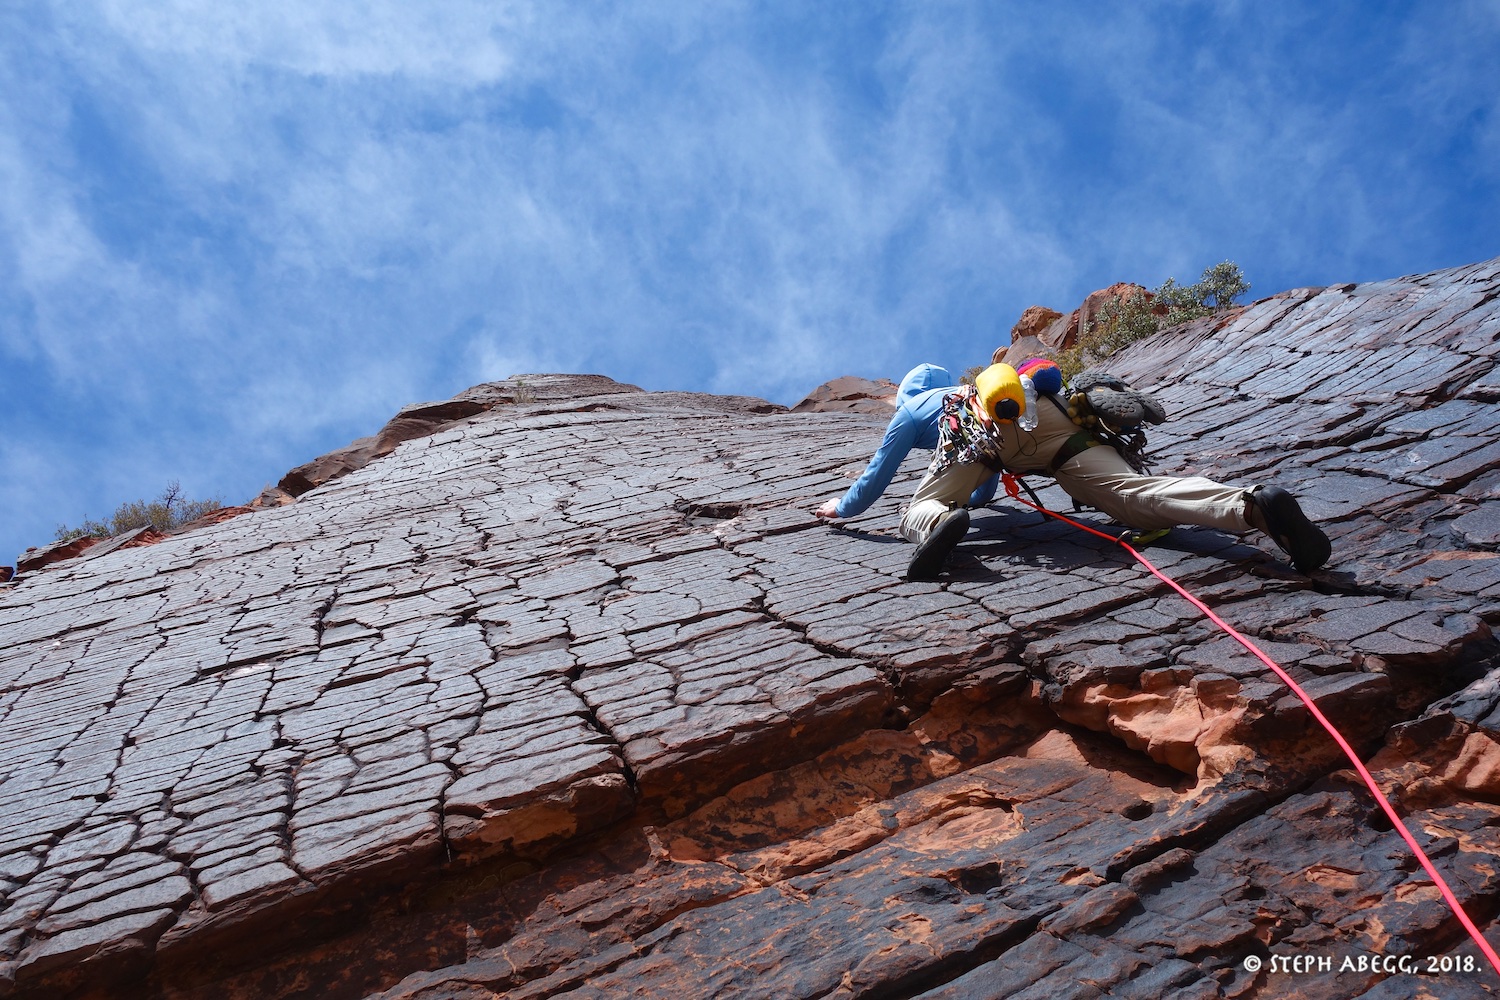
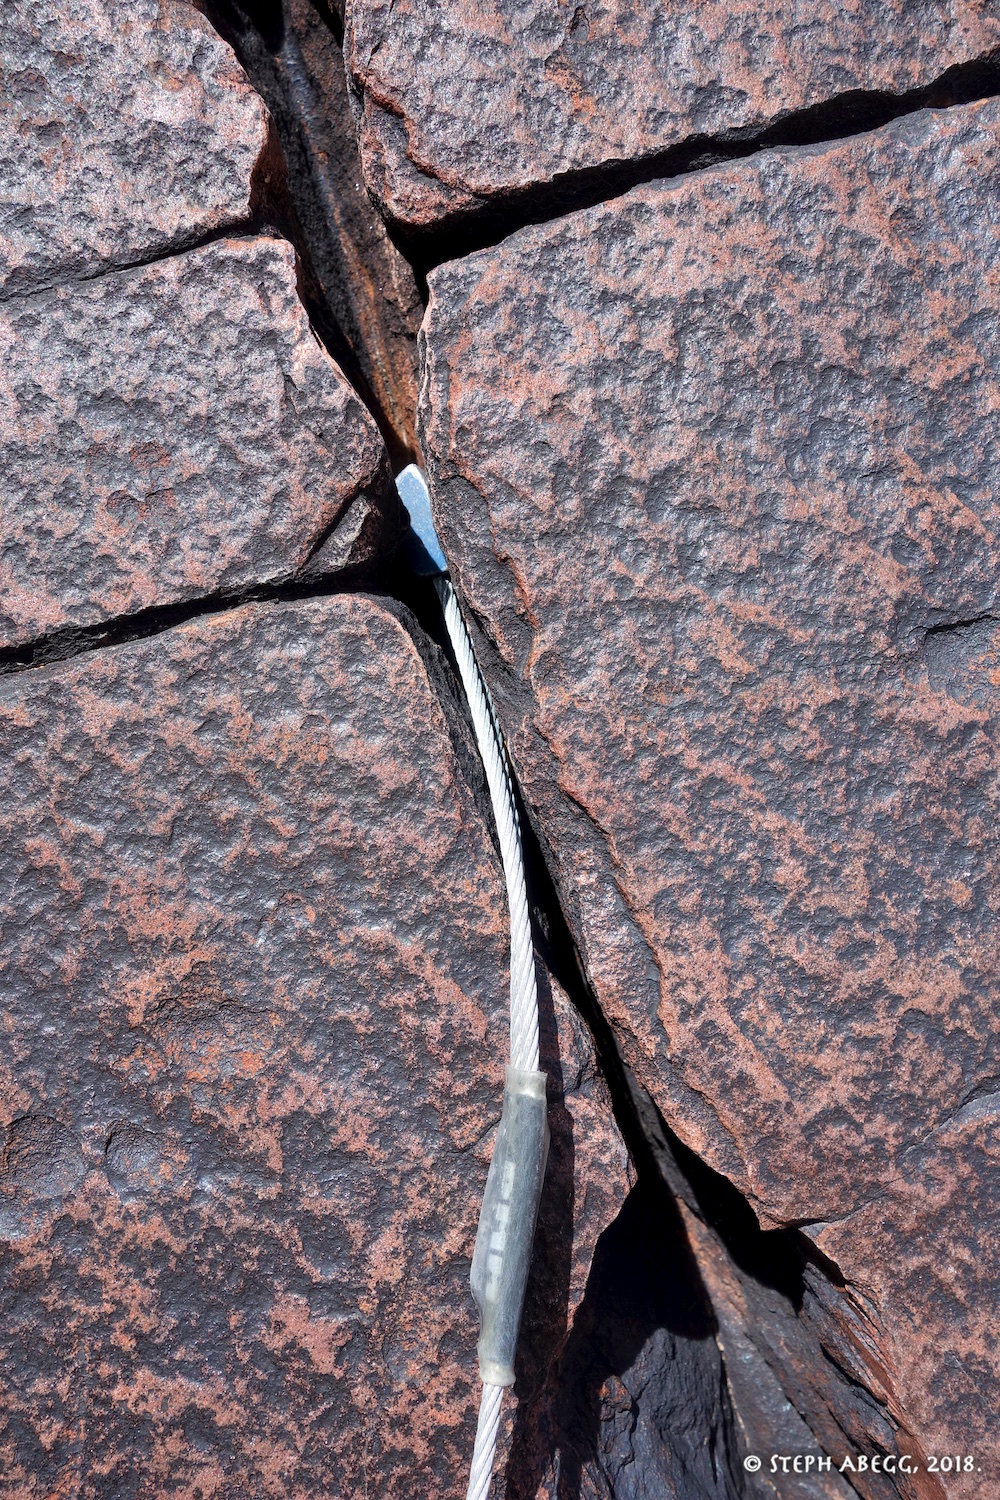
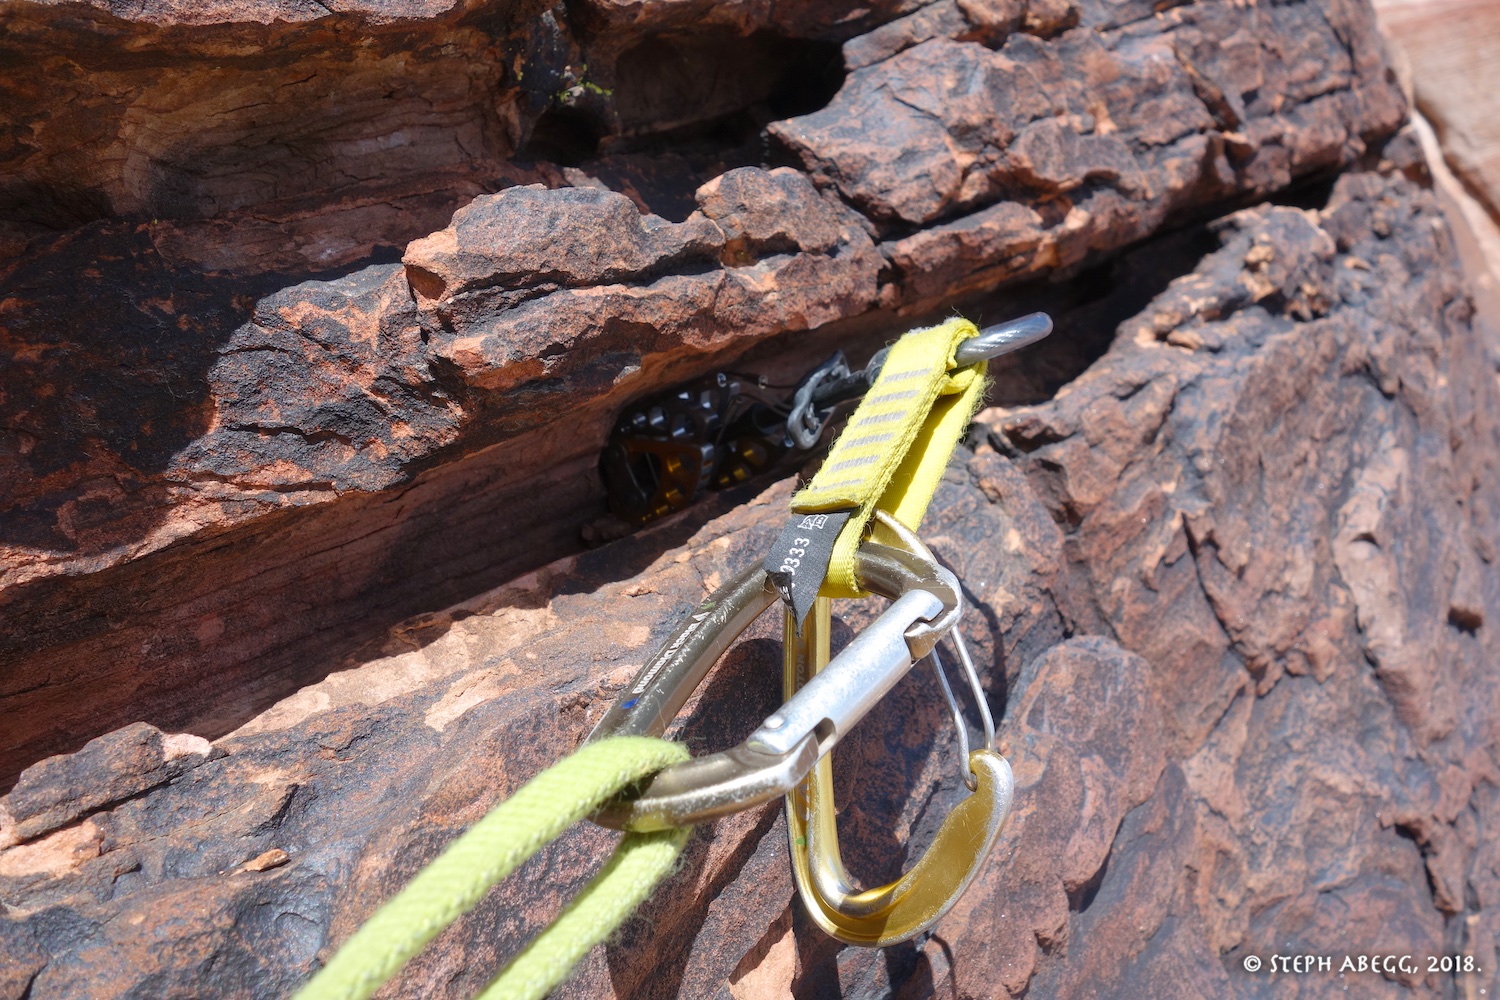
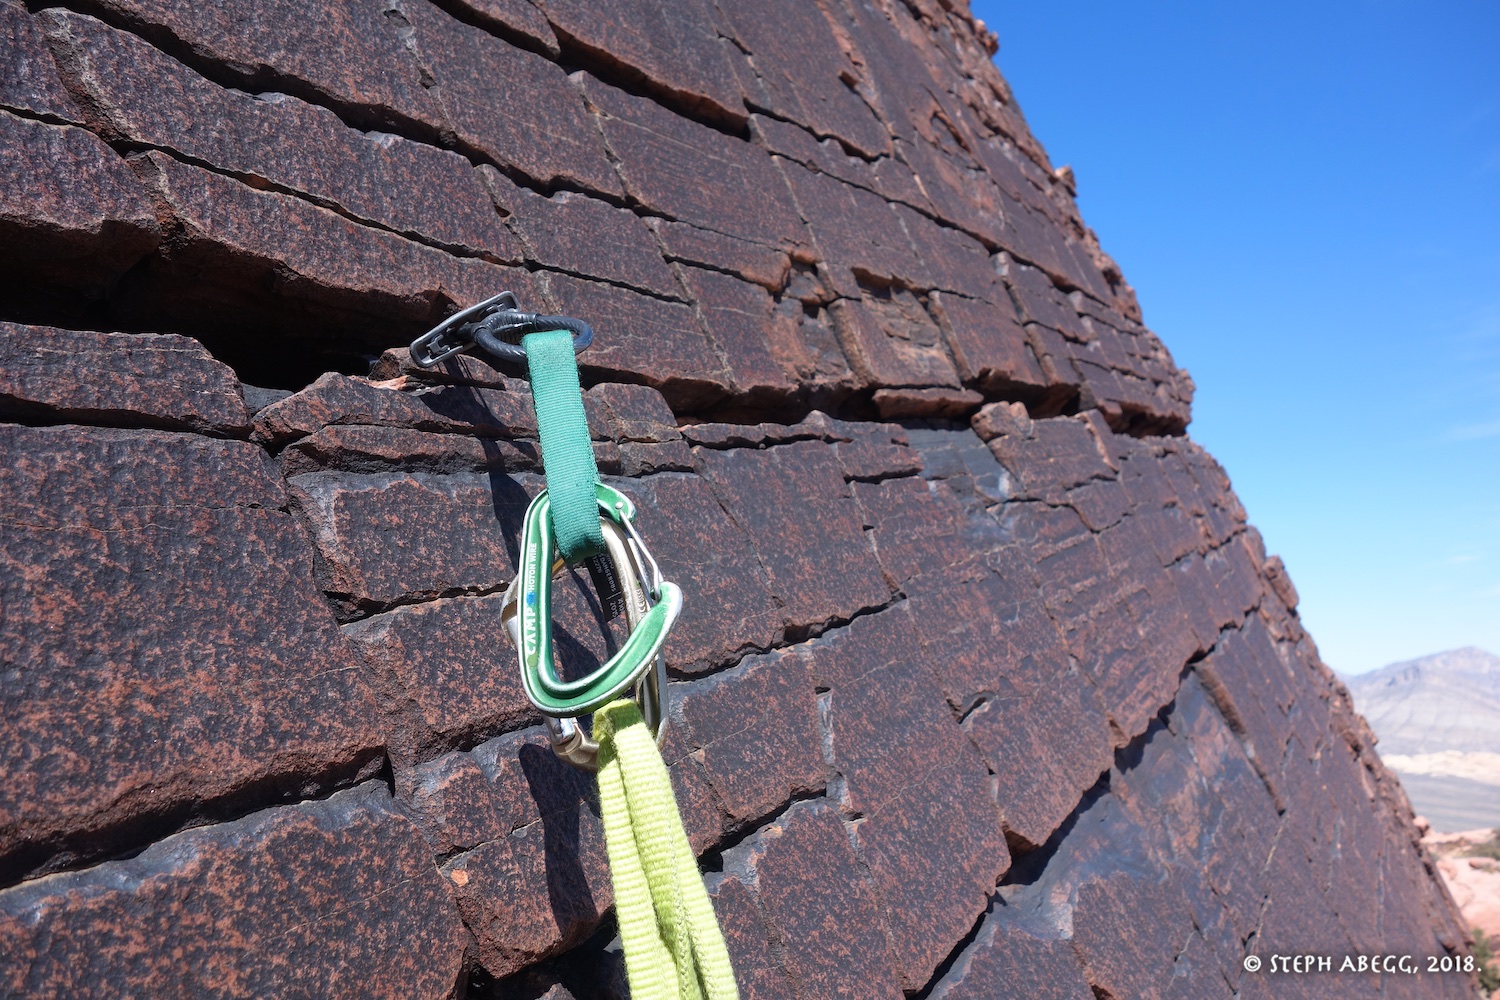
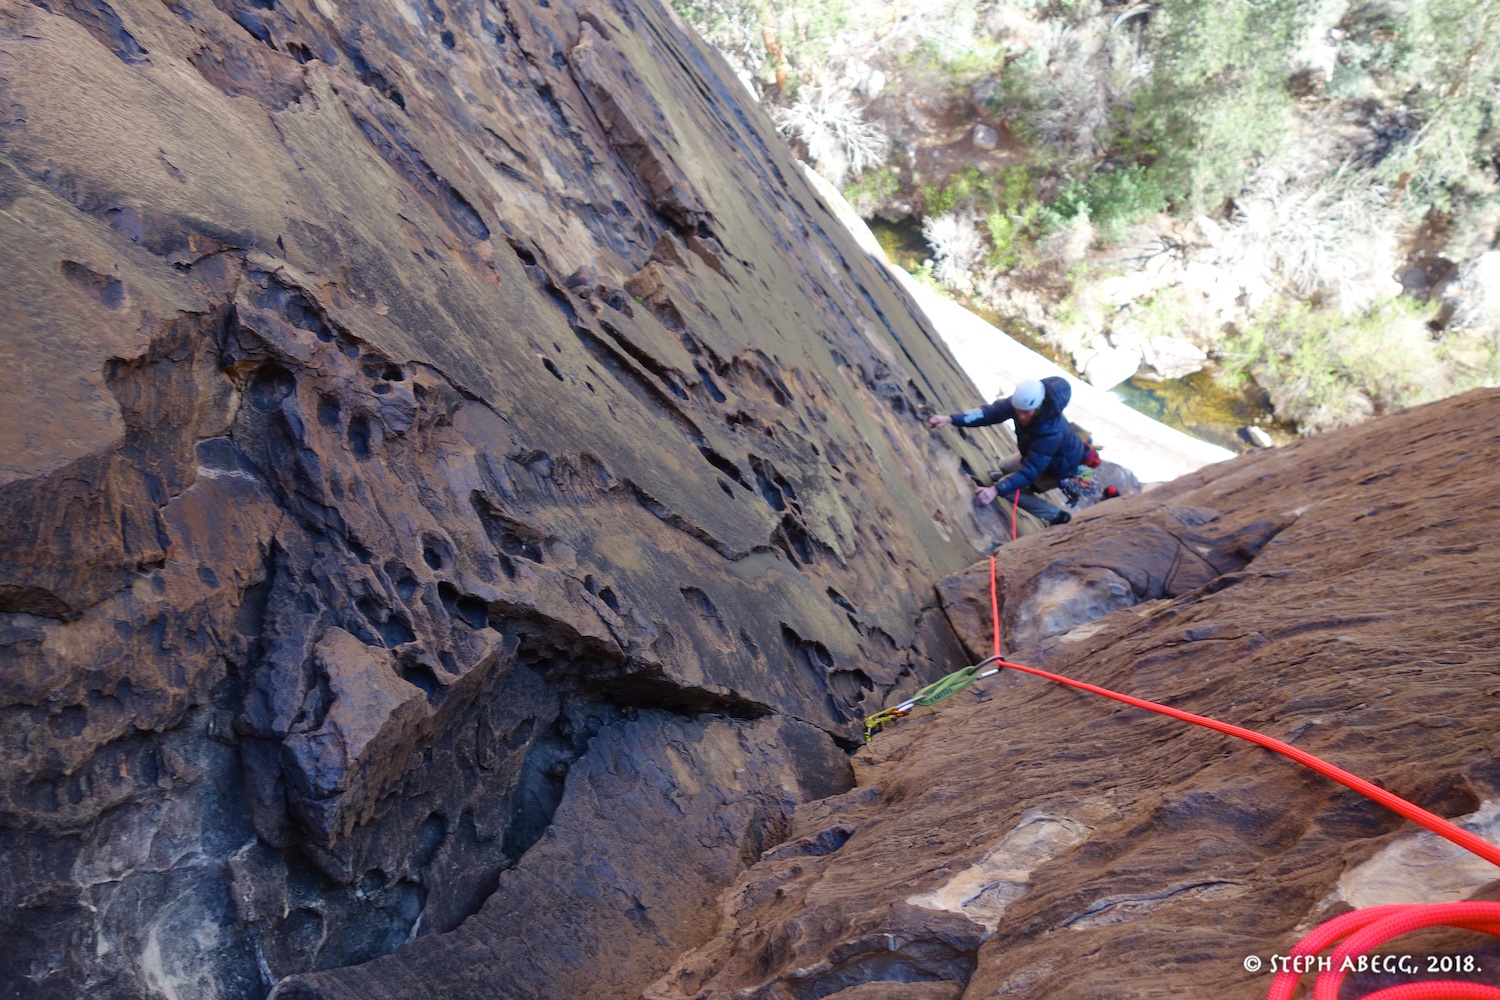
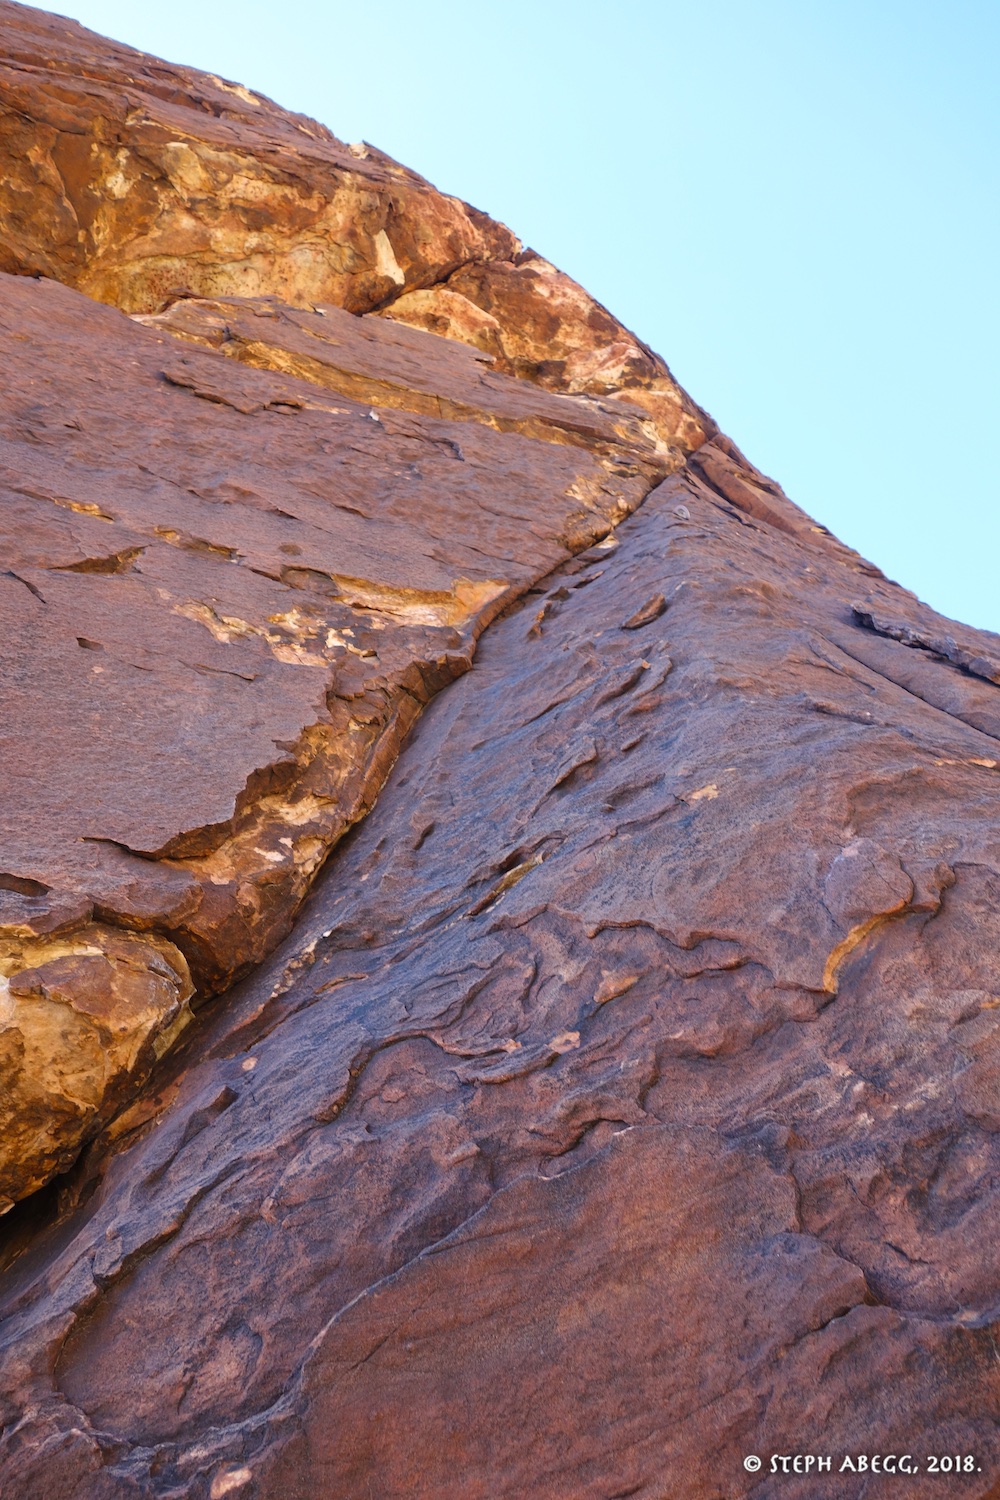
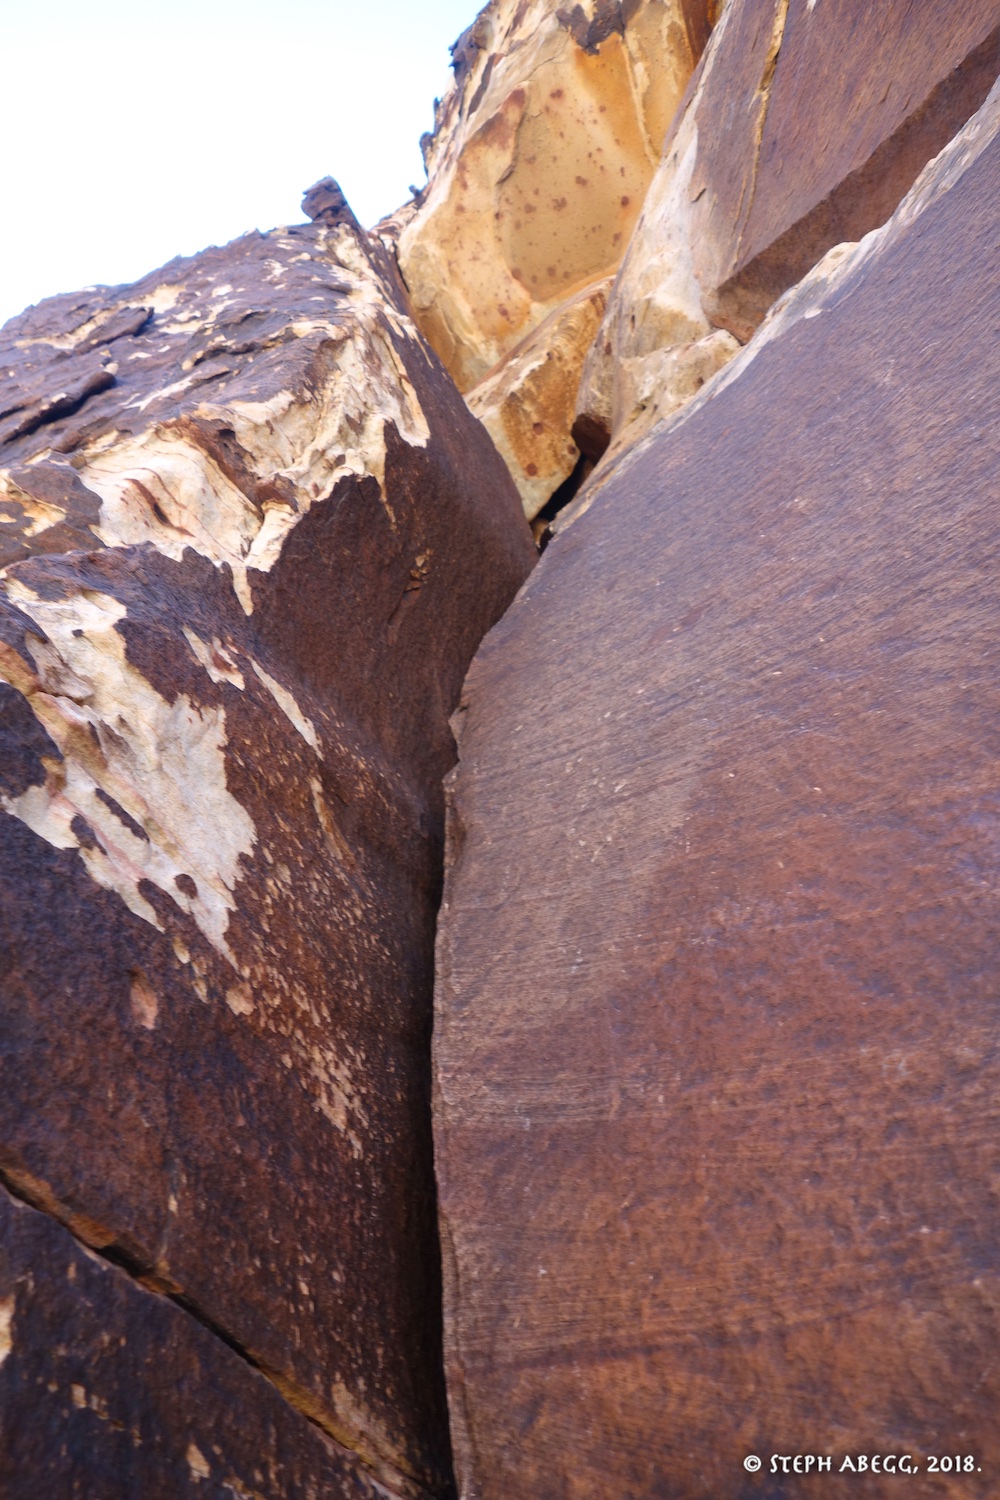
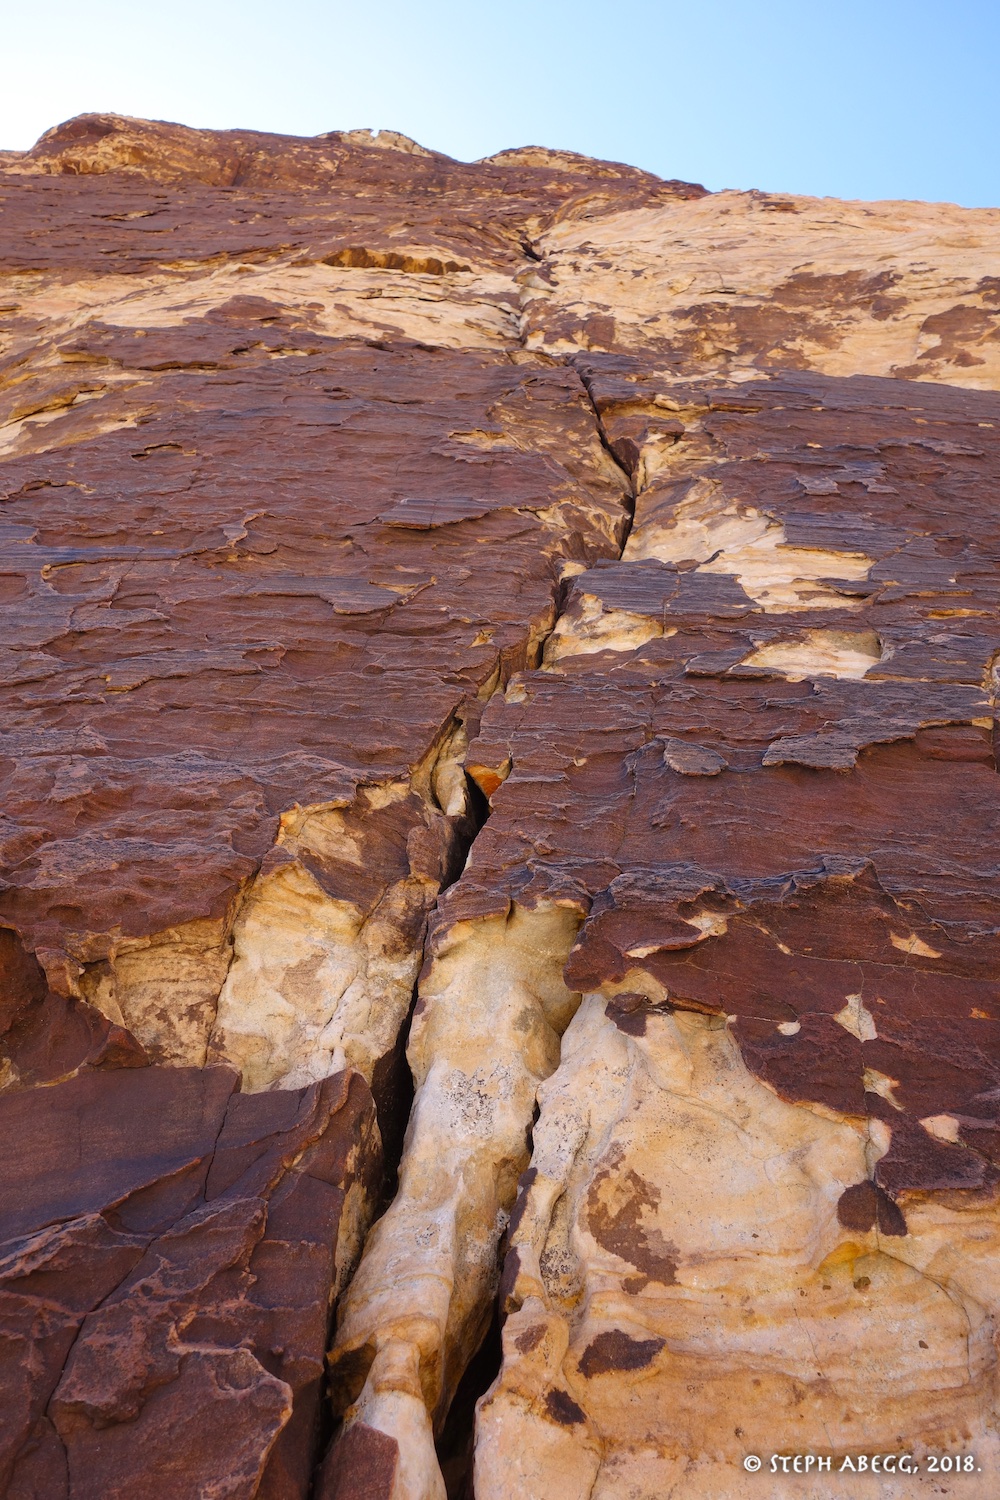
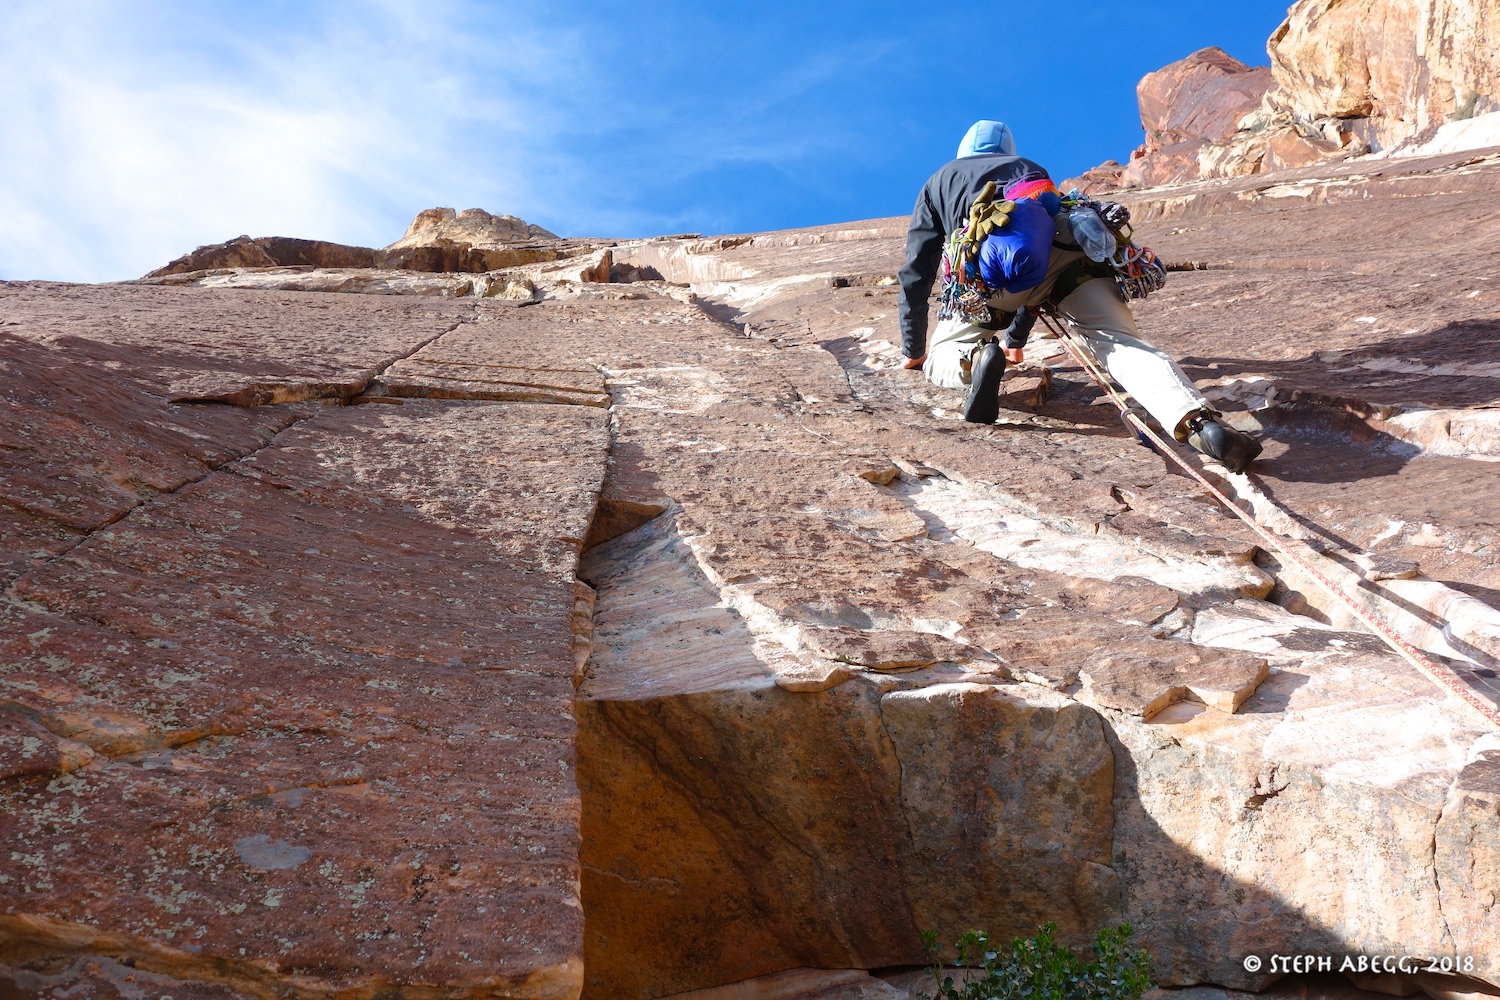
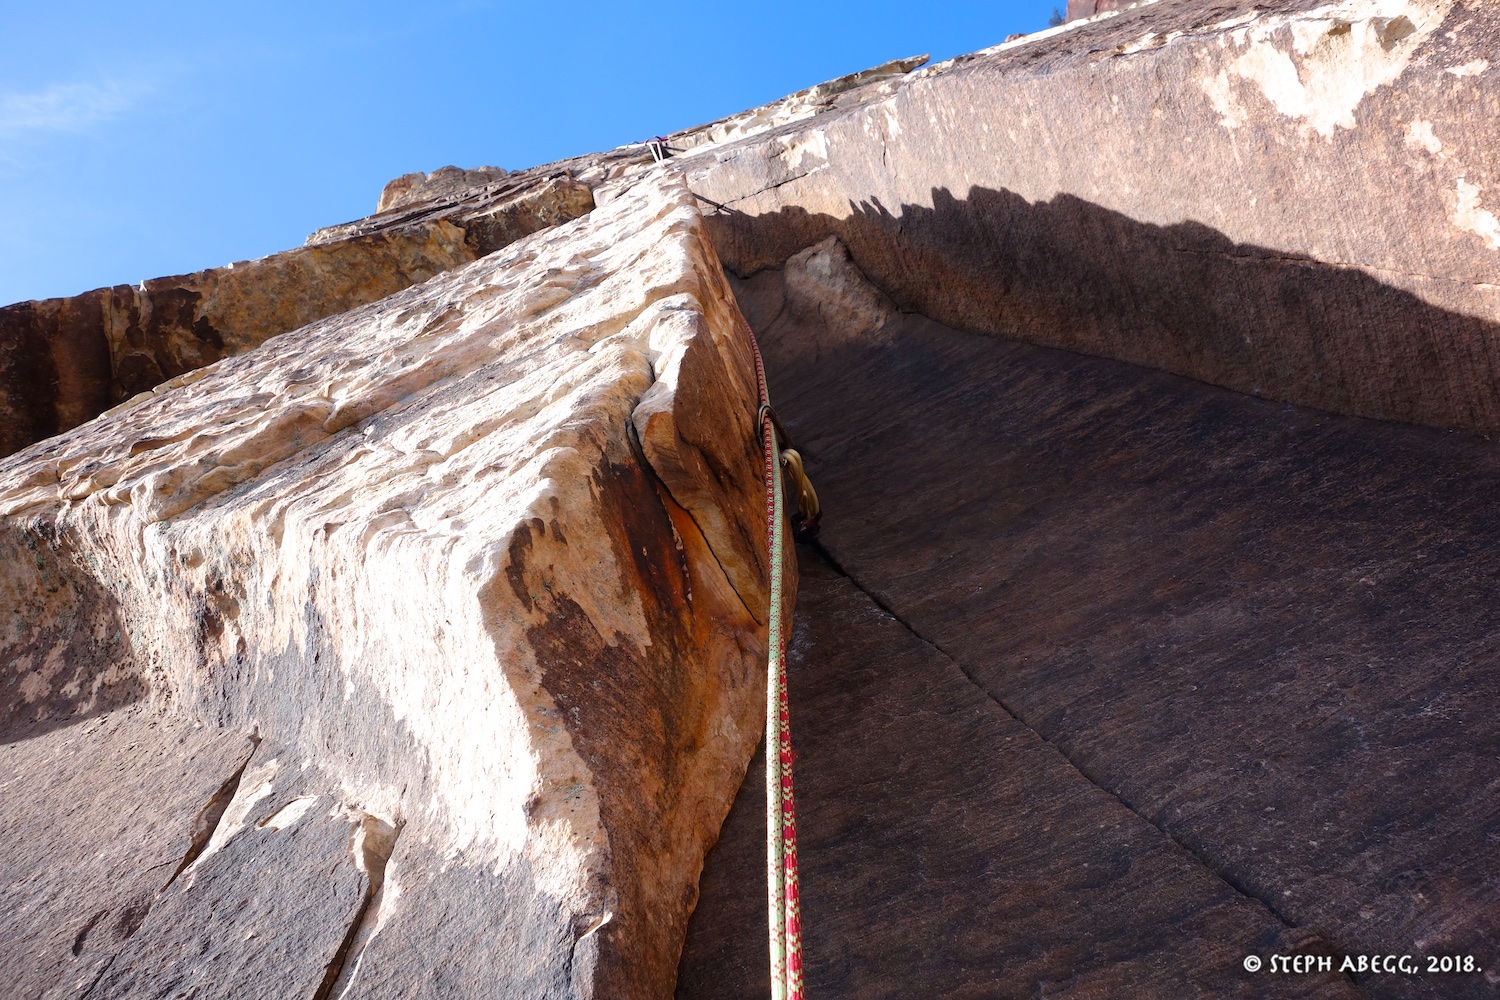
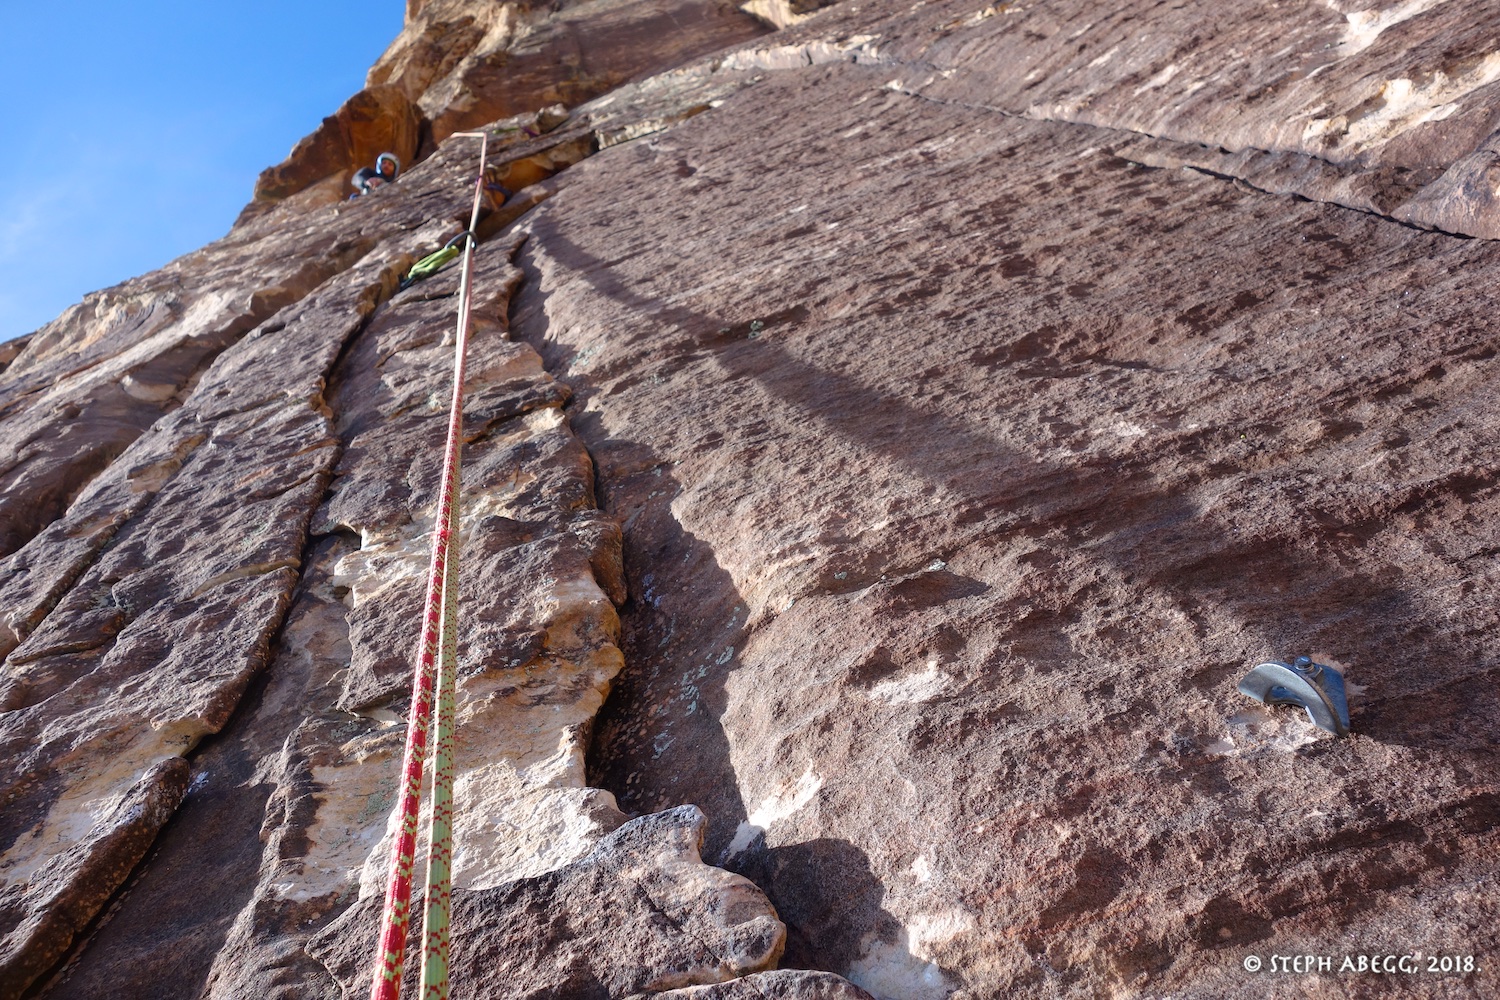
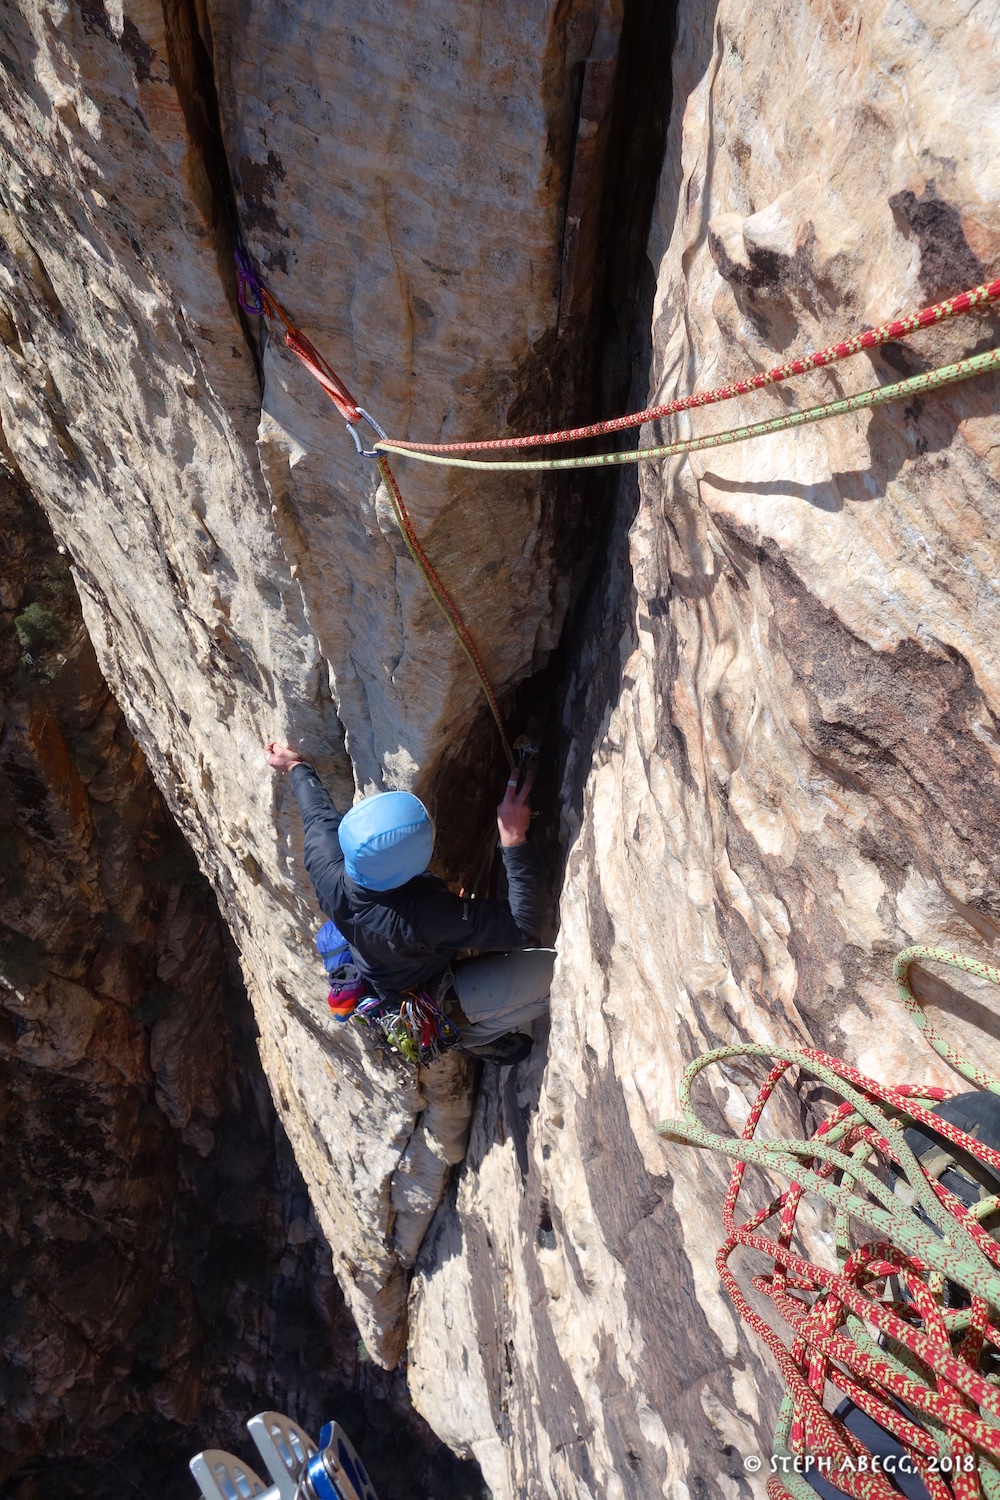
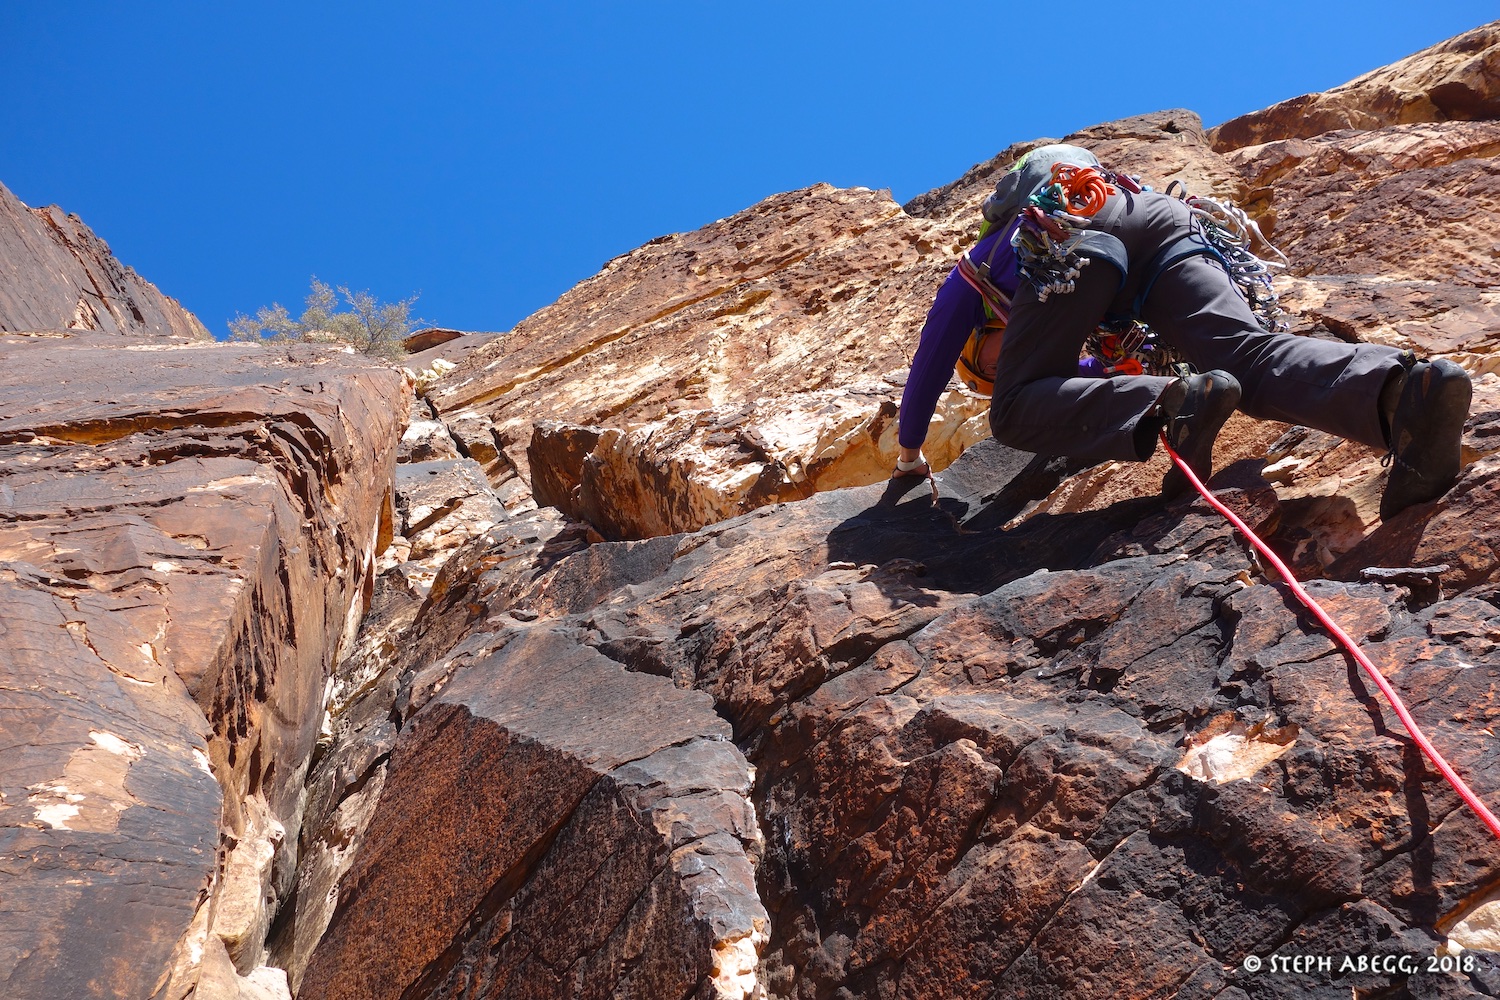
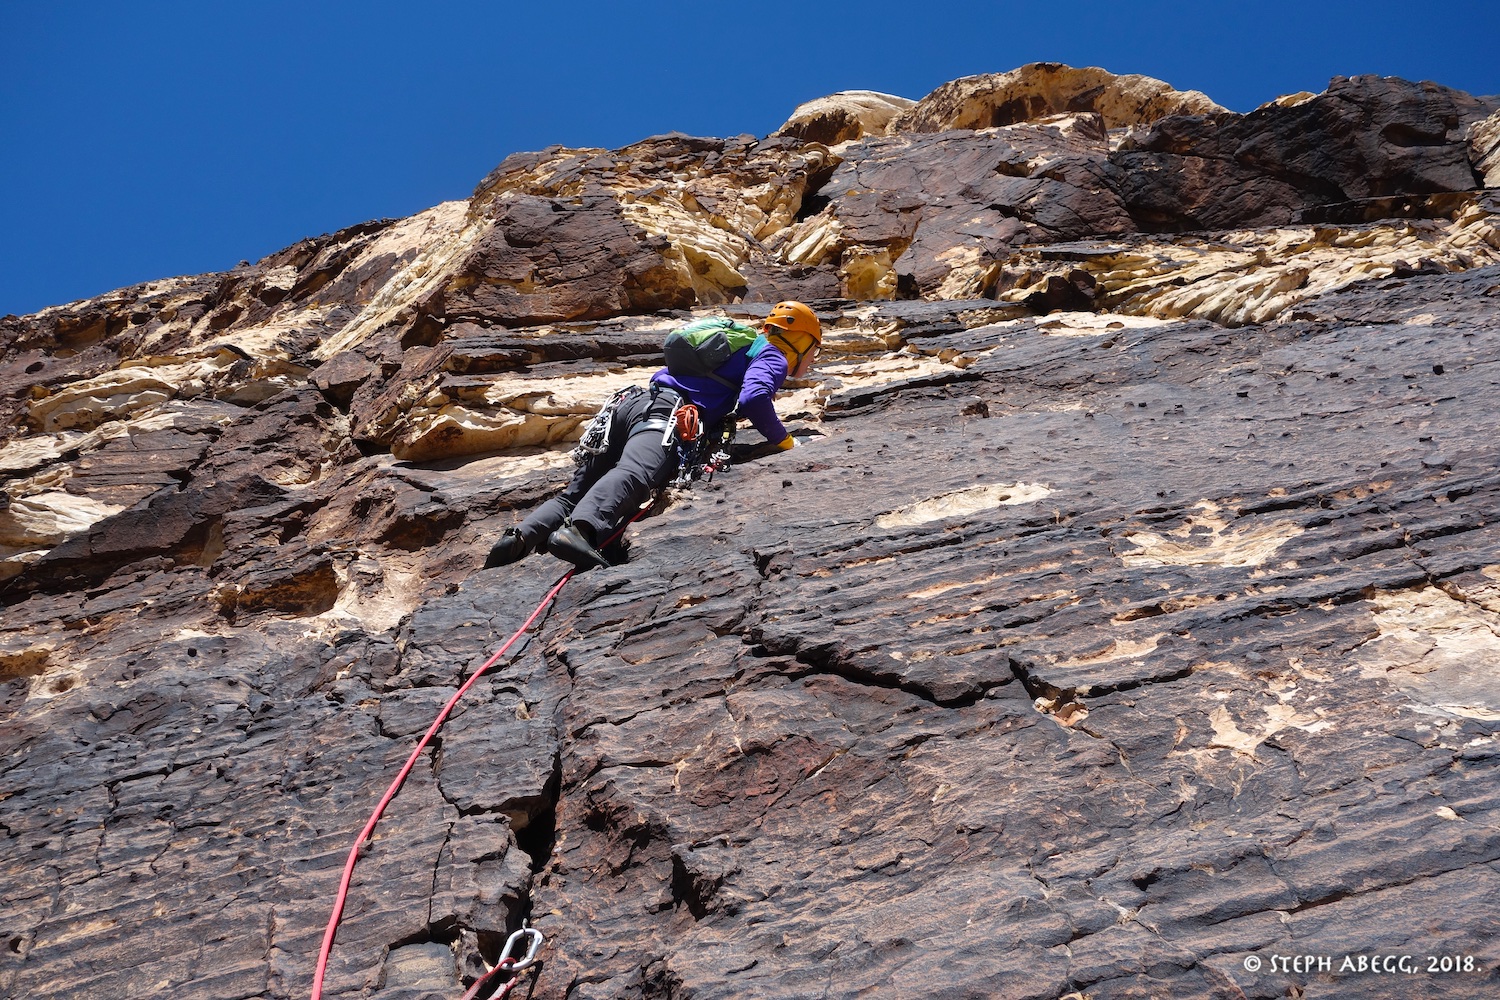
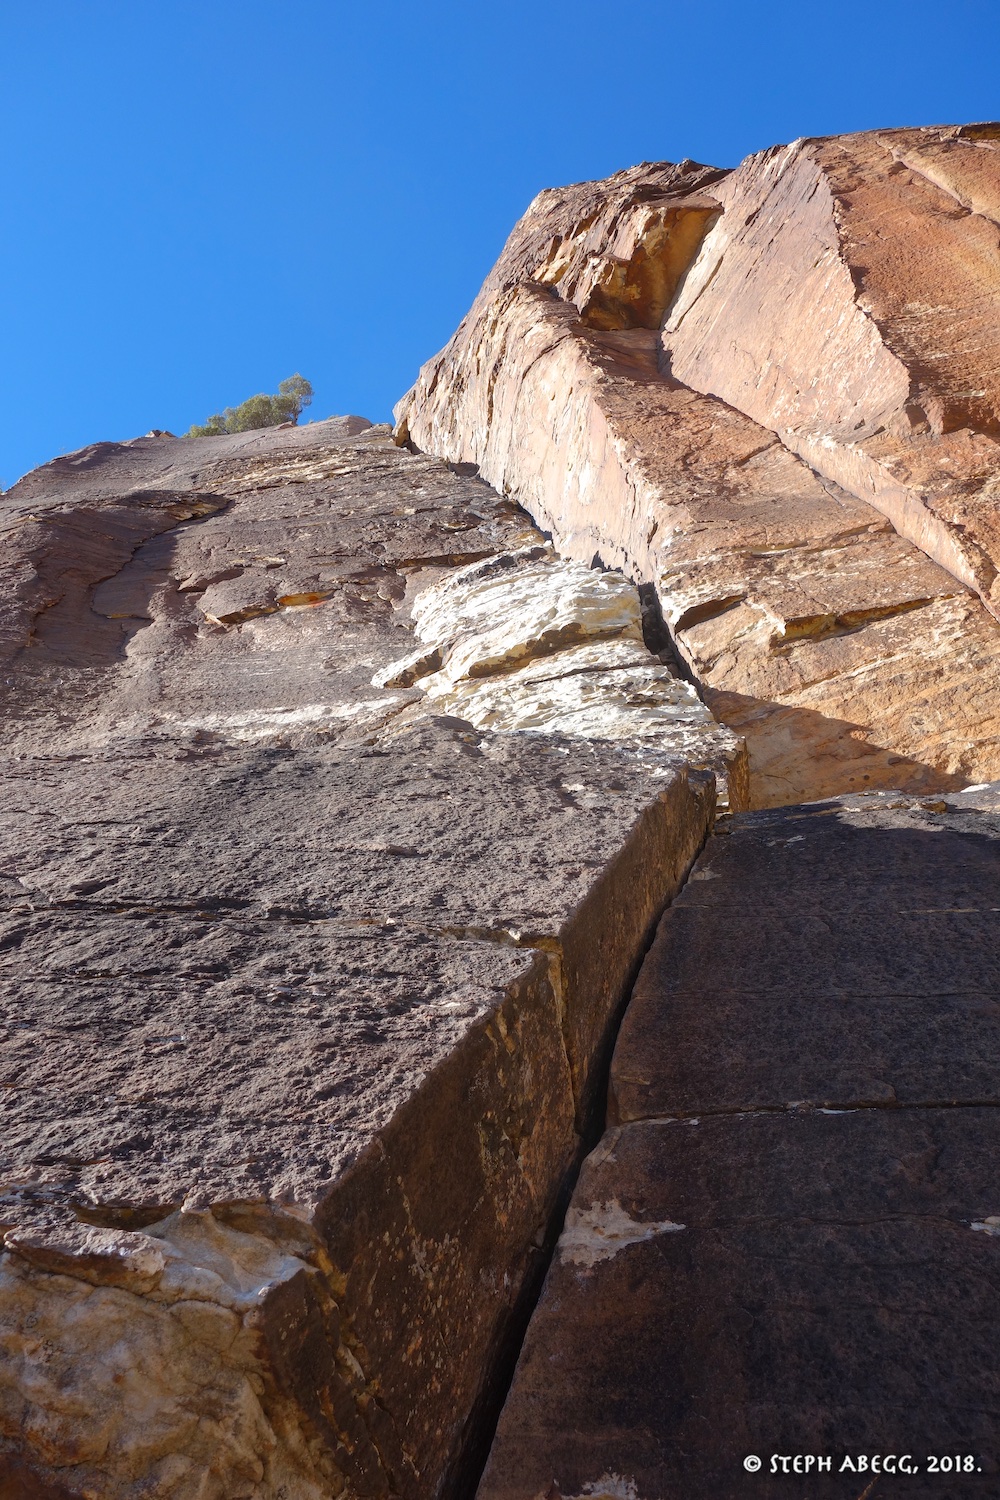
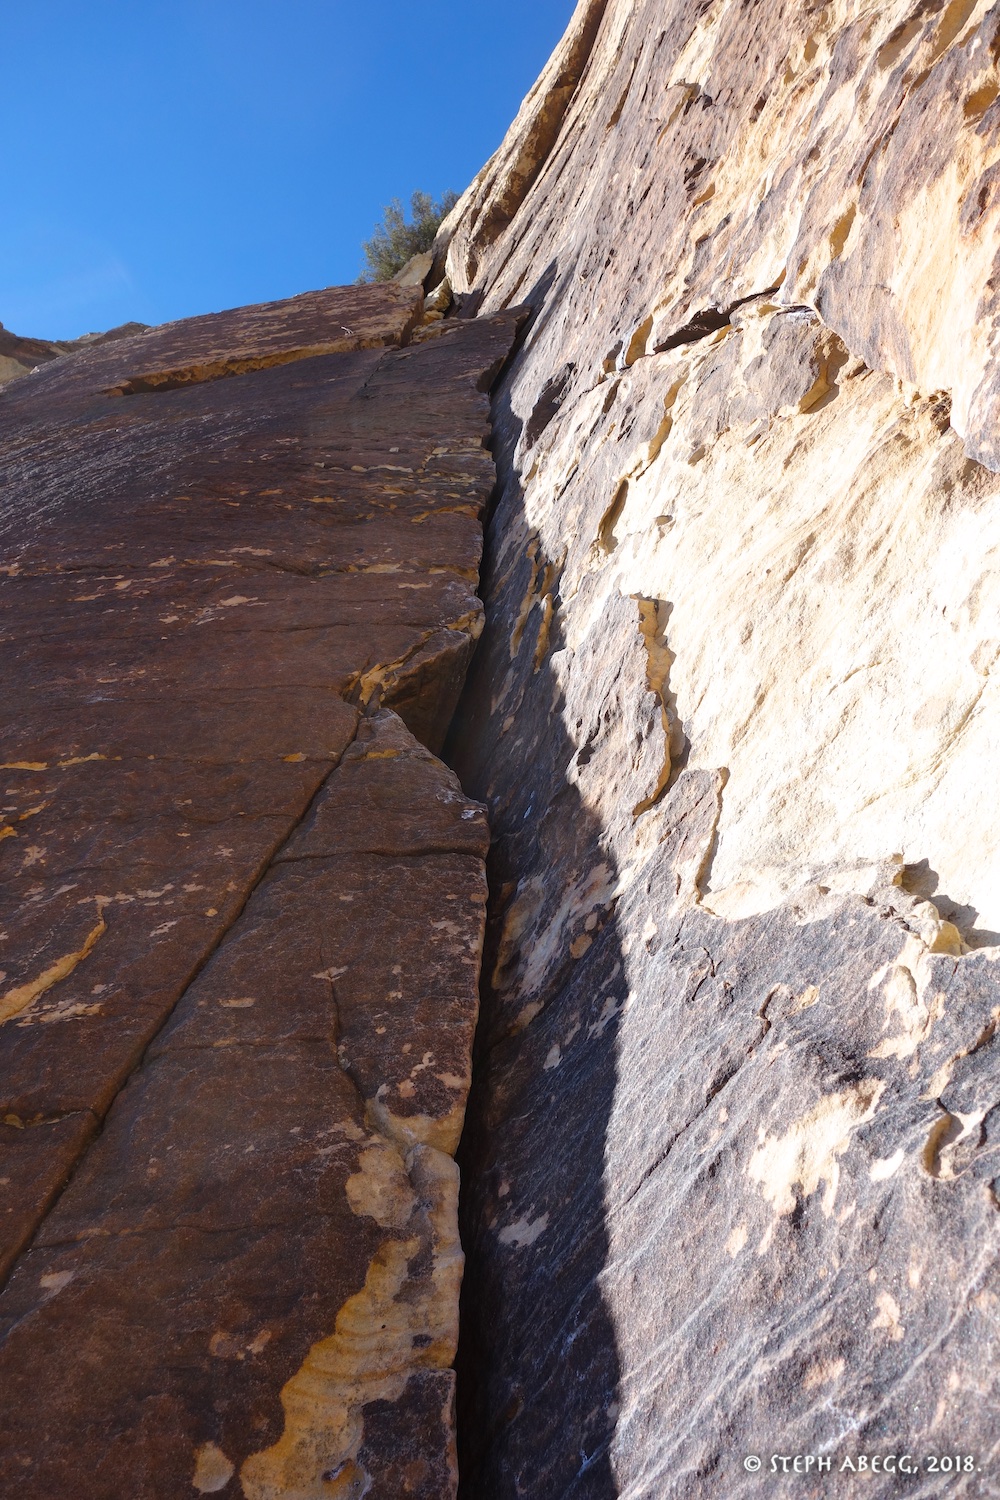
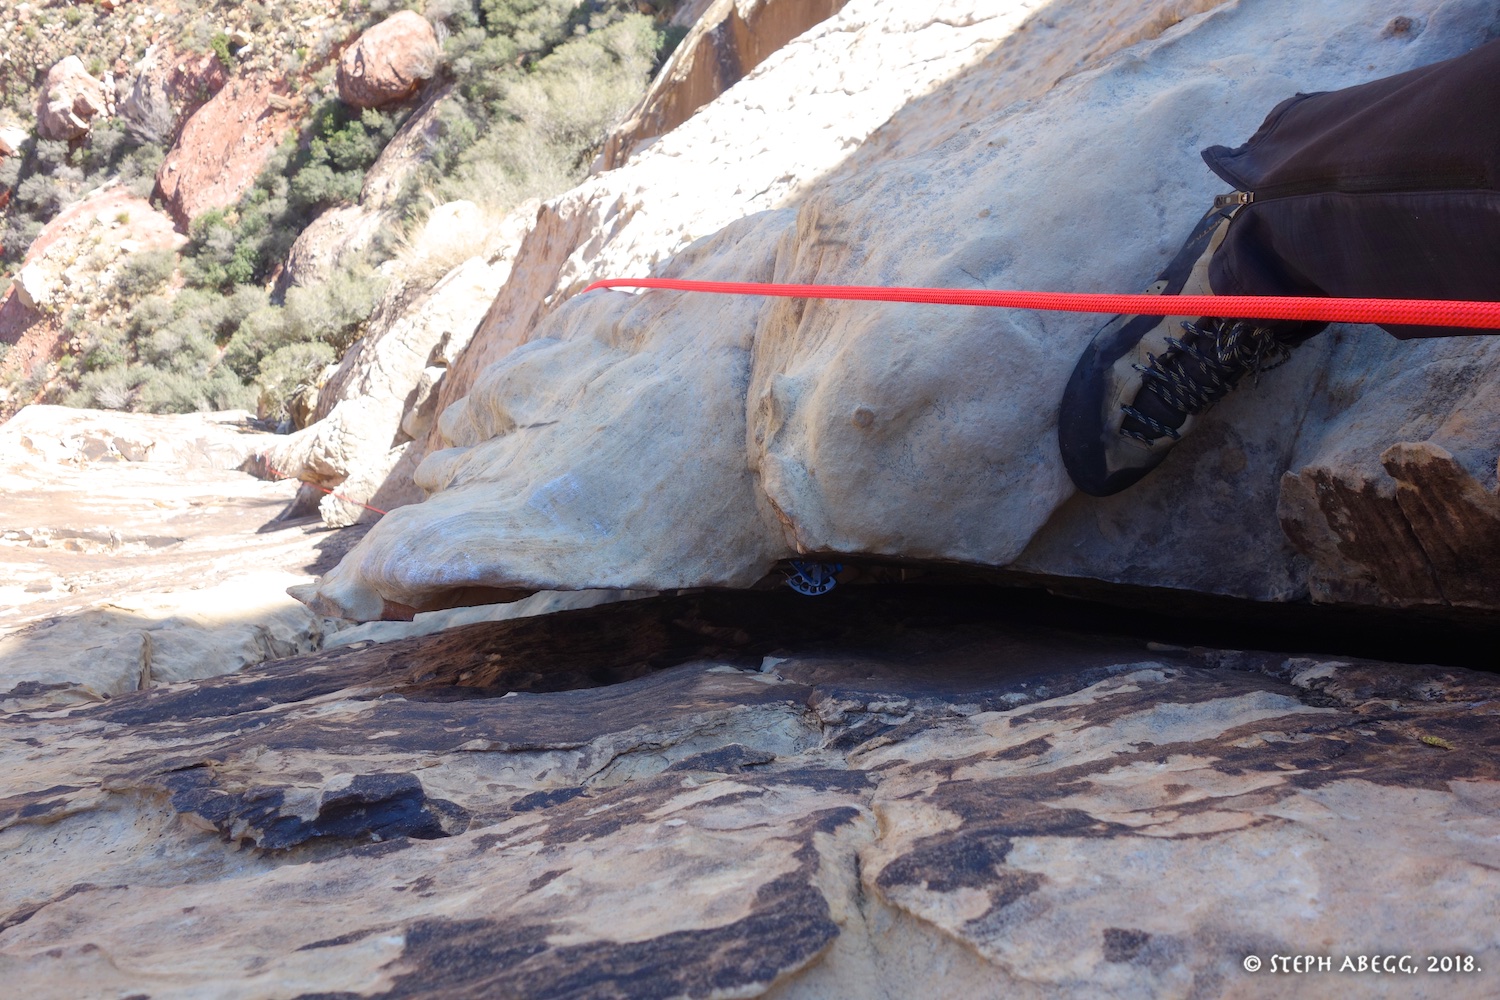
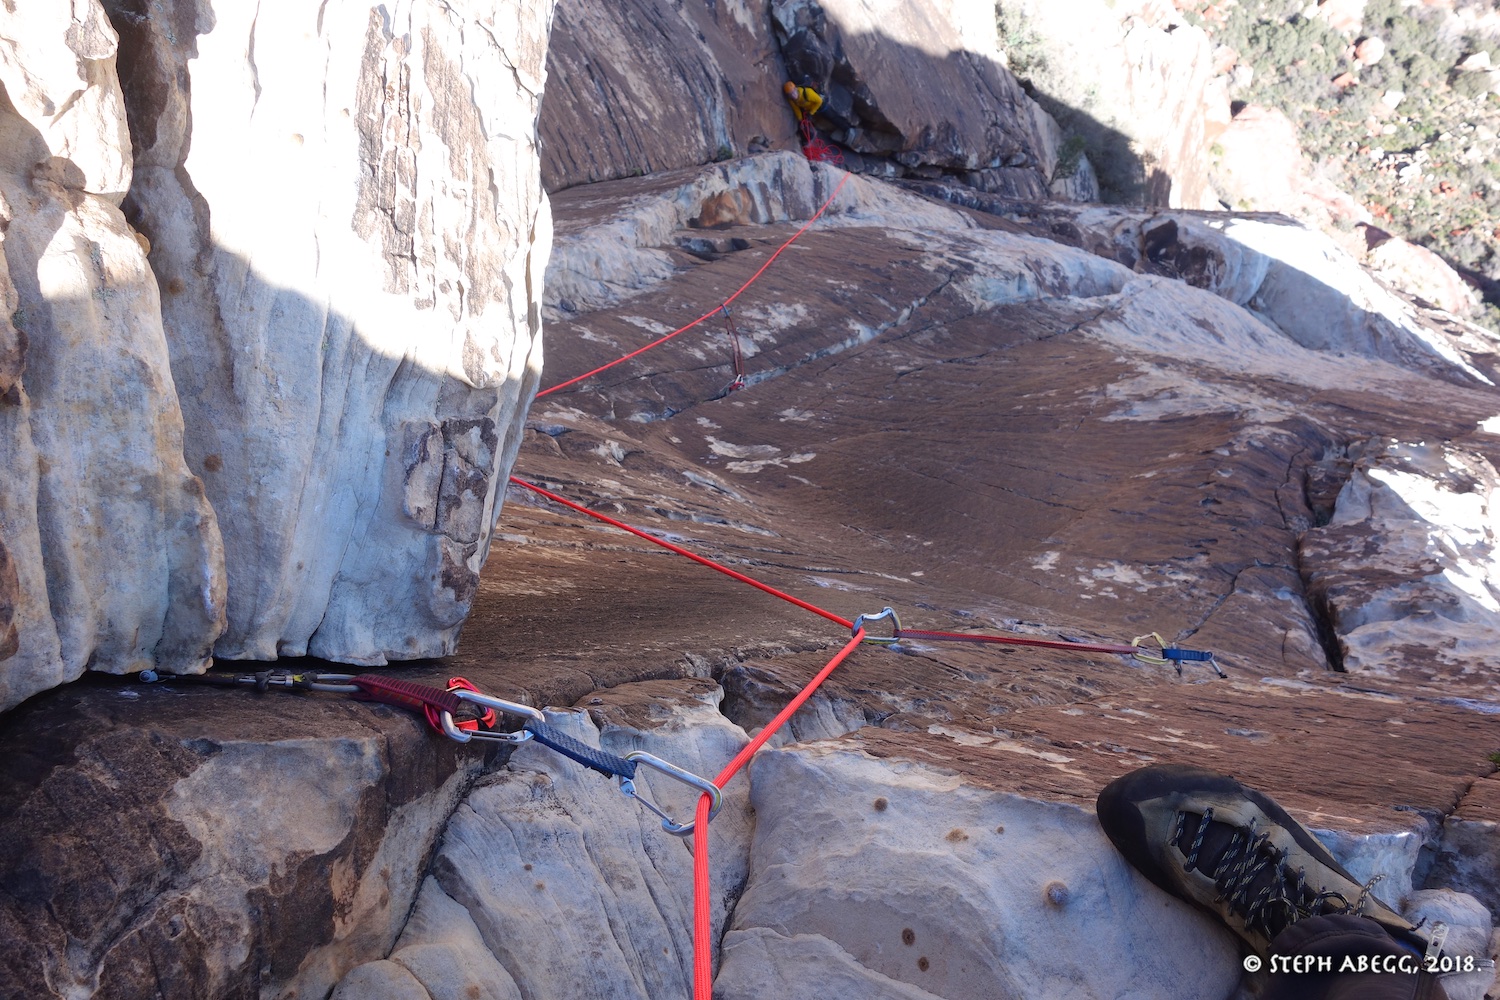
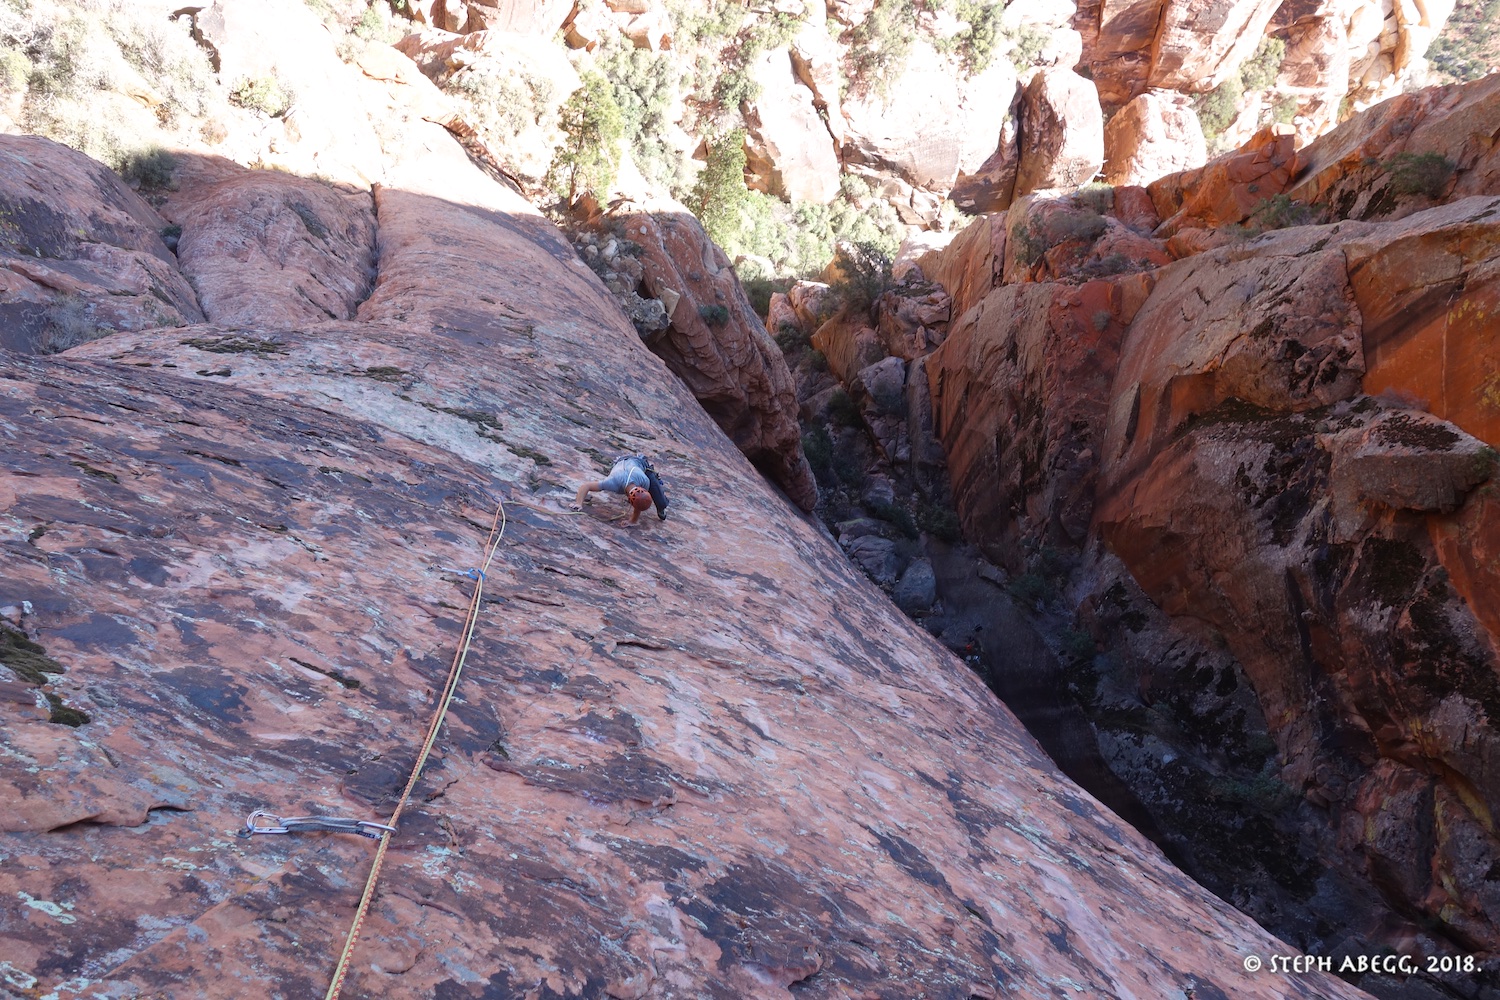
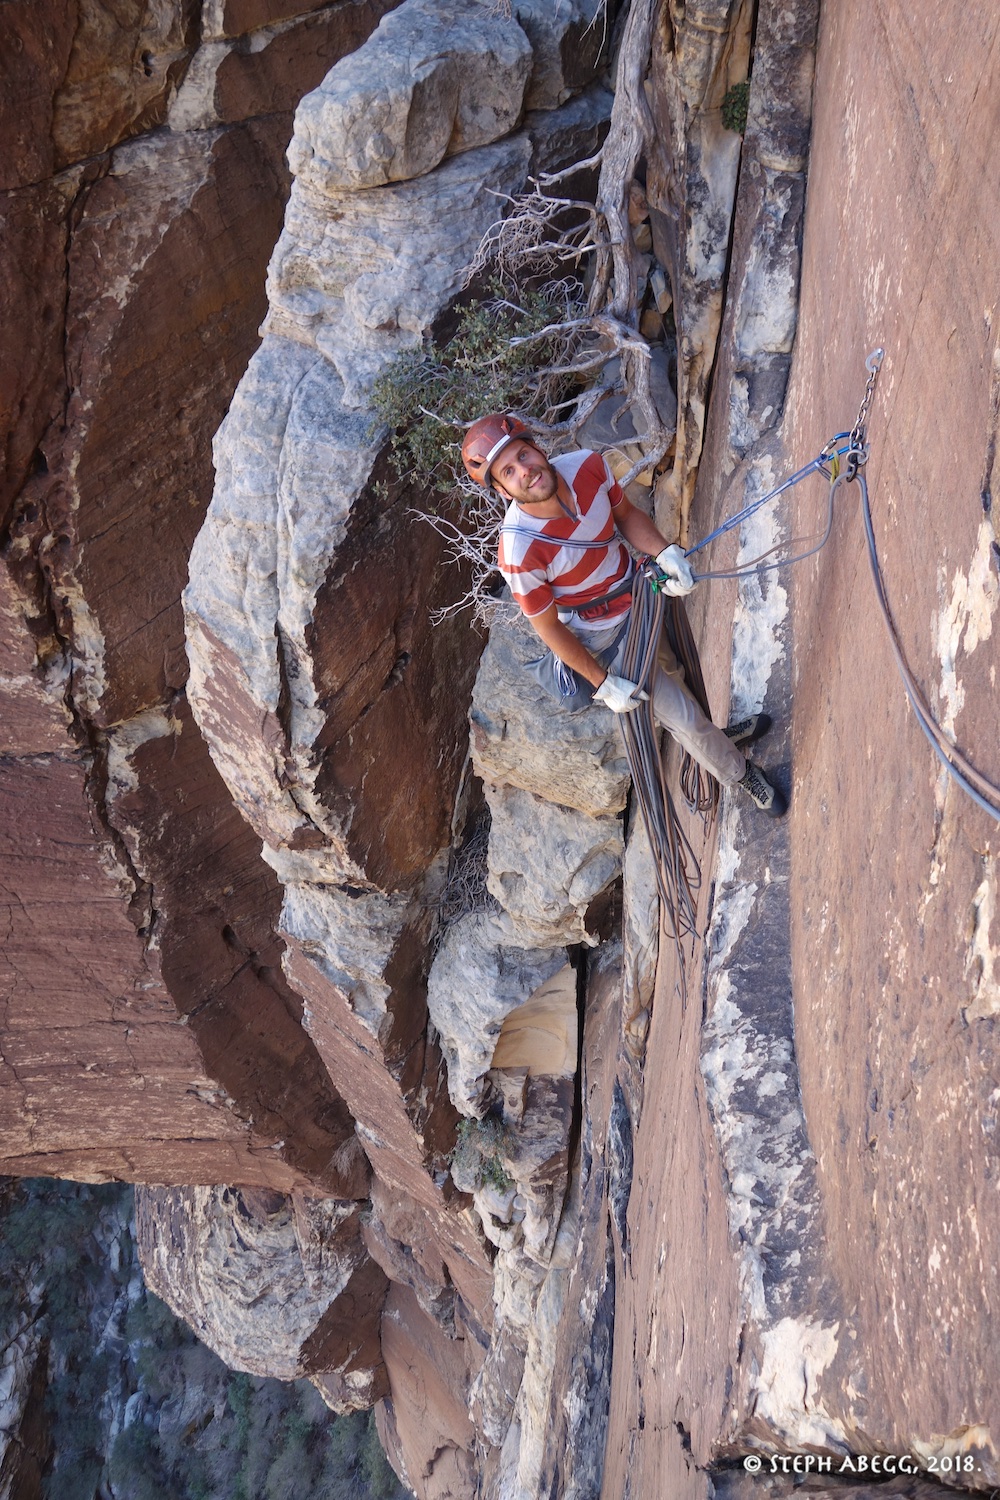
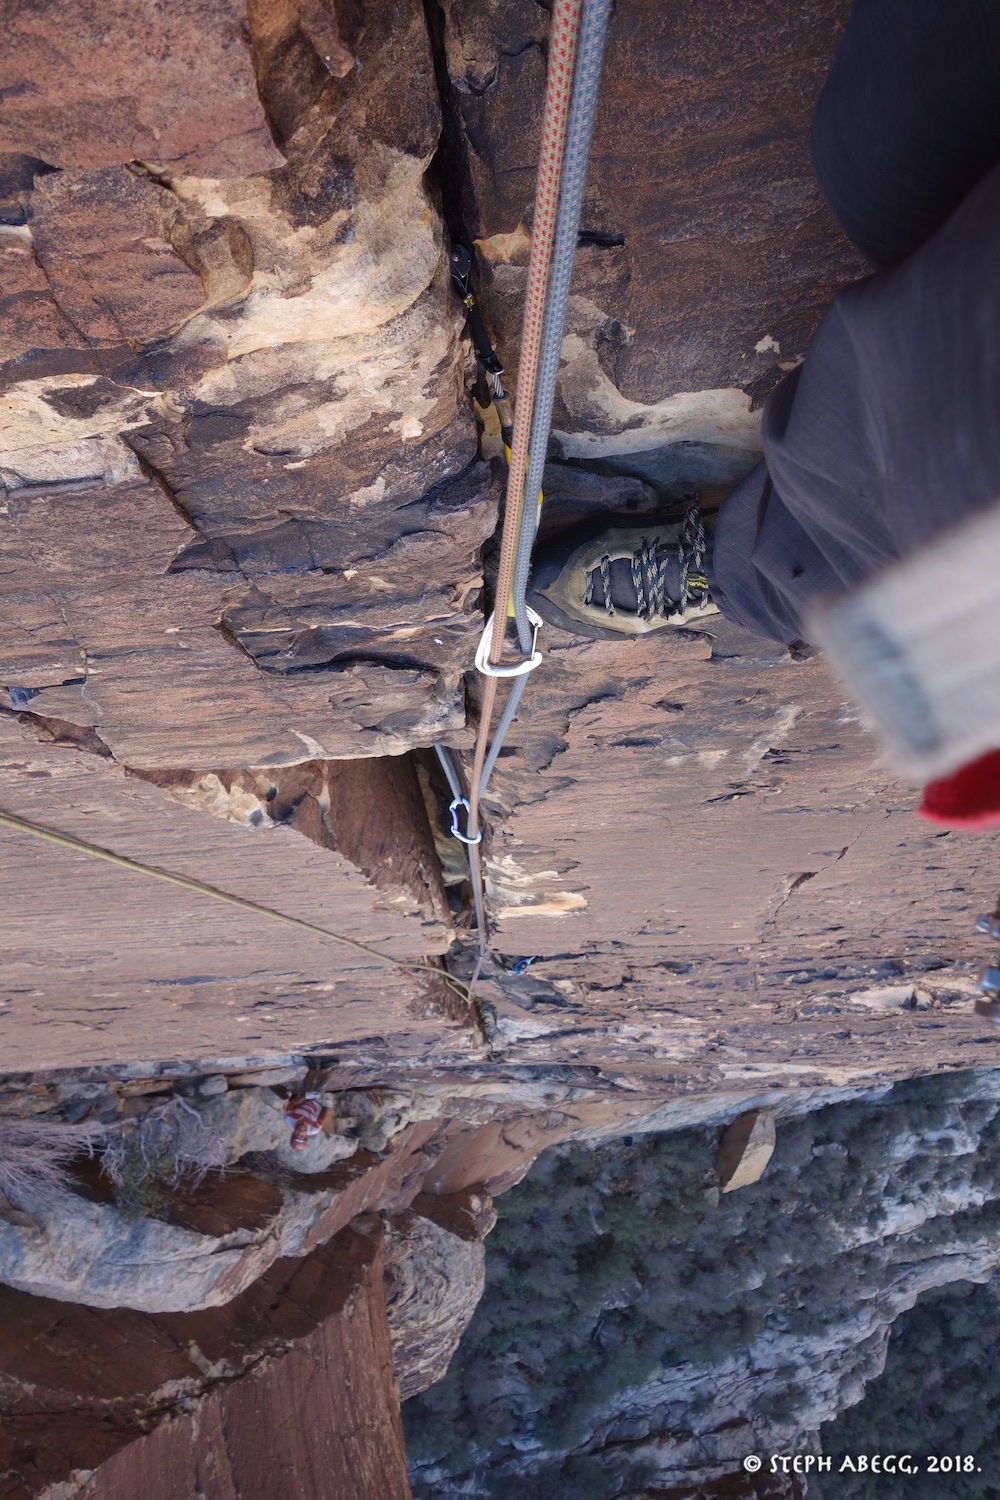
The third and fourth pitches of the route climb up a beautiful web of brownstone bricks, and are the main attraction of the route. The protection is mostly by nuts (offsets work well) between the bricks, with a couple of horizontal cam placements (the #2 placement mentioned in many route descriptions is shown in one of the photos). Super cool and unique climbing.
ARMATRON
PITCH
4
(5.6, 100')
More climbing up brownstone bricks. I felt that the climbing was a tad easier on Pitch 4 than on Pitch 3, but featured awesome exposure along the left edge of the wall.
ARMATRON
PITCH
5
(5.5-5.7, 120-90')
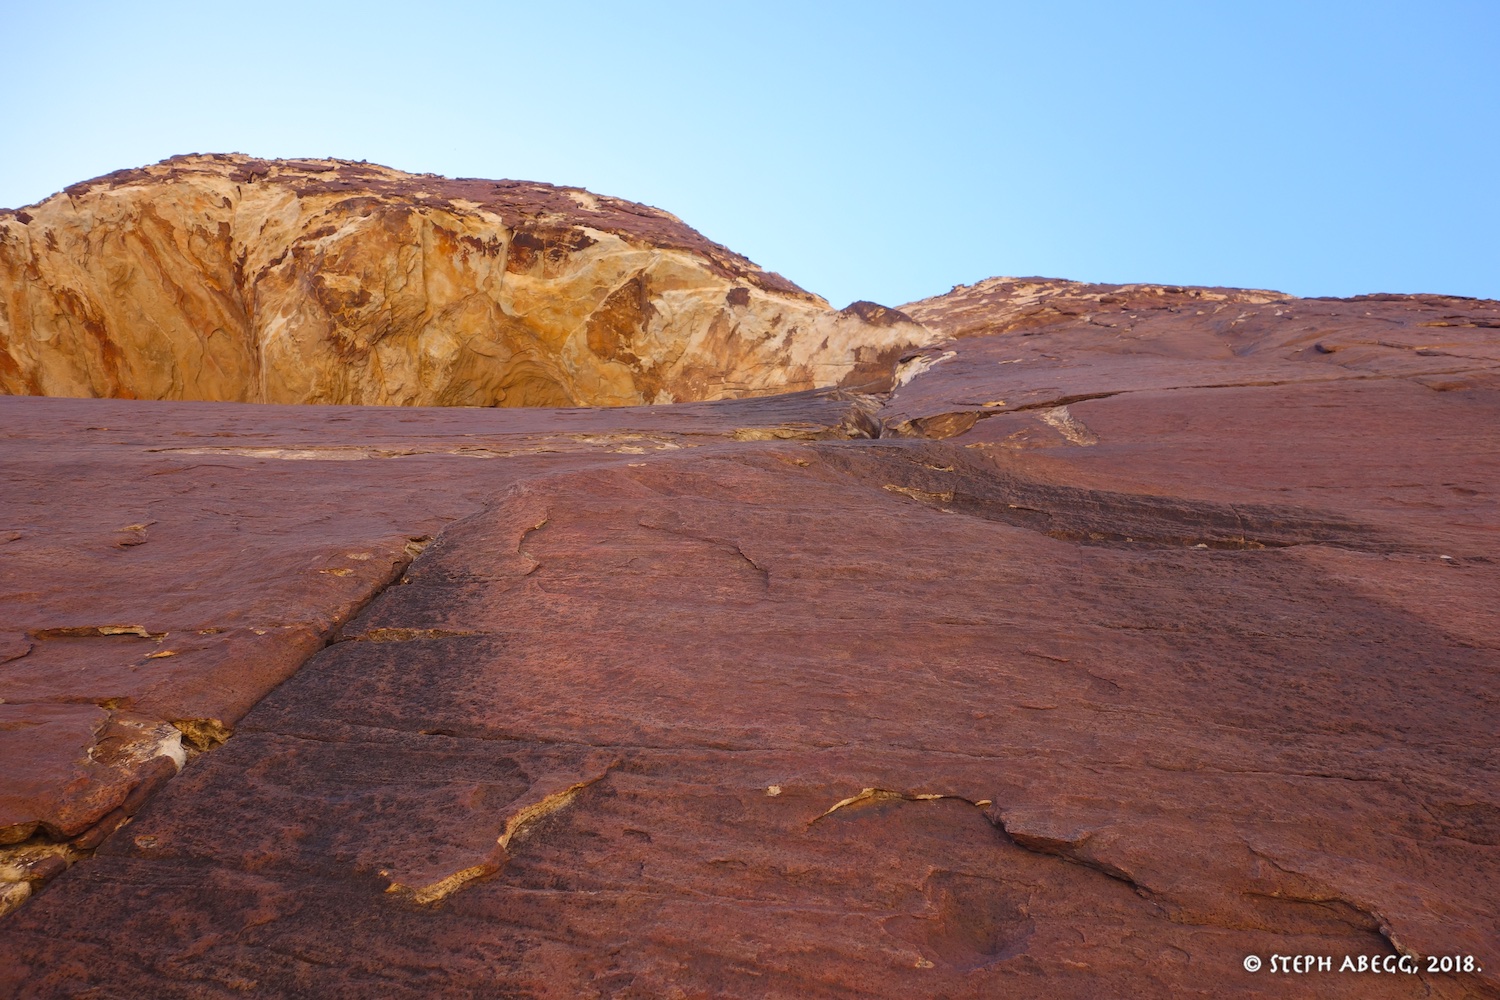
Climbing up the featured arete, with a few scattered bolts for protection. There are several options of where to stop to set a gear belay. If you stop after 120 feet, the climbing is no harder than 5.5 or so, or if you lengthen the pitch, you might have to go up a 5.7ish headwall with a bolt.
ARMATRON (REQUIEM FOR A TADPOLE)
PITCH
6
(5.5.5.7, 50-120')
The route finishes up the featured arete of the last pitch of Requiem for a Tadpole.
TOP & DESCENT
(walk off from top of Juniper Peak)
On top of the tower. A short scramble to the top of Juniper Peak from here. Then a quick scramble down the shoulder to the base of Armatron. We had started rather early, and despite our approach via Myster Z, we had arrived at Armatron ahead of the pack (4 other parties on the route that day), and were back to Vegas before 5pm.
Climbing the full Dark Shadows route to the top of Mescalito is an outstanding adventure, entailing some of the highest quality 5.7/5.8 climbing in Red Rocks and an actual summit. Although many parties only climb the first four pitches before rappelling (as I myself did in 2015), it is my belief that in order to claim you've really climbed this route you've really got to do the full thing to the top (I've coined the 4-pitch route as "Light Shadows" =)). I was pleasantly surprised by the excellent and sustained-at-the-grade climbing on the upper pitches.
FA: John Martinet & Nick Nordblom, 1979.
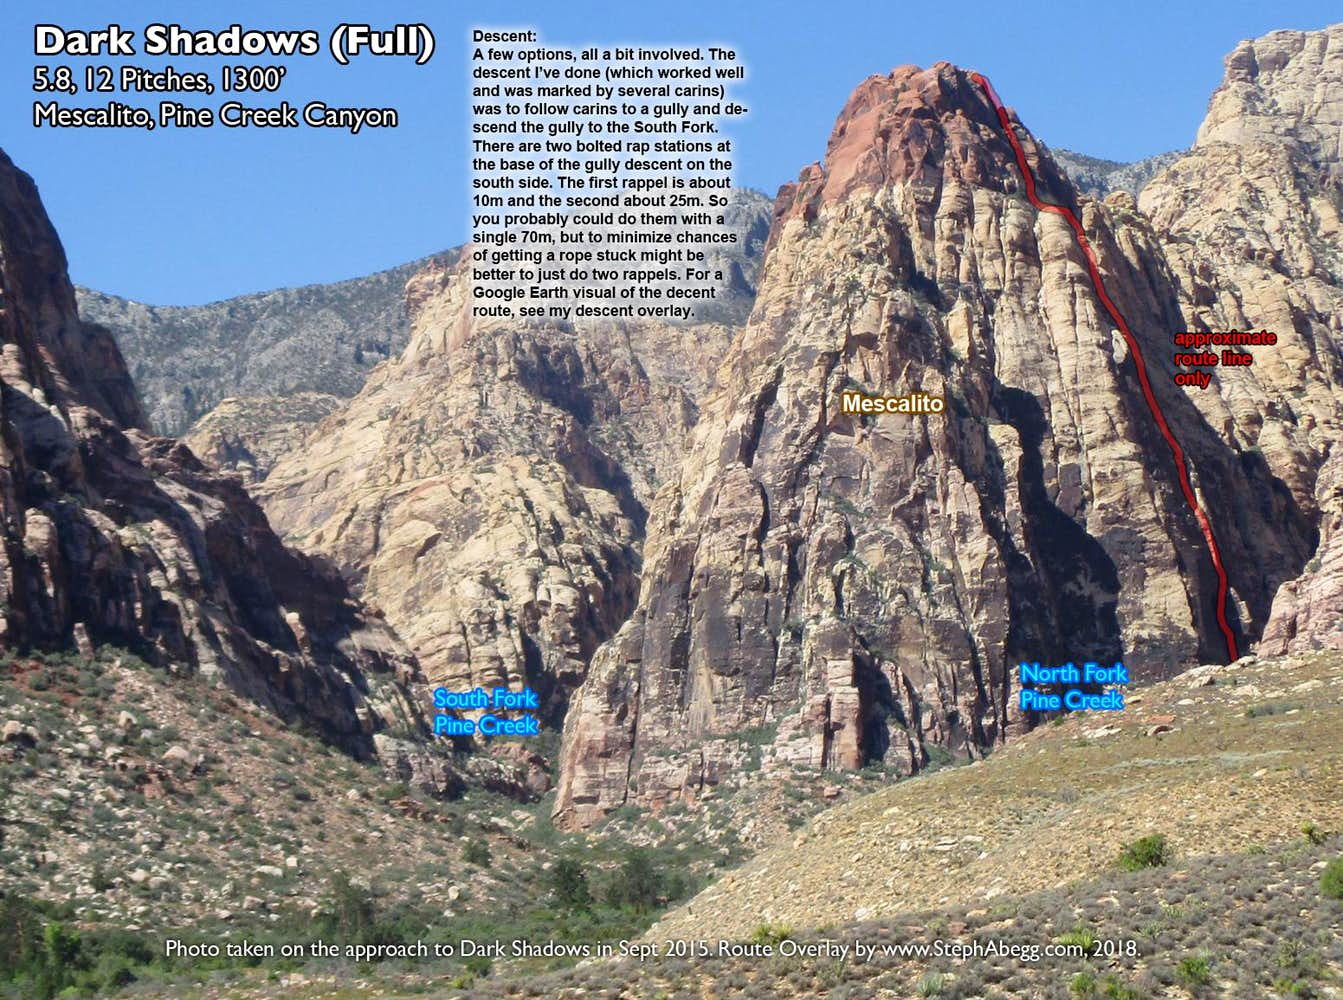
Route Overlay & Descent Options
Pitch-by-Pitch Photos
(Pitches as per Handren guide)
Photos:
Notes:
APPROACH
Approaching Mescalito.
PITCH
1 (5.5, 70')
(we linked with Pitch 2)
Starting up Pitch 1. Watch out that you don't get your rope wet!
PITCH
2 (5.6, 75')
(we linked with Pitch 1)
Fun corner crack climbing.
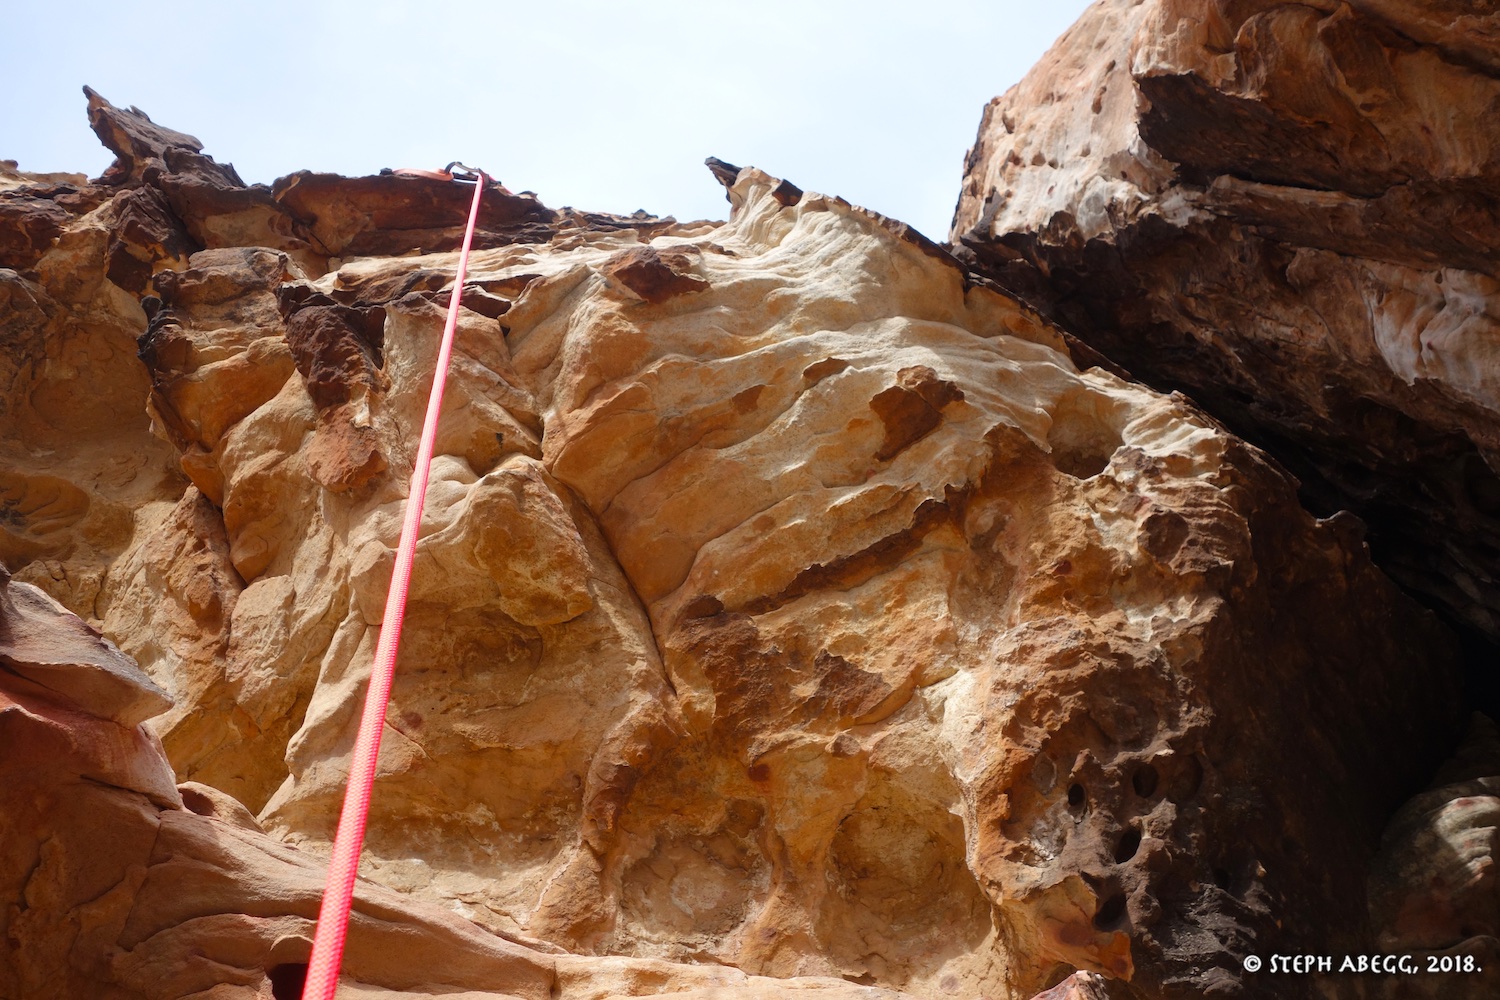
PITCH
3 (5.8, 120')
Huecos and varnish that squeaks when you put your shoes on it.
PITCH
4 (5.8, 75')
Arching crack. The 4th pitch ends at a bolt anchor just above the crack in the photo, but to continue on, continue up to another bolt anchor about 20 feet higher.
PITCH
5 (5.7, 120')
Arete, roof, and crack. A great pitch.
PITCH
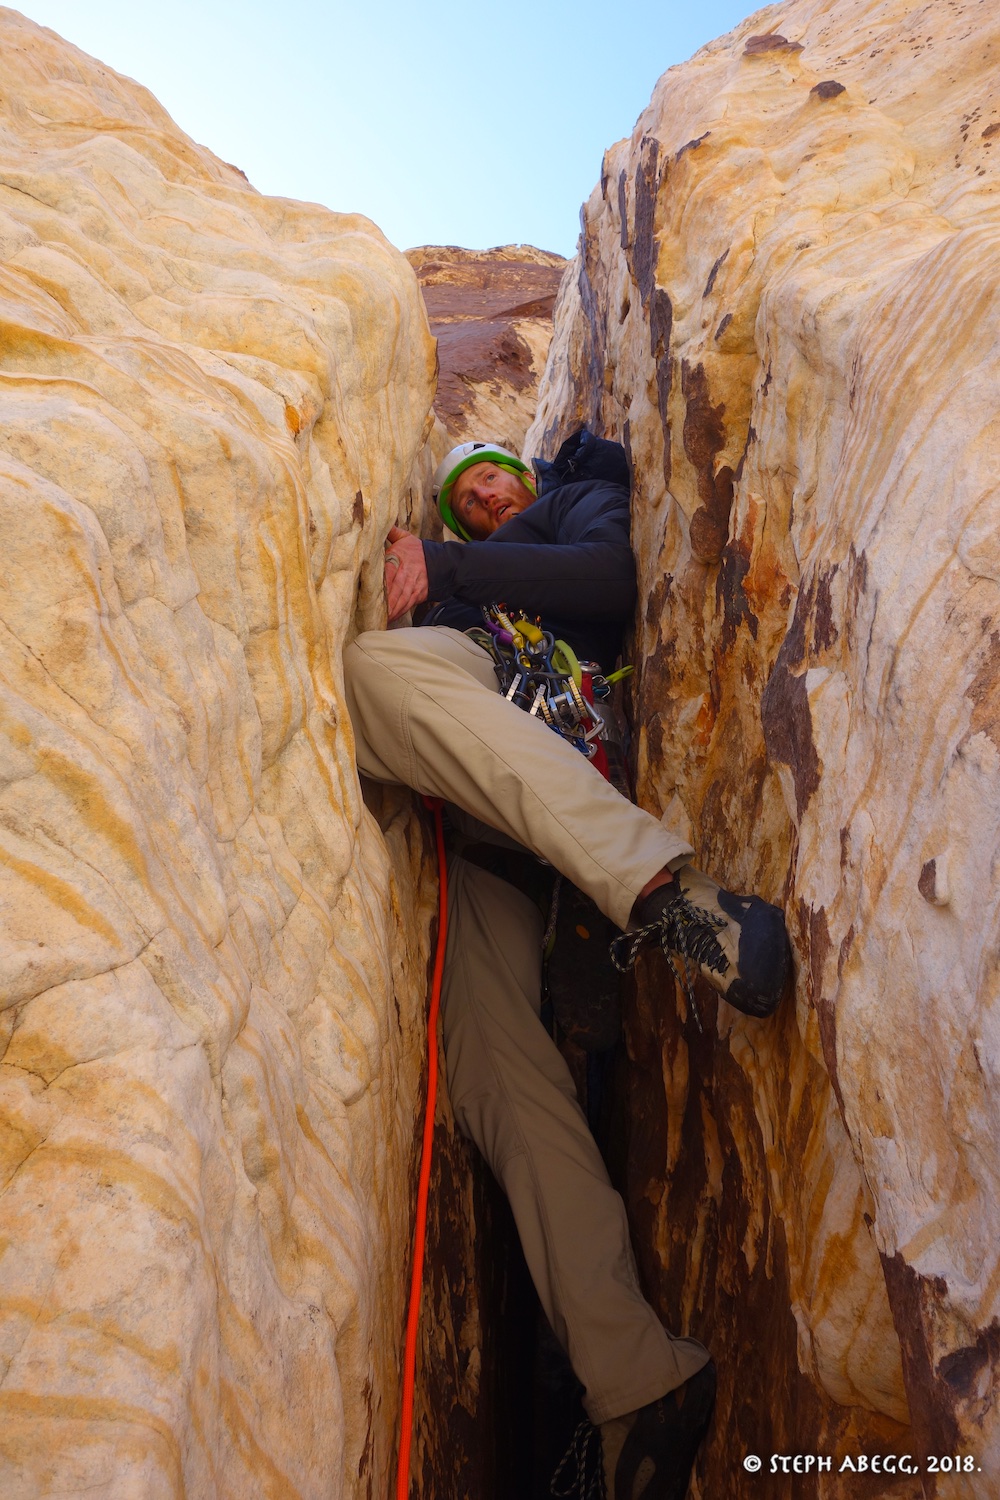
6 (5.7, 120')
We started this pitch from a sheltered alcove and had to climb a 20 foot chimney at the start. I am not sure if this chimney was on the route, but it was actually pretty fun and gave a sheltered belay (which was nice because it was super windy for us).
PITCH
7 (5.7, 120')
Mostly a finger crack size. Small cams and offset nuts.
PITCH
8 (5.7, 60')
This is a short pitch that could be linked with the previous.
PITCH
9 (5.7, 110')
Twin cracks of fun, ending on a ledge with a single bolt. You can backup the bolt with an 0.4-sized cam.
PITCH
10 (5.8, 170')
Another great pitch, featuring a varnished face and a nice juggy roof. Put a leader who does not mind a bit of face runnout on this pitch.
PITCHES
11-12 (5th, 300')
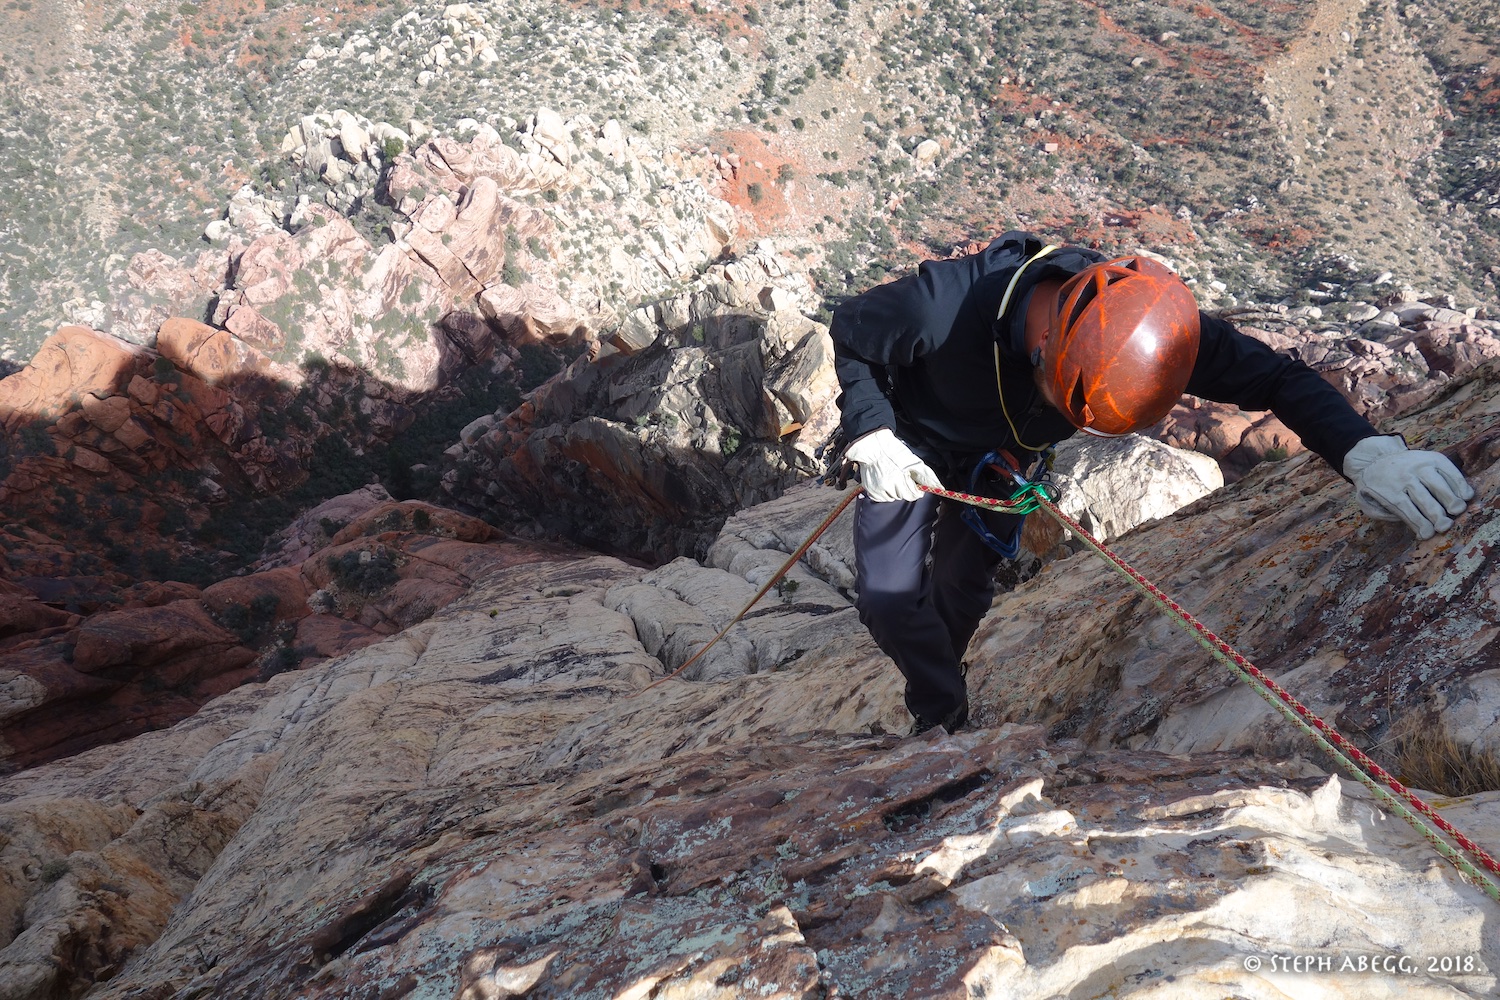
Looking up from the top of Pitch 10, about 300-400' to the top. We unroped here and soloed the first 2/3 and then roped up for the last 1/3. Kind of adventurous climbing but I enjoyed it.
ON TOP!
Nice to tag a summit!
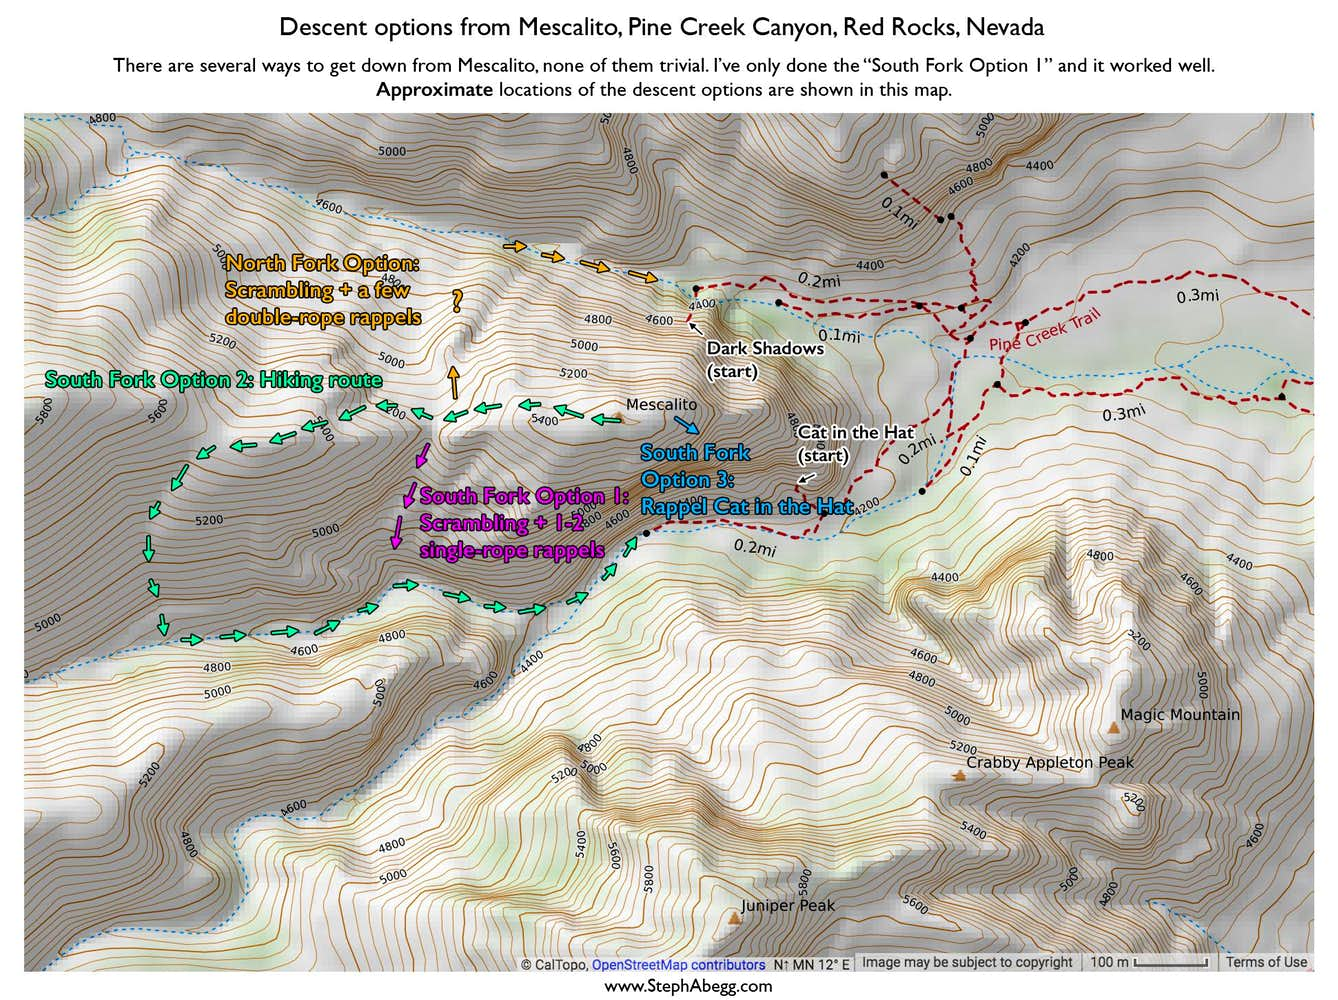
DESCENT
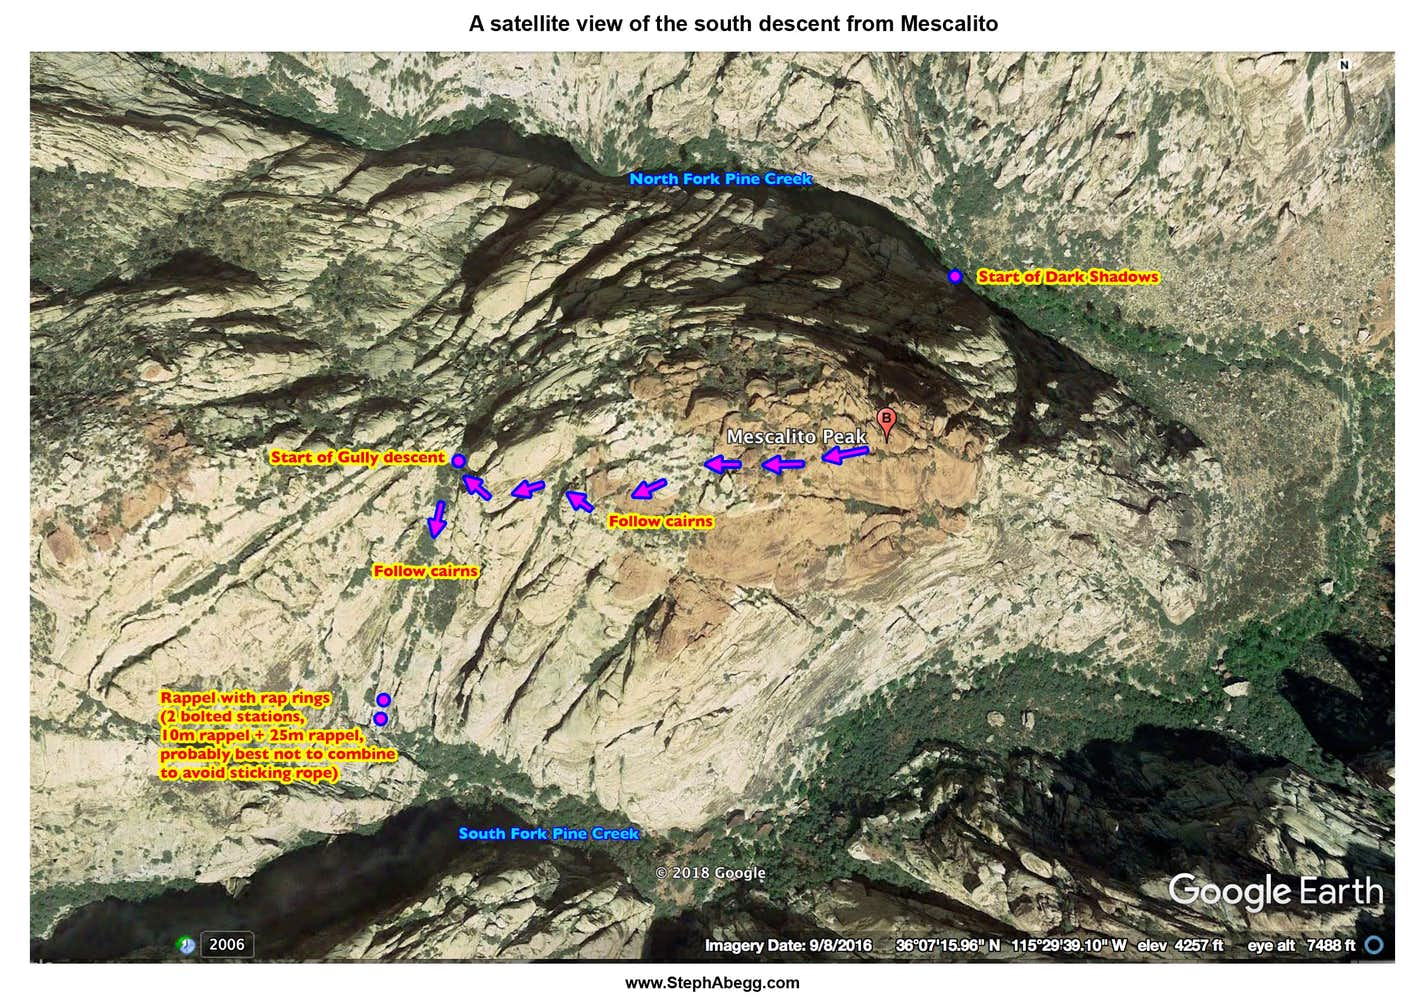
(scramble down from top of Mescalito, see my descent overlay)
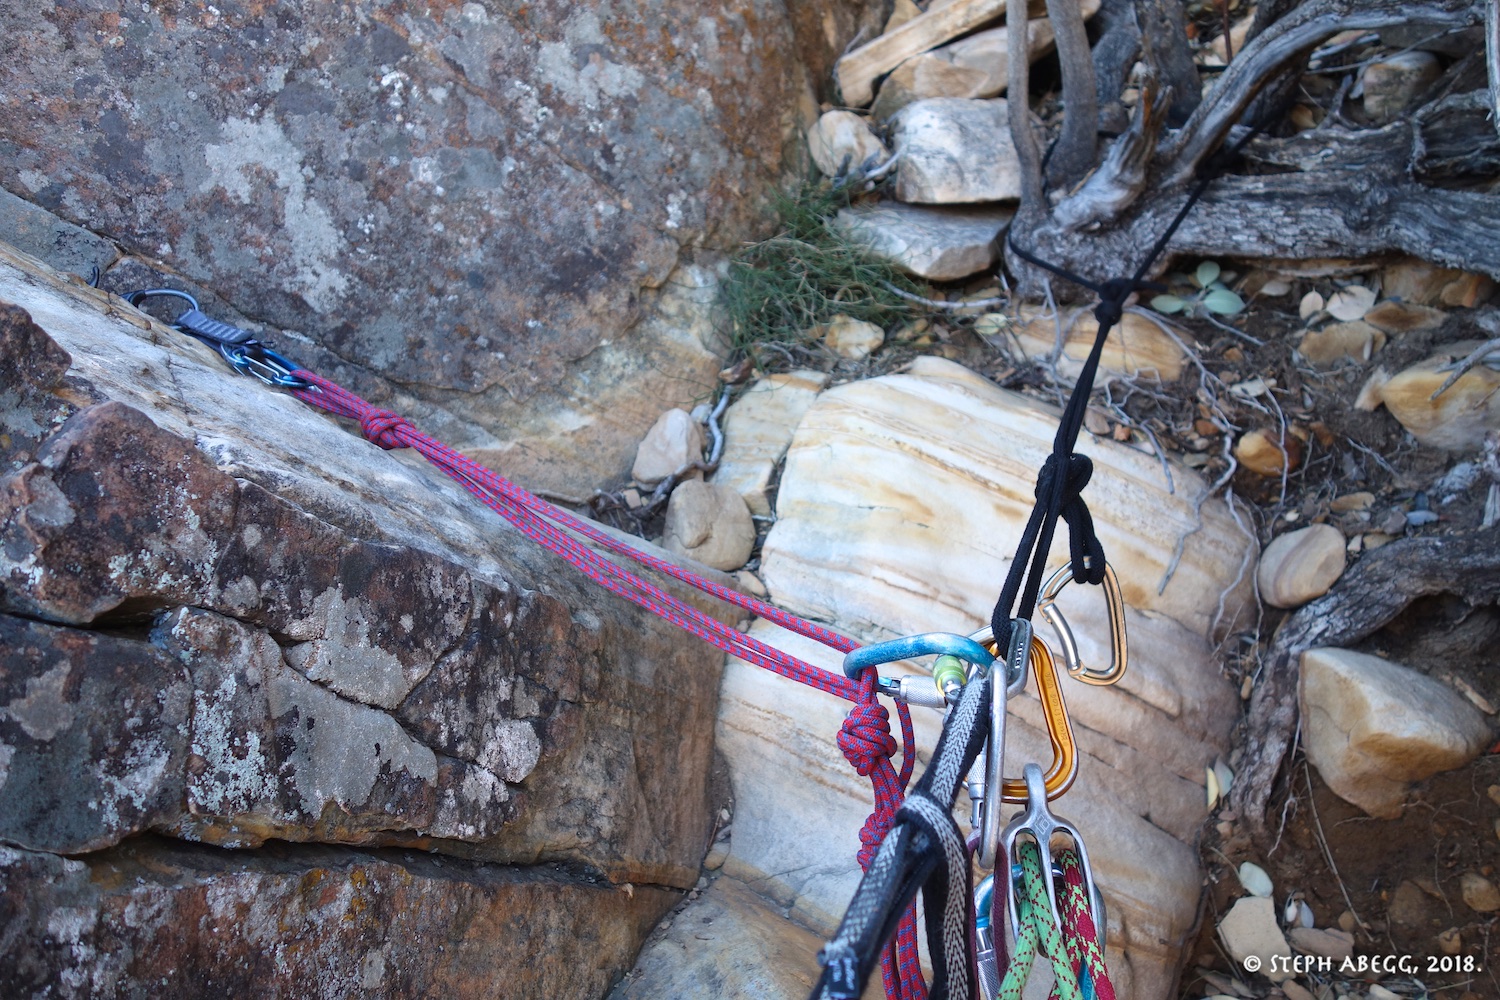
There are a few options for the descent, all a bit involved. The descent we did done (which worked well and was marked by several carins) was to follow carins to a gully and descend the gully to the South Fork. There are two bolted rap stations at the base of the gully descent on the south side. The first rappel is about 10m and the second about 25m. So you probably could do them with a single 70m, but to minimize chances of getting a rope stuck might be better to just do two rappels.
For a Google Earth visual of the decent route, see my descent overlay.
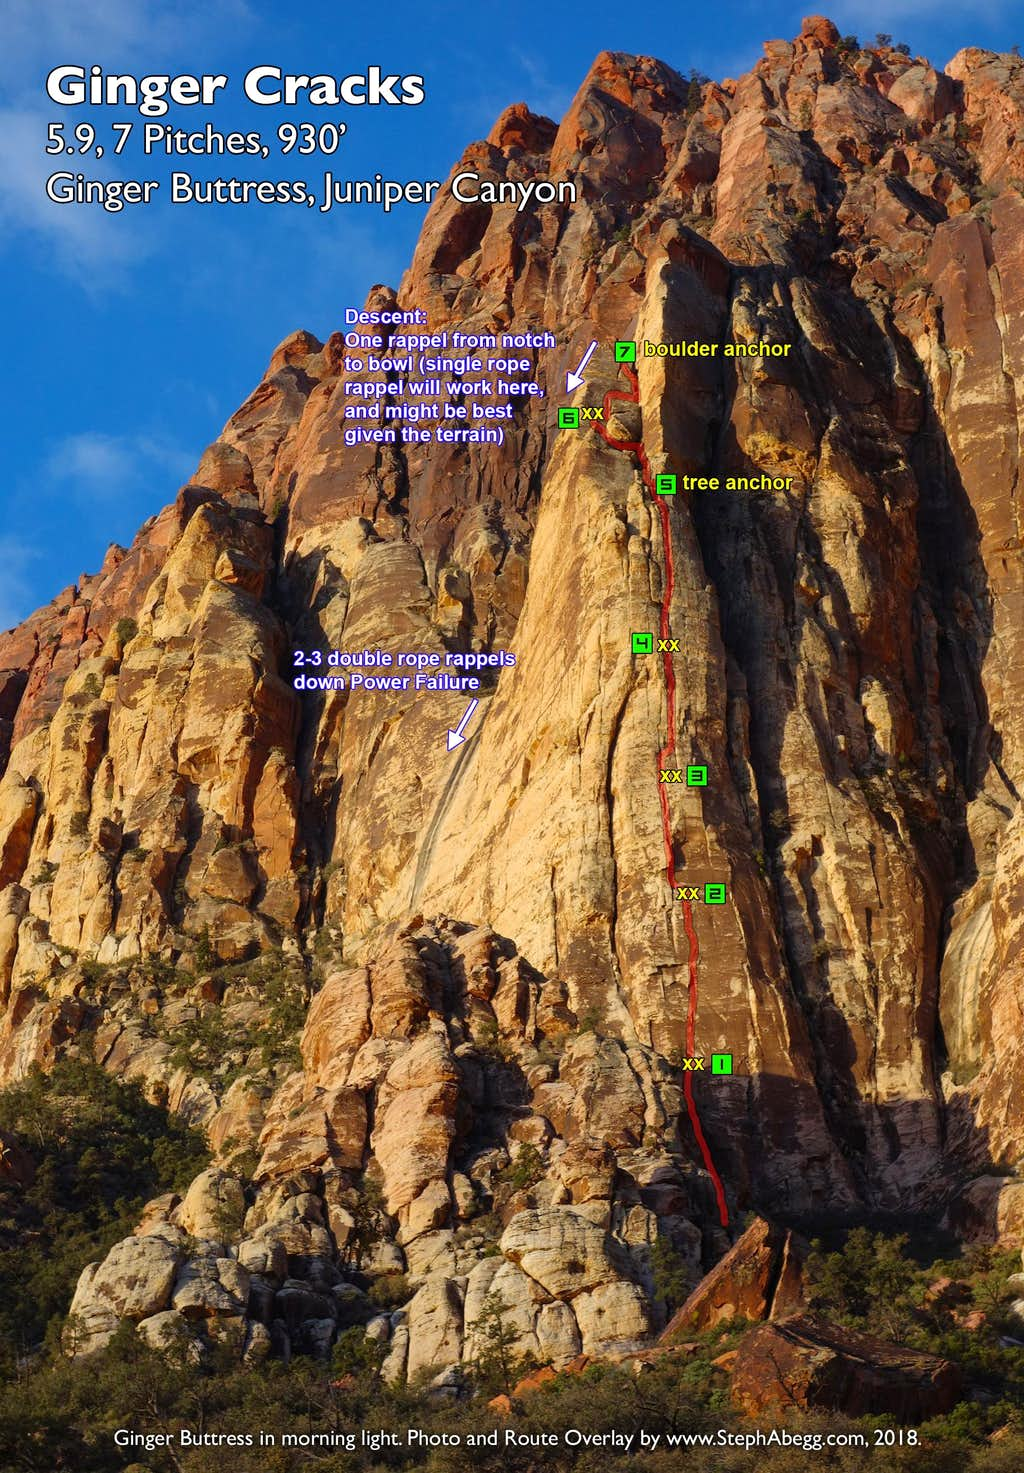
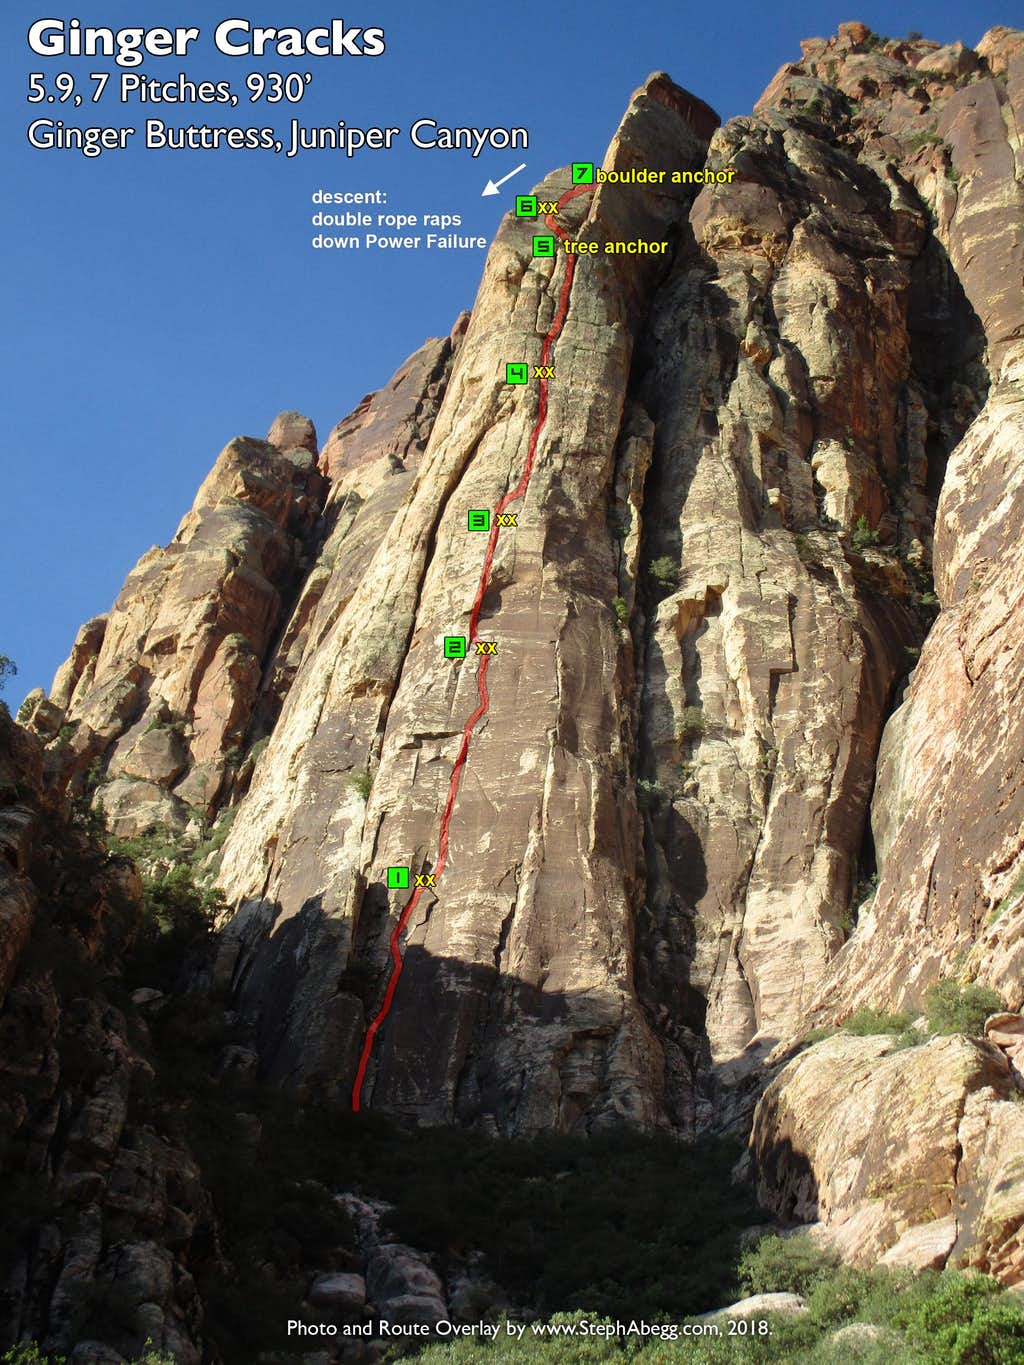
Climbs to the top of Ginger Buttress in 7 varied and mostly excellent crack pitches. If you like crack-climbing (like I do), this route is a must-do.
FA: Mark Moore & Lars Holbek, 1977.
Route Overlays
Pitch-by-Pitch Photos
(Pitches as per Handren guide)
Photos:
Notes:
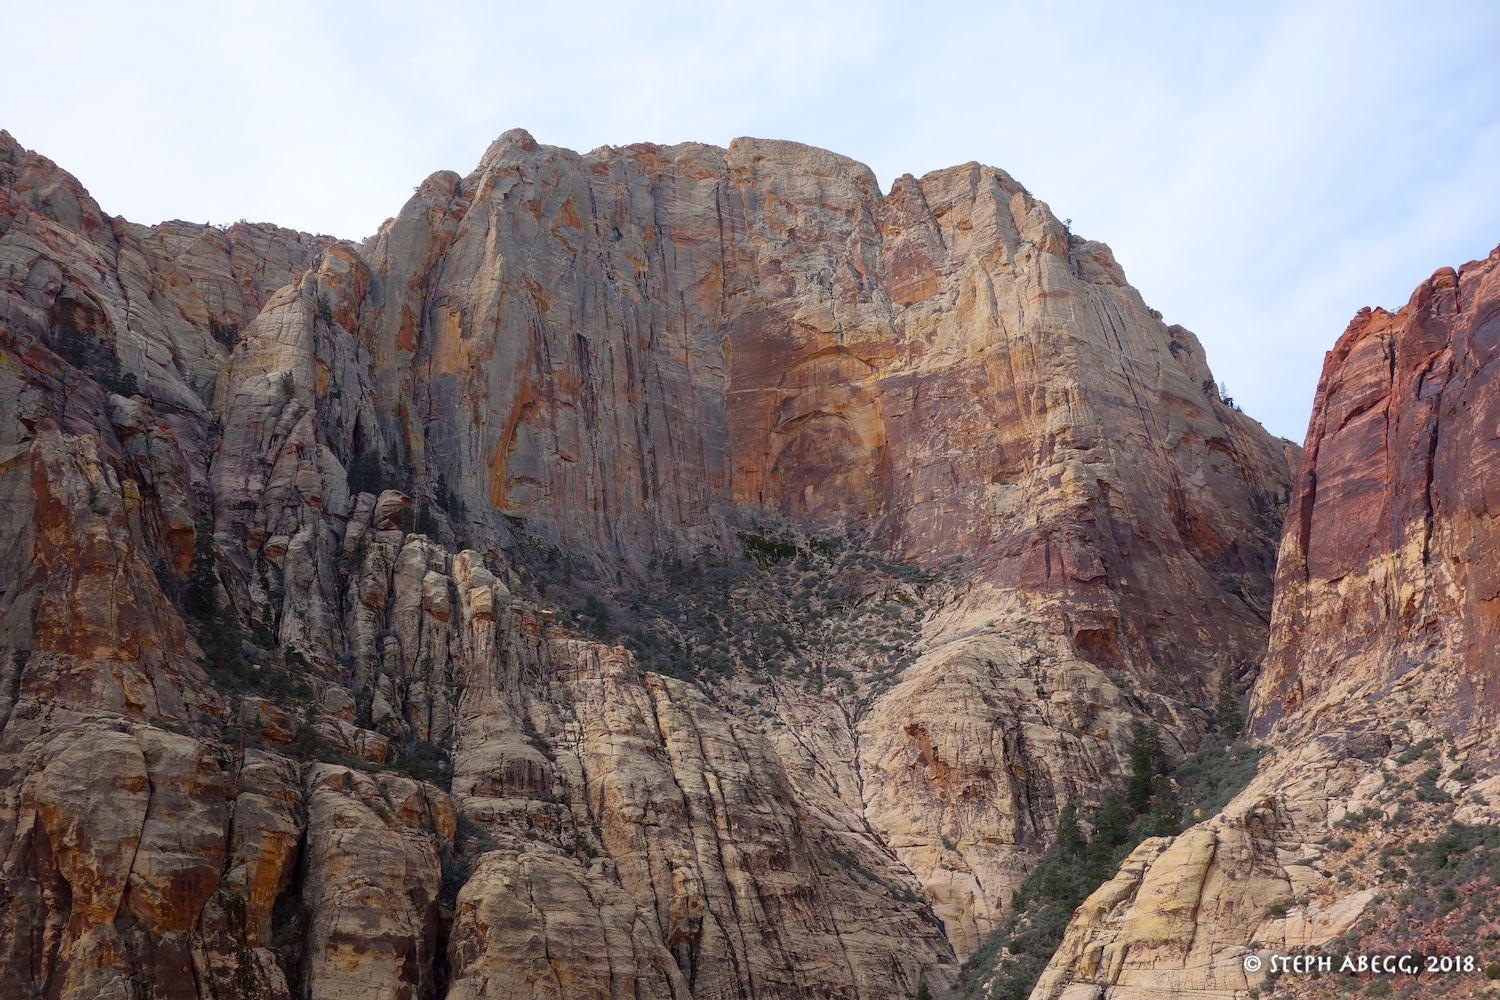
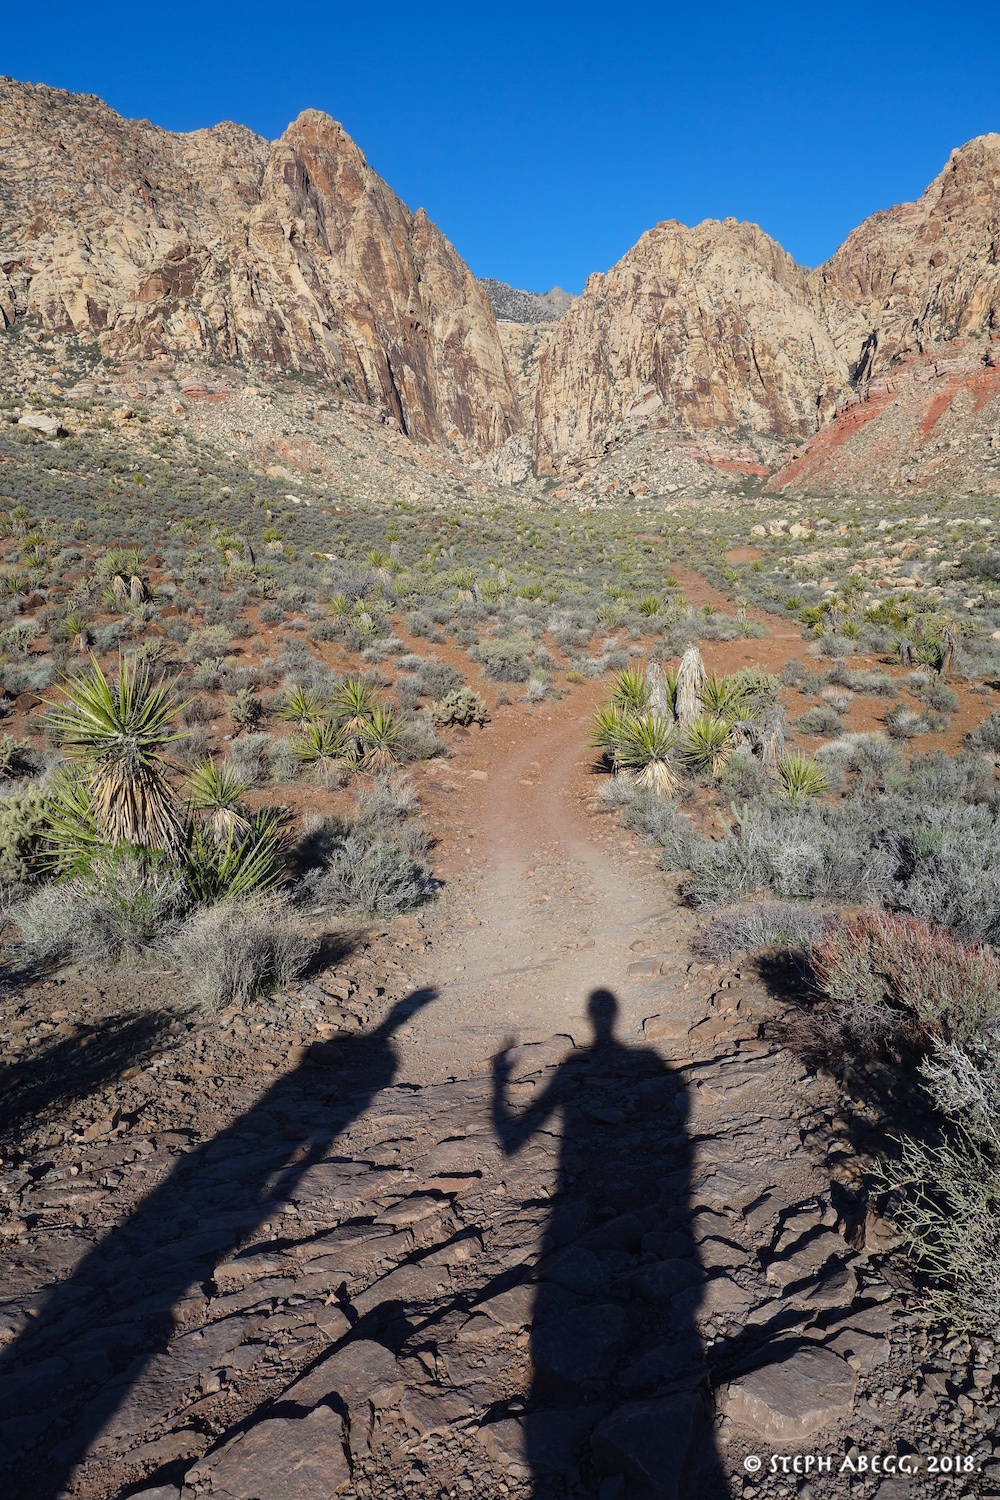
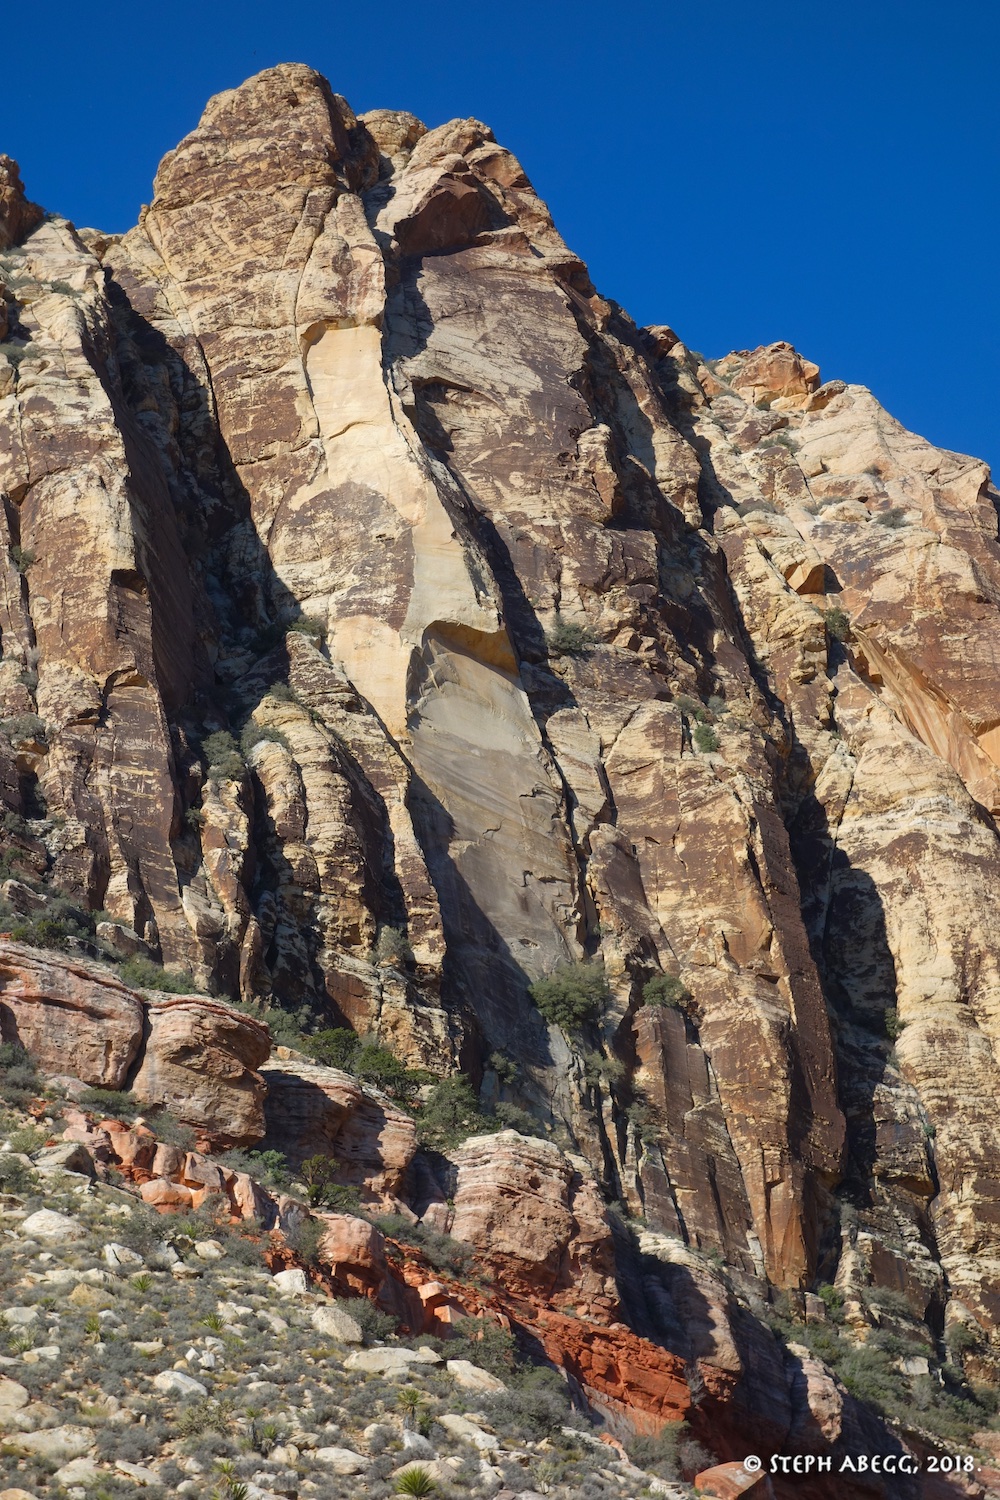
APPROACH
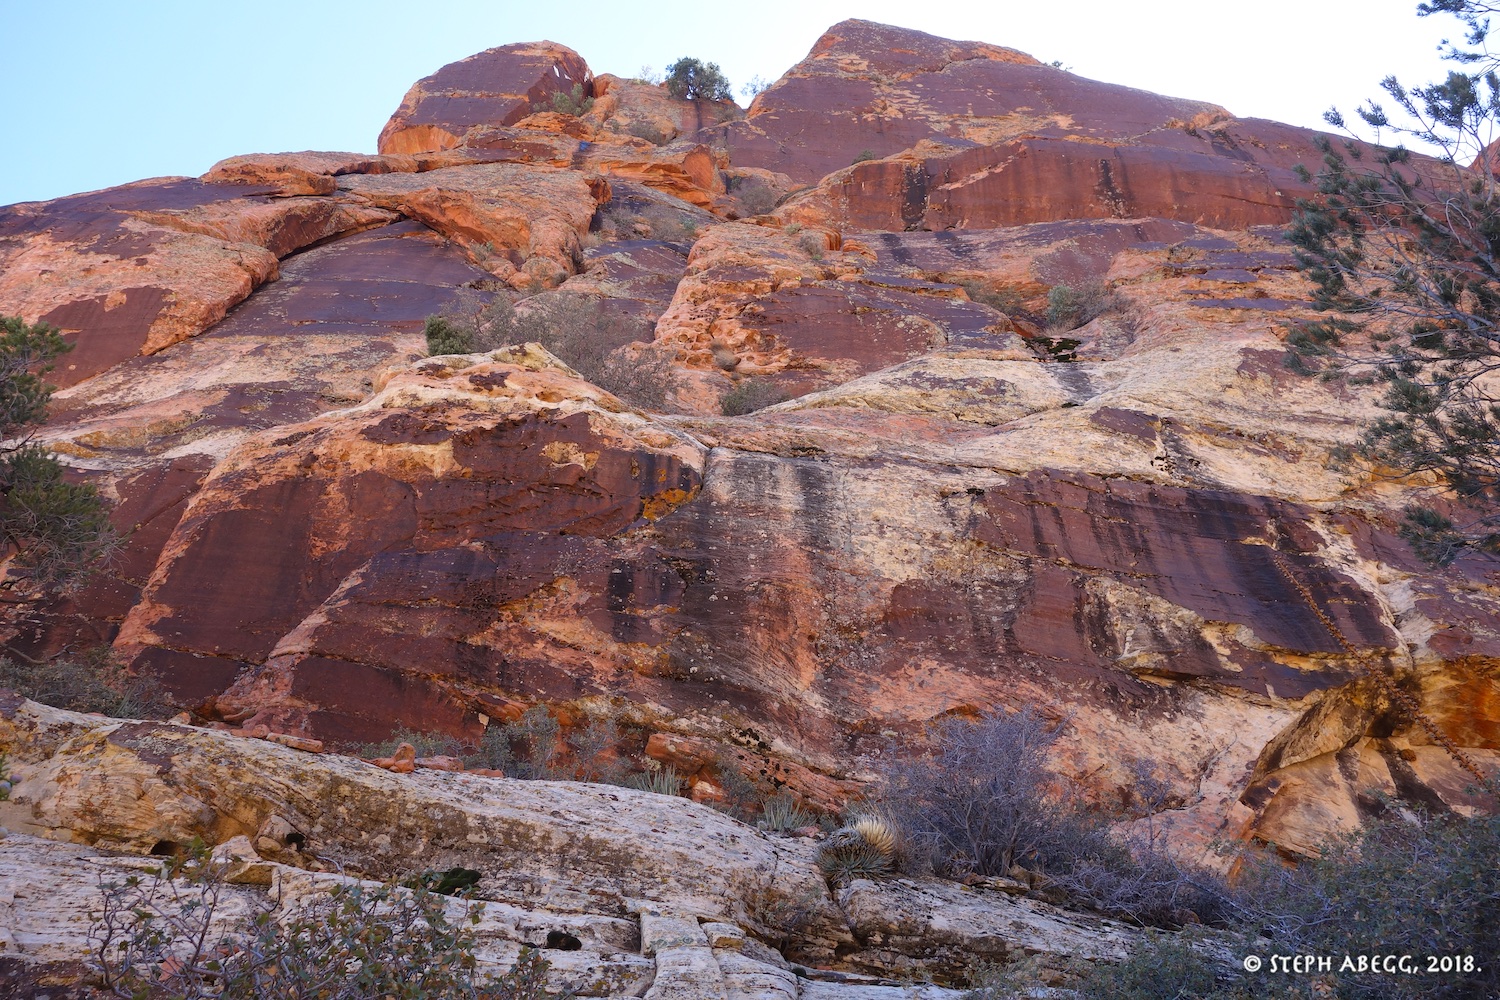
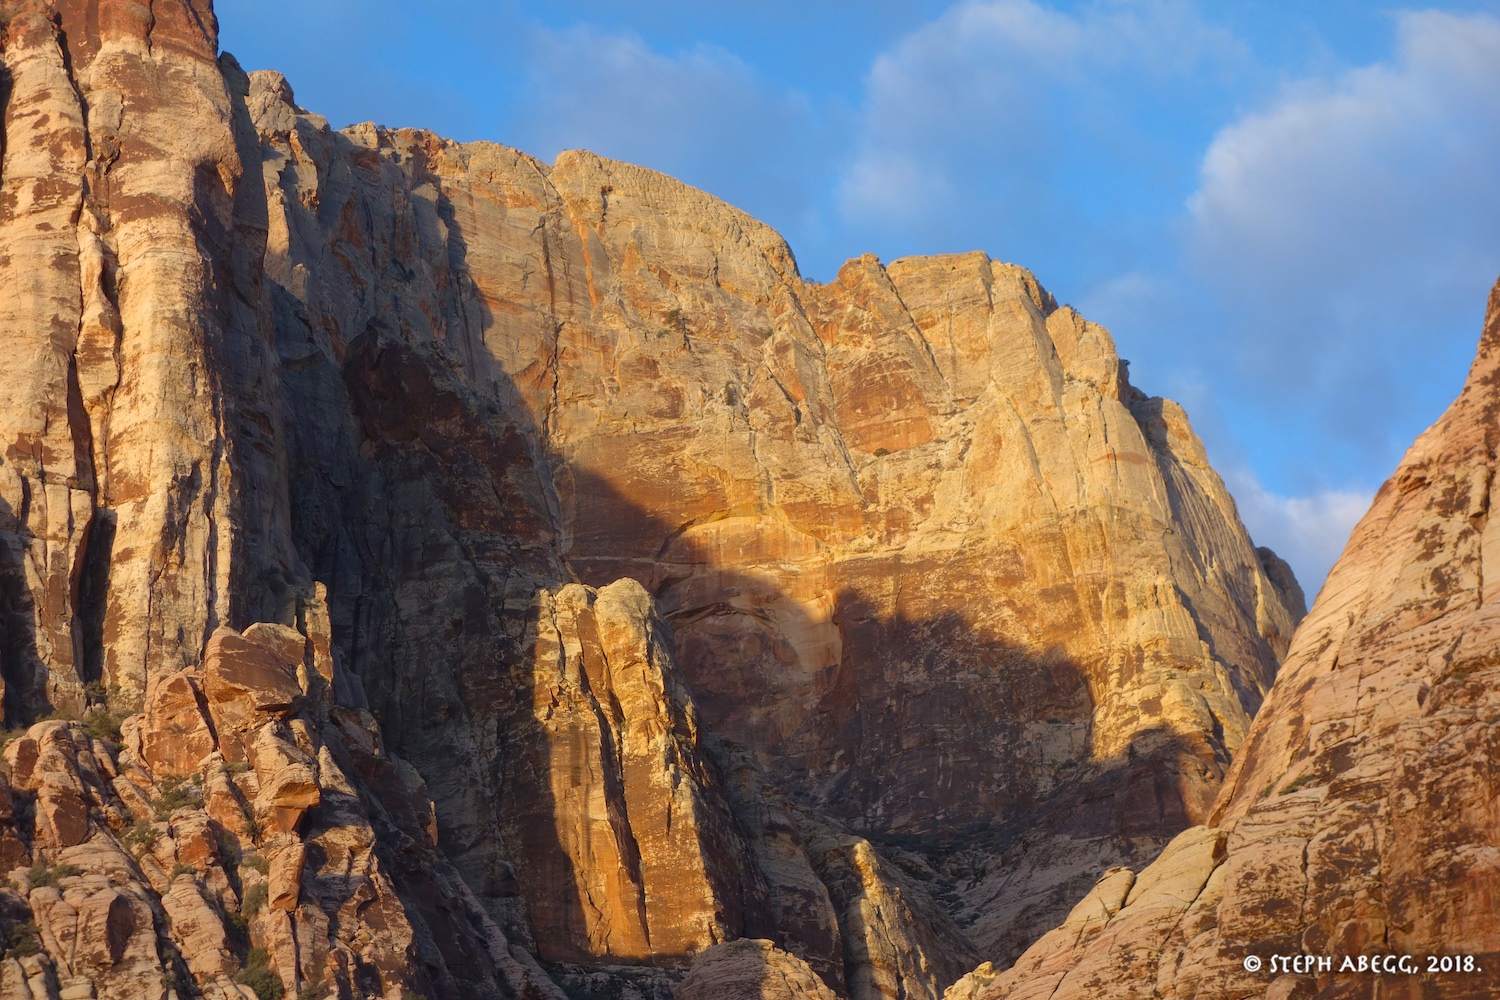
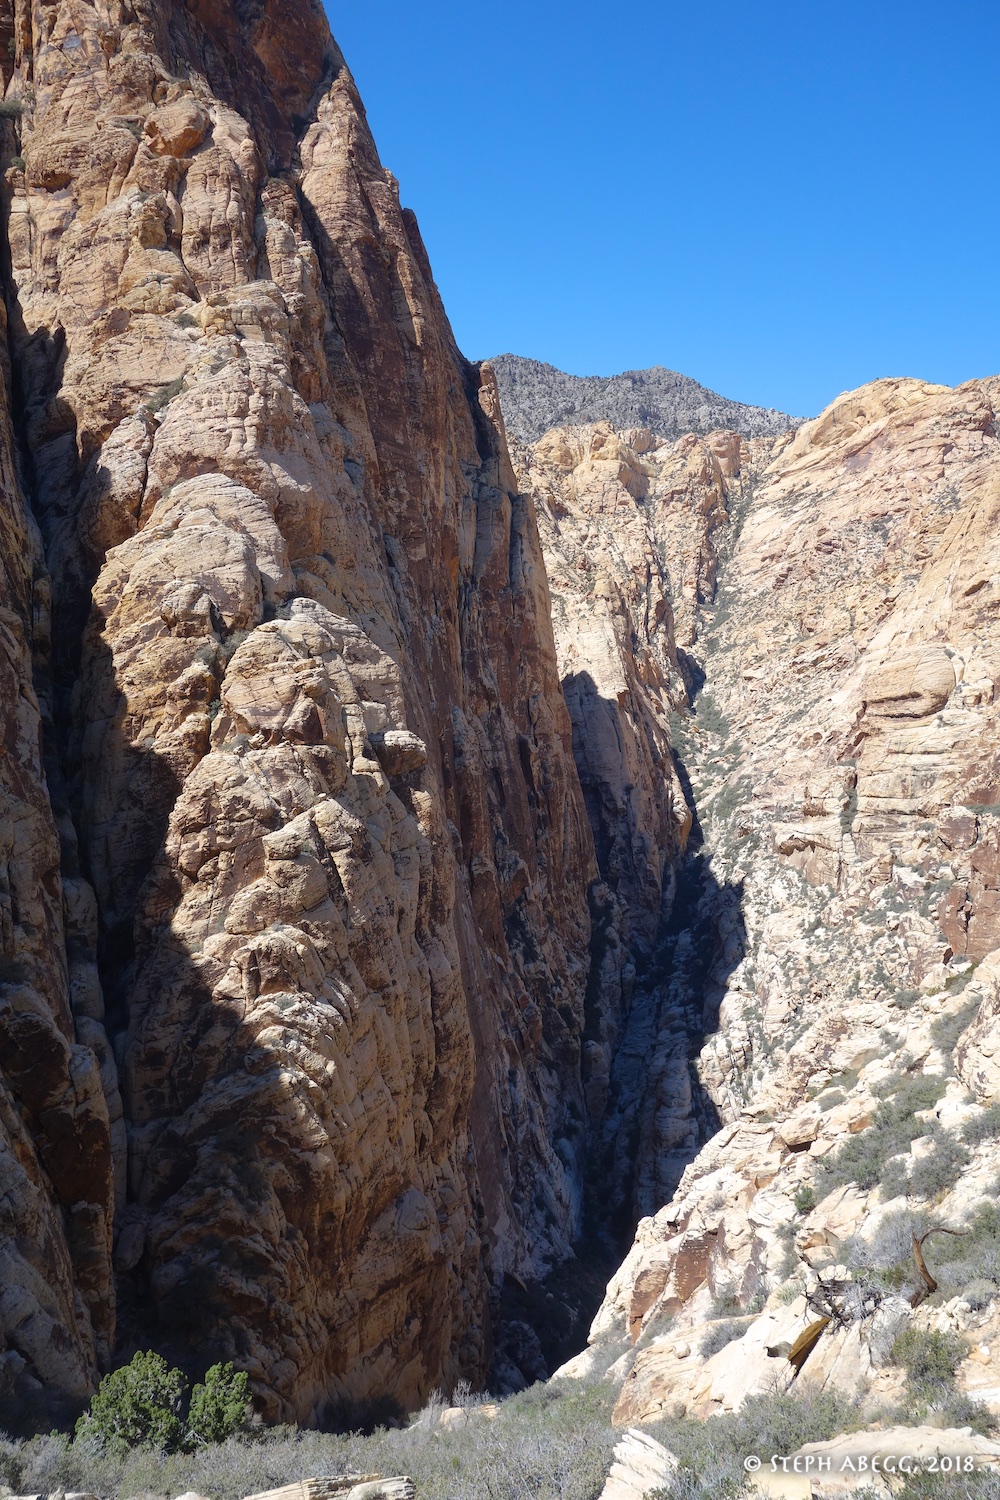
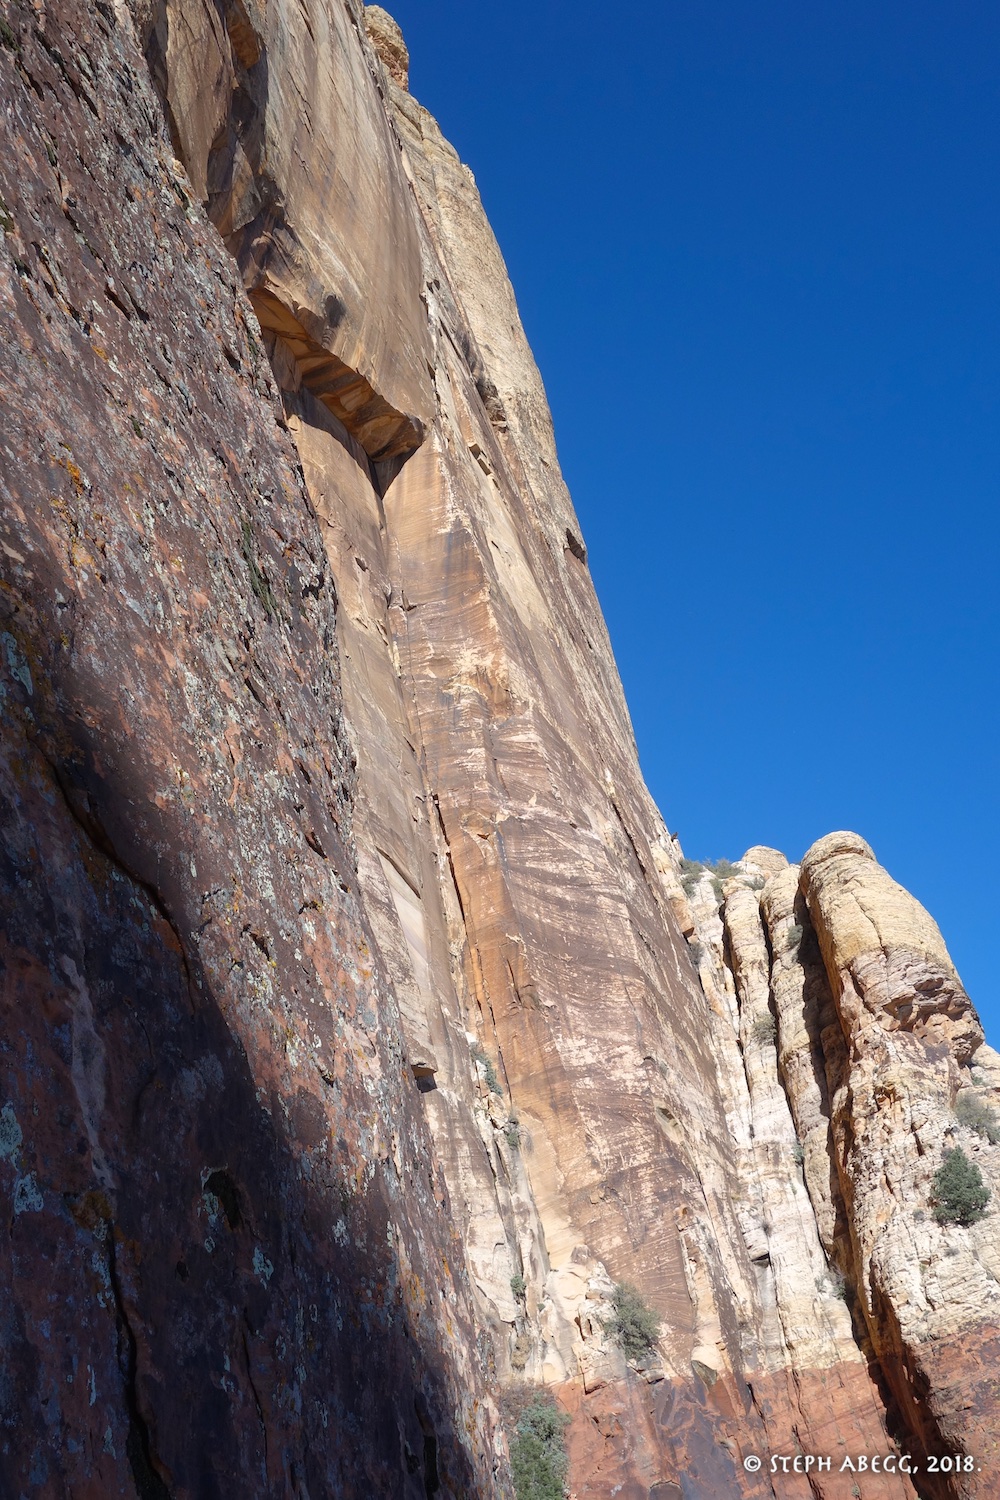
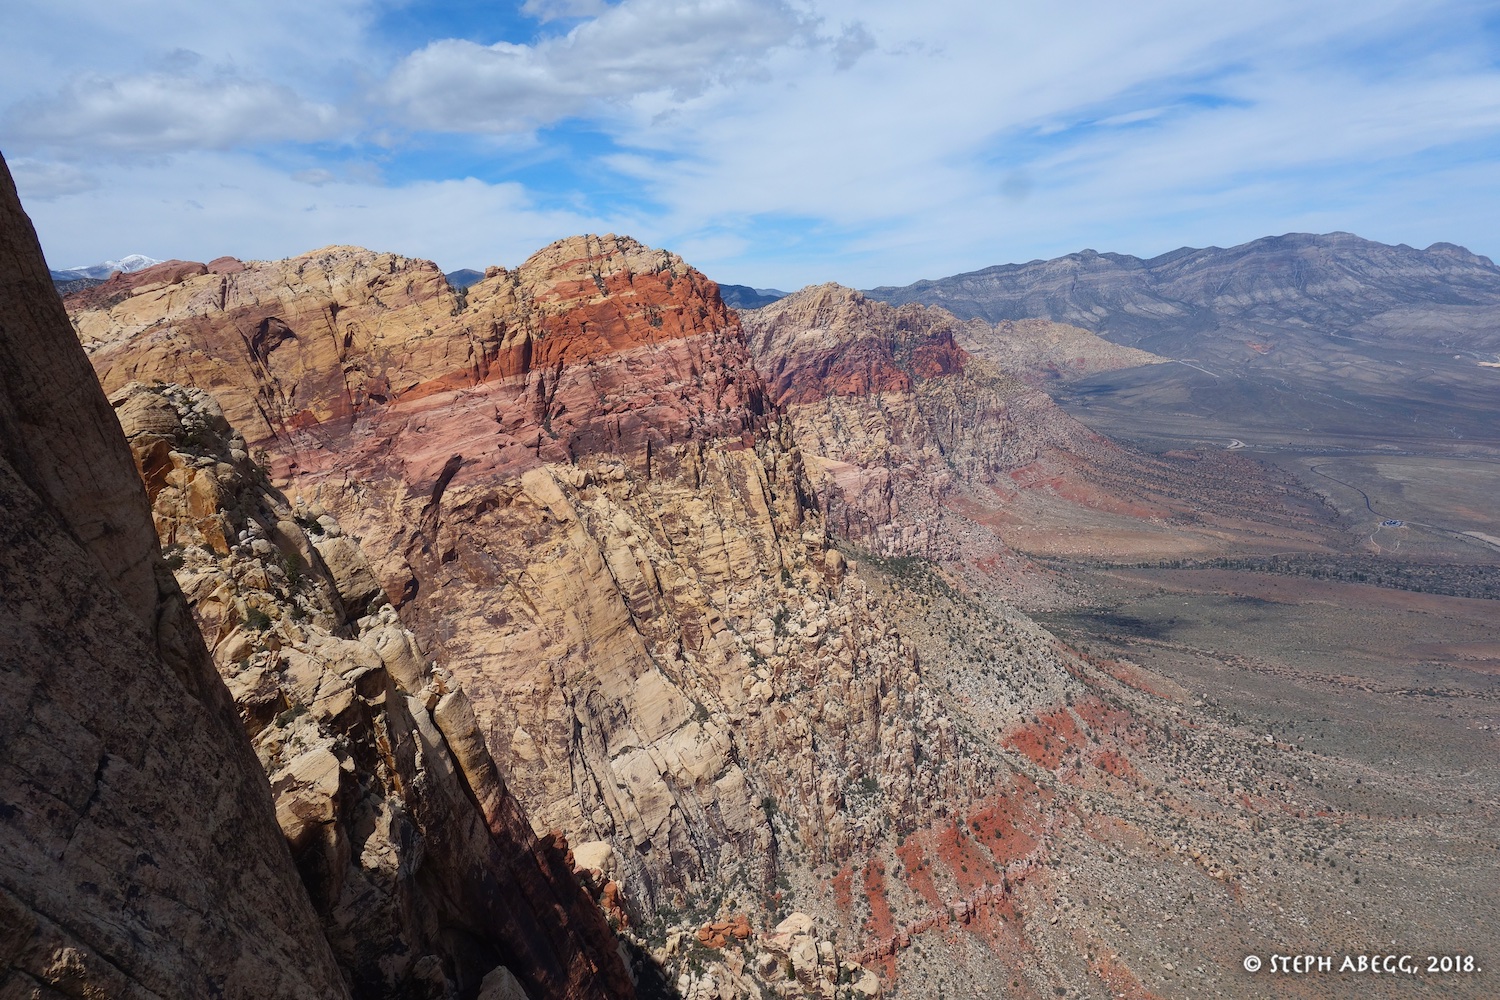
Morning sun on Juniper Canyon. Rainbow Wall is impressive.
PITCH
1 (5.7, 100')
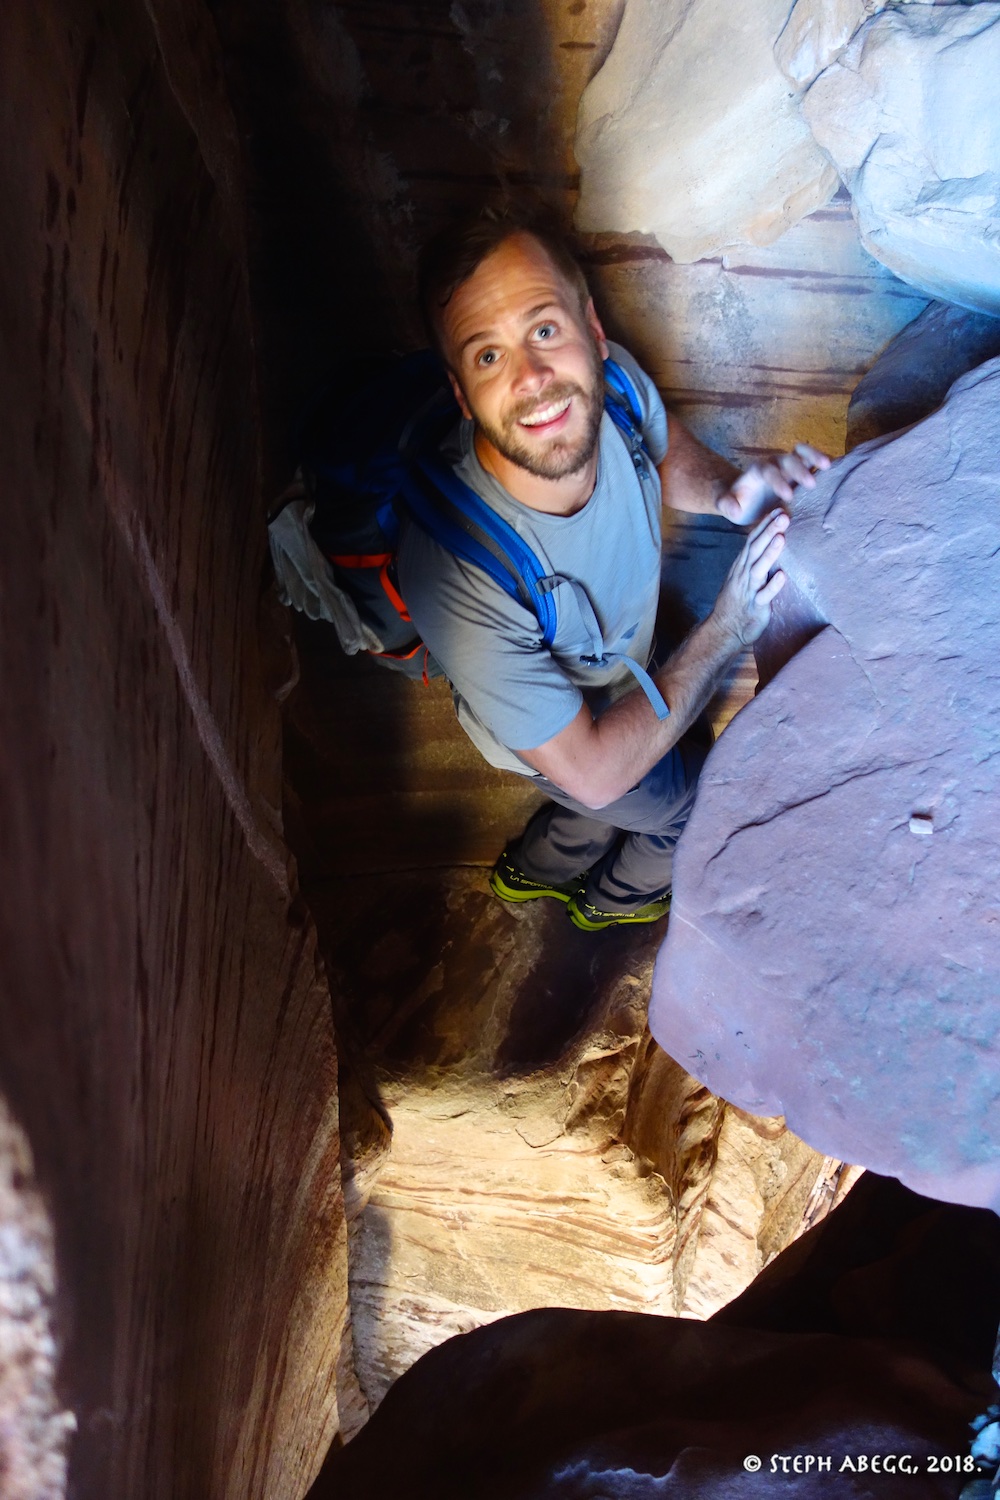
I felt like I was climbing a granite crack and chimney system on this pitch. Really fun climbing.
PITCH 2 (5.8, 150')
More excellent climbing with a funky 5.8 chimney. Lots of fixed cams for some reason.
PITCH 3 (5.7, 90')
More fun crack.
PITCH 4 (5.9, 140')
This is the crux pitch of the route. There are a few bolts to protect the crux.
PITCH 5 (5.8, 180')
The crack didn't look like much from below but was pretty fun. Gets a bit mungy 4th at the top of the pitch, with questionable rock quality. Belay off a tree at the top of this pitch (the only anchors without bolts is this one and the one at the top notch).
PITCH 6 (4th, 160')
The only throw-away pitch of the route. 4th class to a bolted anchor on a ledge you have to beached-whale onto.
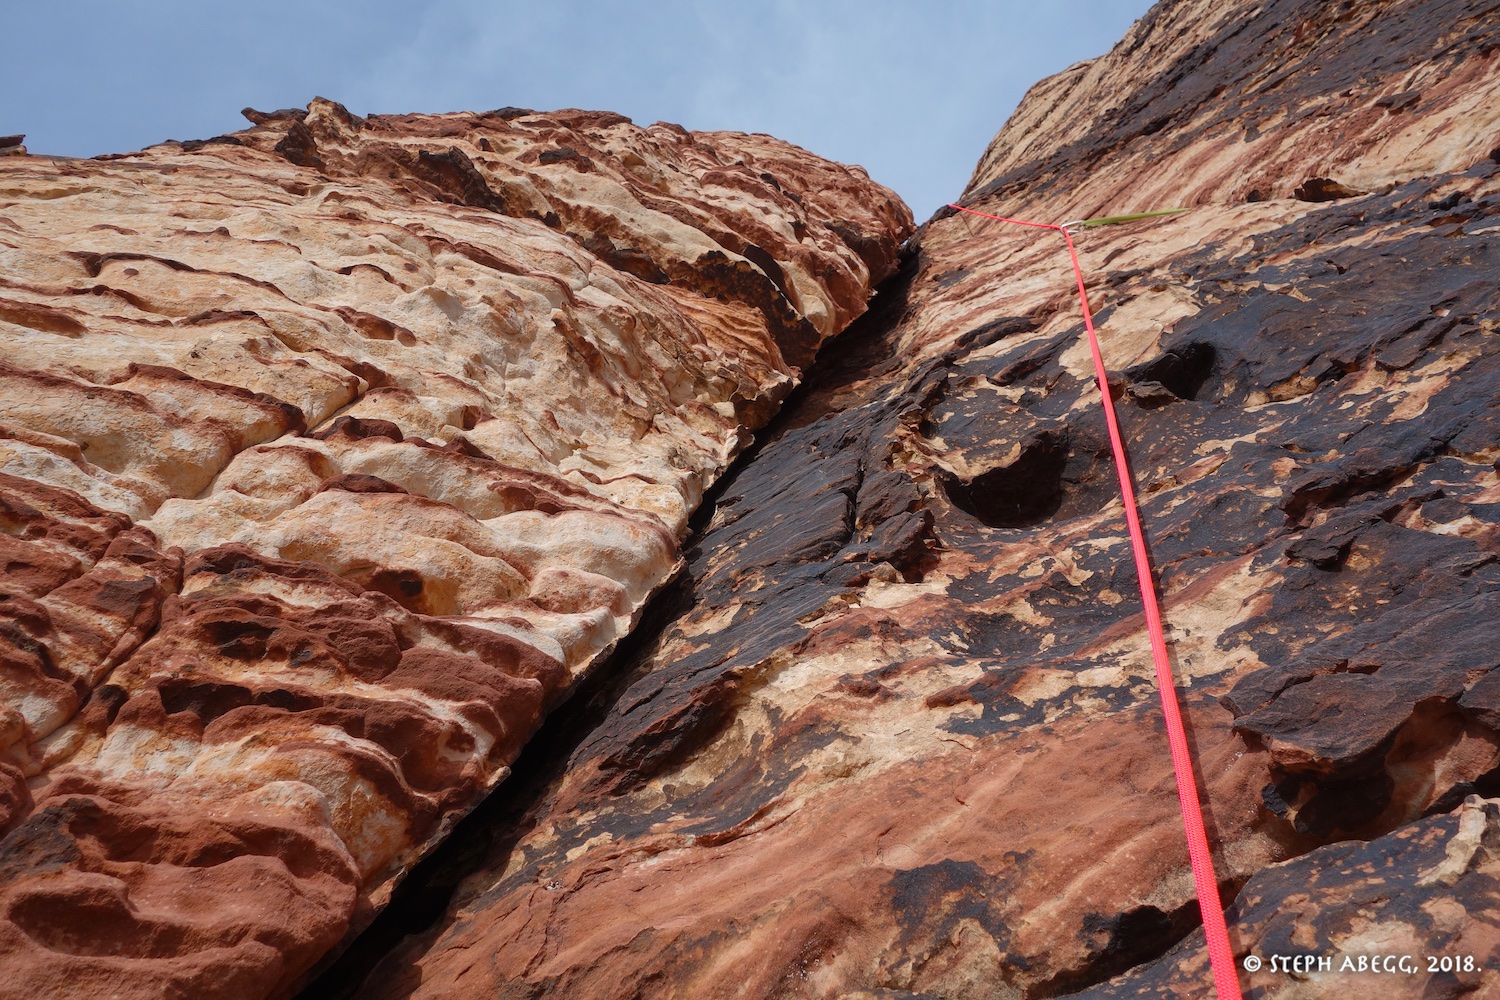
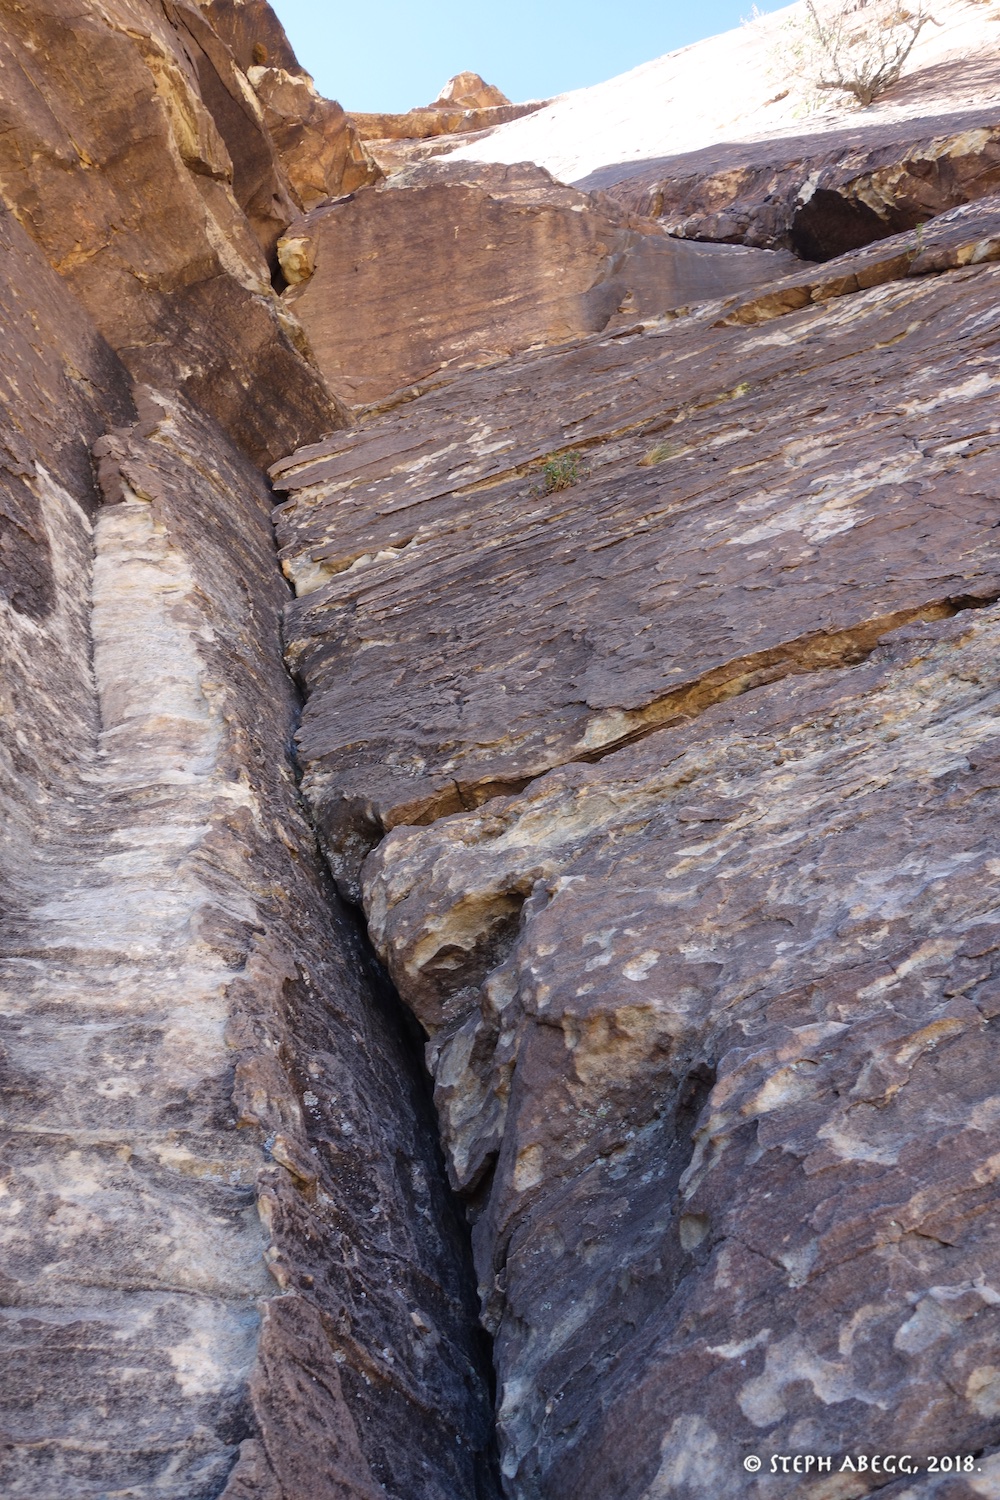
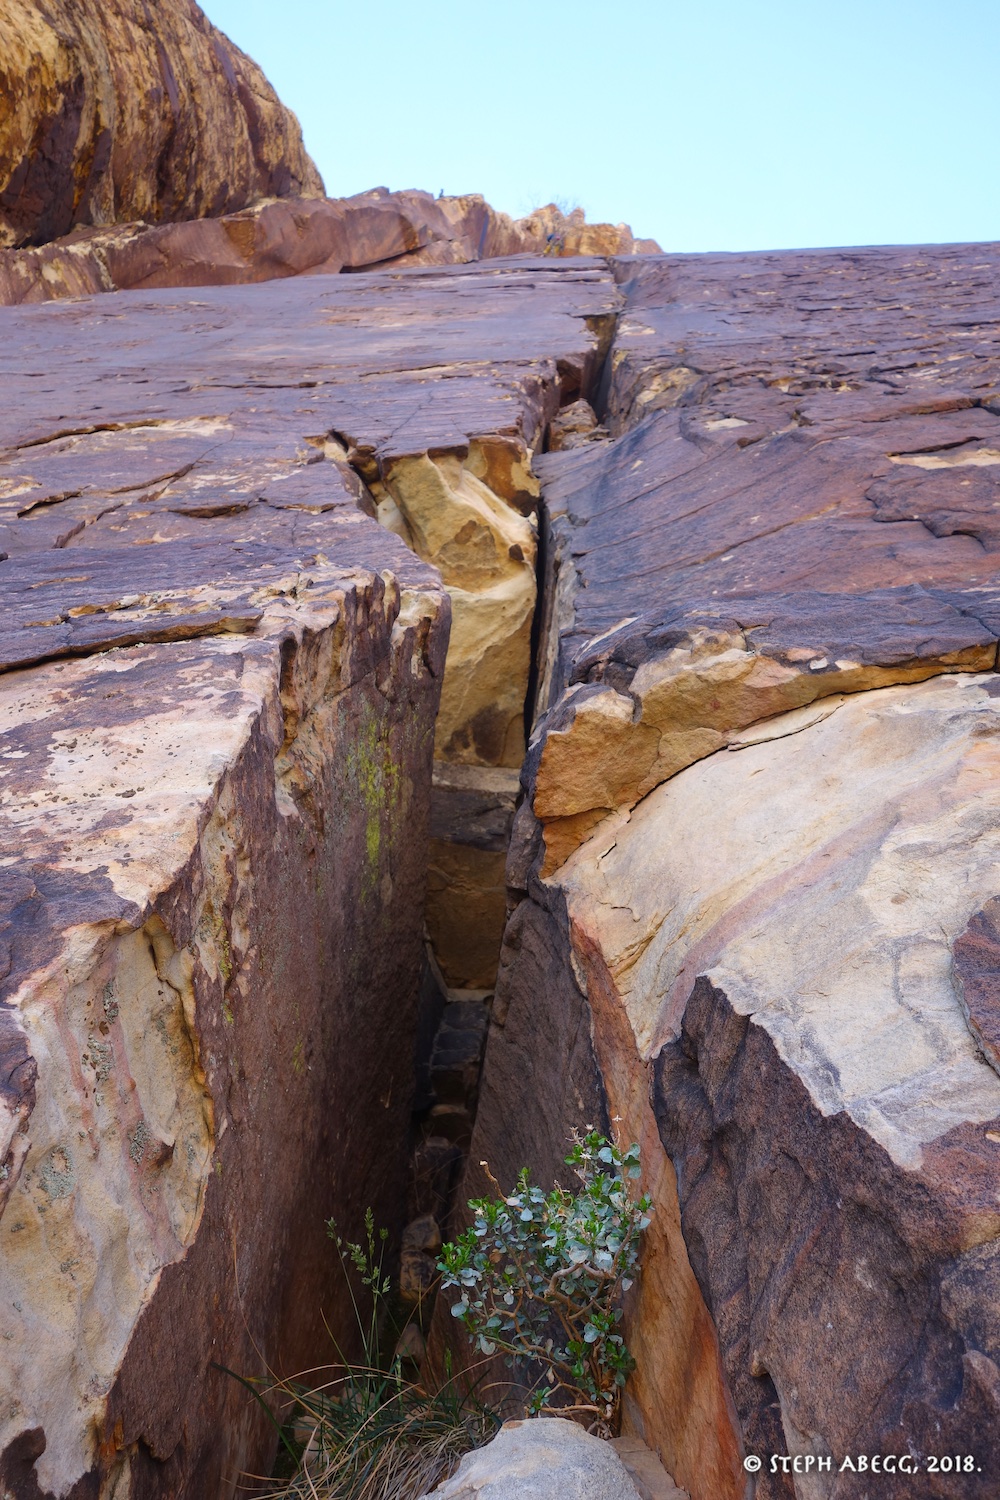
PITCH 7 (5.6, 120')
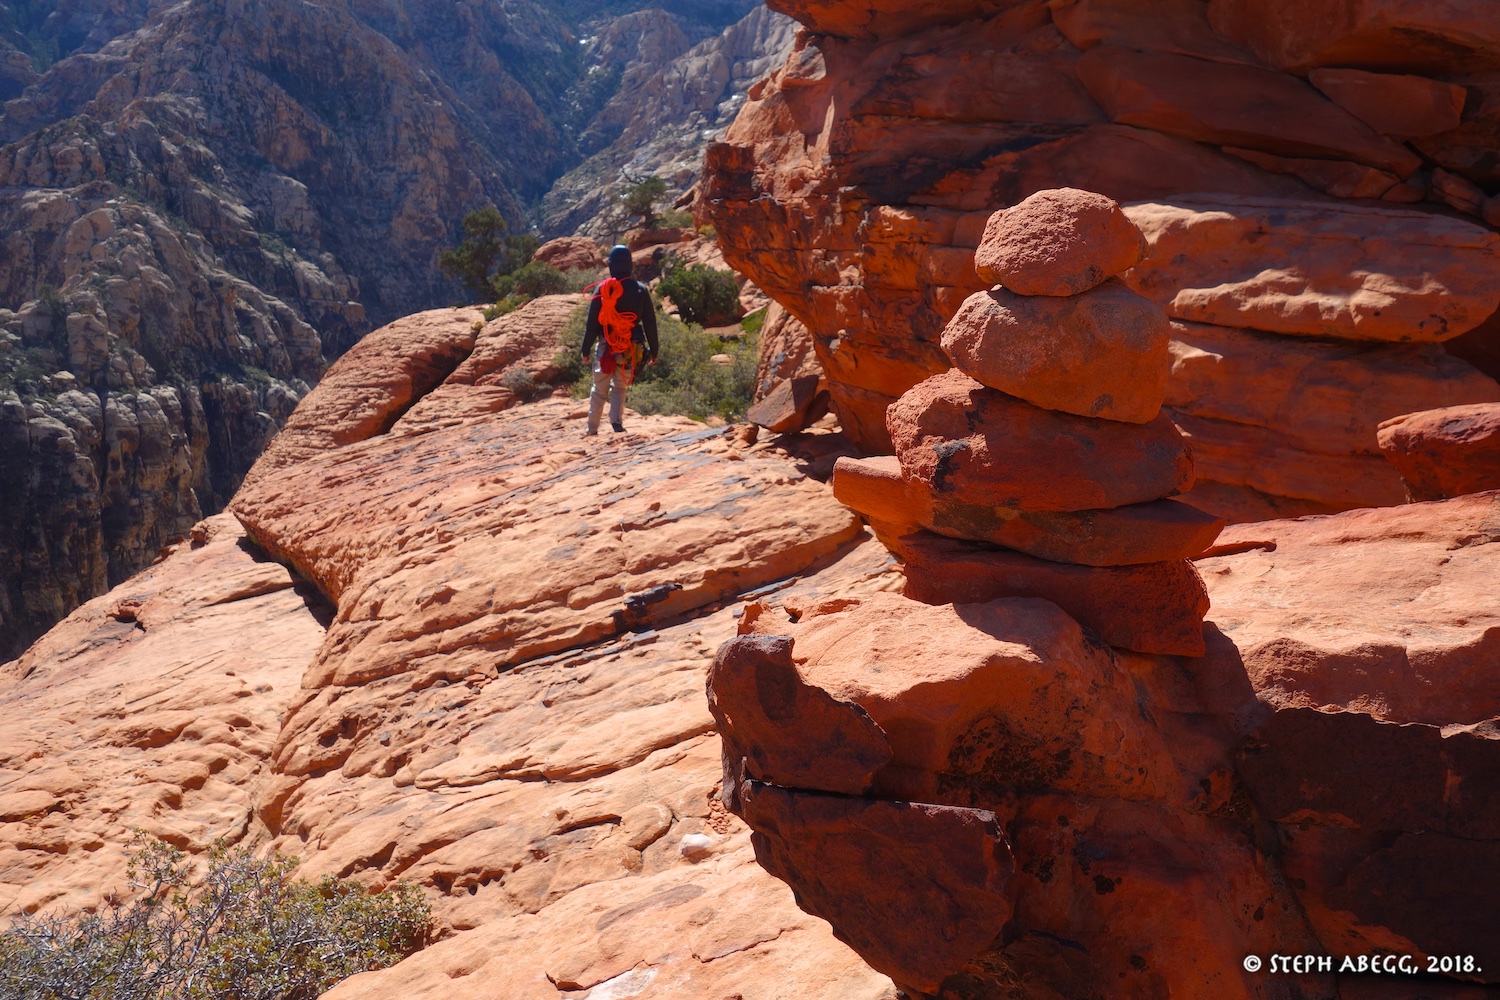
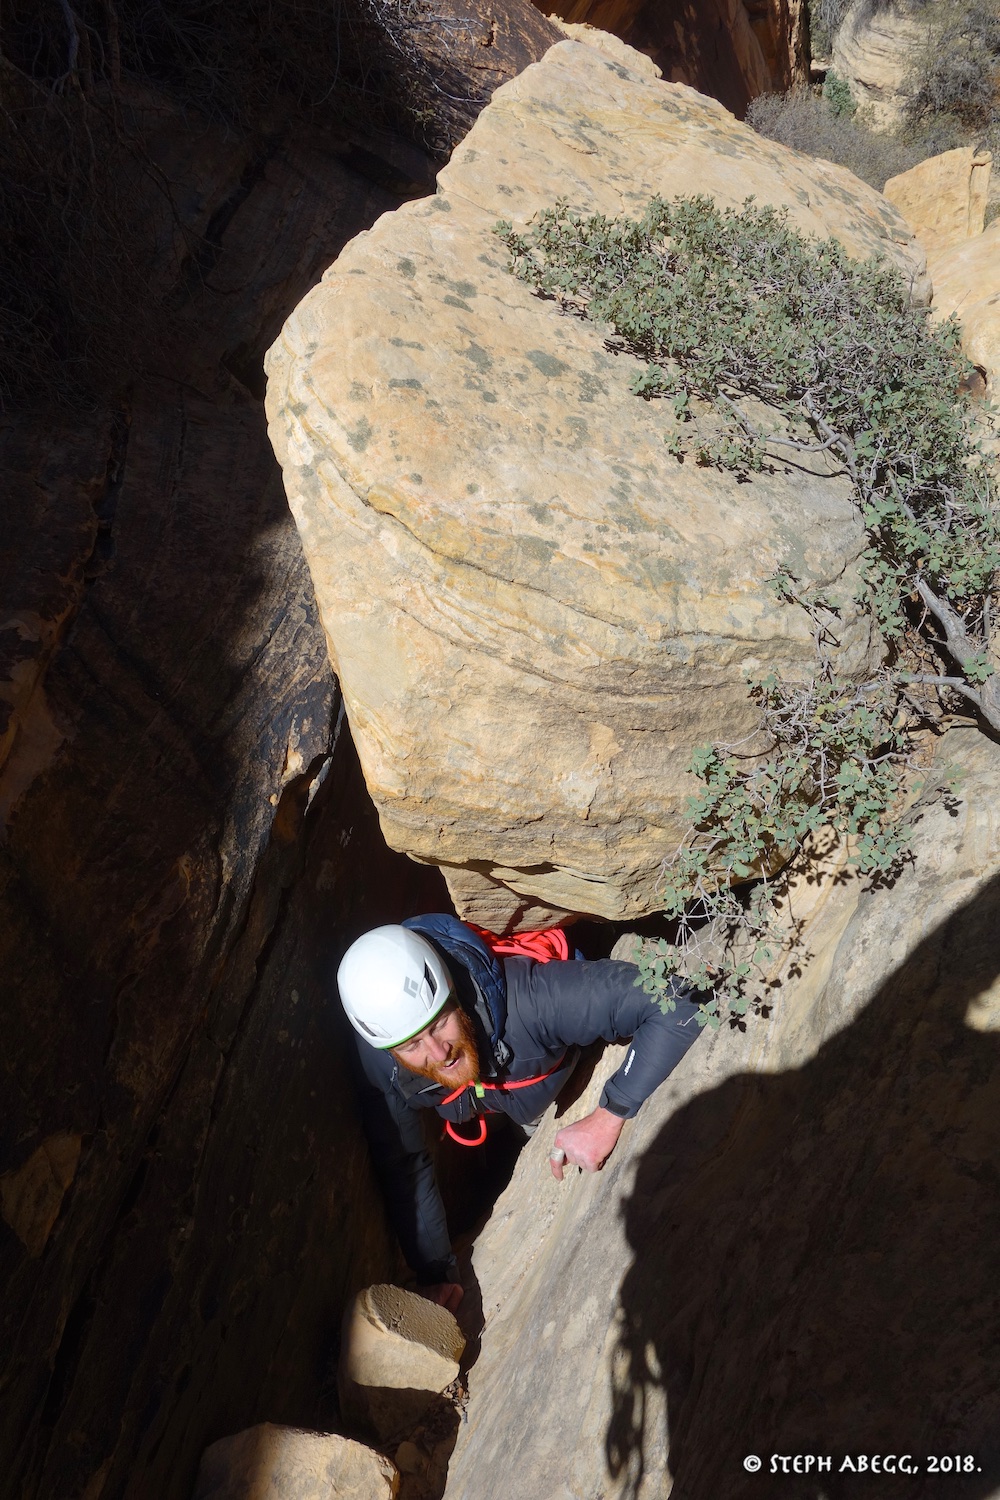
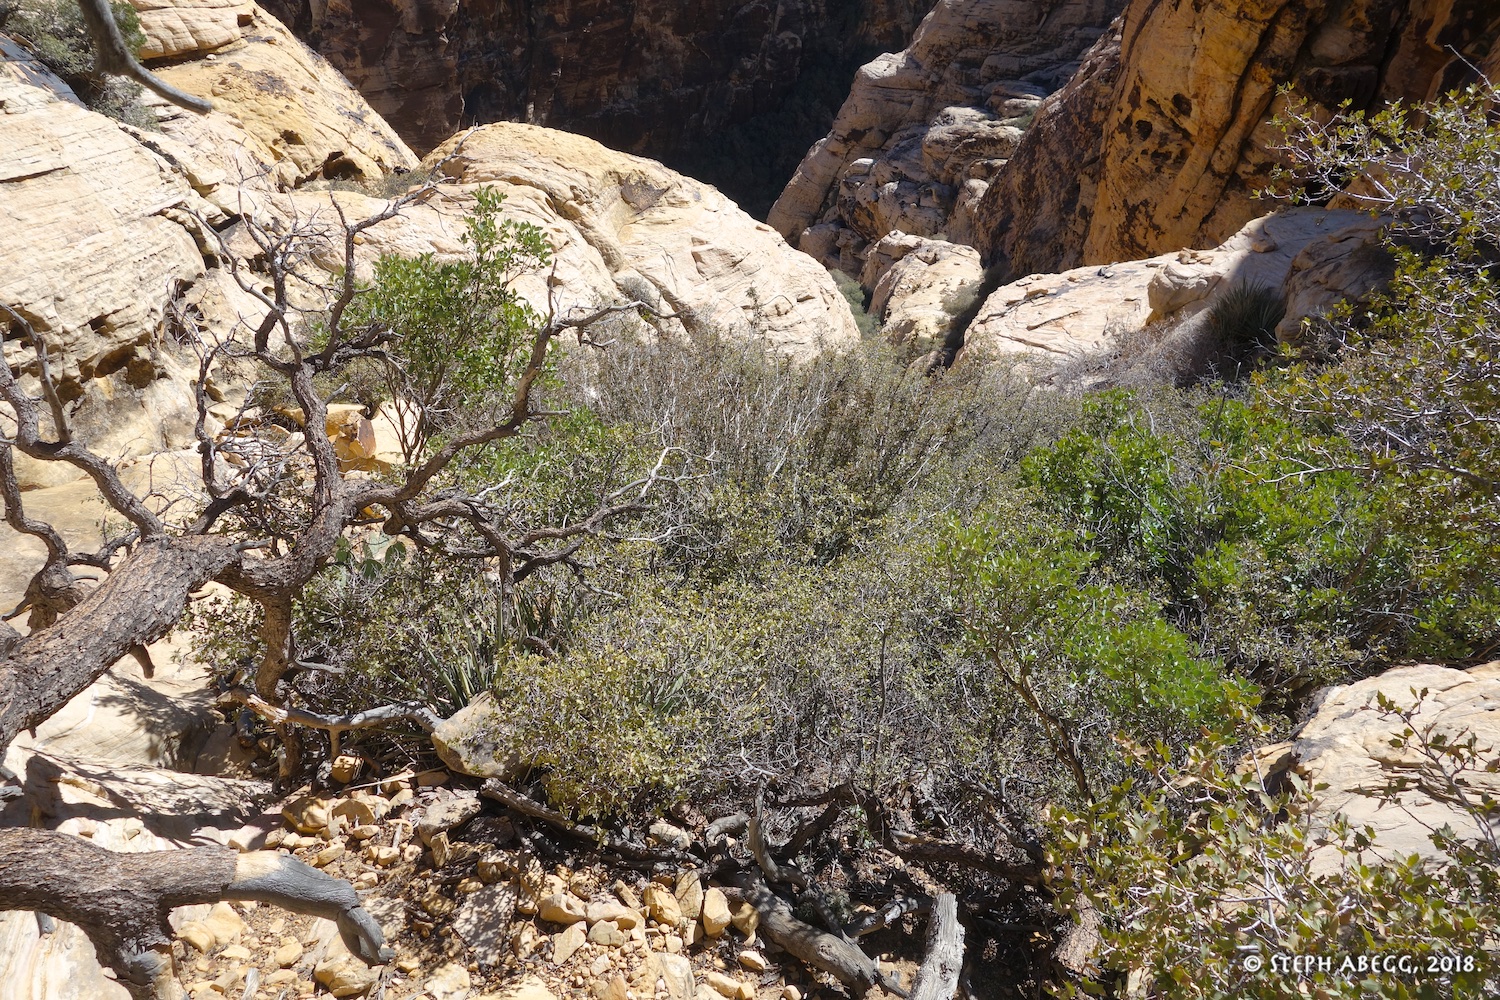
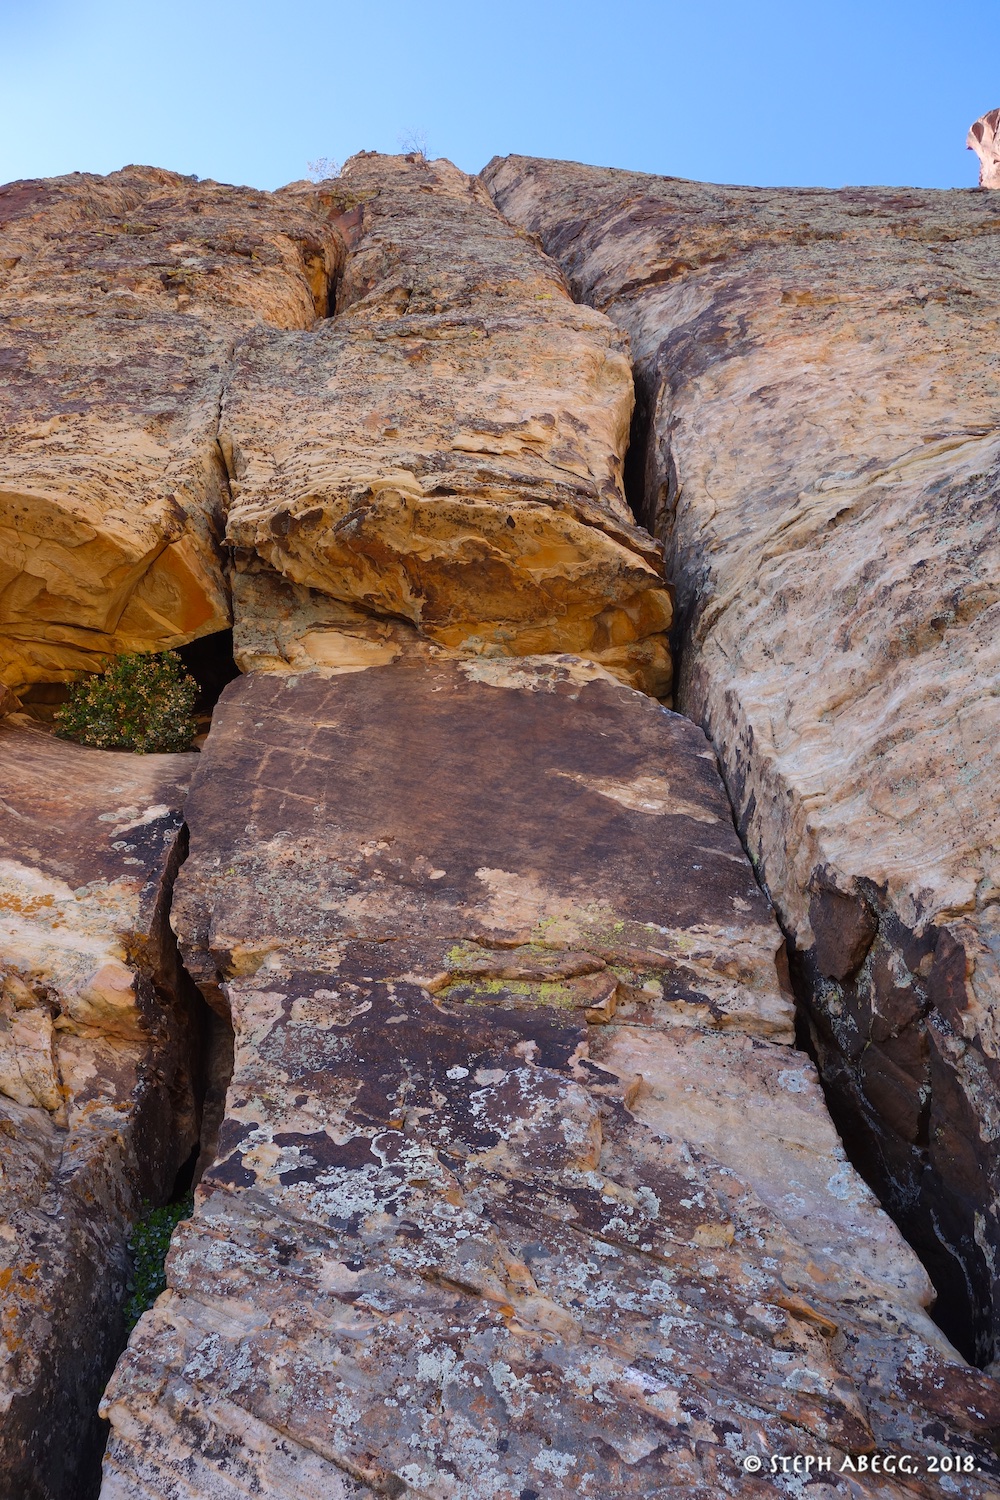
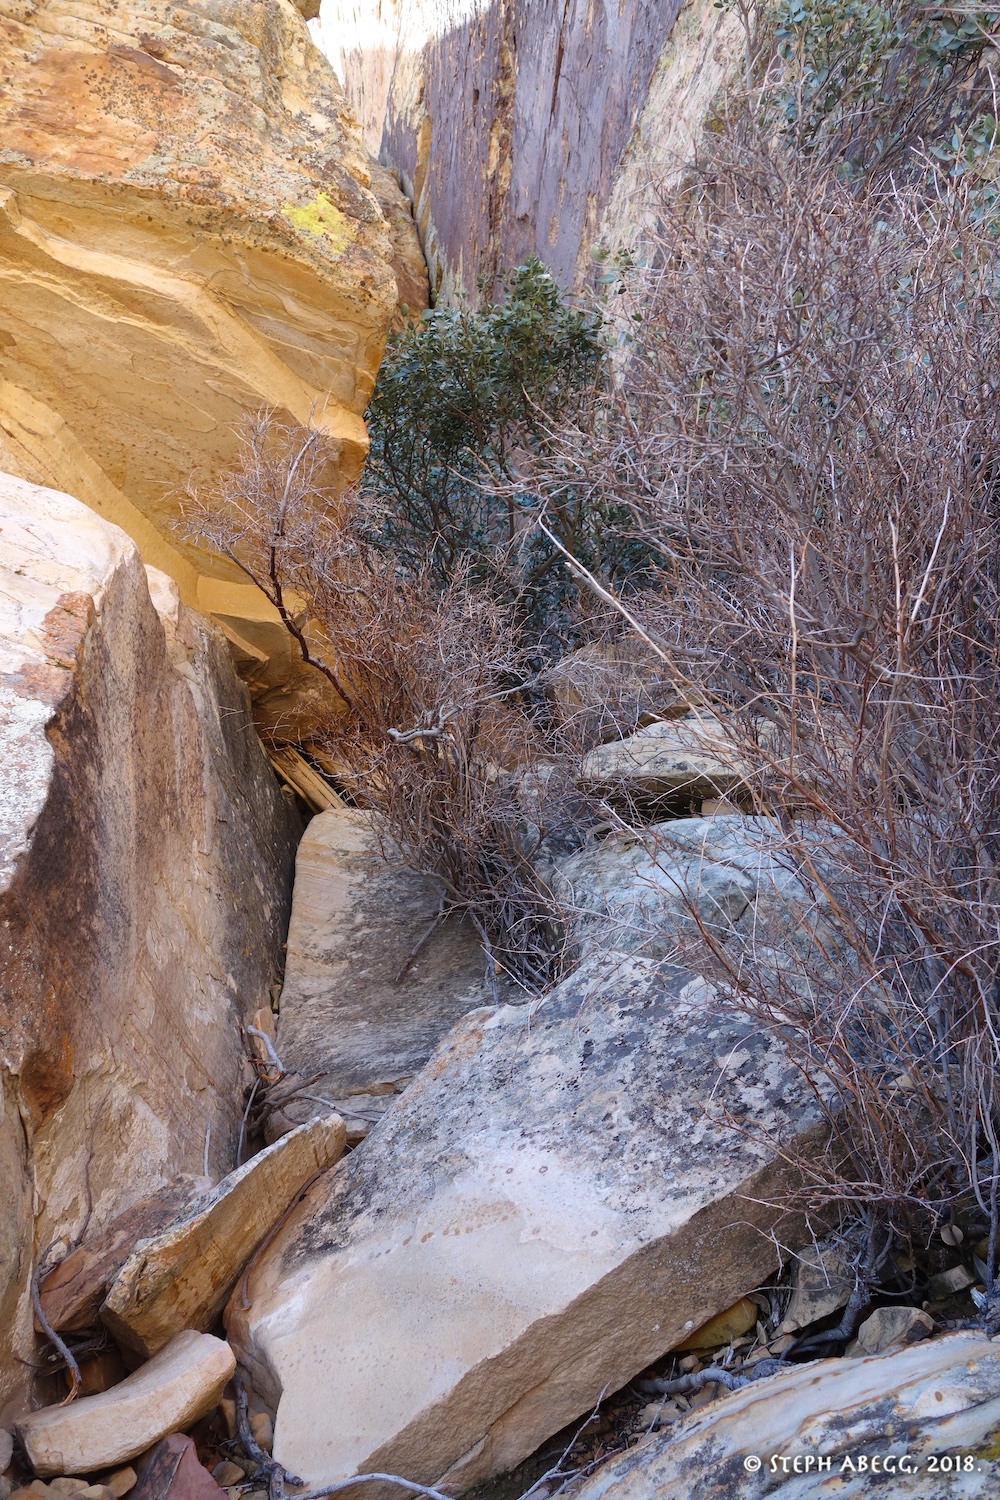
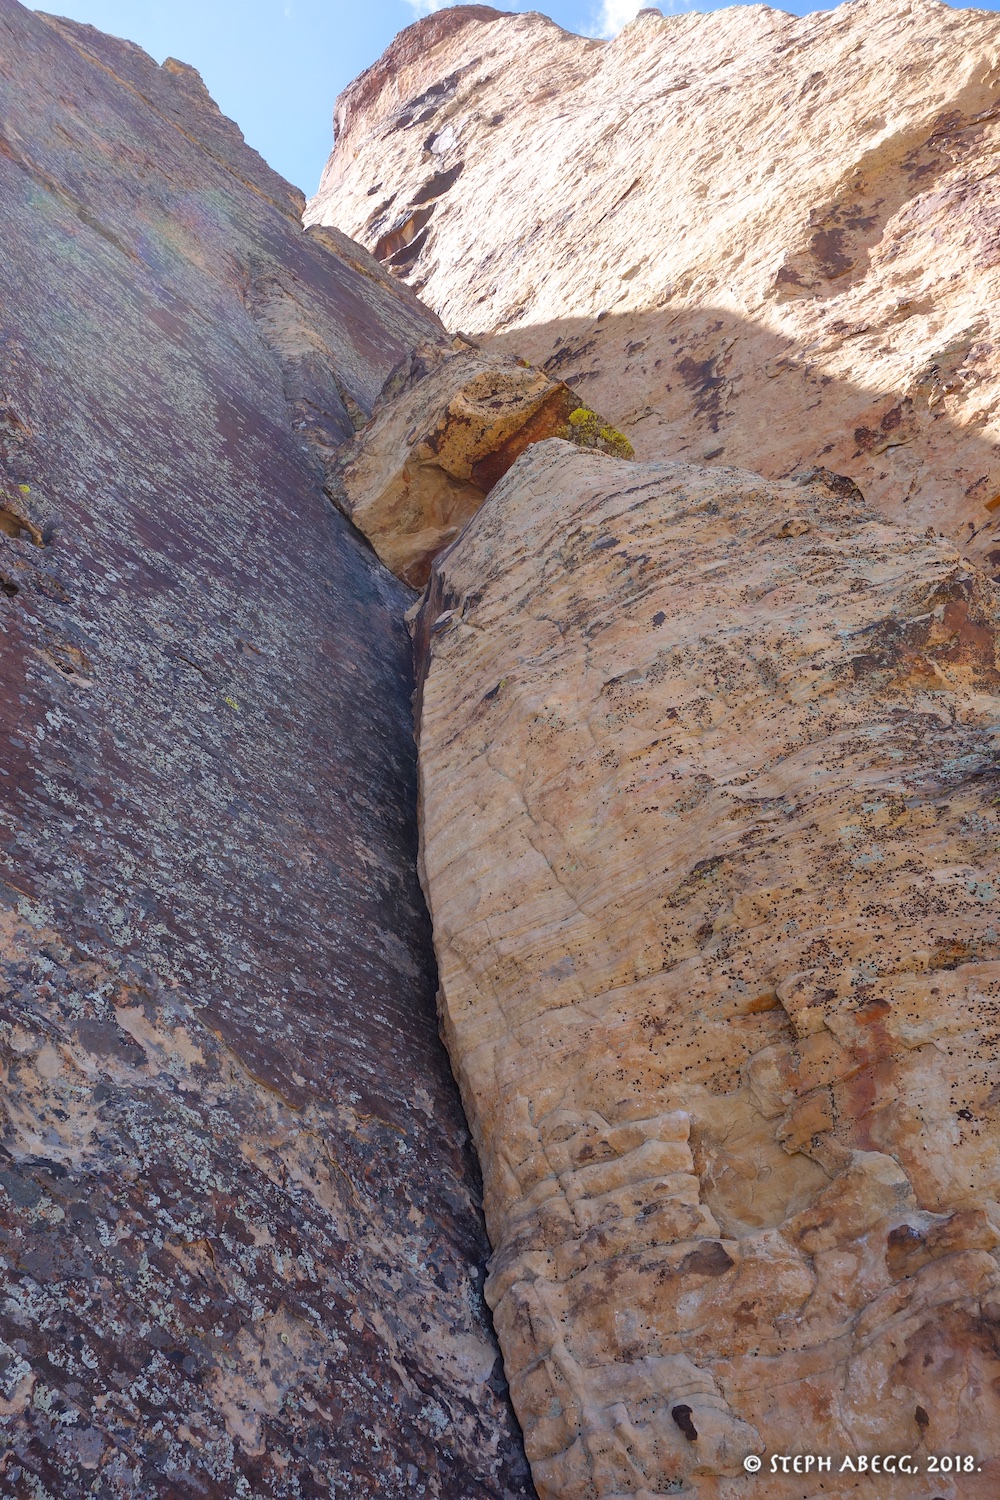
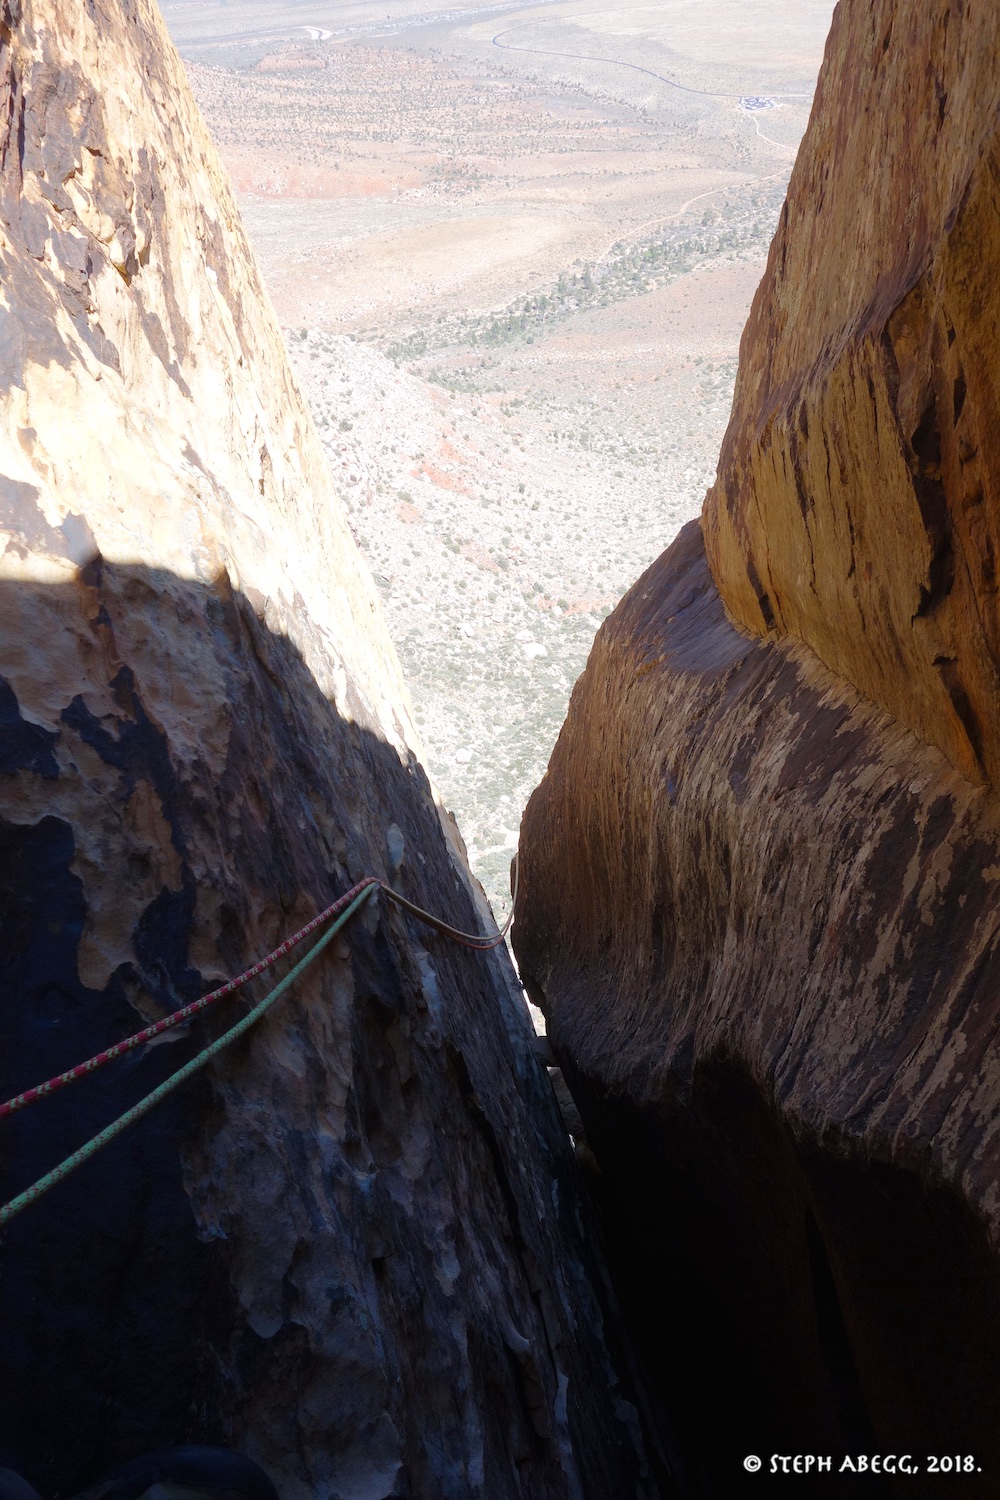
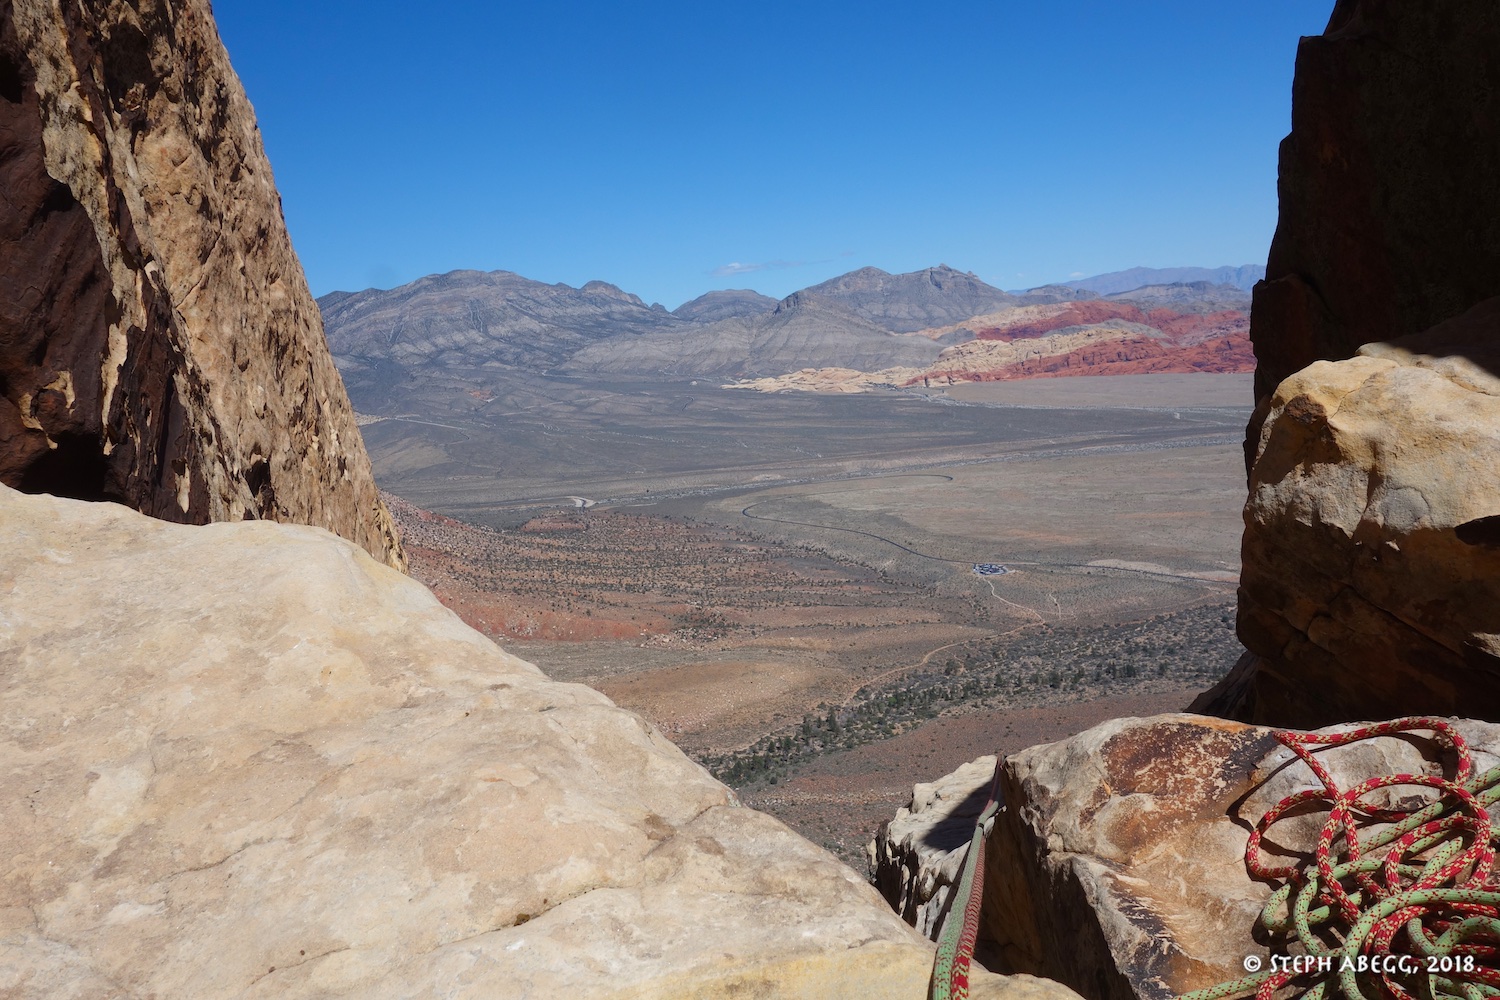
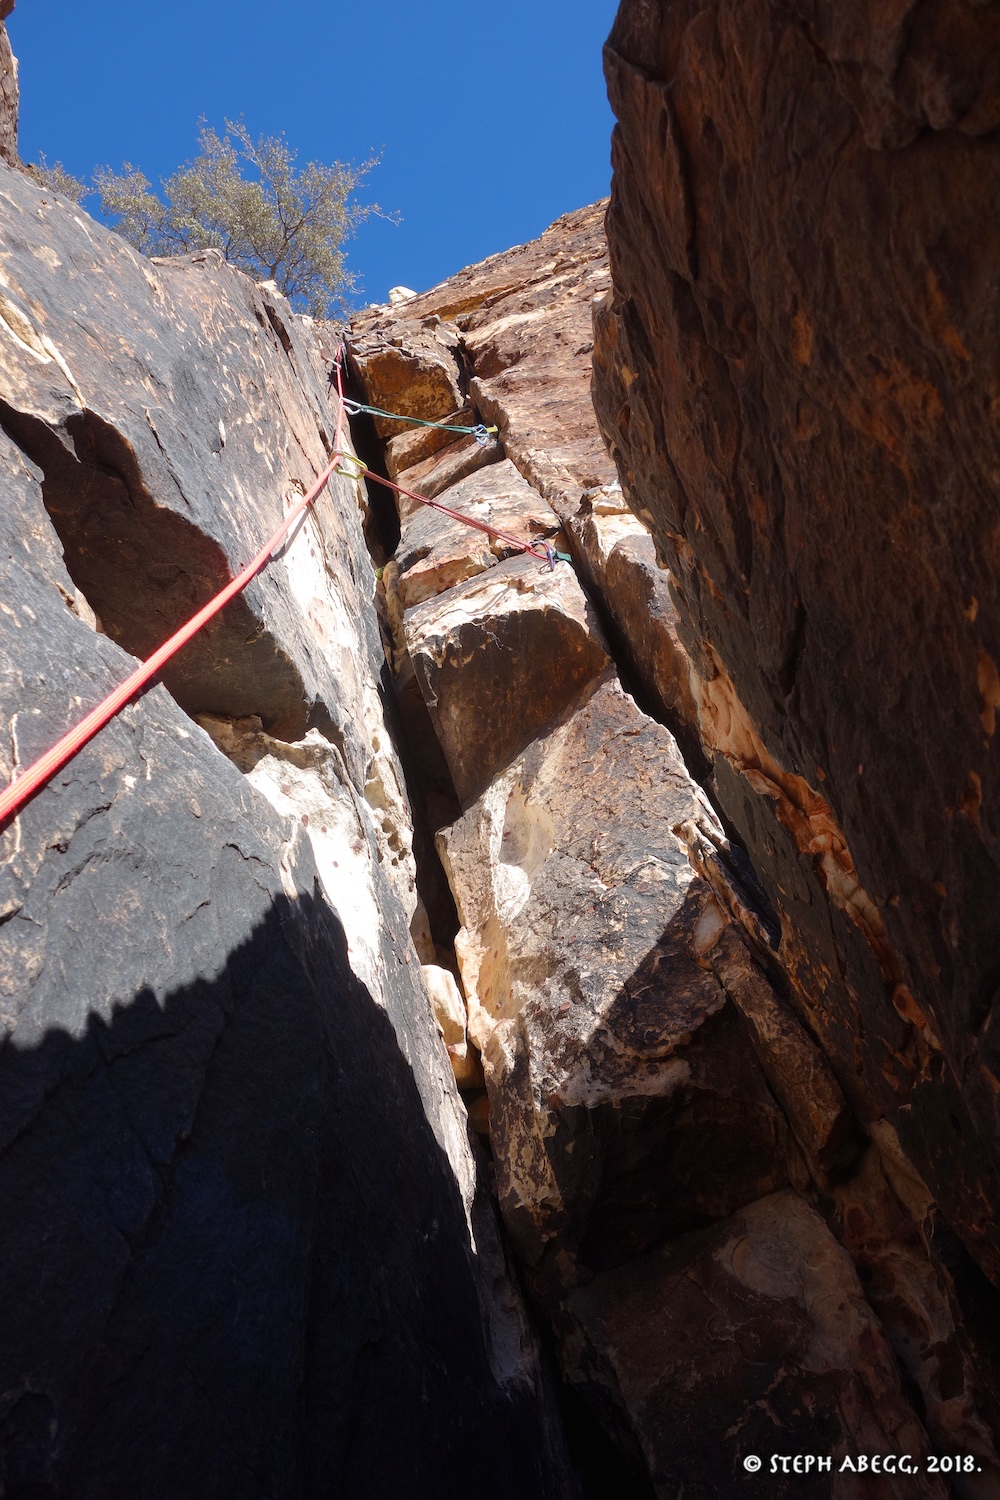
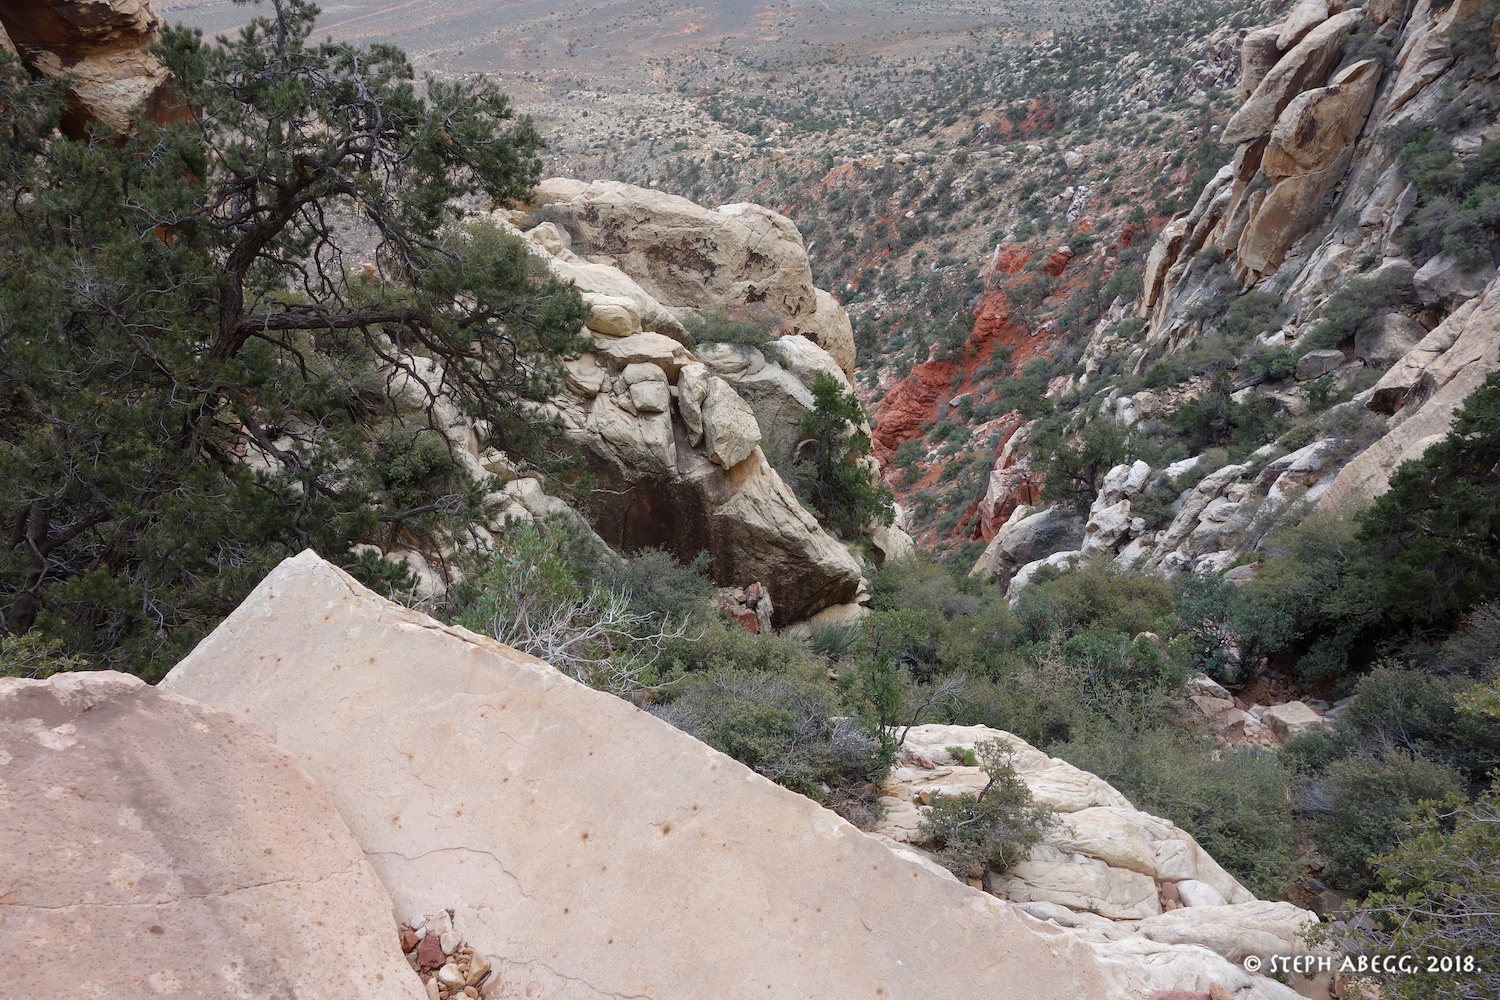
This is a fun pitch, climbing crack and corner to the notch. Make sure to step left for the final 30 feet to the notch, rather than being suckered into the chasm (second photo).
DESCENT
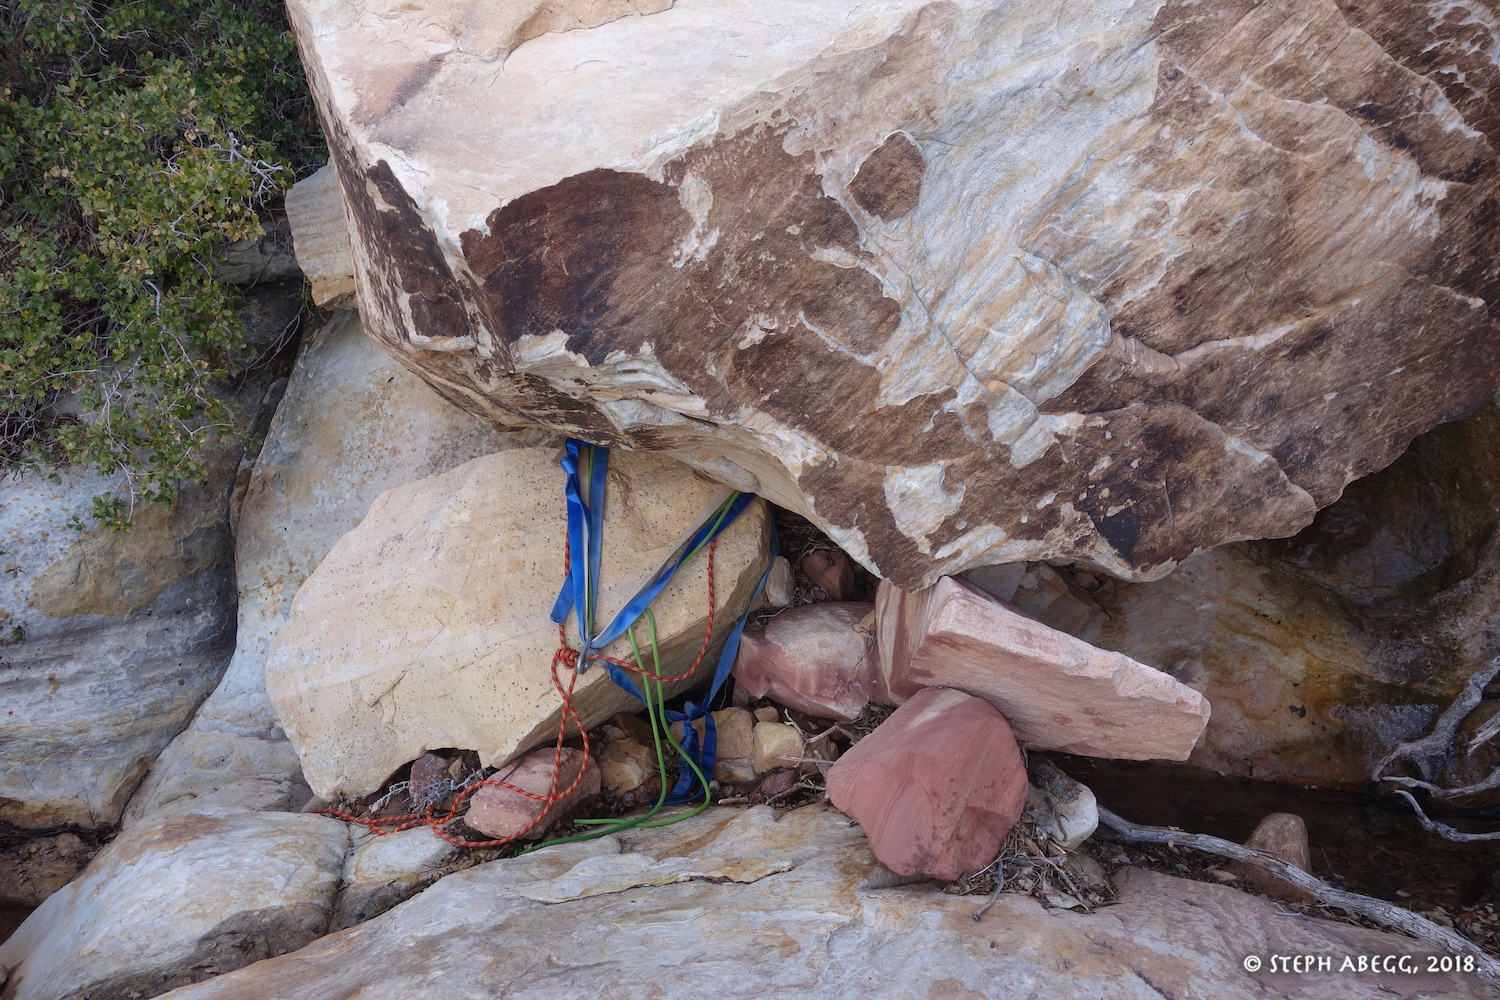
(Rap down Power Failure with 2 ropes)
The descent entails a rappel from the notch to the bowl below (might be best to use a single rope here to avoid knocking rocks down or getting a rope stuck), then 2 double rope rappels down Power Failure. All beta we had read said 3 double rope rappels down Power Failure, but we easily made it in 2. Perhaps we used different rap anchors (the ones we used for the 2nd rappel were in the middle of the waterstreak about 50-55m down). Be careful about kicking rocks down as you descend the bowl to the rap anchors at the top of Power Failure.
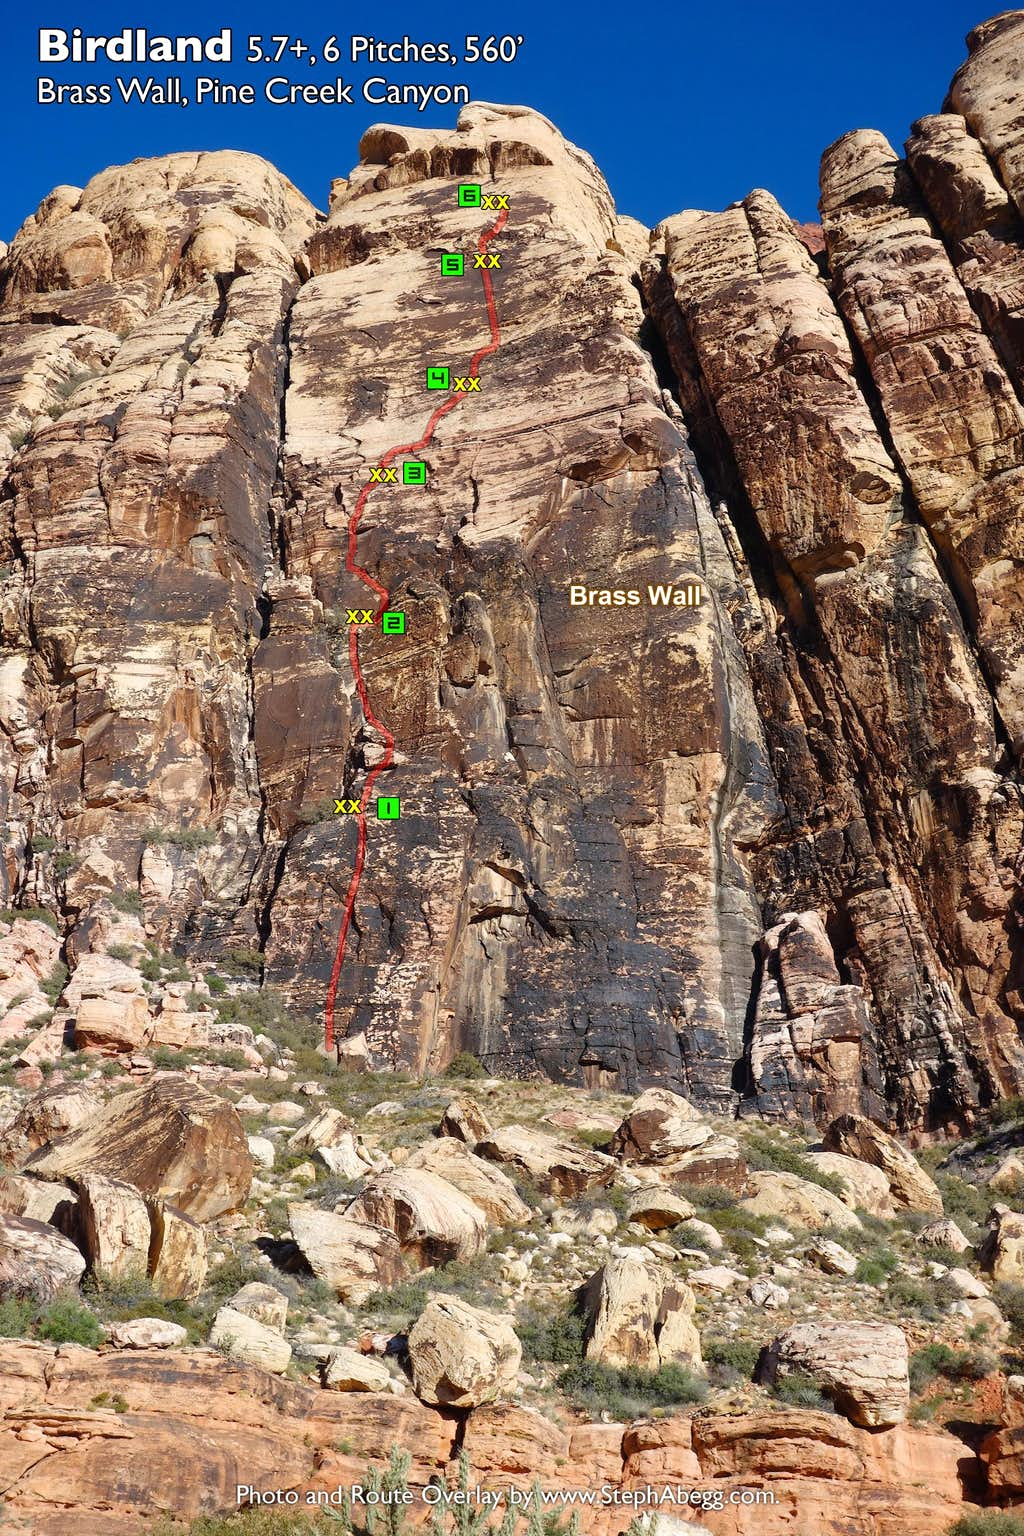
This is a classic Red Rocks route, featuring moderate climbing on solid rock featuring a beautiful fingercrack on the 5th pitch, a mellow approach and descent, and sunny exposure. Unfortunately, the pleasure of this route is compromised by the typical $#!%-show of newbie crowds made doubly worse by the fact that to descend you have to rappel through them (there were at least a dozen parties on it when we climbed it, on a Tuesday). This would be a great climb to do on a moonlit night.
FA: Mark Limage & Chris Burton, 2001.
Route Overlay
Pitch-by-Pitch Photos
(Pitches as per Handren guide)
Photos:
Notes:
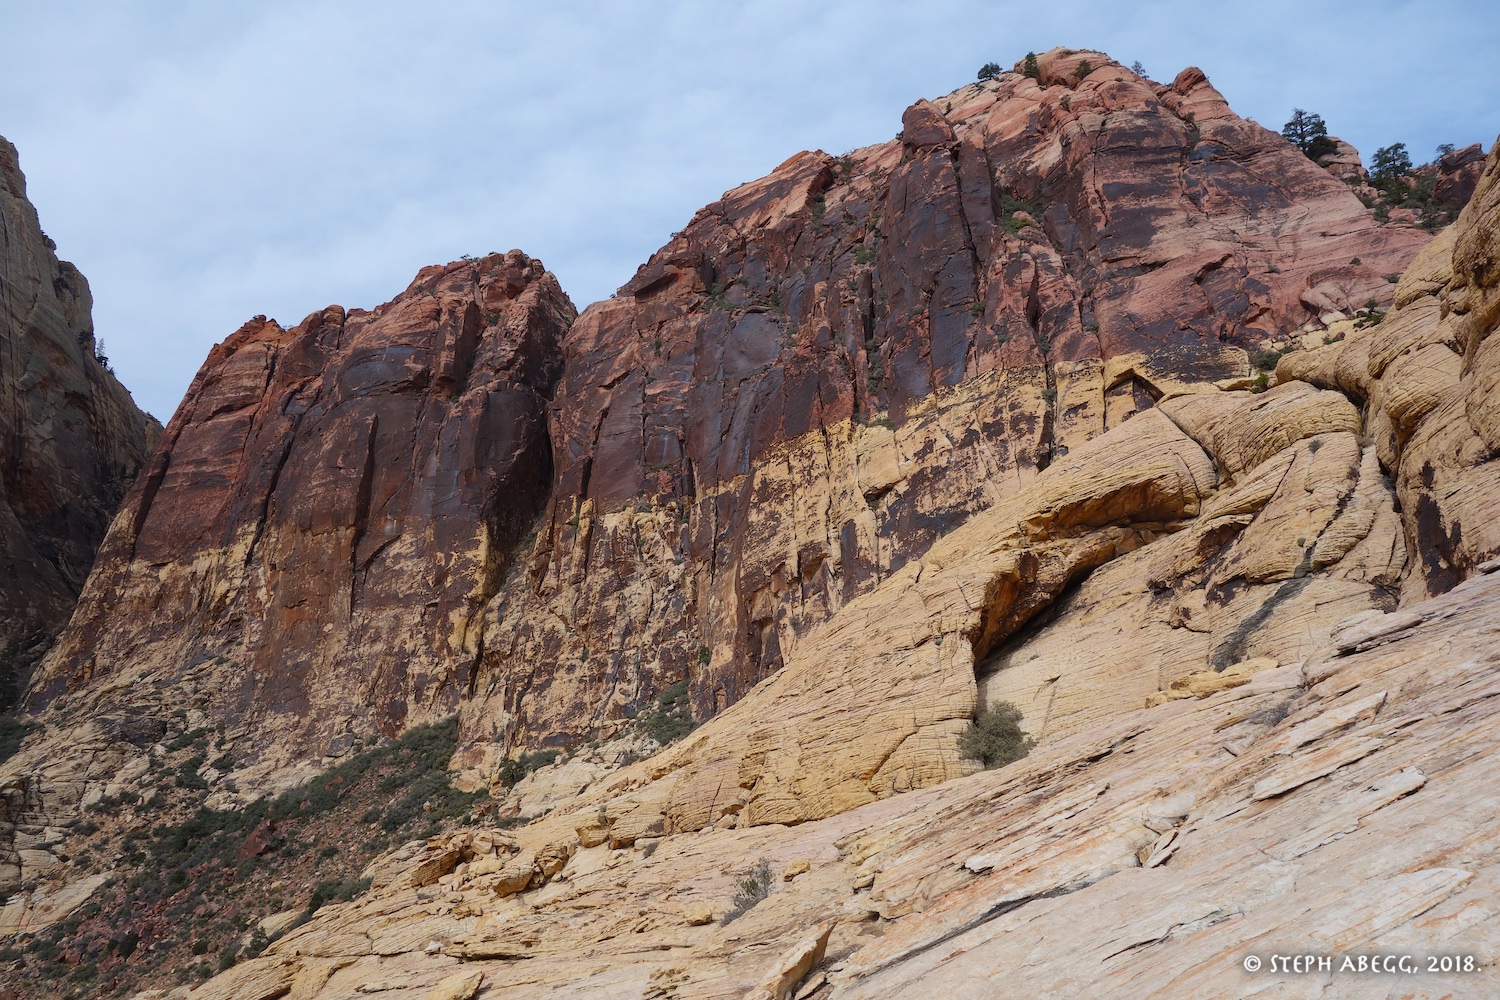
APPROACH
Brass Wall on the approach.
PITCH
1 (5.6, 110')
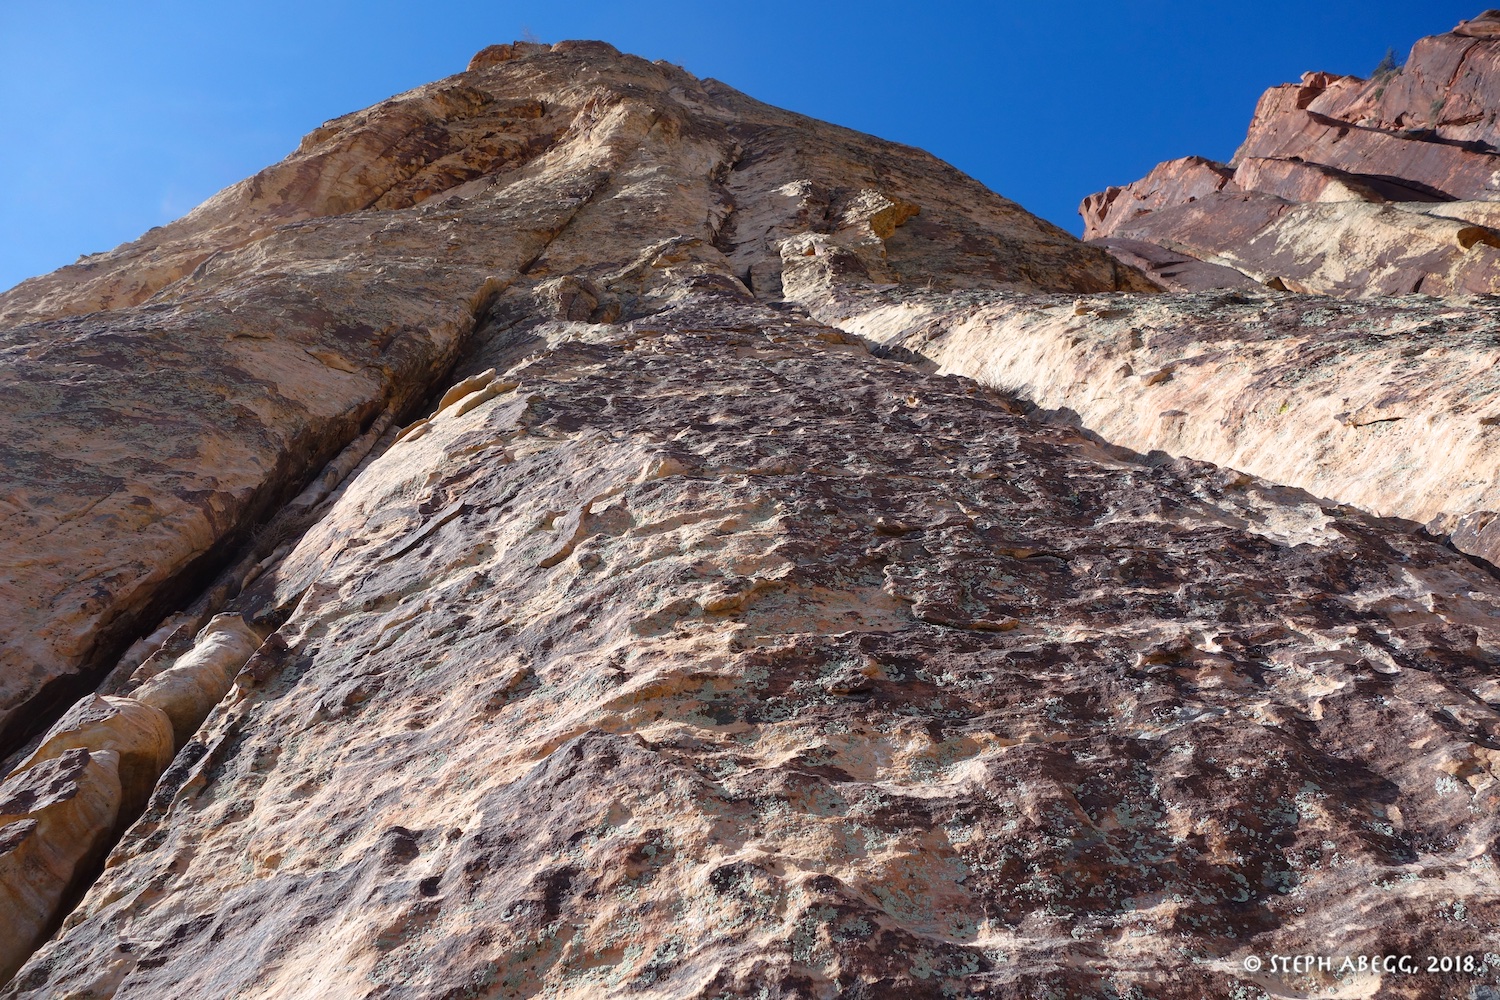
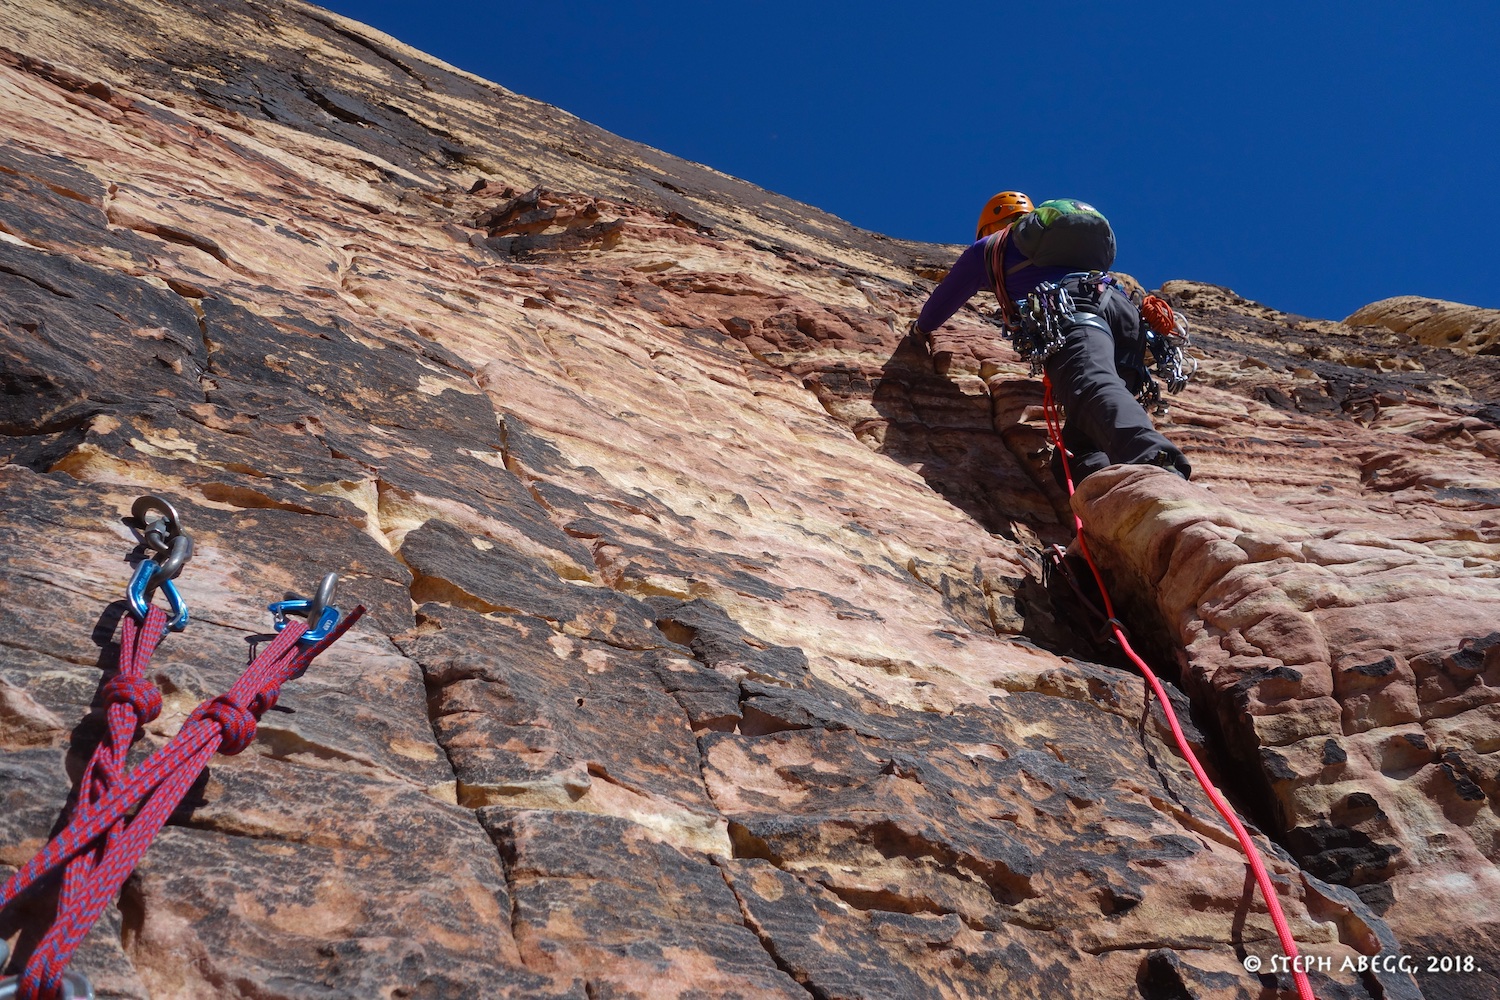
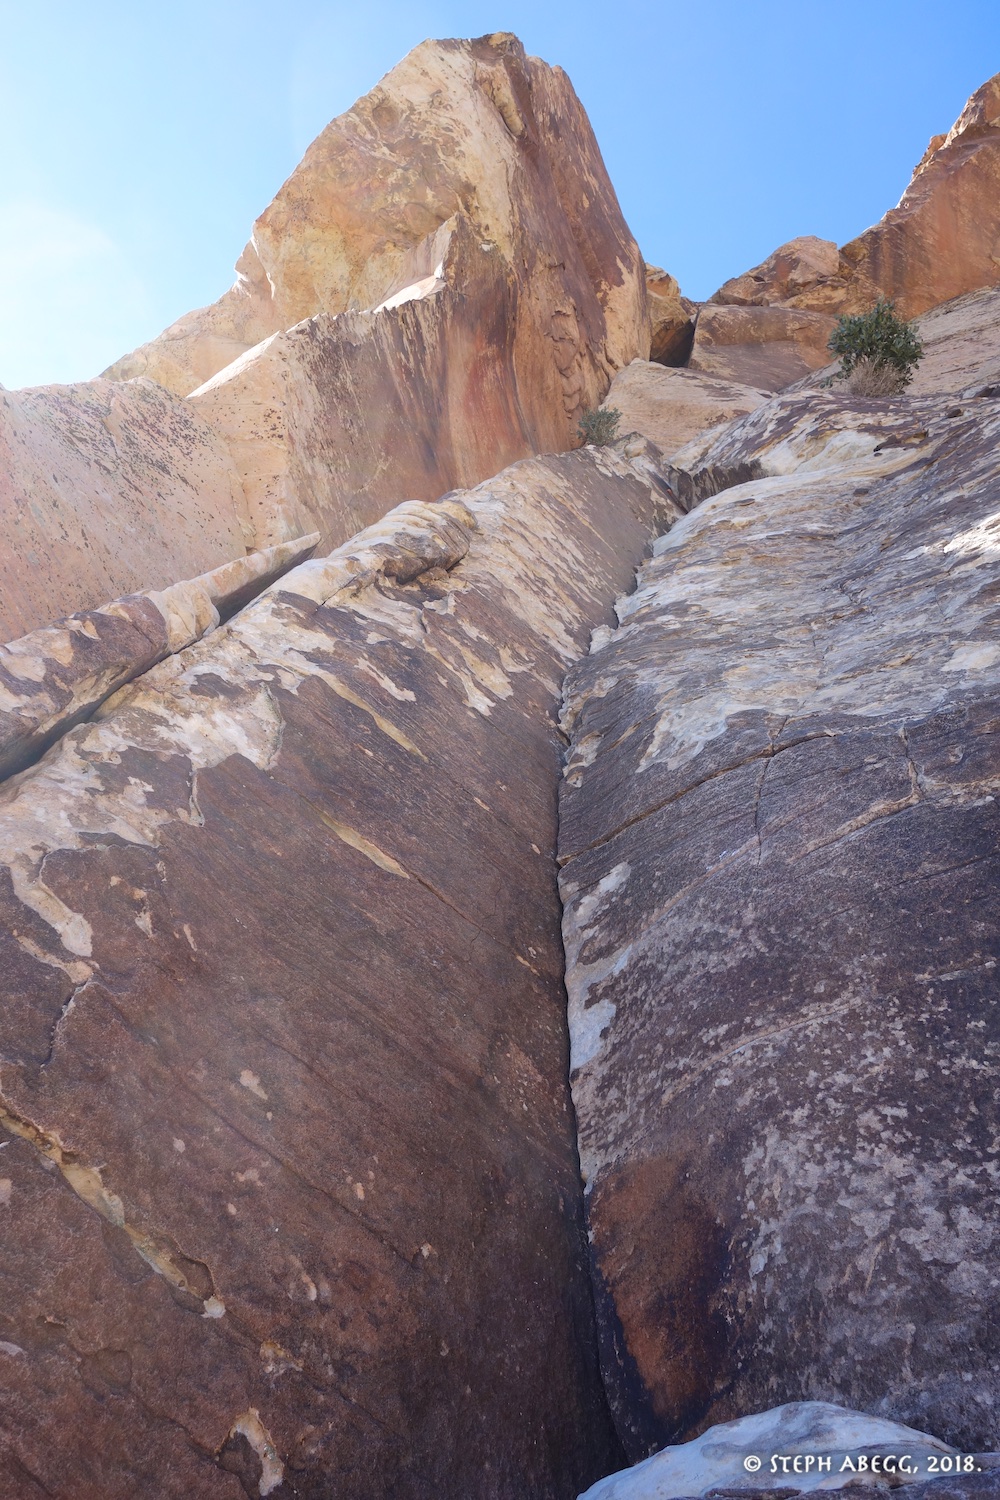
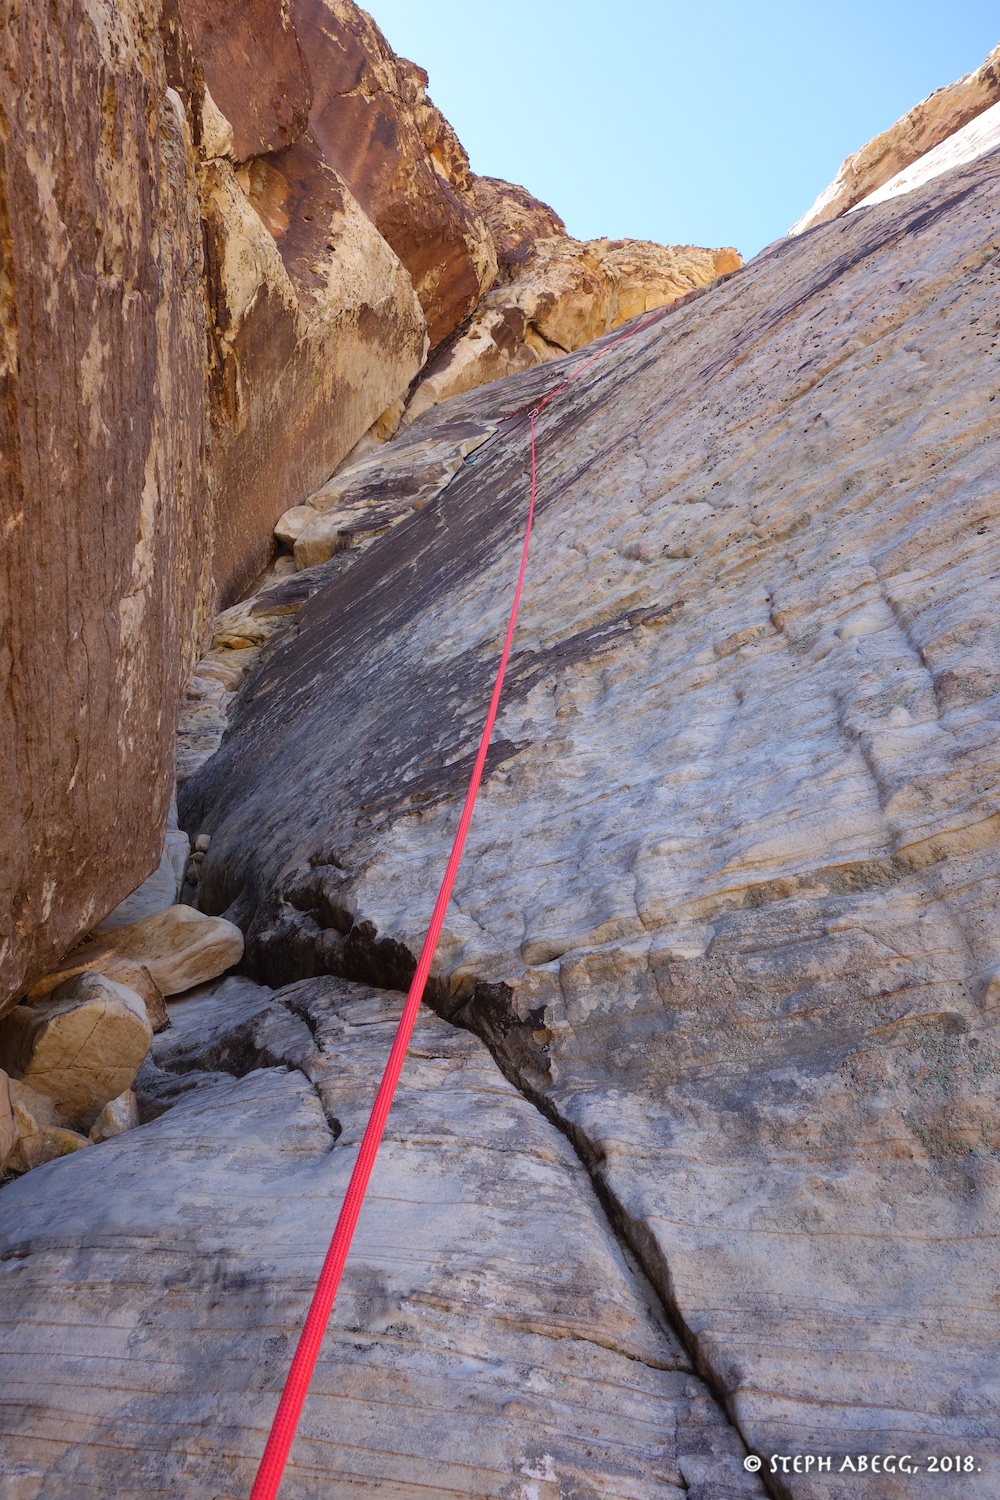
Looking up Pitch 1 from the base of the climb. Climb the obvious crack.
PITCH 2 (5.7, 110')
Pitch 2 is a bit more thoughtful than Pitch 1.
PITCH 3 (5.7+, 85')
Pitch 3 has a nice face section followed by a steep and juggy crack. Probably the most sustained pitch of the route.
PITCH 4 (5.6, 95')
An easy juggy romp on Pitch 4.
PITCH 5 (5.7+, 95')
Pitch 5, the money pitch of the route. These photos make the fingercrack look endless, but its probably only the last 20-30 feet. Pretty fun though!
PITCH 6 (5.7, 75')
We opted to climb the option Pitch 6. It didn't seem overly loose or runnout as was warned in the guidebook. However, the climbing was unremarkable, but it was nice to climb a bit higher.
DESCENT (rappel route with single 70)
The descent shares the same anchors as the route. The problem with this is that the route is so popular you end up having to juggle your rappels around parties climbing upwards, some of whom are new enough to climbing that they are quite concerned to be sharing an anchor with 4 people at once, but what can you do...
OTHER PHOTOS FROM THE DAY
Burrow and The Great Red Book.
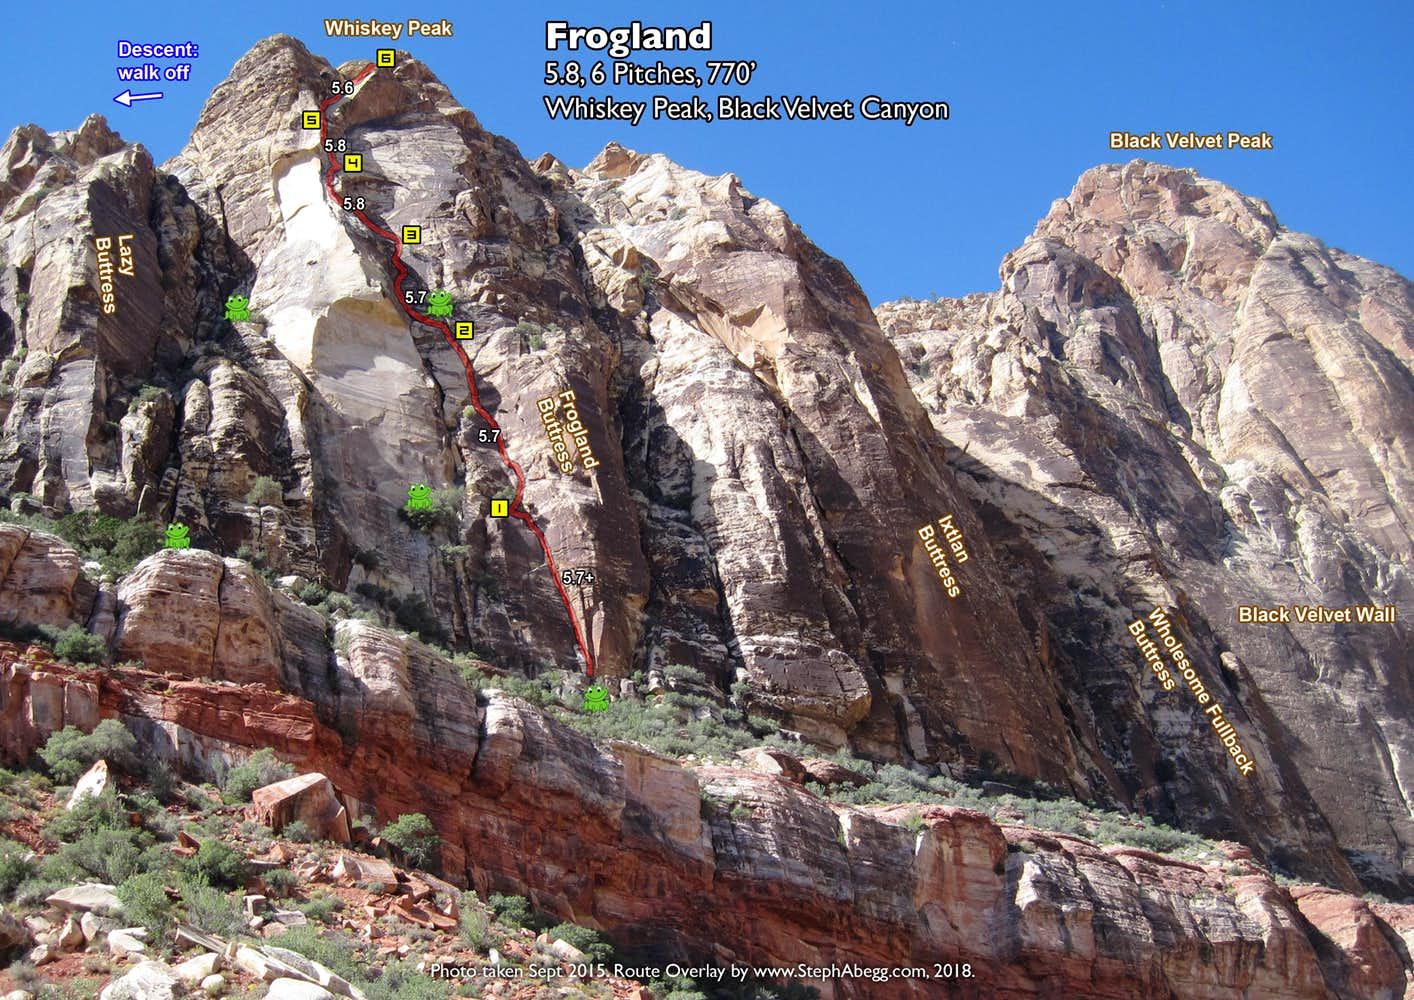
Climbs a crack system to the top of Frogland Buttress. This is an enjoyable and varied route on great rock with sustained climbing at the grade. On a Wednesday, we arrived at the base at the same time as 4 other parties (and a few more arrived after that - arrive at 7 or 11 but not at 8....); but Randy and I made like a frog and jumped onto the first pitch first, and blasted to the top in 3 hours. I had a blast climbing this route with Randy.
FA: Mike Gilbert, Joanne Urioste, & Jorge Urioste, 1978.
Route Overlay
Pitch-by-Pitch Photos
(Pitches as per Handren guide)
Photos:
Notes:
APPROACH
Approaching the route. Not too hot in the sun and not too cold in the shade - a perfect day for the route (the route goes into the shade by 10am or so).
PITCH
1 (5.7+, 120')
Looking up Pitch 1. So fun. I wish I had gotten more photos, but I climbed this pitch like I had a flock of hornets chasing me, trying to establish our position at the head of the day's Frogland pack.
PITCH 2 (5.7, 160')
Pitch 2. More fun with a bit of a layback at the top (save your #3 cam to protect it).
PITCH 3 (5.7, 90')
Pitch 3.
PITCH 4 (5.8, 100')
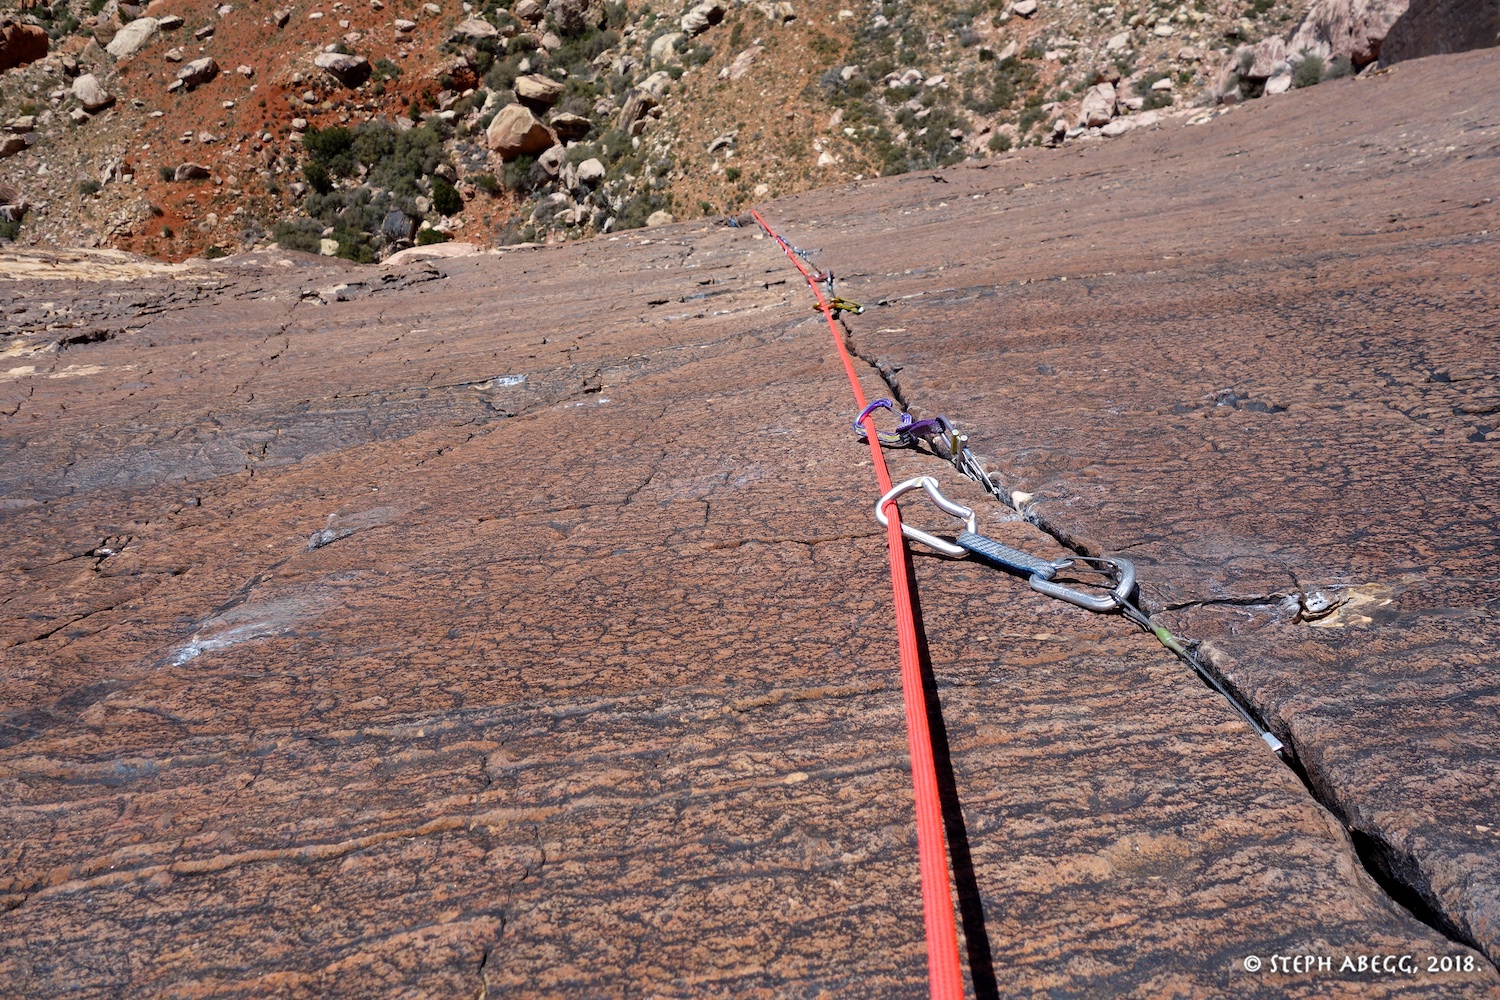
Pitch 4 has the first crux (5.8) section of the route, involving stepping left across the varnished face to the crack on the left. You can place a high cam on the right to protect the move. Once you get to the crack on the left you can place a cam, but beware of placing it too low as this will pull the follower horizontally and also create rope drag. The second photo is taken looking down at this crux section after leading it. The rope zig-zags a bit (unavoidable unless you just don't set gear), but I had minimal rope drag given where I placed the cams.
PITCH 5 (5.8, 90')
Pitch 5, which has the second crux (5.8) section of the route, involving some PG face moves to a bolt. Caution about this section, as there is not much for protection in the 20 feet below the bolt, so you could have the potential for a factor 2 fall on your anchor if you did happen to fall here. The second photo shows a crack against the left wall, which is protectable with 0.5 cams, and would allow you to bypass the slabby crux (the crack is probably 5.9ish). The pitch finishes by going behind a chockstone and belaying after that. Another great pitch of climbing.
PITCH 6 (5.6, 180')
I had led all of the pitches up to this point, so it was time for Randy to lead us to the top!
DESCENT
(walk off)
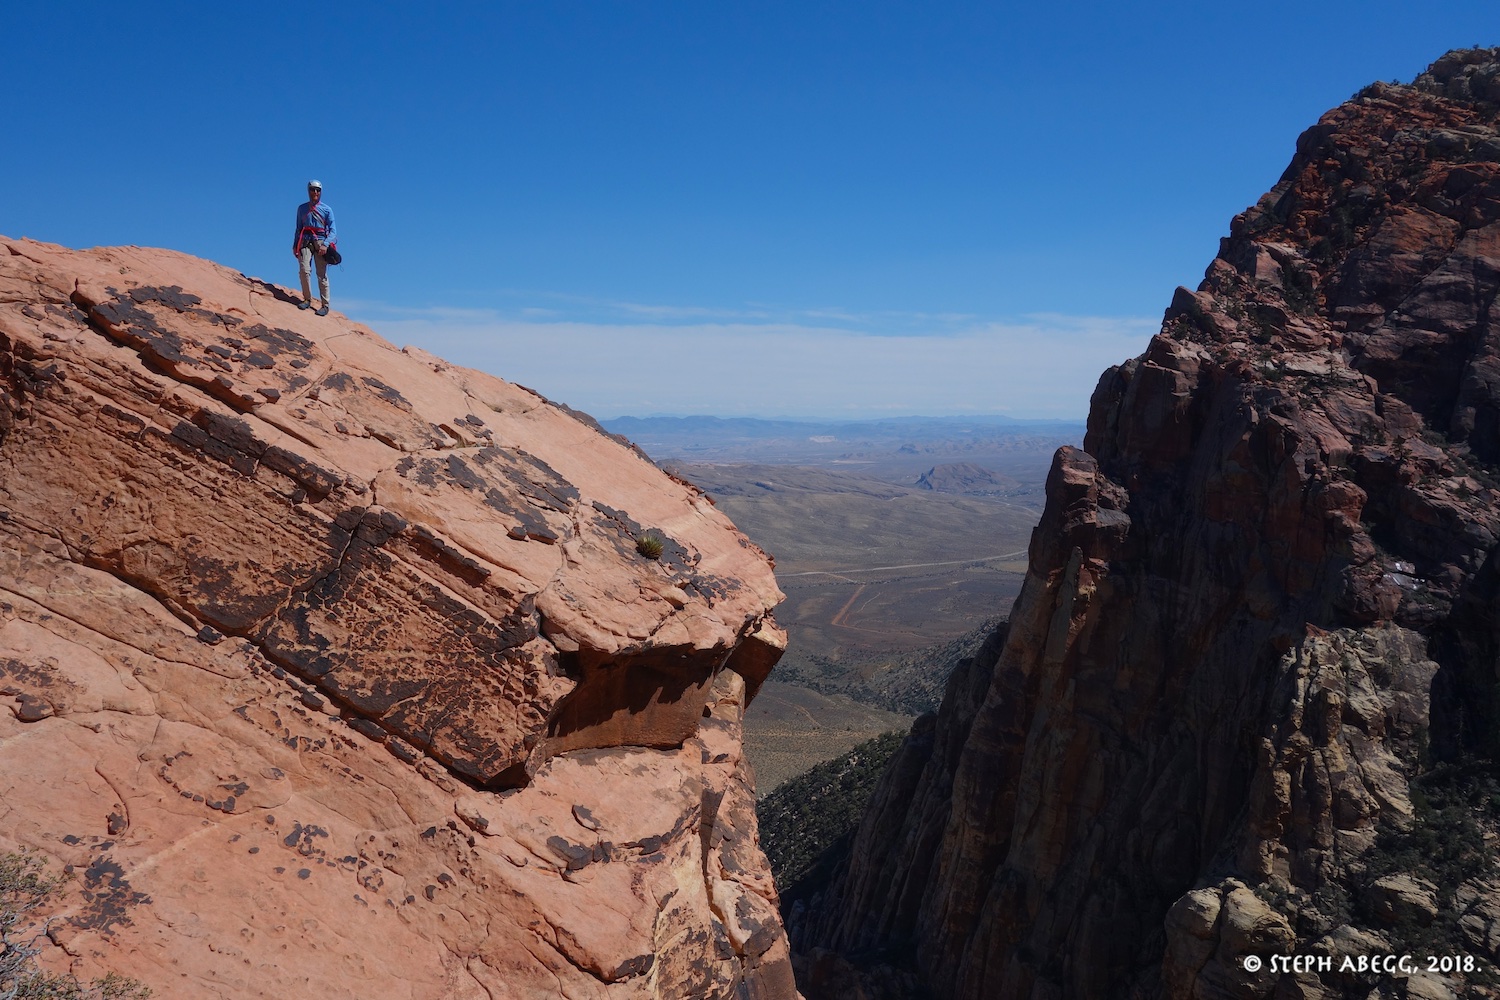
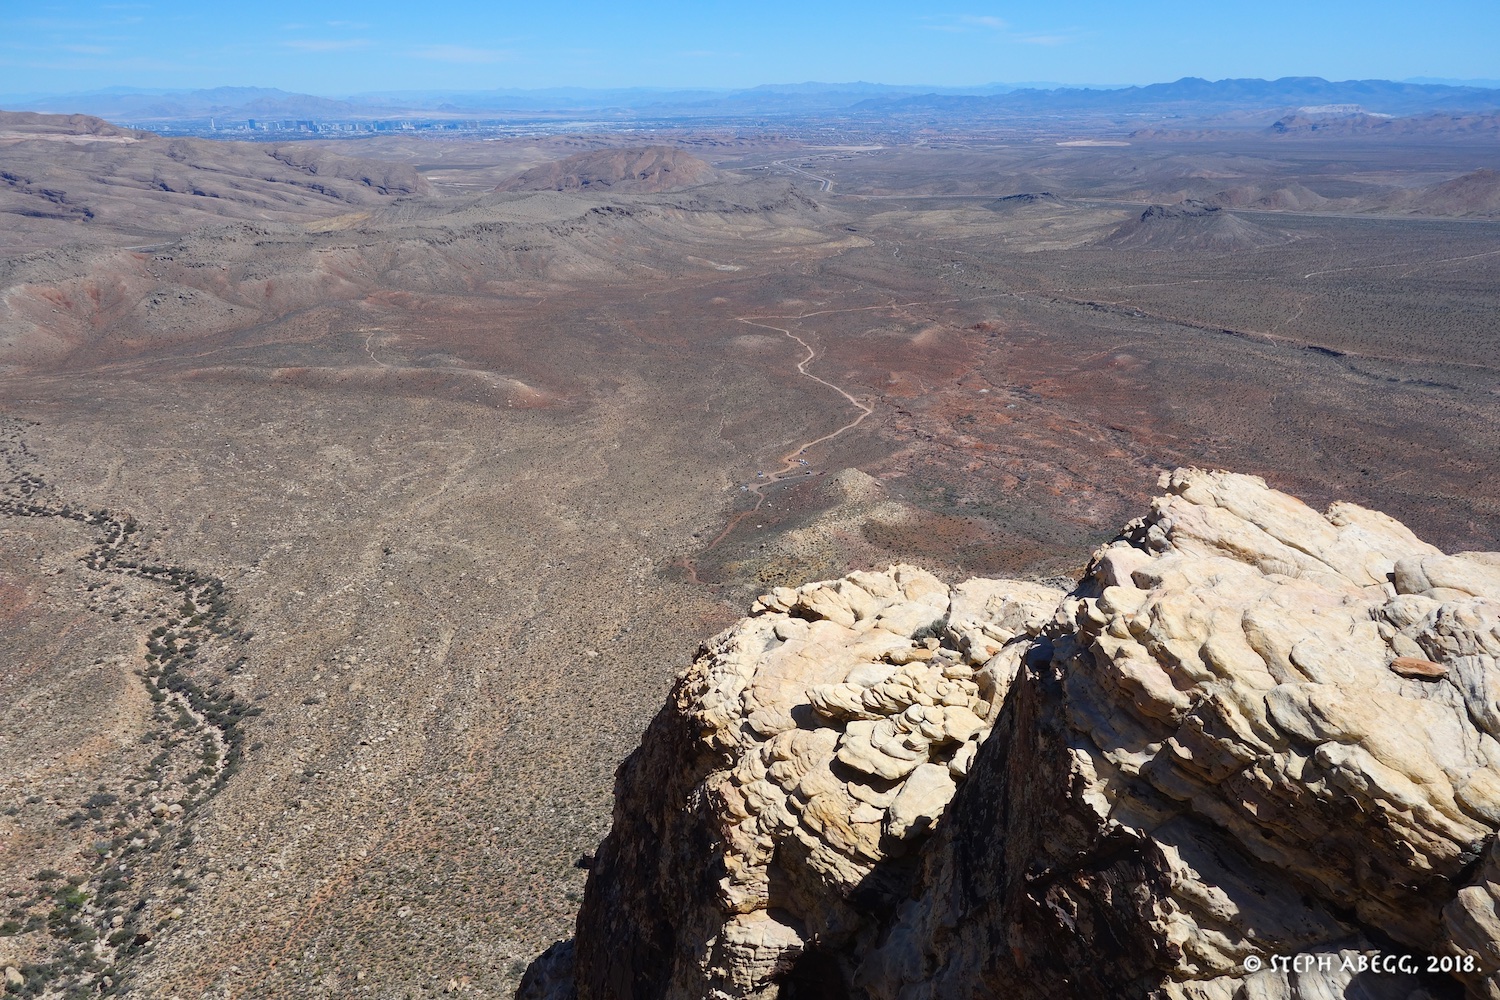
View from the top of Frogland Buttress/Whiskey Peak. Black Velvet Wall is always impressive.
OTHER PHOTOS FROM CLIMB
Caution about the varmints at the base.
FA: Jorge Urioste & Mike Clifford, 1997.
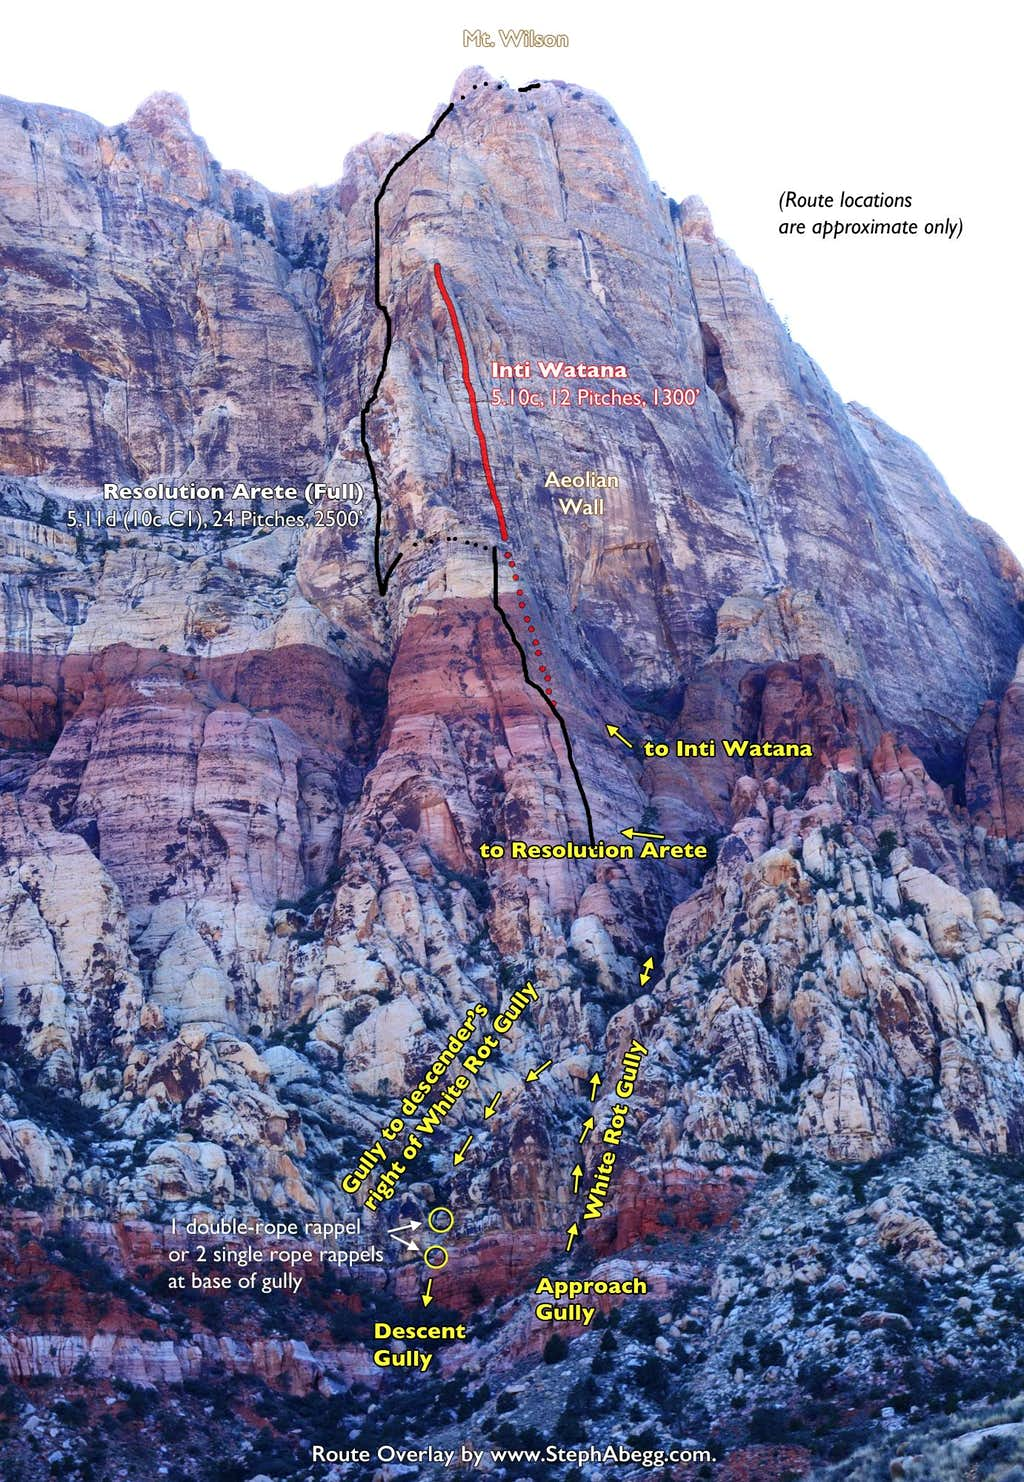
This excellent route climbs the north face of a prominent tower on Resolution Arete, offering a mix of bolt-protected face climbing and gear-protected crack climbing. I thought this route was excellent and Danny and I had a phenomenally fun day.
(Danny and I had originally planned on linking Into Watana with the upper part of Resolution Arete to make a full day of climbing to the top of Mt. Wilson. However, at the trailhead we decided it would be more fun to climb Inti Watana without packs and get back early enough so I could join the Uriostes for dinner and climb something else the next day, the last day of my trip. We never regretted our decision. Someday I want to come back and climb the full Resolution Arete to the top.)
FA: Jorge Urioste & Mike Clifford, 1997.
Time Stats
Approach: 1 hour, 40 min Climb: 5 hours, 15 min Rappel route: 1 hour 30 min Hike out: 2 hours
Route Overlays
Pitch-by-Pitch Photos
(Pitches as per Handren guide)
Photos:
Notes:
APPROACH
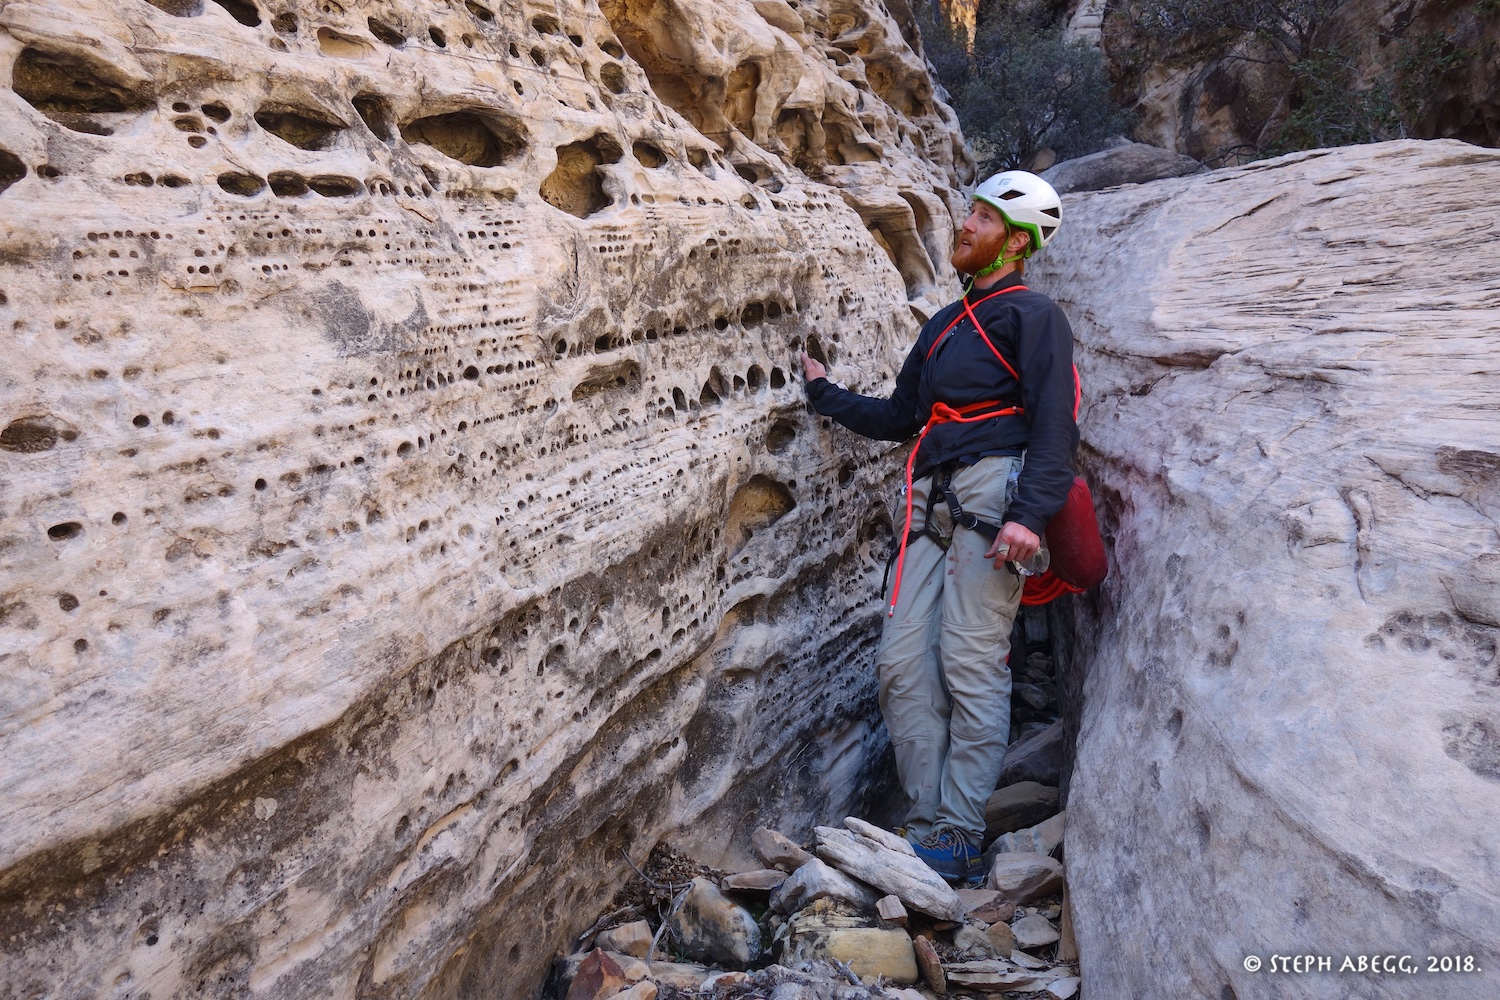
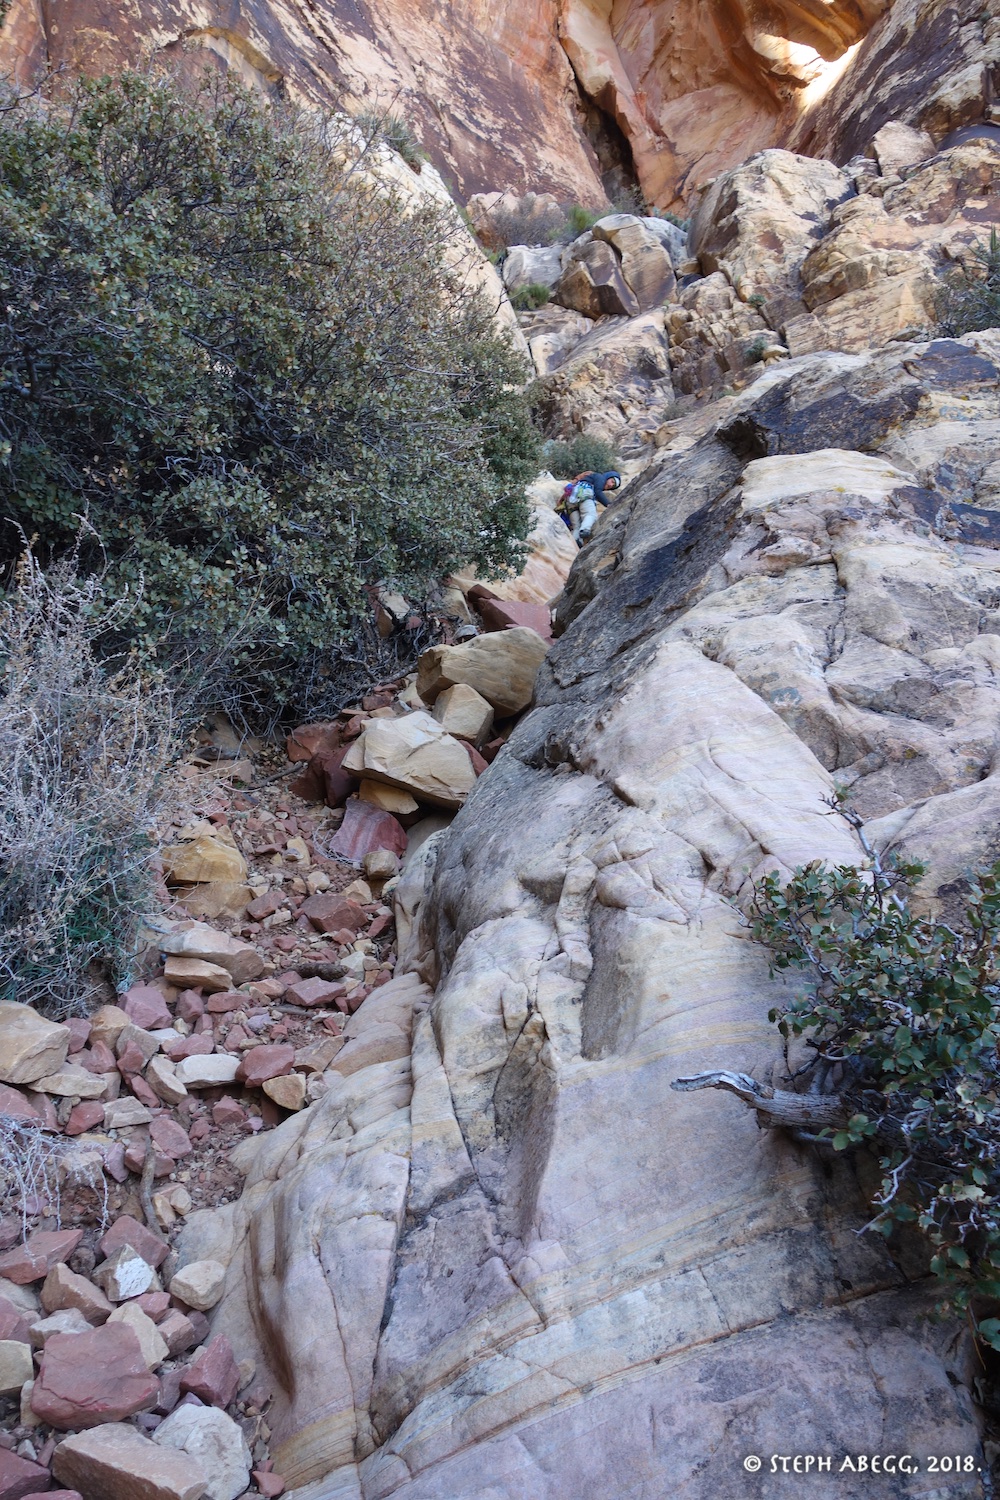
The approach took us 1 hour and 40 minutes, but could easily take longer if you get off route. See my route overlay. Basically, you scramble up White Rot Gully past where you cut off left for Resolution Arete, and then find a shaded narrow gully that runs along the base of Aeolian Wall.
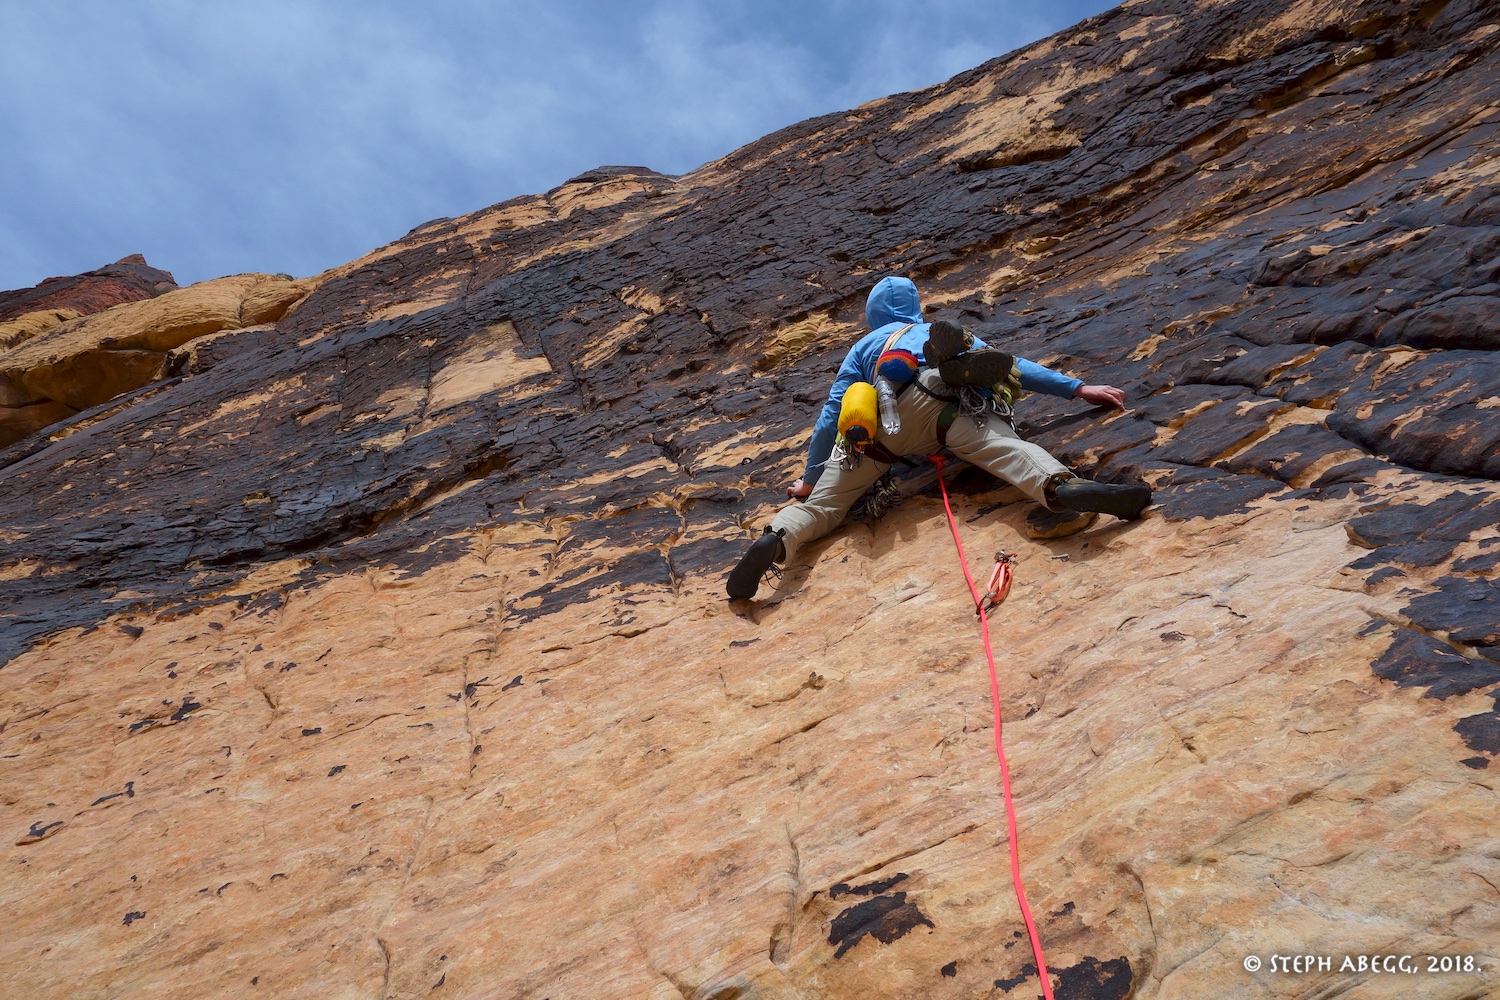
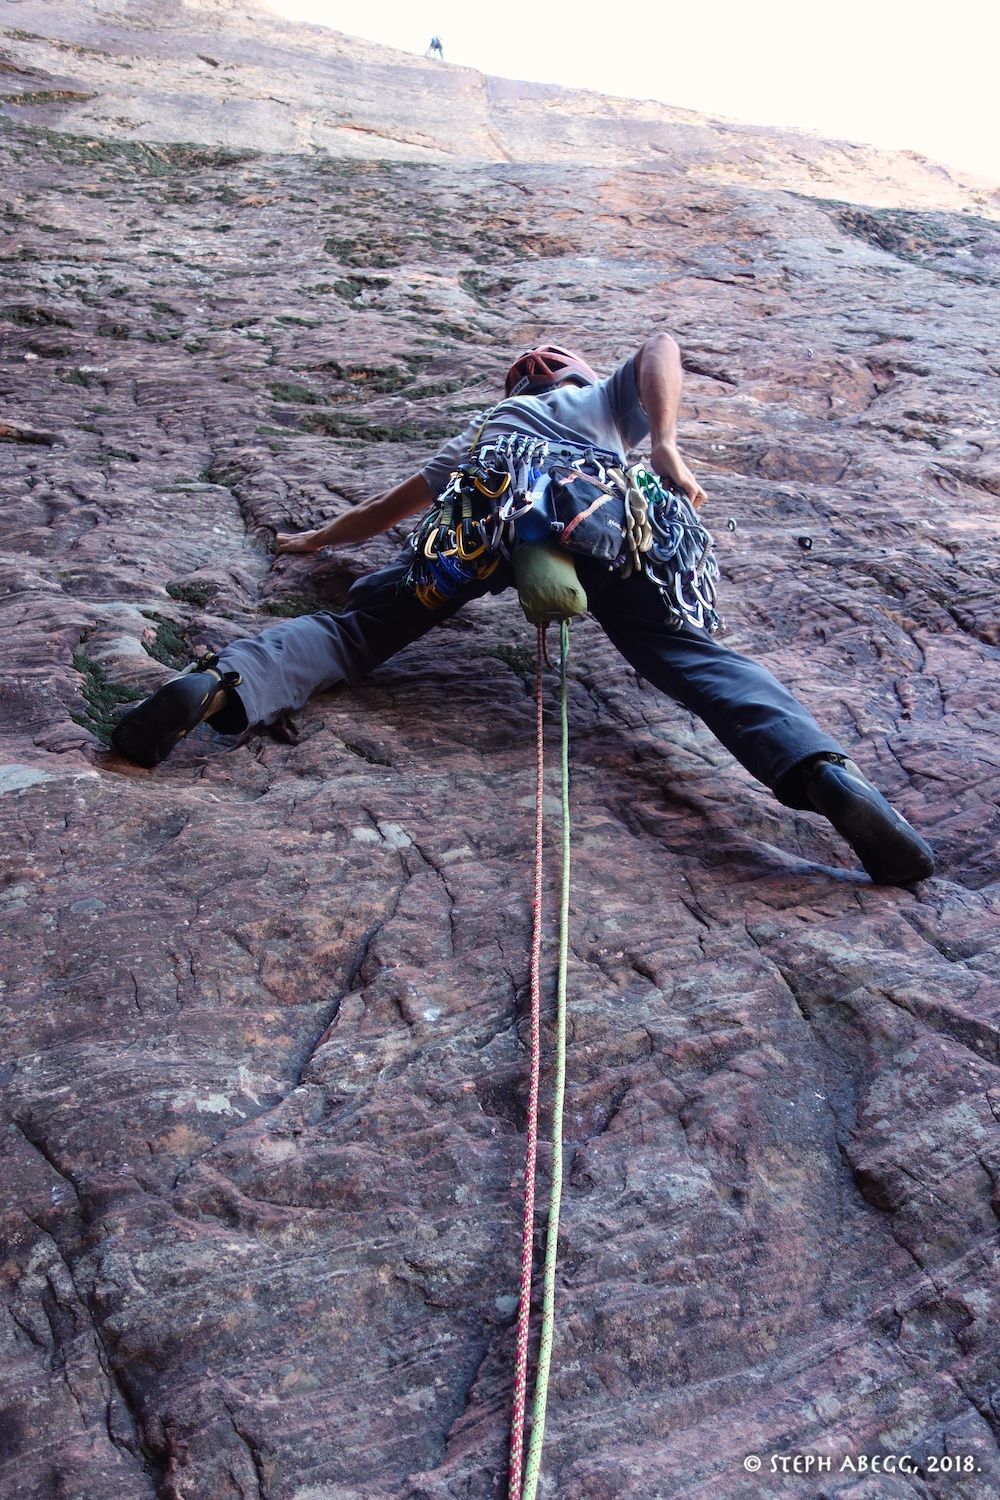
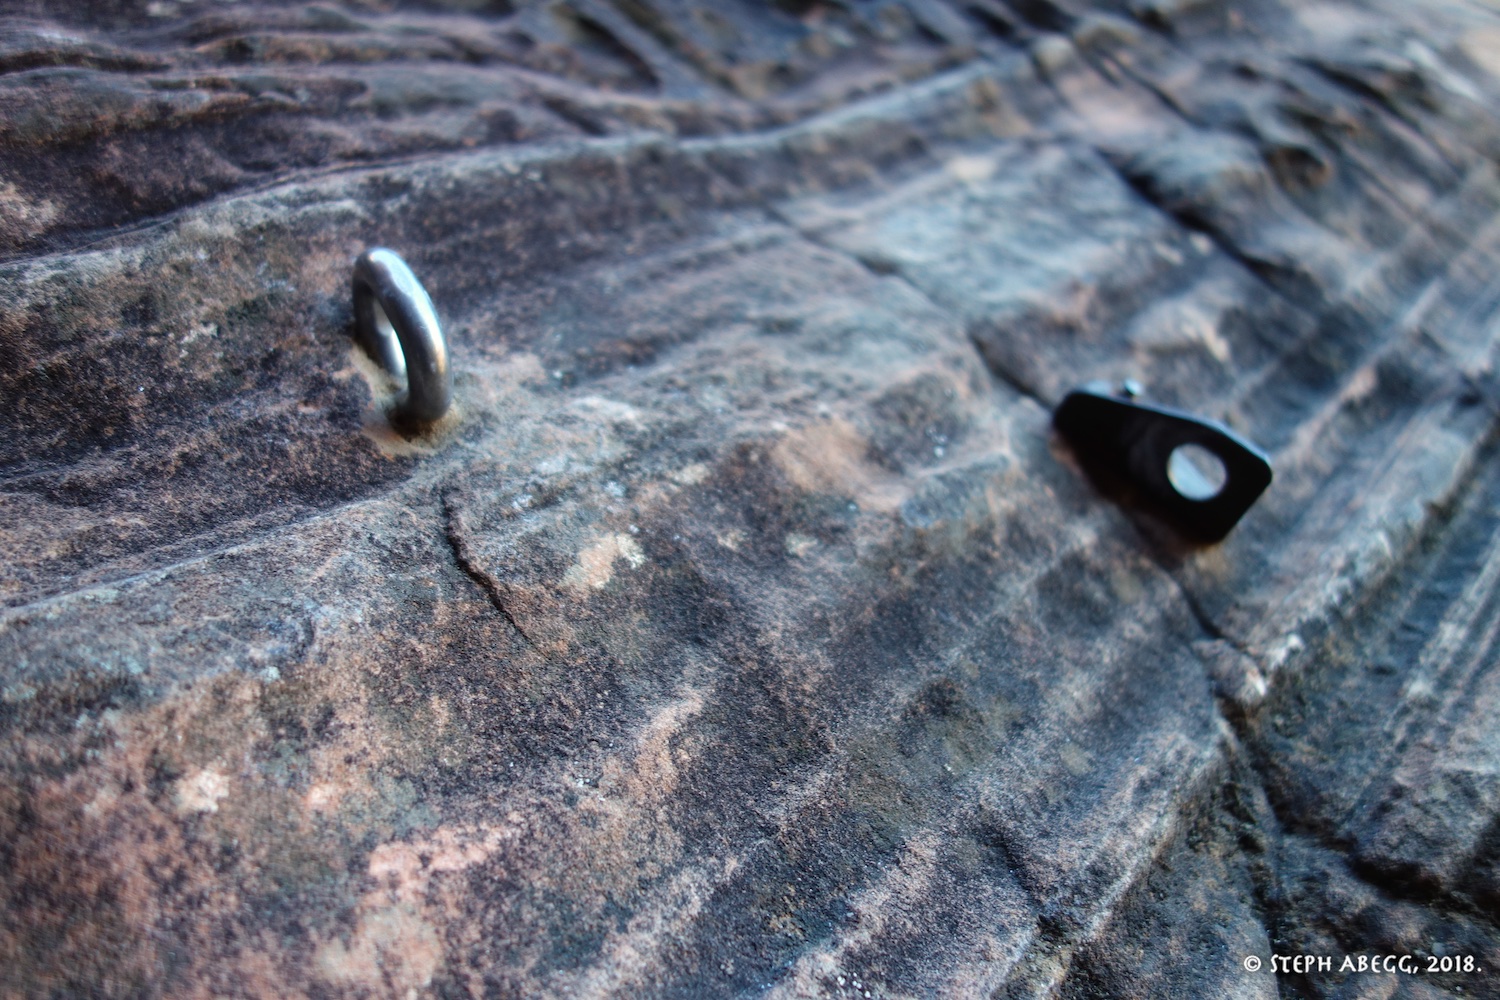
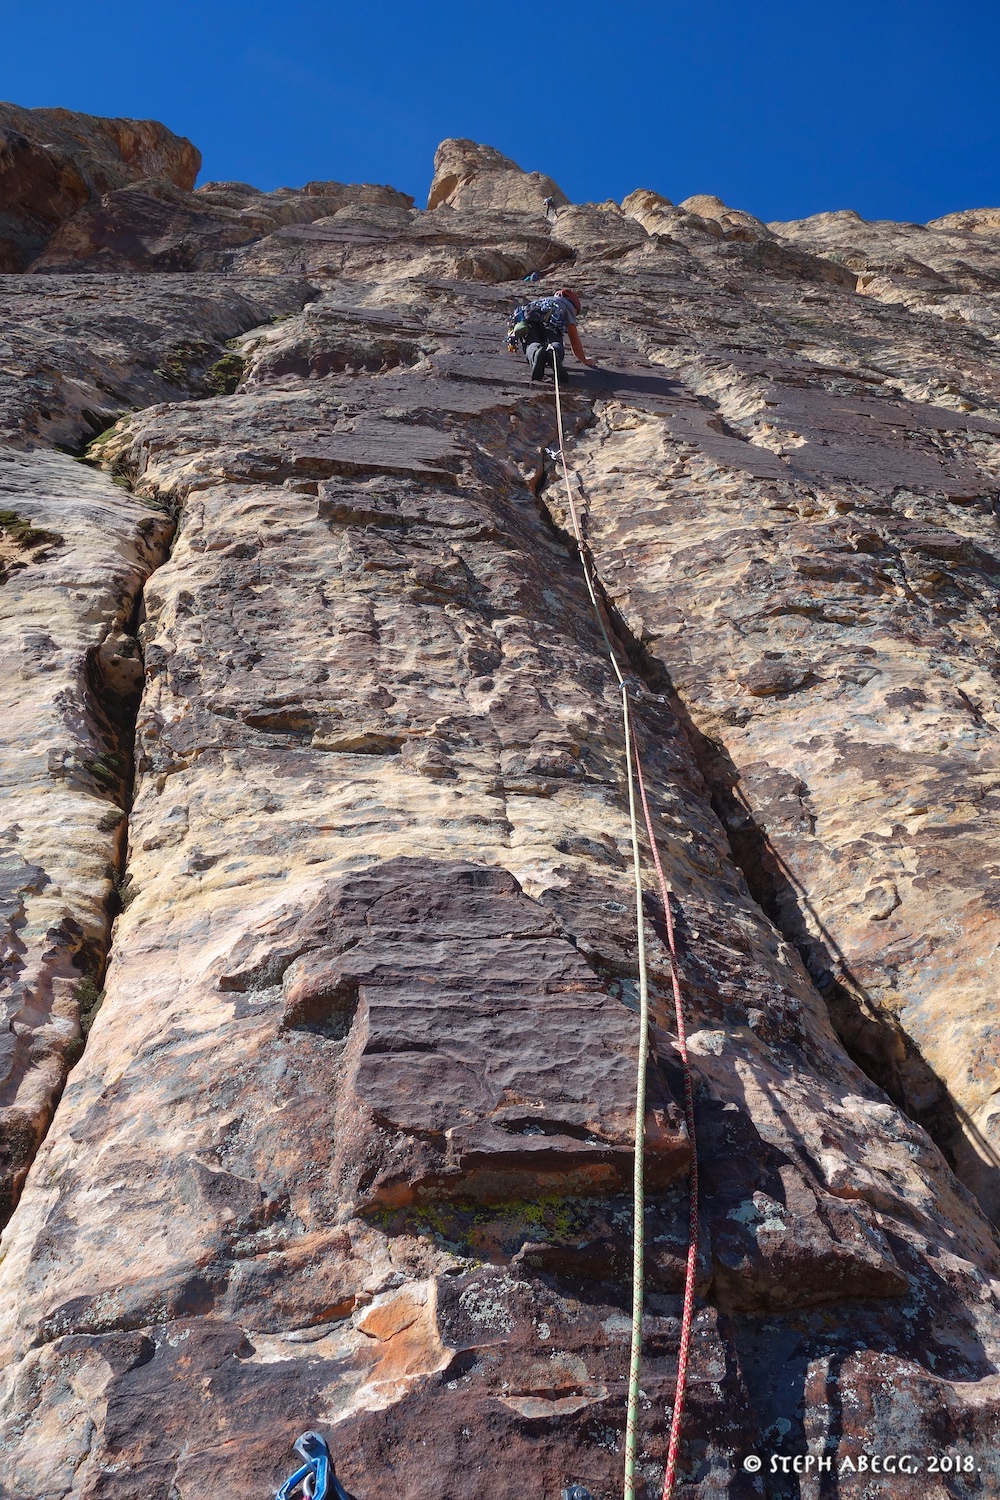
PITCH
1 (5.9+, 90')
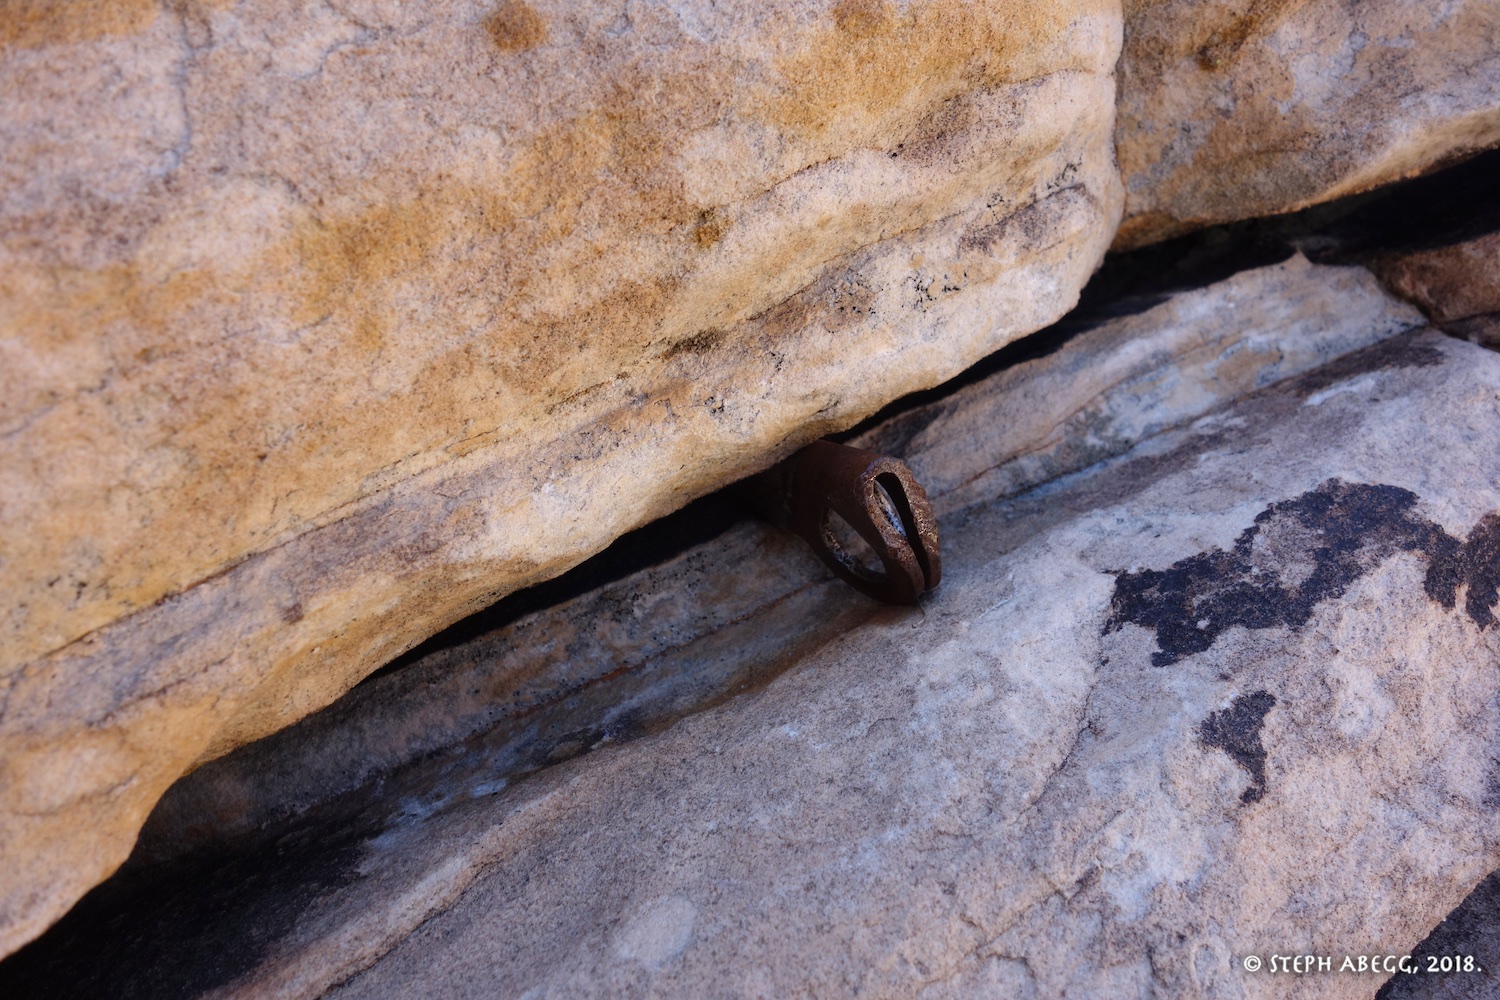
(~7 bolts, no gear)
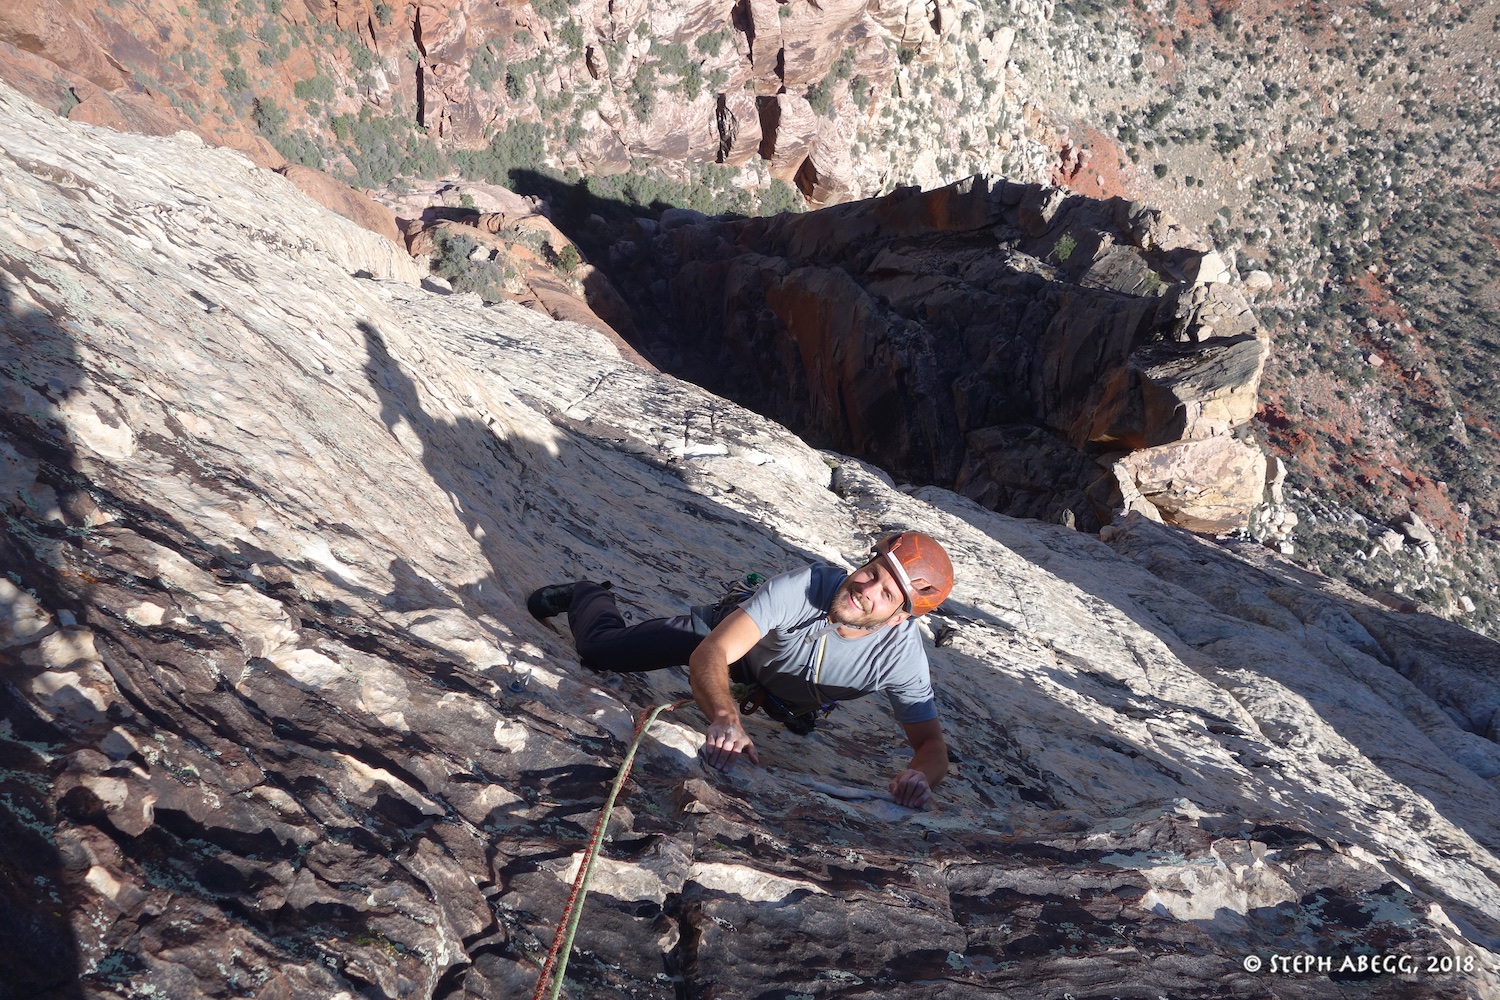
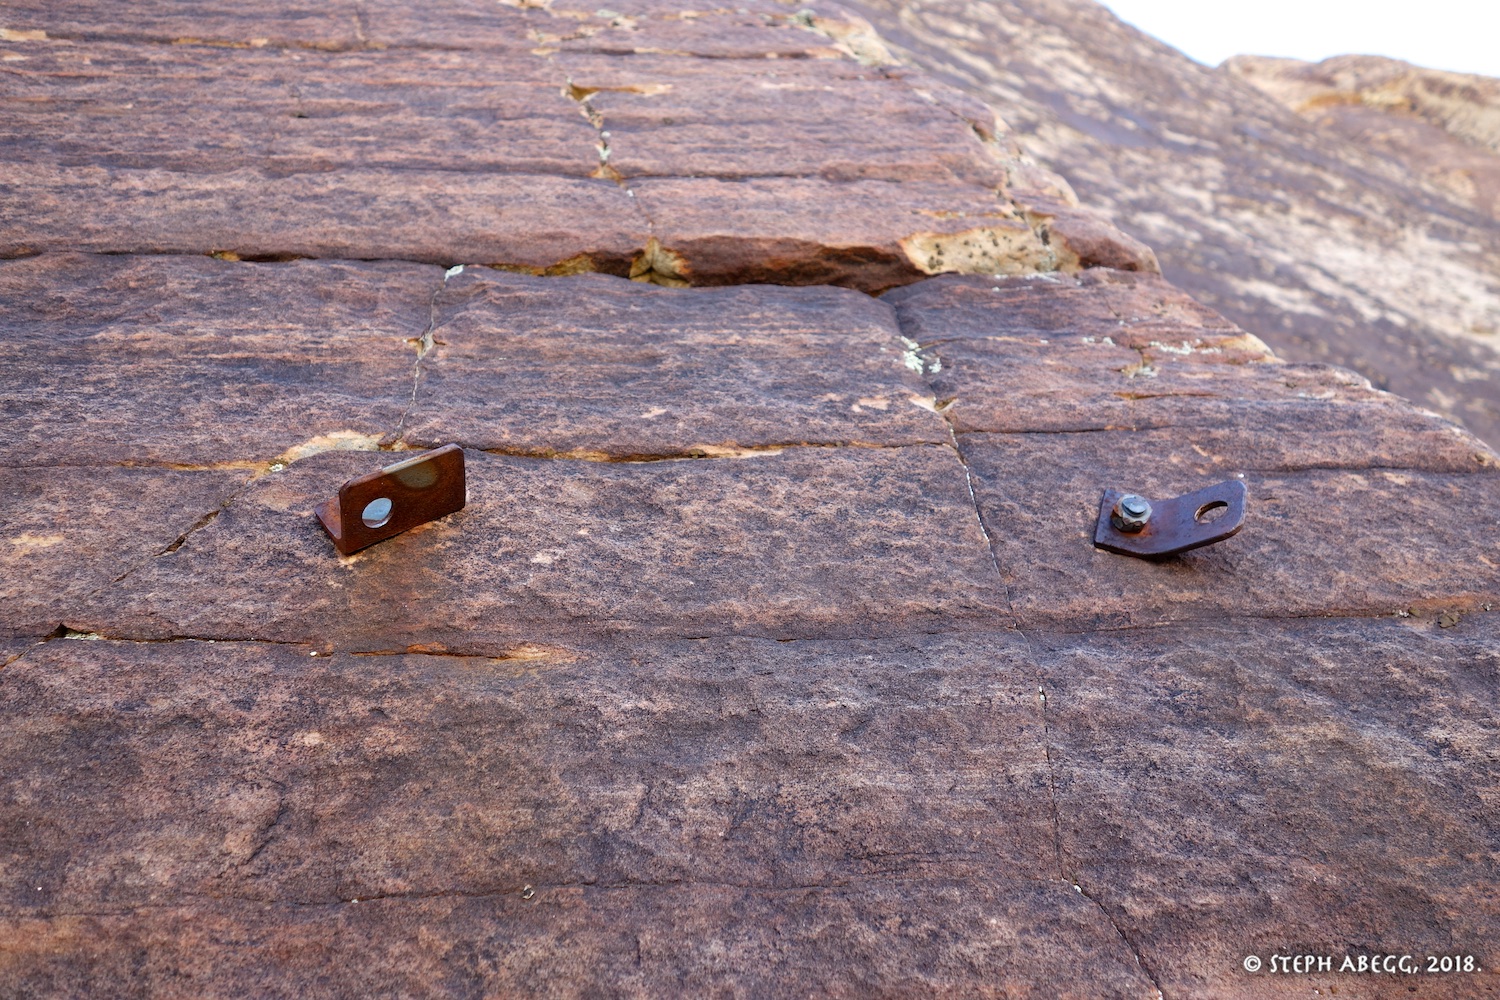
Cruxy face climbing right off the deck. It is entirely bolt protected, and well-bolted, as is the route in general. Jorge's original bolts have been replaced (the photo on the right shows an original bolt on the right, and new bolt on the left). The next day when I joined the Uriostes for dinner, I asked Jorge how he placed the original bolts, and I was impressed and rather astounded to hear how he had placed them on lead, holding onto a tiny crimper with one hand while holding a heavy drill and drilling the bolt with the other. I found this pitch hard enough to hold on with two hands and no drill!
PITCH 2 (5.10c, 100') (~10 bolts, no gear but you can place a 0.5 cam if you want)
This is the crux pitch of the route, fully bolt protected, although a 0.5 cam is nice to have for extra protection near the crux. Danny led these first 2 pitches, and I was happy to follow. We swung leads after this.
PITCH 3 (5.8, 130')
(~12 bolts, no gear)
Pitch 3 is a fun bolted 5.8 jug fest.
PITCH 4 (5.9, 140')
(Gear + a few bolts)
Fun climbing on Pitch 4. The third photo shows the view over to Aeolian Wall Original Route (1800', 5.9, A3).
PITCH 5 (5.7, 130')
(All gear)
Fun climbing on Pitch 5.
PITCH 6 (5th, 130')
(Small gear + a few bolts)
Fun climbing on Pitch 6. Did I say fun? It's interesting that route descriptions don't give a rating for this pitch, but it felt like mostly 5.8/9 climbing, protected by a mix of small gear and a few difficult-to-spot bolts.
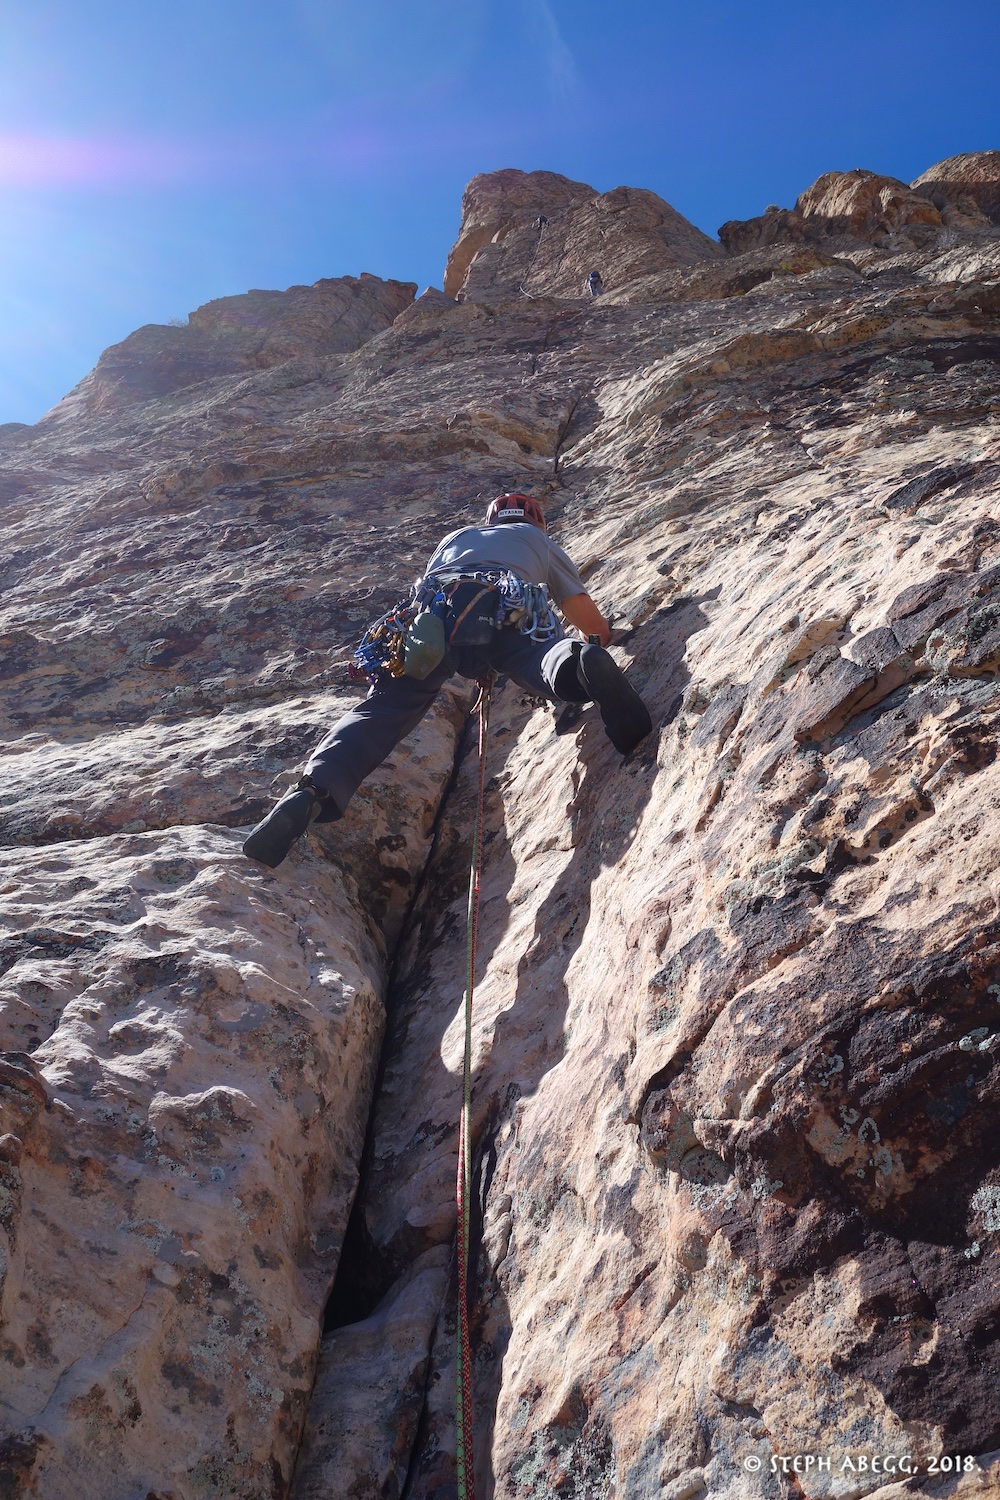
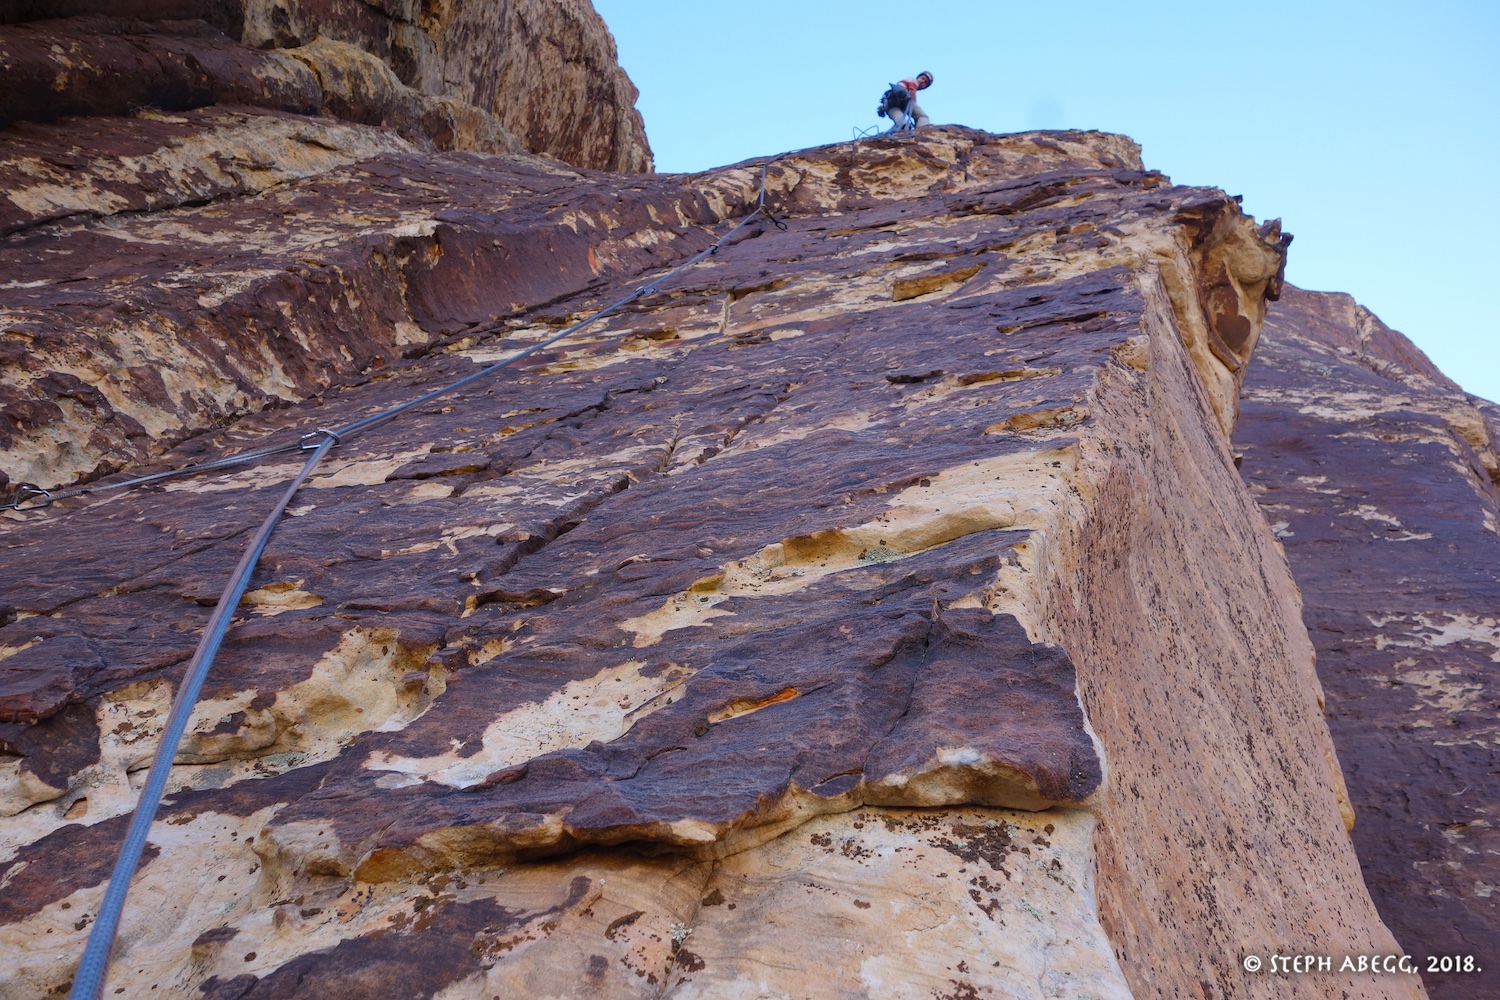
PITCH 7 (5.9, 165')
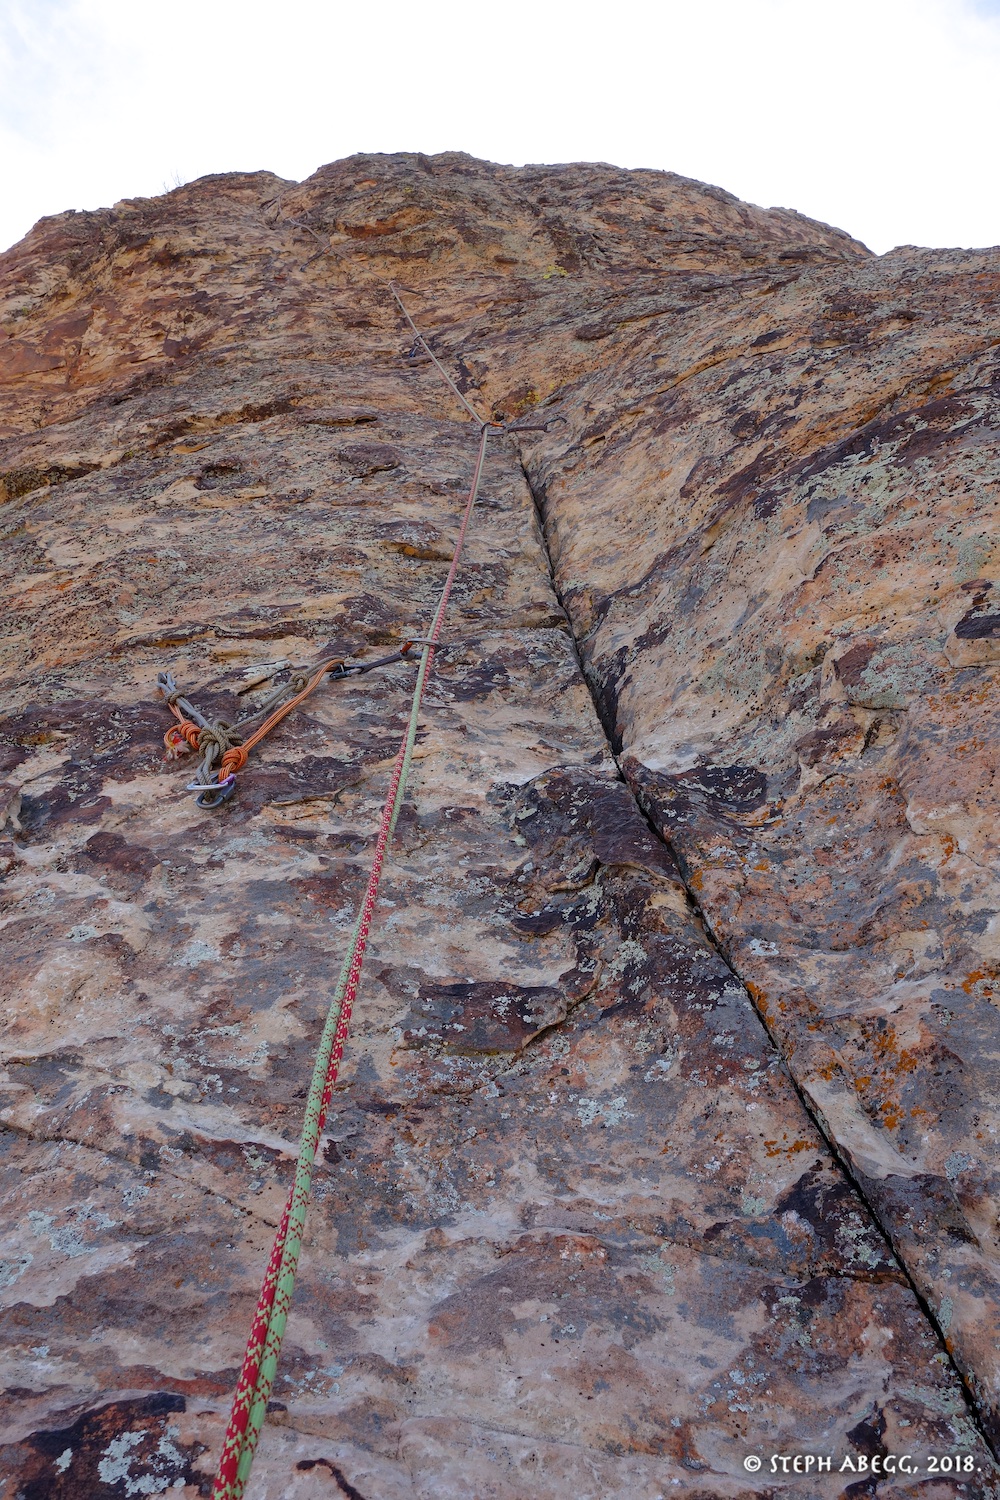
(All gear)
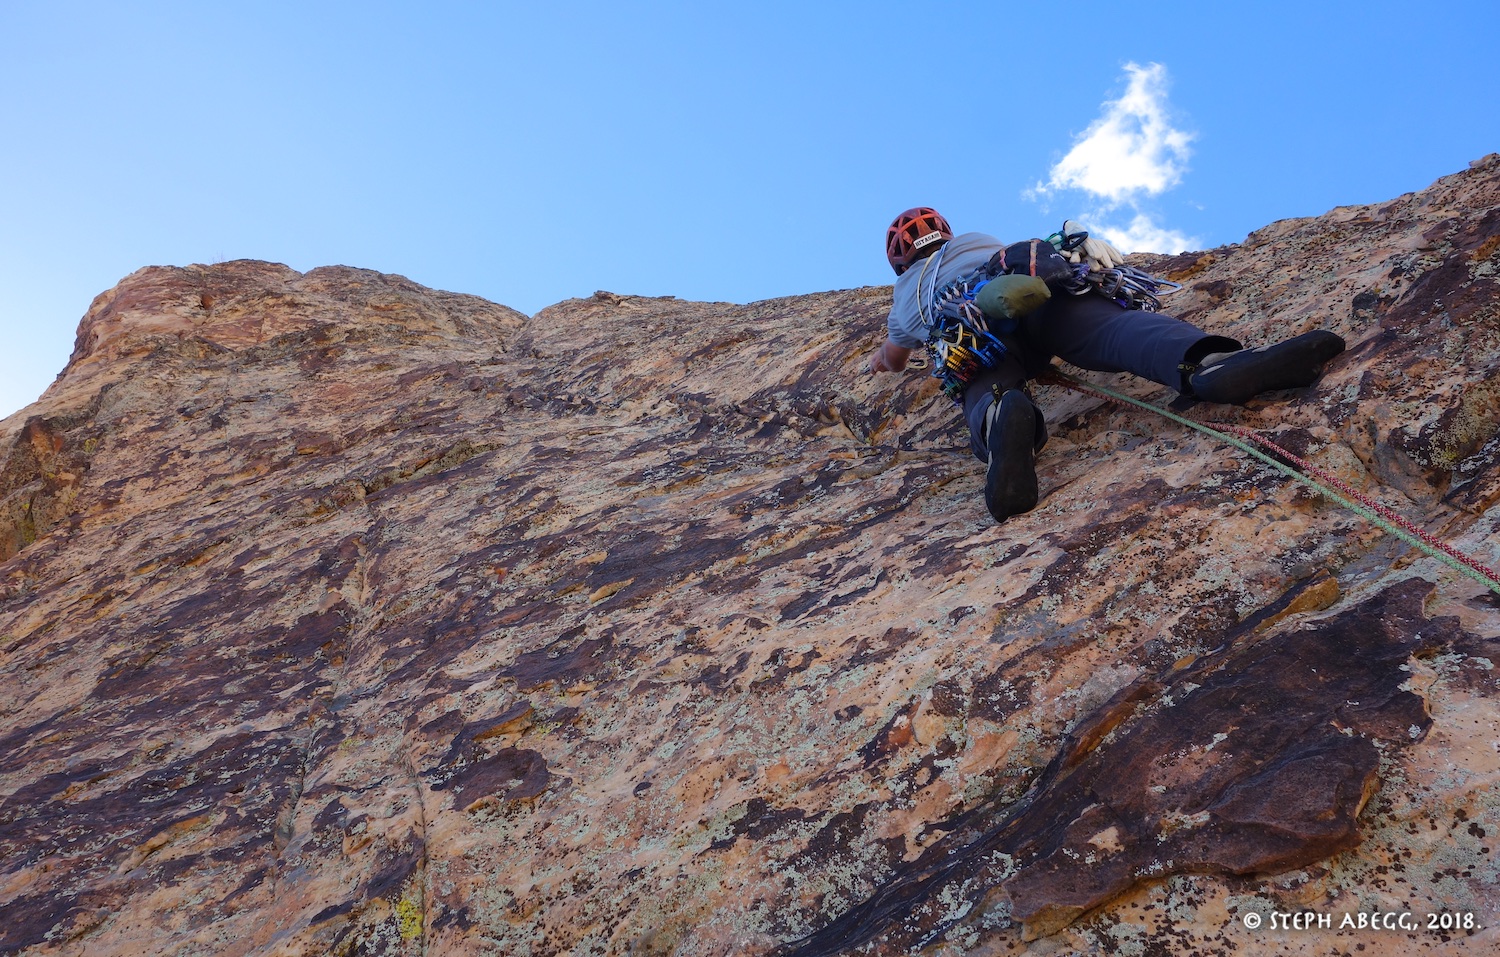
Pitch 7 was one of my favorite pitches on the route. No bolts on this pitch.
PITCH 8 (5.9+, 130')
(Gear + a few bolts)
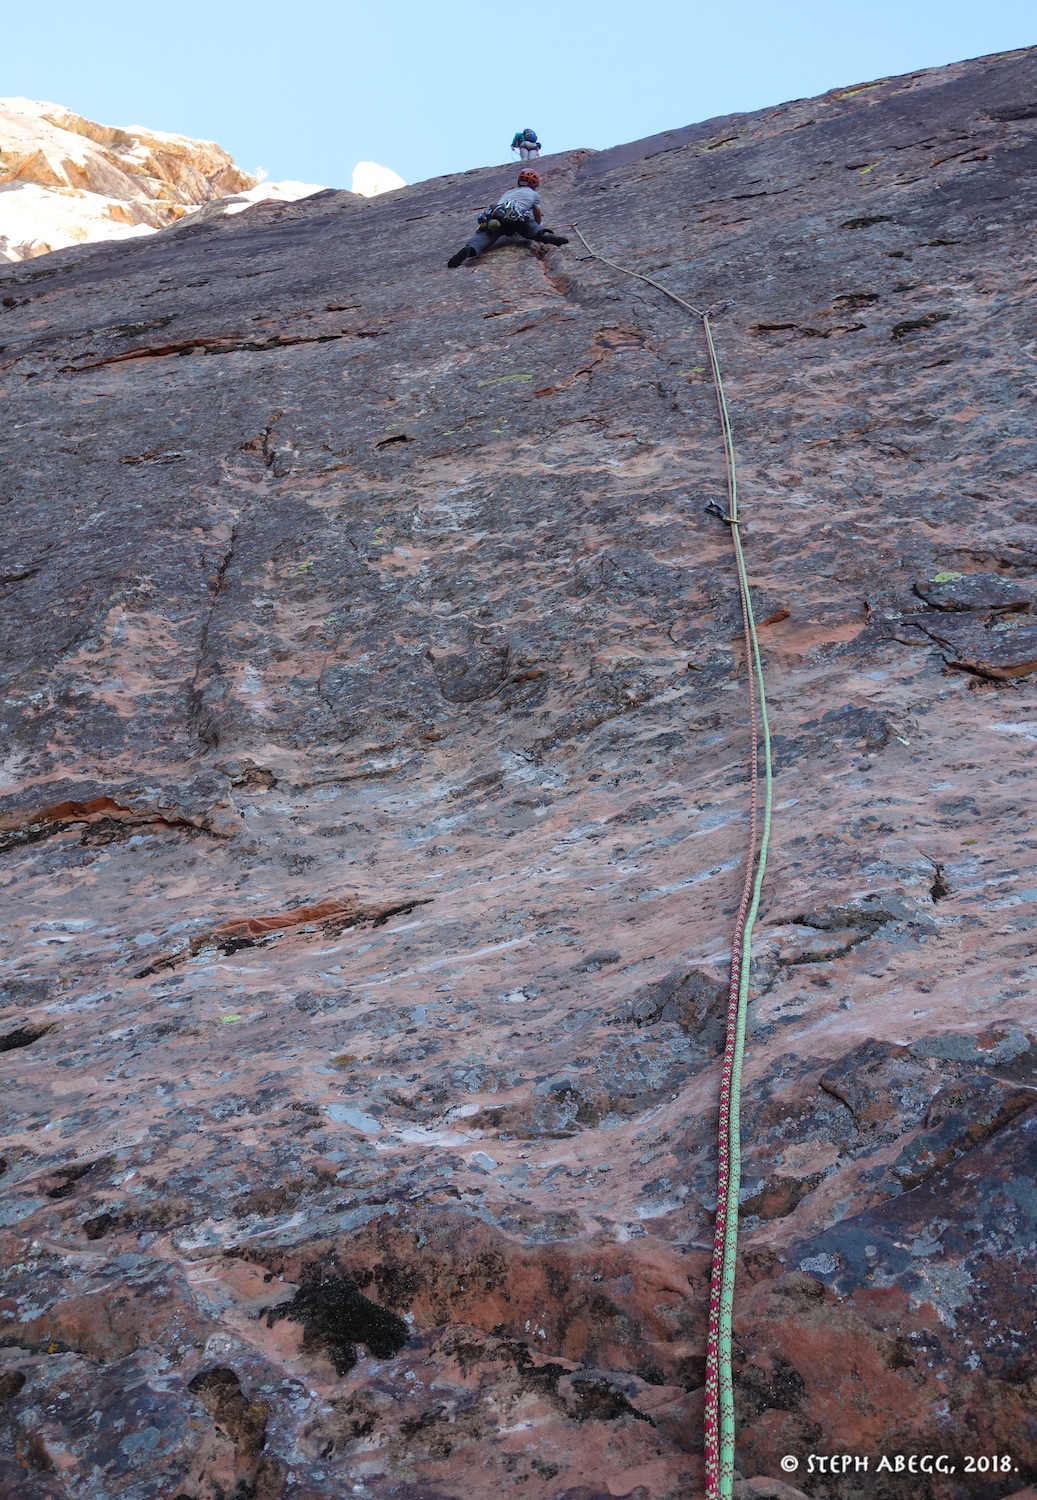
Pitch 8 was fun too. The second photo shows a climber leading this pitch as we descended. There was one other party ahead of us (they continued on to the top via Resolution Arete) and one other party behind us.
PITCH 9 (5.9, 50')
(~5 bolts, no gear)
(we linked with Pitch 10)
Pitch 9 is short and fun. Begins with a juggy roof that ends up being easier than it looks. And fun. Did I say fun?
PITCH 10 (5.9, 110')
(~12 bolts, no gear)
(can be linked with Pitch 9)
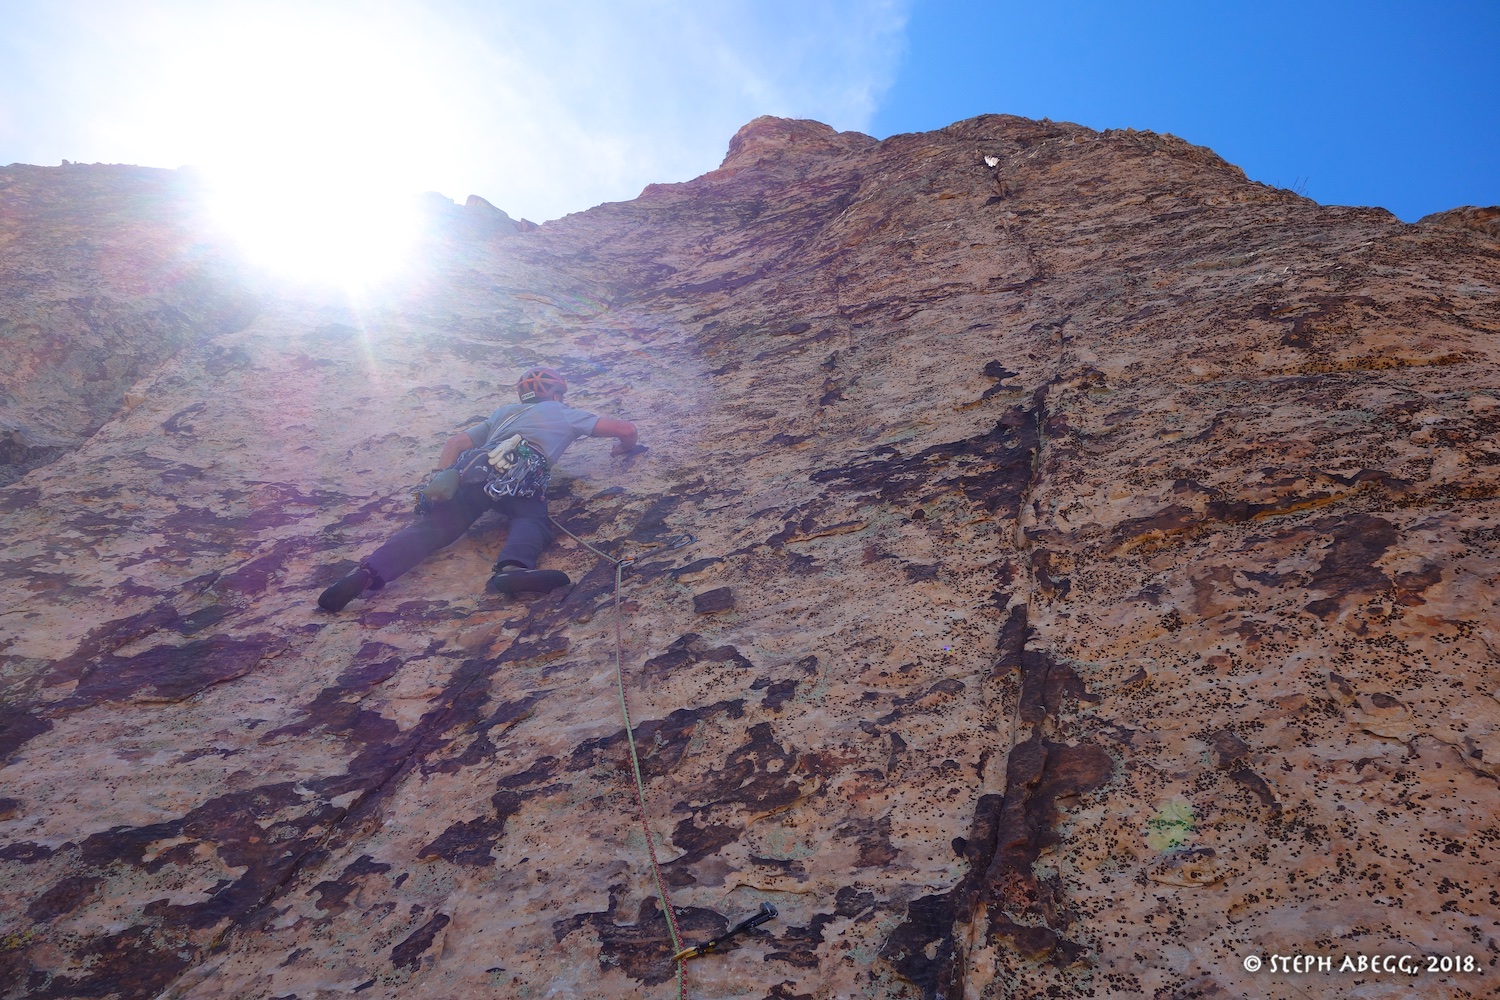
Pitch 10 looks steep and hard from below, but it ends up having positive varnished edges wherever you need them. And it is well-bolted. Awesome pitch.
PITCH 11 (5.9, 60')
(~5 bolts, no gear)
(we linked easily with Pitch 12)
We linked Pitches 11 and 12 easily to bring us to the top of the route. Danny and I had been swinging leads up to this point, so this was technically my pitch, but I was happy to let him lead the harder face-climbing stuff.
PITCH 12 (5.10c, 70')
(~7 bolts + a few offset nuts to supplement)
(we linked easily with Pitch 11)
Looking up Pitch 12. There is supposedly a 10c section on this pitch, but nothing felt too much past 5.9. Maybe 5.9+. Nice to have a soft rating on the last pitch. This pitch is fully bolted but a few nuts are nice to supplement the bolts.
TOP OF ROUTE!
First photo: Looking up towards the continuation on Resolution Arete. Danny and I had originally planned on continuing to the top of Mt. Wilson, but had decided at the car that morning it would be more fun to climb Inti Watana with no packs, and get back early enough so I could join the Urisotes for dinner and climb something the following day. We never regretted our decision. Someday I want to come back and climb the Resolution Arete in its entirety.
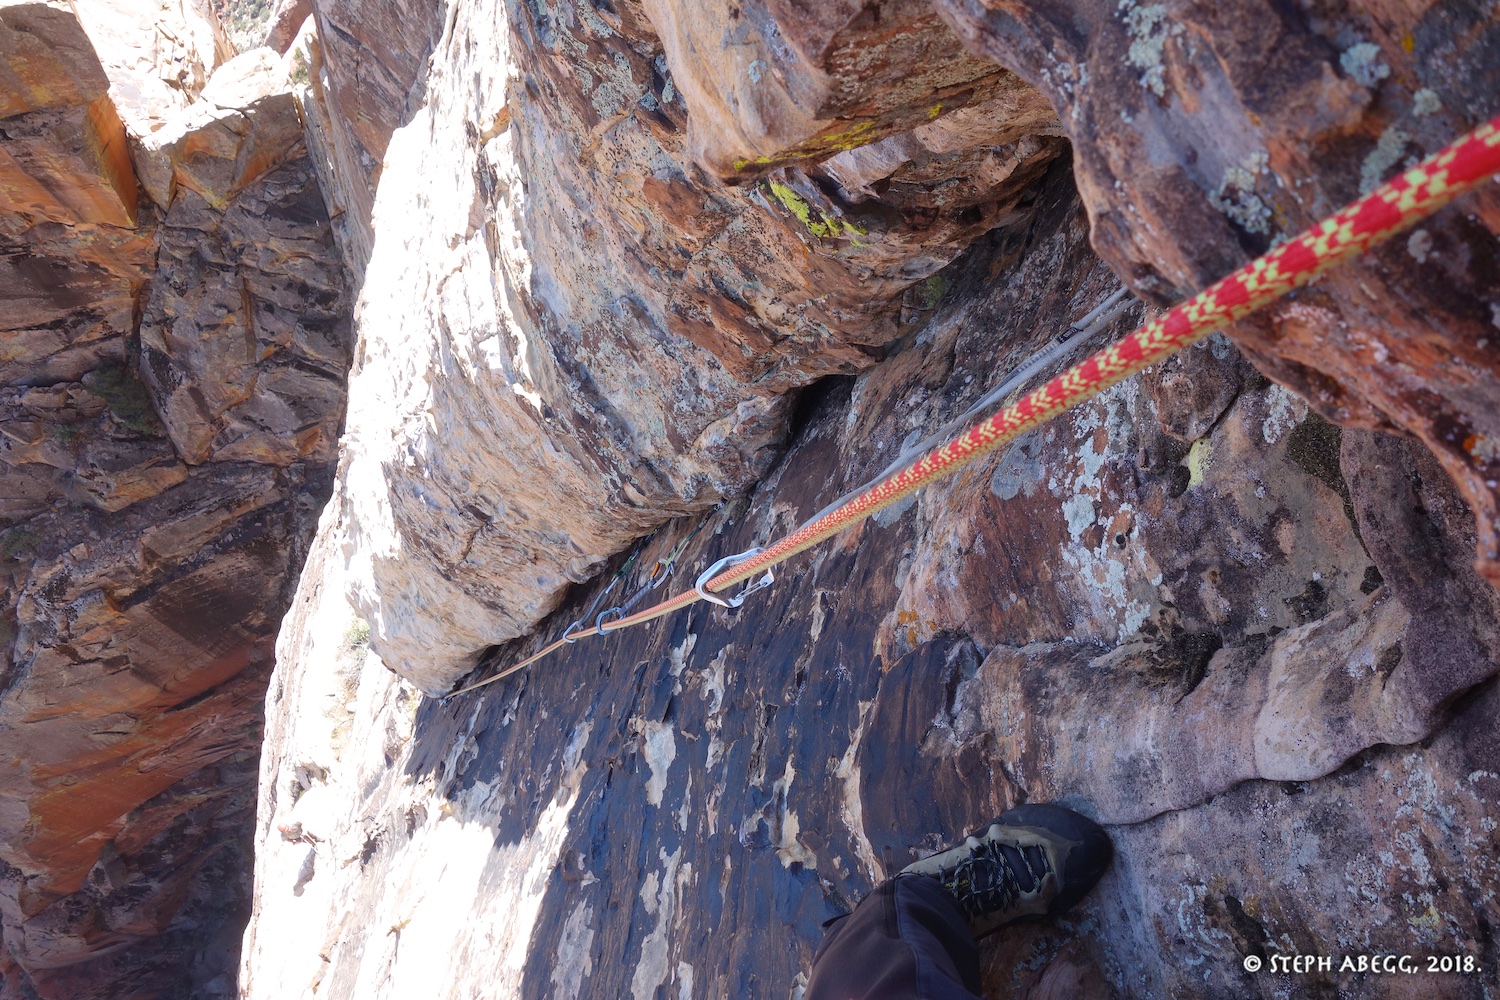
Second photo: You can see down the entire route from the top.
Third photo: View of Red Rocks to the north.
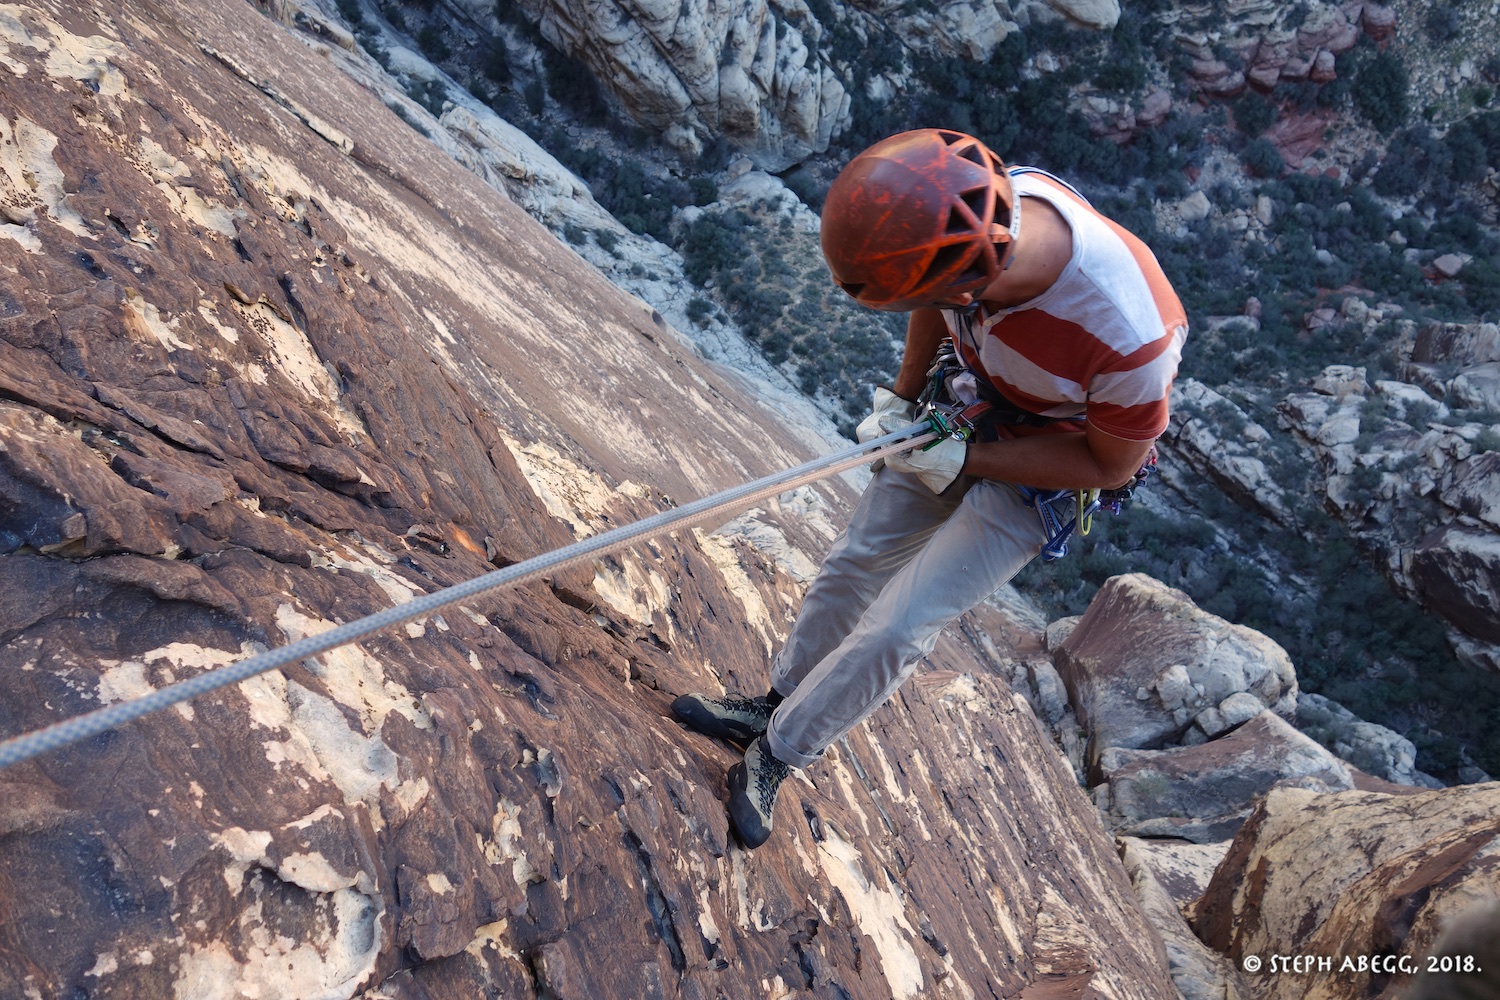
DESCENT
(rappel route with 2 ropes)
To descend, rappel the route with 2 ropes. We did this in 1.5 hours and 8 rappels, as follows:
Link Pitches 12-11
Link Pitches 10-9
Rap Pitches 8, 7, 6 individually
Link Pitches 5-4
Link Pitches 3-2
Rap Pitch 1 on single rope
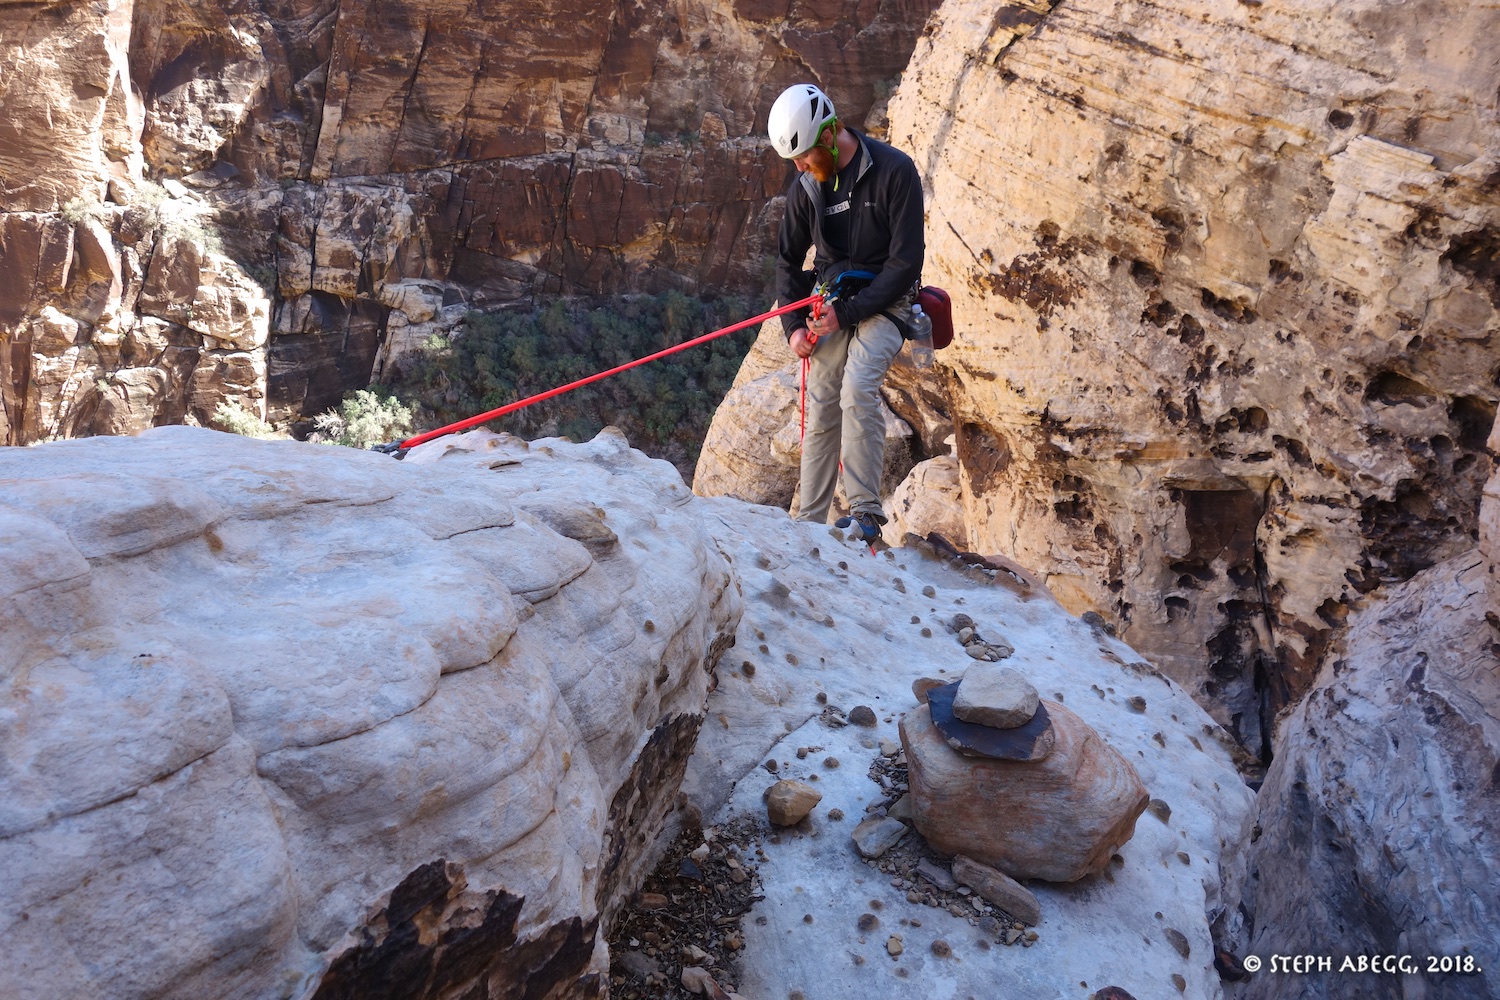
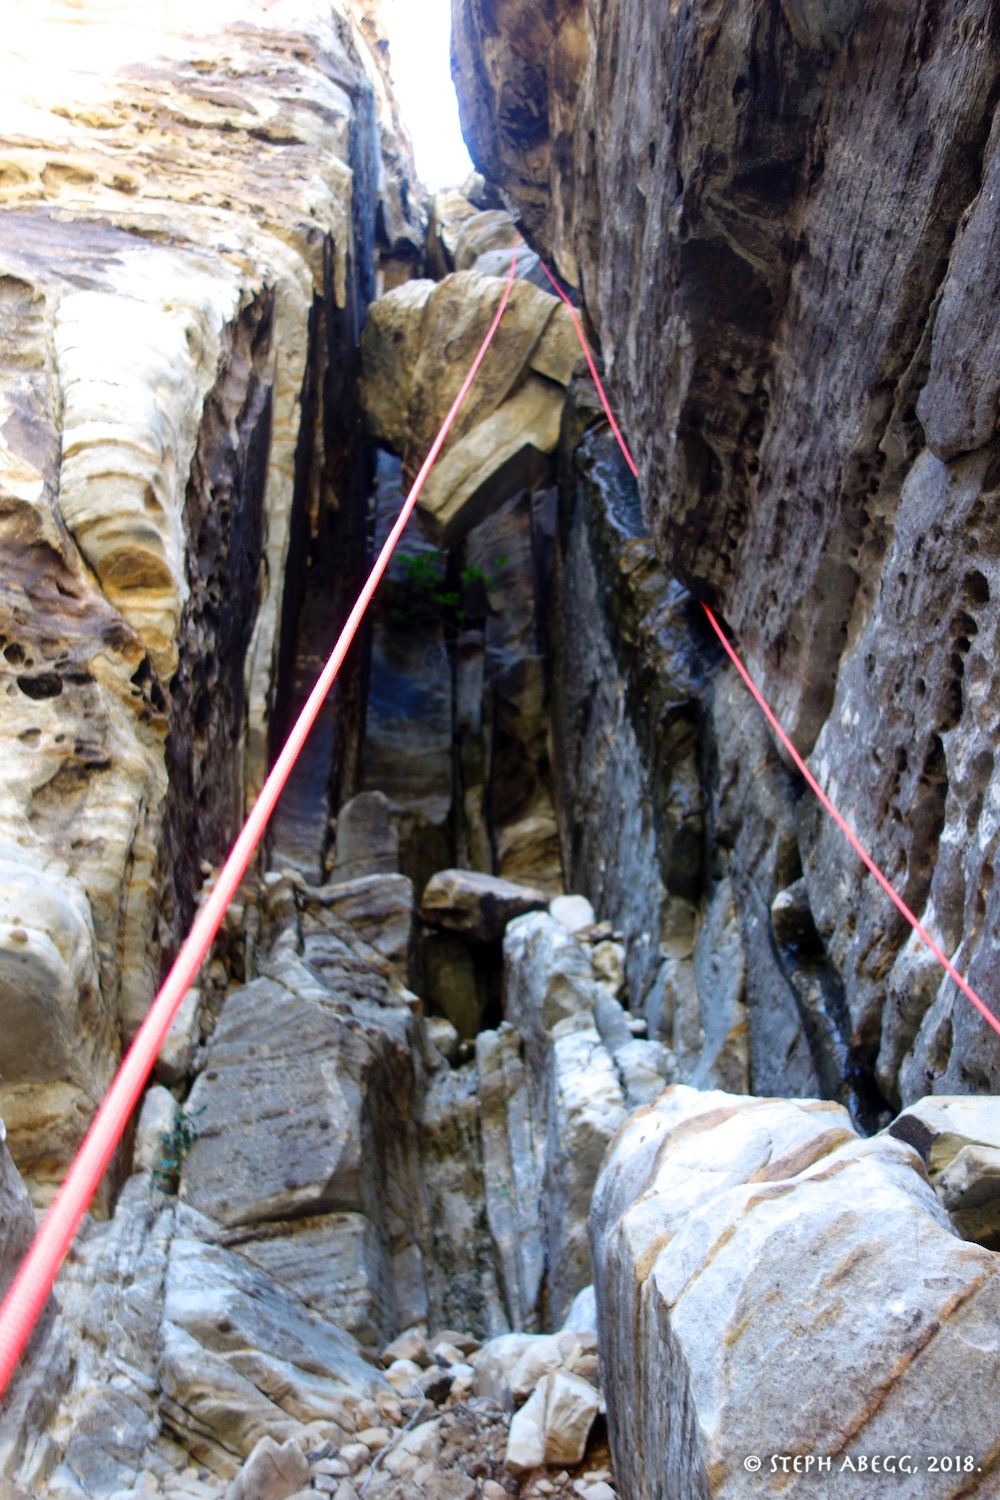
On the hike out from the base of Inti Watana, you can avoid scrambling down White Rot Gully by scrambling down the gully to descender's right of White Rot Gully and making a single double-rope rappel (or 2 single-rope rappels) from the bottom of the gully. See my overlay for a visual. I'd definitely recommend this way as White Rot Gully would be no fun to scramble down.
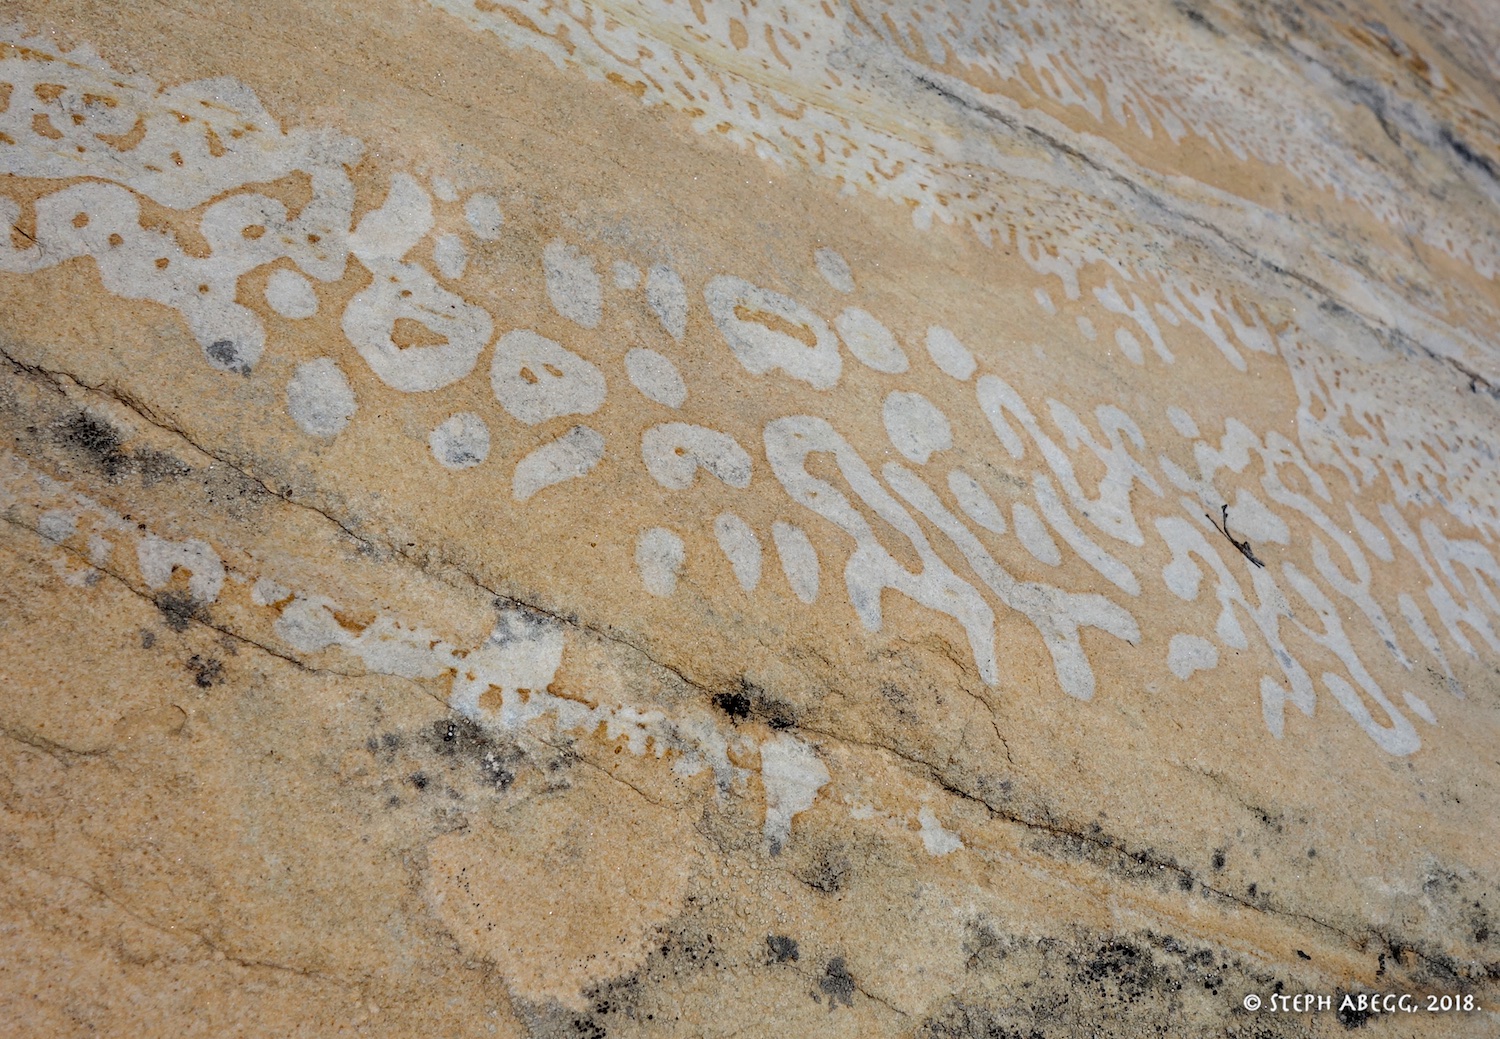
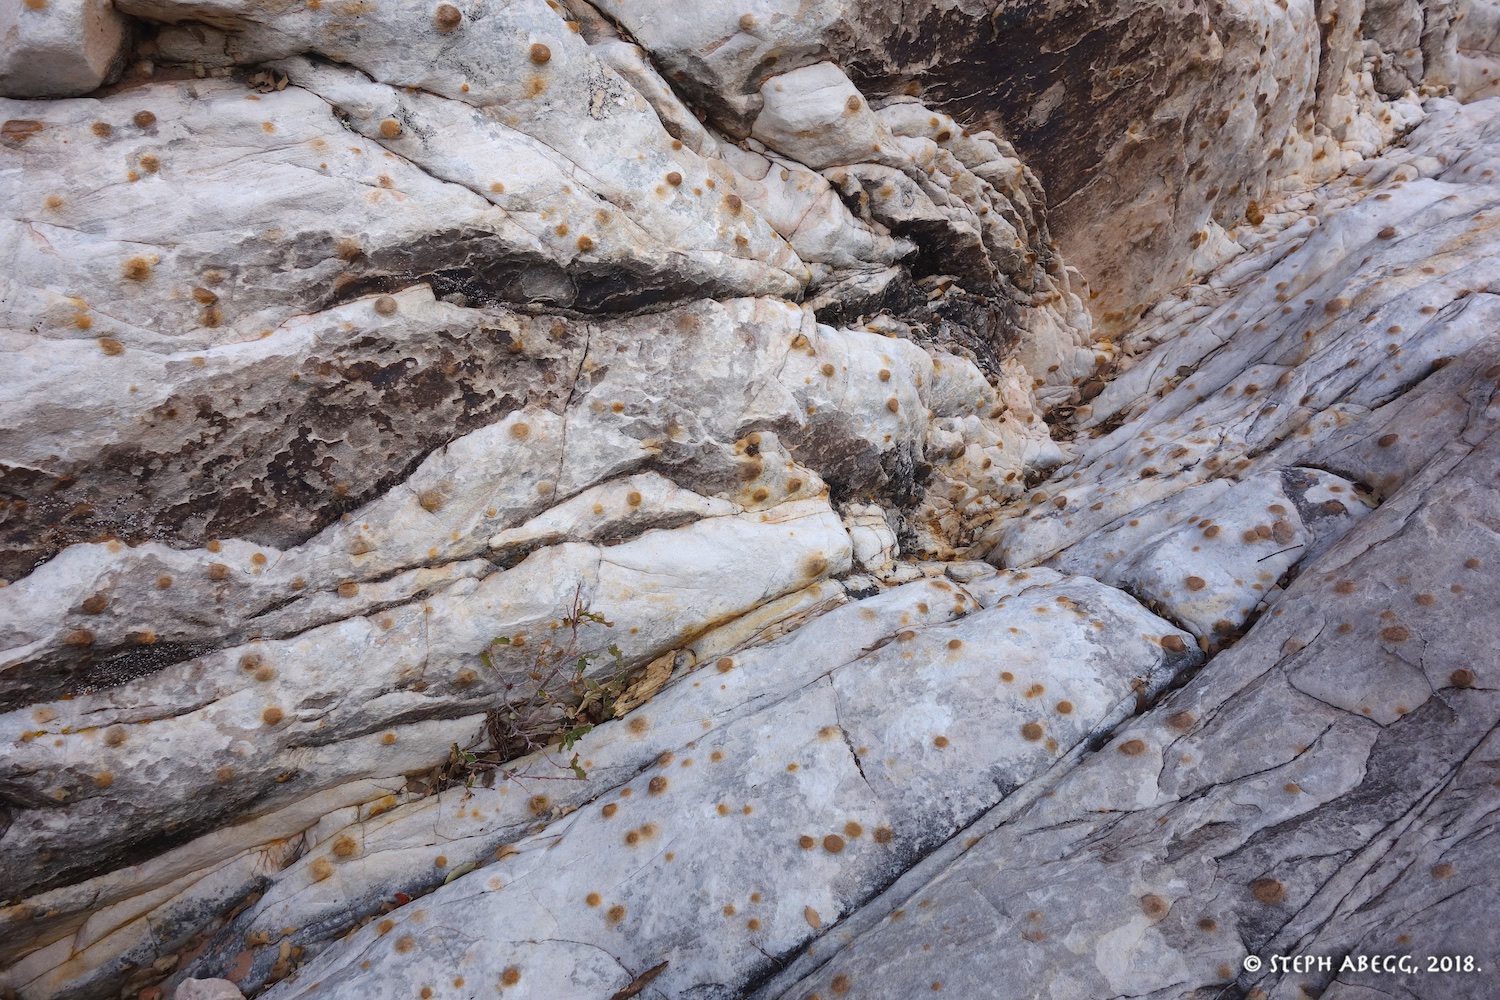
Last photo: Danny and I decided to call these "iron pimples" and someday put up a route that climbs this sort of rock called "Iron Pimples."
After exploring the upper canyon a bit, Danny and I decided to climb Refried Brains (a route on the left side of Black Velvet Wall). There was a party on the first pitch, so while we waited we climbed Spark Plug, a single-pitch route that climbs a steep fingercrack and corner on the far left end of the wall — bring lots of 0.4's! After that we climbed Refried Brains (the route actually goes all the way to the top of Black Velvet Wall, but the rock quality deteriorates after the first 4 pitches, so most climbers climb the lower 4 pitches, as we did). These four pitches are long with great rock and interesting climbing that is sustained at the grade. I thought it was really good climbing. It was pretty cool to climb this route with Danny, since his parents put this route up 12 years before he was born.
FA (Spark Plug): Paul Van Betten & Sal Mamusia, 1983. FA (Refried Brains): Joanne Urioste, Jorge Urioste, Stephanie Petrilak, 1979.
Route Overlay
Pitch-by-Pitch Photos
(Pitches as per Handren guide)
Photos:
Notes:
APPROCH
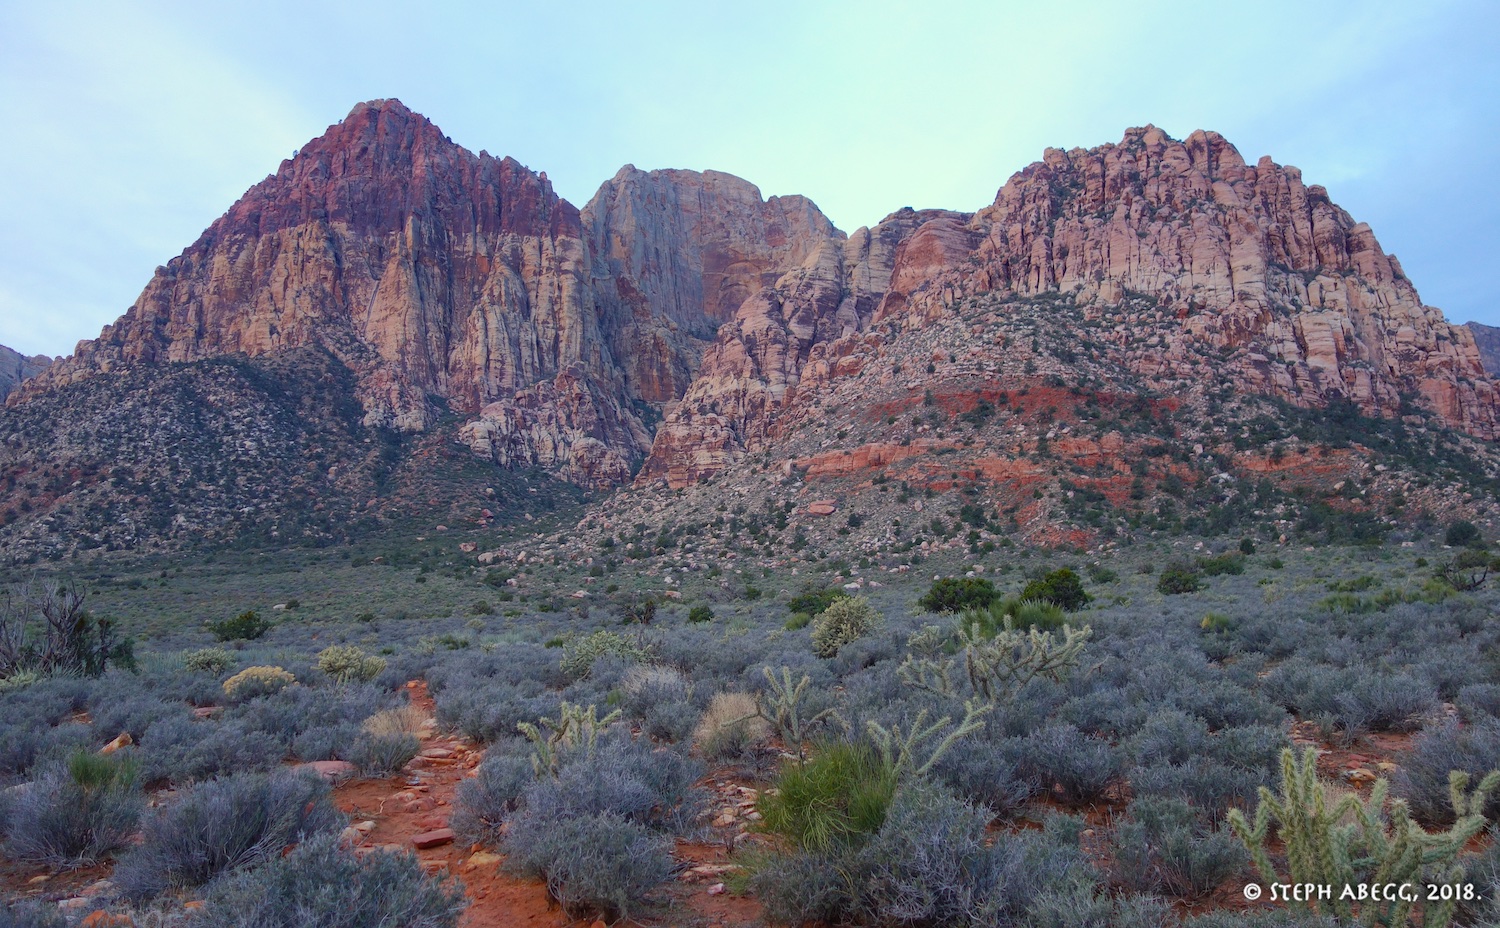
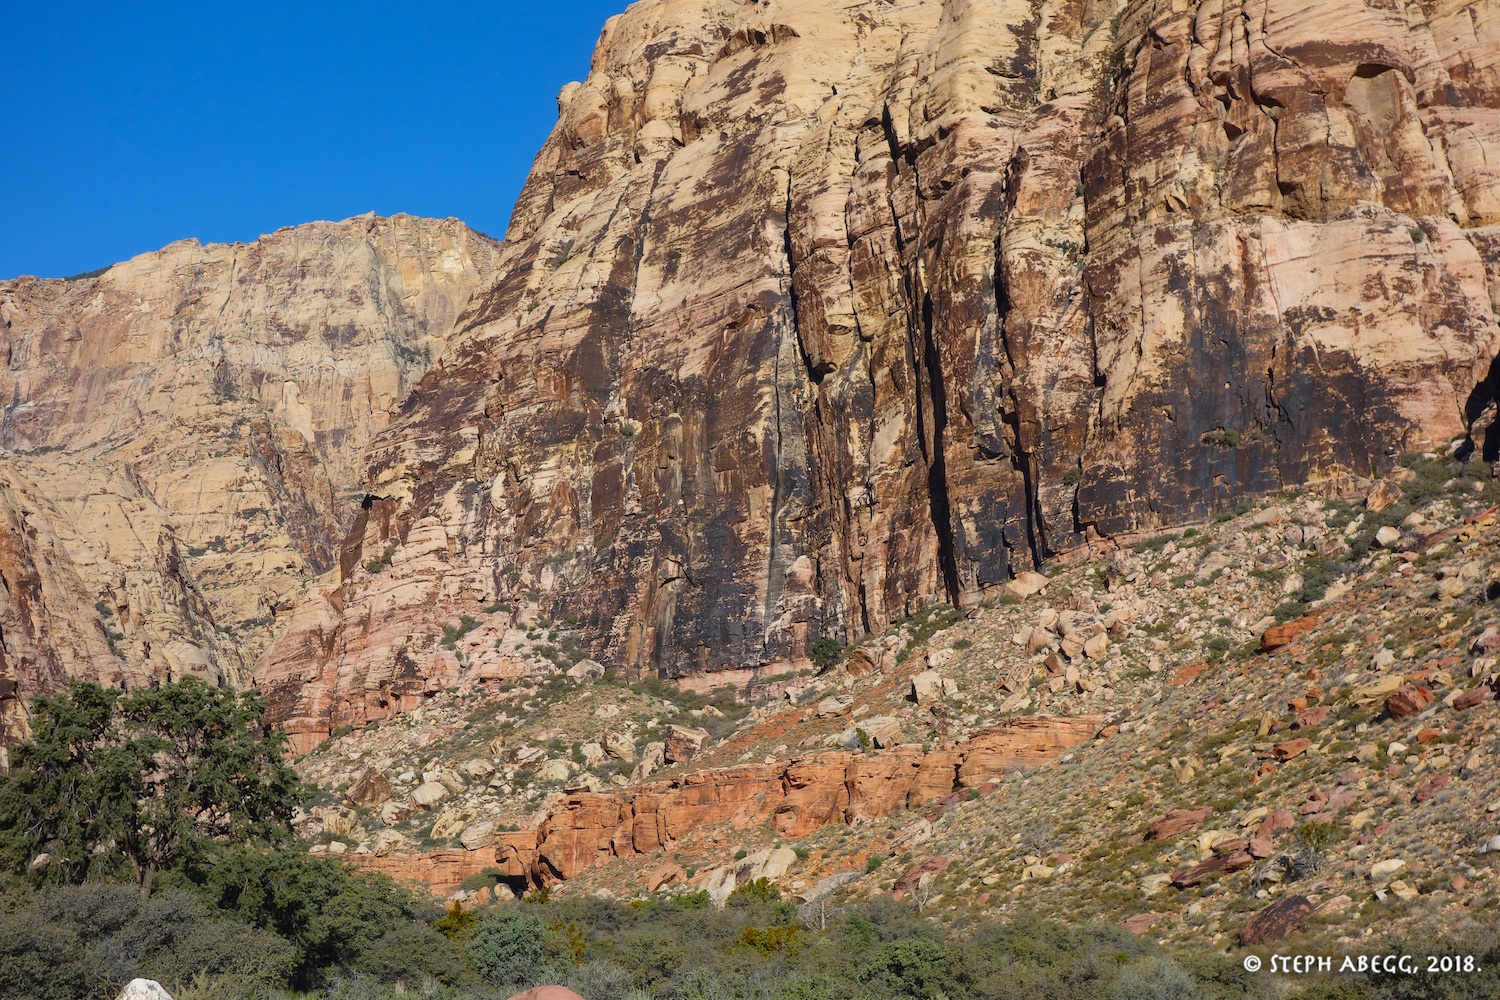
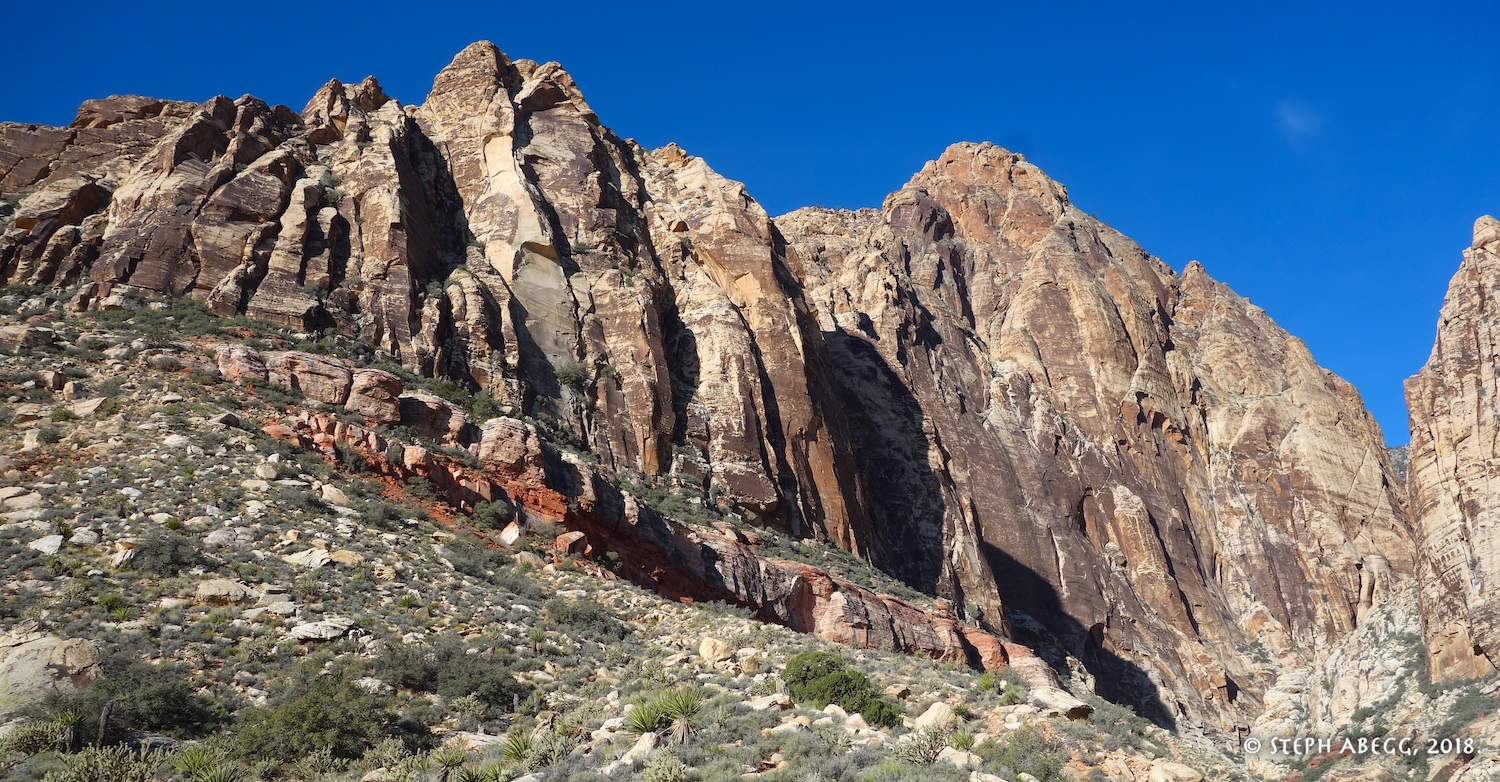
Black Velvet Canyon in morning light. I love this place.
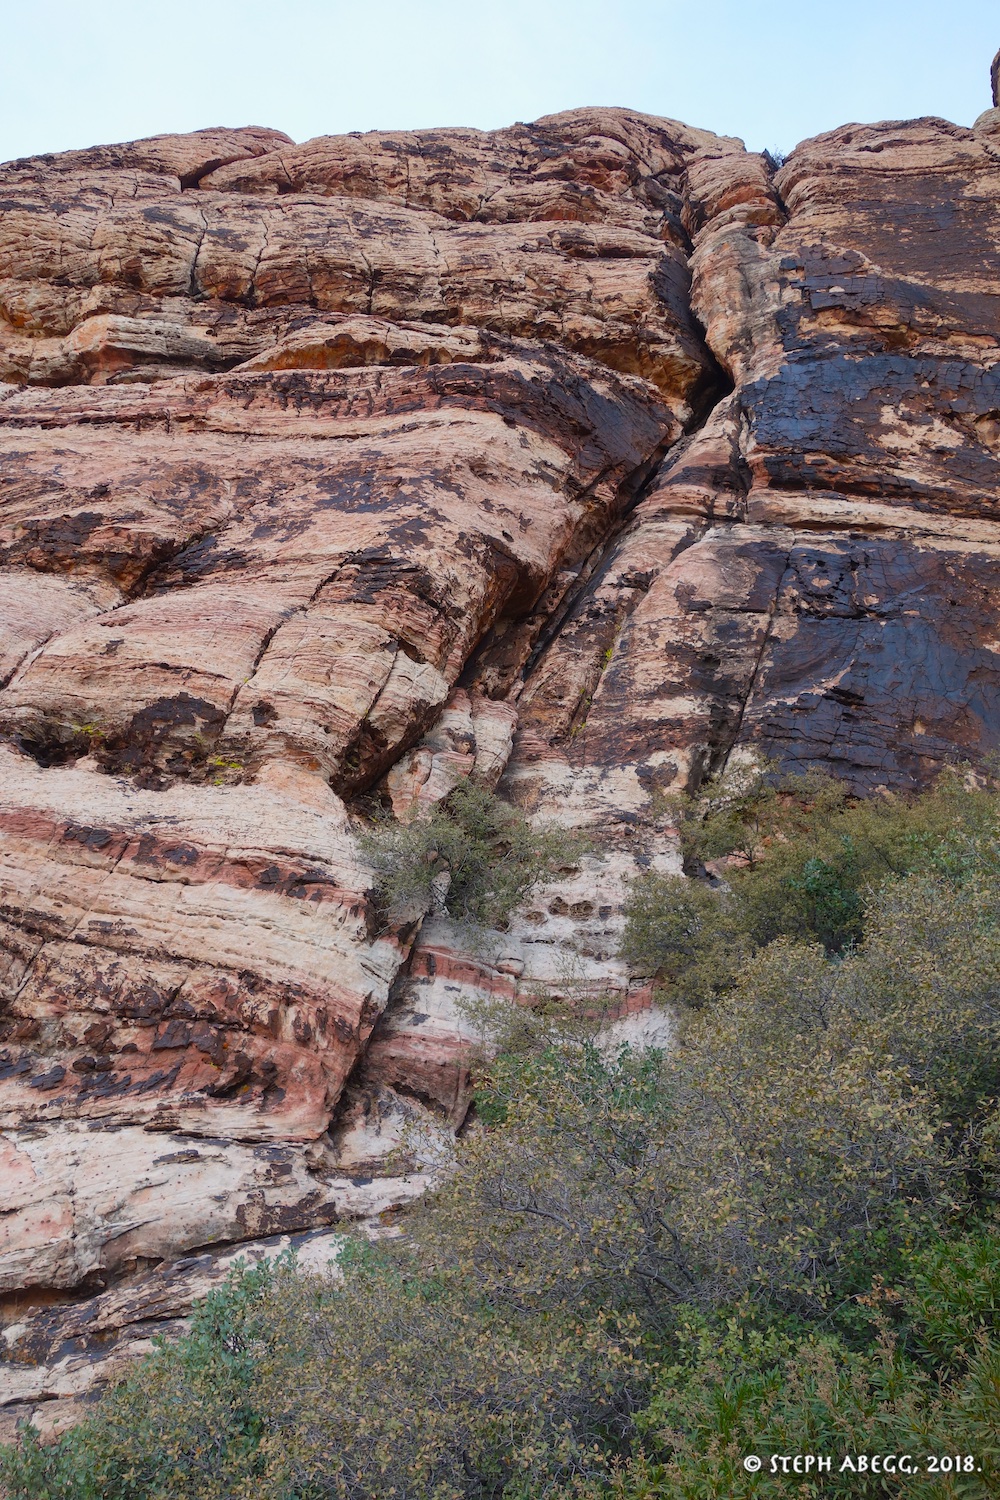
SPARK PLUG
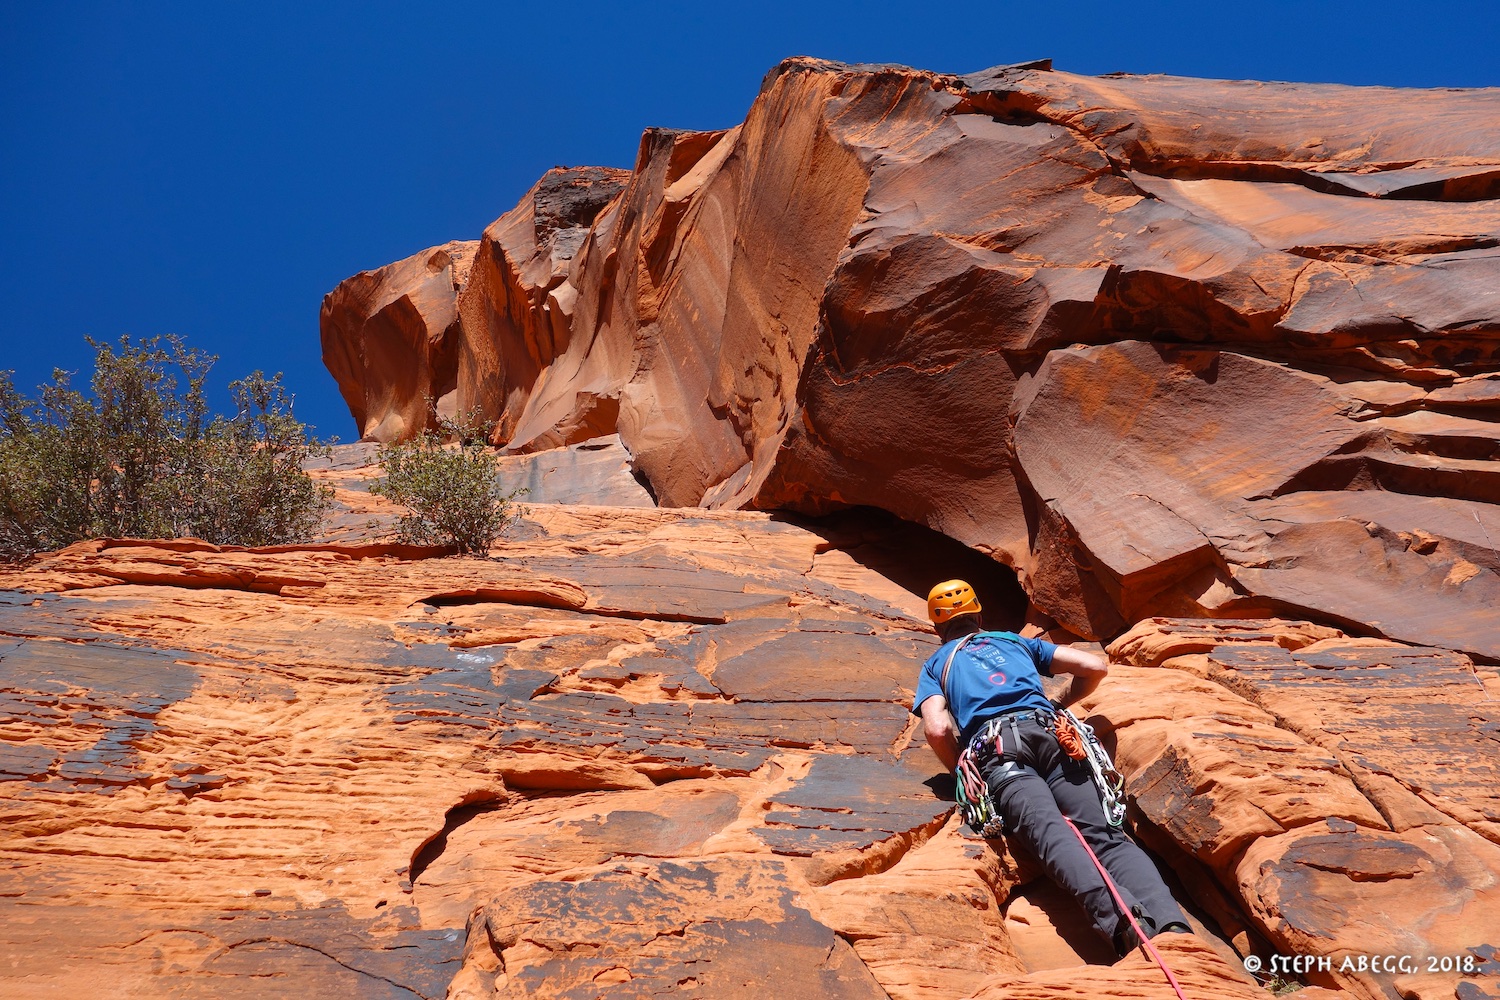
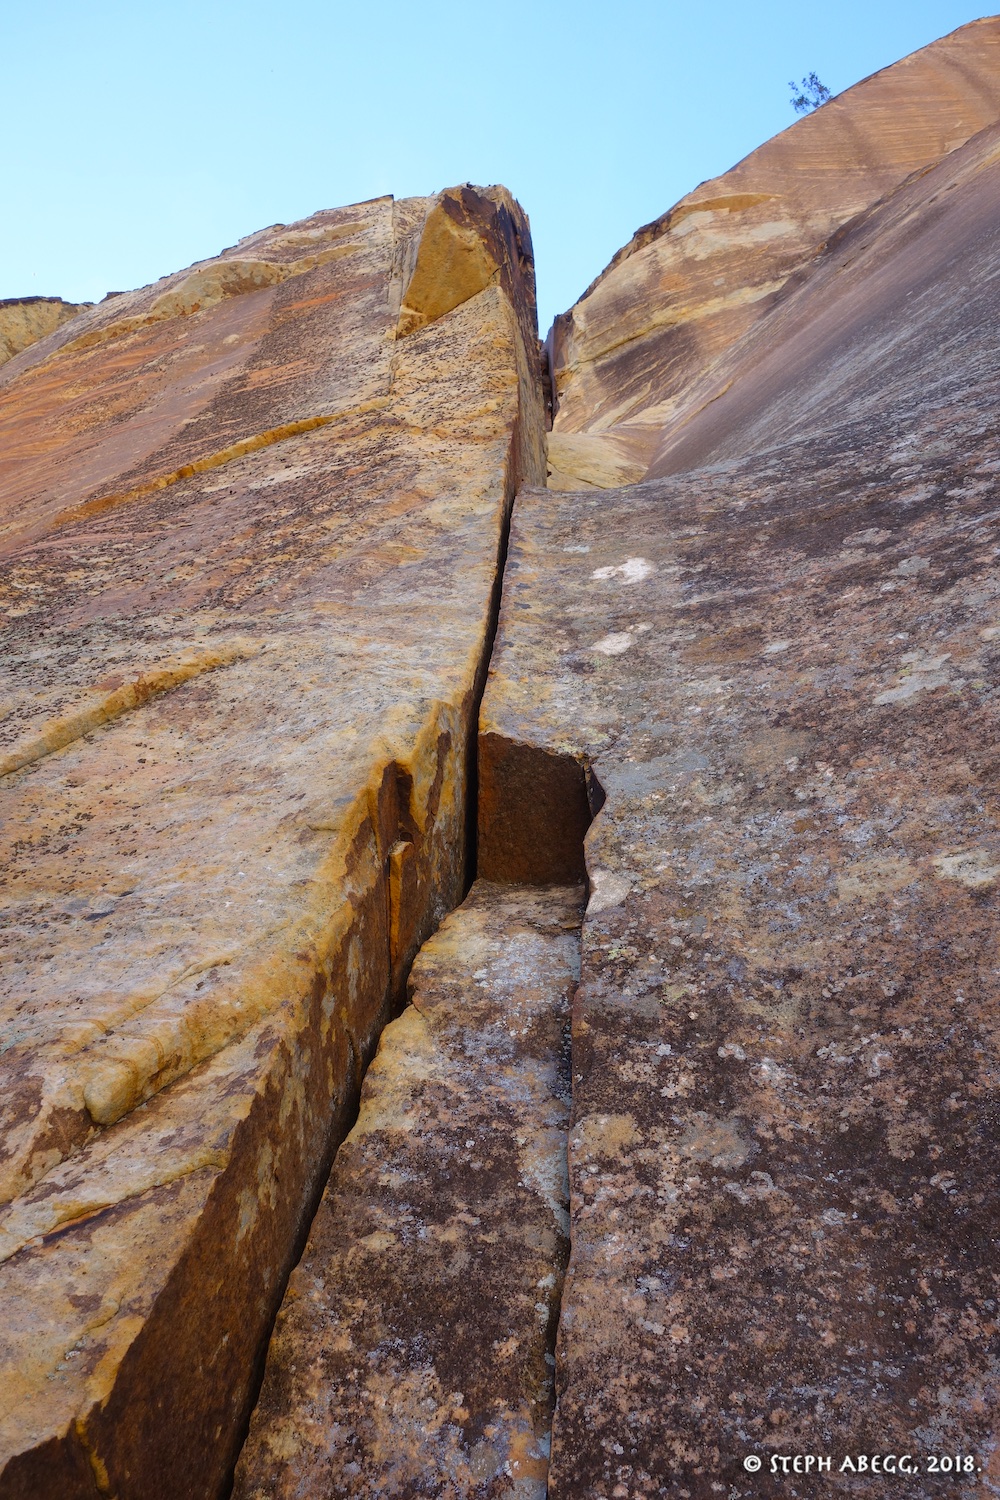
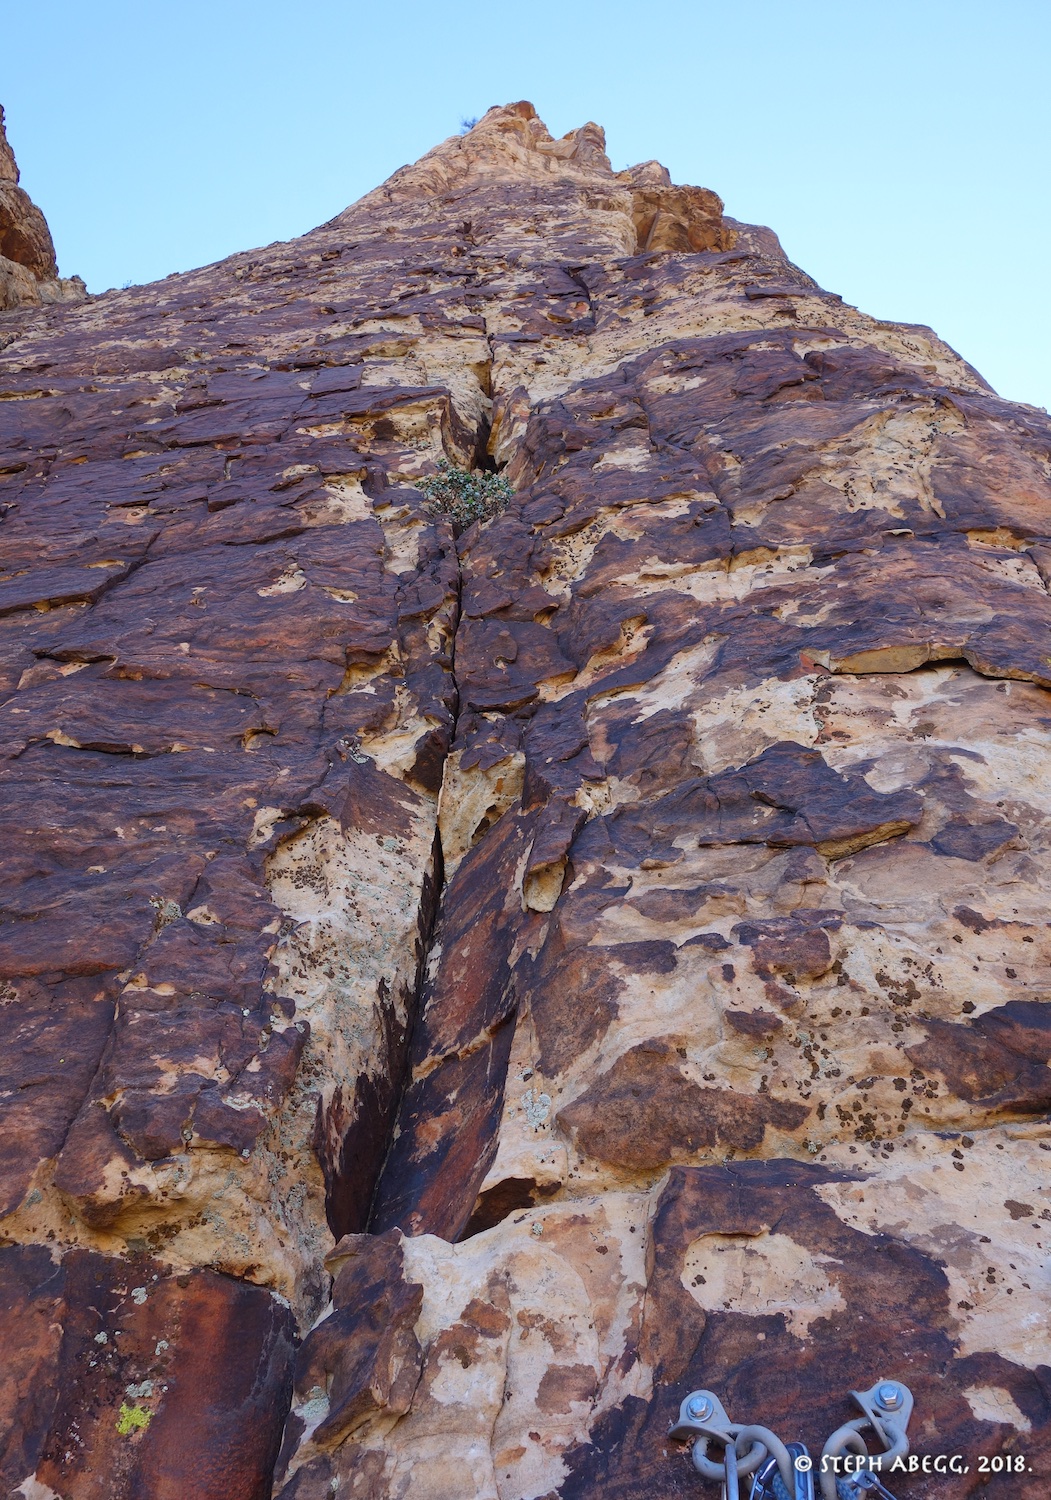
PITCH 1 (5.10b, 100')
This single-pitch climb packs a punch and is a good pitch to climb if you are waiting in line for a route nearby on Black Velvet Wall. The guidebook said triples in 0.75 but I believe this should have said triples (or more!) in 0.4. I only needed 1-2 0.75 but could have been happy with half a dozen 0.4's (which is a tricky size for my hands as it is).
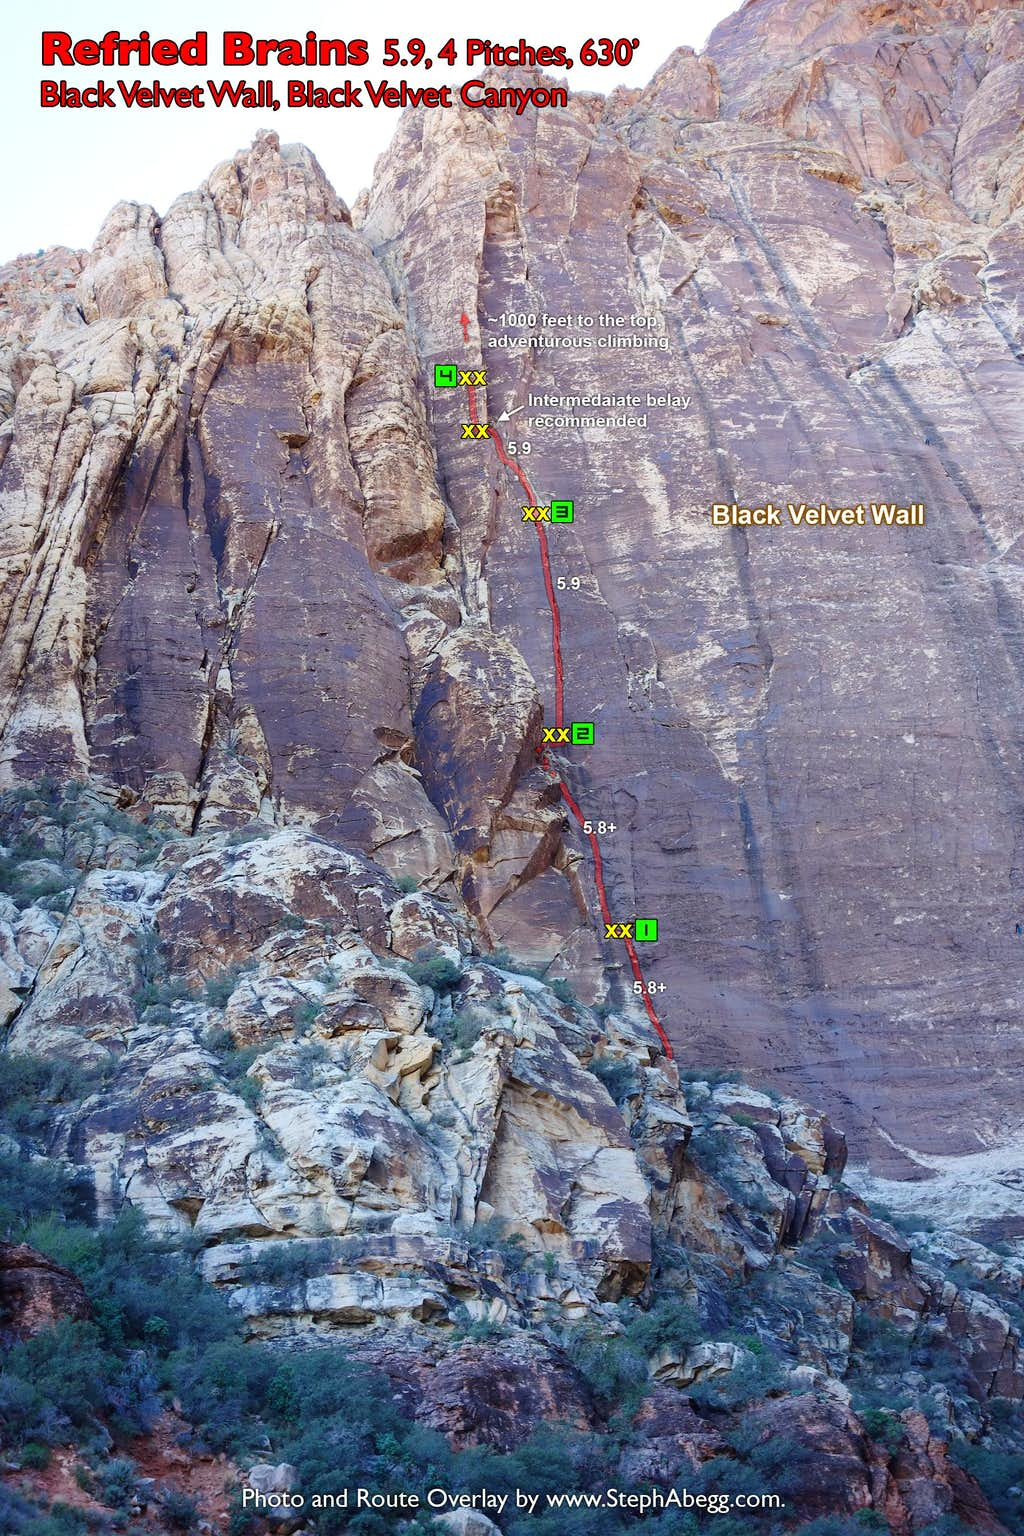
REFRIED BRAINS
PITCH 1 (5.8+, 150')
A good pitch with a few cruxy moves where offset nuts work well for pro.
REFRIED BRAINS
PITCH 2 (5.8+, 150')
Climbs the corner through some interesting features.
REFRIED BRAINS
PITCH 3 (5.9, 150')
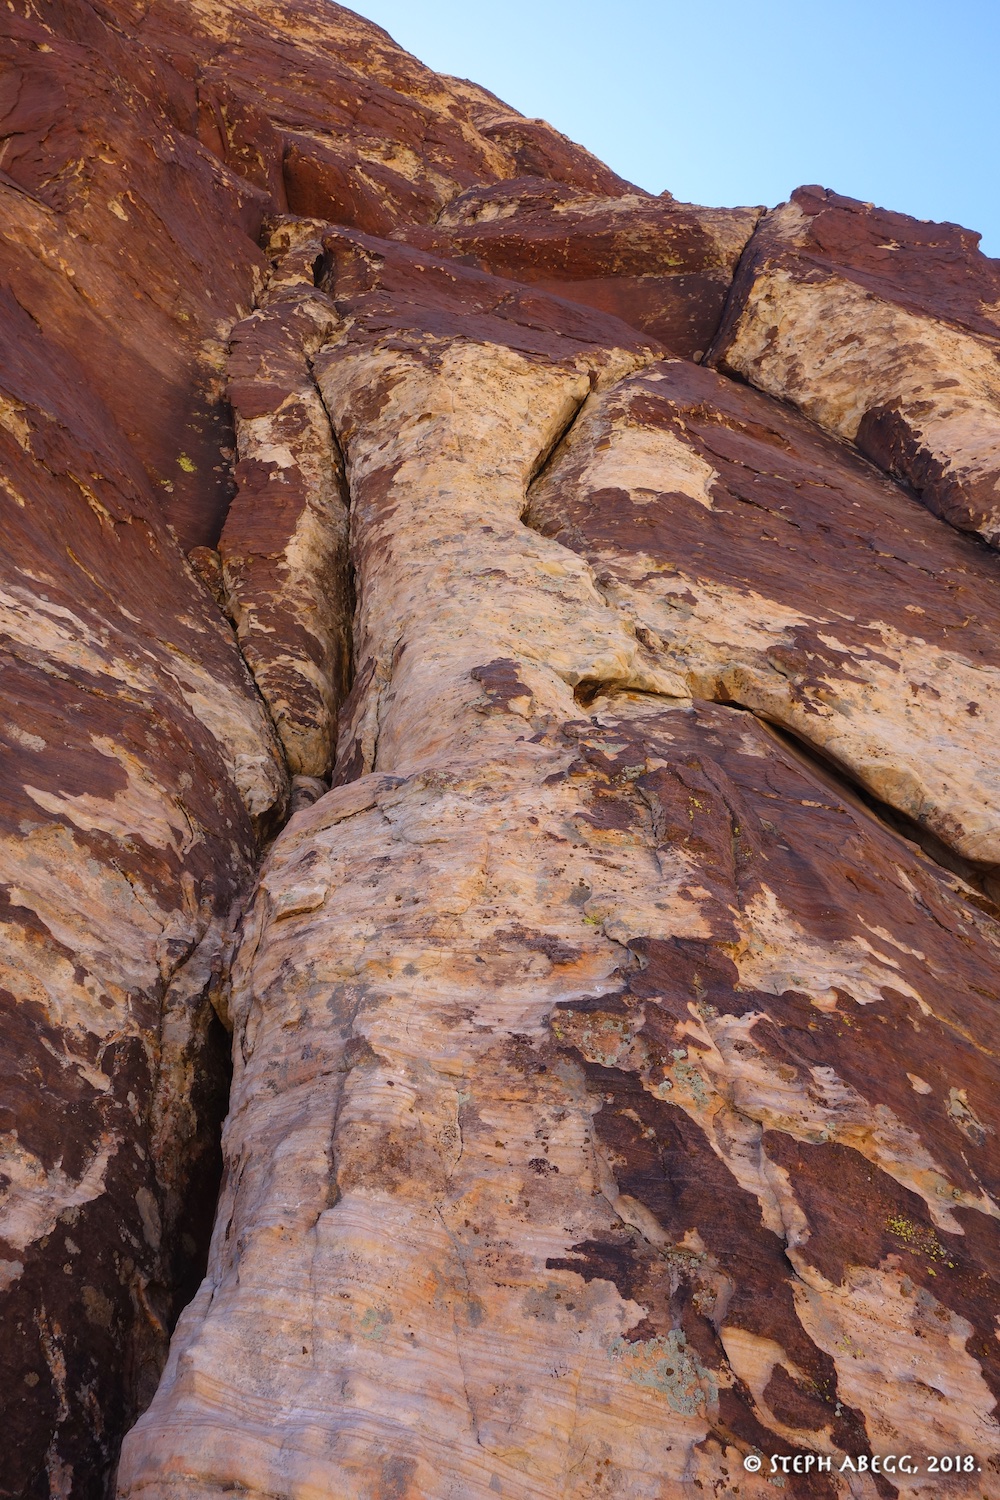
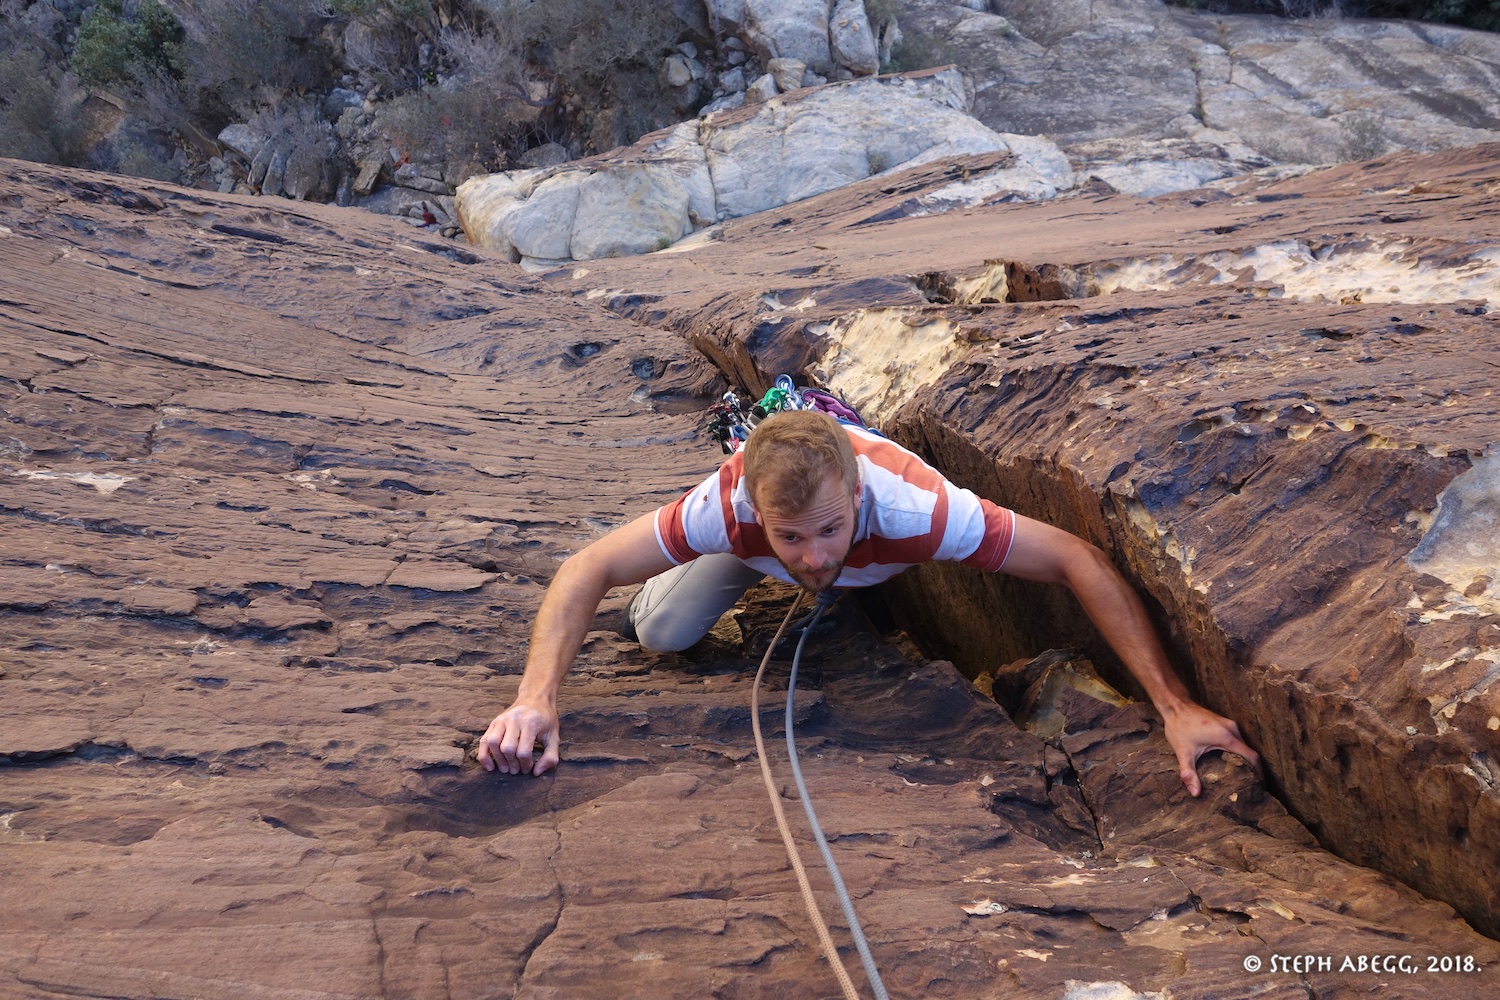
Great climbing up a varnished crack, which has a little of everything (offwidth, hands, fingers, jugs,...).
REFRIED BRAINS
PITCH 4 (5.9, 180')
(best to break into 2 pitches with intermediate belay on arete)
Another cool pitch. To avoid heinous rope drag on the last part of this pitch after turning the arete, it is best to break this into two pitches with an intermediate belay at the arete.
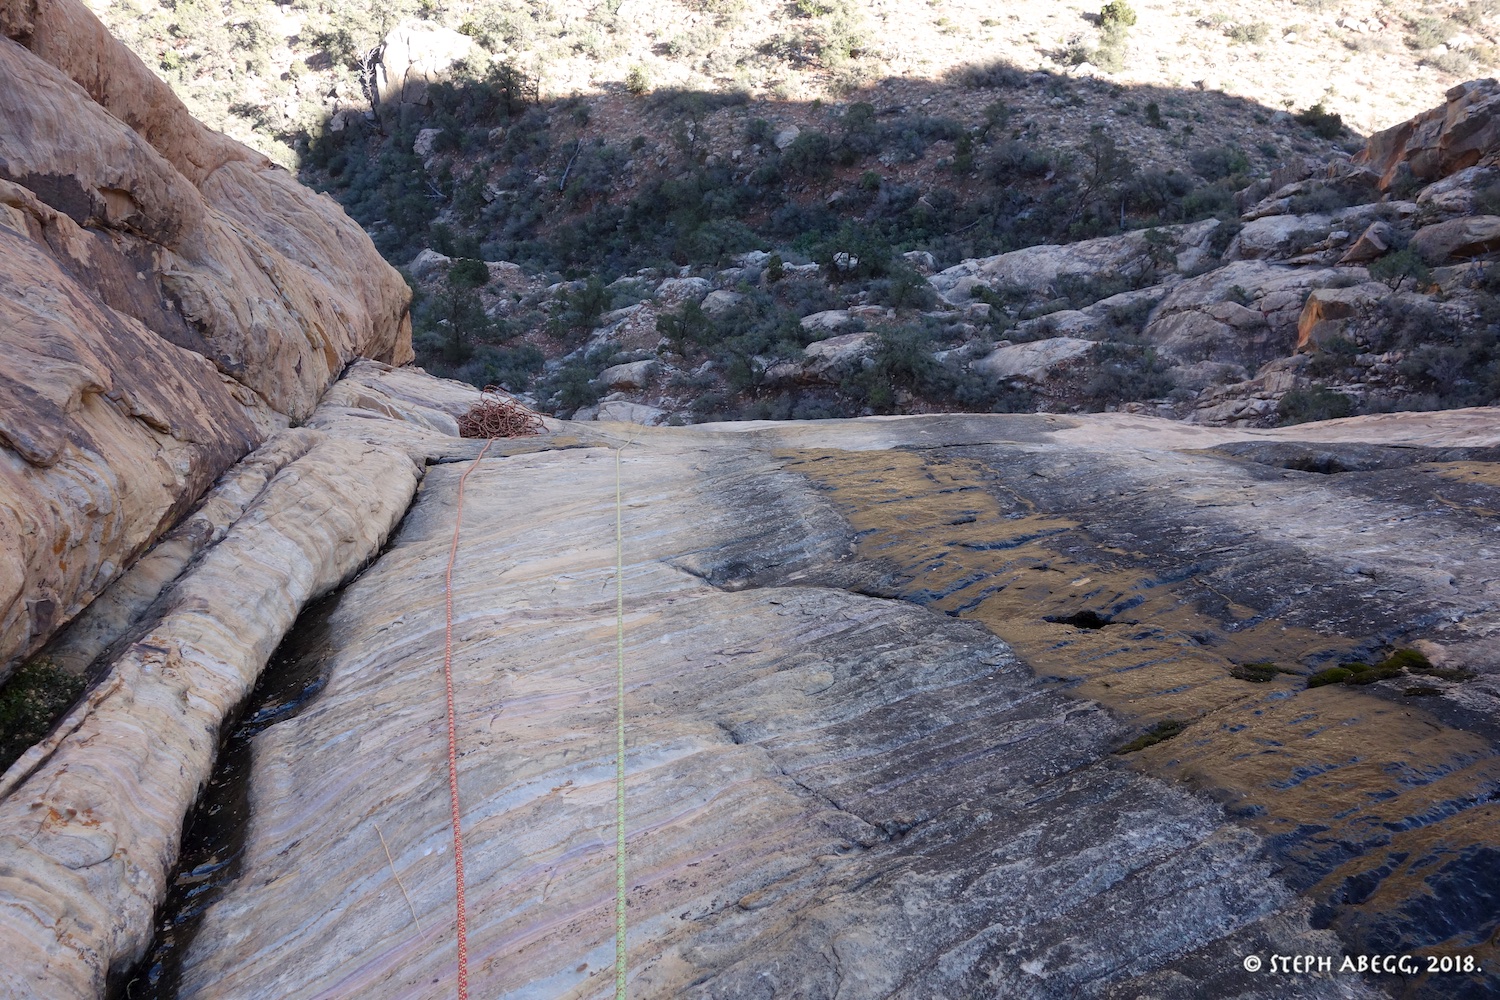
DESCENT
(rappel route with 2 ropes)
The first photo shows a view up from the top of Pitch 4 at the continuation of the route. The rock quality deteriorates and there are no fixed anchors after the top of Pitch 4, so most climbers rappel from here.
OTHER PHOTOS FROM THE DAY
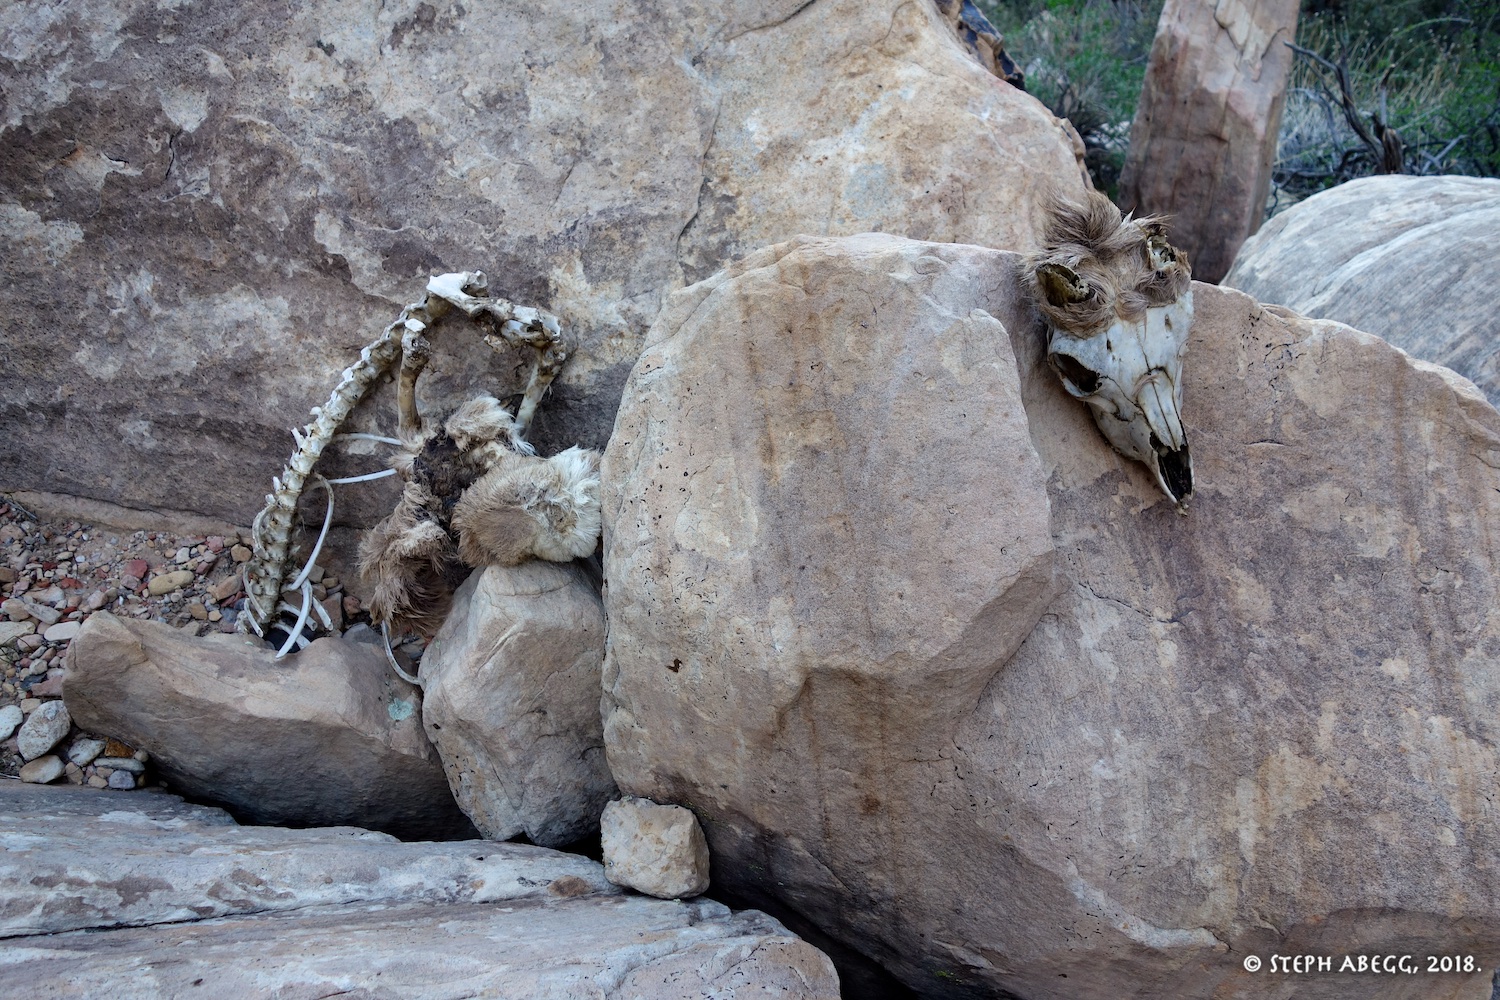
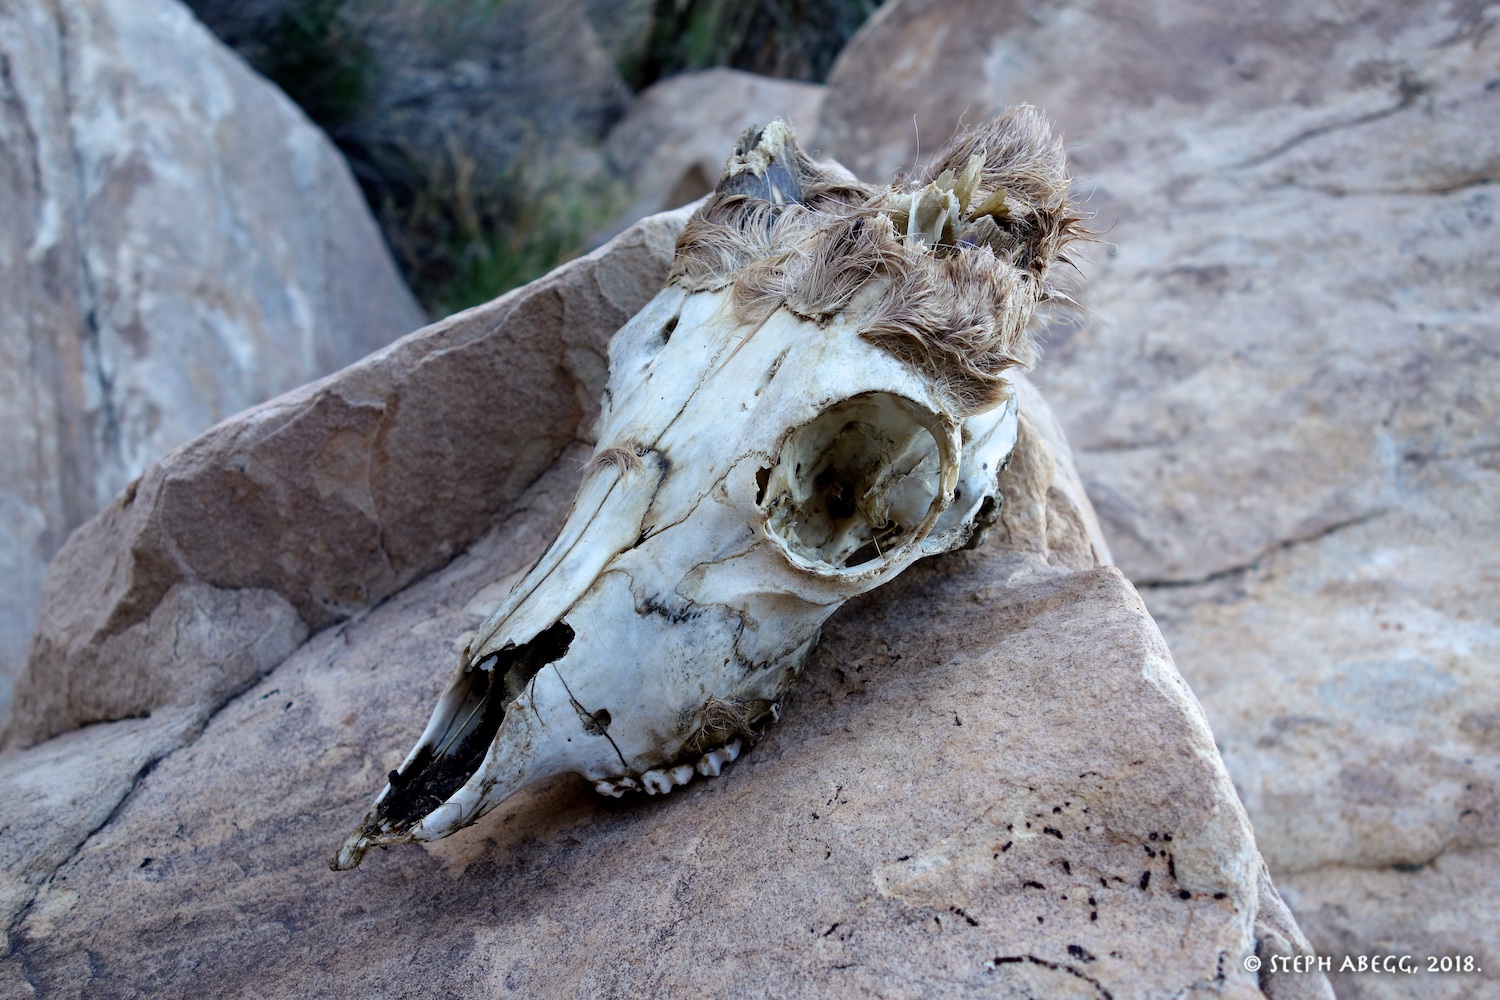
Photos 1-2: We found the remains of a bighorn sheep while hiking out.
Photos 3: Beautiful spring evening in Red Rocks. I really do love this place.
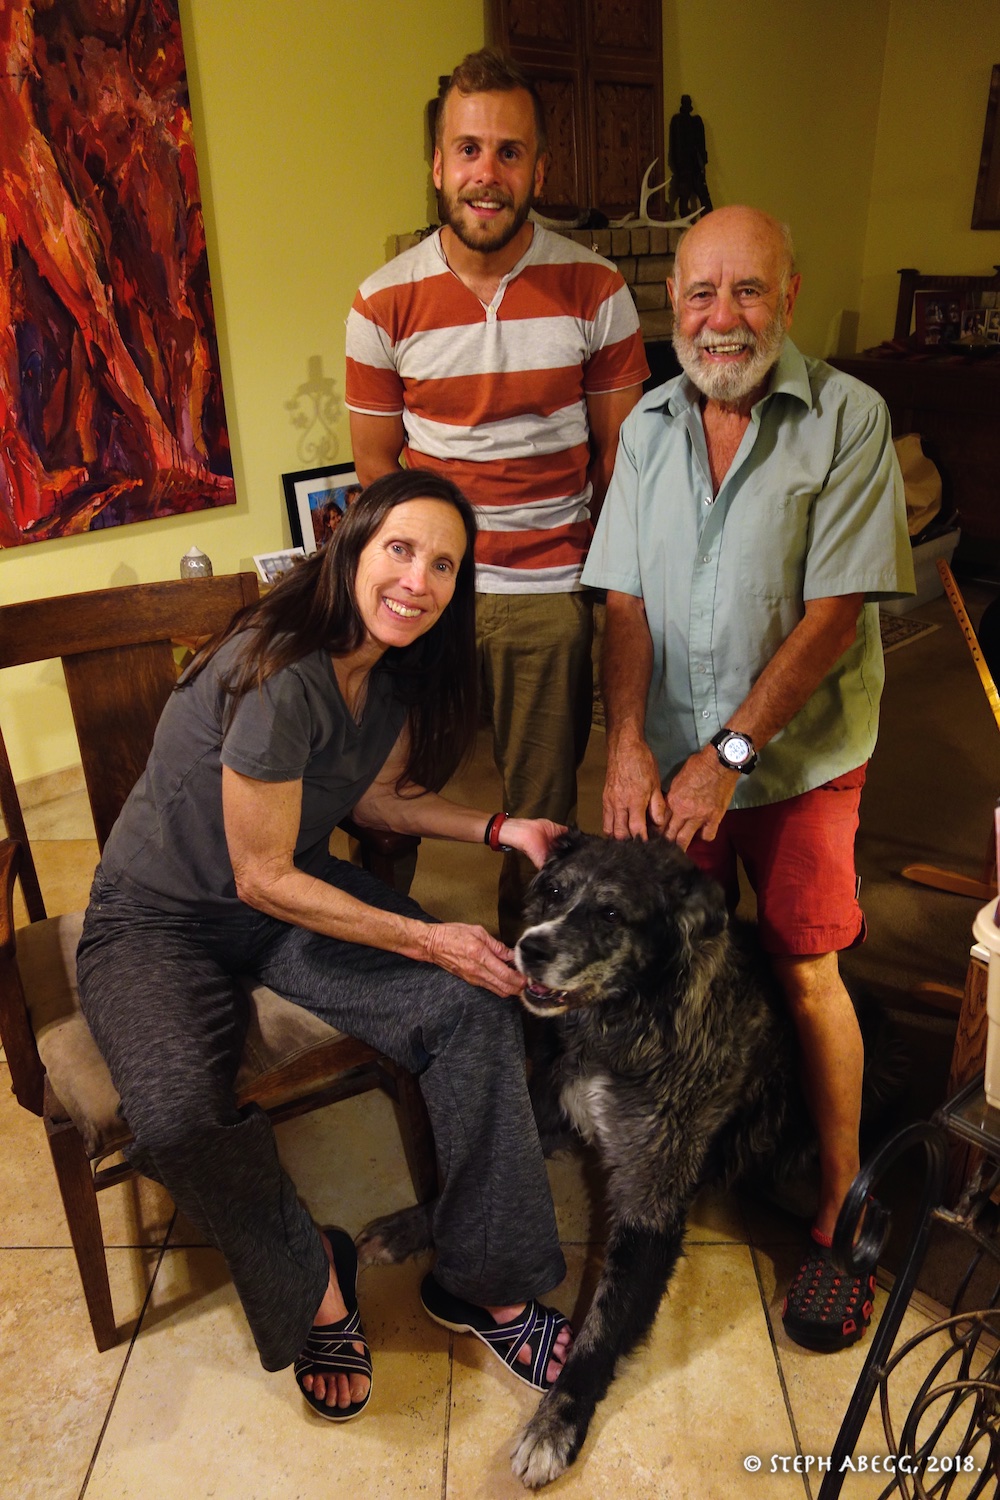
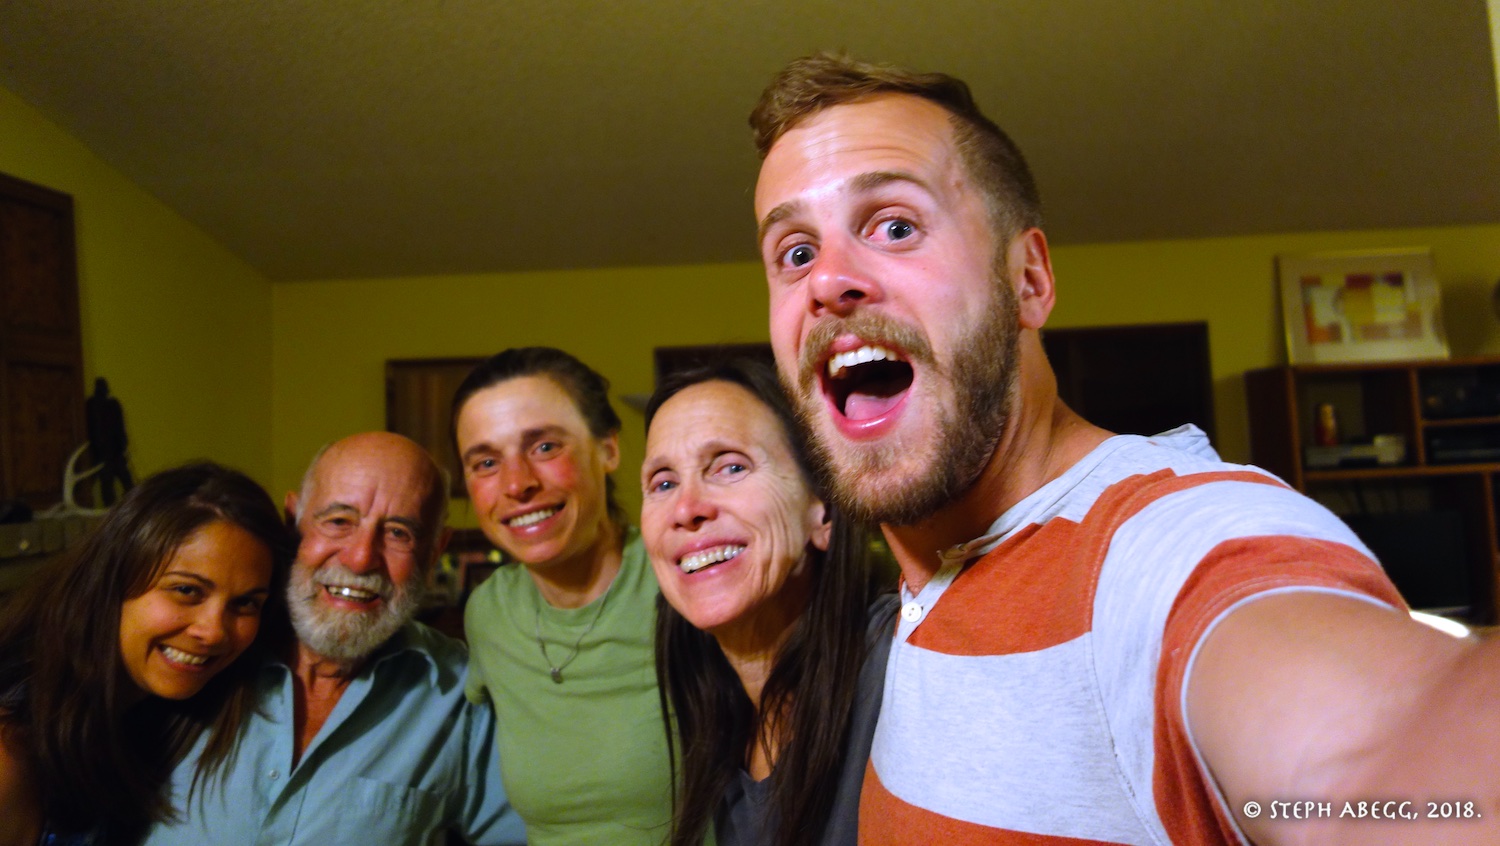
Photos 4-5: I went to the Uriostes' that evening for dinner. The Uriostes are such cool people, and one cannot help but have fun in their presence. I am fortunate to know them and of course so thankful to them for all of the awesome routes they put up all over Red Rocks. Joanne gave me a list of climbs I should do next time I am there, and I cannot wait until my next trip to Red Rocks!
Useful beta. Updated route information. Corrections. Historical notes. Interesting facts. No fluff please. Please do not put links in your comment, as my spam filter will filter those comments out.