3.1. Northern Pickets
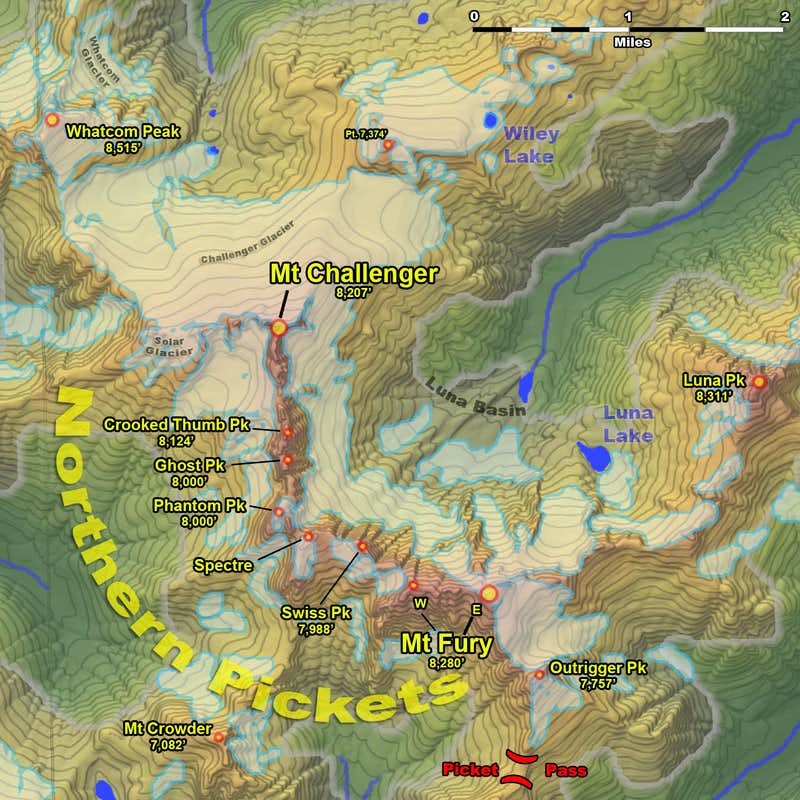
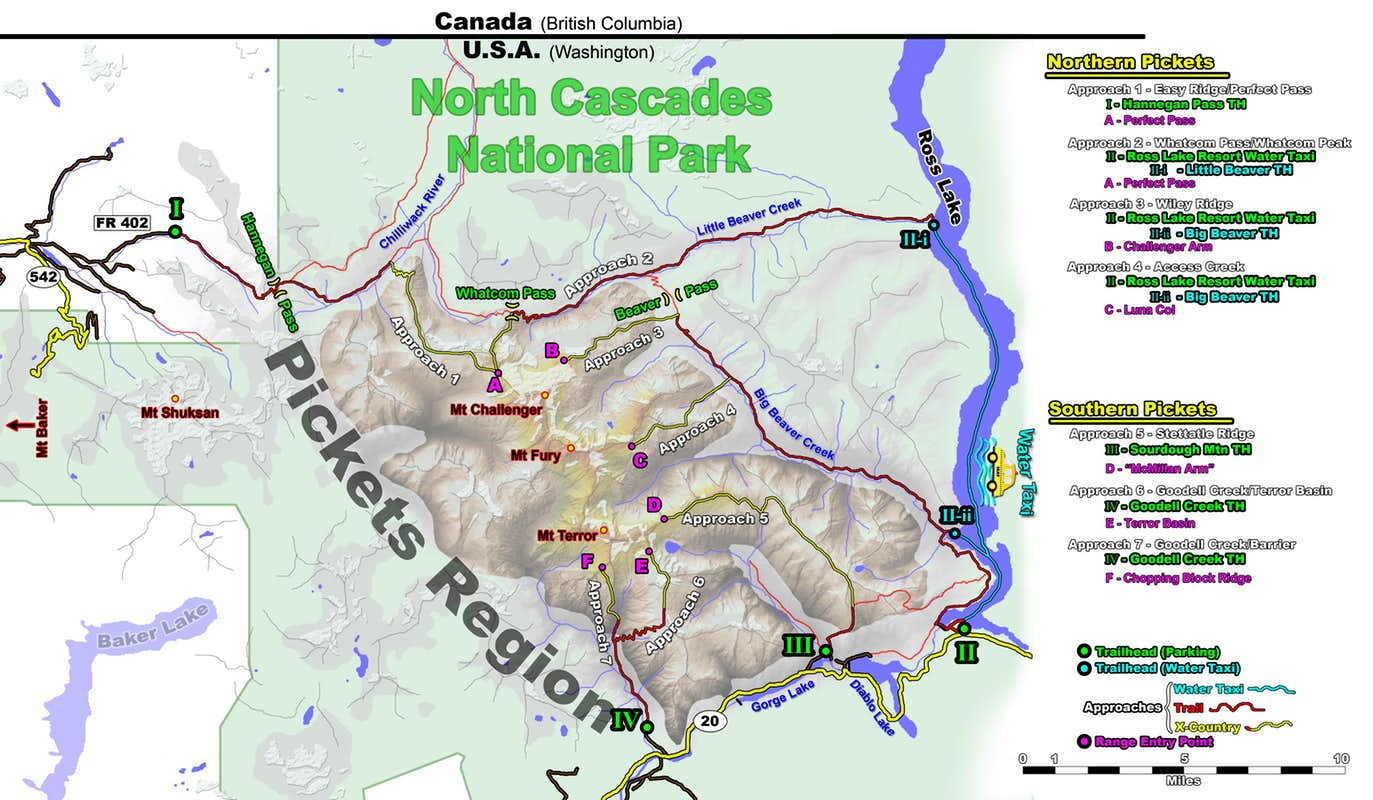
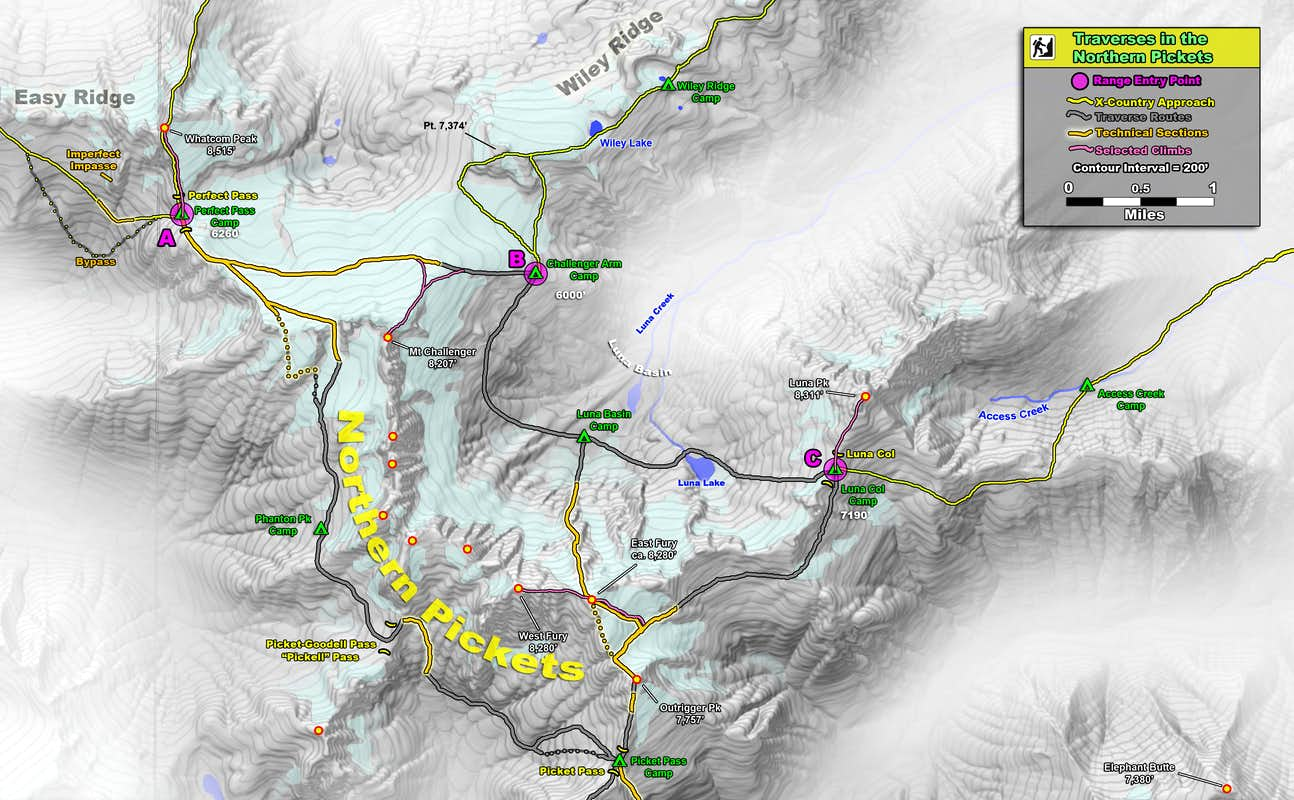
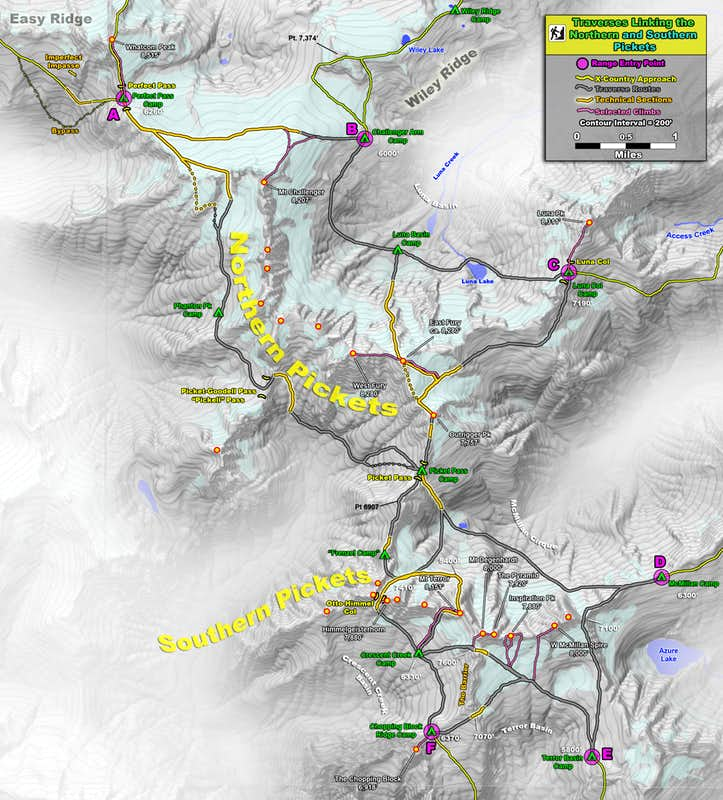
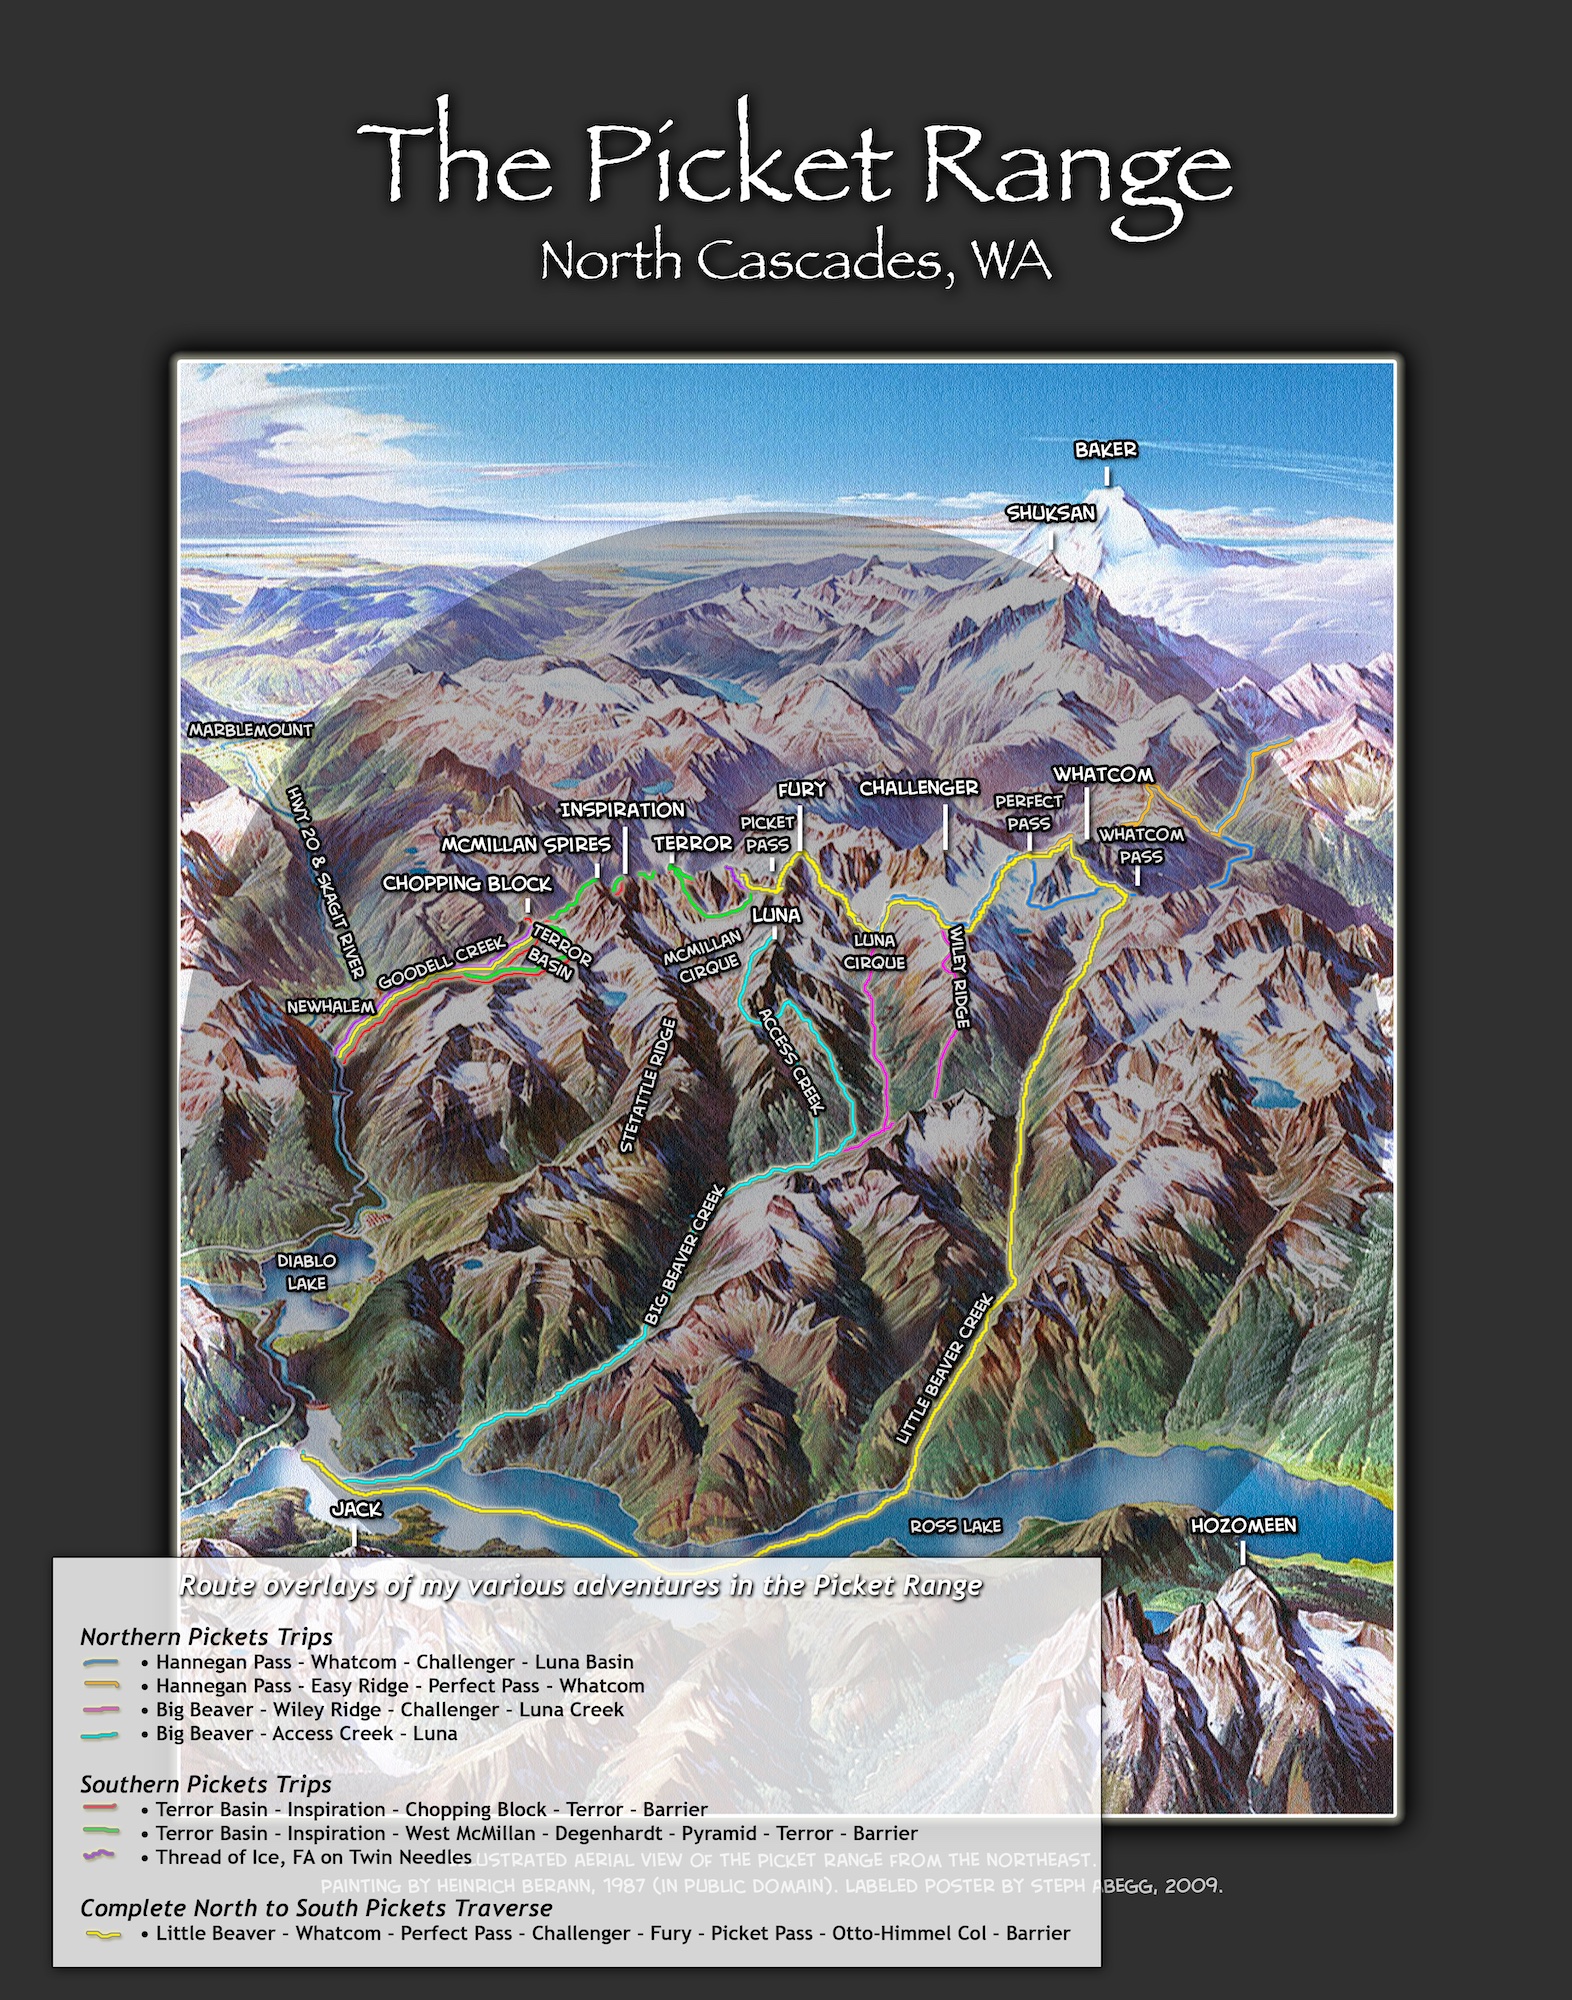
There are four main approach (or exit) routes for the Northern Pickets. (Of course there are always other creative approach options, but most that I can think of come up some obscure creek valley or ridge and would involve a lot of 'shwacking and car plant problems.) The numbers on the following approaches correlate with the maps on this page.
-
APPROACH 1: Easy Ridge to Perfect Pass
-
APPROACH 2: Little Beaver Creek to Whatcom Pass and over (or around) Whatcom Peak
-
APPROACH 3: Big Beaver Creek to Wiley Ridge
-
APPROACH 4: Big Beaver Creek to Access Creek
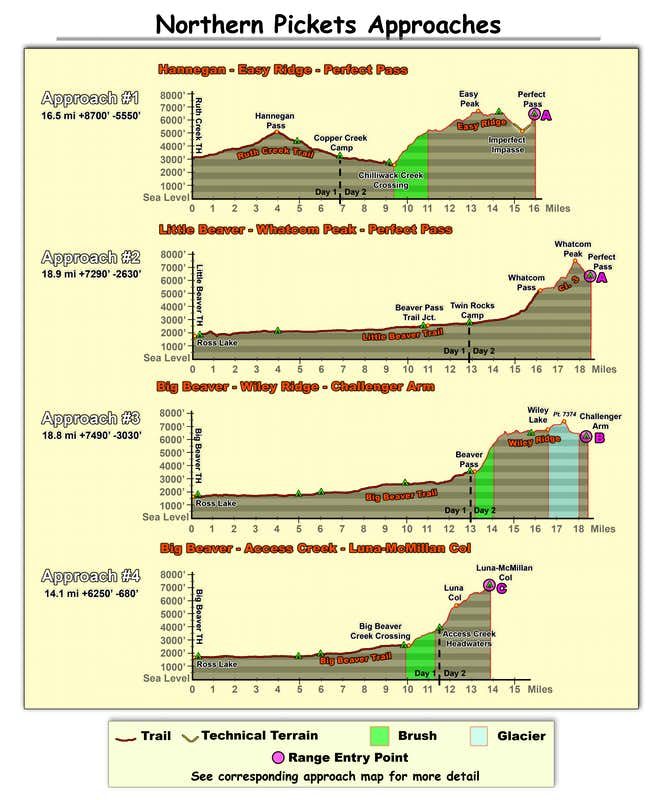
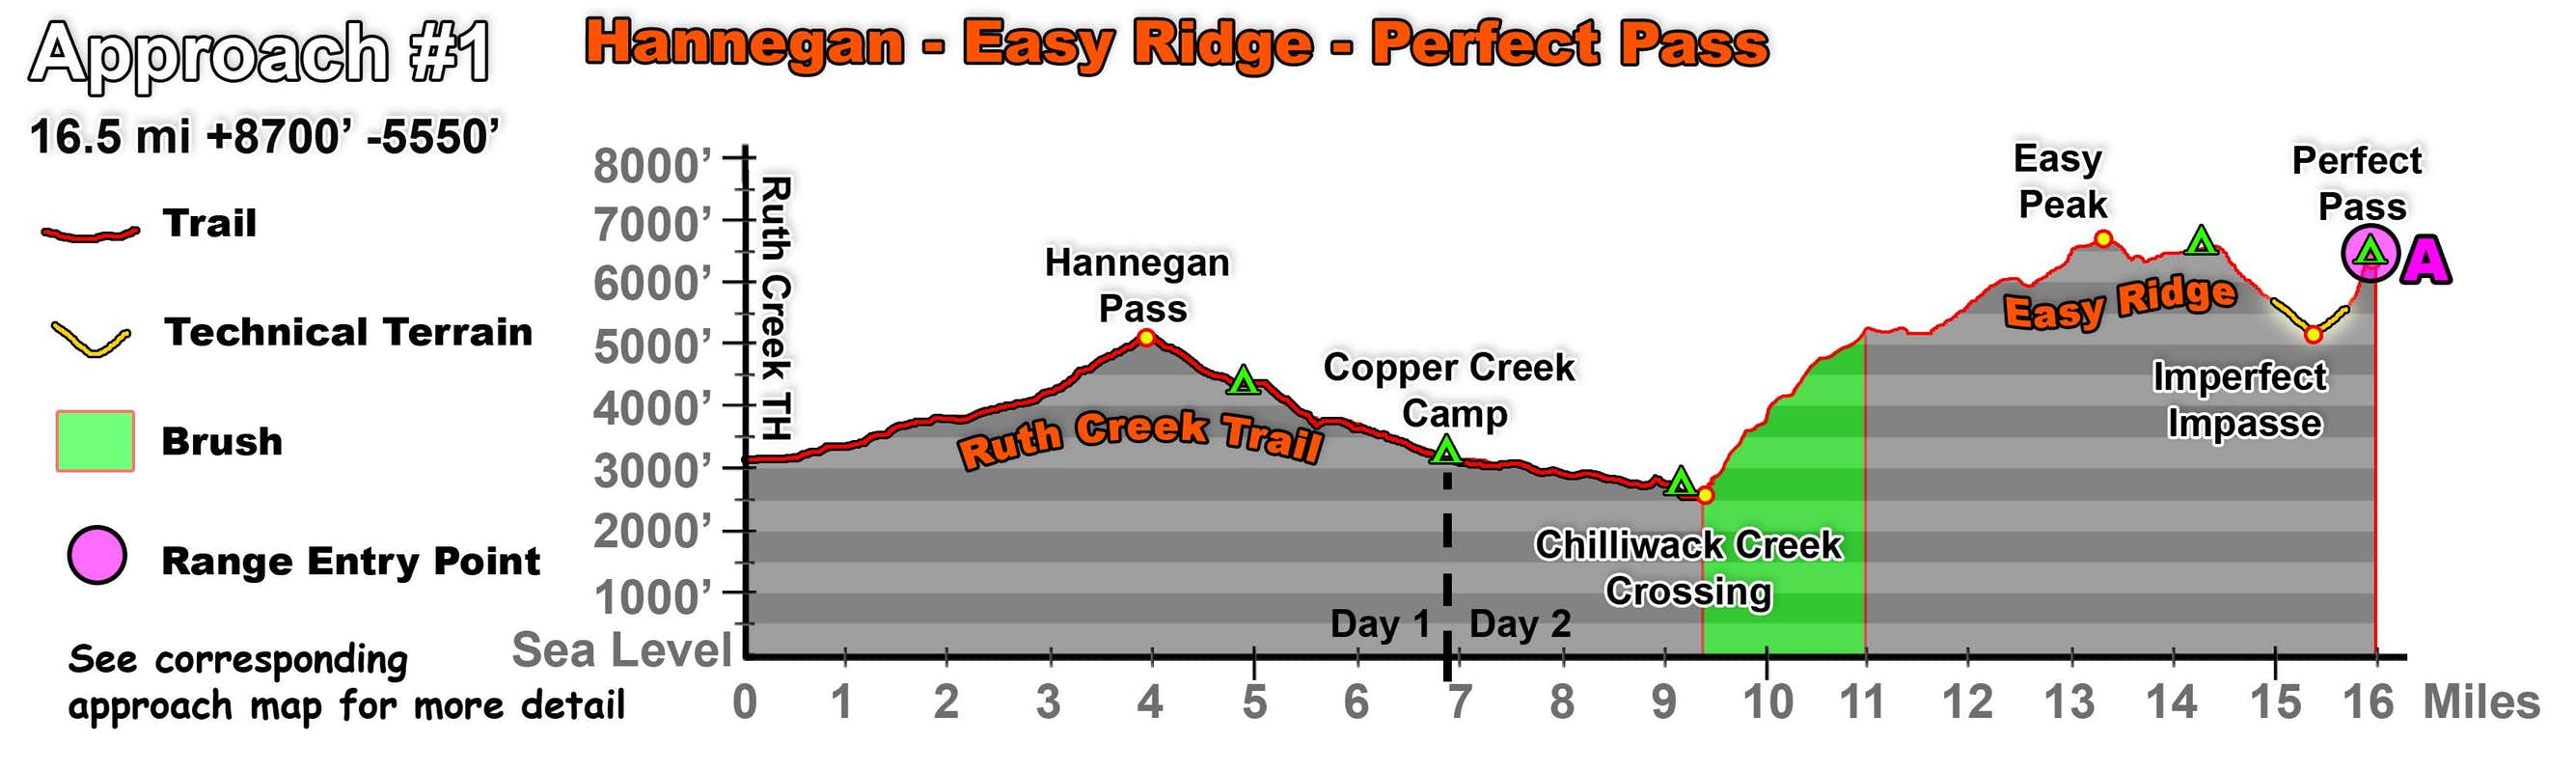
Approach 1: Easy Ridge to Perfect Pass
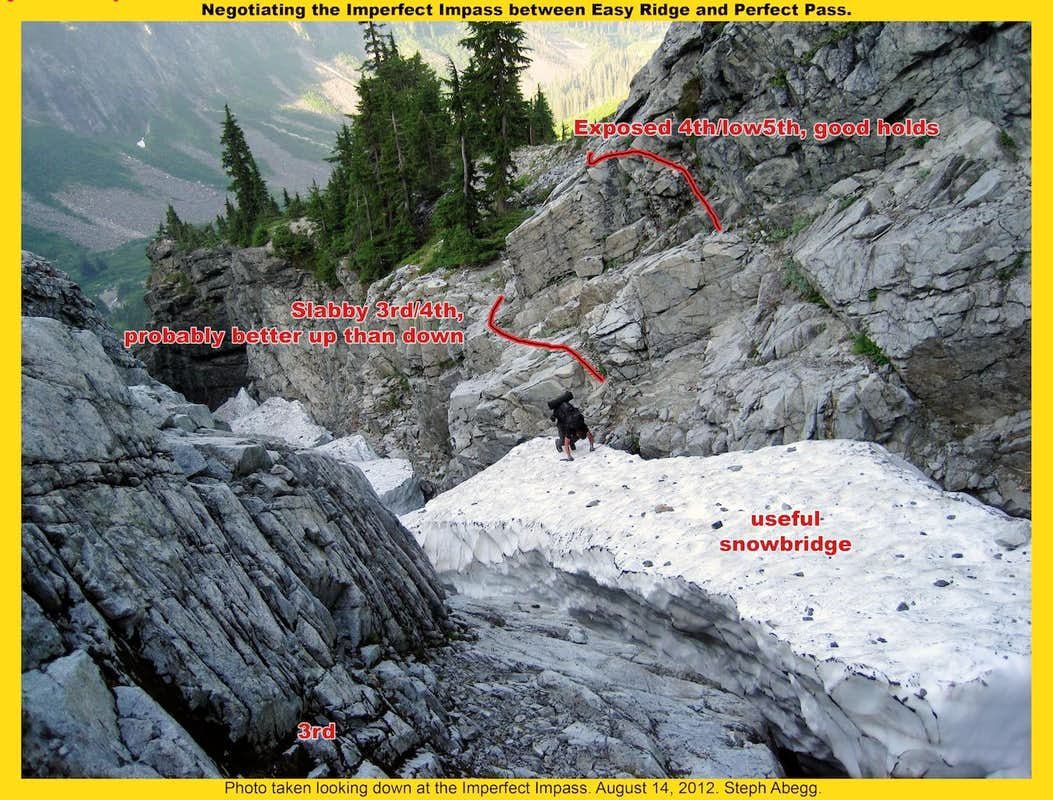
This is a popular way to get to Mount Challenger. The advantage of the Easy Ridge approach is that there is not too much bushwhacking, and you have a scenic walk along the spine of Easy Ridge. The three disadvantages are: (1) the Hannigan Pass trailhead is a long drive from any other approach route into the Pickets, (2) it is a rather long approach with ups and downs, and (3) the Perfect Impass (aka Imperfect Impasse) shortly below Perfect Pass is a perplexing feature, sometimes easy walked across on snow, other times requiring a long detour down and back up through brutish brush. When I did the Easy Ridge approach in 2005, we opted the detour down and around the Impasse; but when I returned to the area in 2012 (this time using the Easy Ridge route as an exit route), I did indeed do the Impasse and I have included some photos at the end of this section.
To get to the Hannegan Pass trailhead drive the Nooksack River road to a left turn on road FR 402. The trailhead is at 3100 feet, starting from a large parking lot at the end of the 4 mile long road.
From Hannegan Pass, you can descend to Copper Creek Camp above the Chilliwack River at about 3200 feet (marked as "campsite" on USGS map). This is a good strategy if you came in Friday evening and want to make it to Perfect Pass Saturday night. From the campsite hike two more miles, then start looking for an unmarked trail descending a little bit to the river. You'll ford the river here and find the Easy Ridge Trail on the other side. At first, the trail is pretty brushy and you'll get wet from dew in the morning. Eventually it starts climbing steeply as it works from 2800 feet up to 5000 feet, where you leave deep forest and enter huckleberry bushes at a pass on the ridge. Congratulations, now you can enjoy the scenery!
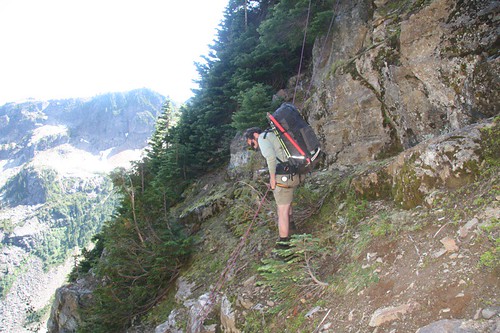
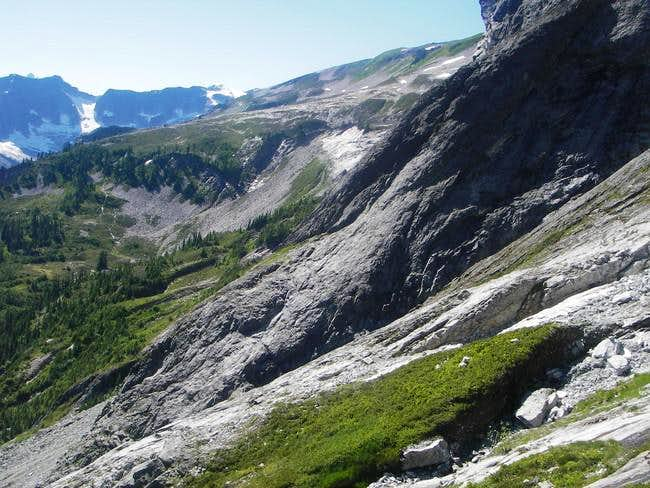
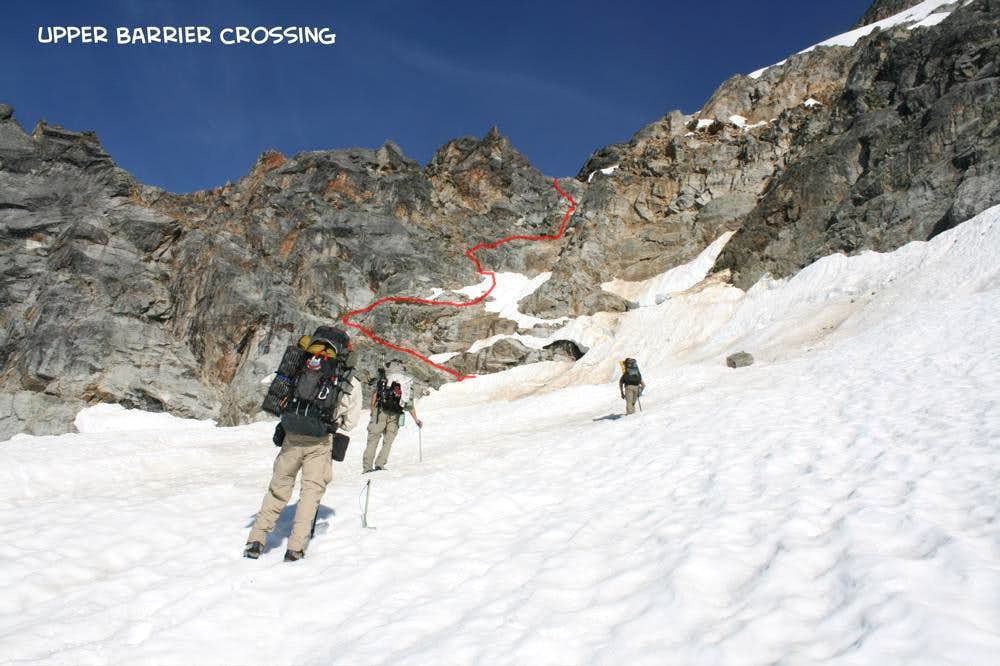
You'll follow the ridge to Easy Peak (6615 ft) in beautiful terrain. After Easy Peak, travel east on the ridge until walls of Whatcom Peak begin to loom. Drop gently down from the ridge in grassy terrain heading southeast. You'll want to lose about 1000 feet, dropping from about 6200 ft to 5200 ft to get to the base of a buttress of Whatcom where an imposing sight will greet you: the Imperfect Impasse.
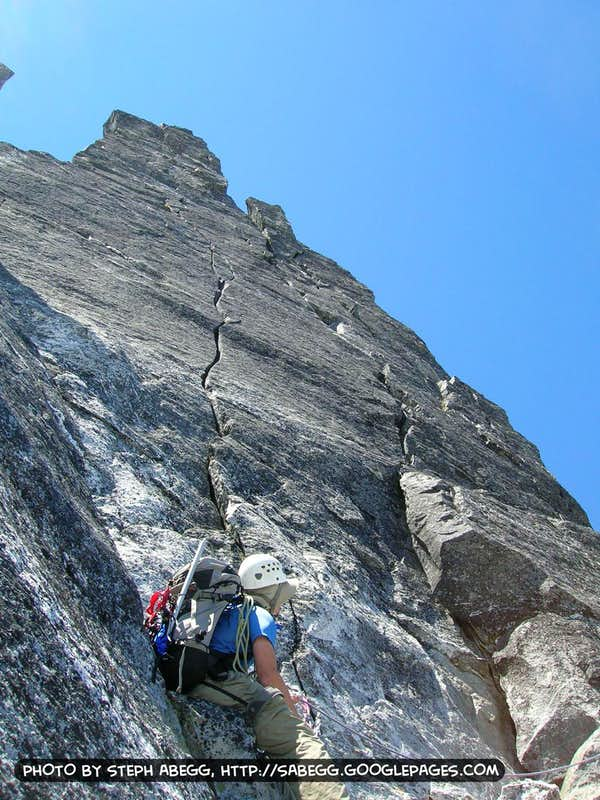
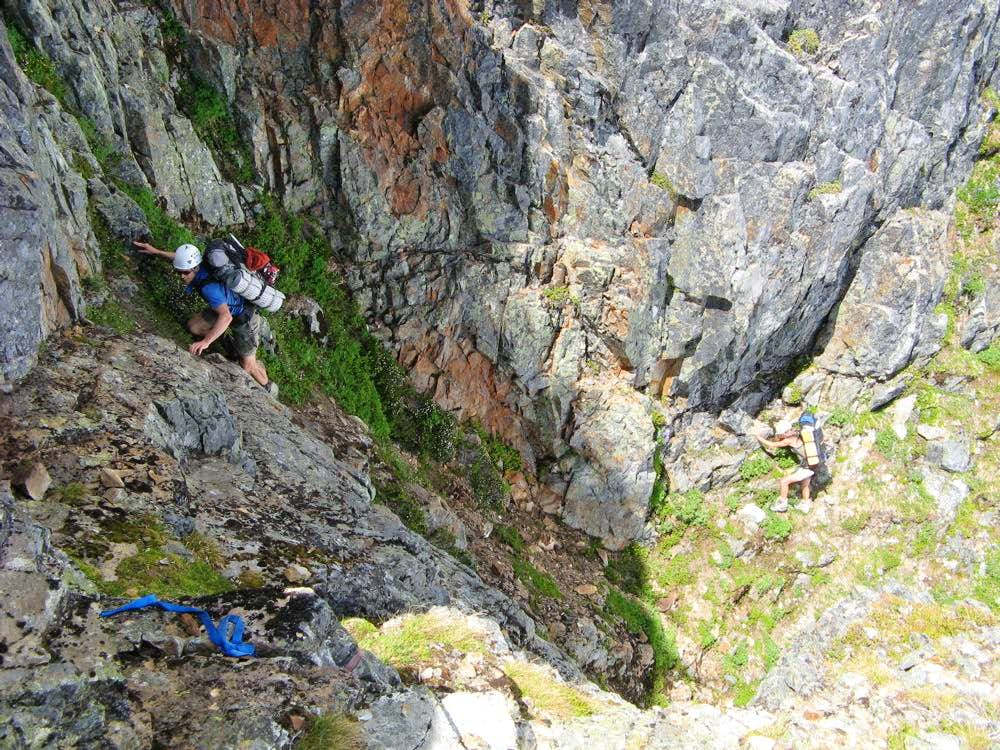
Going early in the year you may barely notice the Impasse: just walk across what is actually a very deep gorge on snow. But when it melts out there is no easy entrance or exit. Climbers have climbed in and above the gorge to find a way across, but it has "terrifying exposure" as one climber noted; at a minimum, be prepared to get the rope out, but also know there is little protection on the slabby terrain.
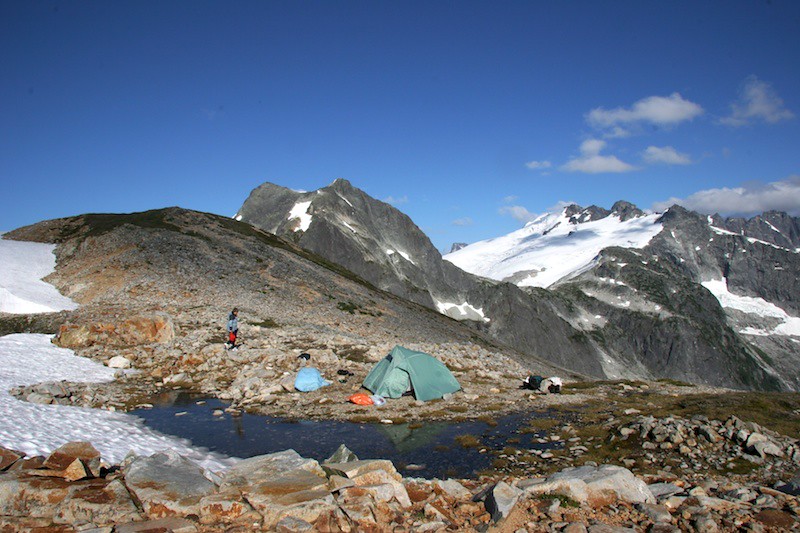
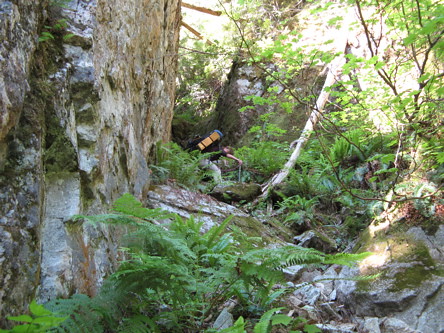
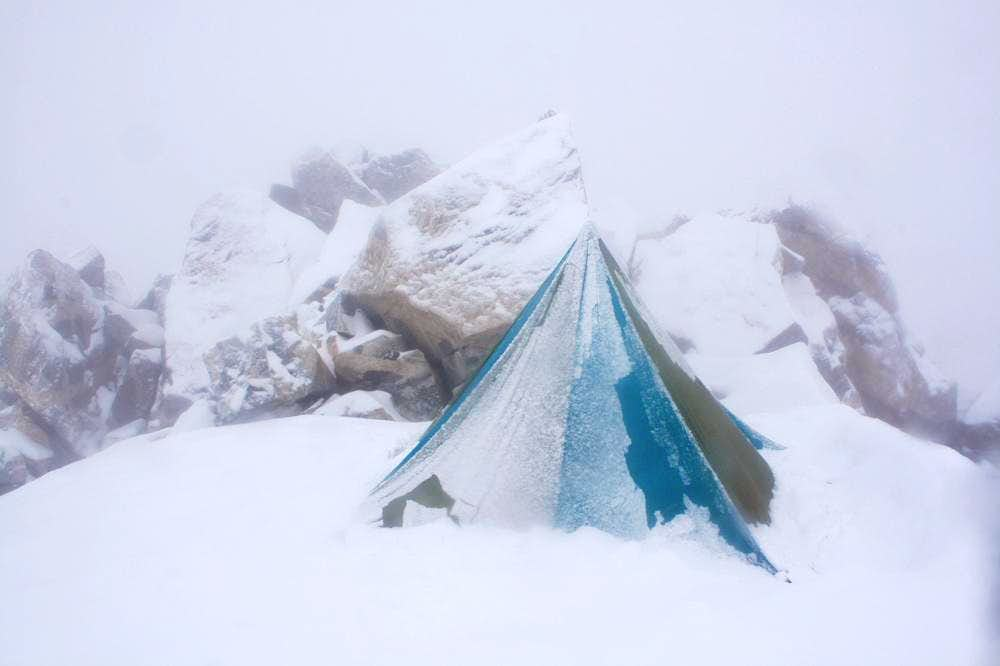
To avoid the Impasse, as I did in 2005, you can descend (another) 1000 feet or so until the gorge ends and you can walk easily across the stream. On the other side grimace and enter the brush and start climbing back up. If benighted, there is a flat spot on the west side of the gorge for a camp. You'll climb up through thick brush and slabs until the way eases below Perfect Pass (6200 feet). Great camping is available here on the edge of the Challenger Glacier.
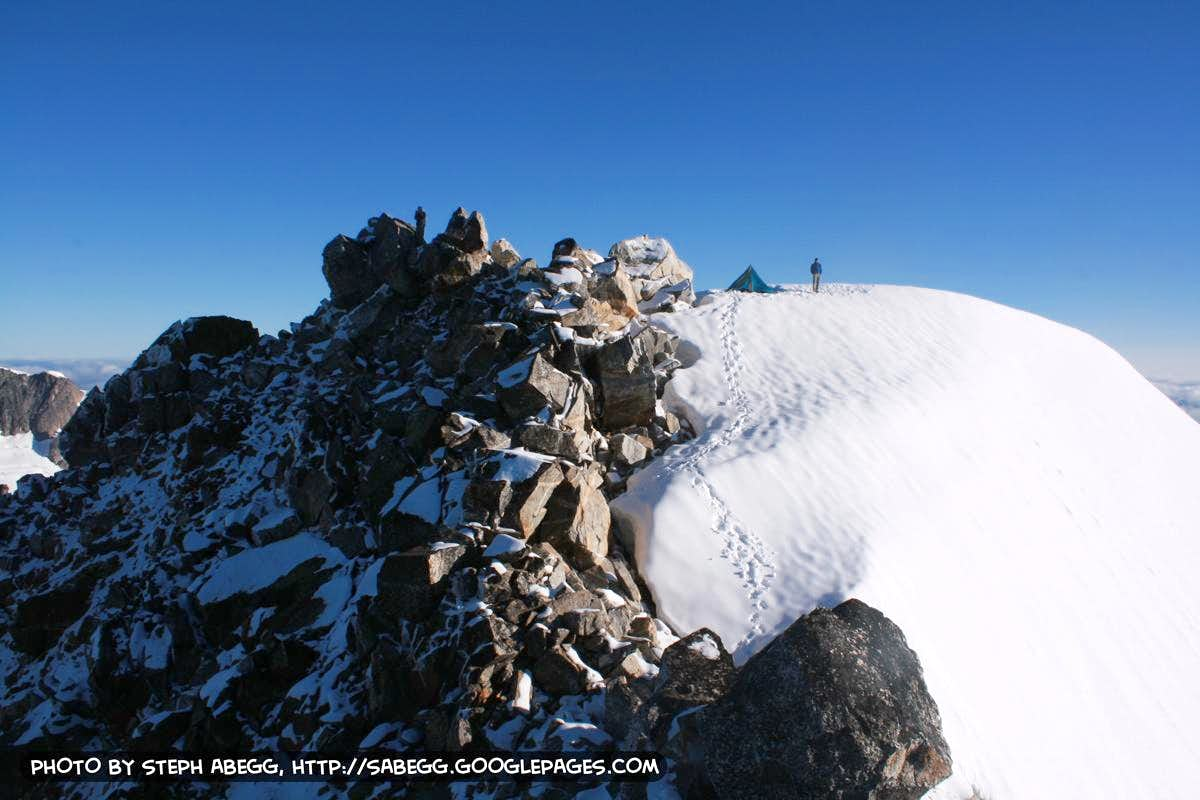
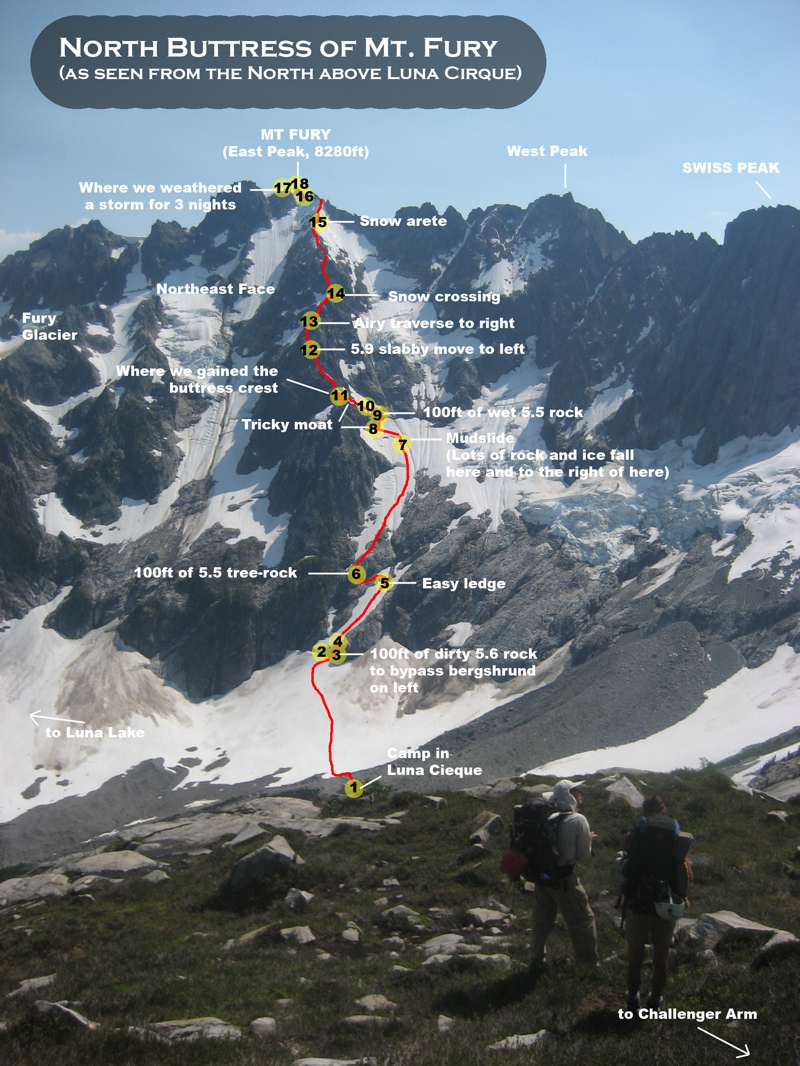
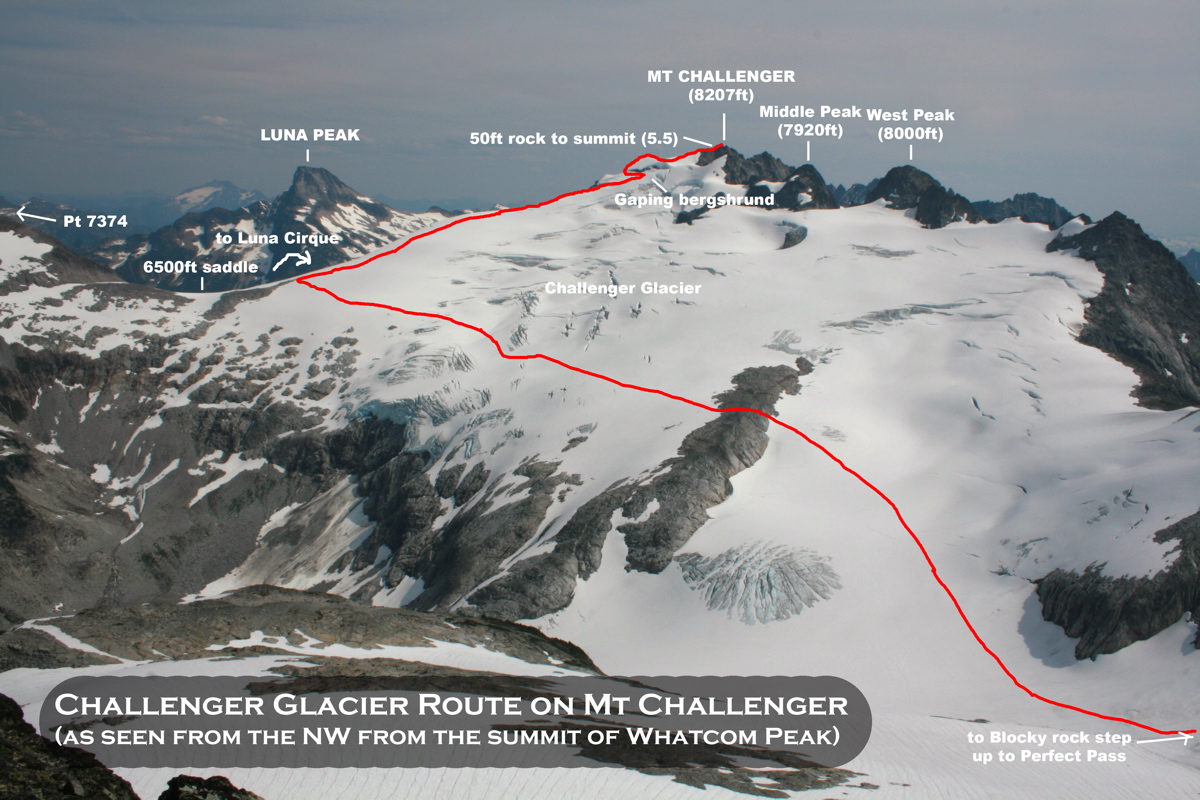
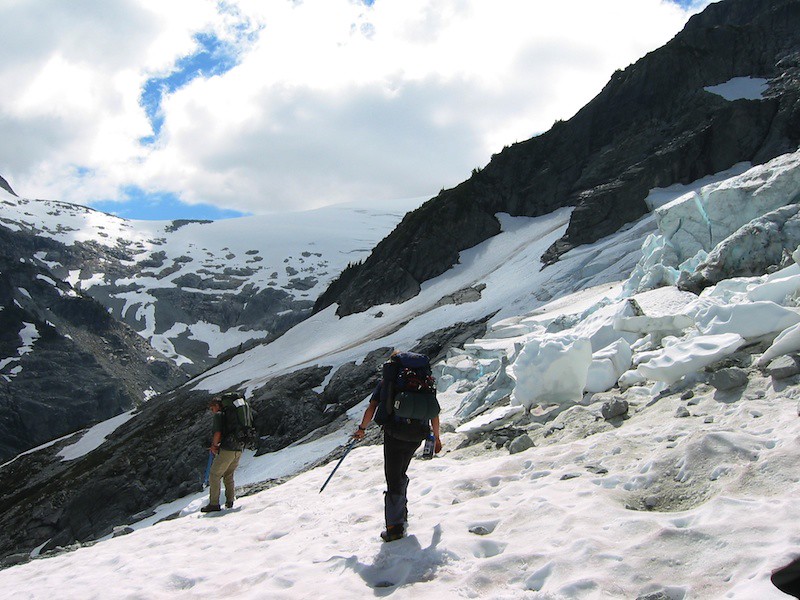
(To climb Challenger from here, just drop down onto the glacier—there are a few options, depending on conditions—and traverse across the large glacier to the saddle below Challenger Arm. Then, climb up Challenger Arm. Although the approach up the arm is an easy hike up snow, in the last few years, a gaping bergschrund just below the summit has turned around many parties. There is almost always a way around if you detour to the leftmost ridge, but sometimes this can be tricky as well. Once you have surmounted this obstacle, the final climb to the summit involves a 50 foot fun rock corner (5.5). Usually it is sufficient to have a rope and a few slings to clip to the 3 fixed pitons. Most parties take a couple of hours from the base of Challenger Arm.)
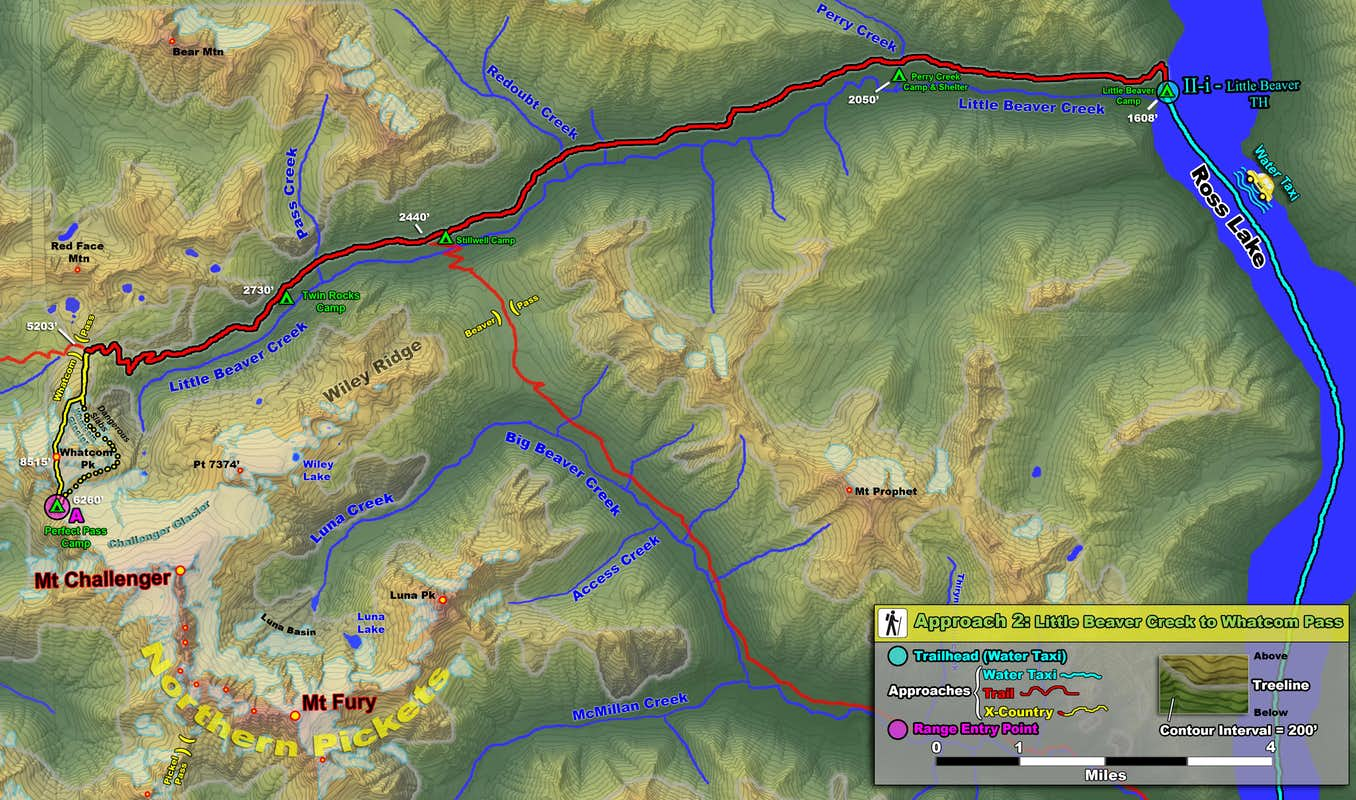
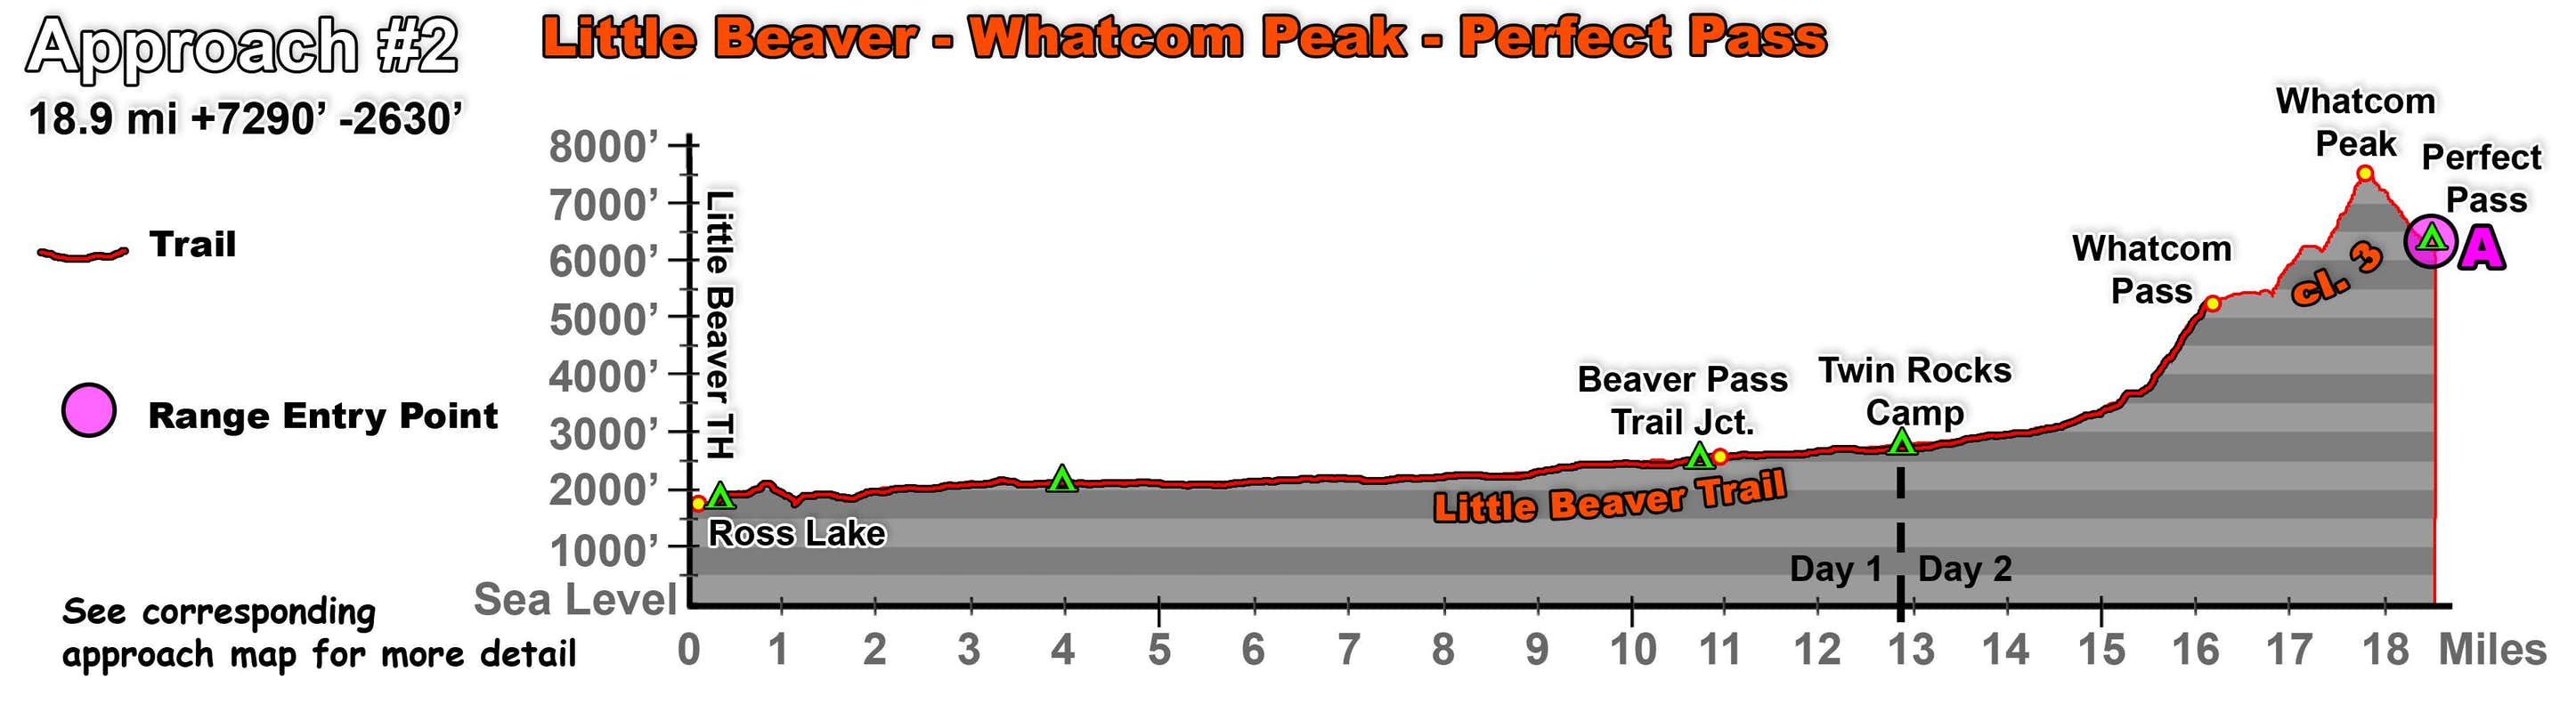
Approach 2: Little Beaver Creek to Whatcom Pass and over (or around) Whatcom Peak
This is the only approach into the Pickets that lacks bushwhacking altogether. The main disadvantage is that it begins with a somewhat long slog along a trail.
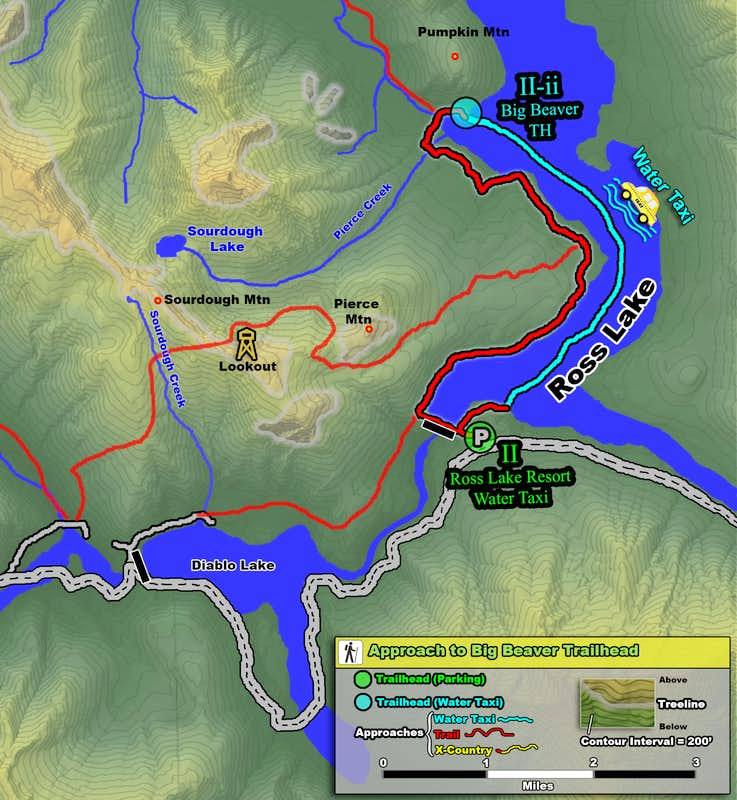
Getting to the Little Beaver trailhead requires a water taxi across Ross Lake. (Unlike the Big Beaver approach described below, a water taxi is necessary in the Little Beaver approach as there is no trail that goes this far around the lake.) Information about fares and booking a water taxi ride can be found on the website for Ross Lake Resort; as of 2011, the water taxi to Little Beaver trailhead is $125 per party. Ross Lake is easy to find along the North Cascades HWY. The water taxi dock is a downhill 0.8 mile hike from the parking lot.
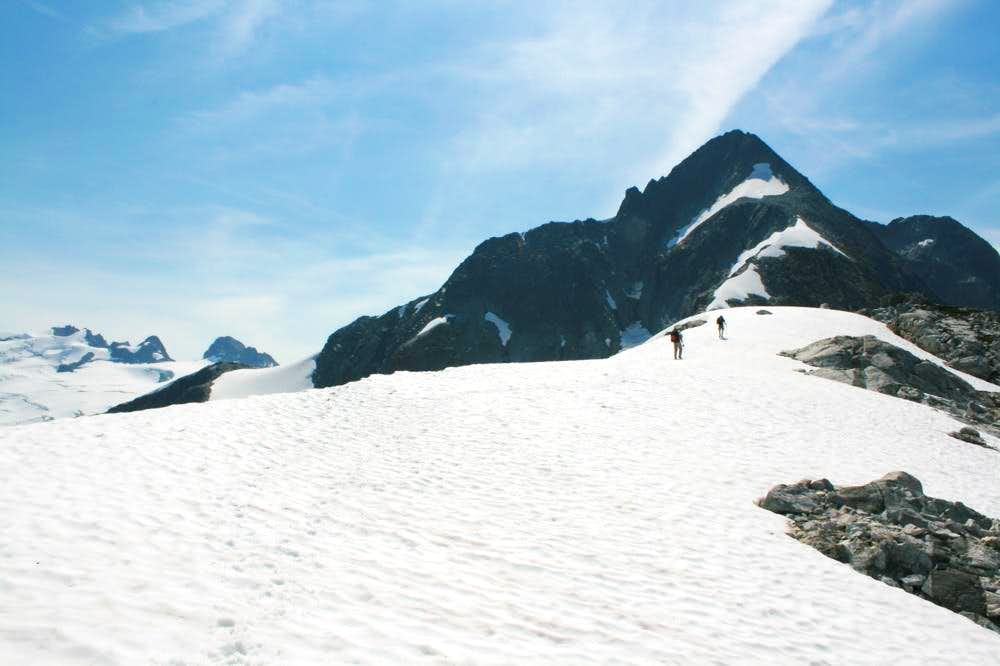
Once at the Little Beaver trailhead, it is about 18 easy trail miles to Whatcom Pass. Usually, parties camp at Twin Rocks camp about 14 miles along the trail before tackling the 2200ft of elevation gain to Whatcom Pass the next day. From Whatcom Pass, head east (left) along a climbers towards the obvious Whatcom Peak, which you will have to climb over. The trail soon peters out, but the going is easy (Class 3). Just keep heading up towards the summit on the north ridge, and below the summit head to the south side of the peak to gain the saddle. From here, you can look down at Perfect Pass (obvious heather-covered saddle below) and you can easily scramble up the final couple of hundred feet to the summit of Whatcom Peak. If there is good snow, the descent down the south side of Whatcom Peak towards Perfect Pass takes all of 10 minutes. In the late season, this might take a bit longer.
(In 2002, instead of going over the easy north side of Whatcom Peak, my dad and I contoured the peak via the Whatcom Glacier. This route is described in Tabor and Crowder's Routes and Rocks in the Mt. Challenger Quadrangle. There are some nice slabs below the glacier which offer a feasible crossing. However, at least in 2002, the Whatcom Glacier is experiencing a process of rapid shrinking, and frequently large chunks of ice go careening onto the slabs below the glacier. My dad and I were actually walking right underneath a truck-sized ice chunk when it slid off; had it had just a few extra feet to pick up speed before it hit us, we would have been swept off the mountain with it. We were quite lucky as it was to not be injured. So, I'm not sure I would recommend the Whatcom Glacier as a route, but it is a possible line of approach; at some point—perhaps even by now—most of the ice chunks will have slid off, opening up nice slabs that are no longer as hazardous to cross.)
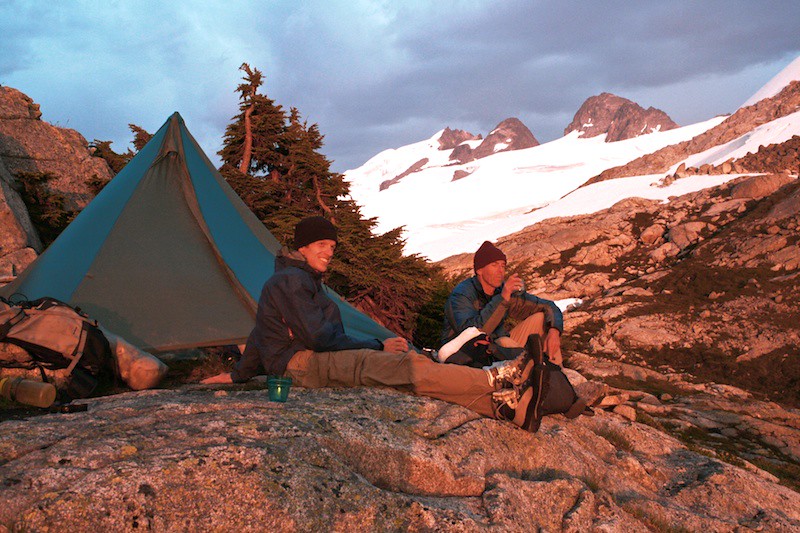
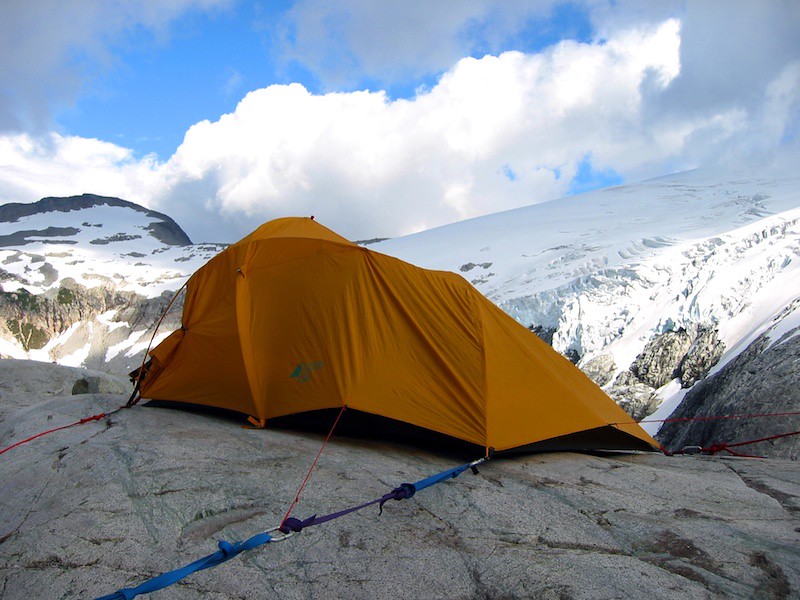
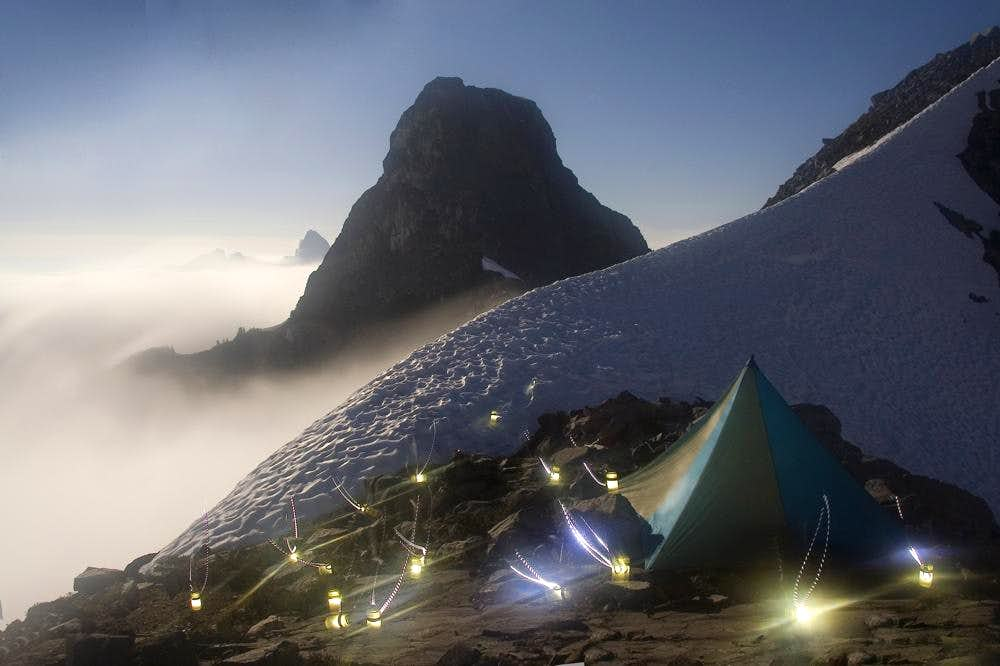
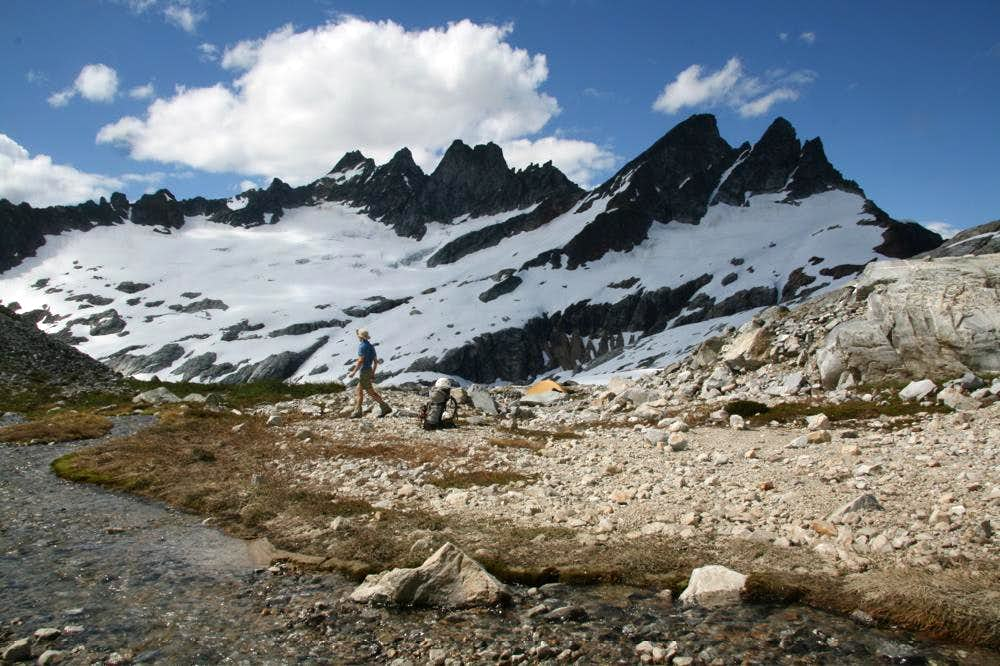
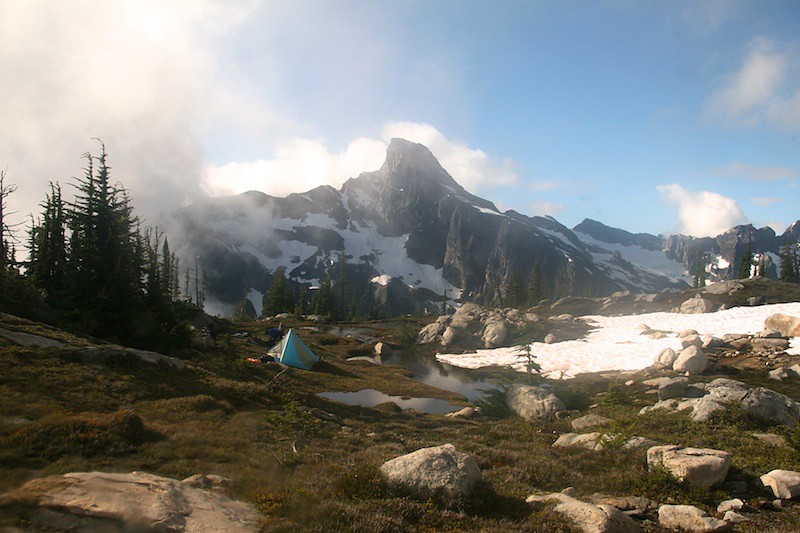
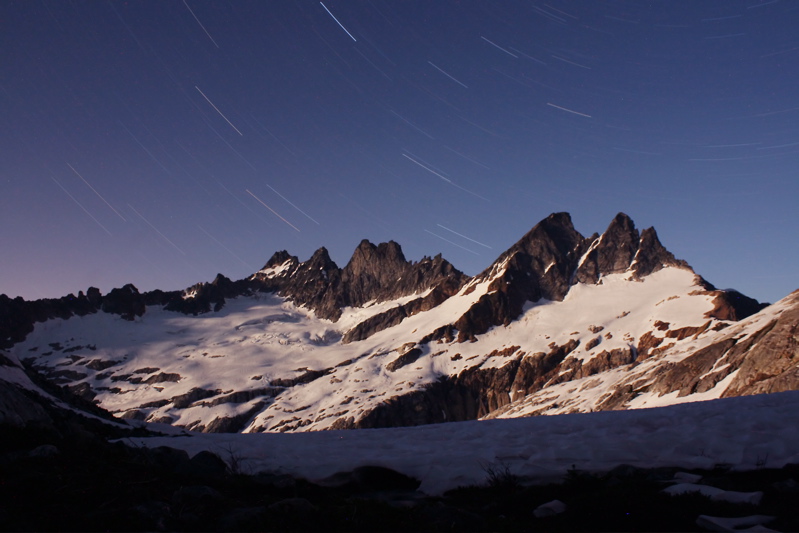
Perfect Pass lives up to its name. Granite slabs interspersed with heather and streams make it a beautiful place to spend an afternoon. From the pass, you can enjoy a sunset over the Pacific, or gaze upon the vast expanse of the Challenger Glacier. This is one of my favorite sunset--viewing spots in the Cascades.
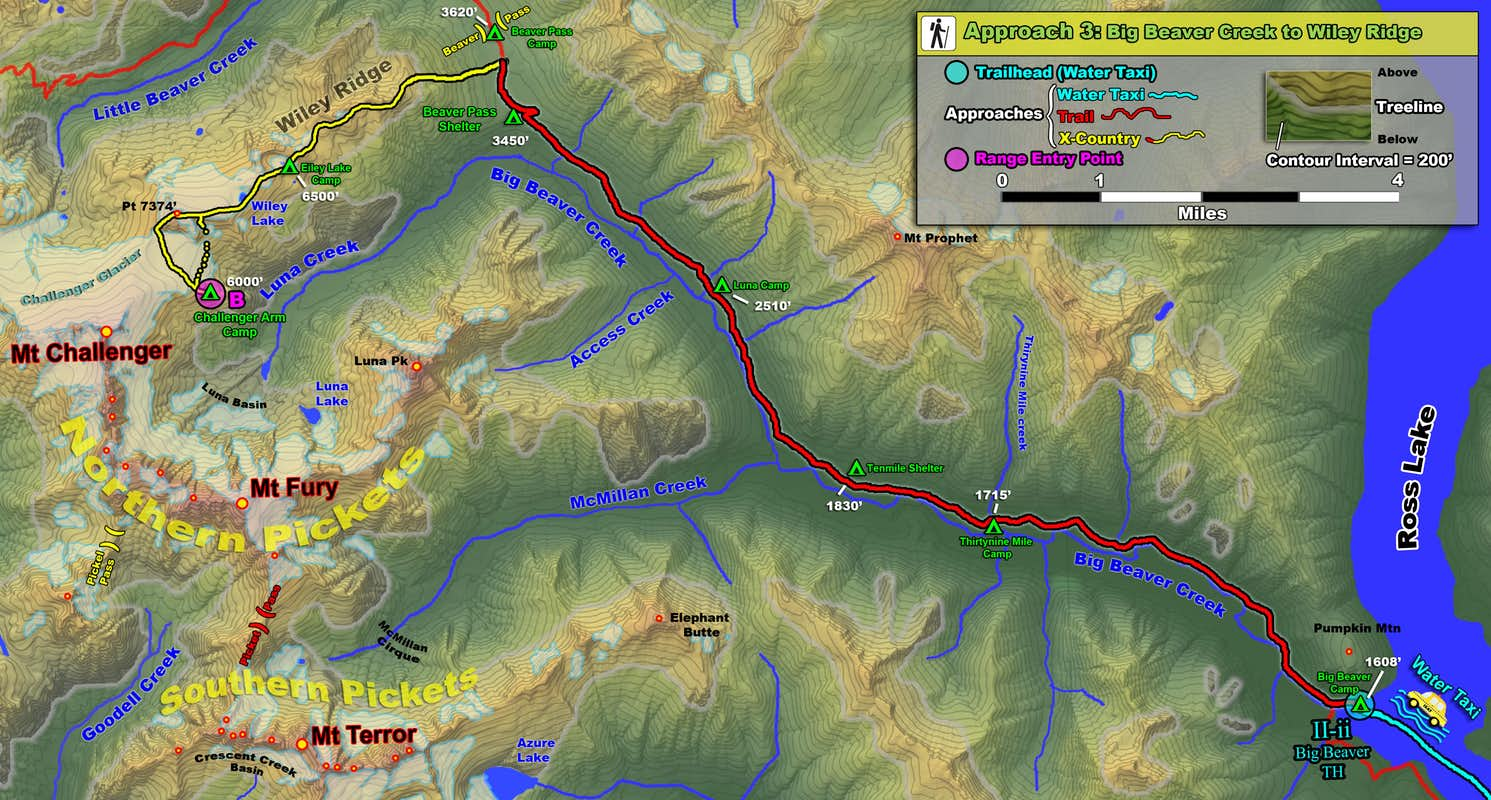
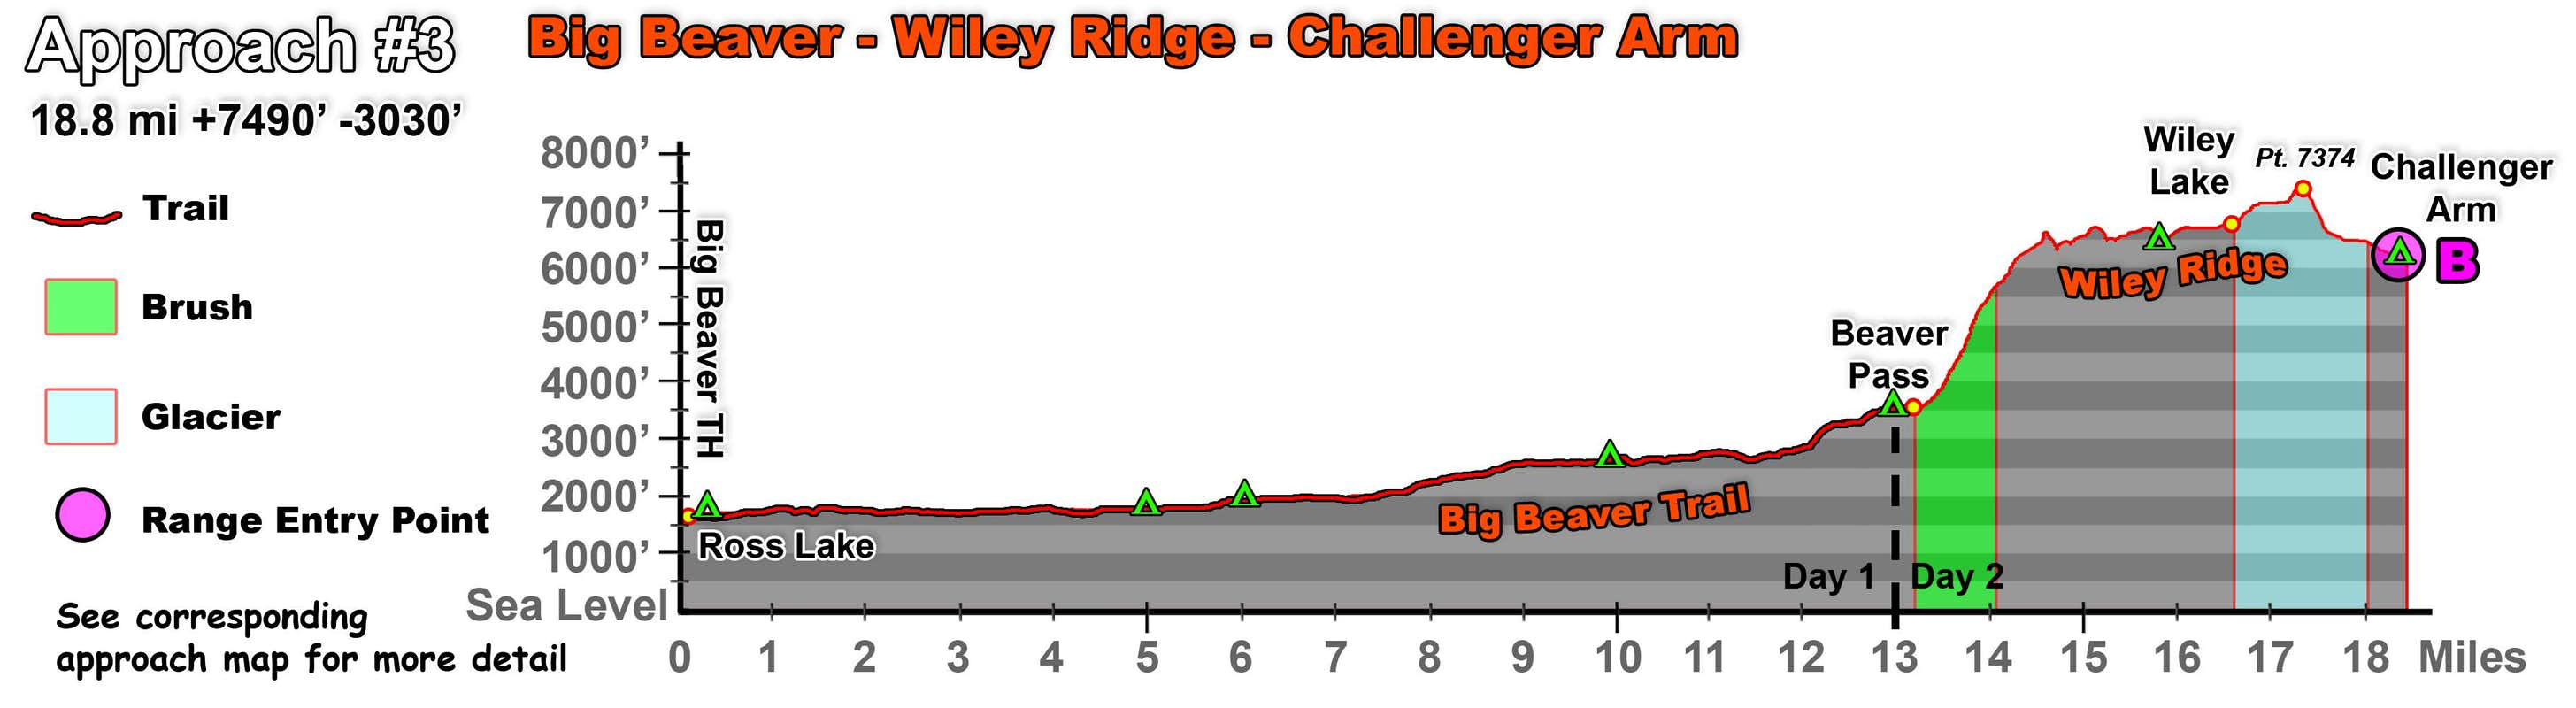
Approach 3: Big Beaver Creek to Wiley Ridge
This is probably the most frequented approach to Mt. Challenger, for whatever reason. Usually, enthusiasm to get into the Pickets will inspire the the trip to begin with a water taxi ride across Ross Lake to the Big Beaver Landing, which avoids about 7 miles of hiking around the lake. Information about fares and booking a water taxi ride can be found on the website for Ross Lake Resort. If you don't want to pay for the water taxi (which as of 2011 is $50 per party to the Big Beaver Landing), you can always just walk the 7 miles, but it is flat and rather boring, and makes it a lot of trail hiking to reach Big Beaver Pass in one day. Ross Lake is easy to find along the North Cascades HWY. The water taxi dock is a downhill 0.8 mile hike from the parking lot.
From the Big Beaver Landing, about 14 easy trail miles bring you to Big Beaver Pass. There is a lean-to shelter that is the last sign of civilization you will see before heading up Wiley Ridge towards the Pickets.
To get onto Wiley Ridge, you leave the Big Beaver Trail about 0.3 miles south of Beaver Pass. The best tact is to go headlong into the underbrush, aiming towards the left-hand timbered rib. I've heard vague stories of the existence of a path, but I did not find it when I made this approach in 2007. On the timbered rib, the brush thins out and you'll spend the next few hours slowly climbing up steep pine needles and clambering over fallen logs. Continue to timberline at about 5,500 ft. Here, the broad Wiley ridge starts to take shape.
As the terrain opens up, hike from one bench to another on the crest or just south of the crest on talus fields or heather slopes. There is sometimes a faint path, and it's pretty friendly terrain. Pass Eiley Lake on its south shore (good camping here), and from west of this lake follow a glacier past Wiley Lake (often frozen). At this point, you will have views of Mt. Challenger looming ahead. Some parties choose to cross over the north slope of Pt. 7374 and descend east down to Challenger Glacier. When I was here in 2007, we choose to go left down a snowfield to Challenger Arm where there is a nice camp overlooking Luna Basin (you can get to this camp by going over Pt. 7374 too).
Now you've done the hard part, and you can bask in the amazing views of the Northern Pickets and climb up Challenger Arm towards the summit, where the view is even better.
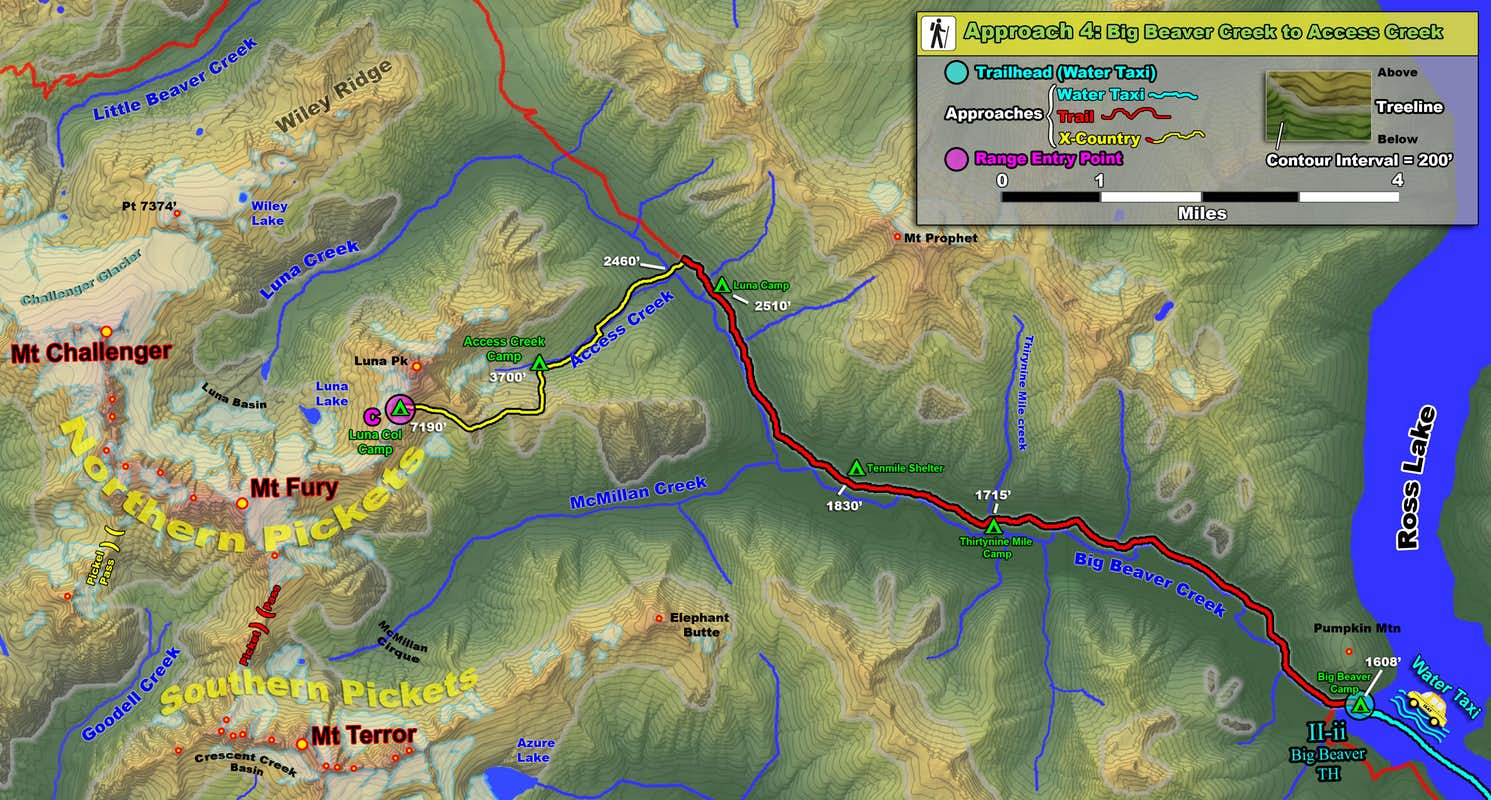
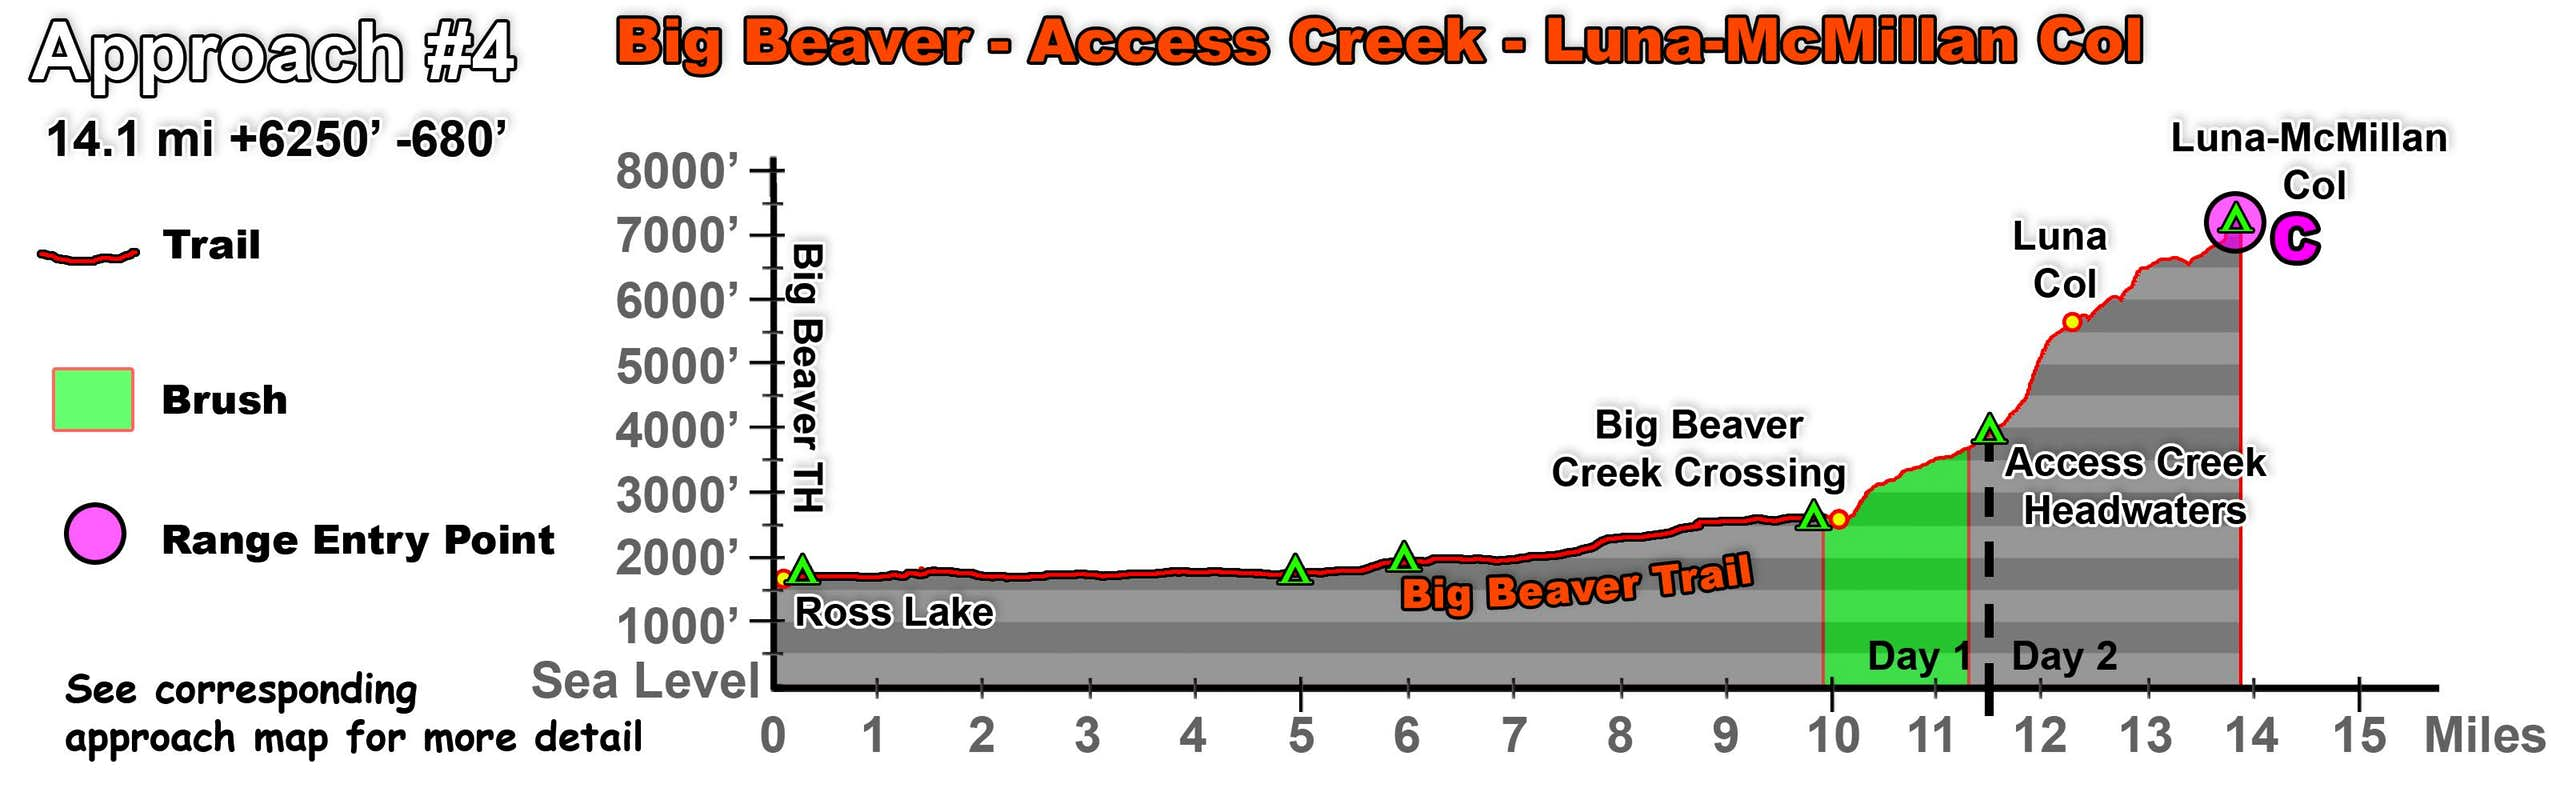
Approach 4: Big Beaver Creek to Access Creek
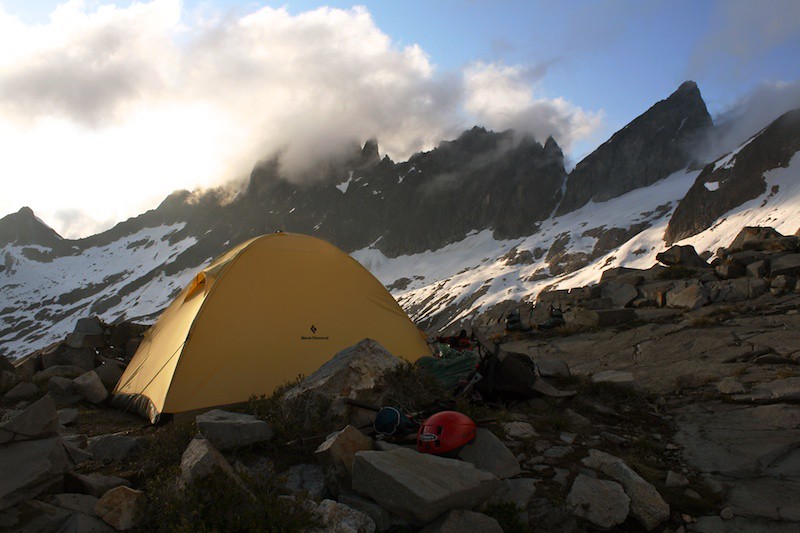
Like the Wiley Ridge approach (described above), this route begins on the Big Beaver trail. You will hike about 9 miles from Big Beaver Landing before turning off the trail. As I found out the hard way in 2007, turning off at the right point is the trickiest part of this approach (so it might be best to use this route as a deapproach route before attempting it as an approach route). The turnoff is about 1.5 miles north of Luna Camp, just north of the entrance to Access Creek with flows NE from Luna Peak. Hike through forest and cross Big Beaver Creek. Some years you can find a convenient log to cross, and some years you will have to wade. [2014 update: Apparently there was a big log jam deposited in Spring 2014, which might stick around for awhile. Thanks to Josh Kelling for the following beta: To use the log jam, first pass Luna Camp. Just past the second brushy clearing in the forest (and before the third and largest such clearing), head toward the creek through dense brush. Cross Big Beaver using the log jam. Next use an upward right-trending bushwhack through moderate and often open forest toward Access Creek. Cross Access Creek to join the normal approach route.] Hike along the north flank of Access Creek in semiopen forest. Near 3,700ft, where travel becomes very brushy, cross to the creek to its south bank. From here, look for cairns and a faint trail that will lead towards the obvious basin at the headwaters of the creek. There is good camping here. Overall, this approach is not as brushy as you might think given that it goes up a creek valley.
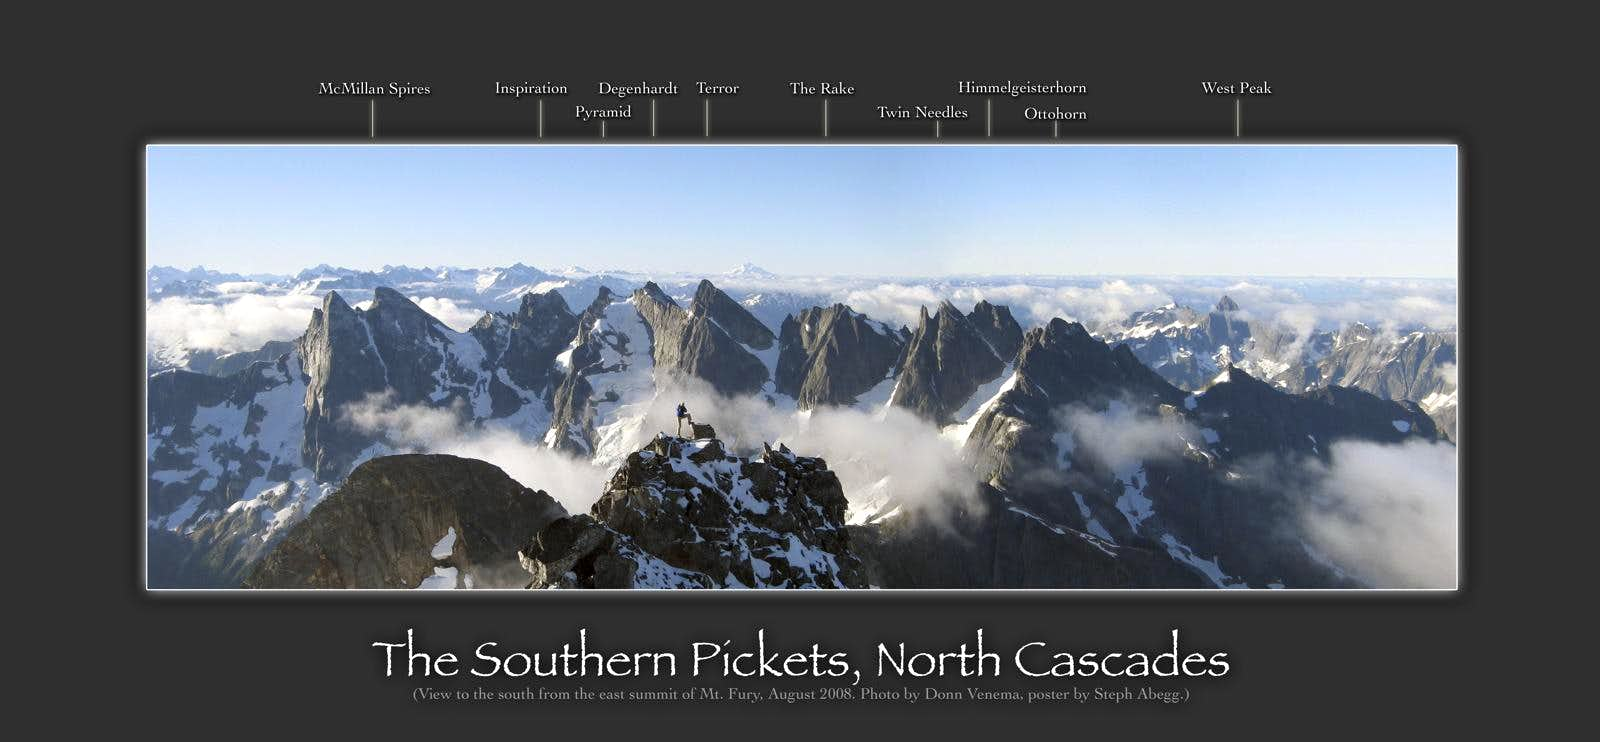
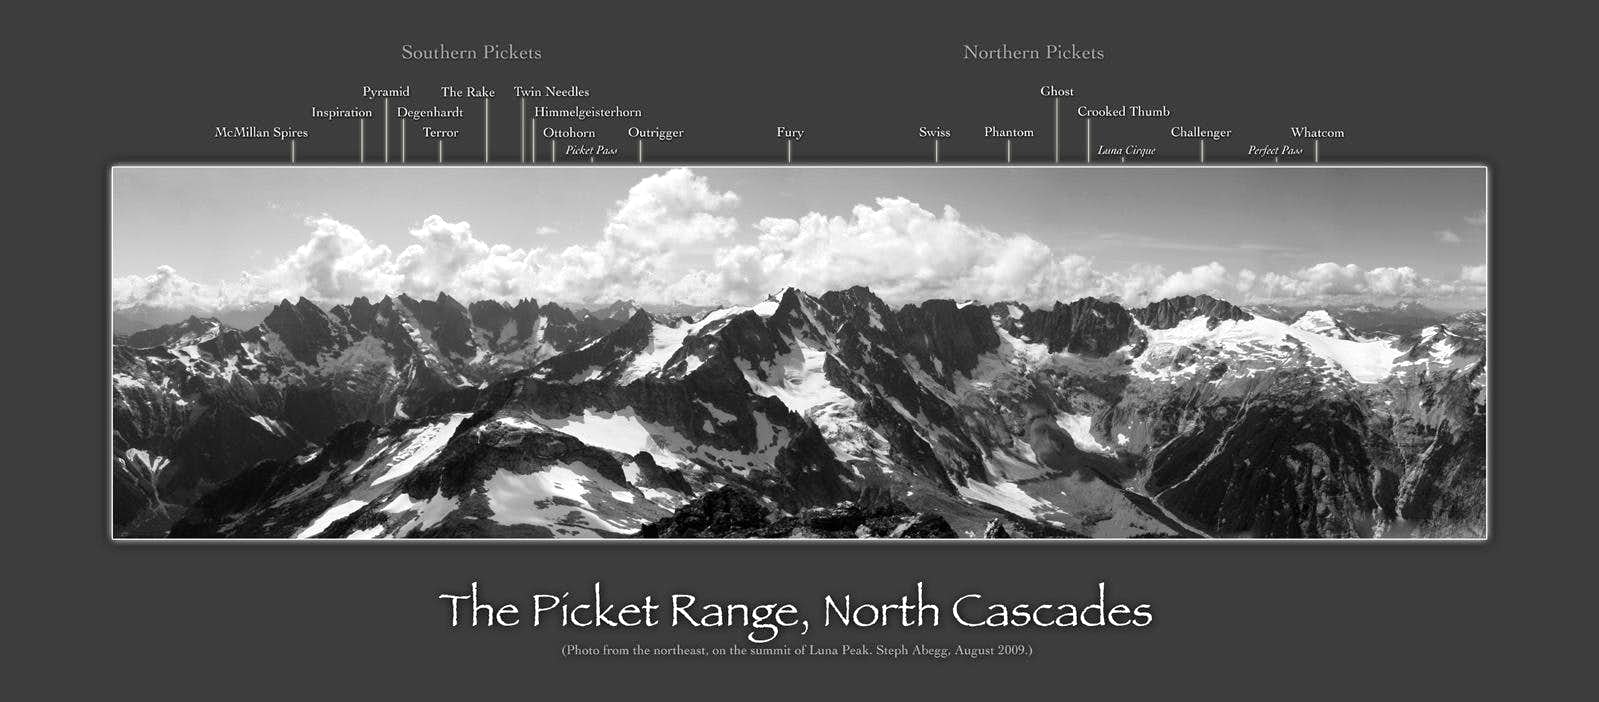
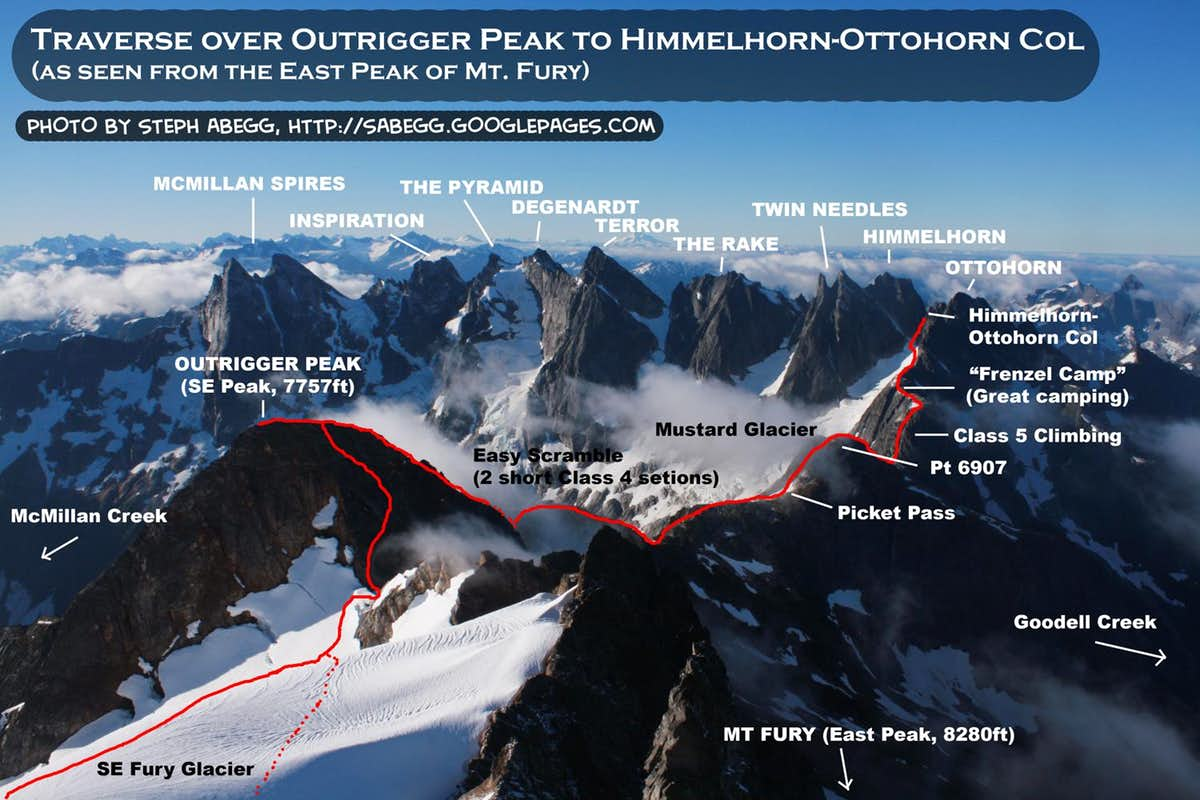
From the Access Creek headwaters, ascend leftward along a bit rockslide stream, between cliffs, heading up towards a noticeable gap in the ridge. From here there is a traverse of several moderately steep basins to the south flank of Luna Peak. A saddle at the base of the SW ridge makes a great campsite. From here, the climb to the summit of Luna Peak is an easy exposed scramble. Luna Peak offers some of the best views of the entire Picket Range, as shown in the panorama near the top of this page.