Cirque Traverse (5.9, ~4 miles on ridge): Pingora, Wolf’s Head, Overhanging Tower, Shark’s Nose, Block Tower, Watchtower, South Watchtower, Pylon Peak, Warrior II, Warrior I, Warbonnet

Cirque Traverse

Routes:

IV, 5.9, ~4 miles on ridge

- Pingora (11,884')
- Wolf's Head (12,163')
- Overhanging Tower (12,164')
- Shark's Nose (12,229')
- Block Tower (12,210')
- Watchtower (12,326')
- South Watchtower (12,300')
- Pylon Peak (12,383')
- Warrior II (12,406')
- Warrior I (12,366')
- Warbonnet (12,369')

One of America's premier alpine rock traverses, traversing across all 11 of the summits of the main spine of the Cirque of the Towers, starting with Pingora and ending with Warbonnet. Seventeen engaging hours on an awesome mountain obstacle course.

Region: Wyoming
Elev: 11,000-12,500 ft
Rock type: Granite
Type: 
Date(s): July 22-24, 2019 (Mon-Wed)
Partner(s): Casey Andrews

Route Overlay and Map

CLICK TO ENLARGE

Intro

The Plan
If you're familiar with my website, you will know that I am a fan of traverse routes involving multiple summits. Some of my favorite traverses I've done to date are: in Washington: the Complete North to South Pickets Traverse, the Ptarmigan Traverse, the Torment-Forbidden Traverse, and the Olympics Range traverse; in British Columbia: the Sir Donald Traverse and the Viennese-Clarke Traverse; in California: the Cathedral Traverse, the Palisade Traverse (somewhat incomplete, I need to go back to this one), and the 
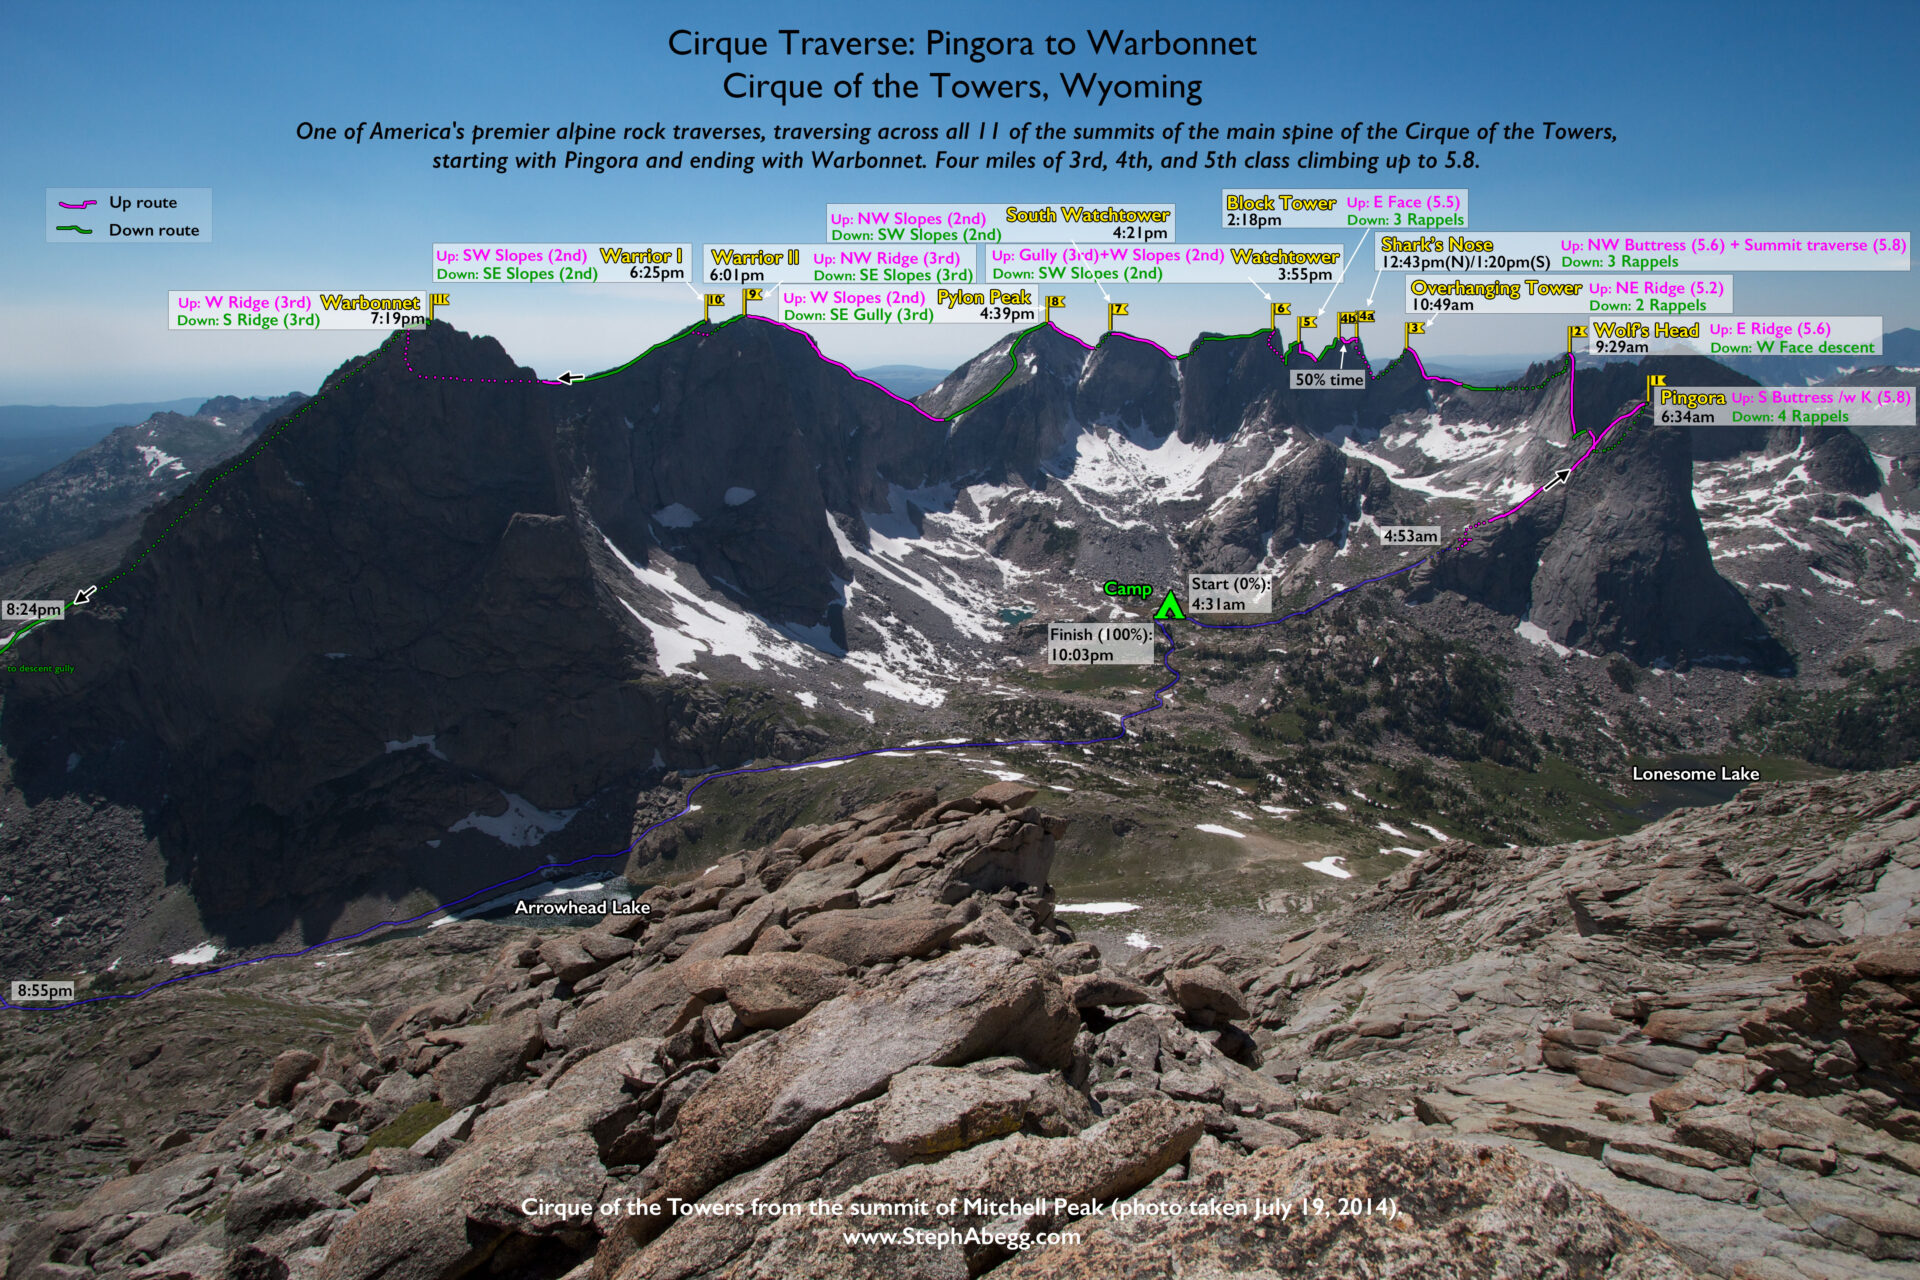
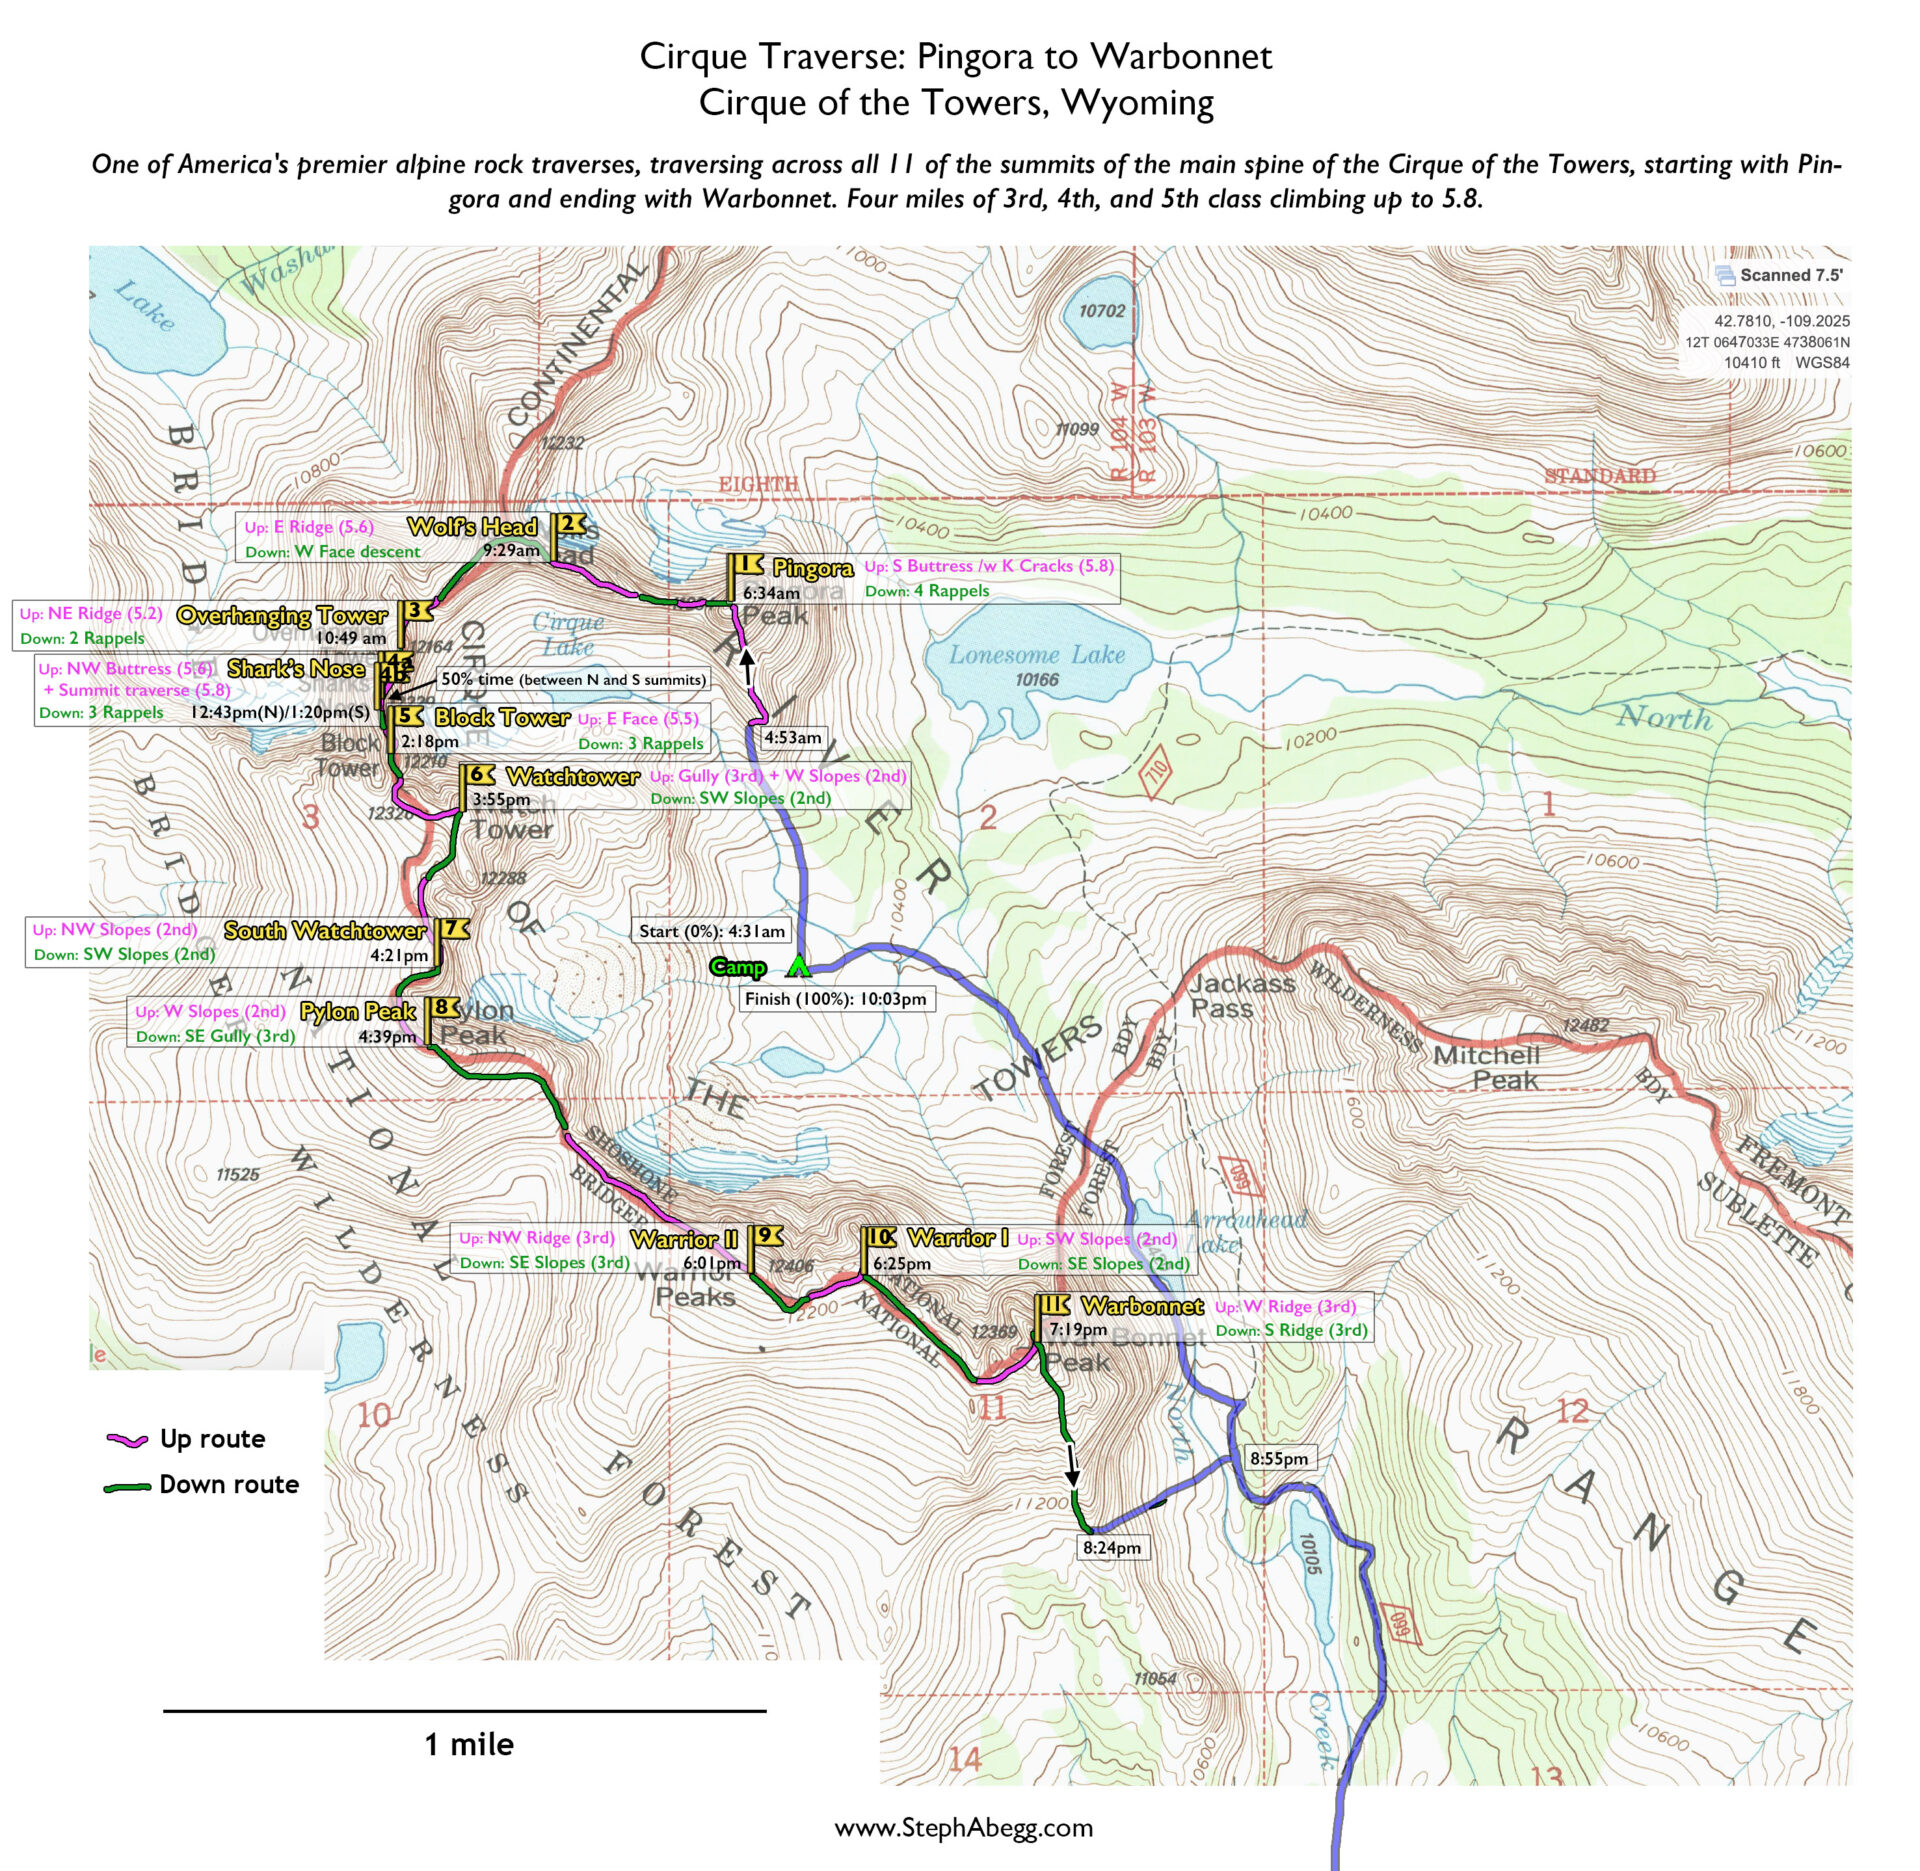
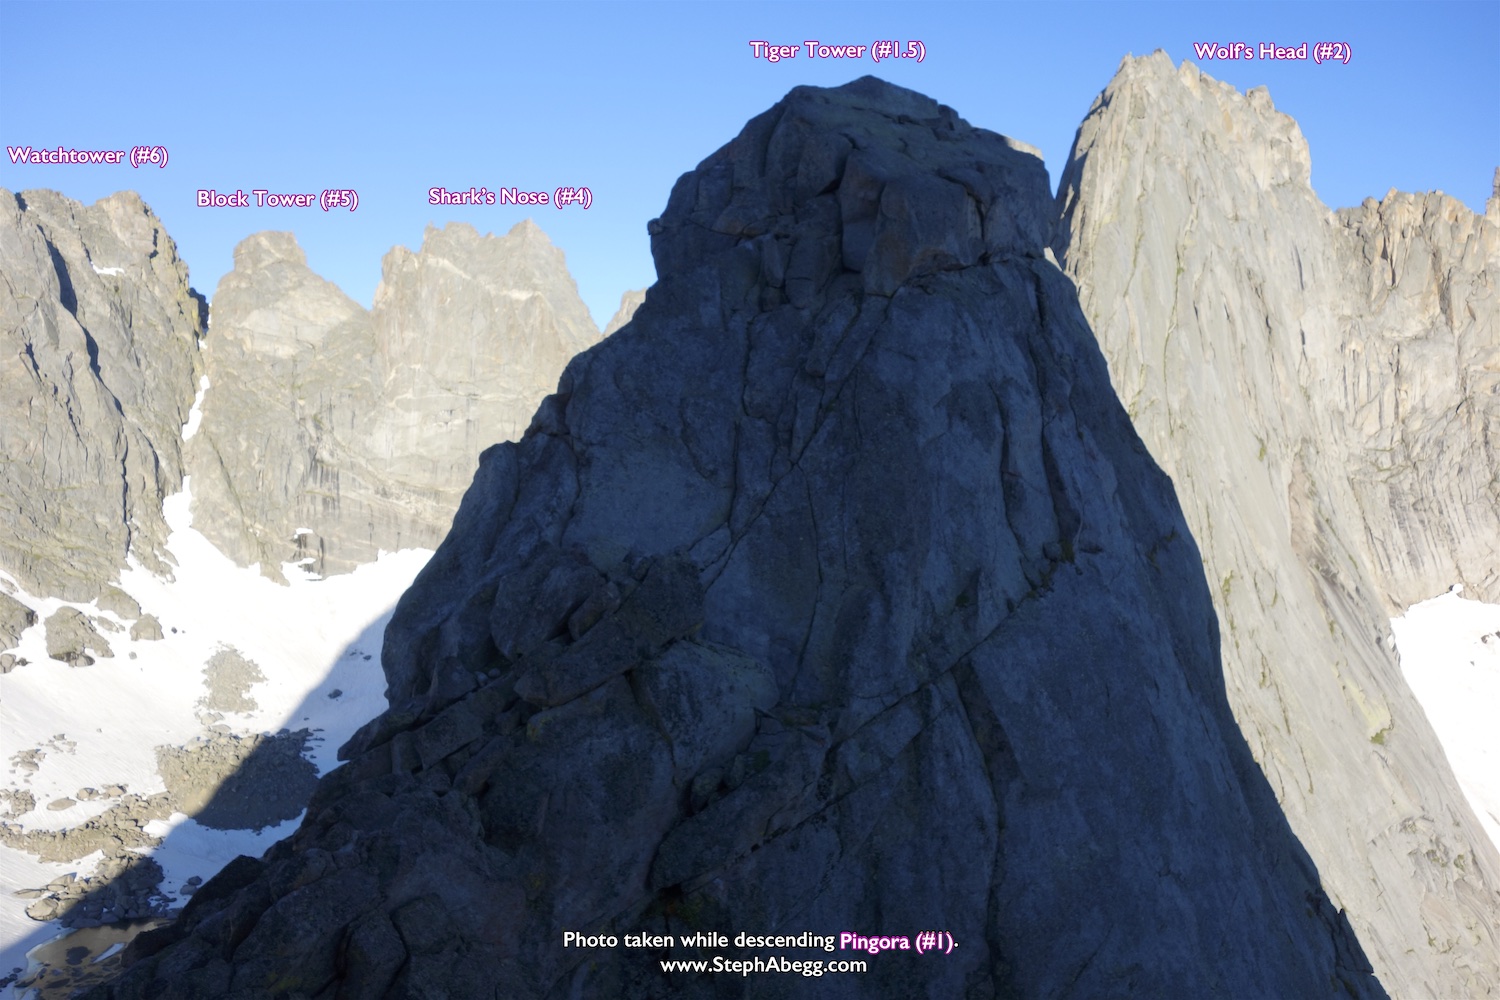
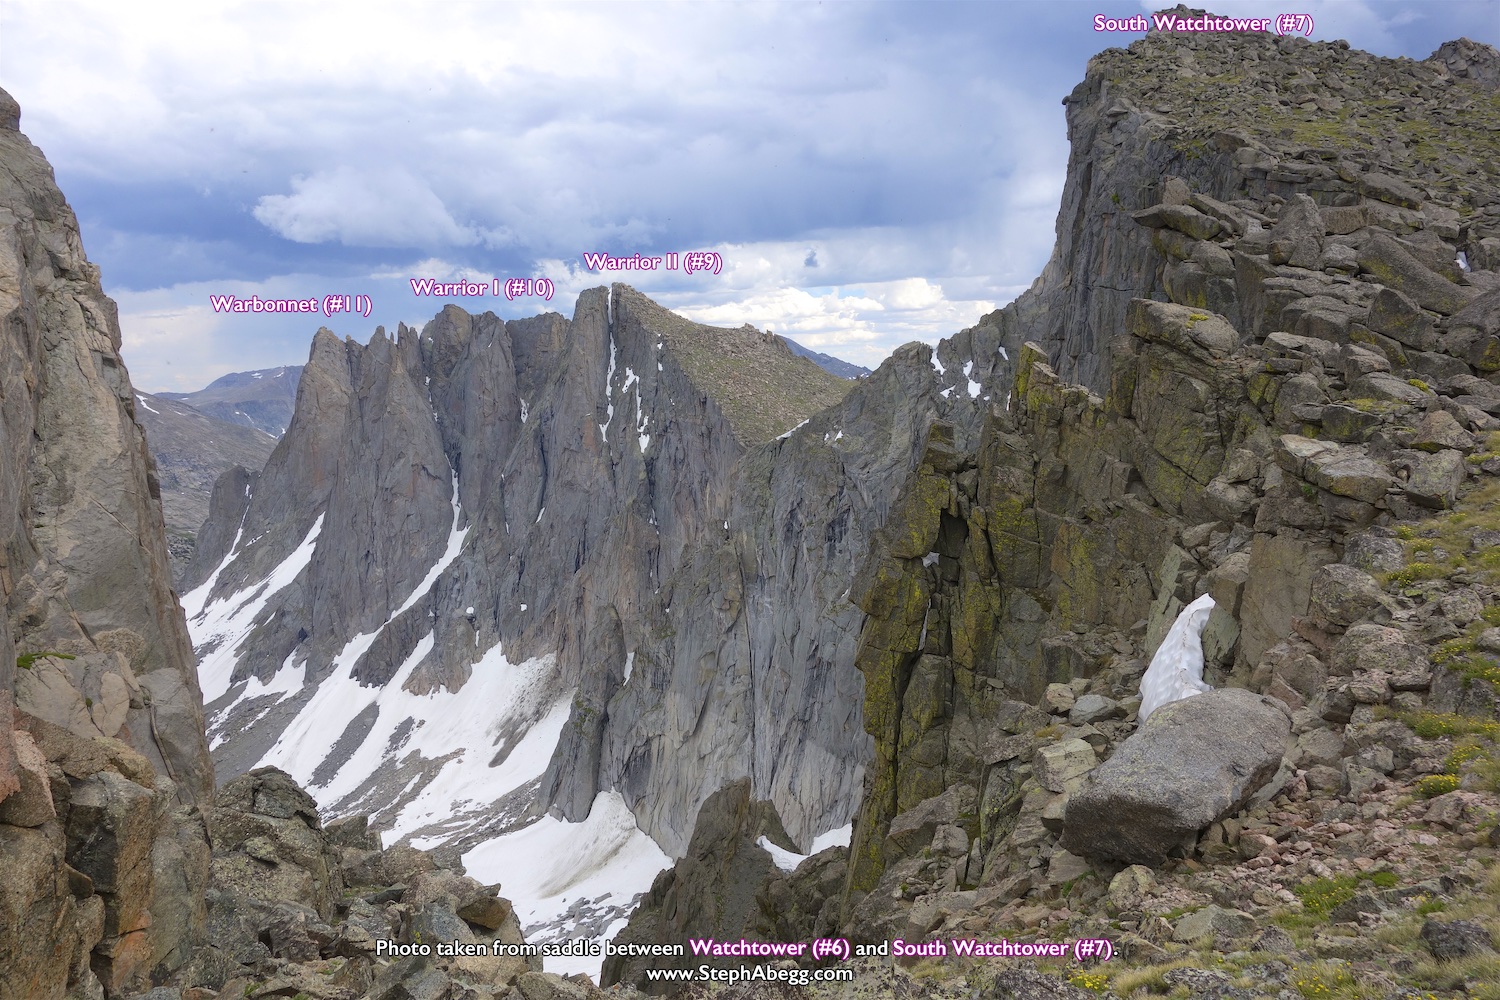
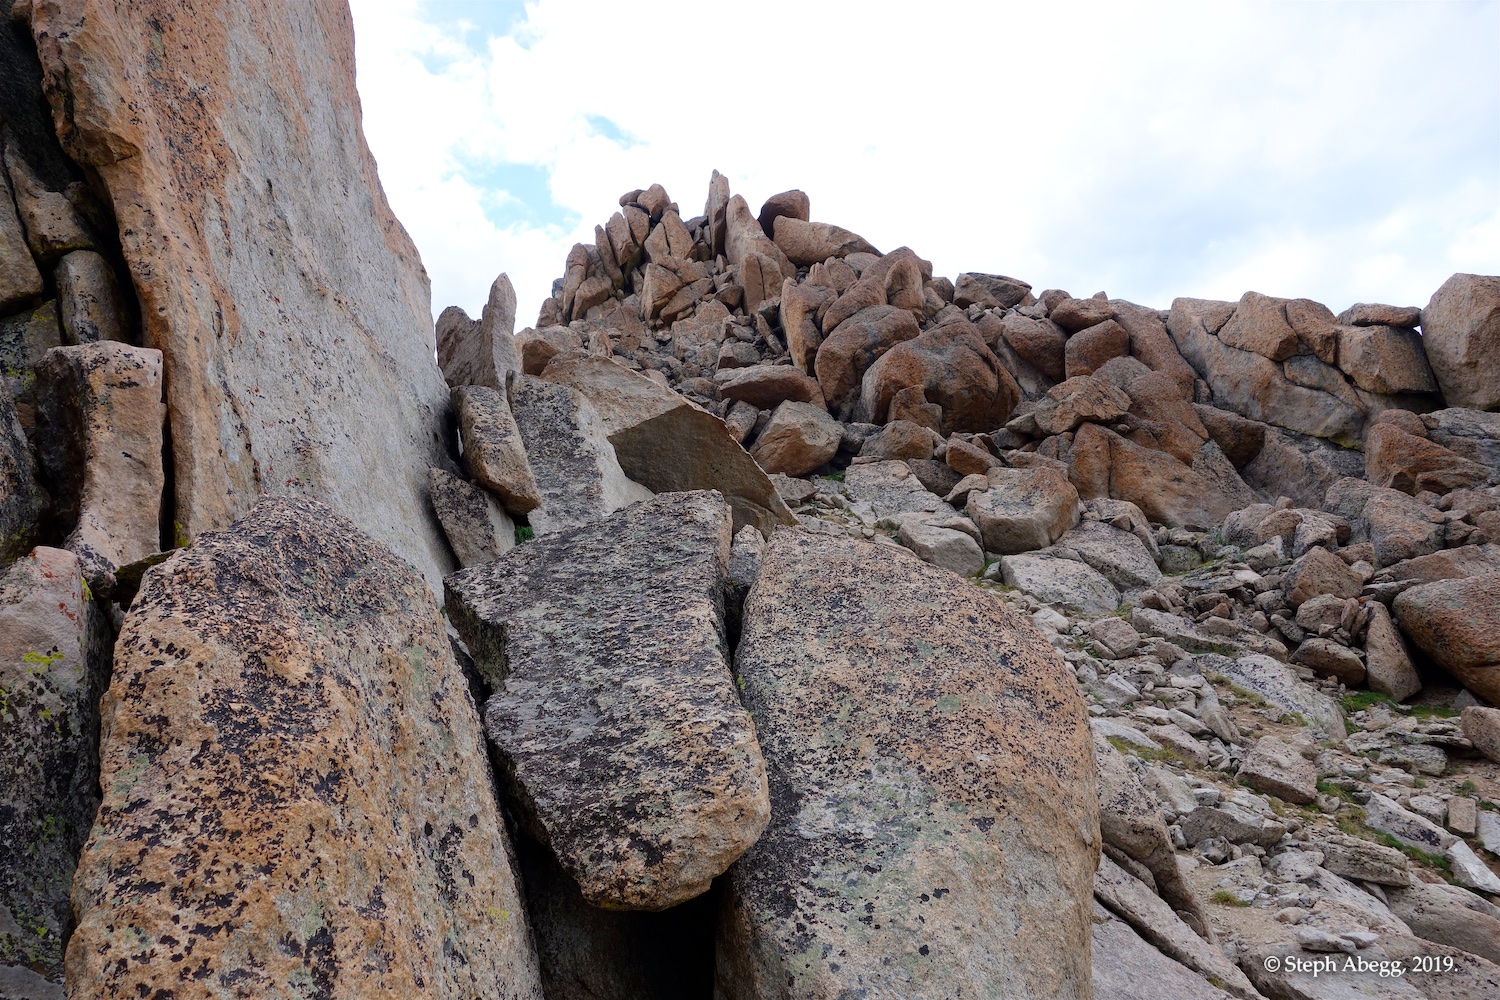
Evolution Traverse. One traverse I'd wanted to do for years was the Cirque Traverse, which traverses across all 11 of the summits of the main spine of the Cirque of the Towers in Wyoming, starting with Pingora and ending with Warbonnet, entailing four miles of 3rd, 4th, and 5th class climbing up to 5.8. The Cirque Traverse in one of America's premier alpine rock traverses (and now having done it I'd fully agree with this statement - the whole thing felt like an engaging awesome mountain obstacle course).

I knew the perfect partner for the adventure: Casey Andrews, who I had done the Evolution Traverse with in July 2017. Both Casey and I are athletes, love long days in the mountains, and share a pet peeve of stopping for breaks or wasting time, so we make a great team for an athletic Traverse like this. Casey was of course interested and fortunately he had a rare window of time long enough to justify the drive from his home in California. So we made plans to do the Cirque Traverse in late July.

Our plan:
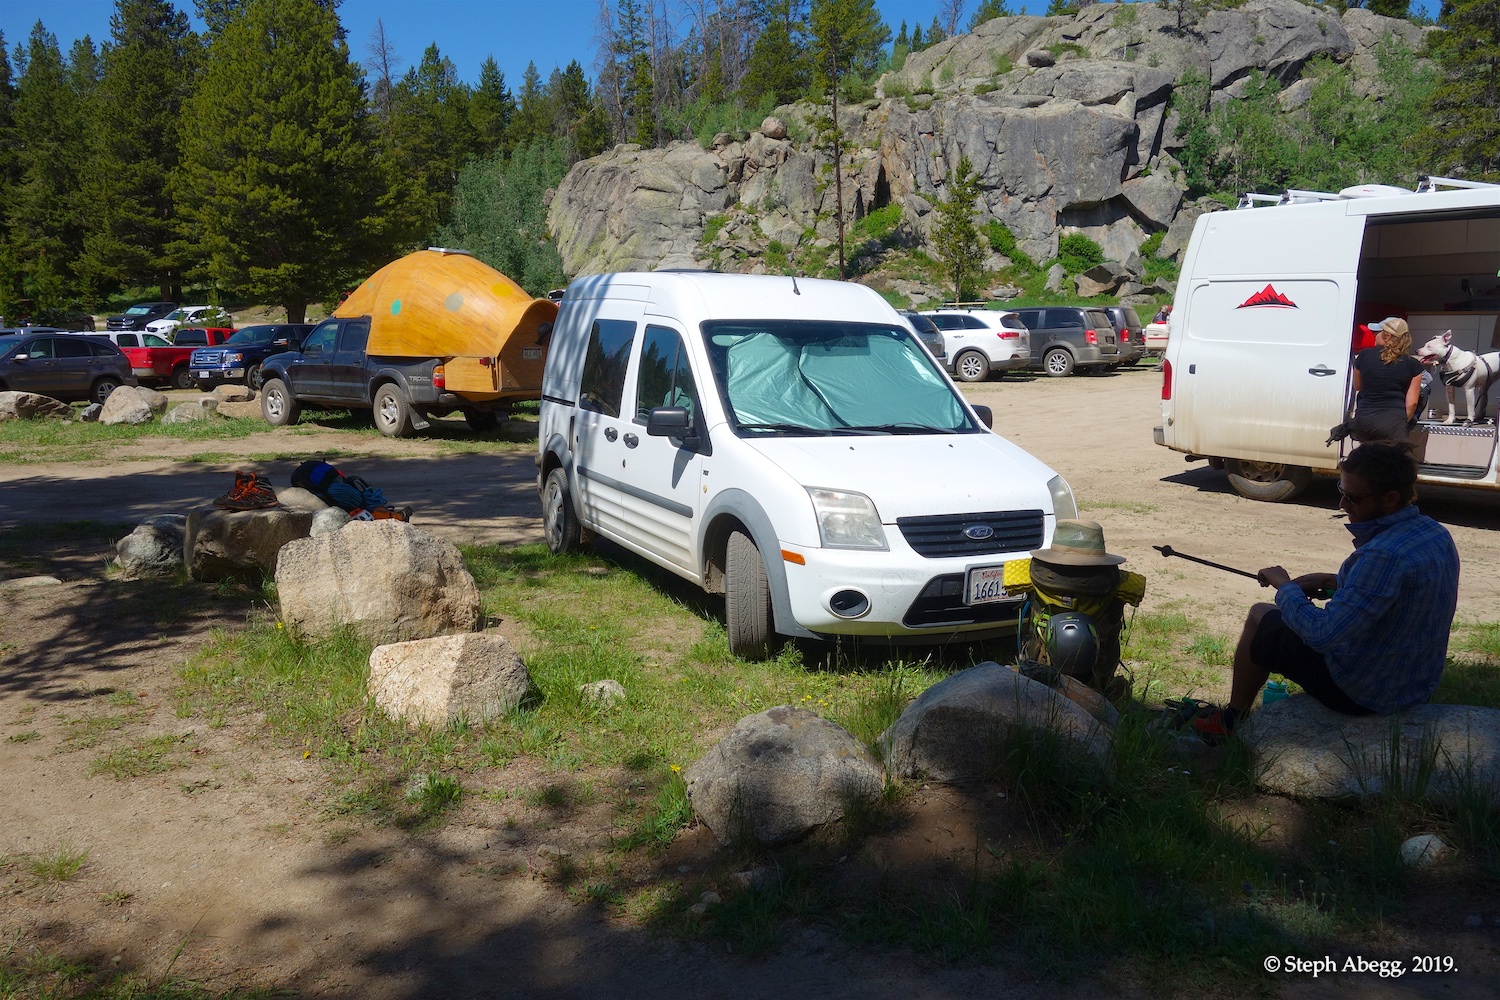
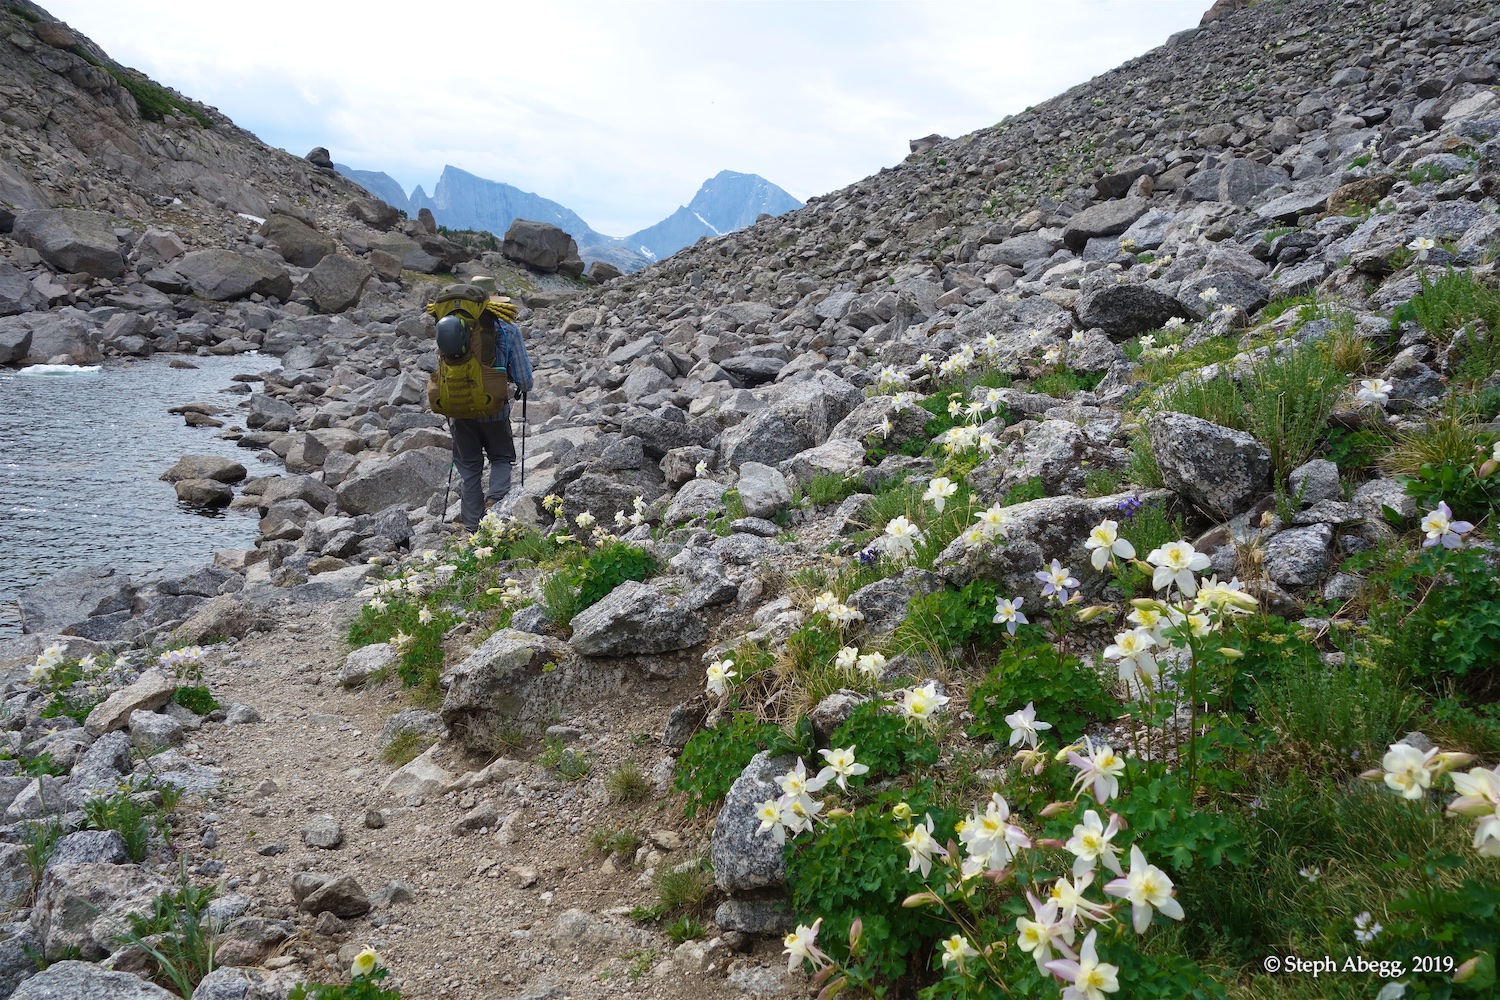
  • Day 1: Hike ~10 miles into the Cirque and establish a basecamp.
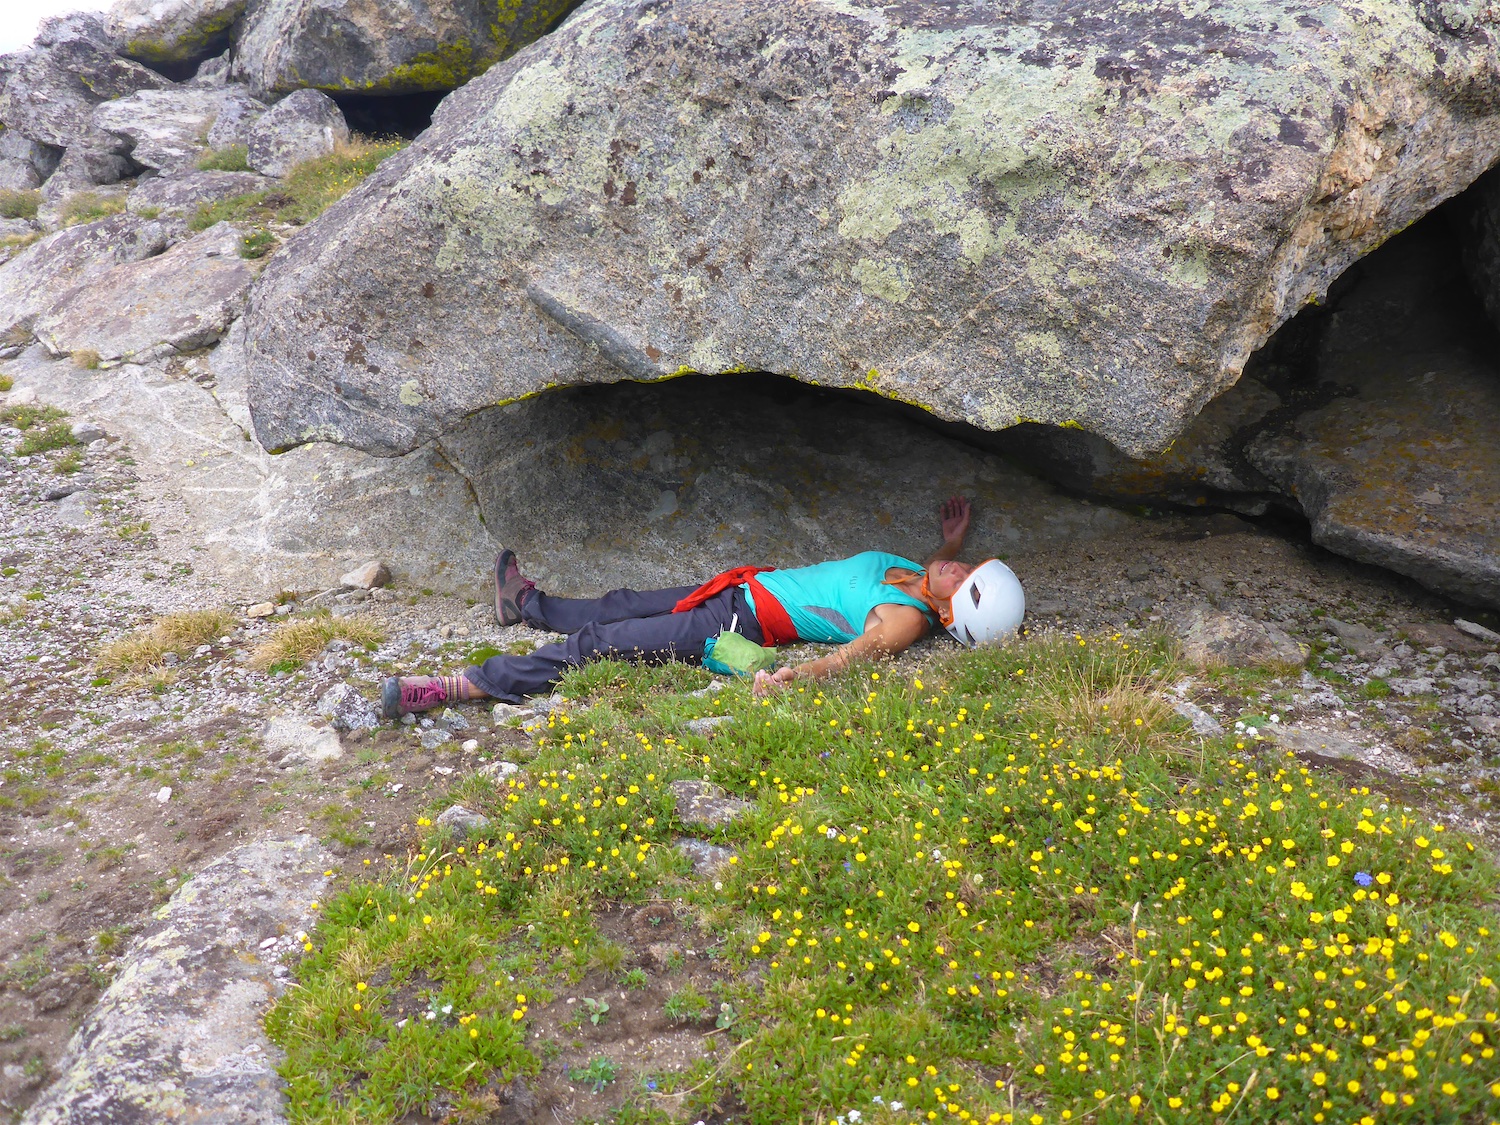
  • Day 2: Leave camp an hour before sunrise (4:30 am). Do Cirque Traverse. Arrive back at camp hopefully the same day. (We arrived back at camp at 10pm, 17.5 hours after we left.)
  • Day 3: Either hike out or climb something else. (A mixed weather forecast for this day and tired bodies encouraged us to hike out, satisfied with our successful 11-summit day the previous day!)
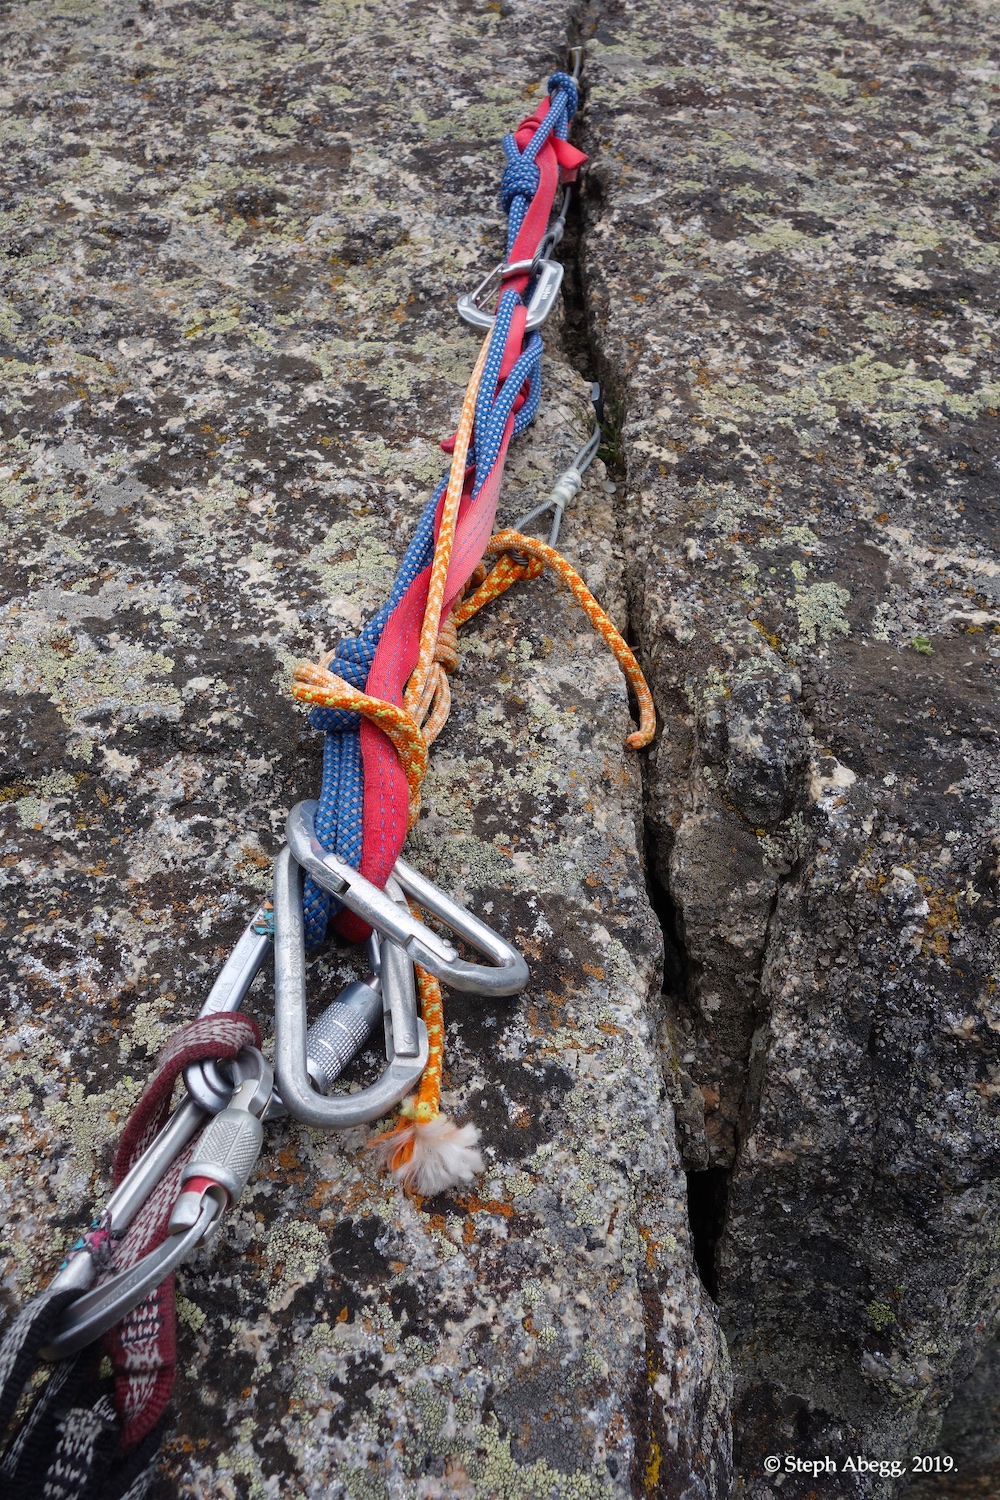
Our rack and rope, where we roped up, where we rappelled
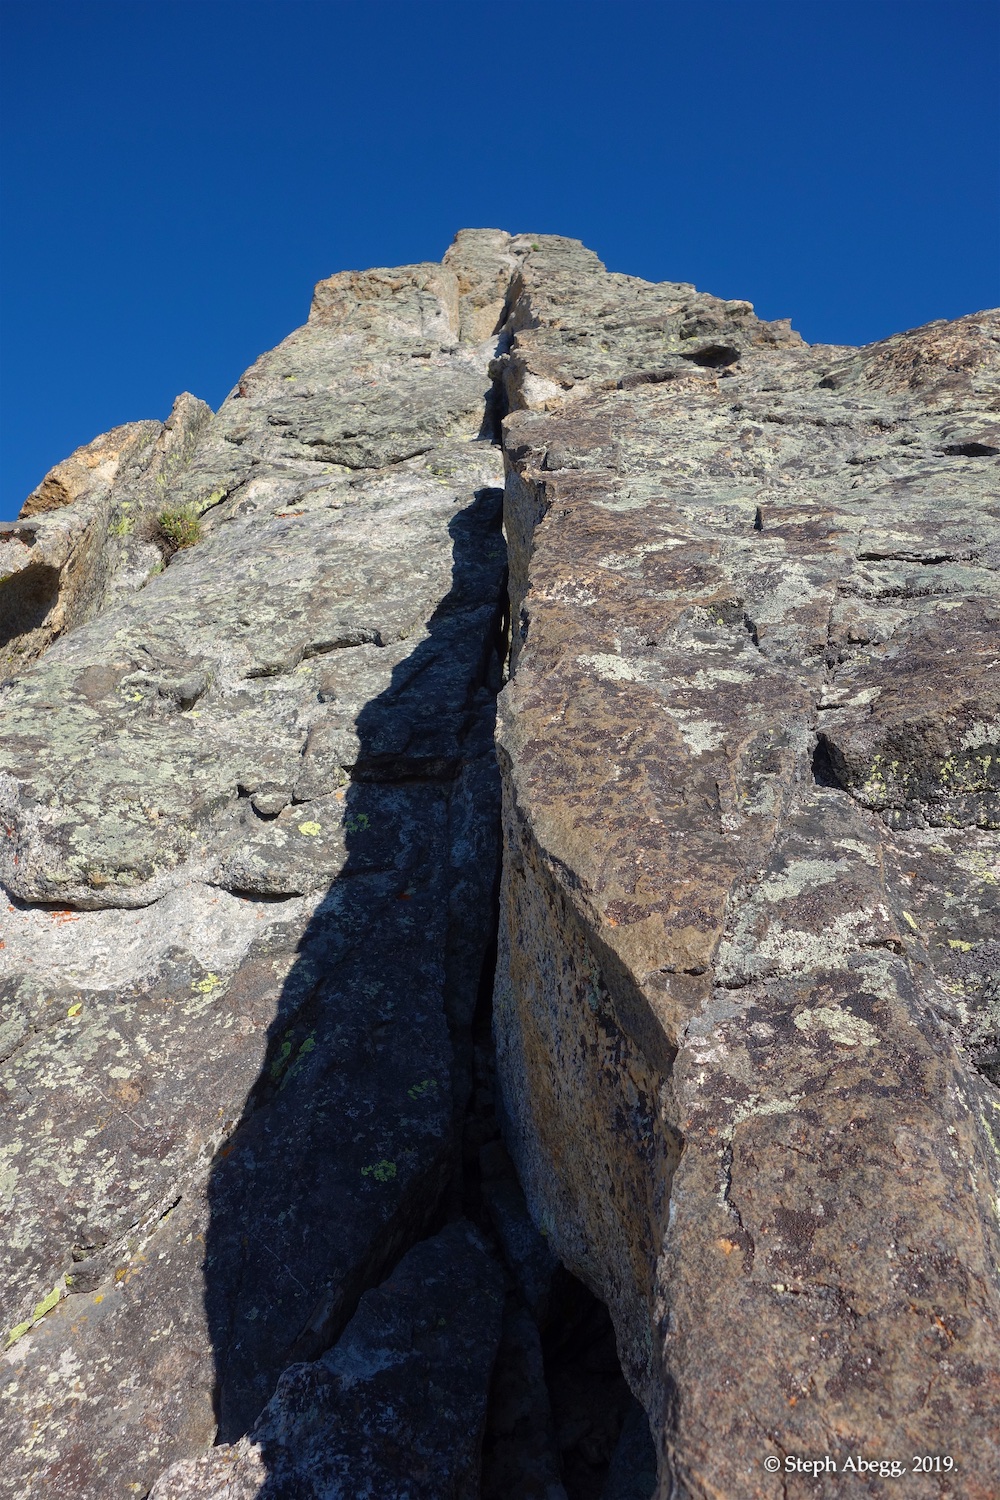
The climbing on the traverse is a mix of 3rd, 4th and 5th class up to 5.8. We brought a single rack (cams from tips to #3), a set of nuts, a dozen shoulder slings, and 3 double length slings. For a rope, we had a light 70m rope (we would have brought a 60m rope, but my 70m was lighter than Casey's 60m option).

We soloed most of the route. We roped up for the following three sections of fifth-class climbing. On these roped sections, we often simuclimbed to speed things up.
  1. Pingora: South Ridge /w K-Cracks variation (5.8)
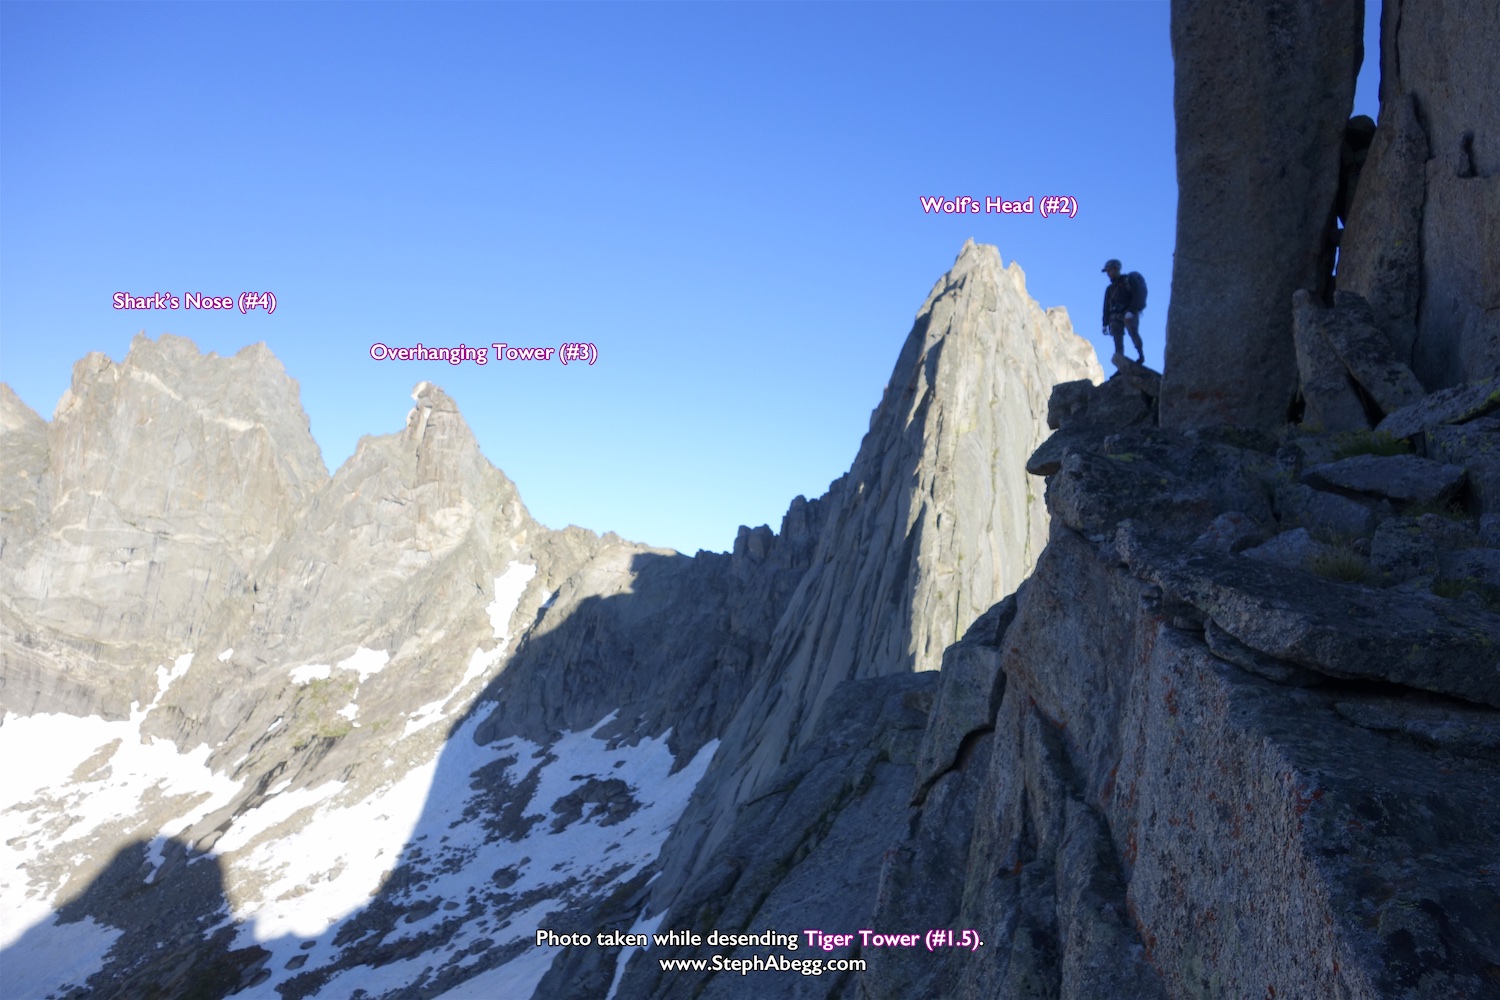
  2. Wolf's Head: East Ridge (5.6)
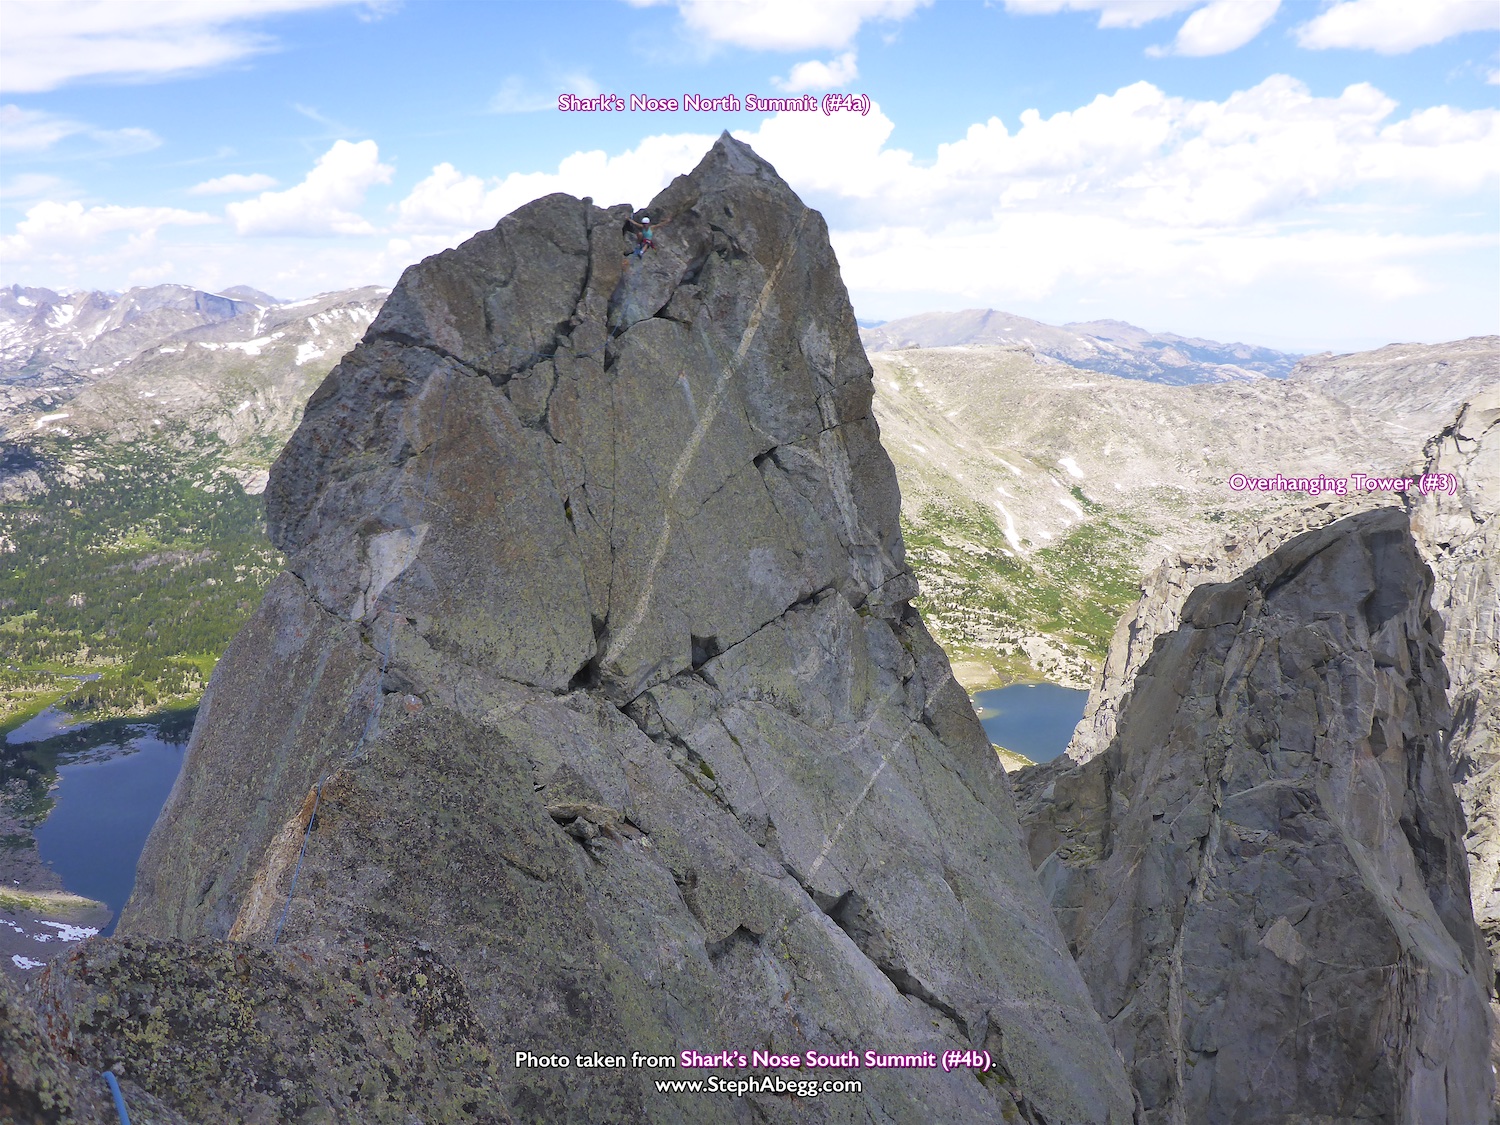
  3. Shark's Nose: The Thoroughfare (5.6) and the Summit Traverse (5.8)
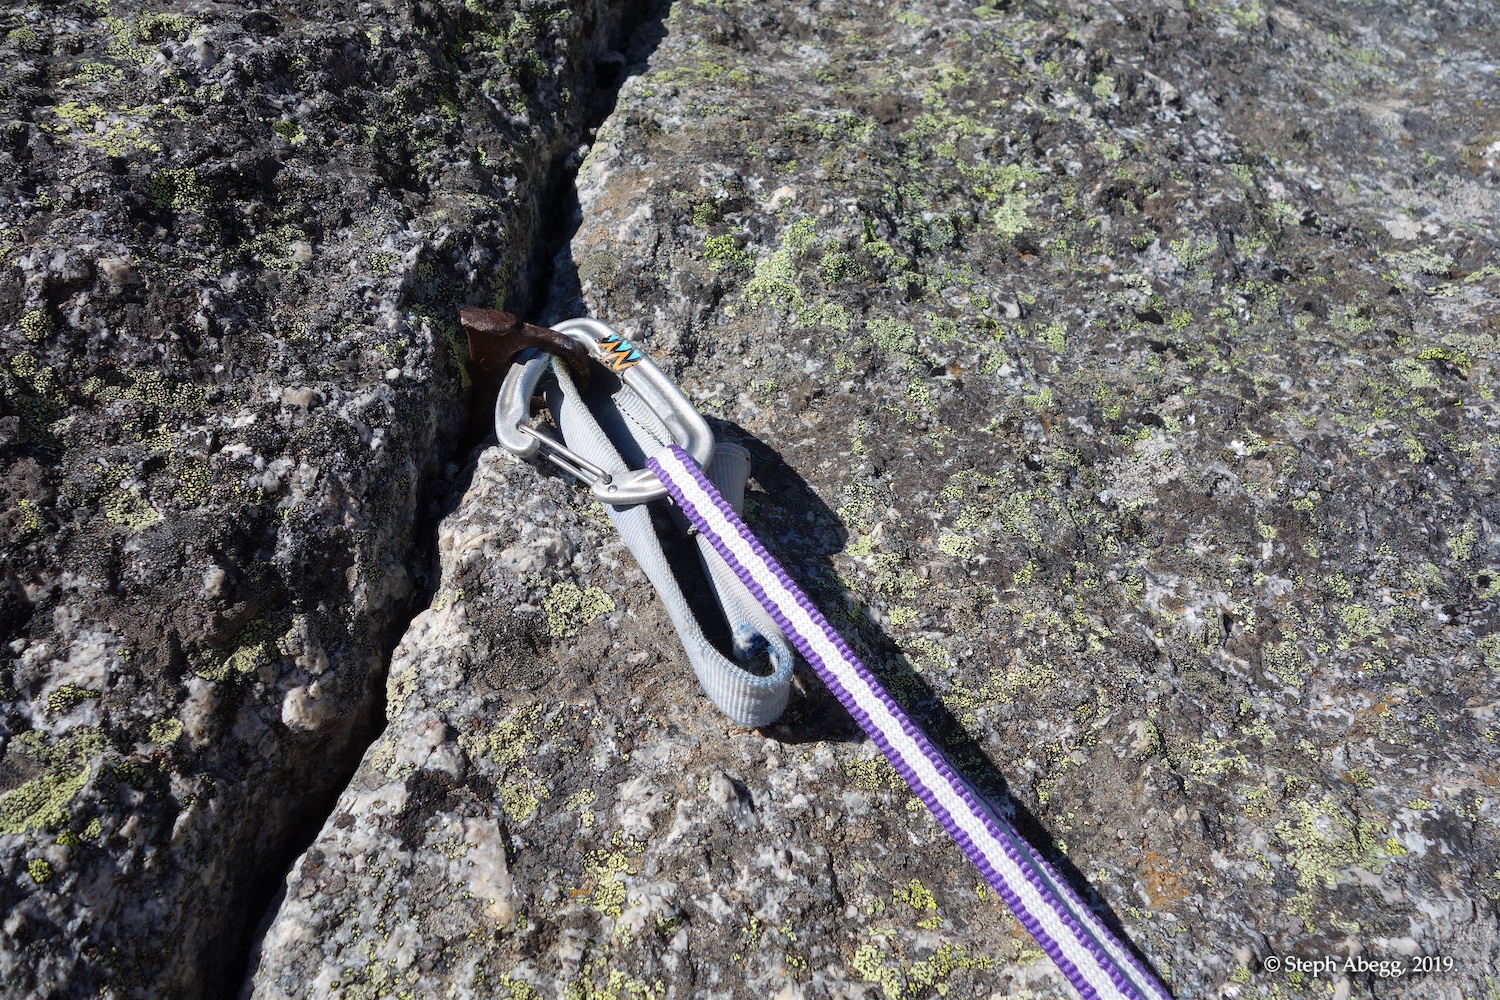
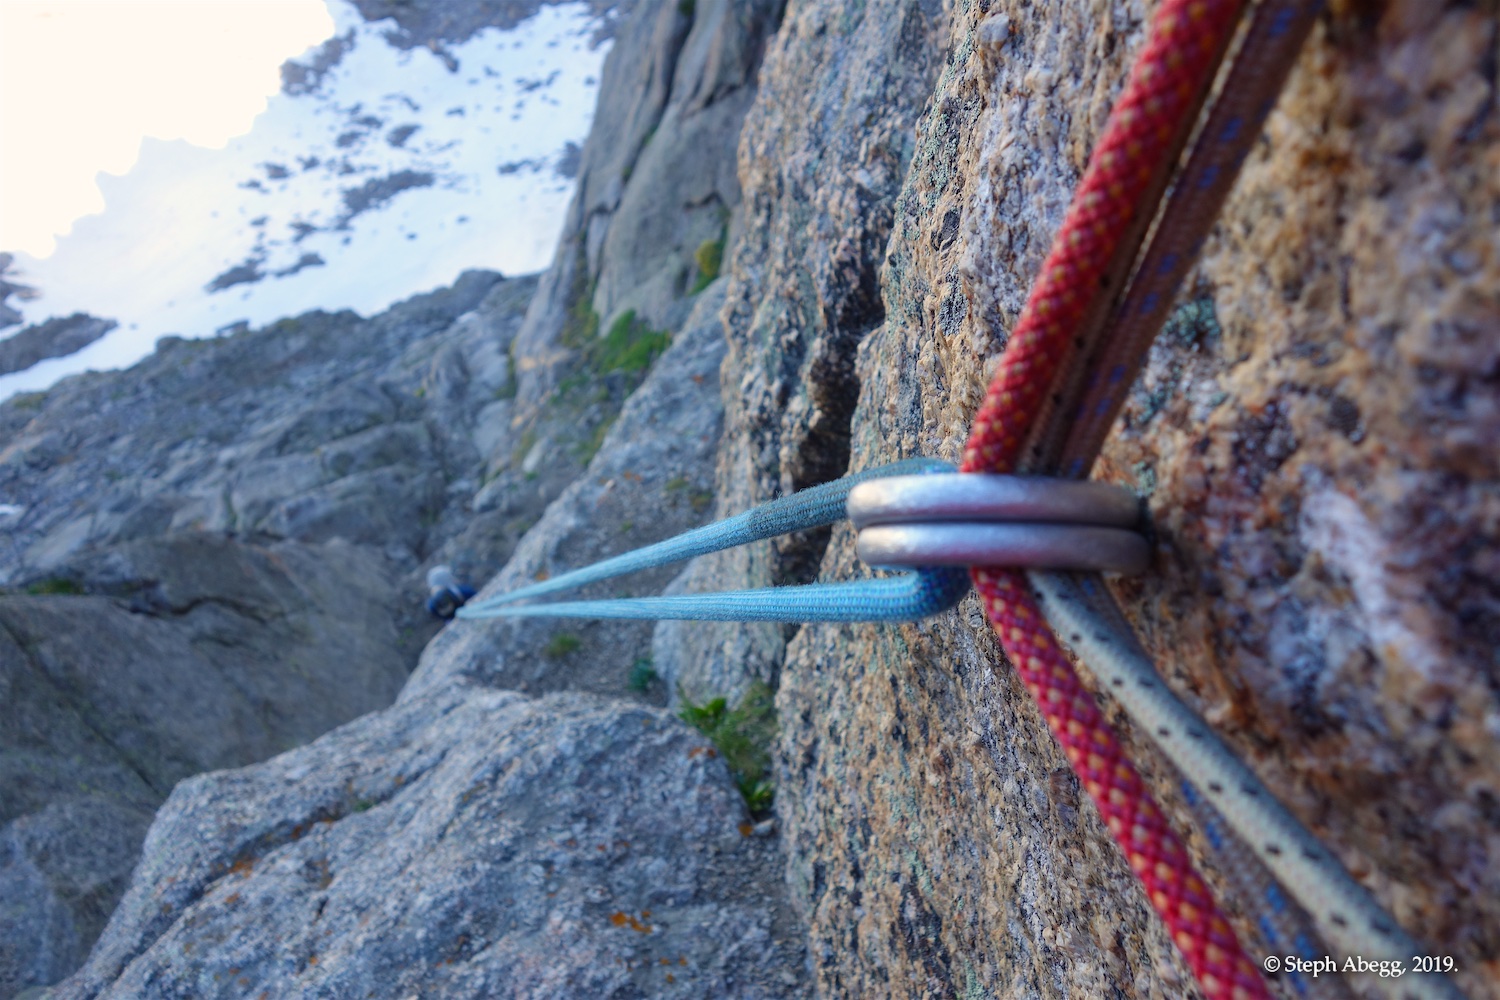
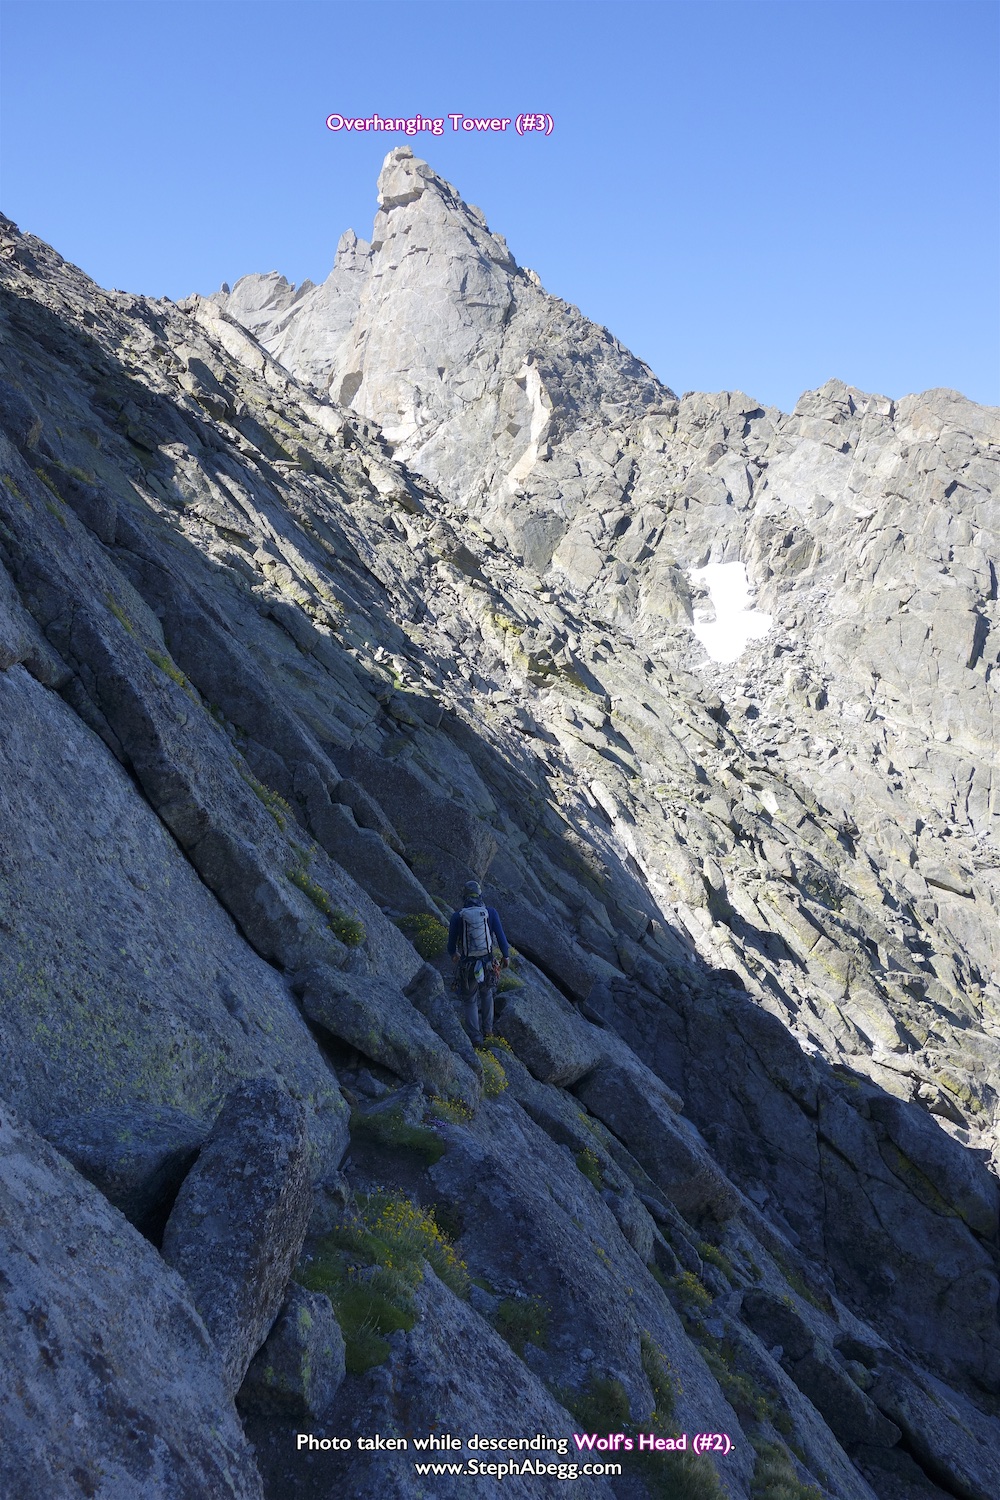
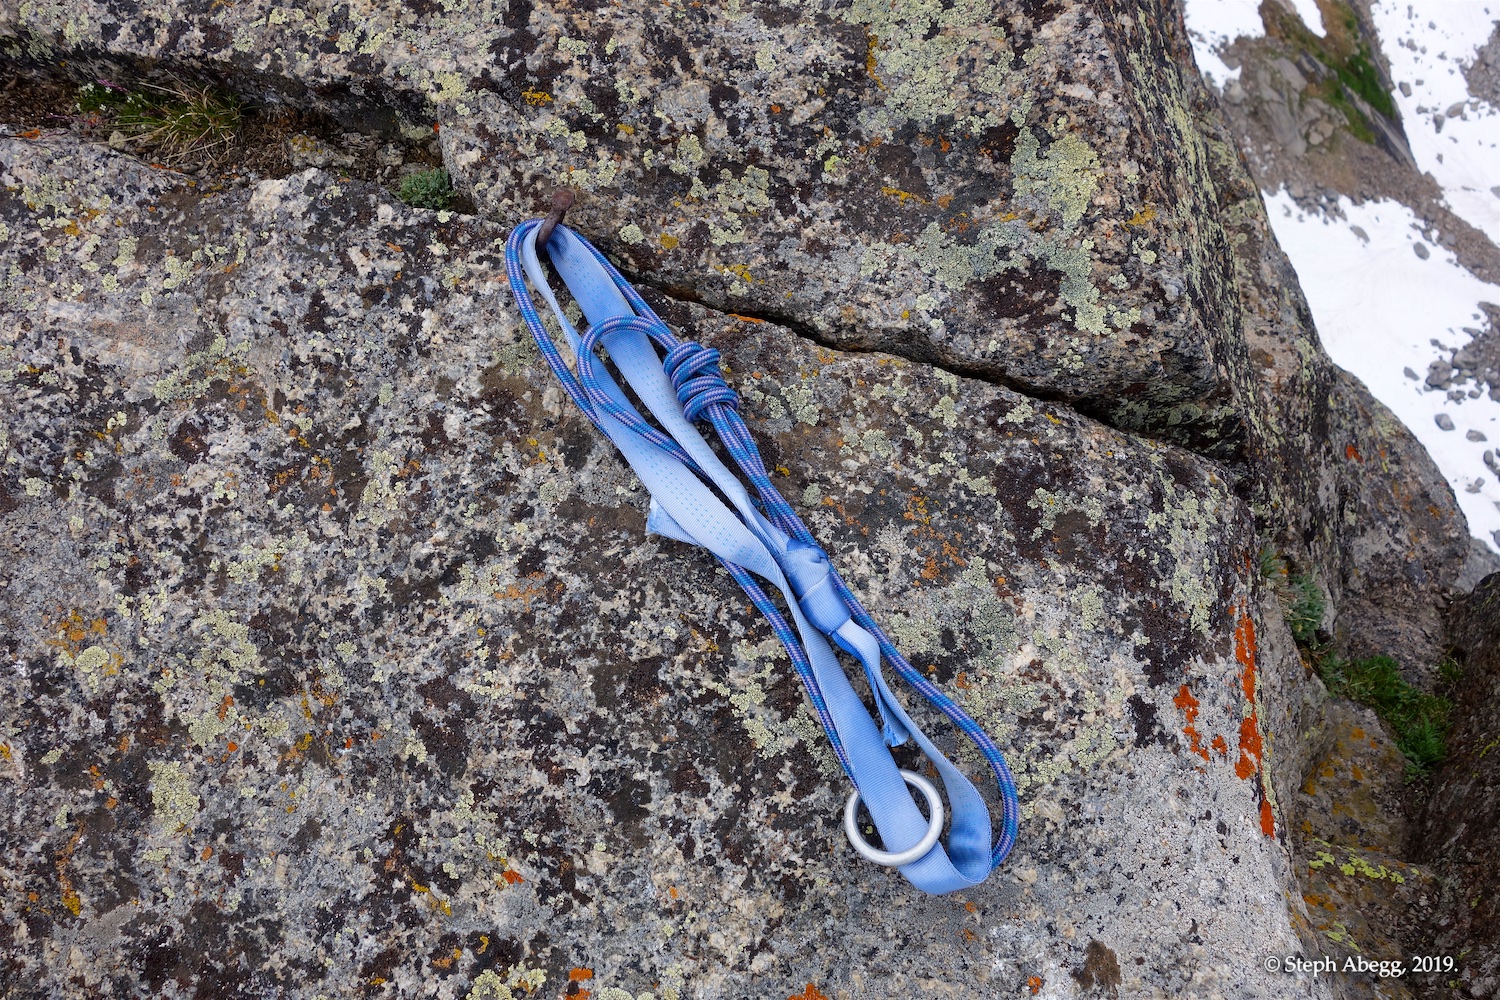
We rappelled 17 times, several of the raps being about 30m (so bring at least a 60m rope). Some of the terrain that we rappelled was downclimbable, so we usually made the decision of whether to rappel or downclimb based on if we already had the rope out or the consequences of a fall. Some of the terrain was not downclimbable, so you definitely want a full rope for the Traverse. We got our rope stuck only once, on Overhanging Tower (fortunately the terrain was mid-5th so we were able to solo up and down to free it quickly). We rappelled at the following locations:
  1. Getting off Pingora (4 raps - mid 5th terrain)
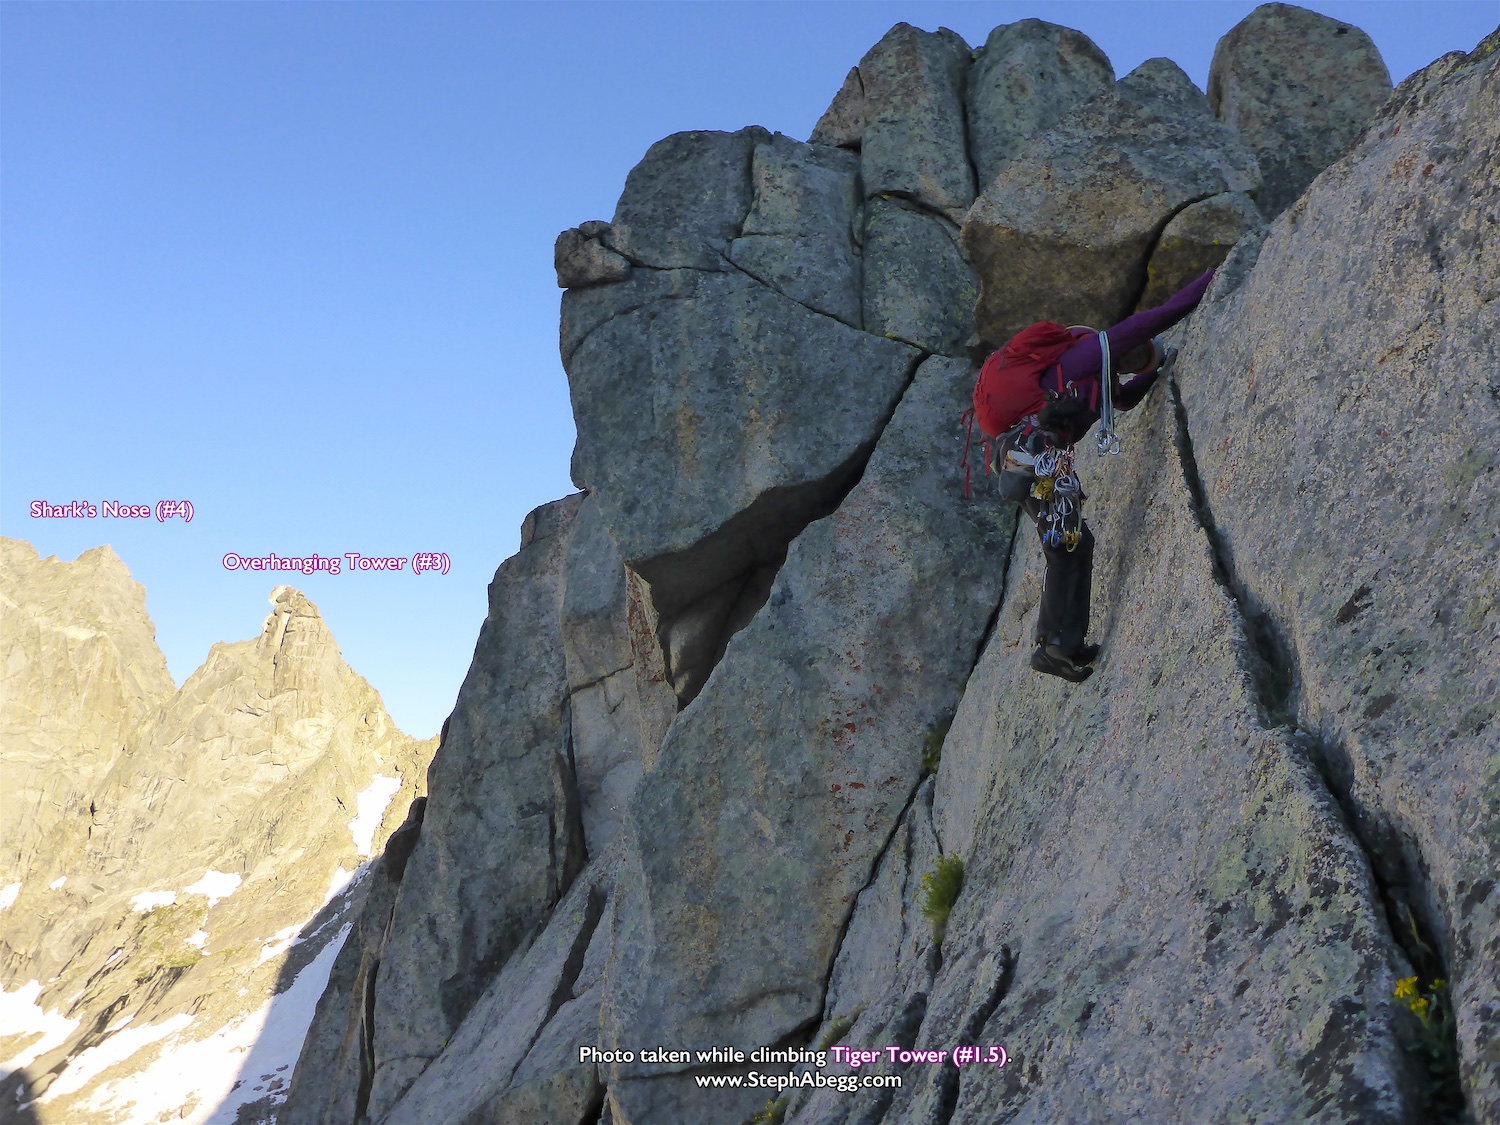
  2. Getting off Tiger Tower (2 short raps - mid 5th terrain)
  3. Getting off Wolf's Head (3 raps - mid 5th terrain)
  4. Getting off Overhanging Tower (2 raps - mid 5th terrain)
  5. Getting off Shark's Nose (3 raps - very vertical terrain - not downclimbable)
  6. Getting off Block Tower (3 raps - very vertical terrain - not downclimbable)
Footwear
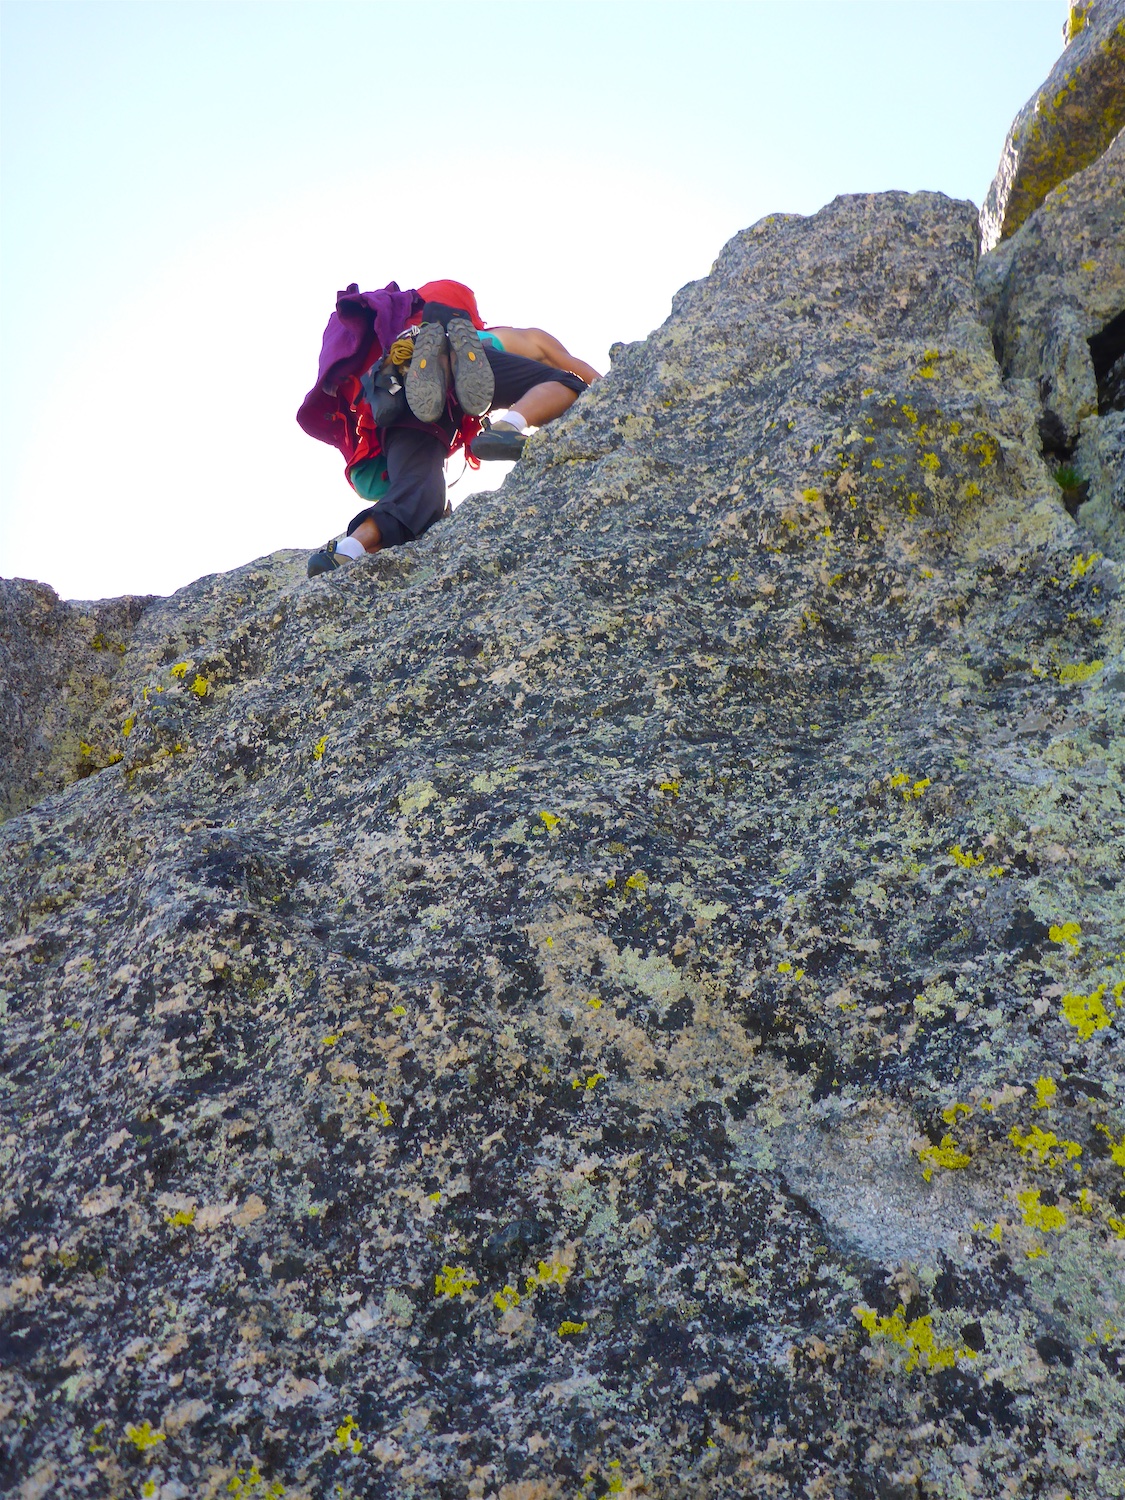
We wore approach shoes for all of the 3rd and 4th class sections of the traverse as well as the rappels. I put on climbing shoes for all of the 5th class sections, while Casey remained in his approach shoes for some of the easier 5th class.

Water on the route
There were snowpatches at some of the cols, but no running water until we got to the east slopes of Pylon Peak. This was was from snowmelt which would not be present in later summer.

The weather
We had perfect weather for this adventure. The morning was cloudless and low stress. It was an unusually warm and calm day, with just a slight breeze. The first afternoon clouds started to dot the sky around 1:30pm, when we were on Shark's Nose, past the halfway point on the route and done with the hardest climbing. The clouds provided a bit of relief from the sun. The clouds thickened over the next couple of hours, but nothing threatened. When we popped up on the shoulder of Warbonnet at 3:30pm, there were some small storm systems on the horizon, but nothing nearby. After this point, the terrain is no more than 3rd class (i.e. weather could move in and you could still keep going), and we knew we had the traverse in the bag. One of the small storm systems moved over us just as we reached the trail around 9pm, reminding us to be thankful for the weather window we had been given. I would not suggest doing this Traverse unless you are pretty confident in the forecast to be dry until you at least reach Warbonnet. There is a lot of scrambling on steep terrain that would be rather dangerous when wet. Plus, it's way more fun in good weather.

Route-finding
Before embarking on the Traverse, we wrapped our heads around the Traverse and the route we would take up each peak and the means of descent. It also helped that I had climbed the first four summits already and made the descent from Warbonnet. So we had no major route-finding issues, apart for climbing to the false summit of Warbonnet only to realize Warbonnet was the next one over (we simply continued over to the true summit, but lost a bit of time since we had dropped our packs in an inefficient spot before heading up to Warbonnet).

Camp-to-camp time
Our camp-to-camp time was 17.5 hours. I feel like this is a pretty respectable time for a competent, athletic party moving at a comfortable pace. We didn't stop much and we were quite efficient, we simulclimbed and even soloed the 5th class to save time, and we made no significant route-finding errors. Part of what took up time was getting the rope out and then get it re-packed—we probably spent more rope time rappelling than we did doing roped-up climbing. We were also never rushing or breathing all that hard. Perhaps we could have shaved a couple of hours off this time if we were really going for a speedy time, but this would have made it less enjoyable. As it was, it was just an enjoyable athletic romp in the mountains. A sub-24 hour car-to-car time is a completely reasonable target (shave an hour off the camp-to-camp time, and then do the approach with light packs and with intent towards speed). As a related note, our 50% time occurred on Shark's Nose during the traverse from the North summit to the South summit; interestingly, this was the crux pitch of the route.

Photos, Overlays, and More!
The following page gives a trip report for our traverse, including maps, stats, and lots of photos. What an awesome adventure involving 11 summits in one day!

Stats

Note: Clock time and percentages start when we left camp and finished when we arrived back at camp. I decided to begin the climb of Pingora at the base of the 3rd class starting up the lower buttress (22 minutes from camp) and I ended the climb of Warbonnet at the top of the descent gully back to the trail (1:39 to camp from top of descent gully).

The Cirque Traverse, Peak-by-Peak

THIS TRIP REPORT IS STILL MOSTLY IN THE EMBEDDED HTML FORMAT OF MY OLD WEBSITE.

The rest of this page contains photos from the traverse, broken down into the sections pertaining to each of the eleven summits. Casey also took several great photos. 14 of the photos below were taken by him. Enjoy!

CLICK ON PEAK SECTION TO DROP DOWN CONTENT

Big Sandy Trailhead to Camp in Cirque
~10 miles; 4 hours 41 minutes (20 minutes of this spent standing under a tree trying not to get soaked by a thundershower)
Photos:
1.    
2.    
3.    
4.    
5.    
6.    
7.    
8.    
9.    
10.    
11.    


Photo descriptions:
1. Driving the long dirt road towards the Cirque.
2. The Big Sandy Trailhead. There were a lot of cars, but it was not as crowded as I have seen it on previous trips. Perhaps the scare of the July mosquitos...
3. A thundershower hit as we arrived at Big Sandy Lake. We hovered under a tree for about 20 minutes to wait out the worst of the rain. In these thundershowers, you can get soaked in seconds, but they pass pretty quickly.
4. Sundance Pinnacle and Warbonnet on the approach. The descent of the Cirque Traverse comes down a gully between the two, closer to Warbonnet than Sundance.
5. Deep Lake Cirque to the southeast.
6. Our first views of the Cirque.
7. Arrowhead Lake. On the way in, we went on the trail over Jackass Pass. On the way out we took the shortcut via the climbers' trail along Arrowhead Lake.
8. Our campsite in the Cirque. I've camped at this site on at least three different trips, so it sort of feels like home.
9. View from camp of the last three peaks of the Traverse.
10. Perhaps this photo is a better representation of my view. The typical July clouds of mosquitos forced us into our tents for the evening.
11.
 At least the population inside my tent is finite.

#1: Pingora Peak   (Camp --> Base of buttress --> Summit (6:34am) --> Pingora-Tiger Tower Col)
STATS: 0:22 to base of buttress, 1:41 up to summit from base of buttress, 0:35 down to col; 2.1%+12.9% of total camp-to-camp travel time; 15% completed with Traverse (camp-to-camp) after descending peak
Photos:
1.    
2.    
3.    
4.    
5.    
6.    
7.    
8.    
9.    
10.    
11.    
12.    
13.    
Photo descriptions:
1. Alpine start.
2. Navigating the 3rd class ledges approach to the base of Pingora's South Buttress route. Fortunately I had been this way a few times before, so it was easy to stay on route.
3. Starting up Pitch 1 of the South Buttress. We linked Pitches 1 and 2.
4. Pitch 2 of the South Buttress. Linked with Pitch 1.
5. The first rays of morning sun on the peaks across the cirque. We'd be over there for sunset.
6. First rays of morning light on Mitchell Peak.
7. Morning light sweeping across the Cirque.
8. Steph leading off Pitch 3. We took the K-Crack variation (5.8).
9. Casey enjoying fun climbing on the K-Cracks.
10. Pitch 4 of the South Buttress is 4th class, so we unroped and scrambled to the top.
11.
 On the summit of Pingora. This might be my favorite photo of the day.
12. Starting the rappels down the West side of Pingora. We made 4 raps. These are long raps, definitely designed for at least a 60m rope. 
13. One of the rap anchors.


Previous trip report for the South Buttress of Pingora in July 2014.

#1.5: Tiger Tower   (Pingora-Tiger Tower Col --> Top of Tiger Tower (7:20am) --> Base of East Ridge of Wolf's Head)
STATS: 0:11 up, 0:13 down; 2.3% of total camp-to-camp travel time; 17.3% completed with Traverse (camp to camp) after descending tower
Photos:
1.    
2.    
3.    
4.    
5.  
Photo descriptions:
1. Climbing around the snow in the notch between Pingora and Tiger Tower.
2. Tiger Tower. We decided to climb this rather than skirt around it. Getting to the top from here is about 5.0. We soloed it. A bonus summit!
3. Climbing to the top of Tiger Tower.
4. Figuring out how to get down off Tiger Tower.....
5. ...2 short raps down the west side. These were our 5th and 6th rappels of the adventure. I began counting rappels by using my hand and a base 5 number system. We did 17 rappels over the course of the day.

#2: Wolf's Head   (Base of East Ridge --> Summit (9:29am) --> Wolf's Head-Overhanging Tower Col)
STATS: 1:56 up, 0:58 down; 16.5% of total camp-to-camp travel time; 33.8% completed with Traverse (camp-to-camp) after descending peak
Photos:
1.    
2.    
3.    
4.    
5.    
6.    
7.    
8.    
9.    
10.    
11.    
12.    
13.    
14.    
15.    
16.    
17.    
18.   
Photo descriptions:
1. Wolf's Head East Ridge. How can you not want to climb that?!
2.
 Wolf's Head East Ridge on left, Bollinger Peak on right. The Kelsey guidebook lists a few routes on this east face: a couple of chimney routes that are "unlikely to b
ecome popular" and a 5.9 A3 route up the diagonal crack system on the face (which might go free at 5.10....). Definitely potential for some other routes on this face.
3. An overlay I made showing the general route on Wolf's Head.
4. Starting up the granite sidewalk on the classic East Ridge of Wolf's Head.
5. Looking down the granite sidewalk.
6. Fun climbing near the summit ridge.
7. Nearing the summit ridge. Now the climb weaves around the five summit towers (L, R, R, L, R).
8. Going left around the first summit tower.
9. Continuing left around the first summit tower.
10. We went through this slot to get to the right side to go right around the second and third summit towers.
11. Piton en route.
12. Going right around the third summit tower.
13.
 Going left around the fourth summit tower.
14. Going right and up to get to the summit.
15. Looking back at the summit towers from the summit.
16. The first rappel, located just off the summit. Rappel towards Bollinger.
17. Another rappel. We rappelled three times, but some parties might rappel more or less depending on downclimbing comfort.
18. Scrambling around the west side of Wolf''s Head towards the Wolf's Head - Overhanging Tower Col. 


Previous trip report for the East Ridge of Wolf's Head in September 2007.

#3: Overhanging Tower   (Wolf's Head-Overhanging Tower Col --> Summit (10:49am) --> Overhanging Tower-Shark's Nose Col)
STATS: 0:22 up, 0:42 down; 6.1% of total camp-to-camp travel time; 39.9% completed with Traverse (camp-to-camp) after descending peak
Photos:
1.    
2.    
3.    
4.    
5.    
6.    
7.    
Photo descriptions:
1. Looking up at Overhanging Tower. We decided to solo up the NE Ridge route (5.2) rather than the 4th class NW Ridge.
2. Starting up the NE Ridge. Just follow your nose upward, nothing harder than 5.2. It's really more of a face than a ridge.
3. Soloing up the NE Ridge.
4. On the summit. Summit #3!
5. Looking toward our next objective: Sharks's N
6. We made two raps down the SW Face of Overhanging Tower to get to the col between Overhanging Tower and Shark's Nose. This is downclimbable at 5.5, but it was a bit loose and we already had the rope out so we rapped. However, the rope did get stuck on one pull, so I had to climb back up to free the rope and downclimb the rap anyway.
7. The second rappel. Casey chose to downclimb.


Previous trip report for the NE Ridge of Overhanging Tower in 1994.

Previous trip report for the NE Ridge of Overhanging Tower in July 2014.


#4: Shark's Nose   (Overhanging Tower-Shark's Nose Col --> N Summit (12:43pm) --> S Summit (1:20pm) --> Shark's Nose-Block Tower Col)
STATS: 1:12 up to N summit, 0:37 from N to S summit, 0:37 down; 13.9% of total camp-to-camp travel time; 53.8% completed with Traverse (camp-to-camp) after descending from S summit
Photos:
1.    
2.    
3.    
4.    
5.    
6.    
7.    
8.    
9.    
10.    
11.    
12.    
13.    
14.    
Photo descriptions:
1. A pretty flower at the base of the route.
2. Pitch 1 of The Thoroughfare route. We had wanted to climb the North Face route, but the start was a bit in-obvious and the climbing looked a bit unprotectable. So we decided to climb The Thoroughfare, which I had climbed before in 2014.
3. Pitch 2. We linked Pitches 2 and 3.
4. Start of Pitch 4. We linked Pitches 4 and 5.
5. End of Pitch 5.
6. Casey on the North summit.
7. Shoeing up for the traverse to the South summit. This ended up being the crux pitch of the route. Very exposed and the "5.8" move seemed a bit sandbagged.
8. View from the North summit looking towards the South summit. Casey is making the crux move. He has a piece of protection in, but with the ledge below and the slack in rope due to the traverse, this would not be a good place to fall.
9. Casey snapped this photo from the South summit looking back at me on the North summit.
10. The crux section.
11.
 We made three rappels to get to the Shark's Nose - Block Tower col. These were long rappels on steep terrain.
12. I got distracted by an impressive band of pegmatite getting to the second rappel.
13. Hand for scale. These are giant crystals!
14. Rappel three. To the col.


Previous trip report for The Thoroughfare route on Shark's Nose in July 2014.

#5: Block Tower   (Shark's Nose-Block Tower Col --> Summit (2:18pm) --> Block Tower-Watchtower Col)
STATS: 0:21 up, 0:35 down; 5.3% of total camp-to-camp travel time; 59.1% completed with Traverse (camp-to-camp) after descending peak
Photos:
1.    
2.    
3.    
4.    
5.    
6.    
7.    
8.    
Photo descriptions:
1. Starting up the upper East Face route on Block Tower.
2. The 5.5 chimney/crack to the summit. We soloed this. I found the final few moves to be a bit spicy but Casey seemed to have no problem!
3. Topping out.
4. Heading towards the rap anchor on the south side of the summit block.
5. We spotted this rap anchor off a single piton. It seemed oddly positioned, so I am guessing it was used to protect the scramble down to the rap anchor on the edge; under wet conditions, getting to the rap anchor on the edge might seem a bit sketchy.
6. Rappel #1 of 3 to get to the 
Block Tower - Watchtower Col. These were all long rappels on steep terrain. Definitely want at least a 60m rope for these.
7. 
All of the anchors were composed of a few nuts and tat. We reinforced the tat on one of the anchors.
8. The third rappel, into the col. This was the final rappel of the Traverse. We didn't need the rope again after this. 

#6: Watchtower   (Block Tower-Watchtower Col --> Summit (3:55pm) --> Watchtower-South Watchtower Saddle)
STATS: 1:02 up, 0:14 down; 7.2% of total camp-to-camp travel time; 66.3% completed with Traverse (camp-to-camp) after descending peak
Photos:
1.    
2.    
3.    
4.    
5.    
6.    
7.    
8.    
9.    
Photo descriptions:
1. Getting from the Block Tower - Watchtower Col was loose 3rd class, with some snow to deal with as well. Not the safest or most enjoyable terrain. 
2. I chose to climb along the moat, which worked pretty well.
3. The final bit of loose gully to the shoulder of Watchtower,
4. We popped out onto a grassy bench, with a couple of miles of pleasant 3rd class terrain stretching in front of us. We knew that when we arrived here, we had the traverse in the bag, even if the weather deteriorated or it got dark (neither of which would happen).
5. We got up to the ridge and headed towards the actual summit of Watchtower.
6. Casey on the summit of Watchtower. Summit #6! The halfway point in terms of summits, but 2/3 of the way done with the Traverse at this point in terms of time.
7. Found embedded in the summit.
8. Looking back at the rugged terrain we have covered so far.
9. I found this nice bivy cave and posed for a photo.

#7: South Watchtower   (Watchtower-South Watchtower Saddle --> Summit (4:21pm) --> South Watchtower-Pylon Saddle)
STATS: 0:12 up, 0:08 down; 1.9% of total camp-to-camp travel time; 68.3% completed with Traverse (camp-to-camp) after descending peak
Photos:
1.    
2.    
3.    
4.    
Photo descriptions:
1. Heading towards South Watchtower.
2. View of the end of the Traverse.
3. The next summit: Pylon Peak. We went up the right ridge and down the left.
4. Another nice bivy cave. There are actually lots of nice bivy spots from Watchtower onward. Although at this point if it got dark you could just keep going.

#8: Pylon Peak   (South Watchtower-Pylon Saddle --> Summit (4:39pm) --> Pylon-Warrior II Saddle)
STATS: 0:10 up, 0:37 down; 4.5% of total camp-to-camp travel time; 72.7% completed with Traverse (camp-to-camp) after descending peak
Photos:
1.    
2.    
3.    
4.    
5.    
Photo descriptions:
1. Heading up to the summit of Pylon Peak.
2. On top. Summit #8! Now they are going quickly!
3. Heading down off the summit of Pylon. It's a long but easy descent to the saddle between Pylon and Warrior II. This saddle is the head of the Wisconsin Couloir.
4. Negotiating some annoying snow on the descent off Pylon.
5. Enjoying the flowers on the descent to the saddle.

#9: Warrior II   (Pylon-Warrior II Saddle --> Summit (6:01pm) --> Warrior II-Warrior I Saddle)
STATS: 0:45 up, 0:11 down; 5.3% of total camp-to-camp travel time; 78% completed with Traverse (camp-to-camp) after descending peak
Photos:
1.    
2.    
3.    
Photo descriptions:
1. At the saddle between Pylon and Warrior II.
2. Our camp. So close, but still three summits to go!
3. On the summit of Warrior II. Two more to go!

#10: Warrior I   (Warrior II-Warrior I Saddle --> Summit (6:25pm) --> Warrior I-Warbonnet Saddle)
STATS: 0:13 up, 0:27 down; 3.8% of total camp-to-camp travel time; 81.8% completed with Traverse (camp-to-camp) after descending peak
Photos:
1.    
2.    
3.    
4.    
Photo descriptions:
1. You always find the best bivy spots when you don't need to bivy.
2. Casey on the summit of Warrior I.
3. Looking down from the summit. Yikes.
4. Looking towards Warbonnet. Only one more summit to go!

#11: Warbonnet   (Warrior I-Warbonnet Saddle --> Summit (7:19pm) --> Descent gully --> Trail --> Camp in Cirque)
STATS: 0:27 up, 1:05 down to top of descent gully leading back to trail, 1:39 more back to camp; 8.7%+9.4% of total camp-to-camp travel time
Photos:
1.    
2.    
3.    
4.    
5.    
6.    
7.    
8.    
9.    
10.    
11.    
12.    
13.    
Photo descriptions:
1. Feather Buttress on Warbonnet. I want to climb this route next time I come to the Cirque.
2. Lots of pretty flower gardens on the shoulder of Warrior Peaks and Warbonnet.
3. Heading up to the summit of Warbonnet.
4. On the summit. A view of most of the traverse.
5. A plaque on the summit of Warbonnet. Finis Mitchell was an American mountaineer and forester based in Wyoming. He died in 1901, so he was 80 years old the last time he climbed to the top of Warbonnet. Impressive!
6. Casey pointing out that we could see all the way to Colorado. Despite the clouds, it was a very clear day with great visibility.
7. Descending the south slopes of Warbonnet.
8. Looking down the descent gully that is between Warbonnet and Sundance. This gully takes you back down towards the trail.
9. Ug.
10. Looking back up the descent gully.
11.
 Alpenglow on the Deep Lake area.
12. Alpenglow on the Deep Lake area. North Lake below.
13. Back on the trail. A 1 hour slog back to camp from here. It started to rain just as we hit the trail. We had nailed our weather window.

Camp in Cirque to Big Sandy Trailhead
~10 miles; 4 hours 14 minutes
Photos:
1.    
2.    
3.    
4.  
Photo descriptions:
1. I woke up a couple of hours before Casey, and enjoyed the opportunity to get a head start on my trip report. I used my photo timestamps to calculate our split times on the 11 summits of the Traverse.
2. 
Pretty sky pilot alongside the trail.
3. Pretty Rocky Mountain Columbine alongside the trail.
4. 
Hiking out alongside Arrowhead Lake. We will be back....

Comments Pertaining to this Page / Trip Report

Useful beta. Updated route information. Corrections. Historical notes. Interesting facts. No fluff please.
Leave a Reply

Your email address will not be published. Required fields are marked *