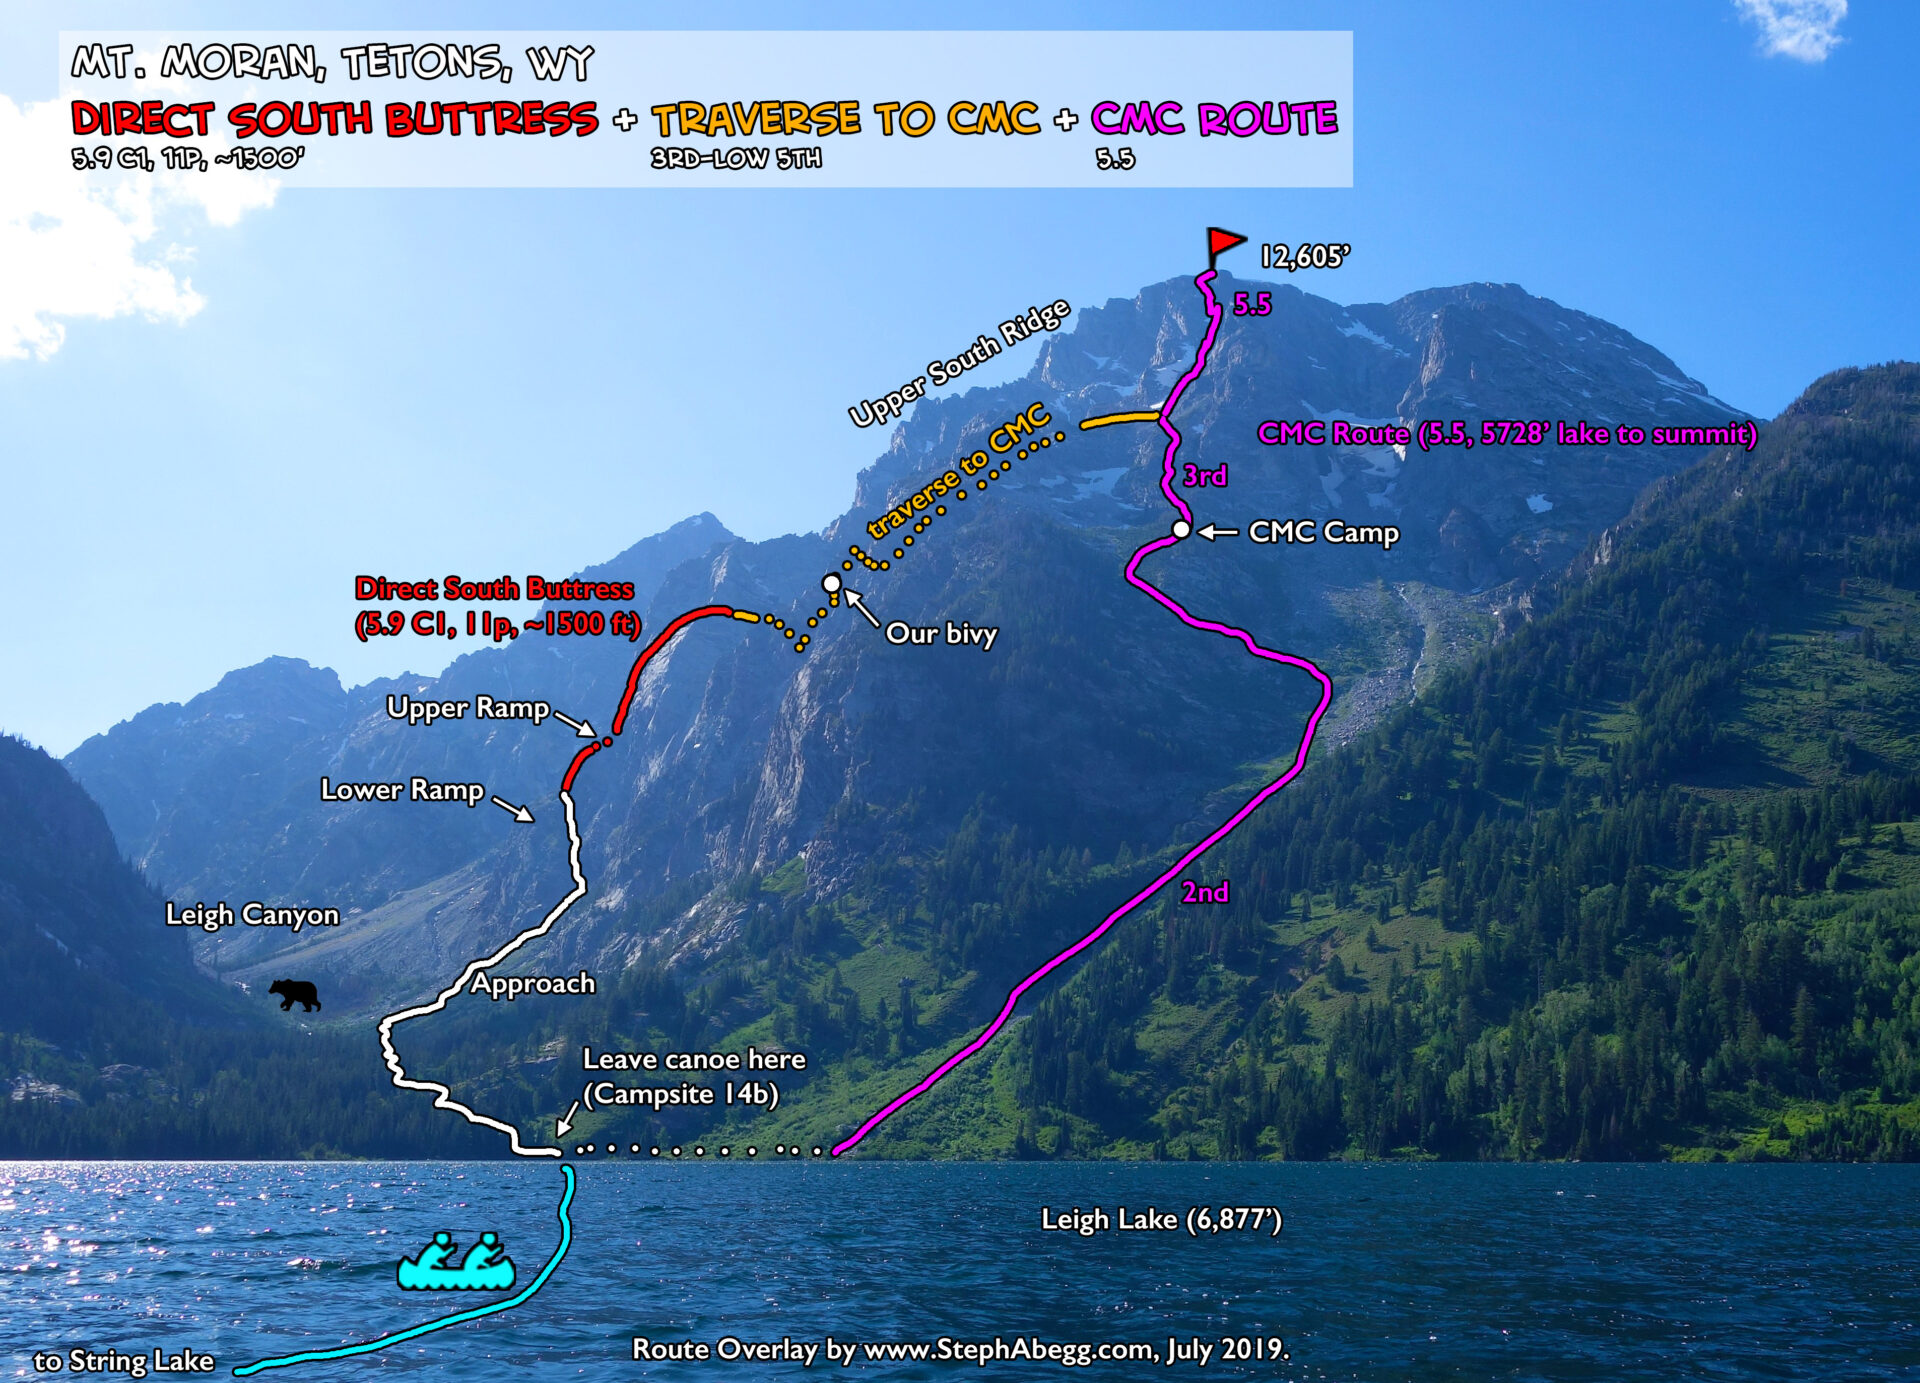
Approach via canoe, 1500 feet of 5.7-5.9 climbing, aiding through a steep C1 crack high on the route, wind gusts threatening to blow us off of the rock, an amazing bivy site high up on the rugged walls of Moran, and a fun 5.5 solo to the summit. Plus, a very uncrowded Fifty Classic. An all-around awesome athletic alpine adventure!
Region: Wyoming
Elev: 12,605 ft
Rock: Gneiss
Mode:
Date(s): July 18&19, 2019 (Thu&Fri)
Partner(s): Will Maness
Route Overlay
CLICK TO ENLARGE
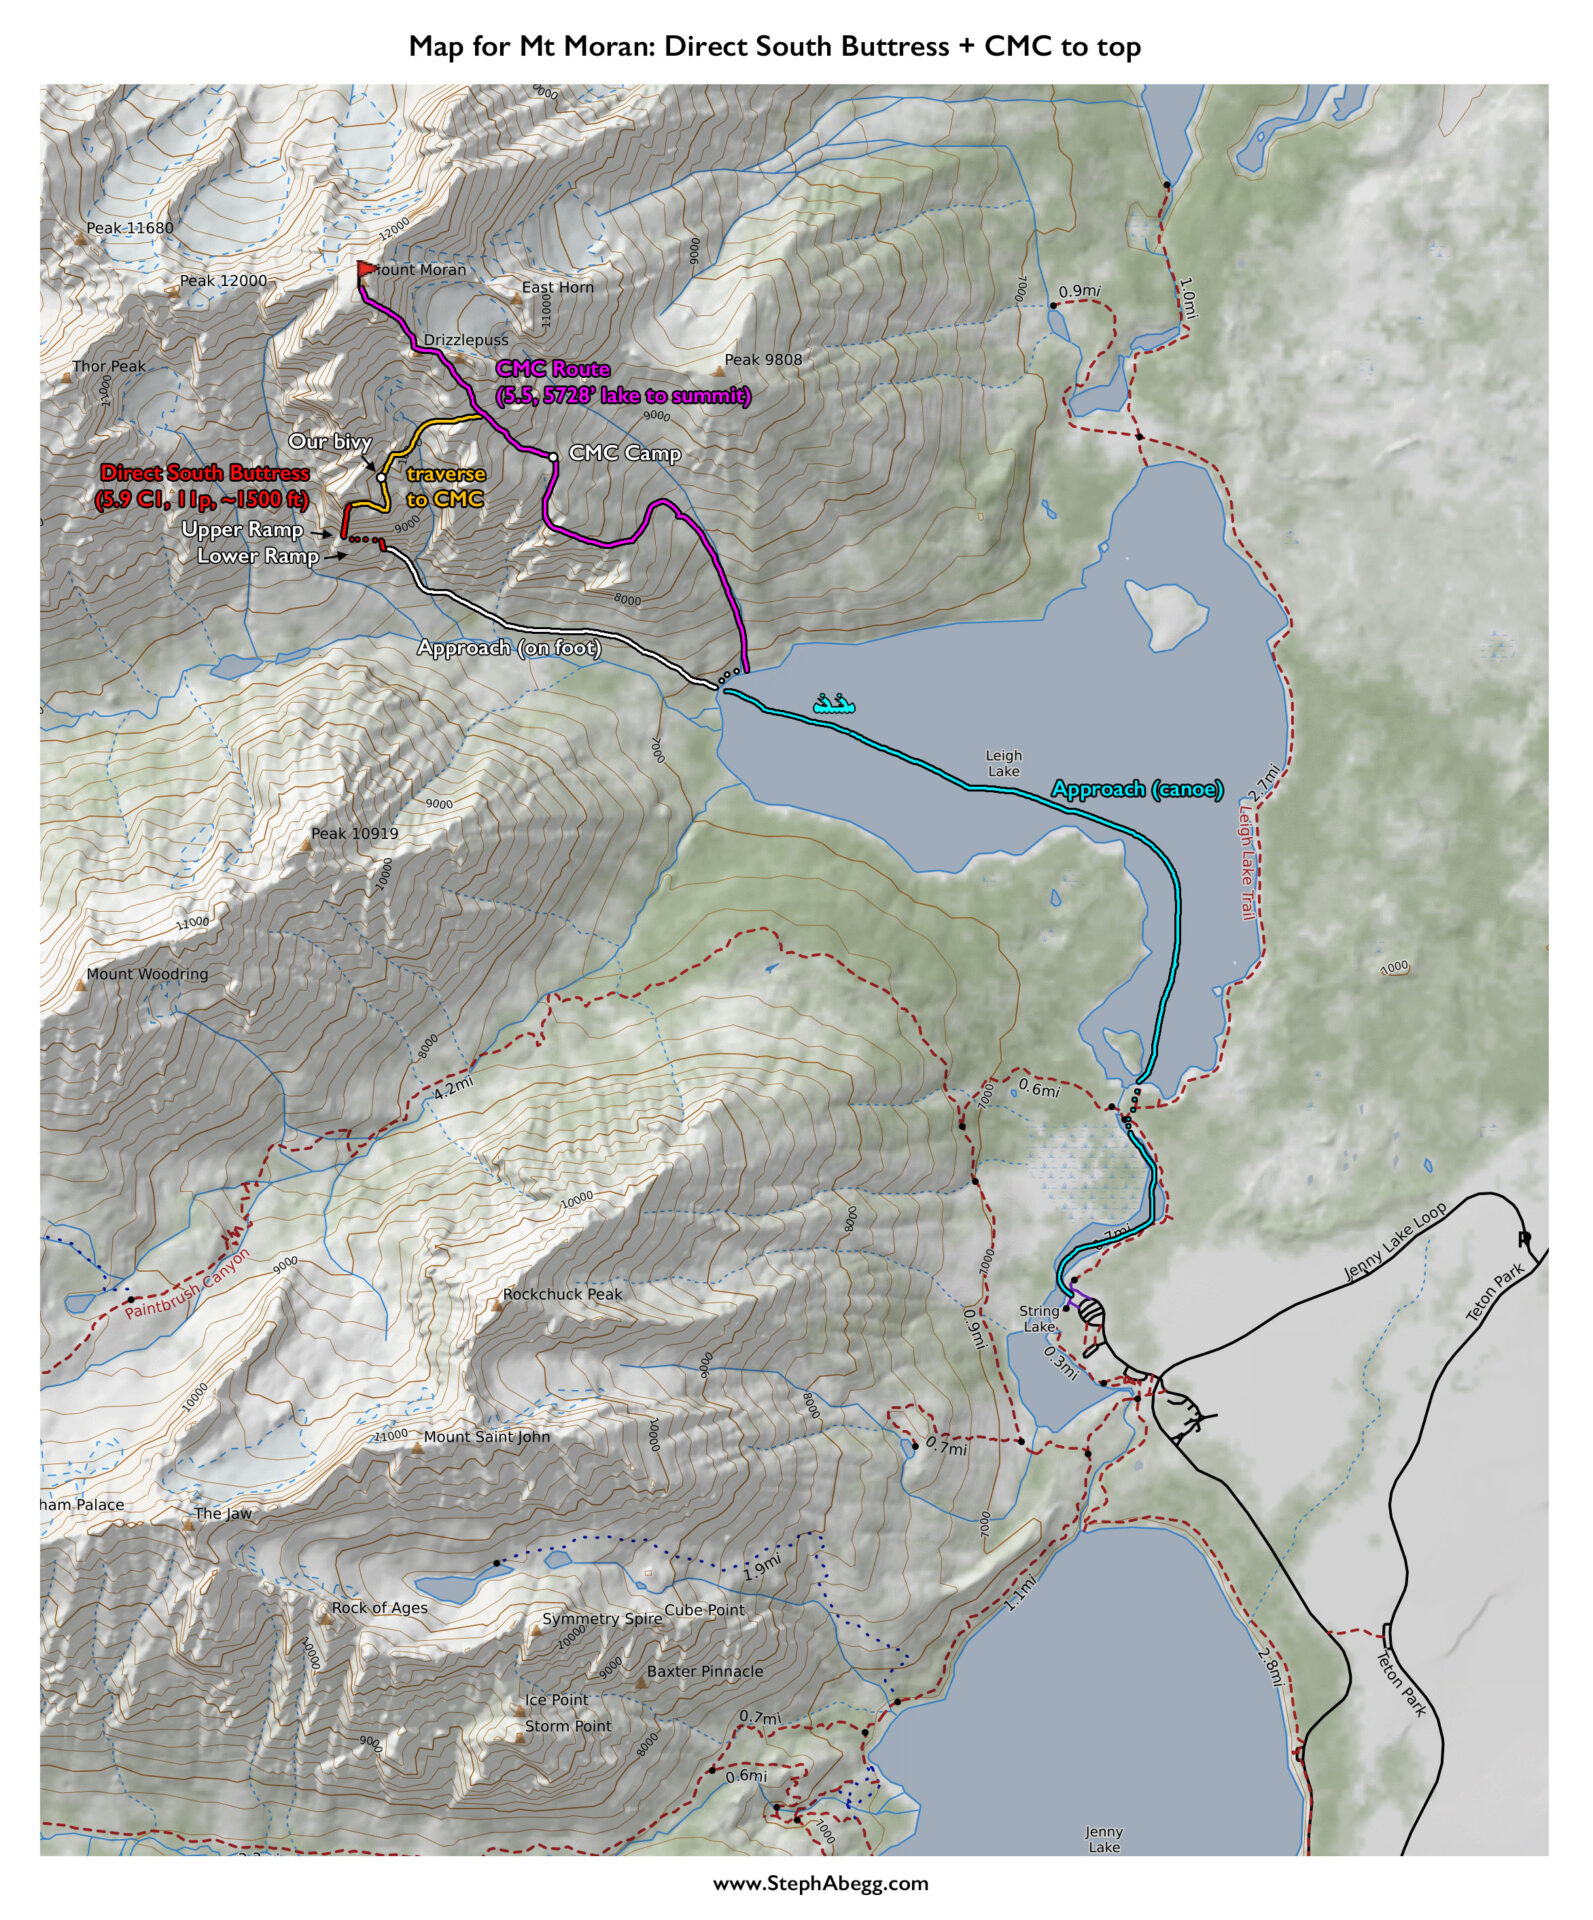
Map & Google Earth
CLICK TO ENLARGE
Intro
Mount Moran is a massive mountain that dominates the skyline to the north of the Grand Teton. Moran has some of the finest alpine rock in the Tetons, and the Direct South Buttress (DSB) is one of Steck and Roper's famed Fifty Classic Climbs of North America. Climbers sometimes refer to this list as the Fifty Crowded Classics. But this does not apply to Moran. The comparative difficulty of the approach to the climbs makes it a much less popular climb than the Grand Teton and other peaks to the south. No trails to Mount Moran have been maintained for over twenty years, and any approach overland requires a great deal of bushwhacking through vegetation, deadfalls and bogs along the perimeter of Leigh Lake. An easier approach is to canoe from String Lake, portage to Leigh Lake, and canoe across Leigh Lake to the base of Moran.
When my newfound partner Will Maness (who was actually spending his summer in Jackson working for Teton Mountaineering) asked if there was anything in the Tetons I was interested in climbing with him, I mentioned Moran. Will was psyched, so we began to plan.
The 1500-foot DSB ends about 1/3 of the way up Mt. Moran. Most climbers descend from here. But for all the effort of getting to Moran, Will and I agreed that we wanted to summit. Our plan was to do the climb in 2 days, with a bivy just above the DSB; the second day we would continue to the summit via the Upper South Ridge, which involves about 2500 feet of low 5th class climbing, with mostly good rock and lots of exposed ridge climbing. When the DSB is combined with the Upper South Ridge, it creates one of the longest routes in the lower 48.
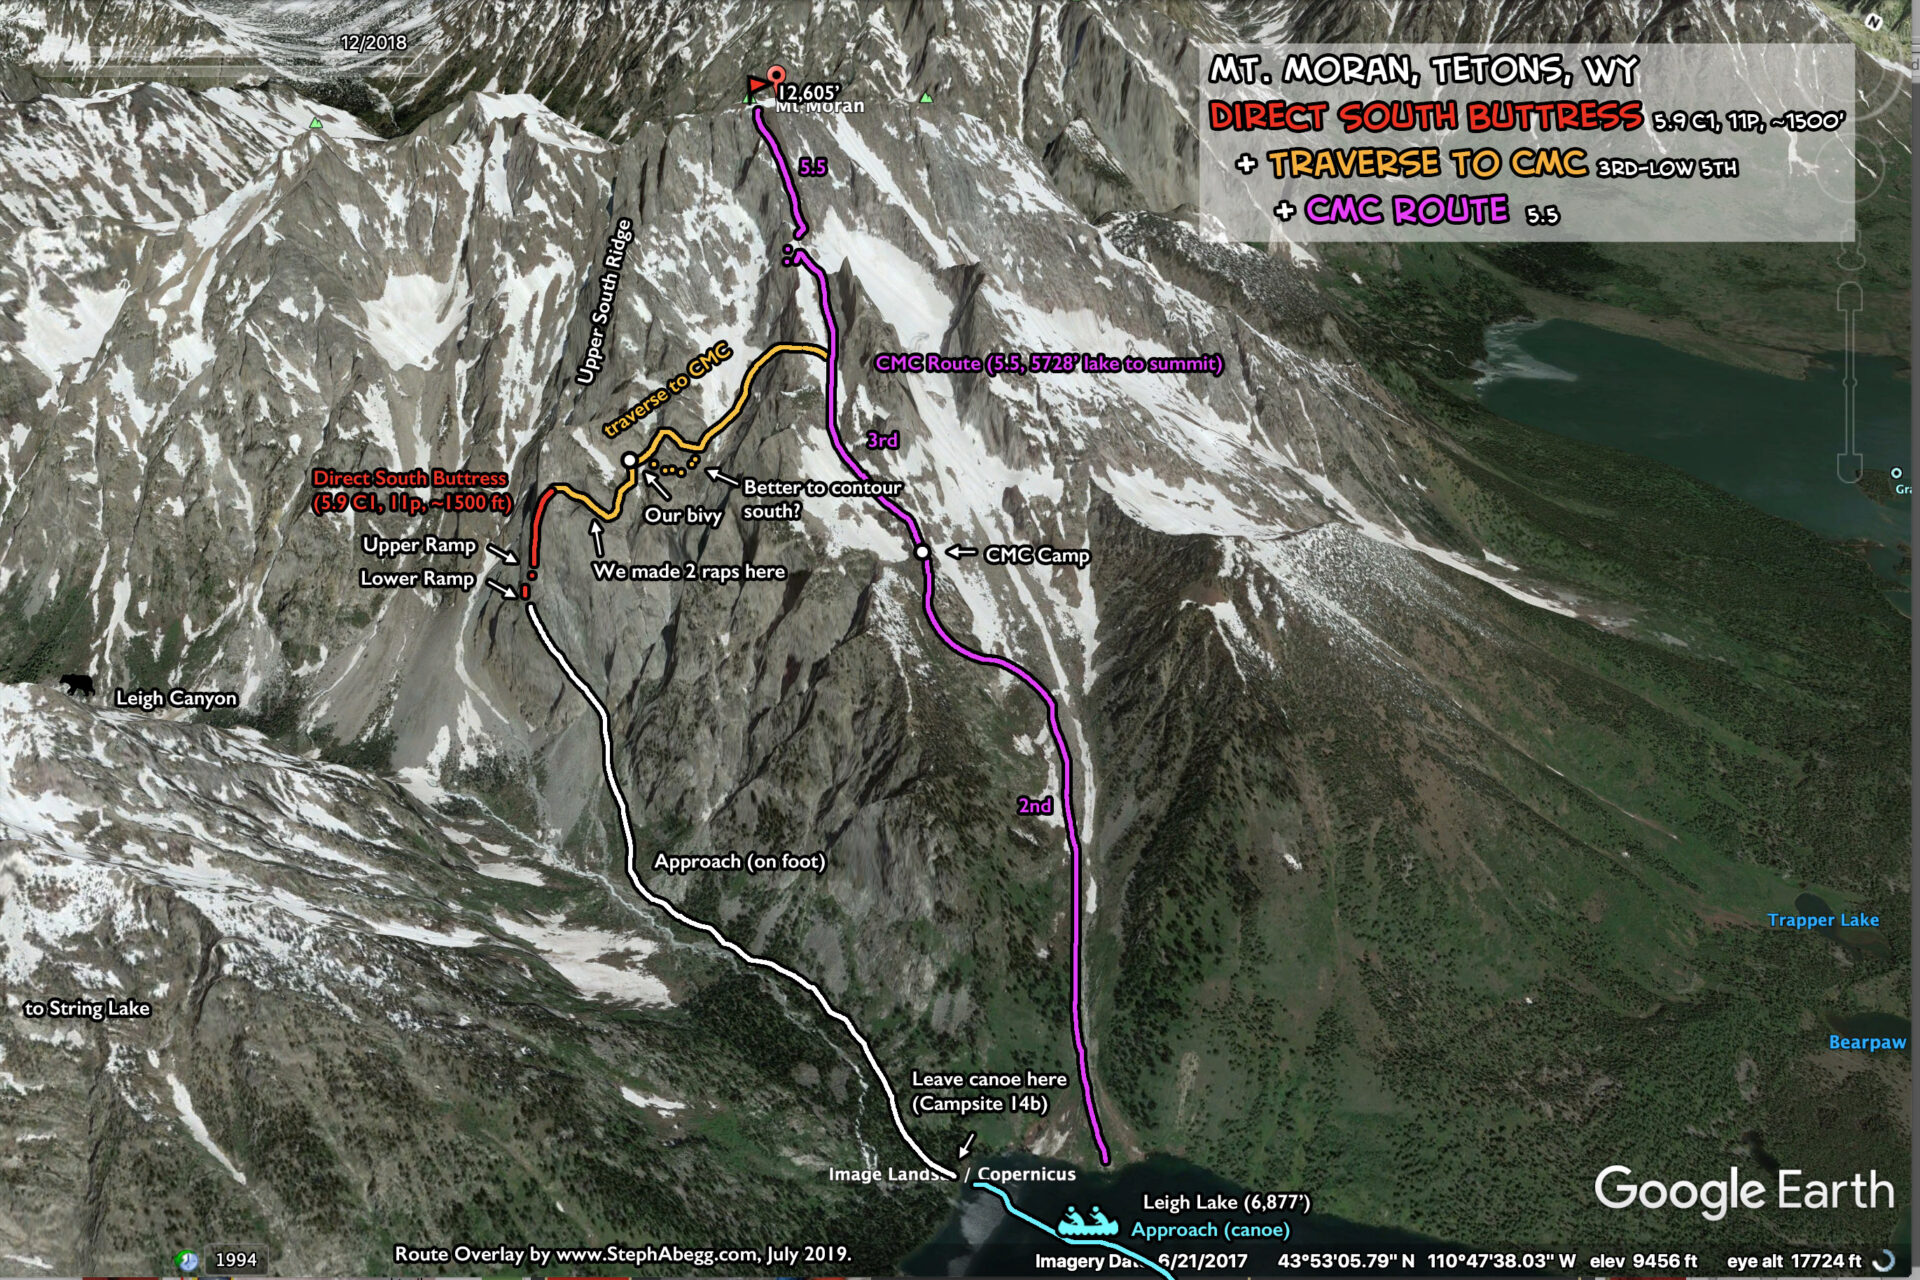
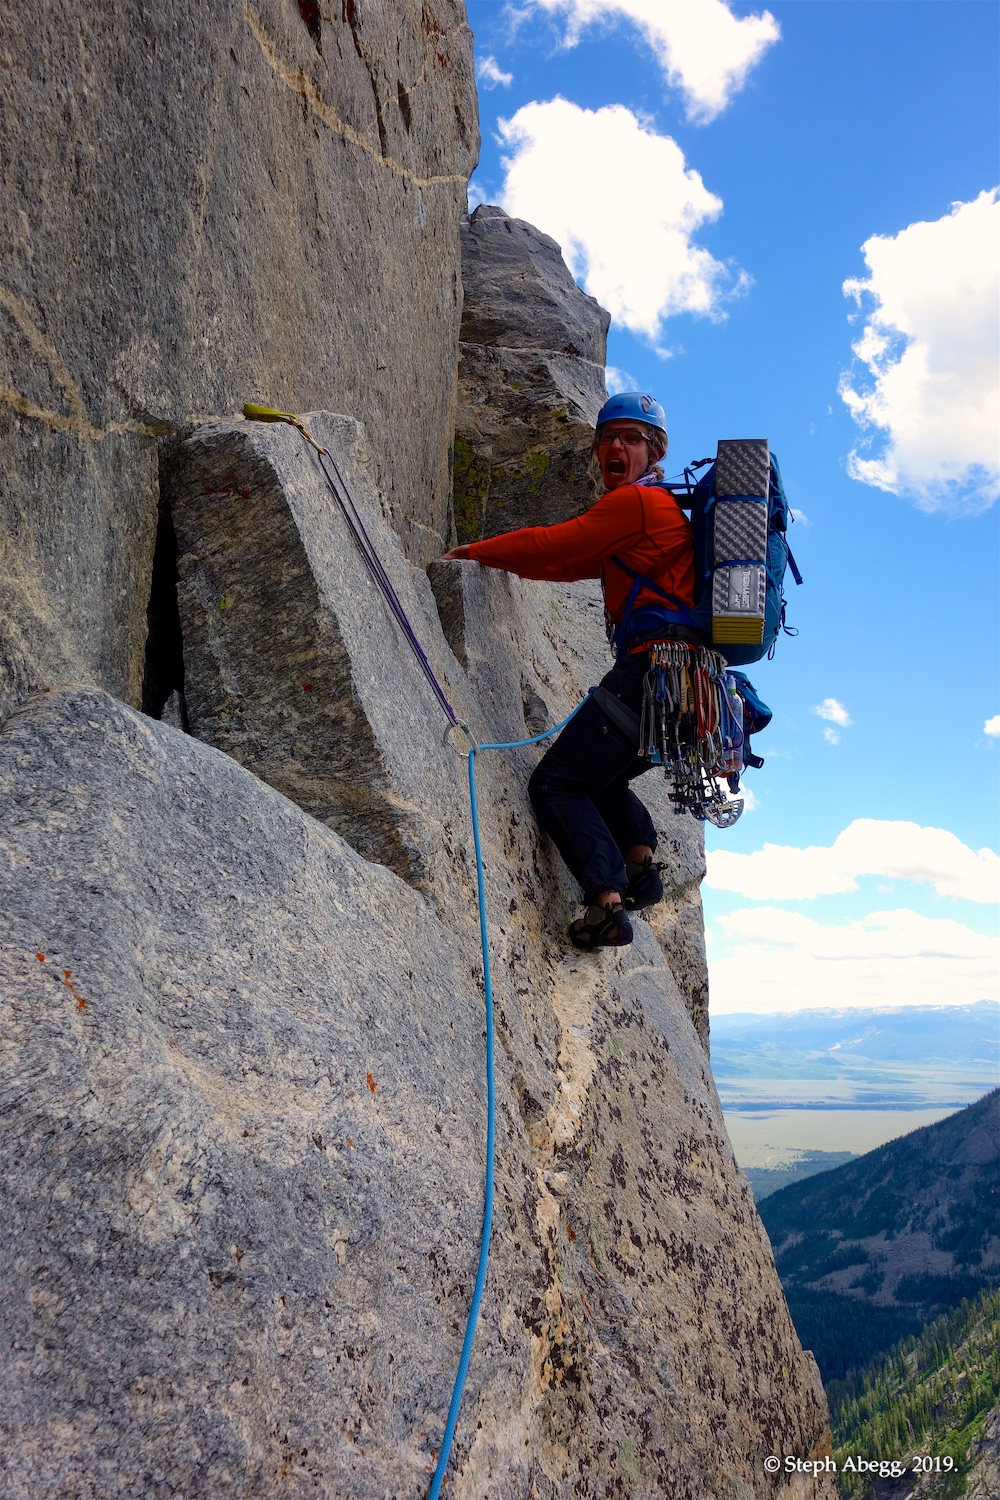
For the most part, things went according to plan, except that we had to modify the way in which we got to the summit after finishing the DSB. On the upper pitches of the DSB, the wind was gusting much stronger than forecasted. I would not be surprised if some of the gusts were 60 mph; when we faced the wind, it blew your lips away from your teeth, like a happy puppy with its head out the car window. The incessant gusts made the face climbing on the 3rd to last pitch quite heady, and the C1 aid on the 2nd to last pitch quite difficult, as the wind was threatening to blow us off the rock and the aiders and slings were blowing practically horizontally. After finishing the DSB, Will and I decided that it was probably not a good idea to stay on the ridge if the high winds were to continue through the night and the next day (which they did); plus, we didn't see any running water in the bowl above the DSB (which we had expected to find, due to the higher-than-usual summer snowpack). So, we decided for our "bail-out option that still involves the summit": traverse to the CMC route, which I had read about in the guidebook (thanks to the wind, my printed guidebook beta had blown away, but I remembered enough of the description to be confident of going for it). I think we made the correct decision, since just before nightfall, we found an awesome sheltered bivy near running water and the next morning we were able to continue the traverse and rather easily get over to the CMC Route. Will's knee was acting up so he decided to forgo the summit and head down to wait for me at CMC Camp while I dropped my pack and scrambled/soloed 2000 feet up to the summit. Another benefit of doing the traverse from DSB to CMC was that I didn't have to haul my heavy pack up the final 2000 feet.
Then it was a vertical mile of descent down to our canoe at Leigh Lake.
What an adventure! Thanks Will for being an awesome partner! And for dealing with acquiring the canoe and loading it on your Prius yourself! Hard to believe that this was one of your first big multipitch adventures, your first climb with a full pack, and your first bivy. Everything will seem easier after Moran!
Itinerary / Time Stats
• Day 1: Early morning paddle across String and Leigh Lakes, climb Direct South Buttress, bivy along traverse from top of DSB to CMC Route. 4:23 am: Start canoeing 5:56 am: Stop canoeing (arrive at Campsite 14b on Leigh Lake) 9:18 am: Arrive at base of route (after losing about 1 hour starting up incorrect approach pitch and bailing halfway up) 11:15 am: Start climbing Direct South Buttress (Pitch 3 of roped climbing) 6:40 pm: Arrive at top of Direct South Buttress 7:25 pm: Begin traverse towards CMC Camp 8:50 pm: Arrive at Bivy location
• Day 2: Finish traverse to CMC Route, climb CMC Route to summit, descent back to Leigh Lake, canoe back across Leigh and String Lakes. 6:15 am: Leave bivy to continue traverse to CMC Route 8:52 am: Intersect CMC Route 11:26 am: Steph arrives on summit 4:20 pm: Arrive back at Leigh Lake 5:20 pm: Start canoeing back across Leigh Lake + String Lake 6:45 pm: Arrive back at cars
• Some time splits: (I've subtracted the breaks between) Canoe to Campsite 14b: ~1.5 hours Campsite 14b to base of route: ~2 hours 15 minutes Climb DSB: ~9 hours (does not account for the 1 hour lost starting the incorrect approach pitch; other than this, no route-finding errors or crowds to take up time, but strong wind slowed us down on the upper pitches) Traverse from DSB to CMC Route: ~4 hours (does not account for the overnight time spent at the bivy) Climb upper CMC Route to summit: ~2 hours Summit to CMC Camp: ~2.5 hours CMC Camp to Leigh Lake: ~1.5 hours
Photos
THIS TRIP REPORT IS STILL MOSTLY IN THE EMBEDDED HTML FORMAT OF MY OLD WEBSITE. MOBILE Tip: Try Landscape mode. It is generally more mobile friendly.
Photos:
Photo descriptions:
Approach
Paddle in from the String Lake canoe launch, portage a few hundred yards to Leigh Lake, and then paddle to the western corner of Leigh Lake at the mouth of Leigh Canyon. From Campsite 14b, find a faint path (occasional cairns) up the canyon. The Direct South Buttress (DSB) is an obvious buttress at the left end of the upper of two ramps the diagonal across the face to the left of Laughing Lions Falls. Head up to the lower ramp.
There are a few options for the two Approach Pitches getting from the lower ramp to the upper ramp and DSB. See the next section of photos.
1.
2.
3.
4.
5.
6.
7.
8.
9.
10.
11.
1.Gearing up the evening before. Shortly after I took this photo, the sprinklers went on. Should have known....that grass looked too green for midsummer in Wyoming....
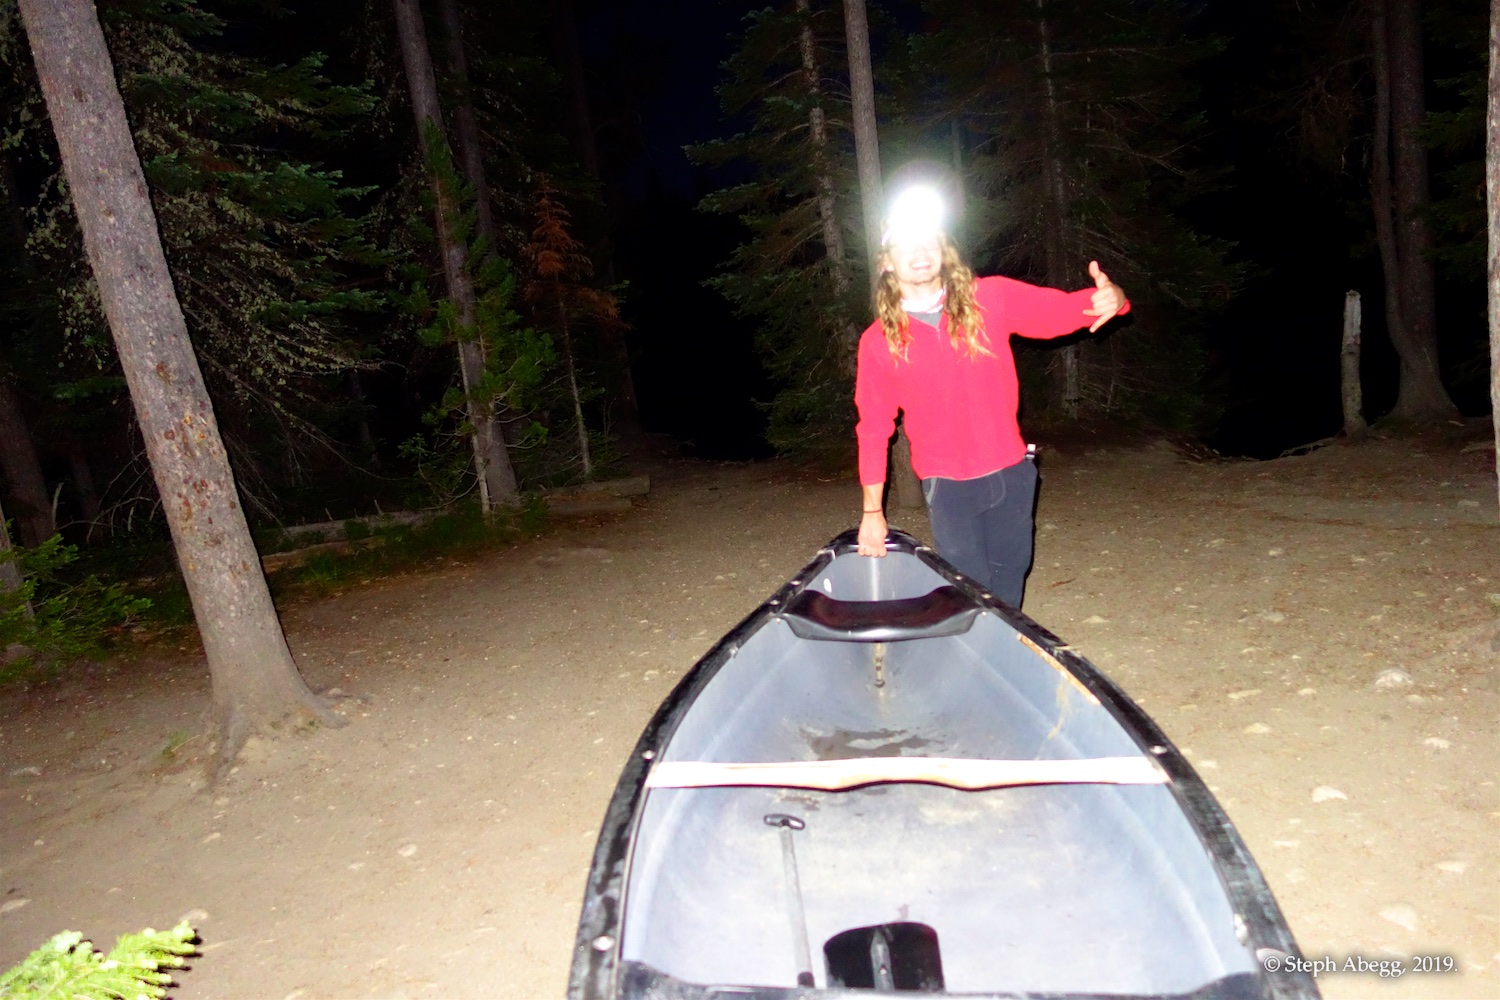
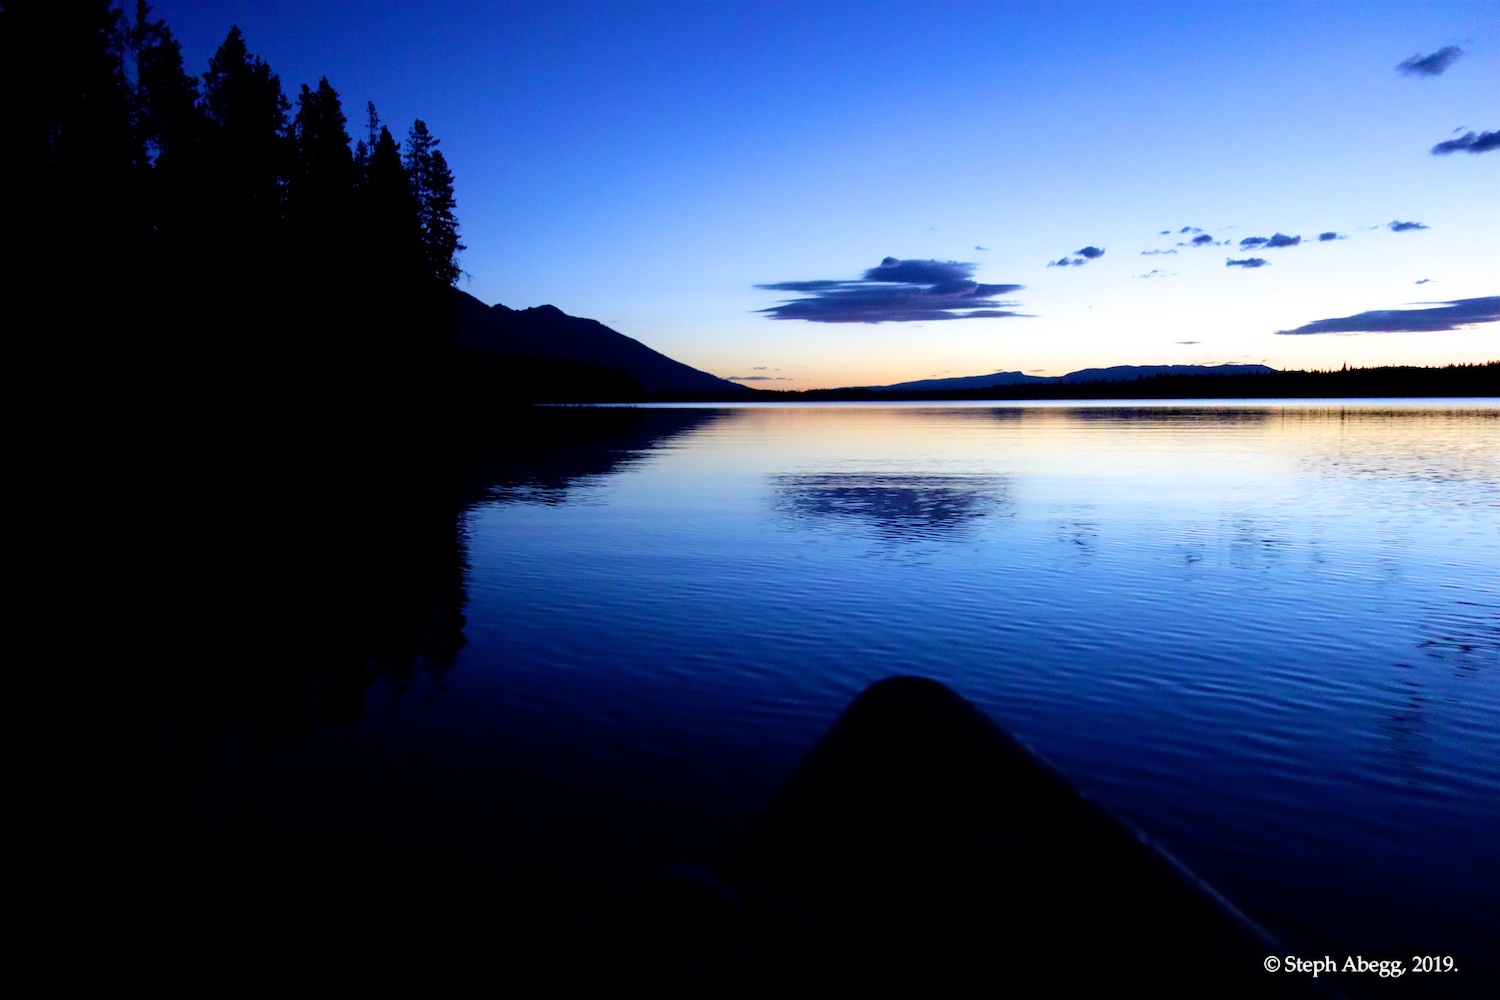
2. Starting the canoe ride in the dark. It's probably not the best idea to be hiking in grizzly territory in the morning darkness, but we figured there had probably never been anyone in a canoe attacked by a grizzly yet.
3. The short portage between String and Leigh Lakes. In my head I had the idea that this would be a 'shwack through marsh and tick-infested brush, but instead we found a trail you could drive a car on. We survived the short portage without being attacked by grizzlies too.
4. Canoeing on Leigh Lake.
5. Approaching Leigh Canyon at the west end of Leigh Lake. Mt. Moran above.
6. Where we docked our canoe, just outside Campsite 14b. The other kayaks are from a family camping at 14b for the night.
7. Drying off the feet and warming by the fire at campsite 14b. These people were very friendly and I am sure that if we had not been in a rush to get to our climb, they would have happily offered us coffee and breakfast.
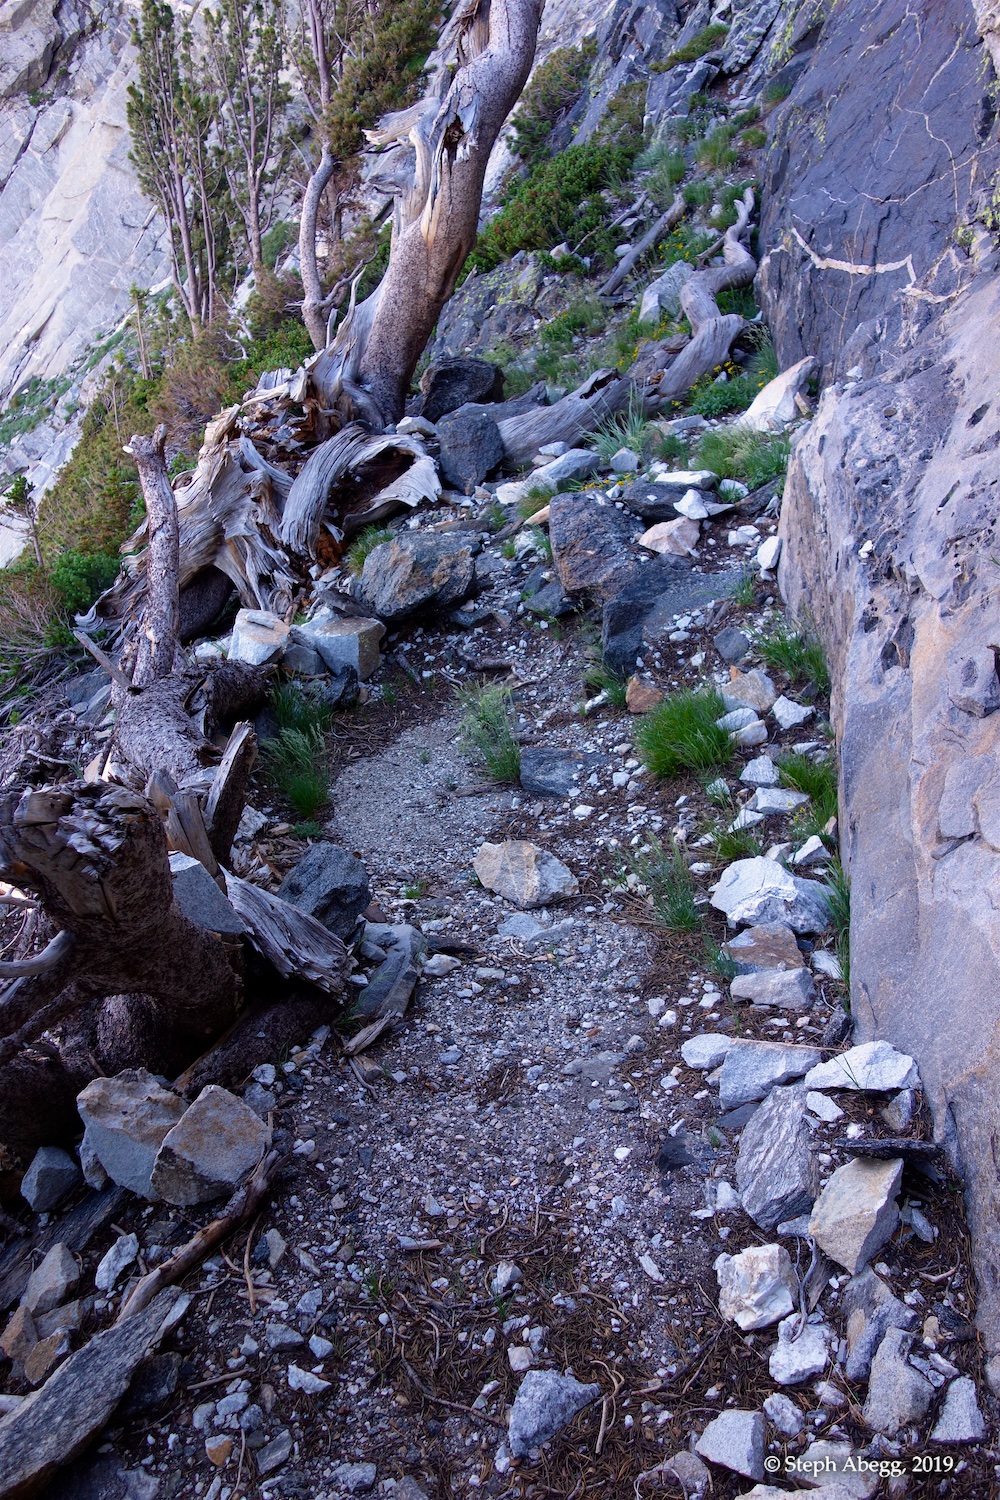
8. The path starts on the north side of Campsite 14b. It is a bit brushy, but we managed to stick to it the entire way (although the cairns split into a few different paths through the talus and boulder fields as we got higher up-canyon).
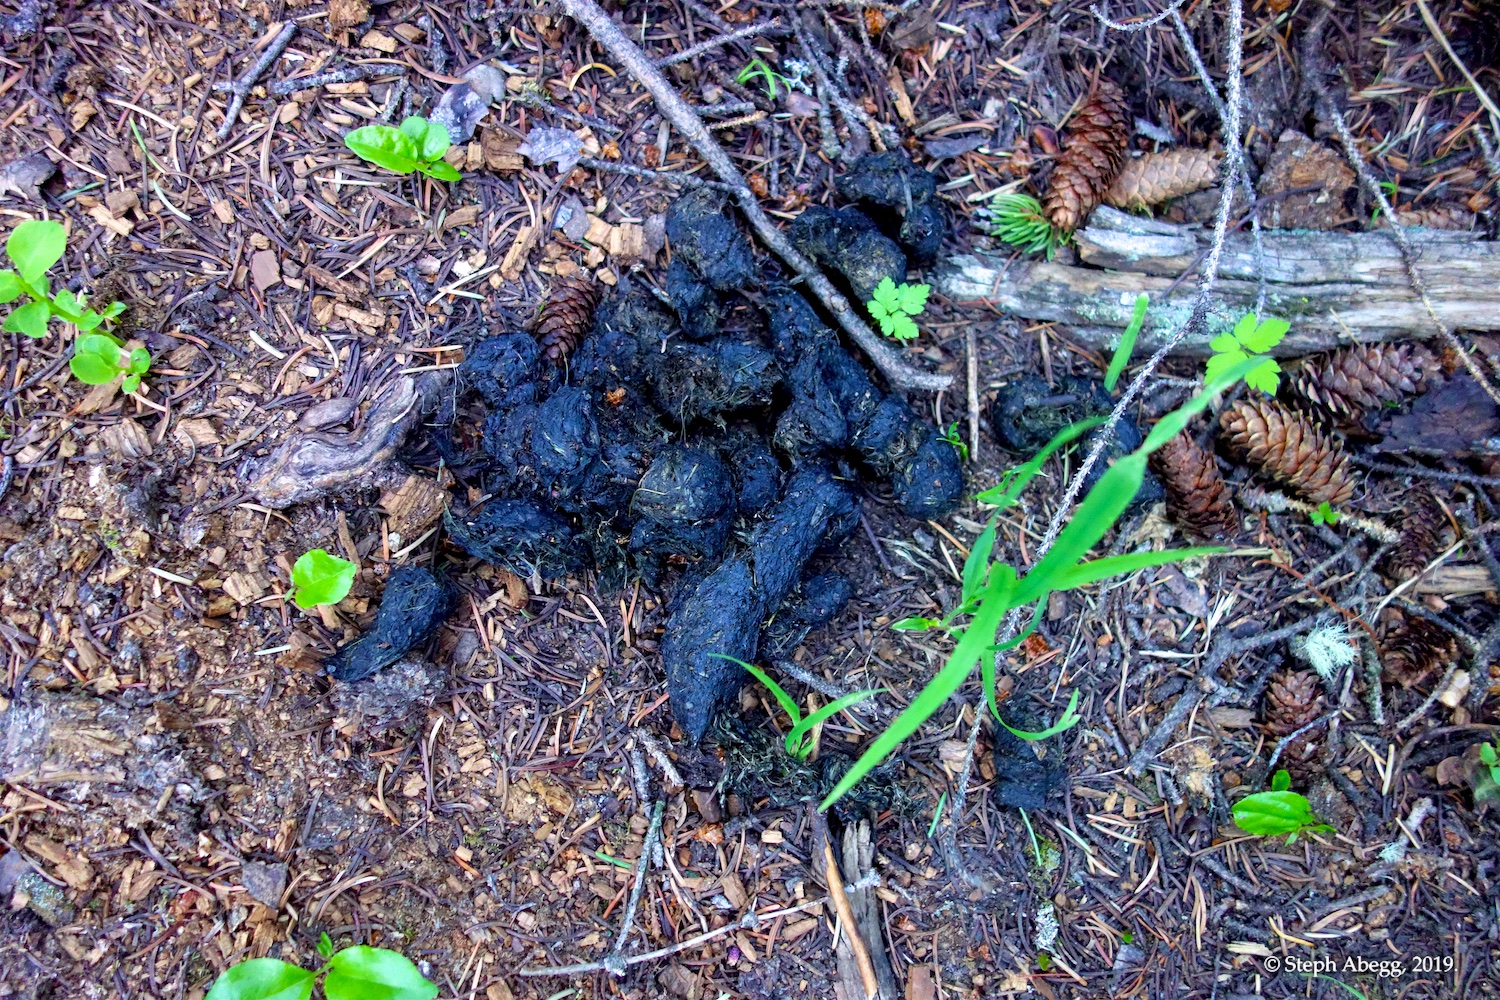
9. A cairn. 10. The closest we came to a bear encounter. Not sure if this is black bear or grizzly scat. Probably black bear, but Will said there were grizzlies in Leigh Canyon so who knows.
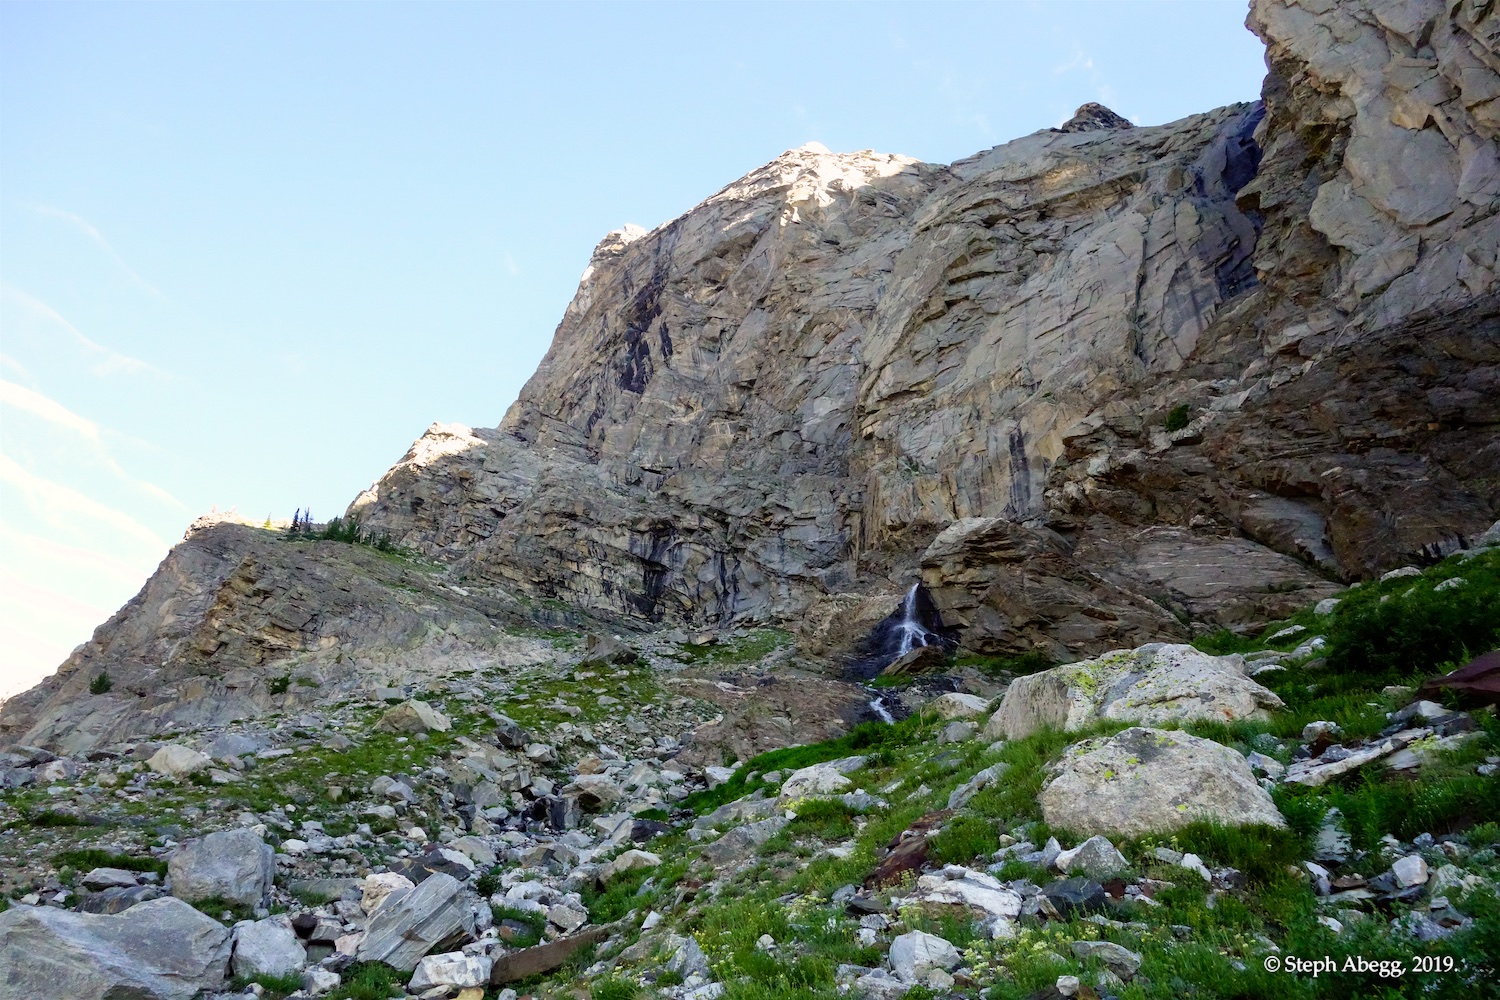
11. The south buttress is on the left skyline. Laughing Lions Falls is the obvious waterfall on the right.
Pitches
1-2
("Approach Pitches")
There are a few options for the two Approach Pitches getting from the lower ramp to the upper ramp and DSB:
(1) Scramble up the lower ramp for several hundred yards past a grove of trees and around the huge blunt arete of the buttress to a 5.3 gully. Climb about 400-500' up the gully to the gully to the upper ledge below the start of the DSB.
(2) Climb the first pitch of the Black Fin route. This pitch climbs to the right-most edge of the upper ramp. Scramble toward Laughing Lion Falls over rust-colored ledges and scree to the base of a clean, right-facing dihedral with a 3-4” crack in light-colored rock. End with a short, easy chimney. Scramble up the ramp for several hundred feet to the end of the ramp on the SW corner of the buttress.
(3) Climb something else between (1) and (2). This is what we did. Not really recommended, but it worked.
12.
13.
14.
15.
16.
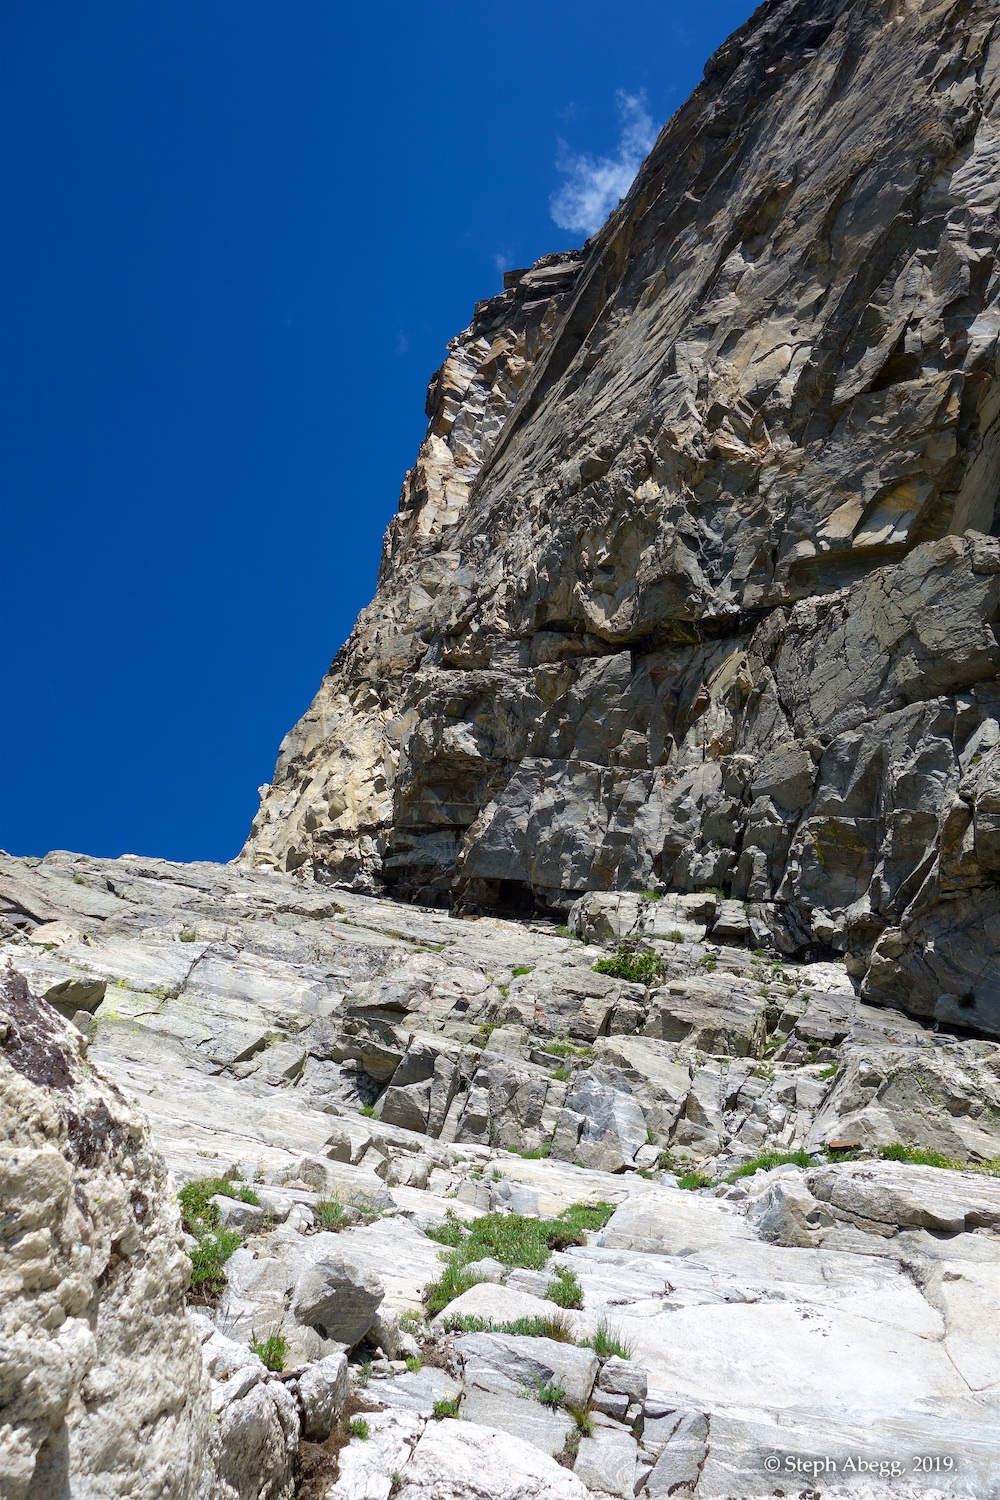
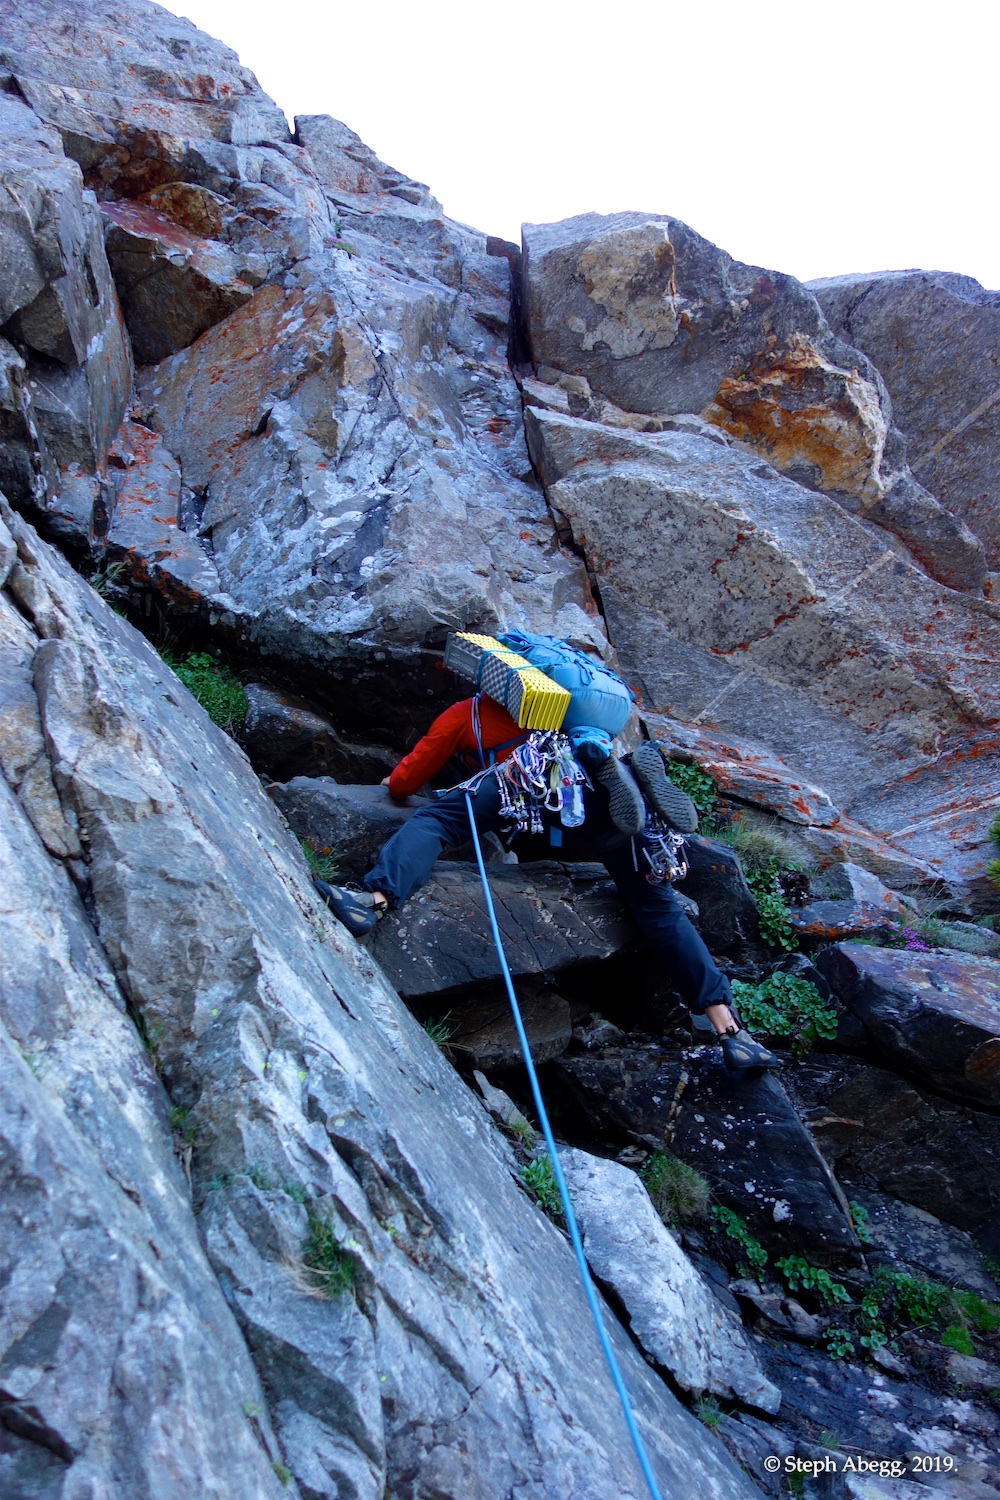
12.I think the first pitch of the Blackfin route climbs the right-facing corner just left of Laughing Lions Falls. In my haste to get climbing, I was just thinking "corner" and didn't really read the "right-facing" part, so I headed up the corner feature just left of center in the photo. It was loose and not great climbing, and I ended up bailing off a bail anchor a previous climber had tied around a large (and somewhat sketchy) flake.
13.Usually for me, route-finding errors come in pairs. So this is what we ended up climbing to get to the Upper Ledge. Approach Pitch 1 (shown in photo) was mostly low 5th with a 5.8+ move here and there. It wasn't phenomenal climbing, so I would probably recommend going with one of the standard approach pitches.
14. Approach Pitch 2 to get to the upper ramp. Easy 5th.
15. Easy scrambling along the upper ramp. The DSB starts just left of the buttress on the skyline.
16. A short low-5th section to get to the DSB. This can be avoided if you were to do the approach pitches directly below the DSB.
Pitch
3
(DSB)
There are two options for this pitch:
(1) Climb up and right to reach a flake, then head up and left to a large ledge system cutting across the face to the left. (5.7)
(2) Go up the third, and last, cleanly fractured dihedral to the left and finish with a finger crack to reach the ledge. (5.9)
We climbed Option 1.
17.
18.
19.
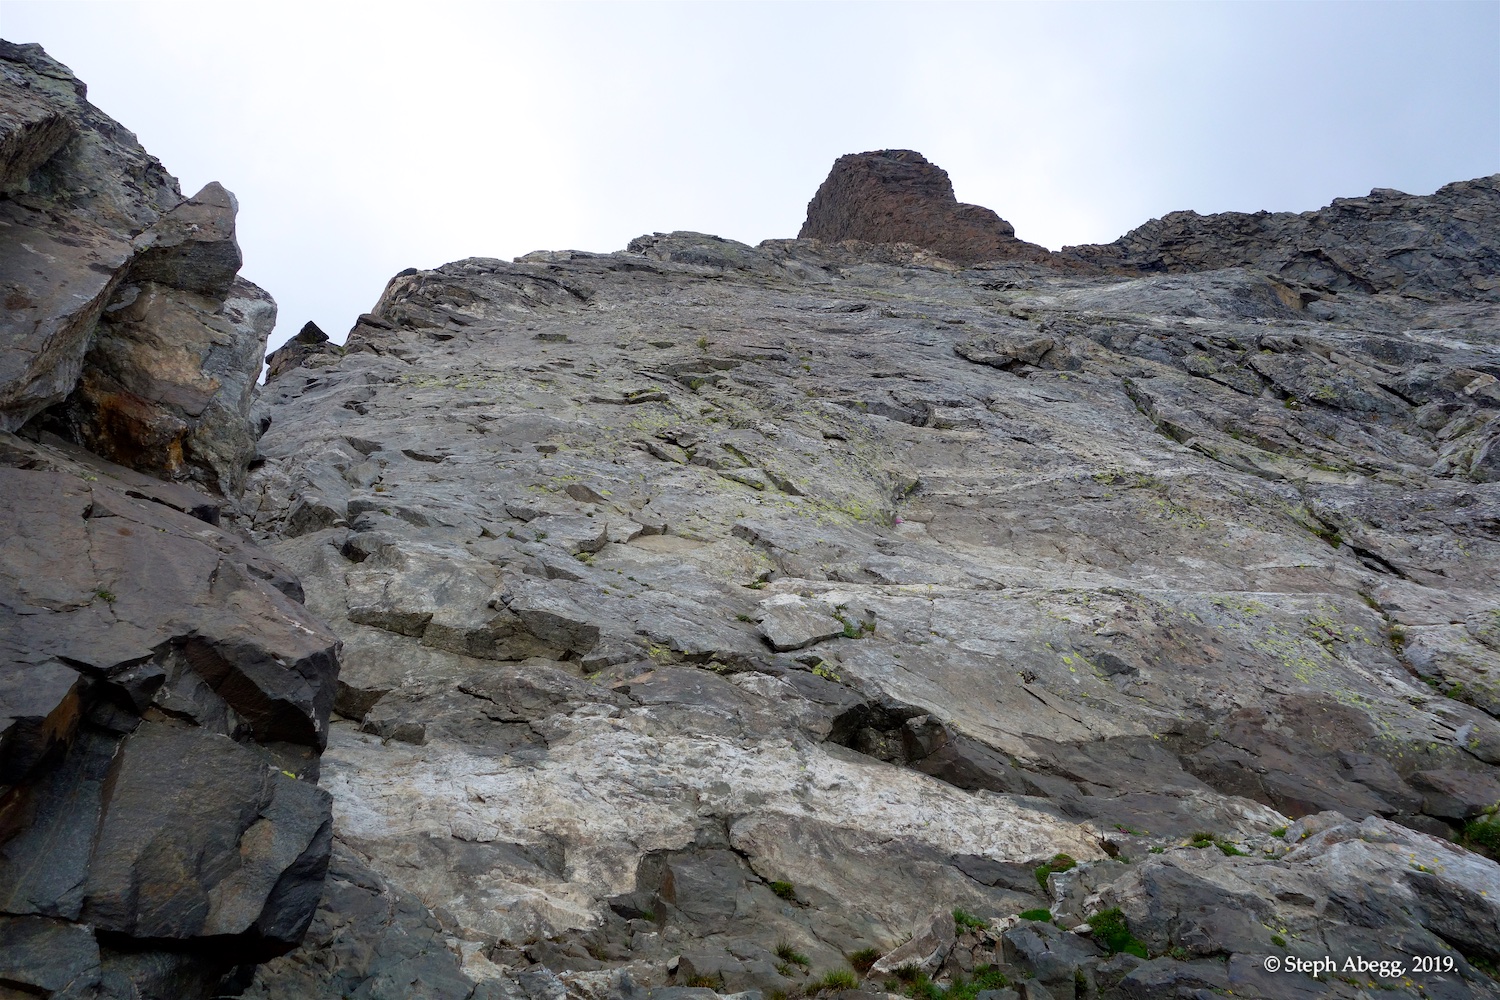
17 BETA PHOTO.Looking up from the base of the DSB. The Ortenburger guidebook counts the first two approach pitches as Pitches 1 and 2, so the start of the DSB is Pitch 3. I posted this photo on mountainproject, and was alerted that our route was incorrect. Mark Thomas correctly notes: "5.7 line is wrong here. I'm sure as we climbed over a flake wrapping to the right and encountered 2 pitons, as indicated in the topo." Will Hodgson agrees: "Agree with Mark. I started up the right '.7' corner marked here and found it very difficult and insecure with poor pro. Ended up backing off and taking the true 5.7 line as marked in both guidebooks. This pitch involves a fair bit of rope drag but follows the flatter-looking gold-and-grey striped ledge along good fingers until an obvious corner system."
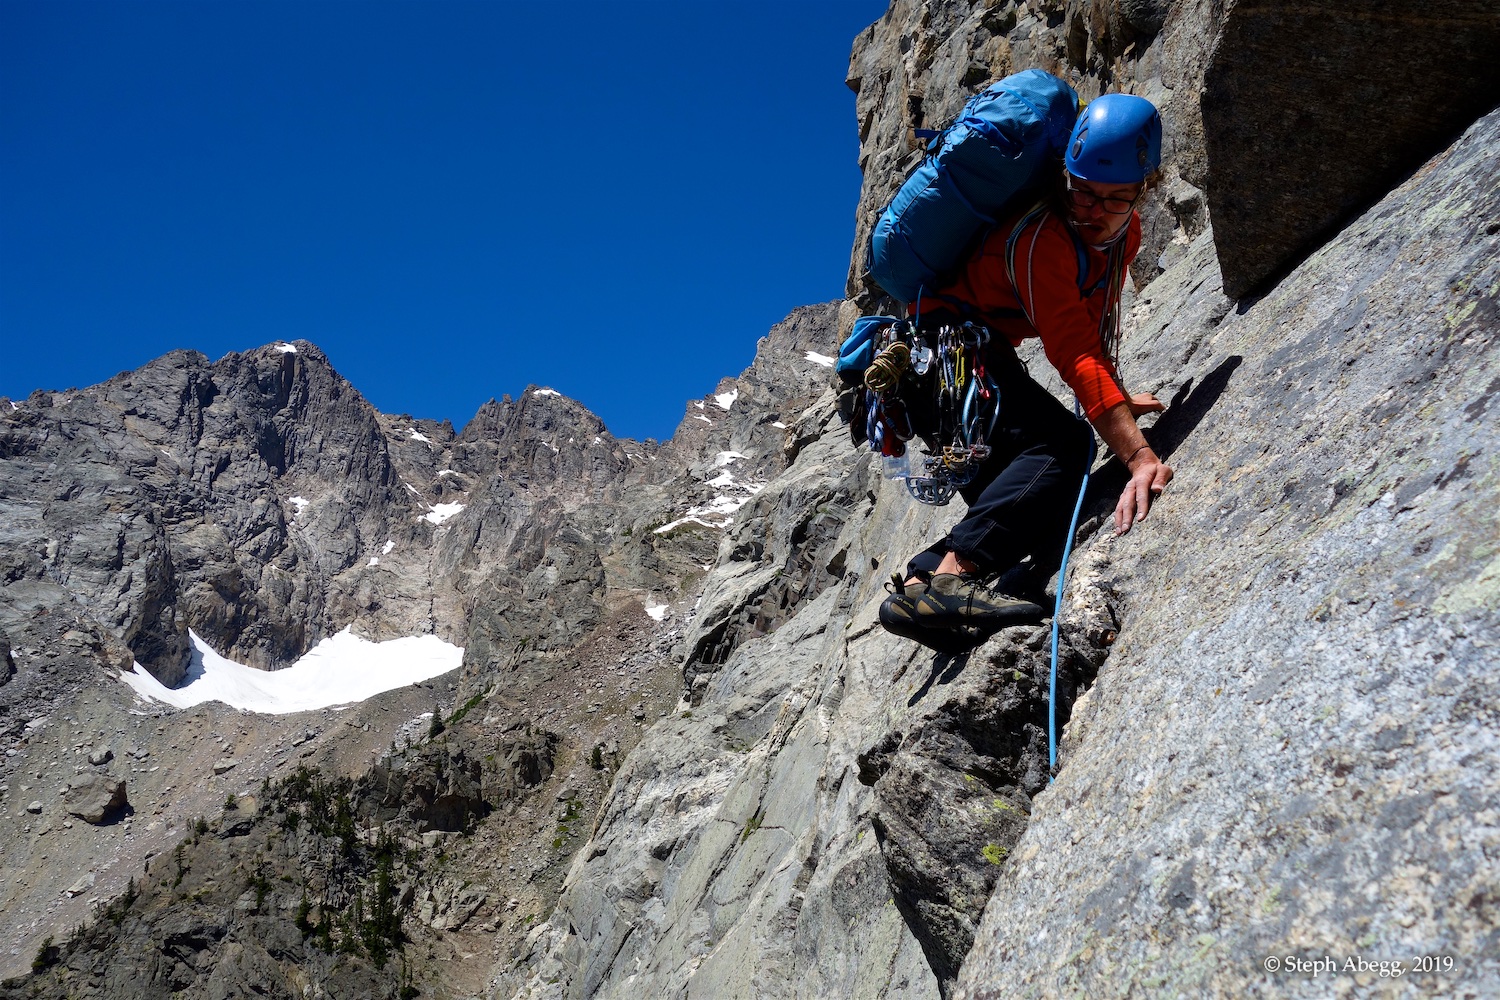
18. A fun 5.7 section.
19. Will nearing the top of Pitch 1.
Pitch
4
(DSB)
This is a long pitch of mostly 4th class, ~300 feet. Some simulclimbing needed to avoid an intermediate belay. Scramble left along the ledge to where it steps down (5.6). Continue along ledge system, eventually climbing up and belaying on 3rd class slabs below a corner.
20.
20.Follow the obvious ledge left.
Pitch
5
(DSB)
There are two options for this pitch:
(1) Climb the loose corner above. The rock is more solid than it looks. (5.8)
(2) Downclimb 4th class slabs above a large gravelly terrace, then scramble up the ramp on the far (north) side of the slab to reach a point above the loose corner.
We climbed Option 1. Option 2 sounded convoluted and like it was trying to avoid doing any actual climbing!
21.
21. Will leading the 5.8 corner.
Pitch
6
(DSB)
Climb easily up and left next to the wall on the right about 100'. Make a 5.6 step up from the ramp to an in-obvious ledge about 20' above the slab. Belay here or downclimb right a short sloping section to the base of some cracks. We downclimbed and found a fixed piton to supplement the anchor.
22.
23.
24.
25.
22.Looking up above Pitch 5 at Pitches 6 and 7. This terrain does not lend itself to any particular route line, so it is a bit in-obvious where the route goes. We followed the pitch description and stayed on route. I was actually a bit surprised at how we made no route-finding errors after the Approach Pitches, because the route is not entirely obvious at times and there certainly is no chalk or bolted anchors to guide the way!
23. A piton at the belay at the end of Pitch 6. Yep, we are on route!
24. Will on the downclimb at the end of Pitch 6 (our topo had this downclimb as the start of Pitch 7, but it seemed the belay spot was better at the base of this downclimb.
25. Steph at the belay at the end of the downclimb. (Photo by Will.)
Pitch
7
(DSB)
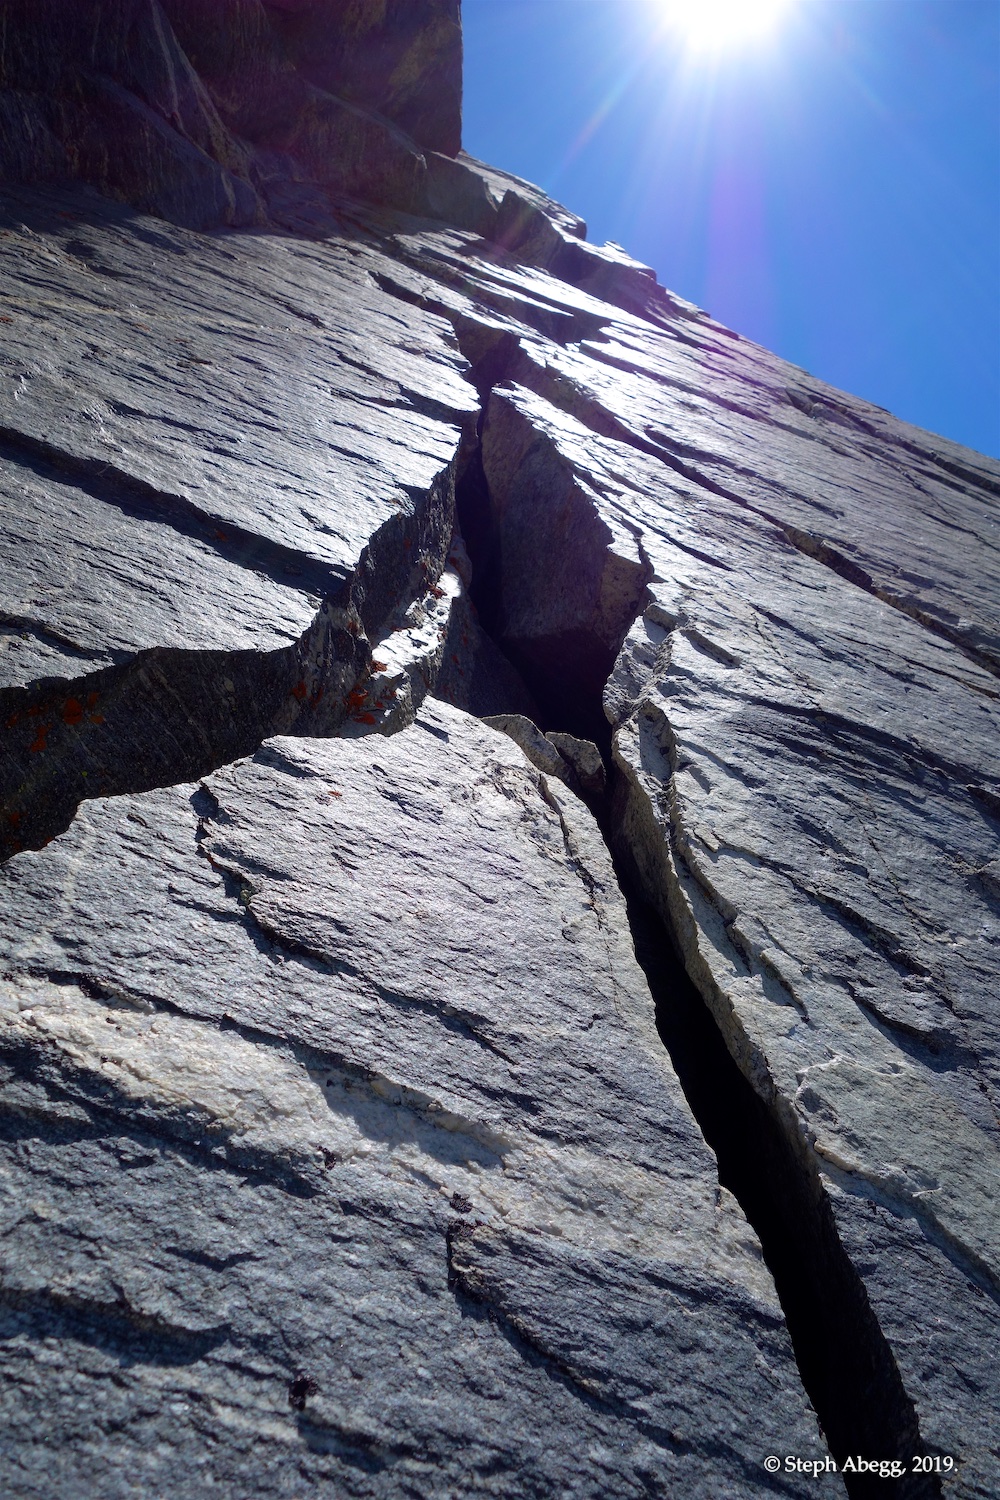
Climb steep 5.6 cracks up and right. Climb through or just left of a chimney with a flake. Scramble up to a small ledge and belay.
26.
27.
28.
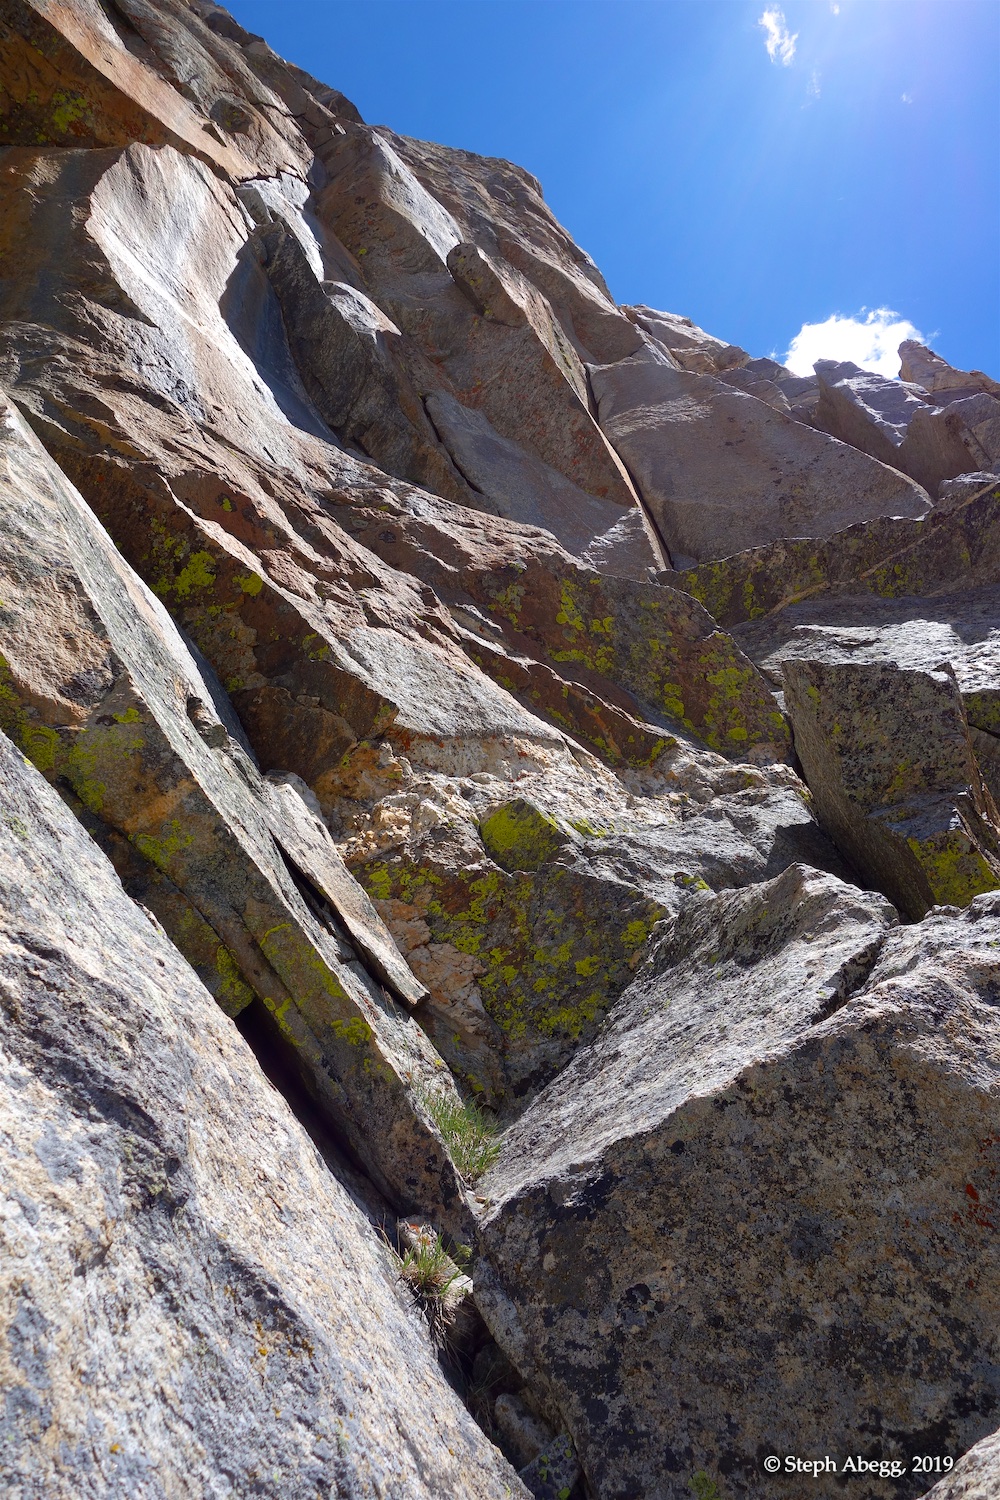
26.Looking up at Pitch 7. This was a fun pitch.
27. The chimney with a flake. Rather obvious once you see it.
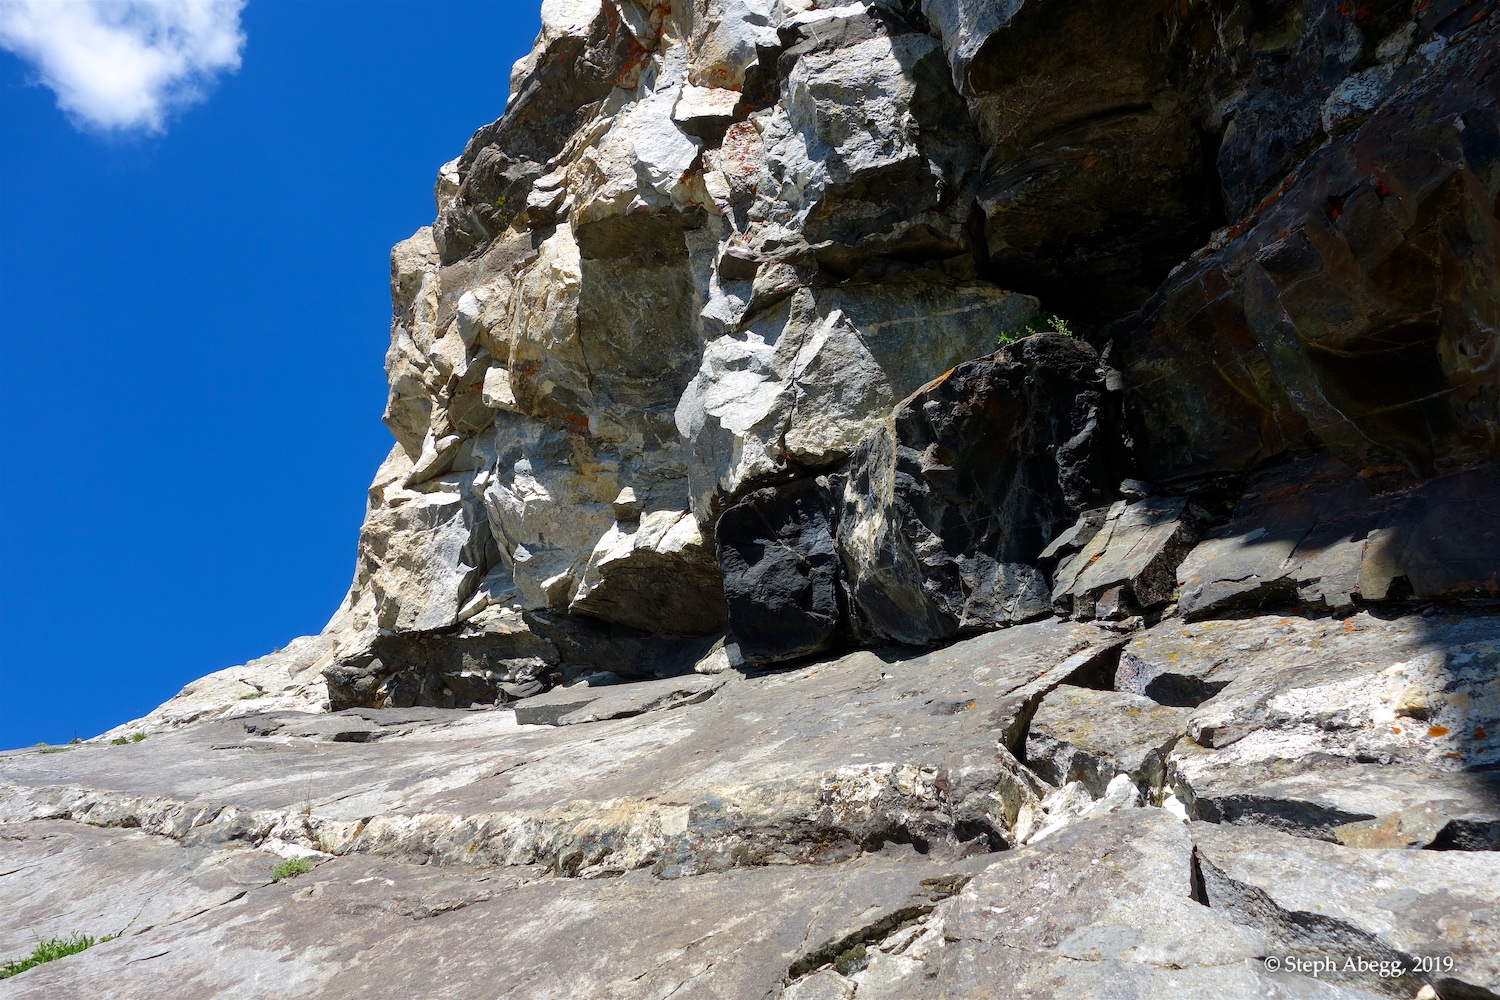
28. Looking up at the upper section of Pitch 7, and to Pitch 8 beyond. Pitch 8 continues up the chimney/crack system just right of the obvious corner splitter.
Pitch
8
(DSB)
Step to the right of a perfect corner hand crack and climb double cracks in a chimney (alternatively, there is a splitter hand crack in a corner just left of the chimney which looks a bit harder but pretty awesome). We found a nice ledge to belay on just right of the chimney/crack system.
29.
30.
29.An obvious corner splitter. I almost climbed this because it looked so good, but it also looked like it might be a tad hard with a 30lb pack, so I went up the standard route just to the right of it.
30. The chimney/crack system. More fun climbing.
Pitch
9
(DSB)
Climb up to a thin, sharp flake. Step off the top of this flake to continue up. Steep rock leads to the left end of a ledge. Place gear where possible, and traverse right to where the ledge narrows to about 4". Balance around the corner of the buttress (5.8) to reach a vertical crack with some pitons. Climb this crack (5.8) and belay at the fixed anchor.
31.
32.
33.
31. Will starting off Pitch 9. I am not sure this is the standard belay spot at the top of Pitch 8, but it was a very nice belay spot. I think it is also possible to start Pitch 9 to the left of this and intersect above in 20 feet.
32. The obvious thin, sharp flake.
33. The upper section of the pitch. This was quite heady in the incessant wind gusts.
Pitch
10
(DSB)
Lower/tension/pendulum down and right to the base of the leaning crack that goes through the overhanging corner to the right. There are a few pitons to assist with establishing yourself at the base of the leaning crack. Apparently this portion (i.e. getting to the base of the crack) goes free at 5.9 face climbing. Next, if you feel like you are crushing it, climb the leaning crack (5.12-) or if you are like most people who climb this route, aid (C1) up the crack to a black rock ledge a short distance around the corner.
Gear beta: There are a couple of fixed pins at the base of the corner. Then I got in the following cams: a great blue totem and black totem in the overhanging crack, a body-weight HB offset nut (I think a #5) + offset cam (either the 0.5-0.4) to help me reach up to clip a fixed nut, and a marginal yellow totem + HB offset nut (I think a #6) to help me pull myself over to the black ledge. I had a single Metolius easy aider for stepping in and two daisies for clipping in short to the pieces. The aid seems a bit harder than C1 when the wind is gusting and your aider and slings are blowing horizontally away from you. I wouldn't be surprised if some of the wind gusts were 60 mph; when we faced the wind, it blew your lips away from your teeth, like a happy puppy with its head out the car window.
34.
35.
36.
37.
34.Bolted anchor at the top of Pitch 10. These were the only bolts on the route, but they were nice to have, since the next pitch involved lowering off this anchor.
35. Looking over and down at the aid section. Have to somehow get to the base of the crack splitting the white rock, and then climb up it to a ledge on the other side.
36. An intermediate slung piton that is useful for getting over to the base of the corner. Fortunately, the wind was blowing up towards the corner and not away from it.
37. Looking up the 5.12- (or C1) corner. My first placement was a blue totem. For more gear beta, see my gear beta notes above.
Pitch
11
(DSB)
Follows an exciting hand traverse (5.5) to the right. Finish the traverse in a right-leaning hand crack. Belay on the edge of the large bowl high up on the South Buttress.
38.
39.
40.
38.Looking over at the 5.5 hand traverse.
39. Looking back halfway through the final pitch
40. The final corner crack to the end of the route.
Traverse from DSB to CMC
+ Bivy
Now you have to decide how to continue. There are four options given in the Ortenburger guidebook:
(1) If you are just climbing the DSB, then the quickest descent is to make several double-rope rappels from trees and fixed anchors to the usual rappel route down the Blackfin chimneys. To get to the start of this descent, the Orgenburger guide says to proceed several hundred feet up and to the eastern edge of the large open bowl. We did not go this way so I cannot say any more.
(2) If you have only one rope and want to descend via the "traditional descent route", climb on the left edge of the bowl and exit onto the horizontal ridge crest at the top of the main buttress. The entire horizontal section must be negotiated. Proceed for numerous pitches over and around towers to reach the end of the horizontal section. A short rappel might be required from the final tower. The standard method of descent starts here and involves two steep parallel couloirs or gullies that descend to the west from the ridge crest. Climb down into this first (southerly) couloir for 200 to 300 feet until you can conveniently cross the separating rib into the more northerly couloir. Downclimb all the way to the drainage separating Moran and Thor Peak. With good routefinding, no rappels are required.
(3) If you want to continue to the top of Moran via the Upper South Ridge, proceed as described above to the end of horizontal section of ridge. Instead of descending down the couloirs, just traverse slightly right and climb the long (~2,200') ridge above, keeping generally on the right side of the crest. The final section (5.4) is on the left side of the ridge.
(4) Another adventurous option is to traverse from the top of the DSB to the CMC route. This has the advantage of getting to water quicker and still allowing an ascent to the summit (via the CMC route). This route crosses several gullies and involves some careful routefinding but is mostly 3rd class. From the top of the DSB, traverse ~300 yards horizontally to the right (east), make a couple of rappels to easier ground, and then scramble northward into the head of a basin (water and bivy sites here). Continue around to a large gully system left (west) of the long south ridge of Drizzlepuss. Scramble up a ramp to the south ridge of Drizzlepuss, where you will intersect the CMC route.
We had initially planned on continuing up via the Upper South Ridge (Option 3), but the strong wind gusts were causing us to rethink our desire to be on a ridge. Plus we were low on water and did not see any running water if we continued up to the Upper South Ridge (there were occasional small snow patches, but melting water with my Jetboil would take awhile and didn't sound like fun). Wanting water and to still get to the summit, we chose Option 4. We had a really nice bivy about 1.5 hours from the top of the DSB route. Not accounting for the bivy along the way, the entire traverse from DSB to the CMC route took about 4 hours.
41.
42.
43.
44.
45.
46.
47.
48.
49.
50.
51.
52.
53.
54.
55.
56.
57.
41.Looking up towards the Upper South Ridge.
42. Looking east. The start of our traverse towards the CMC Route involved hiking across this treed bowl.
43. Starting across the bowl.
44. A bivy site in the grove of trees. But no water.
45. Rappelling to easier ground. (Photo by Will.)
46. Scrambling.
47. We found an awesome bivy site in a grove of trees, with water about 100 feet away.
48. In addition to the stove, my luxury item was a solar light cube. Will's luxury item was a pillow. All of our luxury items were worth it.
49. Location of our bivy is at the orange arrow. Ignore the purple track. 50. View out from our bivy. Leigh Lake below. (Photo by Will.)
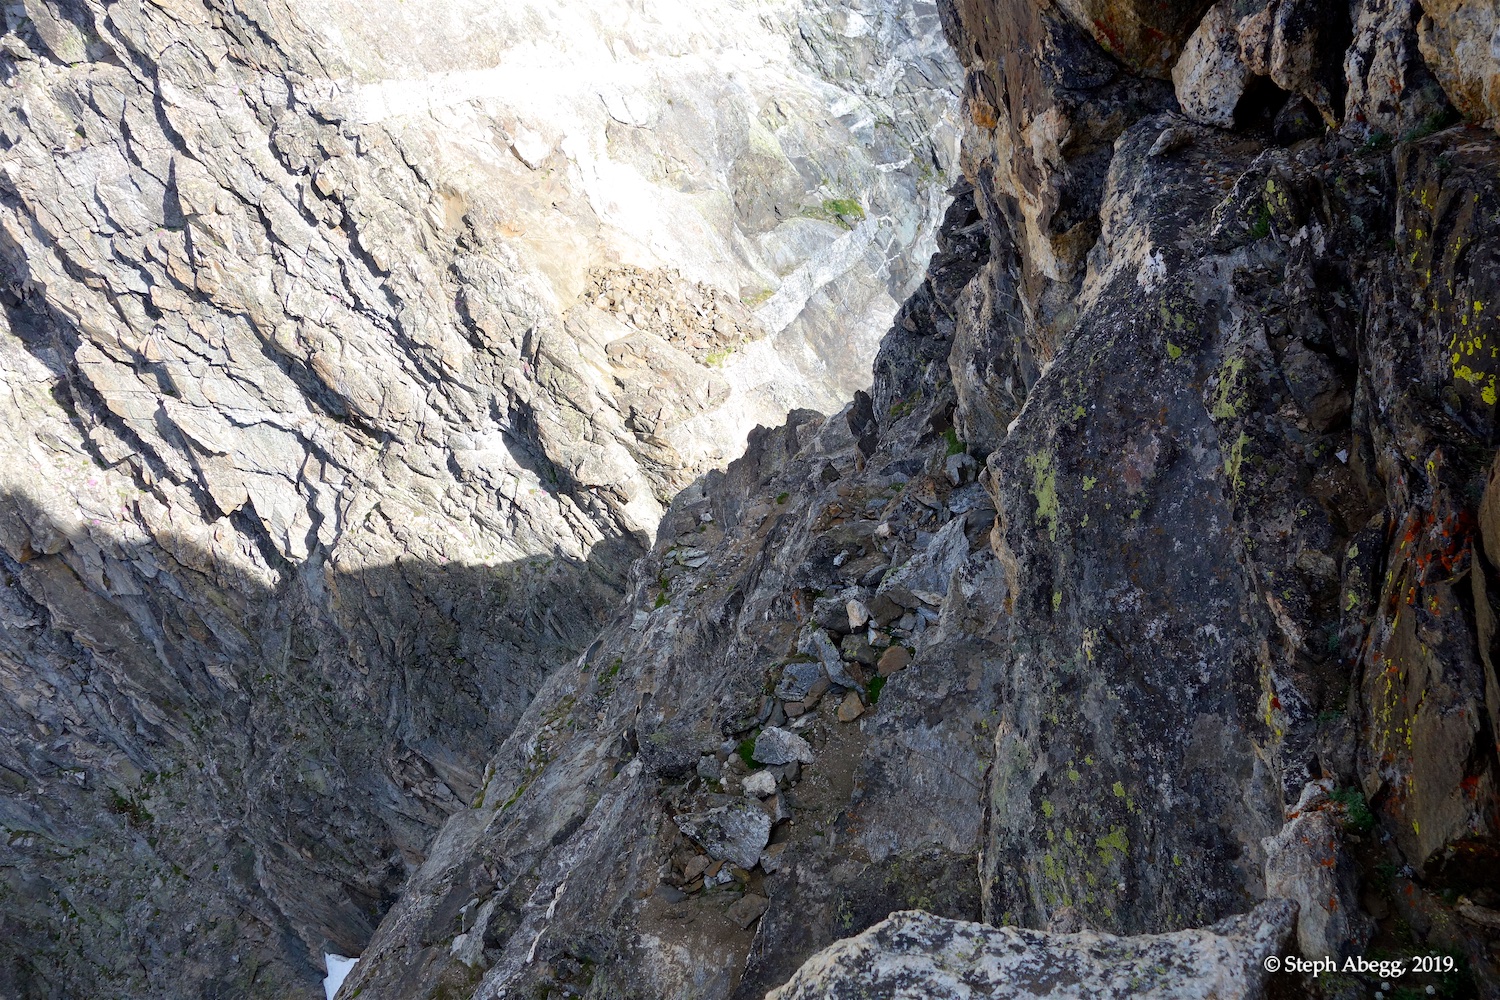
51. The next morning, we ascended this gully a bit since we thought the notch on the right looked promising.
52. A short section of 5th class in the gully we roped up for. I think this could have been avoided had we contoured around the rock buttress instead of going up this gully (see my Google Earth overlay). 53.Scrambling up towards the notch.
54. Rappelling the other side. In retrospect, I am pretty sure we could have just contoured around the end of this rock buttress and avoided both the 5th class step and the rappel (see my Google Earth overlay). (Photo by Will.)
55. We scrambled across this broad gully to the low point in the ridge on the right. This must be the long south ridge of the Drizzlepuss feature, since we intersected the CMC Route on the other side of the notch.
56. We didn't see any mountain goats, but there must be some goats living high on Moran. 57.View back from the notch.
CMC to top
Our traverse from the top of the DSB intersected the CMC route a little less than 2000' below the summit. I headed up while Will opted to head down to CMC Camp and wait for me. The first half was just a steep trail. The second half was low 5th climbing up to 5.5. The crux for me was getting off Drizzlepuss. You have to downclimb ledges on the west side of Drizzlepuss. The final section to the notch is a bit steep and in-obvious, but I found a 5.5 way to do it via a ledge about level with the notch. From the notch, climb 4th and low 5th weaving up the face left of the obvious black dike. The summit itself is a large expanse of talus with a great view of the Grand Teton to the south and a bunch of lakes (Jackson Lake, Leigh Lake, Emma Matilda Lake, Two Ocean Lake) to the east.
From the notch below Drizzlepuss, I decided to just dump my rope and harness and pack and take only my camera and rock shoes (in case I needed them) to the top. The climbing was quite easy and there was always an easy option, and I soloed up to the summit in less than an hour.
58.
59.
60.
61.
62.
63.
64.
65.
66.
67.
68.
69.
70.
58. Heading up the CMC Route, just after we intersected it on our traverse.
59. Upper CMC Route climbs left of the obvious dike feature. 60. Ledgy terrain to descend on the west side of Drizzlepuss. 61. One of the ledges. Just pretty much weave your way easily down these ledges.
62-63. Looking up the CMC route after downclimbing to the notch. 64. Nearing the top.
65. The summit!
66. View of The Grand to the south.
67. Jackson Lake below. 68. Looking down the descent, which is just to climbers' left of the CMC Route. The obvious tower feature is West Horn. Leigh Lake far below. 69. The descent follows the blocky 4th class ridge to climbers' left of the ascent route. 70. Closer view of West Horn.
Descent
From the summit, you have a bit over a vertical mile to descend to get to Leigh Lake. Get ready, knees! From the summit, I downclimbed the blocky ridge just climbers' left of the CMC Route. This was mostly 3rd and 4th class and easy to do without rappels. After reascending the west side of Drizzlepuss (much easier on the way up), the rest of the descent via the CMC Route was just 2nd and 3rd class trail all the way to Leigh Lake. This put us at the end of a drainiage a few hundred yards away from our canoe at the entrance to Leigh Canyon. Our knees were happy to have a canoe ride rather than several miles around the lakes to get out!
71.
72.
73.
74.
75.
76.
71. CMC Camp. This is supposedly one of the better campsites in the range. It is pretty nice.
72. Hiking down the lower CMC route (just a trail at this point). 73. Looking back up at Moran from near the end of the descent.
74. Signs directing the way for the portage.
75. A beautiful day for an afternoon paddle.
76. A family of Common Mergansers.
Useful beta. Updated route information. Corrections. Historical notes. Interesting facts. No fluff please. Please do not put links in your comment, as my spam filter will filter those comments out.