This was my second trip to the Bugaboos. We climbed two classic routes—Beckey-Chouinard on South Howser and Snowpatch Route on Snowpatch Spire. I also climbed Hound's Tooth. This page details our climbing adventures.
Region: British Columbia
Elev: 3,412 m / 11,194 ft (S Howser); 2,830 m / 9,285 ft (Hound's Tooth); 3,084 m / 10,120 ft (Snowpatch)
THIS TRIP REPORT IS STILL MOSTLY IN THE EMBEDDED HTML FORMAT OF MY OLD WEBSITE. MOBILE Tip: Try Landscape mode. It is generally more mobile friendly.
The Bugaboos of British Columbia are an amazing group of huge granite spires towering above a sea of glaciers. Soon after my first trip to the Bugaboos in 2006, I began to make plans to return to this amazing climbing meca. Top on my list was the Beckey-Chouinard route on South Howser Tower (a Fifty Classic). I also wanted to climb Snowpatch Spire (the spire which towers above Applebee Dome Camp), and decided that the Snowpatch Route (aka SE Corner aka Wiessner's Route) seemed like a long fun route up this spire.
So, a year later, in August 2007, I returned to the Bugaboos with my friend Clint Cummins. Our trip to the Bugaboos was a grand success: 3 stellar summits in 5 days. Below are photos and commentary from (1) the Beckey-Chouinard route on South Howser Tower, (2) Hound’s Tooth and a traverse below Pigeon Feathers, and (3) the Snowpatch Route (SE Corner) on Snowpatch Spire.
Climbs We Did
CLICK ON ROUTE TO DROP DOWN CONTENT
BECKEY-CHOUINARD, SOUTH HOWSER TOWER
Date: August 6-7, 2007
Route: TD+, 5.10, 20-22 pitches, ~800 m (2,600 ft)
Summit elevation: 3,412 m (11,194 ft)
Climbed by: Clint and Steph
We decided to climb the Beckey-Chouinard route on South Howser Tower from Applebee Camp, instead of setting up a camp in East Creek Basin as most climbers do in order to shorten the approach on summit day. We left Applebee at 4am and hiked over the Bugaboo-Snowpatch Col and Pigeon-Howser Col and across East Creek Basin to where the Beckey-Chouinard route begins on the west side of South Howser Tower. We began scrambling up the ridge at 7:30am, and began the roped climbing at 8:30am. We reached the summit at 1:15am. We did not stop to bivy (it was too cold), but we immediately began the rap route down the east face of South Howser Tower. We were in our sleeping bags at Applebee shortly after 7:00am. A great 27 hour adventure!
An illustrated pitch-by-pitch description of our adventure on the Beckey-Chouinard route on South Howser Tower is given below. The pitch numbering is from the topo in the Atkinson-Piche guide.
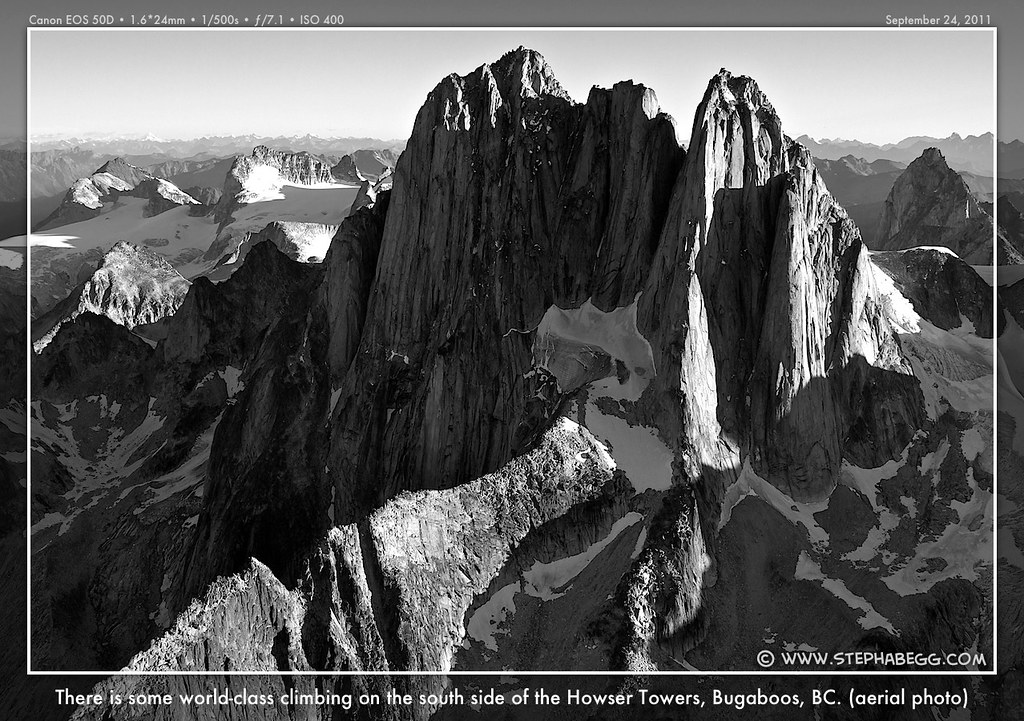
Update 1: In September 2011 and May 2012, I did some aerial photography of the Bugaboos with my friend and pilot/aerial photographer John Scurlock. In the photo below, the Beckey-Chouinard route takes the sun-shade line. See more photos from my Sept 2011 and May 2012 aerial photography adventures.
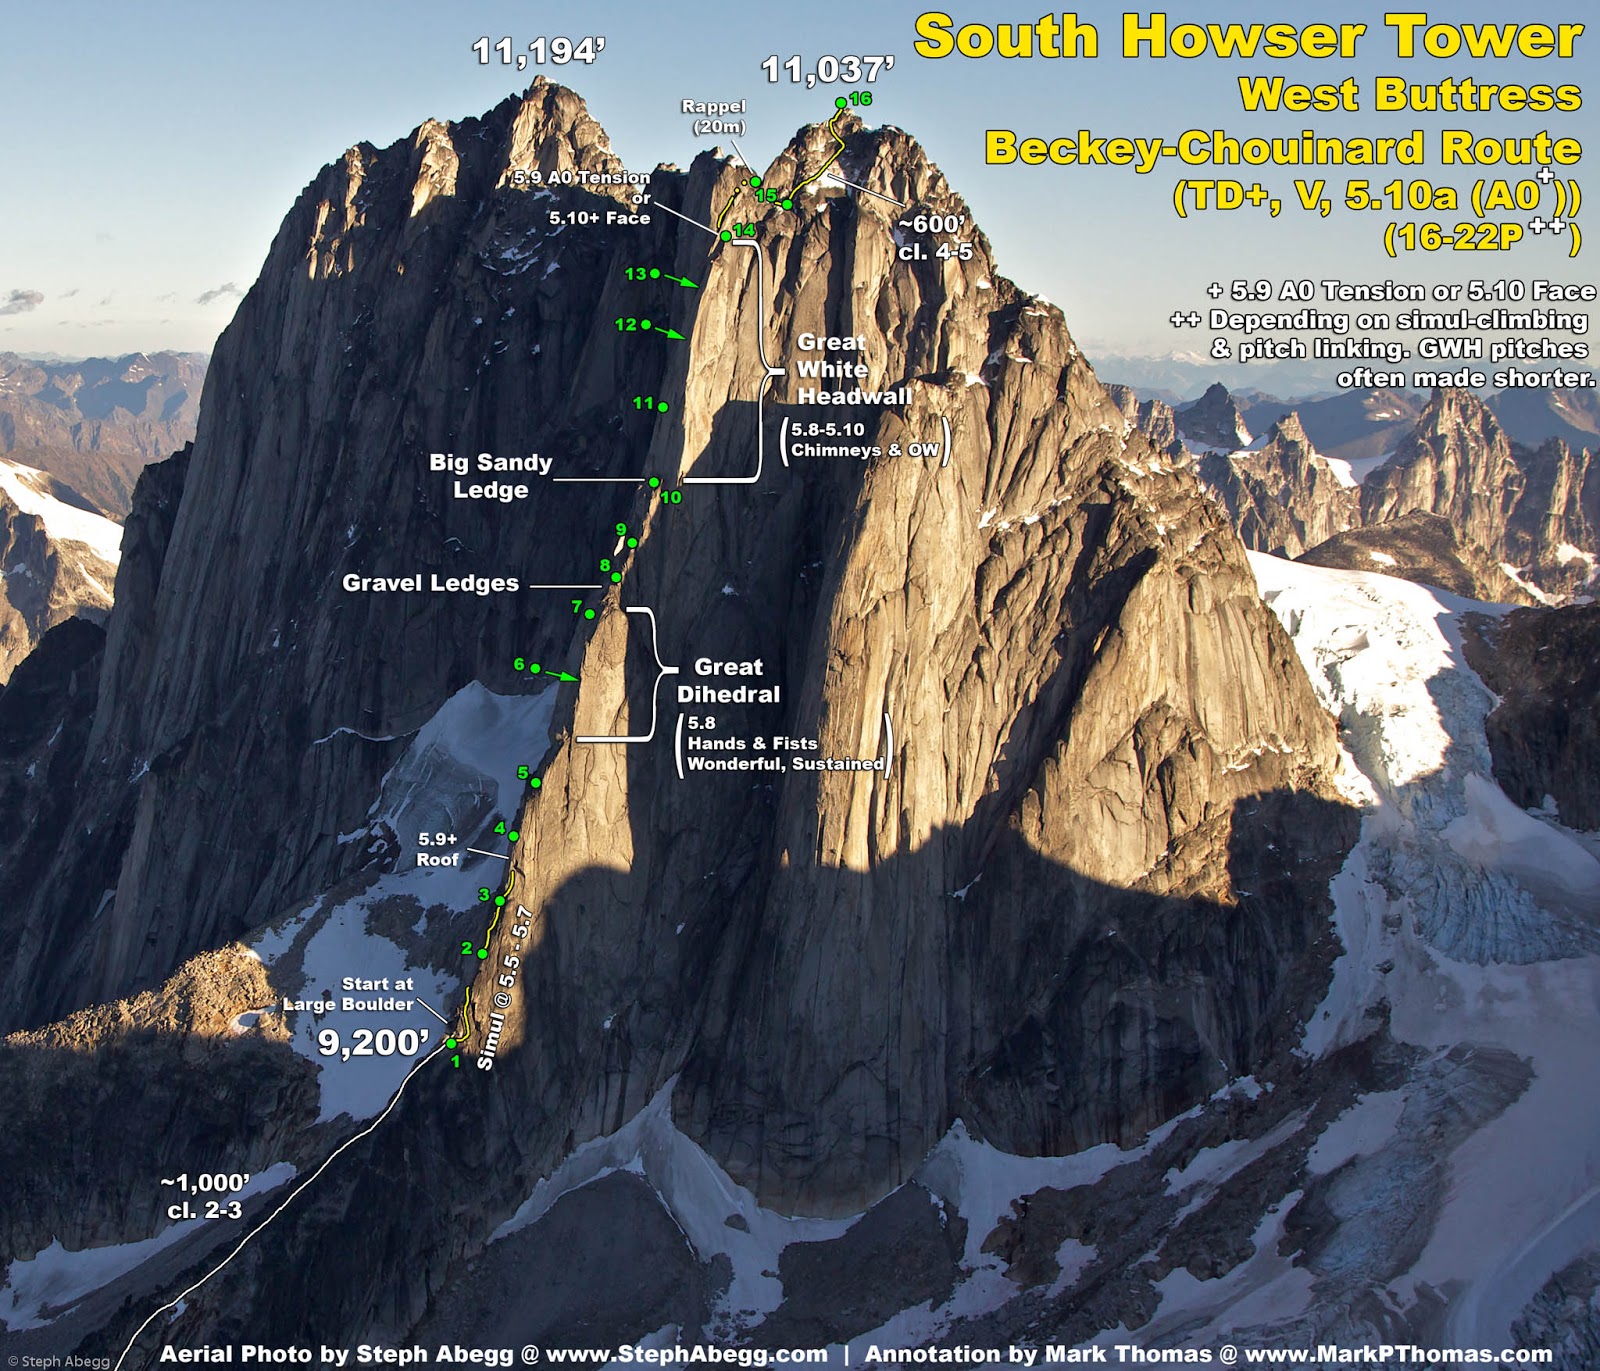
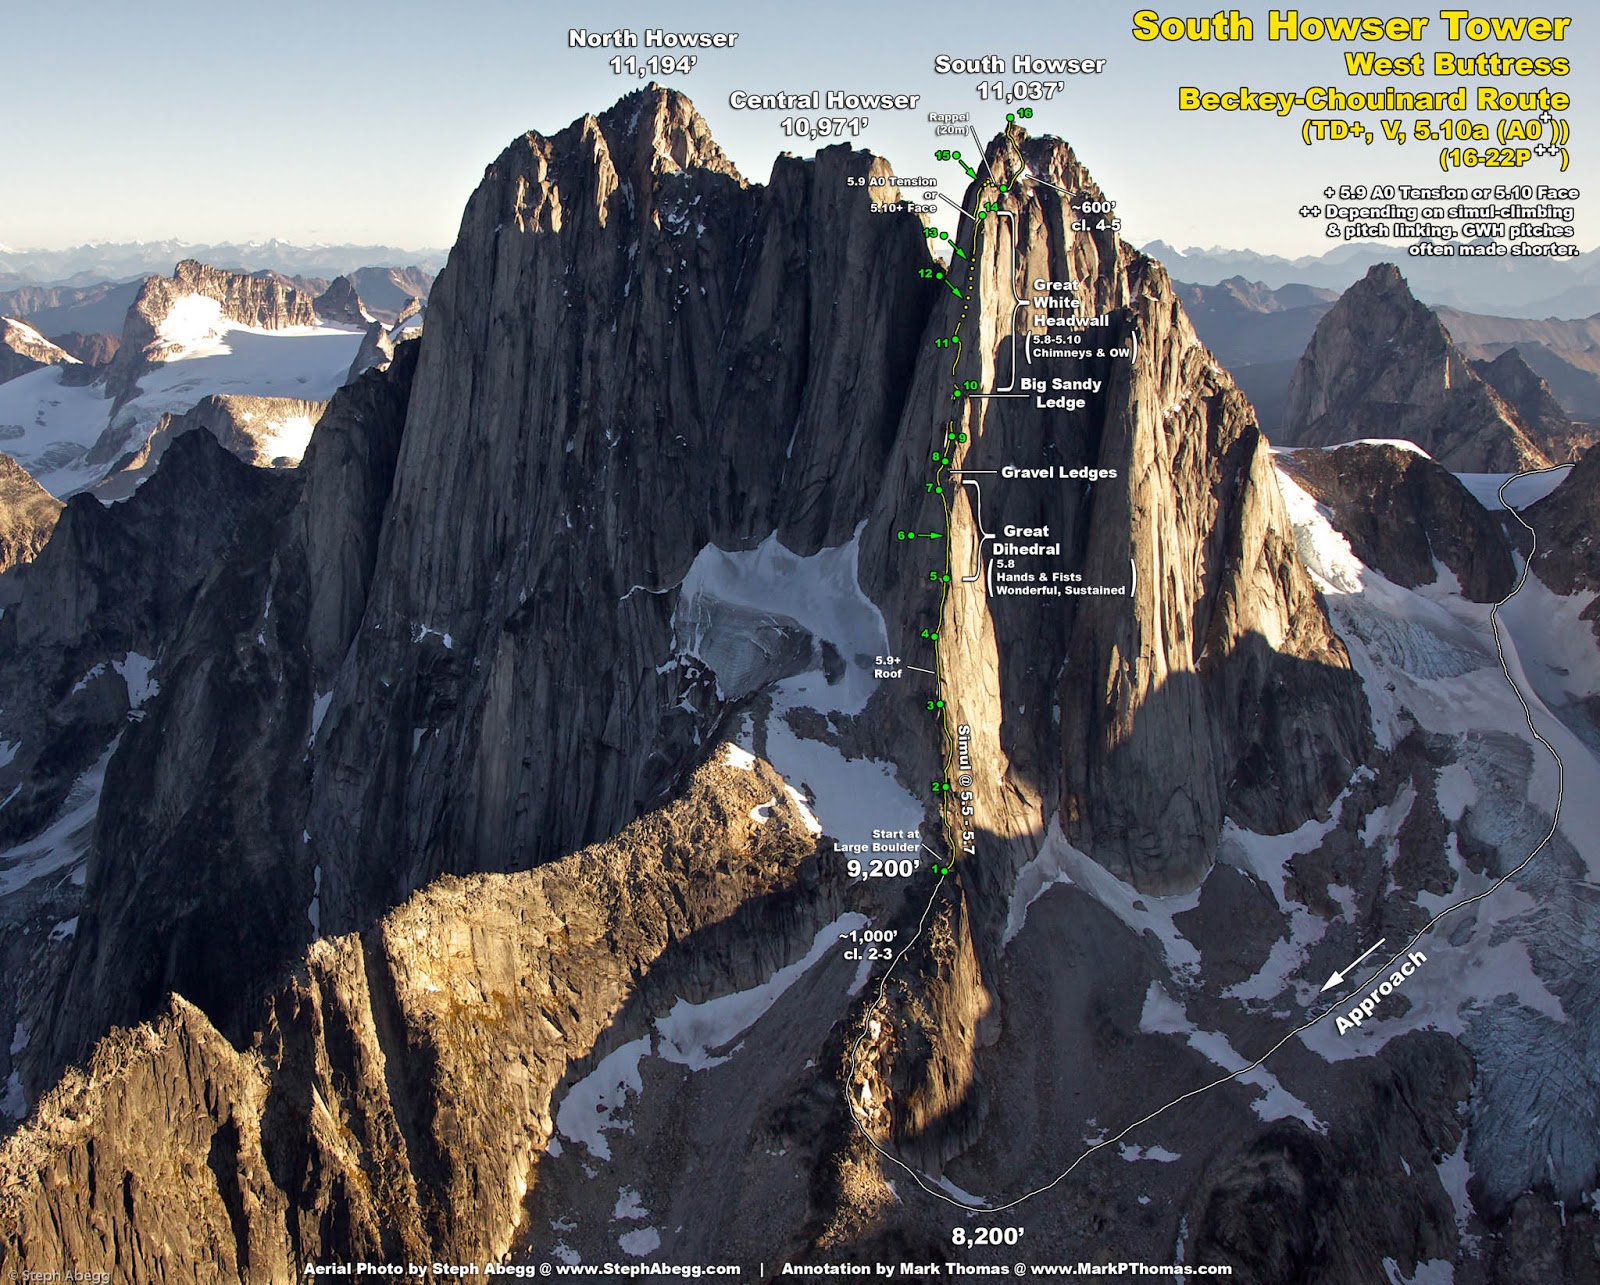
Update 2: In 2013, my friend and King-of-the-Route-Overlay Mark Thomas used my aerial photos to make some awesome route overlays after he climbed Beckey-Chouinard route. See Mark's trip report for more photos.
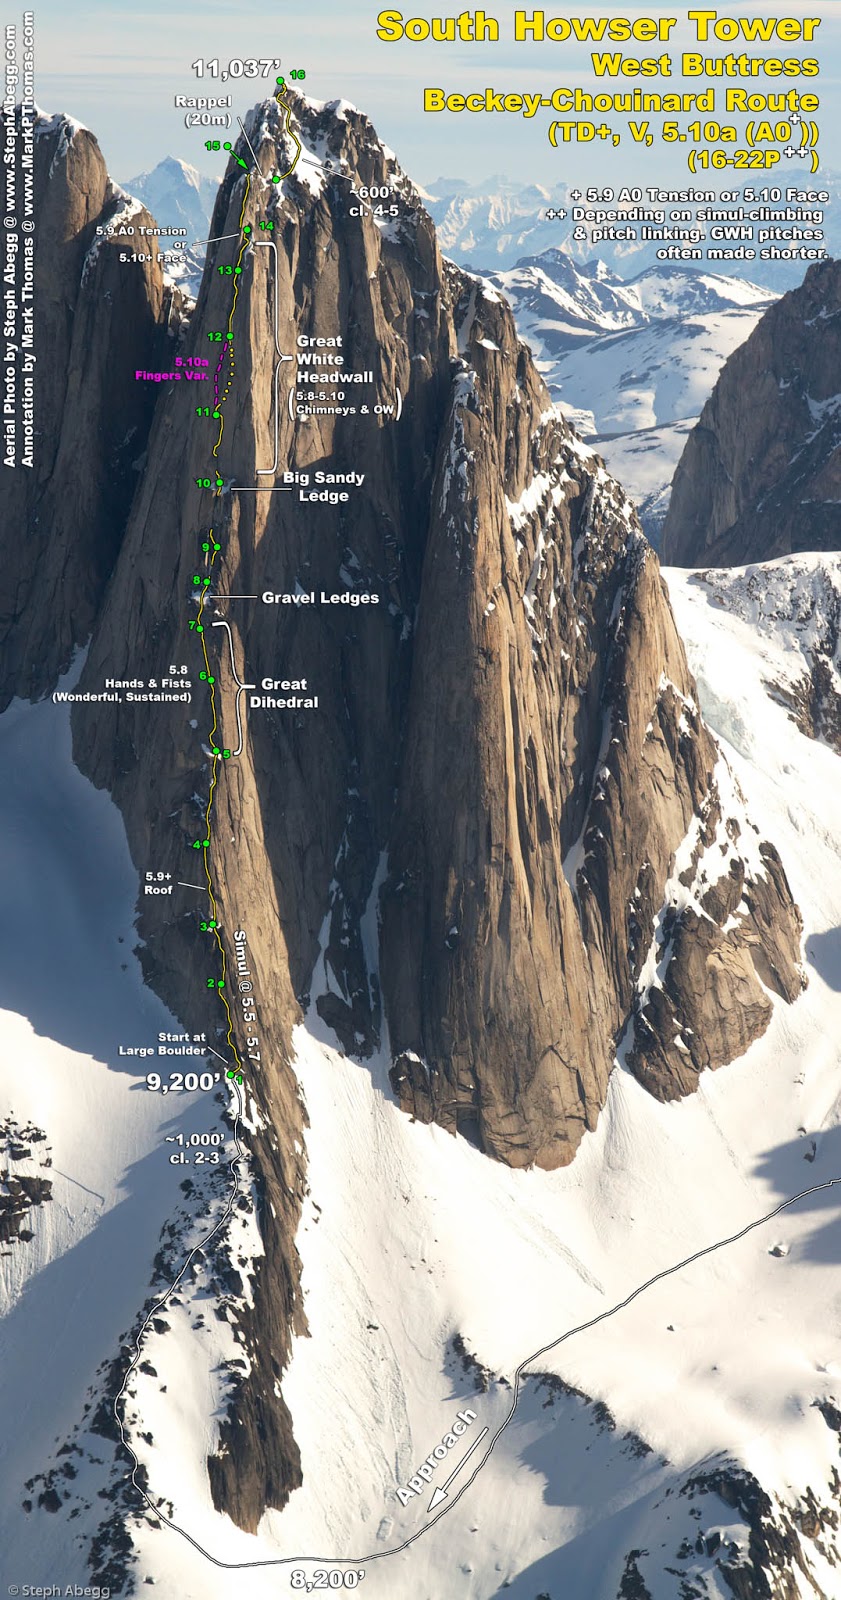
Update 3: I climbed Beckey-Chouinard again in July 2016, with a bivy below the Great White Headwall. Here are some updated overlays including the fixed rappel route that was established a few years after my 2007 climb. See my 2016 trip report for more photos.
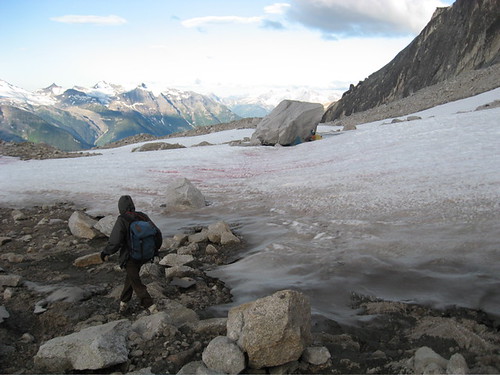
APPROACH
We left Applebee Dome Camp at 4am. We climbed over the Bugaboo-Snowpatch Col, traversed across the Upper Vowell Glacier to the Pigeon-Howser Col, and dropped down into the East Creek Basin to access the beginning of the climb. It took 3.5 hours to get to the start of the ridge on South Howser Tower, and another hour to begin the roped climbing.
Photos:
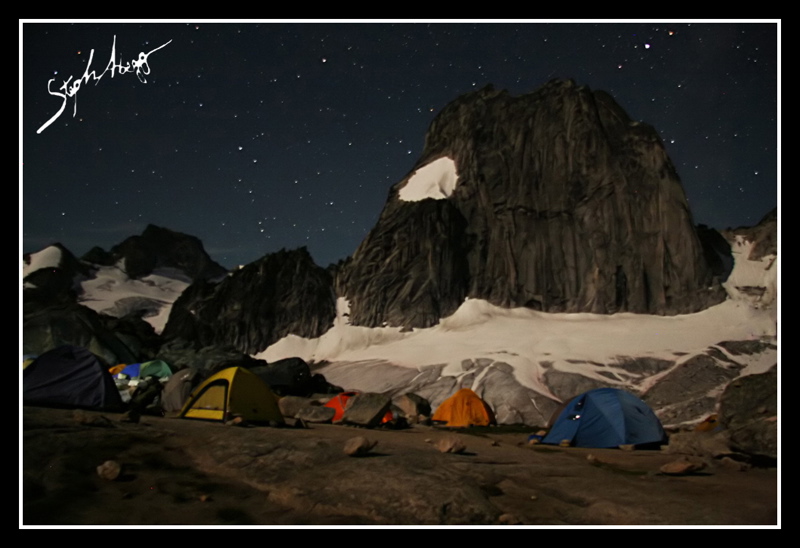
1. Applebee Camp and Snowpatch Spire in early morning. Alpine starts are key in the Bugaboos where the routes are long and afternoon storms are common.
2. Looking down the Bugaboo-Snowpatch Col.
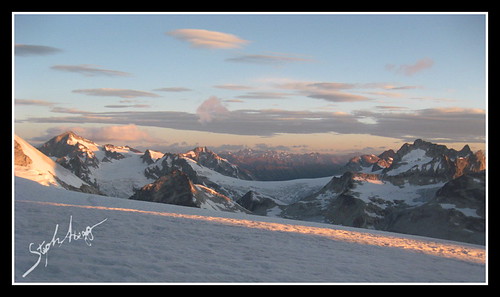
3. Sunrise on the Upper Vowell Glacier.
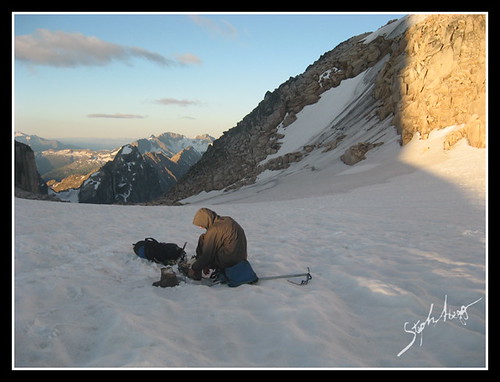
4. Exchanging boots for approach shoes at the Pigeon-Howser Col .
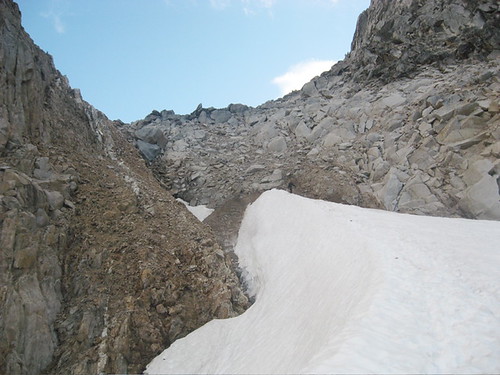
5. The west side of Pigeon-Howser Col.
6. The East Creek Boulder Camp below the start of the Beckey-Chouinard route.
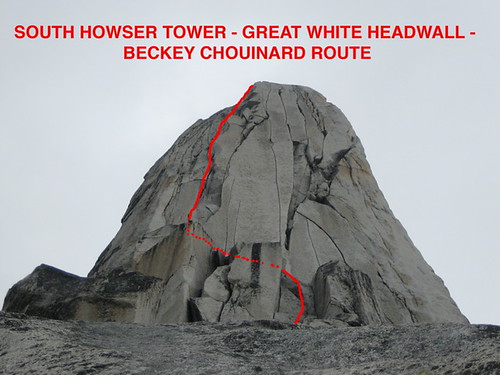
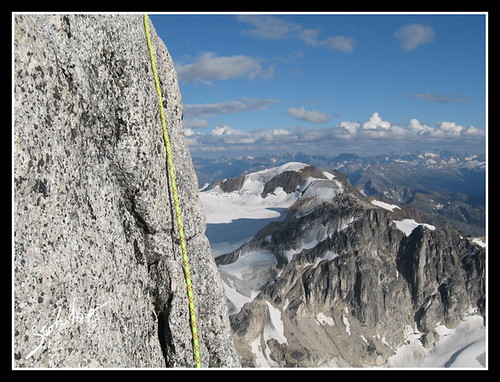
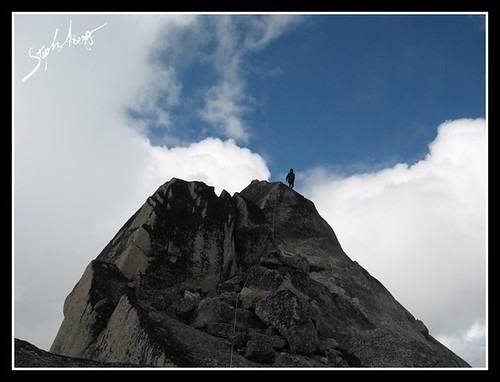
7. The Beckey-Chouinard route.
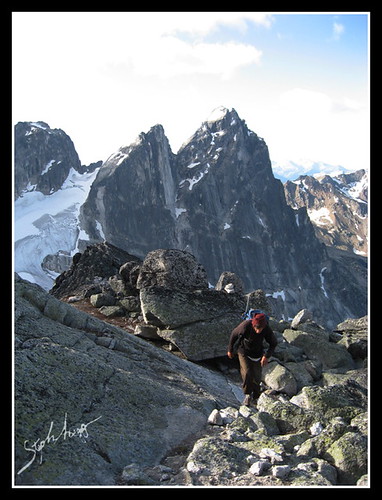
8. 1000ft of scrambling up the ridge to get to the roped climbing.
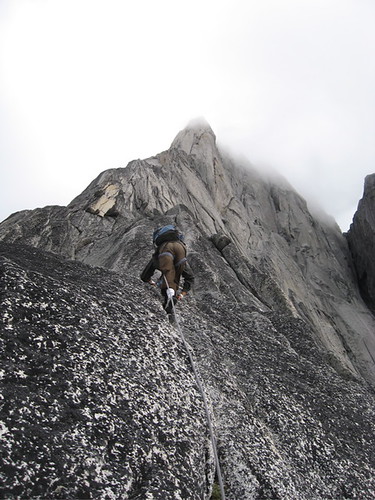
PITCHES 1-3
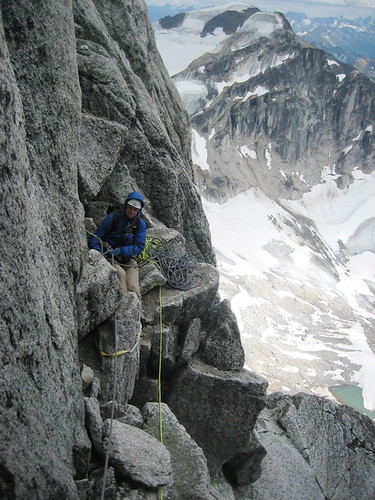
Pitches 1-3 are mid-5th climbing on the ridge. Pitch 1: From a belay in small boulders step down right to gain an exposed slab on the right and climb cracks and flakes to a block belay on the ridge crest (5.5). Pitch 2: Climb up the ridge crest (5.5). Pitch 3: Where the crest steepens follow cracks and grooves left of the crest to a ledge belay behind a large block (5.7).
The first photo shows Clint climbing Pitch 3. The second photo shows the view of the Minaret from Pitches 1-3.
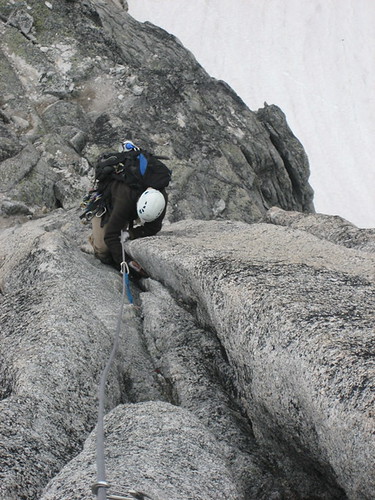
PITCH 4
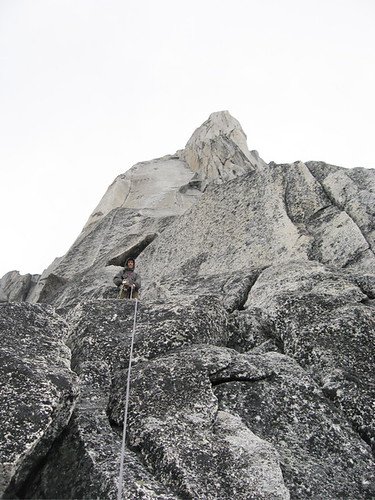
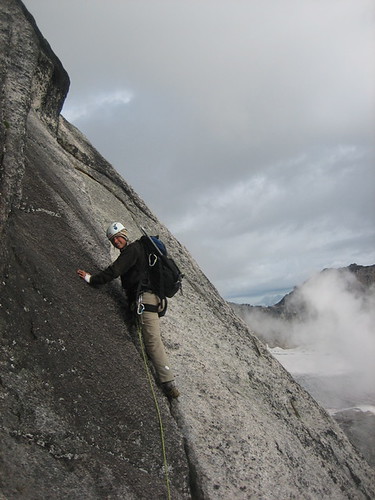
Follow steep cracks just right of the crest to the left edge of a small overhanging bulge (fixed cam). Make an insecure move over the bulge and follow cracks past a horn to a step, small ledge belay (5.10-, 50m).
The photo shows Steph just above the 5.10 bulge.
PITCH 5
Climb cracks on the left side of the arête, stepping to the right side part way up and follow cracks to easy ground. Scramble over easy ground to gain a flake and a short chimney to the left, which leads to a slab belay, or belay on the crest (5.8, 60m).
The photo shows Clint at the top of Pitch 5. Pitch 6 goes off to the right from here.
PITCH 6
Handrail right over the arête and cross cracks to gain a big left-facing corner or climb directly up from the crest belay. Climb the corner to an alcove belay behind a jutting block (5.8, 60m).
The photo shows Clint starting off Pitch 6.
PITCH 7
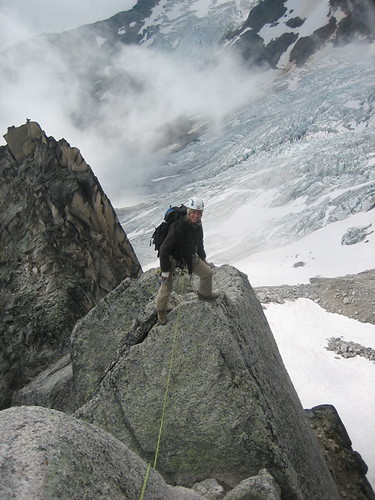
We climbed Pitch 7 (as defined by the topo) in two pitches. Continue up the stellar corner to a crack and belay at the start of some scree-covered ledges (5.8, 60m).
The photo shows Steph climbing up the upper part of Pitch 7, a strenuous and fun wide crack. I ended up wearing my approach shoes the entire route, mostly because I cringed at the thought of taking off my wool socks and sticking my feet in the cold rubber of my climbing shoes! But the approach shoes worked out great!
PITCH 8
Scramble over scree and belay at the upper bivy site.
The photo shows Steph at the belay at the bottom of Pitch 8.
PITCH 9
Climb up a chimney and cracks over blocks to a block belay where the wall steepens (5.6).
The photo shows Steph climbing up Pitch 9.
PITCH 10
Step left to climb a short strenuous crack to a ledge. Go right past a flake to reach two opposing corners and climb the right-hand to the bivy ledges below the Great White Headwall.
The photo shows Steph at the belay between Pitches 9 and 10. These shady belays were cold!
PITCH 11
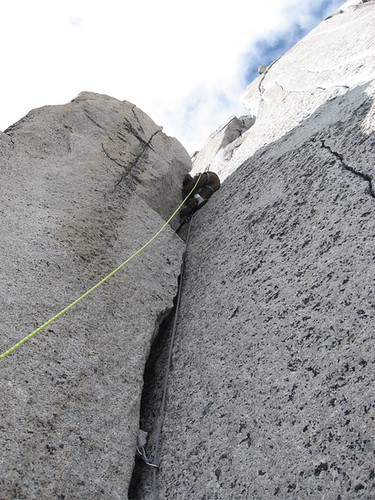
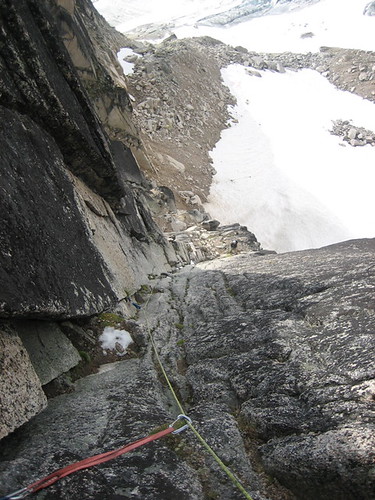
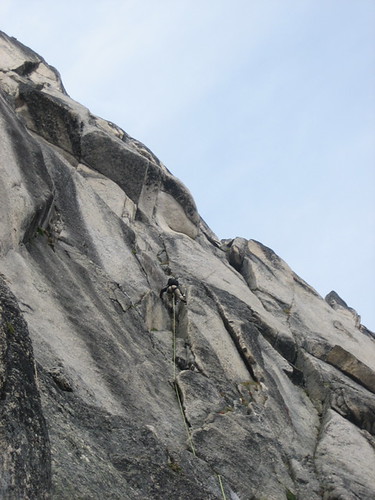
Pitch 11 starts up the Great White Headwall. Walk left to the furthest bivy site and climb up to a wide crack in the right facing corner at the far left side of the headwall. Climb the wide crack to the top of the small tower and continue up a corner crack system. Climb the corner until able to break out left and up a short, steep wall to a small ledge belay (5.10-, 55m).
The first and second photos show the Great White Headwall. There are lots of cracks on the headwall that have yet to become routes. The third photo shows Clint climbing up Pitch 11, a wide crack. I found my approach shoes worked great for these wider cracks (I actually kept my approach shoes on the entire route, since they were working fine and are much warmer).
PITCH 12
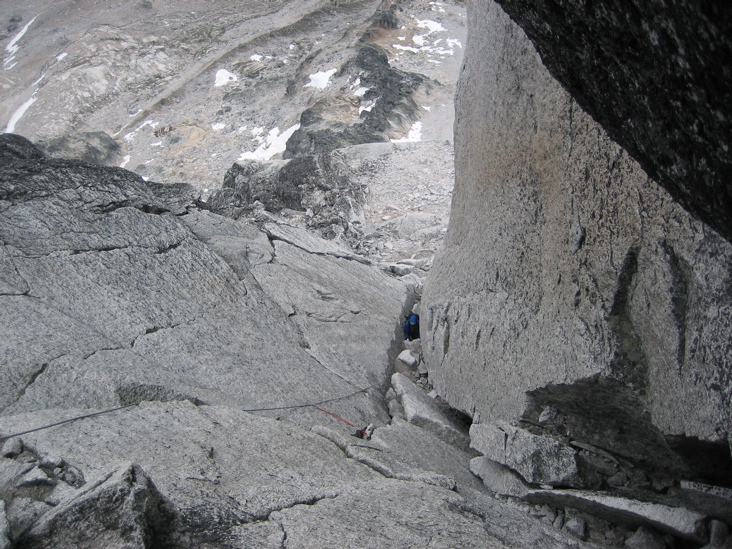
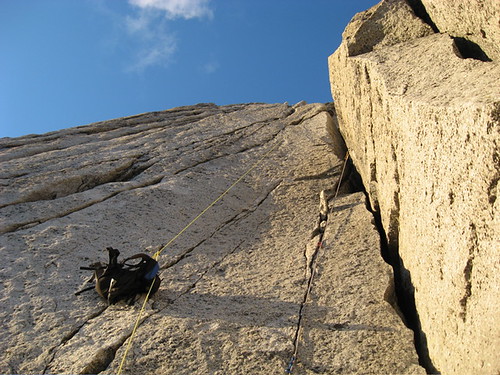
We climbed Pitch 12 (as defined by the topo) in two pitches. Step up above the belay and make a hard balance move right back into the corner. Follow the corner past the guillotine blocks and a tough squeeze. Move to a belay at the start of a steep gully (5.9, 60m). (Cracks on the left wall can be climbed at 5.10 to avoid the corner, but we climbed the corner.)
The first photo shows Steph climbing up the first half of Pitch 12. The second photo was taken looking up the second half of Pitch 12, where we hauled packs to be able to climb through the awkward squeeze.
PITCH 13
Climb up the gully over chock stones to where it steepens into a capped corner. Climb the second crack on the left wall to a belay at the base of a long, shallow, right-facing corner (5.9, 60m).
The photo shows the view from the upper pitches on the route. It got dark soon after we finished Pitch 12, so we didn’t take any photos.
PITCH 14
Follow the corner to a two-pin belay at a small notch (5.8, 30m).
PITCH 15
Tension left (A0) into a gully (or free at 5.10+) and follow it to a belay at its top (5.6).
PITCHES 16-20
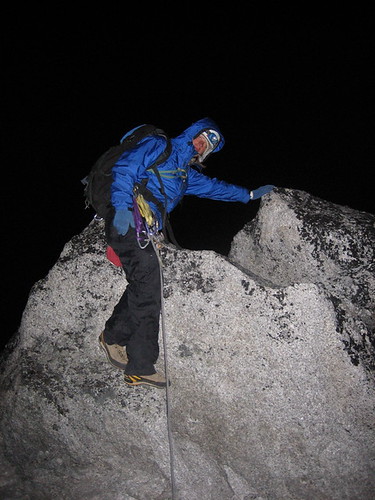
From the top of the gully, step down right to gain rappel slings and make a 20m rappel to ledges on the south side. Climb up and right around two indistinct buttresses to gain the ridge just right of the summit. This is about 200m of steep and broken fourth-class terrain with numerous short, mid-fifth class steps. Bivy sites are possible through here and near the summit. The rappels start about 20m south of the summit where most parties emerge from the broken terrain.
Due to the dark and because we were tired, we pitched out this section instead of simulclimbing. It took quite awhile since it was difficult to route-find in the dark.
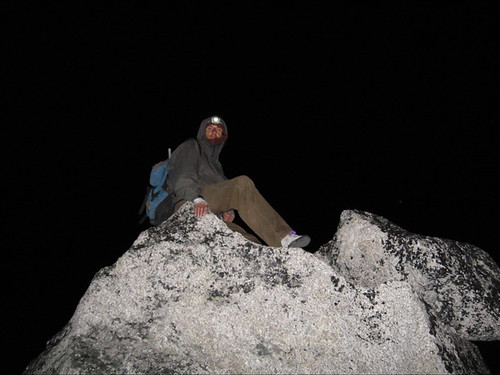
ON THE SUMMIT
We arrived on the summit at 1:15am, about 17 hours after we started the roped climbing. Although it was a bit chilly, we were lucky to have no rain for our climb. We did not have any bivy gear and thought it would be best to keep moving because of the cold, so we began the rappels down the east face in the dark.
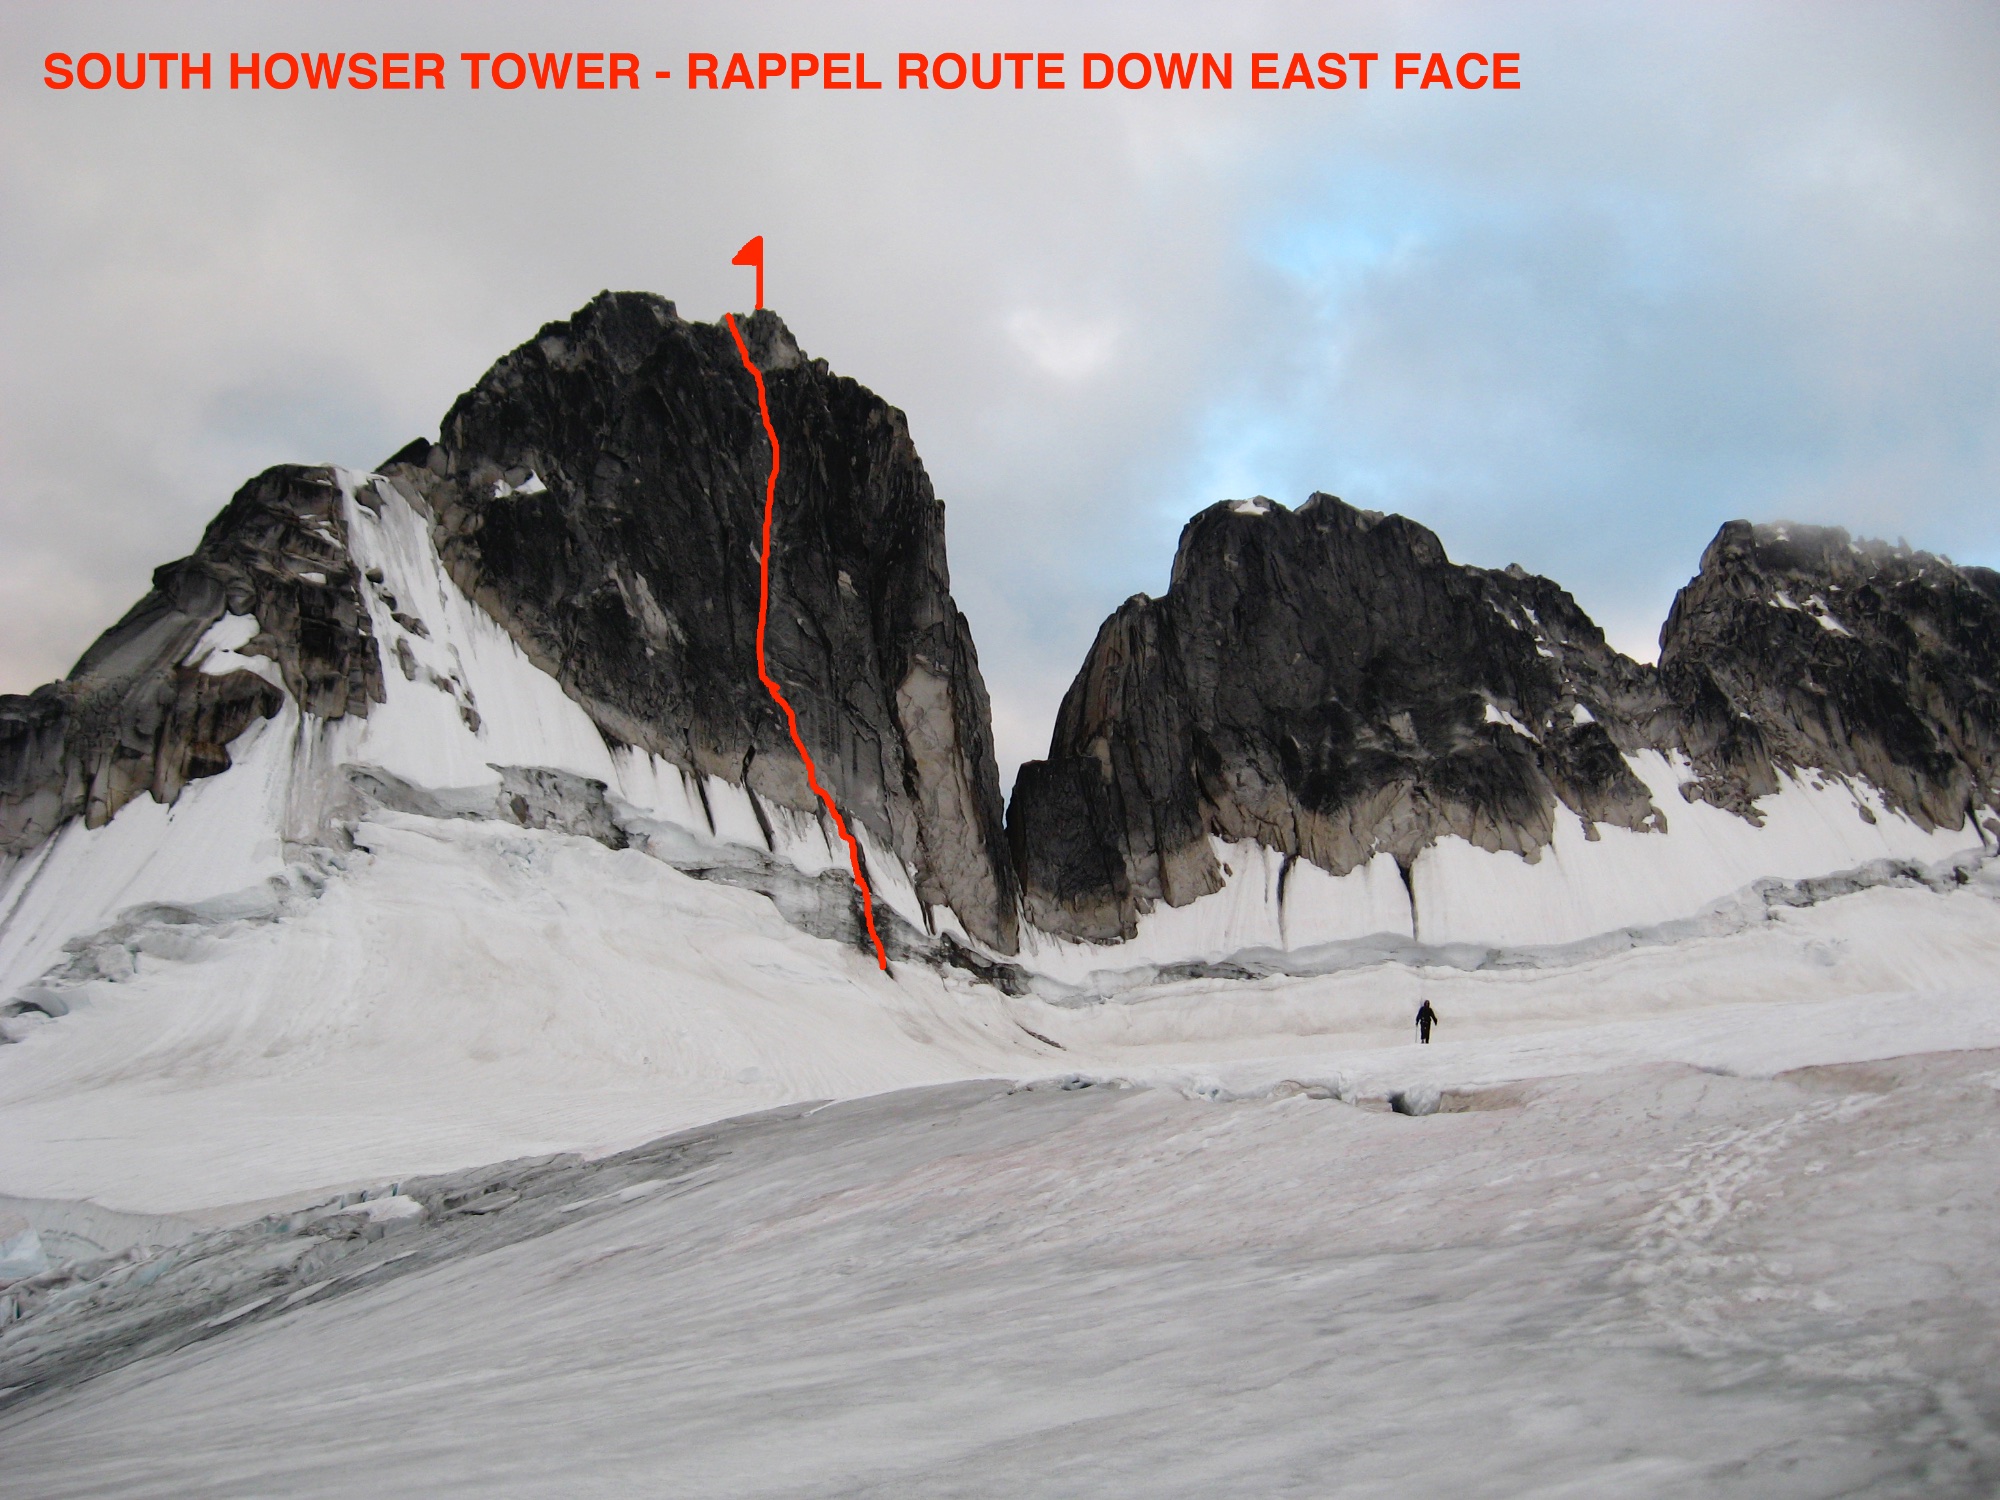
DESCENT
We rapped down the east face of South Howser Tower. We got one of our two ropes stuck in a flake on the third rappel, so we had to cut the rope and continue rapping with a single rope. We managed to find sling anchors every 30m. We were worried that we would not be able to make it over the bergschrund with a single 60m rope, but someone had extended a line of rope to the last rappel anchor, and we added on the remaining half of the rope we had cut and were able to rappel past the bergschrund onto the snow below. Less than 2 hours later, we were diving into our sleeping bags at Applebee.
Photos:
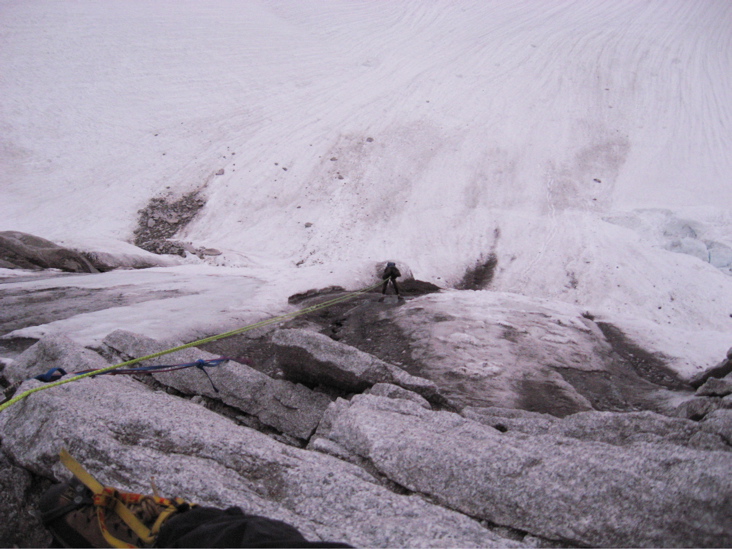
1. Clint setting up to rappel over the bergschrund from the end of a fixed rope extended from the last rappel anchor.
2. The rappel route down the east face of South Howser Tower. It can be done with a single 60m rope, although two ropes are usually required to get past the bergschrund (unless the anchor is extended by a fixed line as it was in our case).
3. Our second sunrise of the climb. A good way to end a long and stellar climb!
HOUND’S TOOTH and TRAVERSE OF UPPER PIGEON FORK OF THE BUGABOO GLACIER
Date: August 8, 2007
Route: Hound’s Tooth: PD-, 3rd, 100 m (330 ft) from snow to summit; Traverse: Glacier travel
Summit elevation of Hound’s Tooth: 2,830 m (9,285 ft)
Climbed by: Steph (Clint took a rest day)
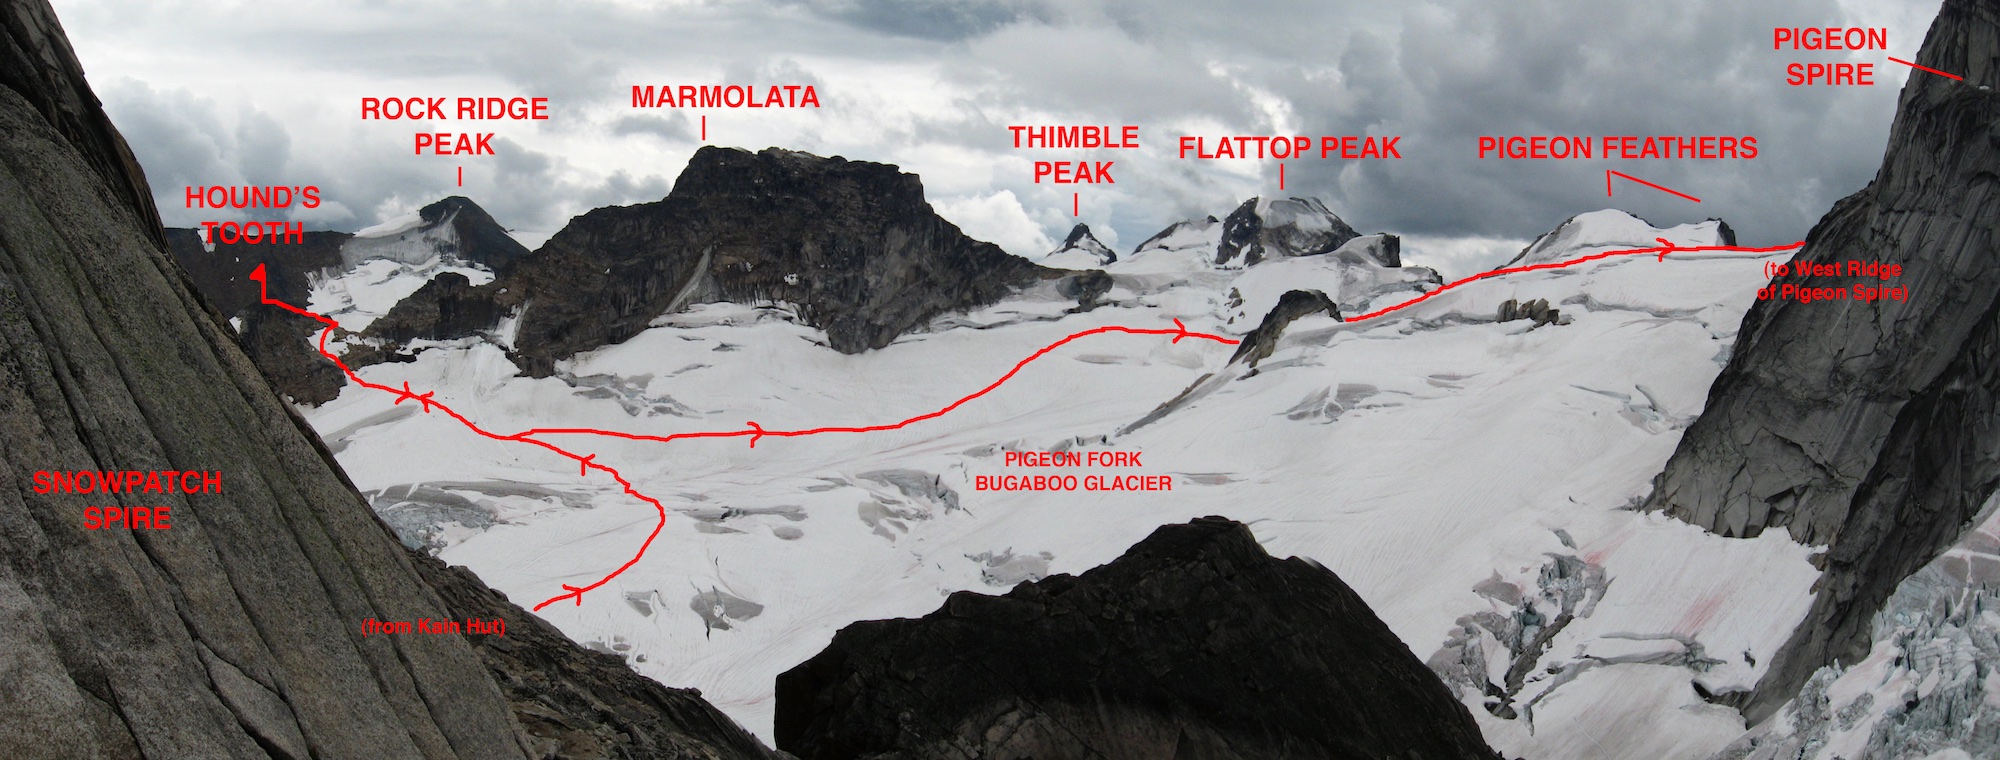
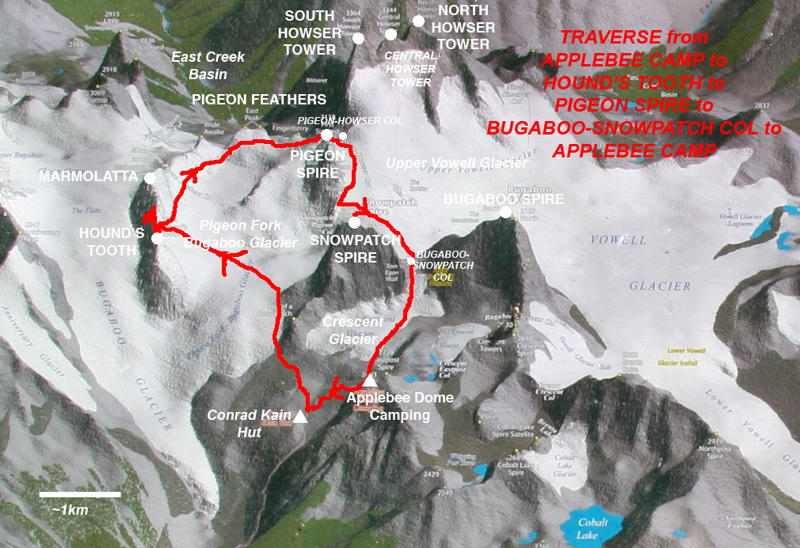
The weather did not look good enough to commit to a longer climb, so we decided to take a rest day. I took the opportunity to explore the area over by Hound’s Tooth and the Pigeon Fork of the Bugaboo Glacier, which you can see from the parking lot. I hiked down from Applebee Dome Camp to Kain Hut and traversed below the toe of Son of Snowpatch; I then traversed across the Pigeon Fork of the Bugaboo Glacier and up to the col between Hound’s Tooth and Marmolata. From here I scrambled up Hound’s Tooth. I then traversed along the upper end of the Pigeon Fork of the Bugaboo Glacier, over the west ridge of Pigeon, over the Bugaboo-Snowpatch Col, and back down to Applebee Camp. It was a fun 7-hour tour around Snowpatch Spire, although visibility was pretty bad at times.
Below are some photos from my climb of Hound’s Tooth and traverse around the upper end of the Pigeon Fork of the Bugaboo Glacier.
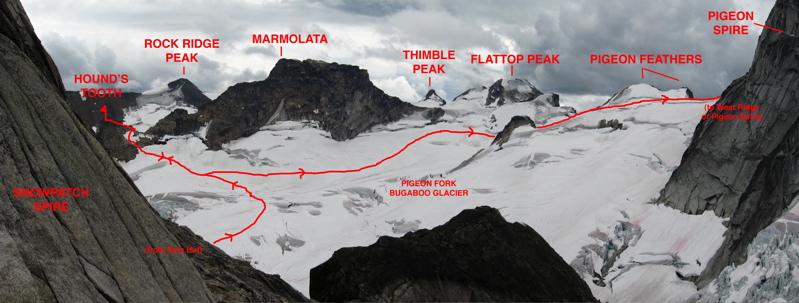
The traverse of the upper Pigeon Fork of Bugaboo Glacier. This photo was taken during the descent down the west face of Snowpatch Spire the next day.
Hound’s Tooth and Snowpatch Spire from the parking lot. Hound’s Tooth is surrounded by the Bugaboo Glacier.
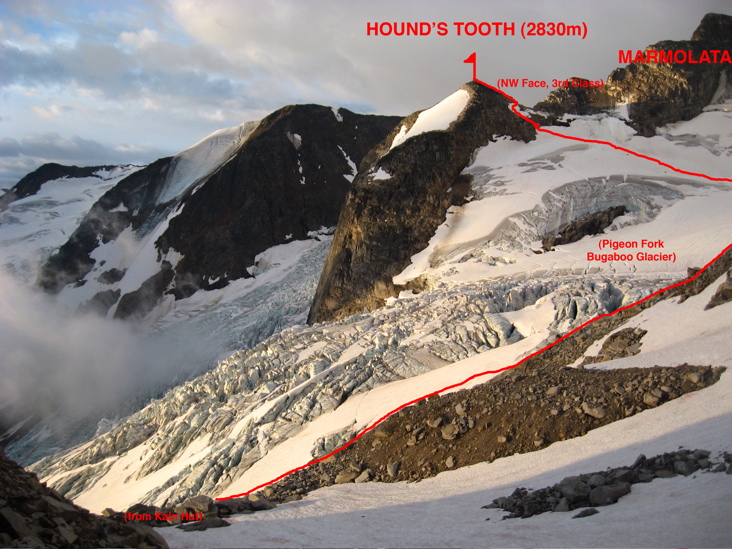
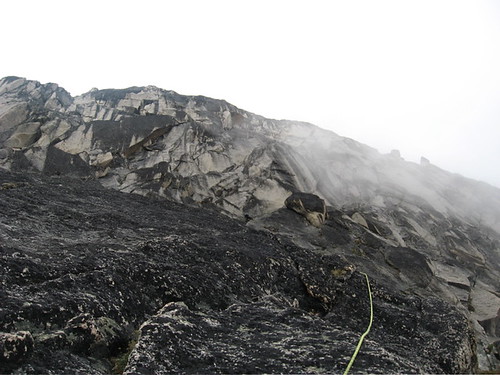
The route I took to climb the NW Face (Class 3) of Hound’s Tooth. This photo was taken from Snowpatch Spire the next day.
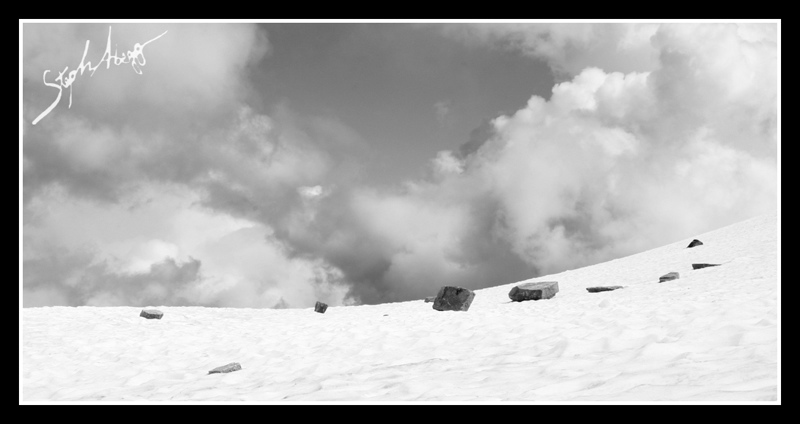
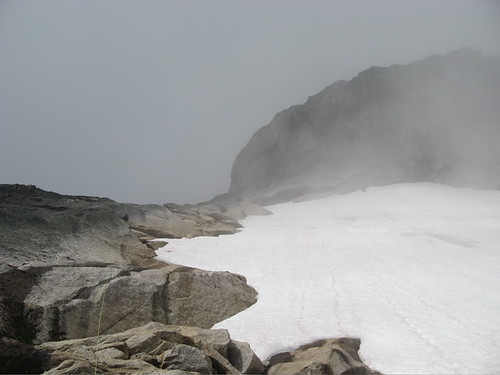
Rockfall below the Hound’s Tooth-Marmolata Col. After I climbed Hound’s Tooth, I started up the east ridge of Marmolata, but I turned back because the rock was too loose.
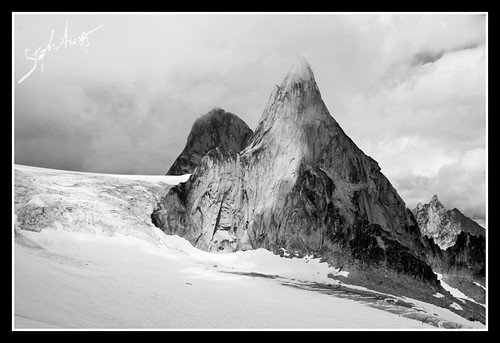
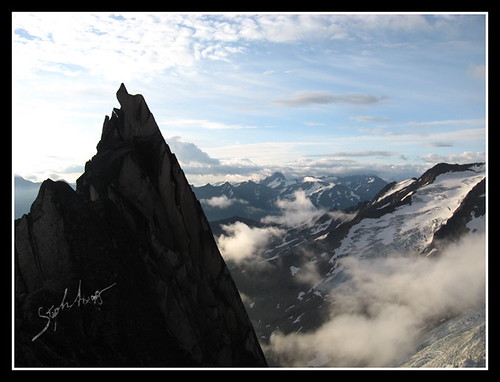
South face of Snowpatch Spire from the Pigeon Fork of the Bugaboo Glacier. Bugaboo Spire is behind to the left.
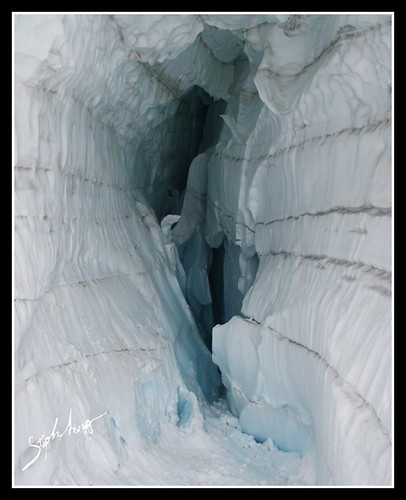
There are some cool crevasses and ice cave formations on the Pigeon Fork of the Bugaboo Glacier.
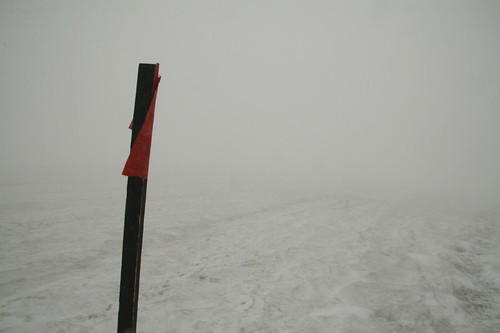
Unfortunately, visibility was not always too good. This made it a bit difficult to navigate across the Pigeon Fork of the Bugaboo Glacier (where I saw no sign of other climbers), but there was a boot-beaten track once I reached the Upper Vowell Glacier after crossing over the west ridge of Pigeon.
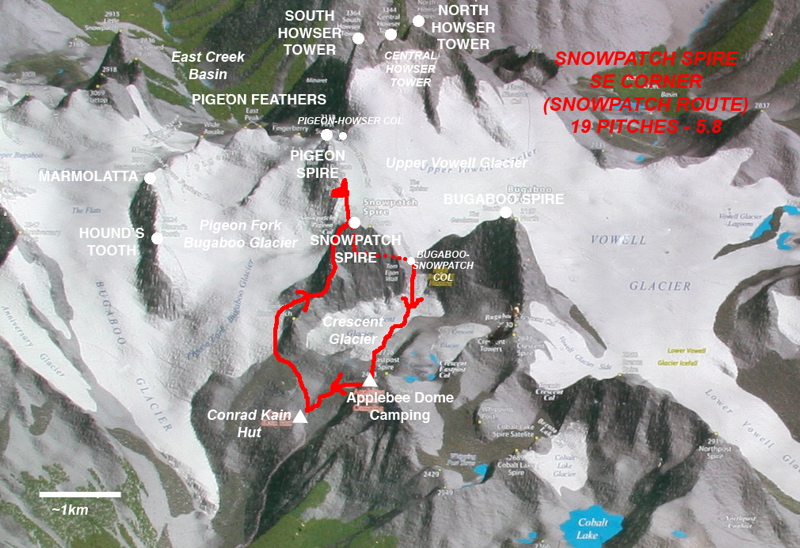
SNOWPATCH ROUTE (aka SE CORNER aka WIESSNER'S ROUTE), SNOWPATCH SPIRE
Date: August 9, 2007
Route: D-, 5.8, 19 pitches, ~500 m (1,600 ft)
Summit elevation: 3,084 m (10,120 ft)
Climbed by: Clint and Steph
We left Applebee Dome Camp at 4am and hiked down and around the toe of Son of Snowpatch and up to the notch between Son of Snowpatch and Snowpatch Spire. We were climbing by 7am, and we reached the summit by 1pm. We rapped the Kraus-McCarthy rappel route down the west face, traversed around to the Bugaboo-Snowpatch Col, and were back enjoying soup and ramen at Applebee Camp by 4pm. What a fun climb and a cool looking peak!
An illustrated pitch-by-pitch description of our adventure on the Snowpatch Route (SE Corner) on Snowpatch Spire is given below. The pitch numbering is from the topo in the Atkinson-Piche guide.
APPROACH
We left Applebee Dome Camp at 4am. We hiked the trail down to the Kain Hut and took a climber’s trail around the toe of Son of Snowpatch. We ascended snow and loose dirt to the notch between Snowpatch and Son of Snowpatch. It took us a couple of hours to reach the notch. We were beginning the roped climbing by 7am.
Photos:
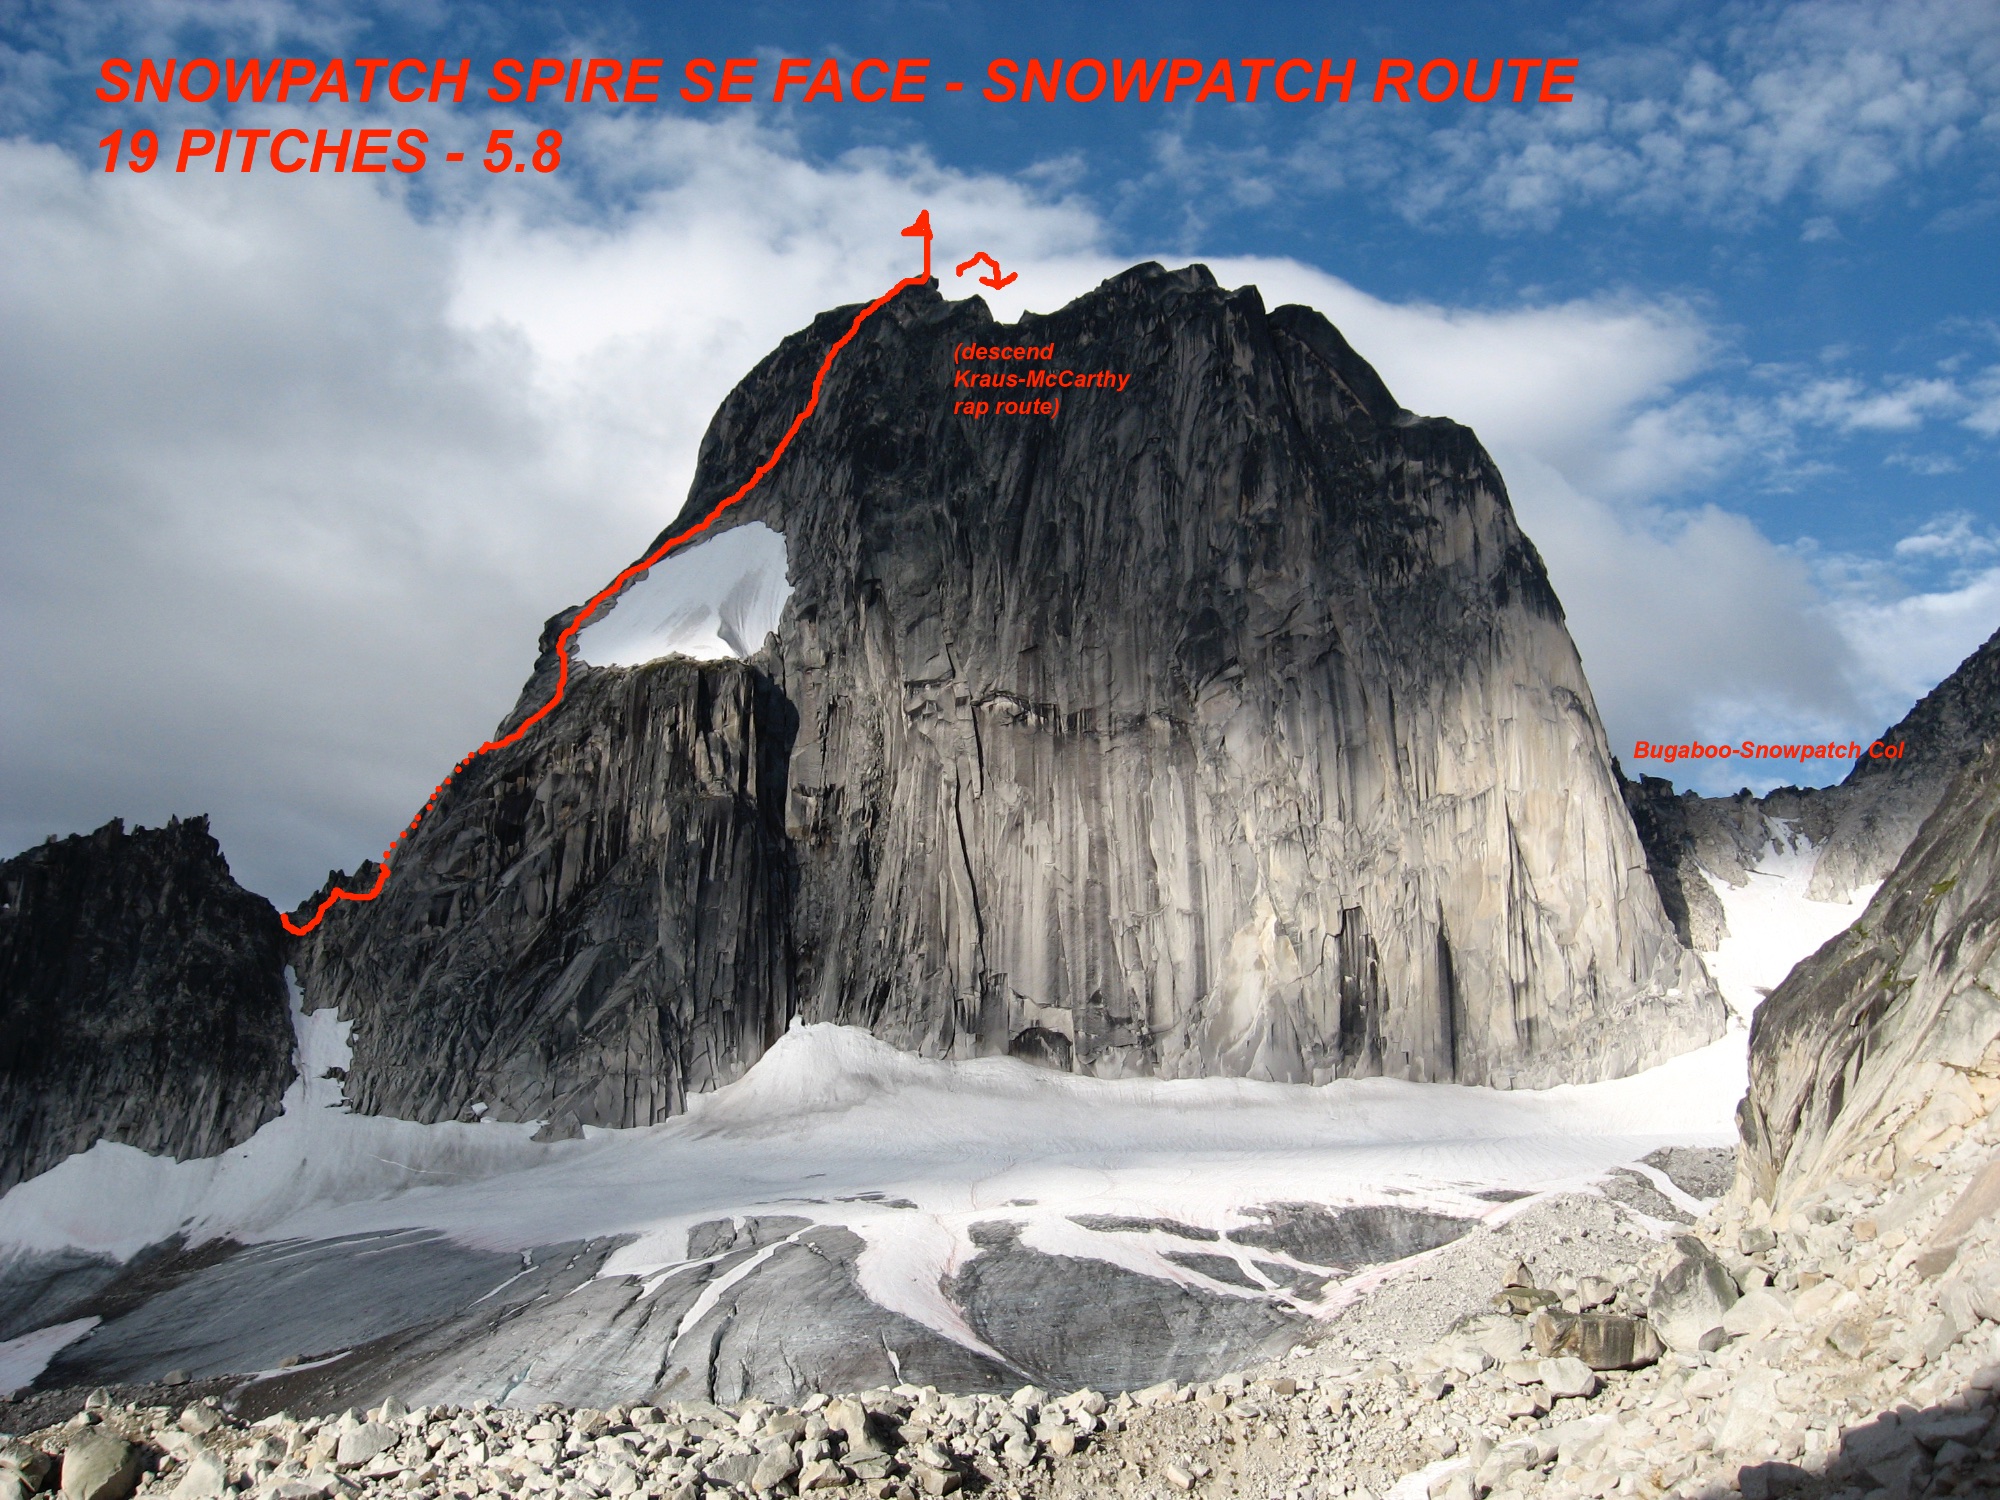
1. The Snowpatch Route (SE Corner) on Snowpatch Spire. This photo was taken a couple of days before the climb.
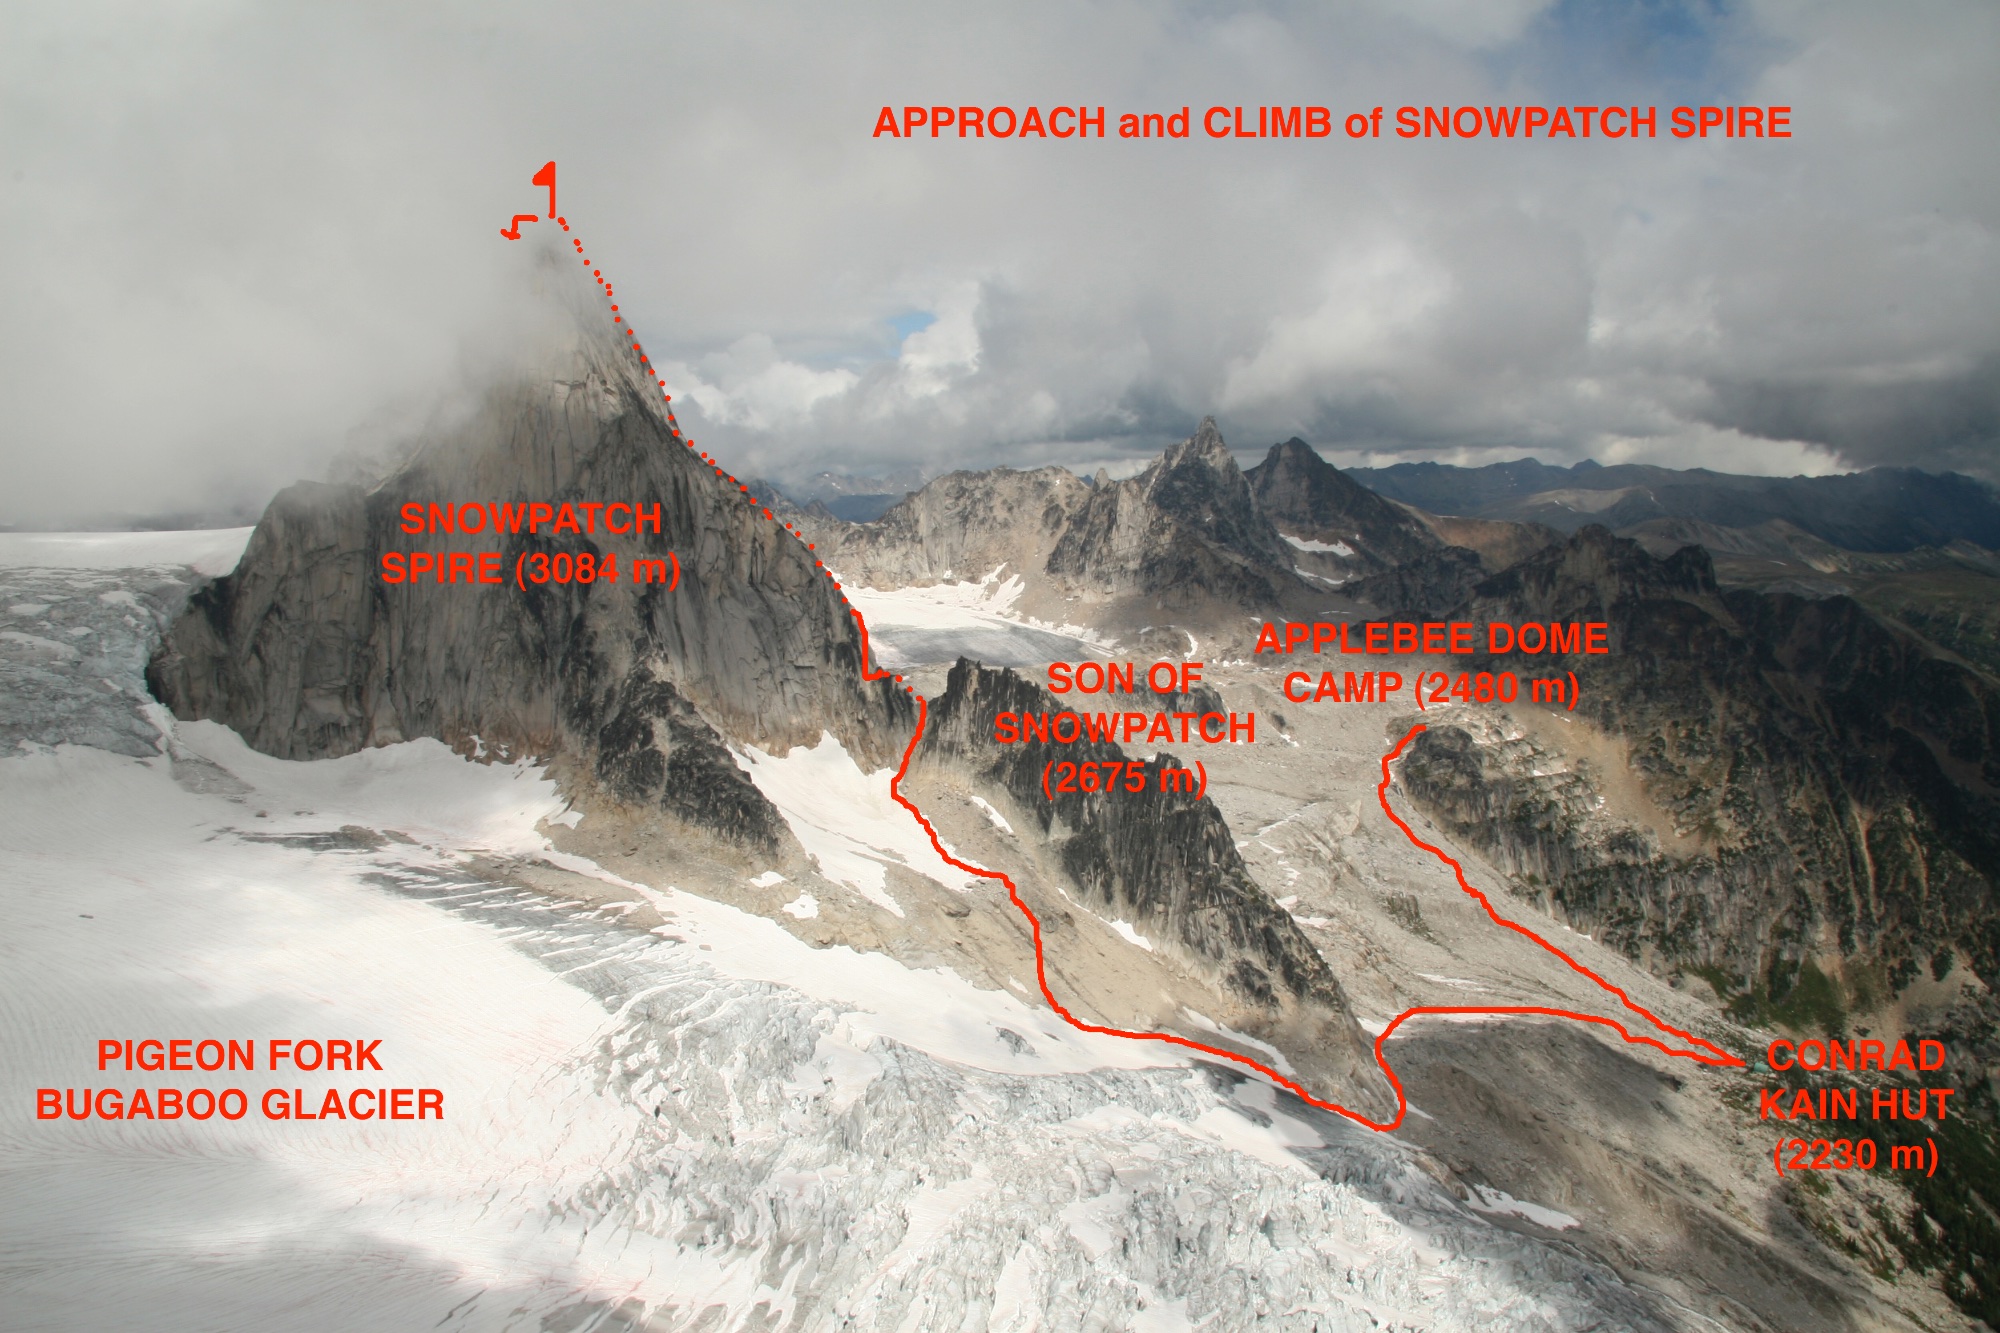
2. The approach and climb of Snowpatch Spire. This photo was taken the day before from the summit of Hound’s Tooth.
3. Ascending the loose dirt slopes to the notch between Snowpatch and Son of Snowpatch.
4. Ascending to the notch, the Bugaboo Glacier in the background.
5. The notch between Snowpatch and Son of Snowpatch.
6. Lots of clouds during the climb, but the rain did not materialize until after we got back to camp.
7. Son of Snowpatch.
PITCHES 1-3
We scrambled up the first three pitches unroped. From the notch between Son of Snowpatch and Snowpatch, contour down the Kain Hut Basin side slightly until able to scramble up broken ground bypassing two small pinnacles on the ridge to gain the ridge-crest proper where it steepens. Several off-route variations exist to the right of the ridge at about 5.9 to gain the ridge higher up. Cross the crest back to the Bugaboo Glacier side and follow a descending ledge system to gain the base of a dihedral overlooking the approach gully.
The photos shows Clint ascending the Kain Hut side back up the ridge.
PITCH 4
Climb the dihedral for one low-fifth pitch.
This photo was taken looking down Pitch 4.
PITCH 5
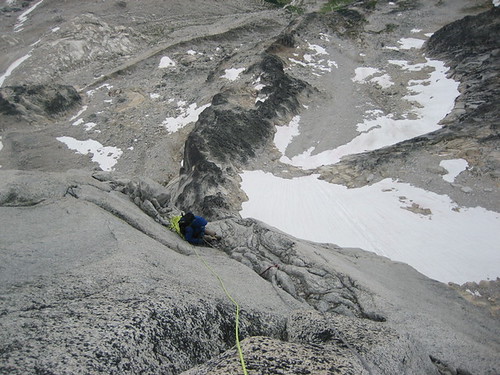
Climb the low-fifth cracks on the right wall to gain the spur and a belay at the base of a steeper wall known as the Weissner Overhang.
This photo shows Steph near the top of Pitch 5, with the Pigeon Fork of the Bugaboo Glacier far below.
PITCH 6
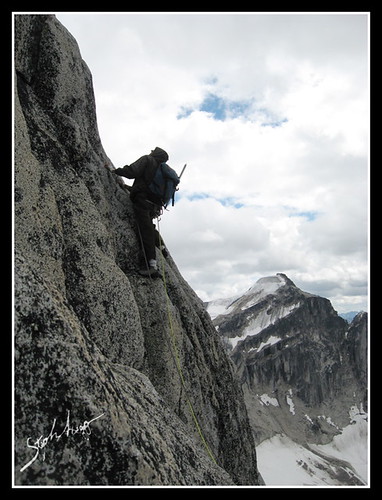
Drop down right to follow a rising mid-fifth class hand traverse on the white slab below a bulging black wall. Belay on its end below a small ledge below the snowpatch.
The photo shows Steph leading Pitch 6 just before the hand traverse under the bulging black wall. This was one of my favorite pitches on the route. As on the Beckey-Chouinard route, notice I wore my approach shoes the entire route - they worked out great!
PITCHES 7-11
Pitch 7 climbs straight up to gain slabs below the snowpatch. Then four long pitches lead up the slabs left of the snowpatch. The climbing is easy fifth class but protection and ledges are scarce.
The photo shows Clint climbing up to the left of the snowpatch. We simulclimbed Pitches 7-13.
PITCHES 12-13
Follow broken ground for two more low-fifth class pitches, trending steadily right to a belay behind a large flake known as the Inverted Pear.
This photo shows Clint climbing up to the Inverted Pear. We simulclimbed these pitches along with Pitches 7-11.
PITCHES 14-15
Pitches 14 and 15 (as described in the topo) can be linked, since these two pitches are short and do not create rope drag to be linked together. Pitch 14 continues along the ledge system to the base of a left-facing white corner. The harder climbing starts here. These upper pitches are not long but the route-finding is convoluted and rope drag is a concern. At the start of the white corner, slings out right in another corner mark the off route Honeymoon Variation. Pitch 15 climbs the first corner past fixed pins to a flake and frictions out left below a bulge to a slab belay below a short dike and offwidth.
The photo shows Steph climbing the white corner of Pitch 15. Pitch 16 goes off the left corner of the photo.
PITCH 16
Either face climb or off-width the short steep wall at 5.8 to another slab and a belay at its top.
This photo shows Clint climbing the vein to the right of the off width. The topo marked this as 5.6 but I would say it is more like 5.8.
PITCH 17
Climb a short section up steep flakes to a hand-traverse left past fixed pins. Make an awkward move left around a jutting flake and climb hollow 5.7 cracks up the short, steep white wall past fixed pins to a ramp. Shuffle right along the ramp to a belay.
We split this pitch into two pitches. The first photo shows Steph at a belay at the top of the steep flakes. The second photo shows Clint leading the tricky hand traverse.
PITCHES 18-19
One or two easy pitches lead to the south summit.
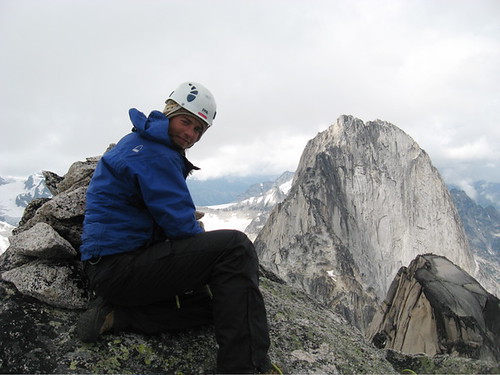
The photo shows Clint on the south (highest) summit of Snowpatch Spire, at 3,084 m (10,120 ft).
SUMMIT
We arrived on the summit at 1pm, 6 hours after we started the roped climbing. We were lucky to have pretty decent weather (some clouds, but no rain until we got back to camp). Snowpatch Spire sits in the middle of the Bugaboo group, so has a great view of the Bugaboo Glacier Peaks, Pigeon Spire, the Howser Towers, Bugaboo Spire, Crescent Spires, and Applebee Dome Camp.
DESCENT
We descended down the Kraus-McCarthy rappel route on the west face of Snowpatch Spire. This was a very good descent route – ledges at every rappel station, minimal loose rock, single-rope (30m) raps from chain anchors. It took us 8-9 single rope raps. We were back to camp in no time!
Photos:
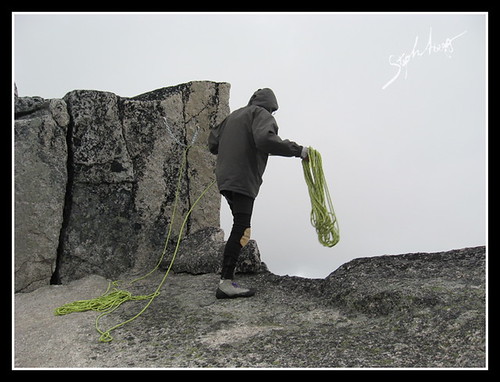
1. "I hope it reaches….” Beginning the rap route.
2. View of East face of Pigeon Spire from the descent.
Other Photos from the Bugaboos.
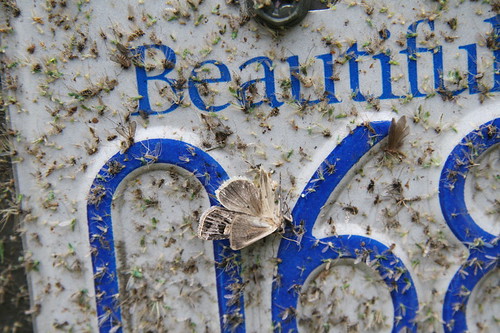
We hit lots of bugs on the way up to the Bugs. Fortunately, the bugs were not a problem in the Bugaboos themselves.
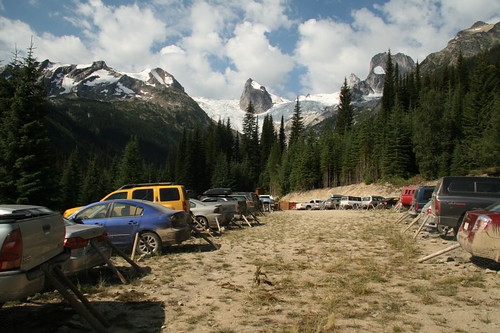
The parking lot was full because of the August long weekend. It was hard to find enough chicken wire to wrap the car to protect it from the Rubbervorious Bugaboo Porcupine.
Applebee Dome Camp when we arrived. The place was packed because of the August long weekend.
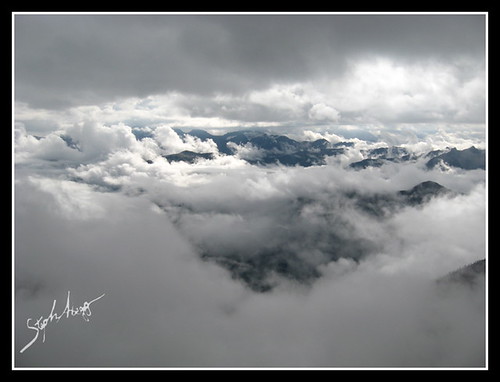
Typical Bugaboos view.
We spent a lot of time in the tent while it rained outside, but we did manage to get in 2 great climbs in 5 days.
What you do most of the time in the Bugaboos….
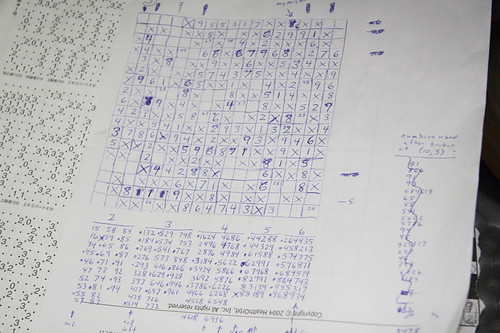
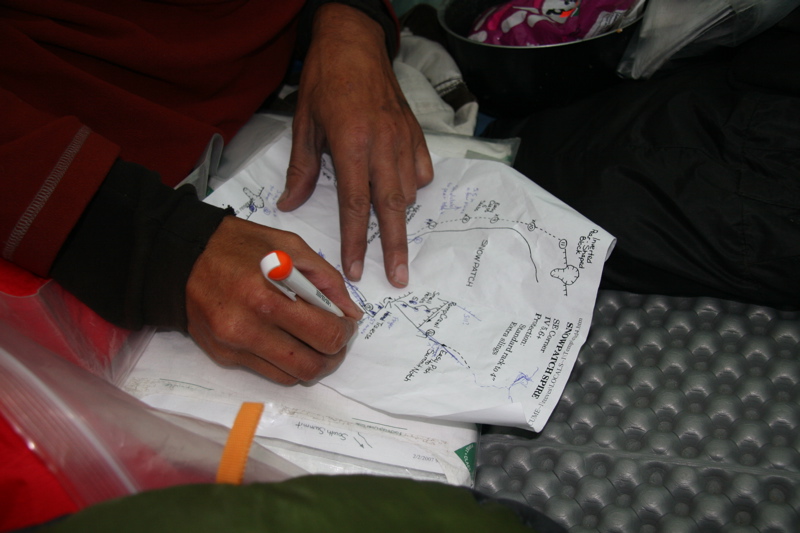
Making improvements to the topo after the climb.
Booty from our climbs in the Bugaboos (alien, biner, and sling from Beckey-Chouinard; ice screw from descent down east face of South Howser Tower; tricam from Snowpatch Route (SE Corner) on Snowpatch Spire).
Typical Bugaboos weather at Applebee Dome Camp.
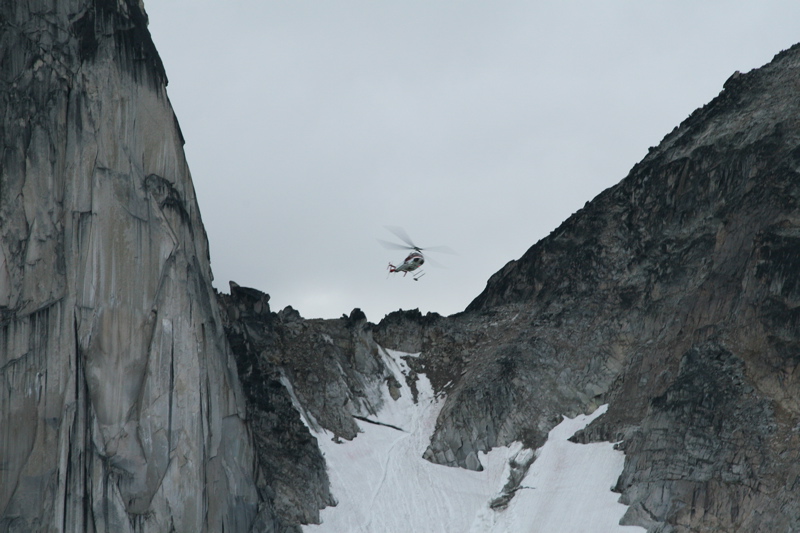
Our friend Dan slipped at the top of the Bugaboo-Snowpatch Col and fell all the way to the bottom, and ended up breaking an ankle and getting a helicopter ride. The Bugaboo-Snowpatch Col was in decent condition during our time in the Bugaboos, but the snow is steep and the conditions ranged from slushy to icy. Every year climbers get hurt going up to or down from the col.
Next Climb with Clint
Clint and I had a great trip to the Bugaboos. Thanks Clint for being a great climbing partner! How about tackling some of those cracks on the Great White Headwall….?
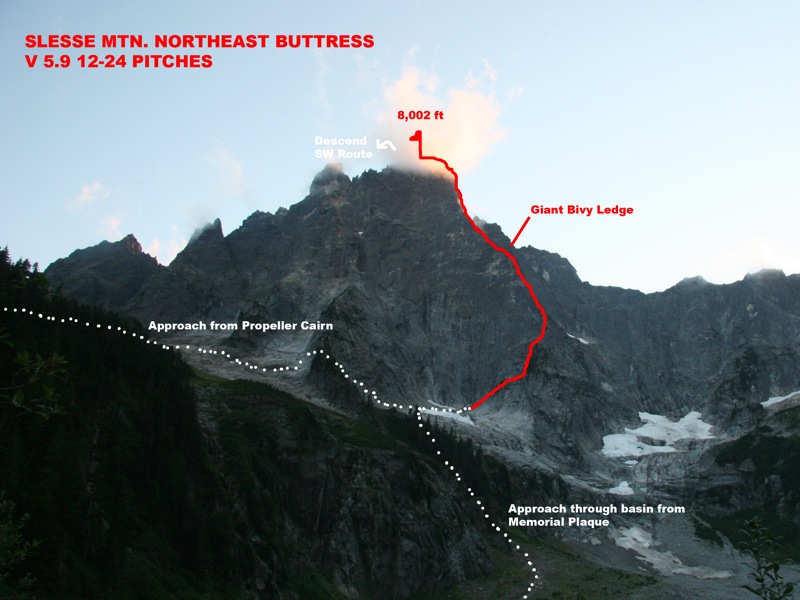
Clint and I had planned on climbing the Northeast Buttress of Slesse before he made his long drive back to California. However, by mid-August the pocket glacier had not yet slid; we had decided not to climb Slesse unless the pocket glacier slid, in light of the unfortunate death of a climber earlier in the season from a calving chunk of glacier. So Clint drove home to California, and we put Slesse on hold for another year. However, when the pocket glacier slid at the end of August and a great stretch of weather appeared in the forecast, Clint and I revisited our plans to climb the Northeast Buttress of Slesse. I mid-September, Clint drove all the way from California, and off we went for another great climb together! Click this link for a trip report of the Northeast Buttress of Slesse.
The route up the NE Buttress of Slesse. 2500ft of stellar climbing! (This photo was taken from the Memorial Plaque on the east side of Slesse on a hike the previous year).
Aerial Photography Adventures over the Bugaboos
In the years since this trip report, I've had the incredible experience of flying over the Bugaboos with pilot/photographer John Scurlock. To see some of these aerial photos, check out my aerial photography page ("aerial trip reports" section).
Video
Video taken while flying around the Bugaboos doing aerial photography, March 9, 2013.
Useful beta. Updated route information. Corrections. Historical notes. Interesting facts. No fluff please. Please do not put links in your comment, as my spam filter will filter those comments out.