Bugaboos 2016: South Howser Tower Beckey-Chouinard, Bugaboo Spire Northeast Ridge, Snowpatch Spire Sunshine Crack, Snowpatch Spire Surf’s Up

Bugaboos 2016: 4 Climbs

Routes:

- South Howser Tower, Beckey-Chouinard (5.10, 2000')
- Bugaboo Spire, Northeast Ridge (5.8, 1500')
- Snowpatch Spire, Sunshine Crack (5.11-, 900')
- Snowpatch Spire, Surf's Up aka Southwest Ridge (5.9, ~700')

Stellar weather + Awesome partners + Bugaboo granite = Spectacular week in the Bugaboos!

Region: British Columbia
Elev: 3,412 m / 11,194 ft (S Howser); 3,204 m / 10,512 ft (Bugaboo); 3,084 m / 10,120 ft (Snowpatch)
Rock type: Granite
Type: 
Date(s): July 23-30, 2016 (Sat-Sat)
Partner(s): Jon Pobst (all climbs), James Fletcher & Stewart Matthiesen (Climbs 1 & 4)

Route Overlays

CLICK TO ENLARGE

Intro

THIS TRIP REPORT IS STILL MOSTLY IN THE EMBEDDED HTML FORMAT OF MY OLD WEBSITE.

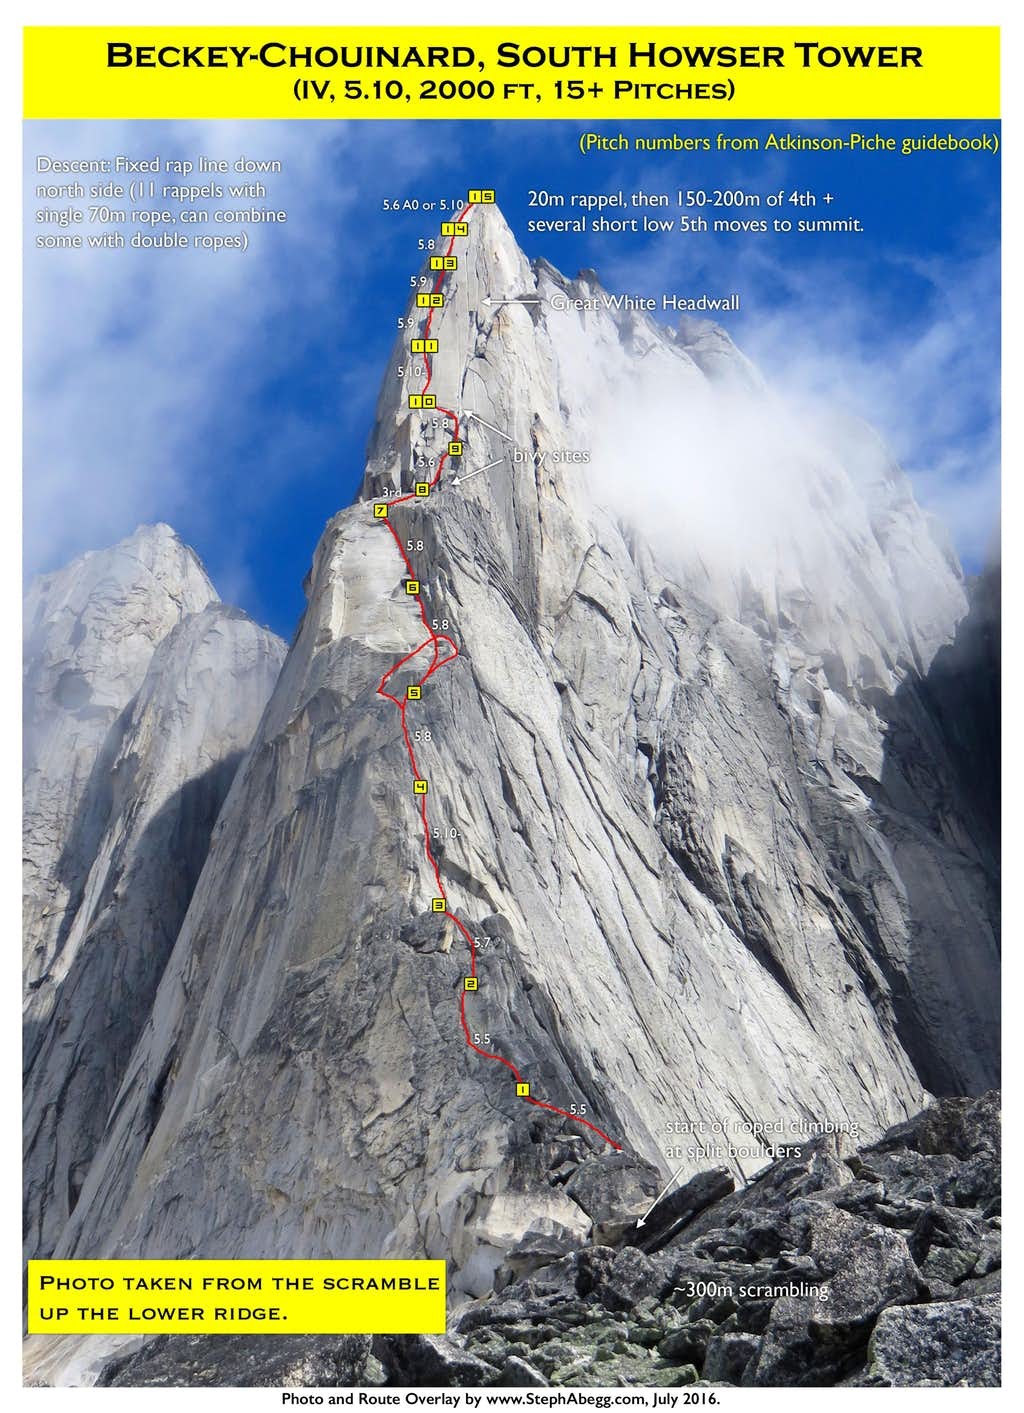
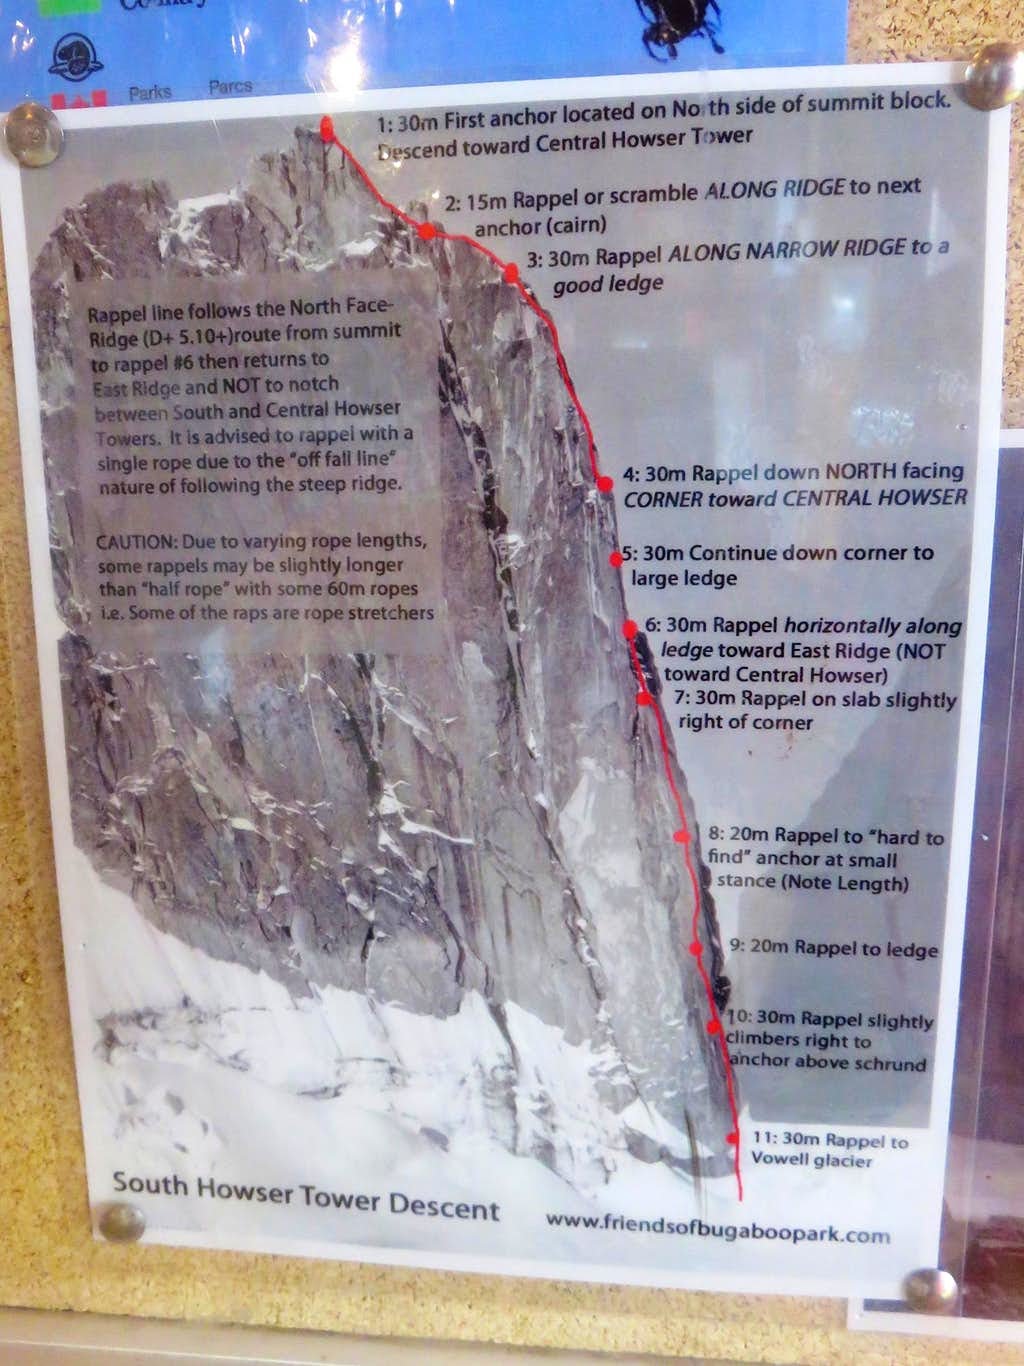
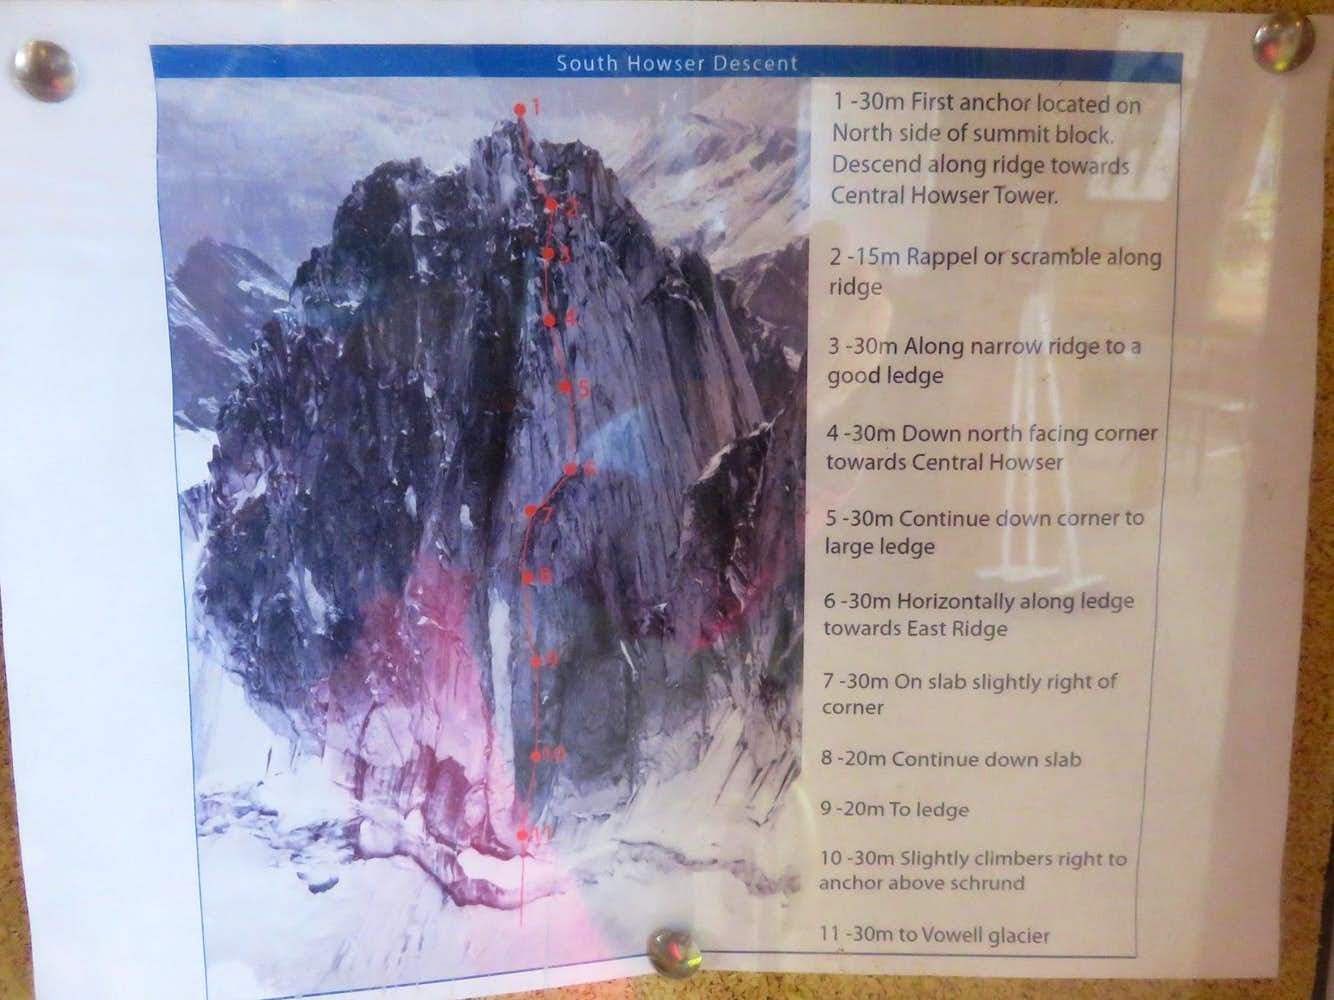
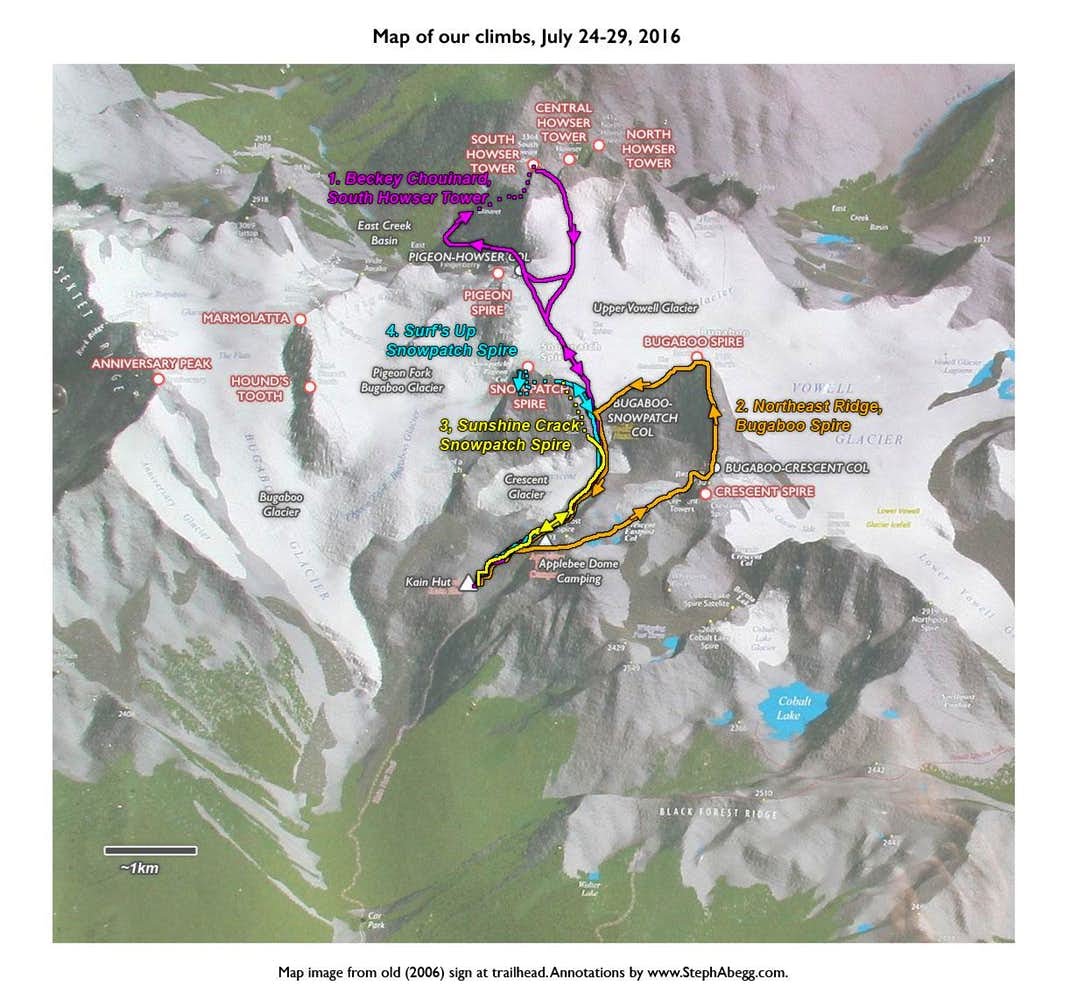
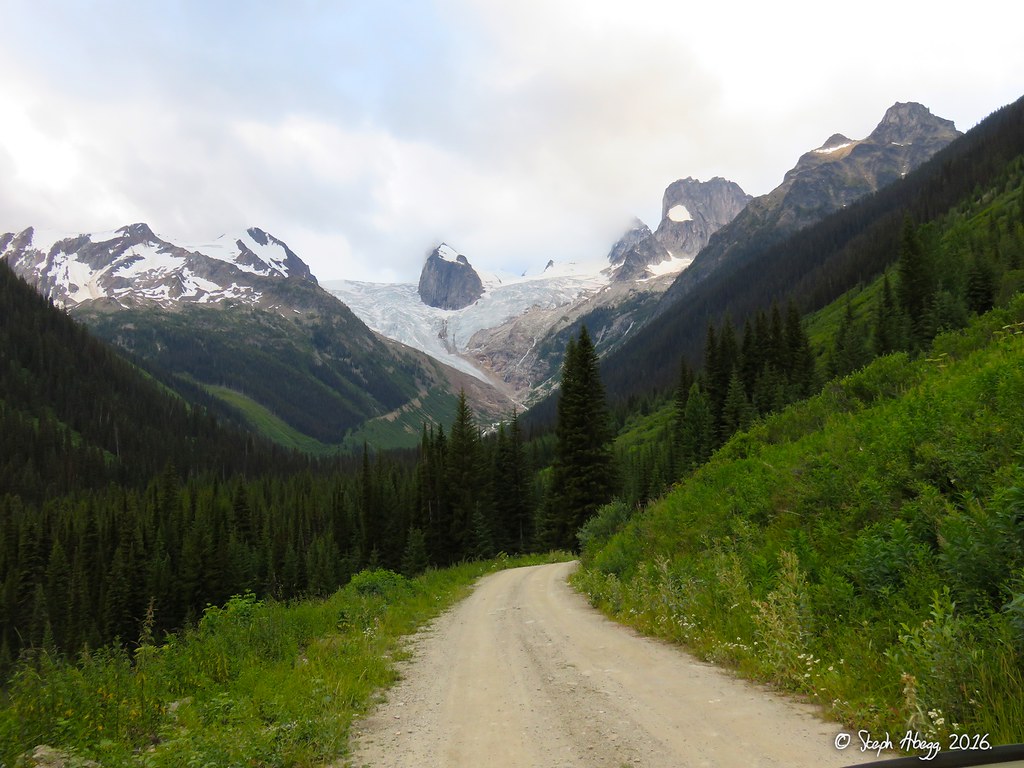
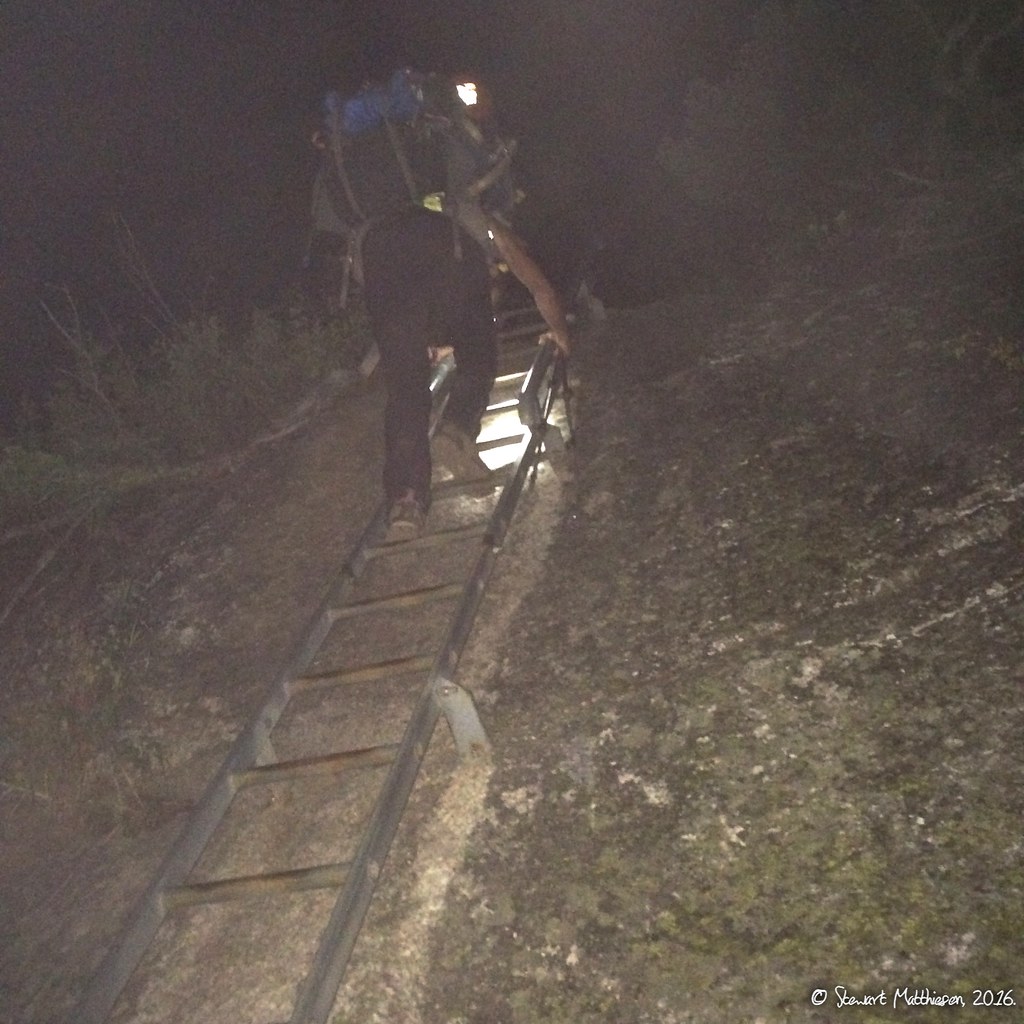
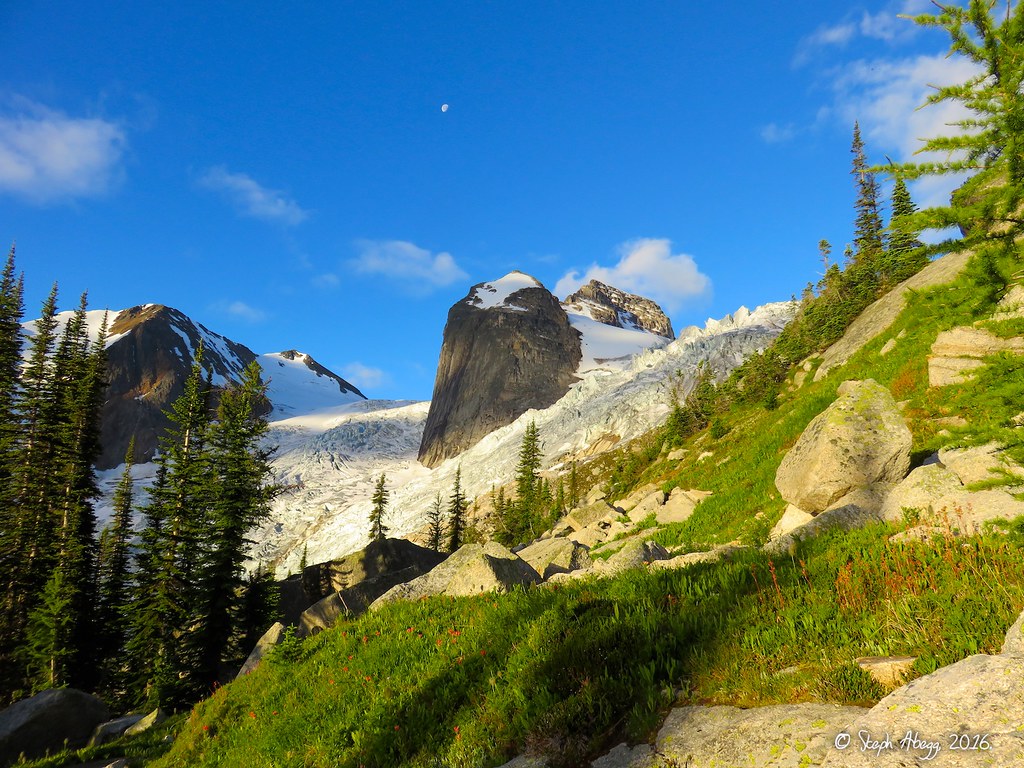
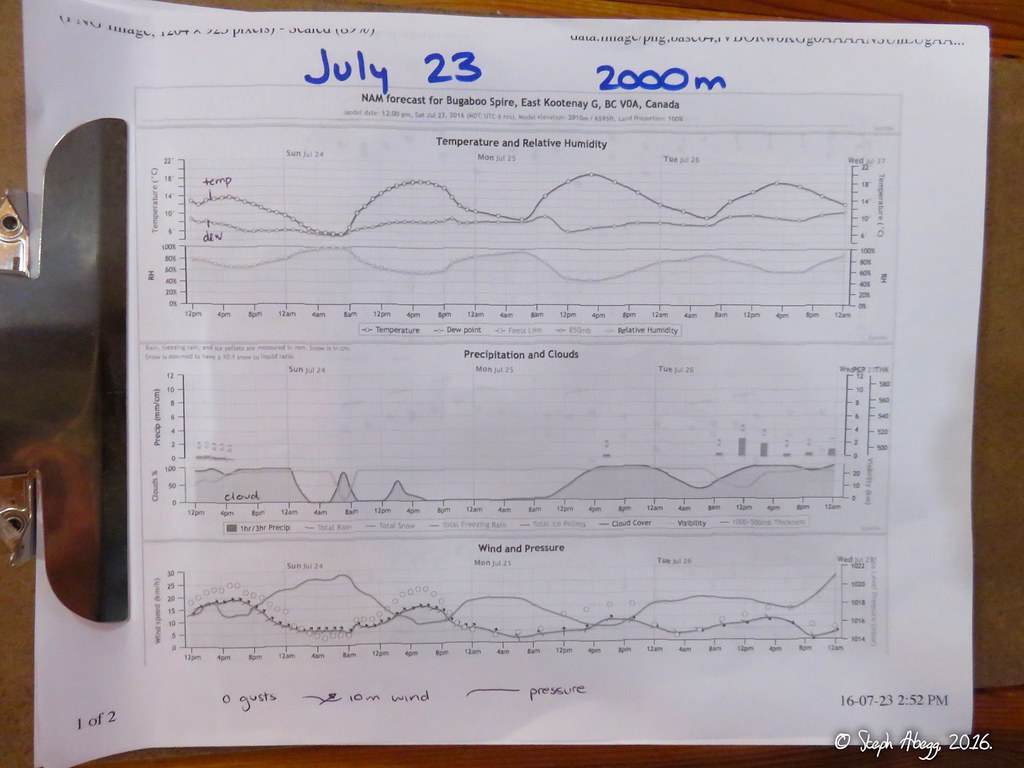
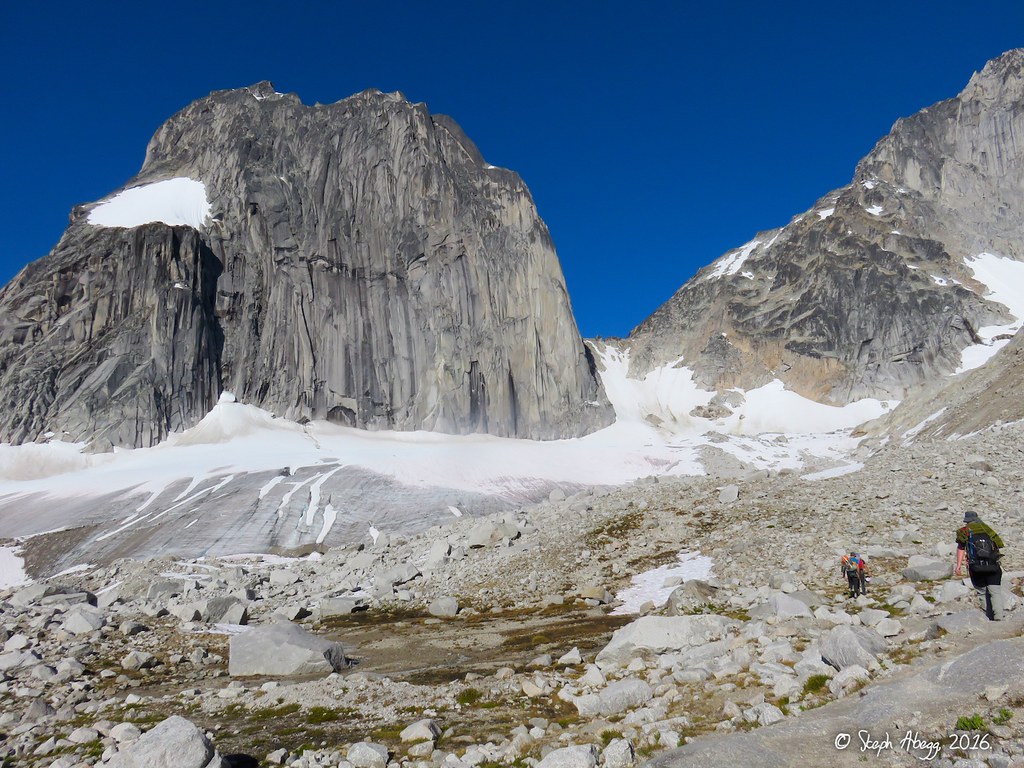
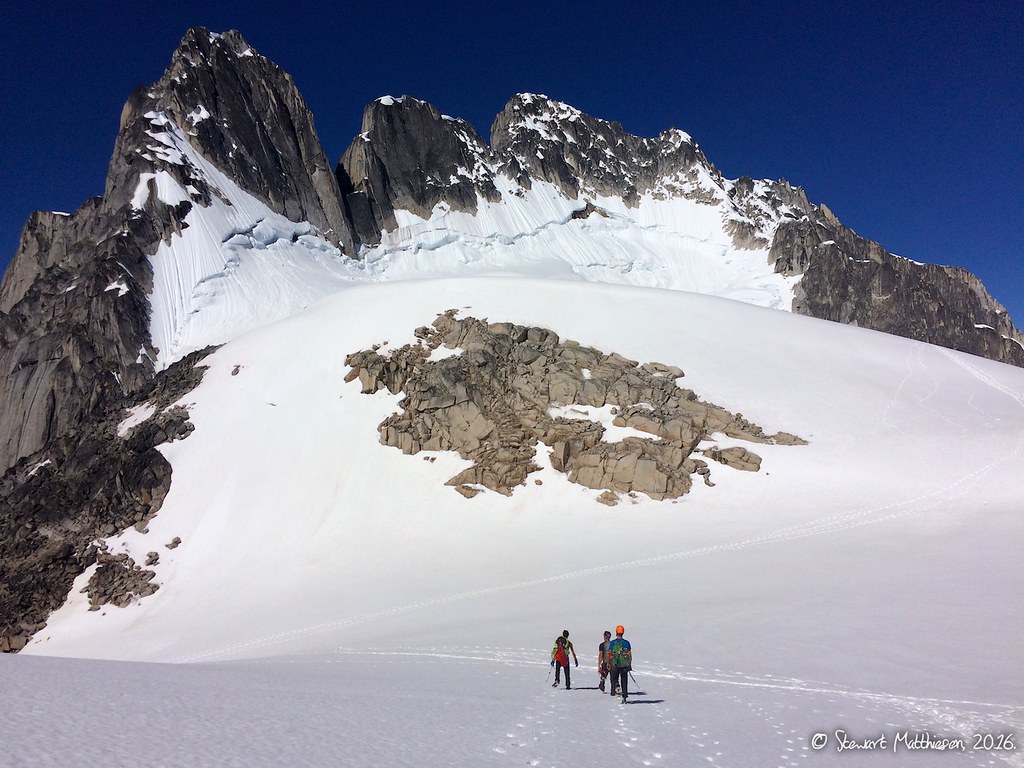
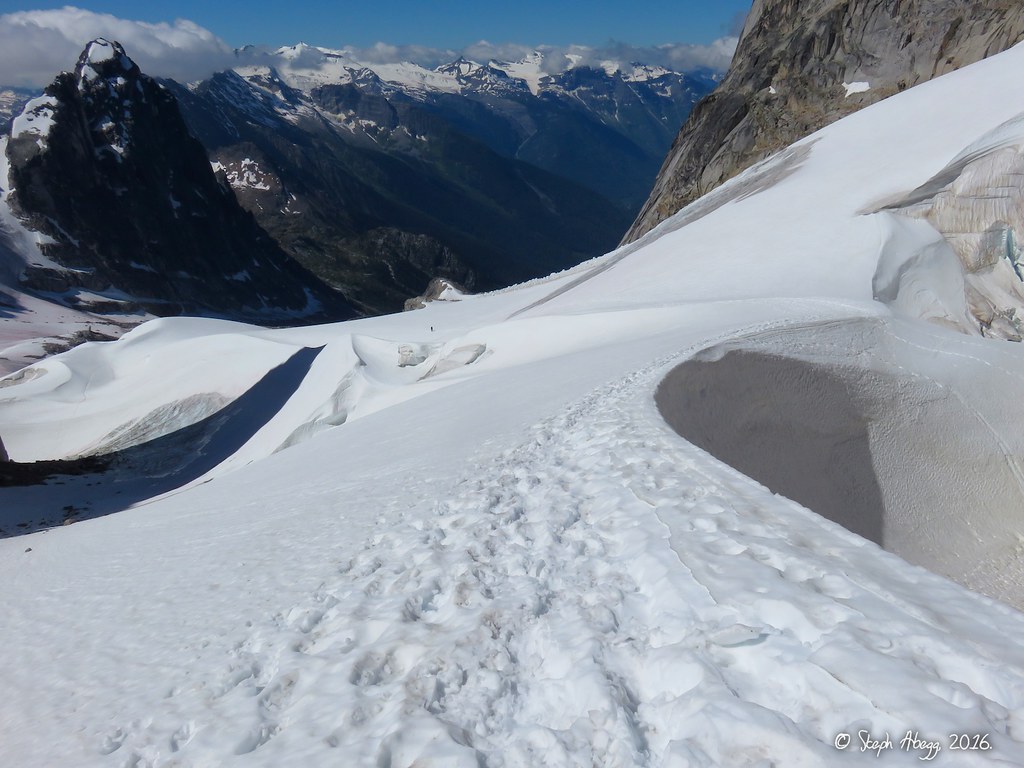
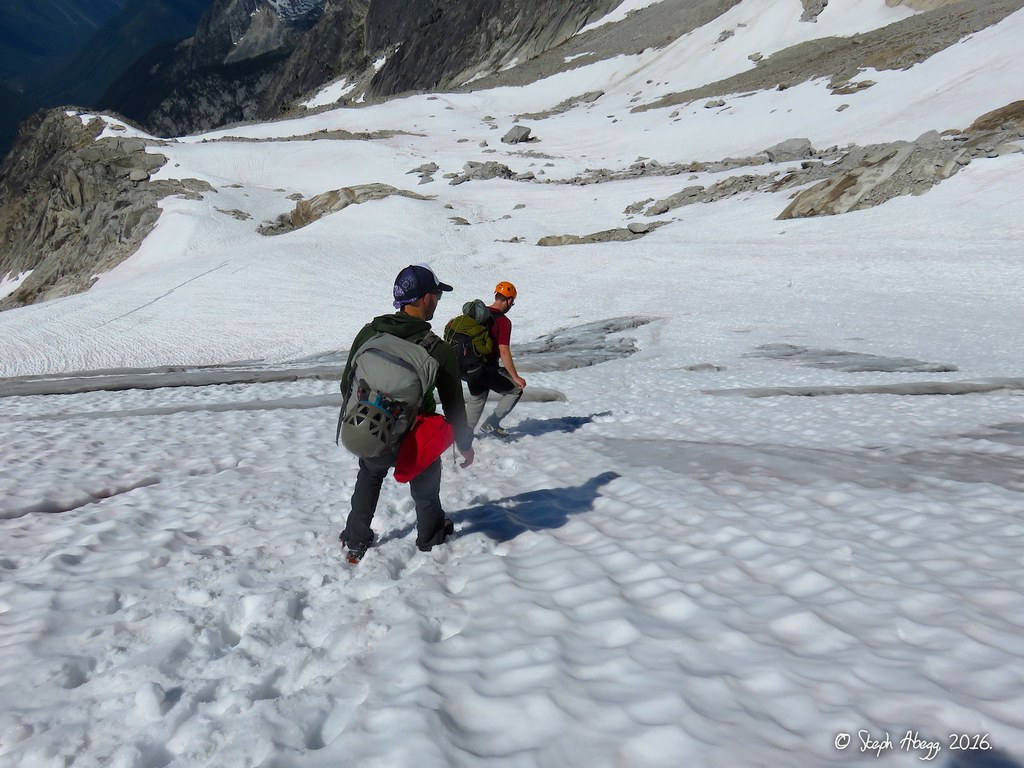
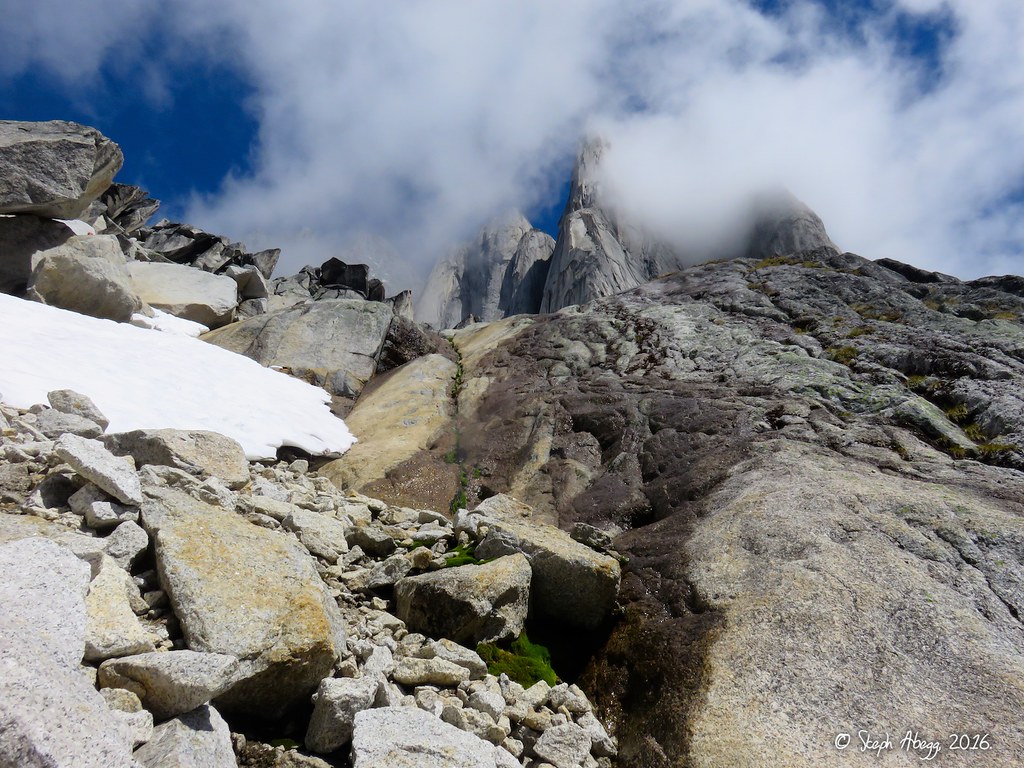
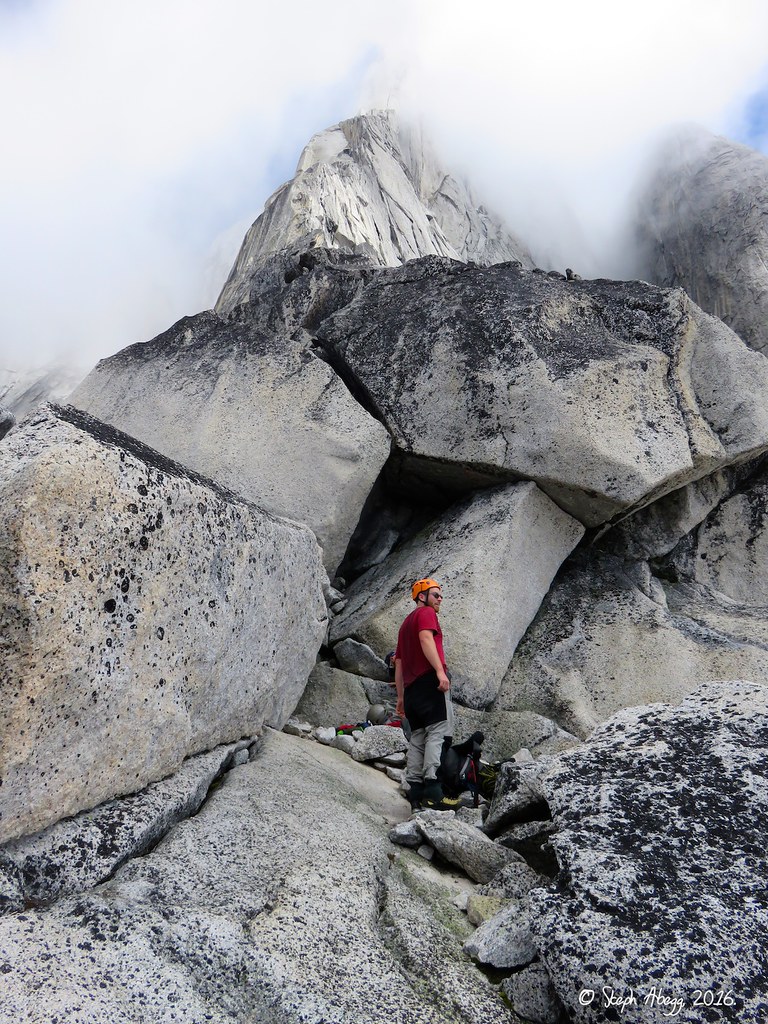
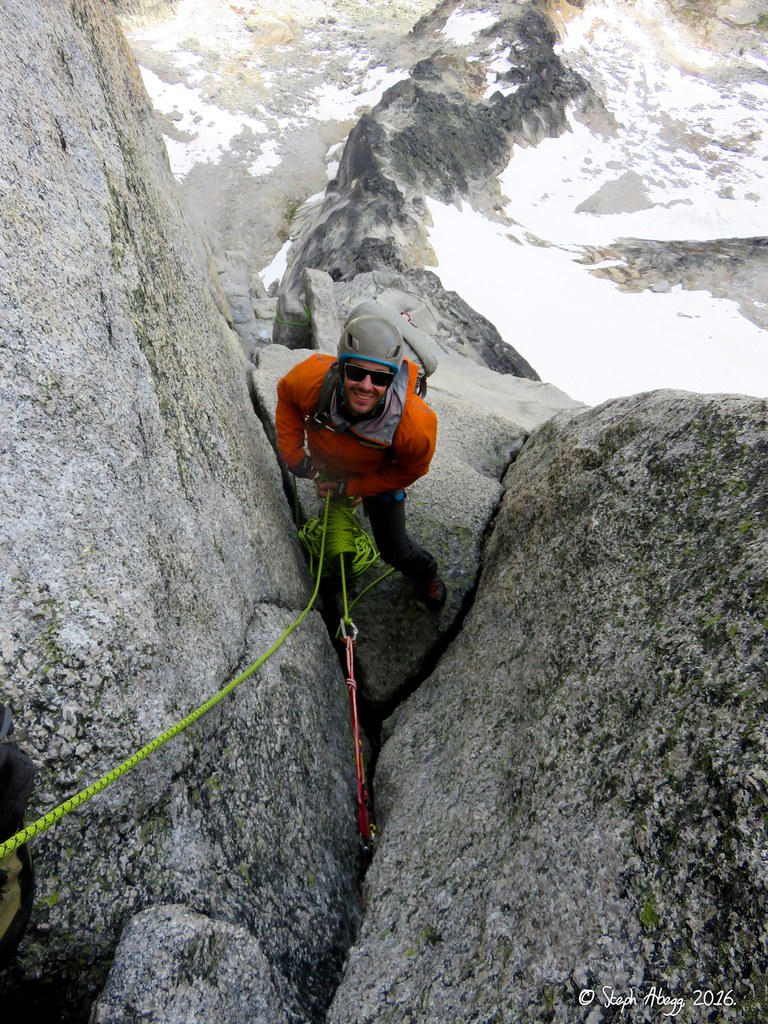
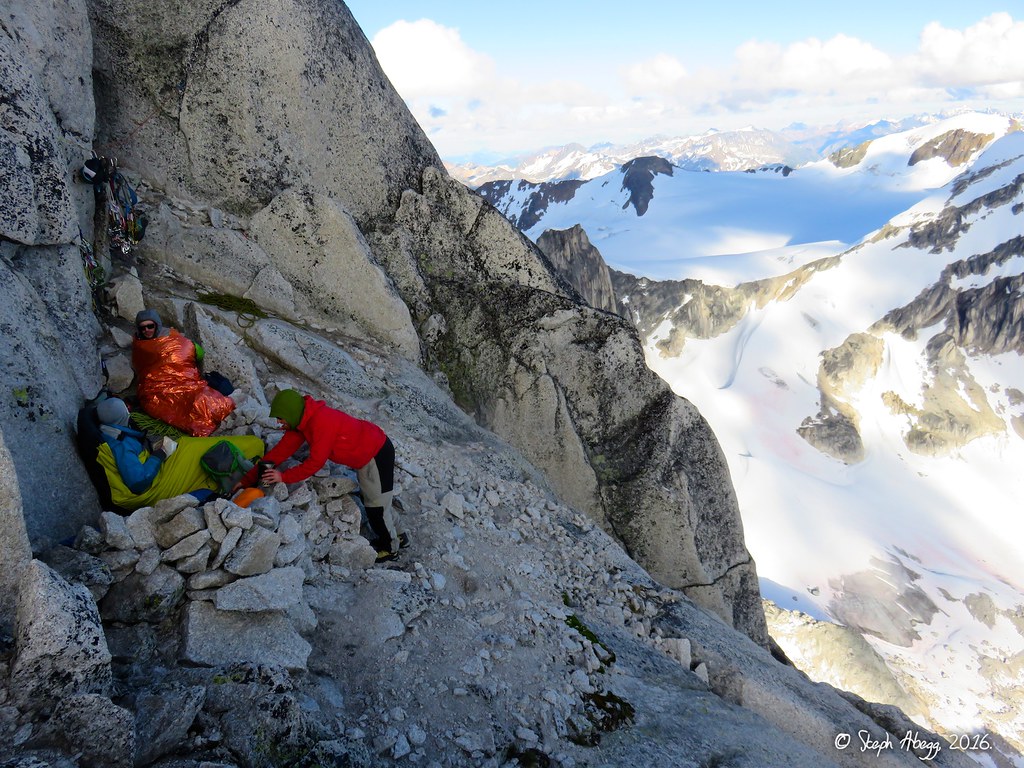
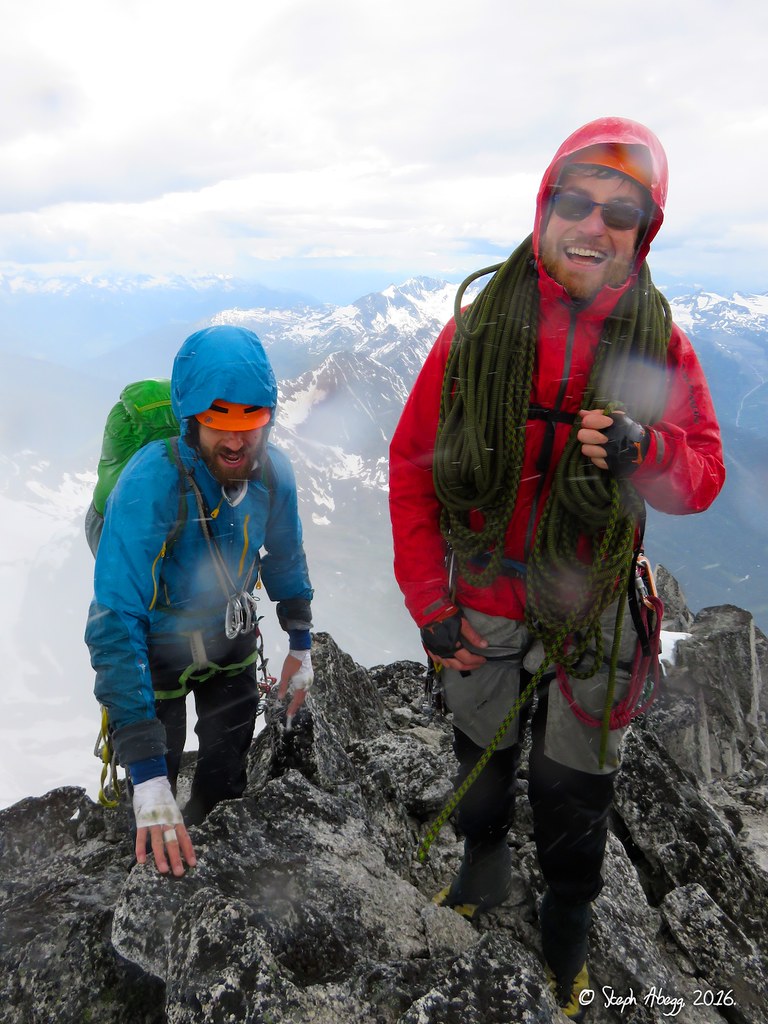
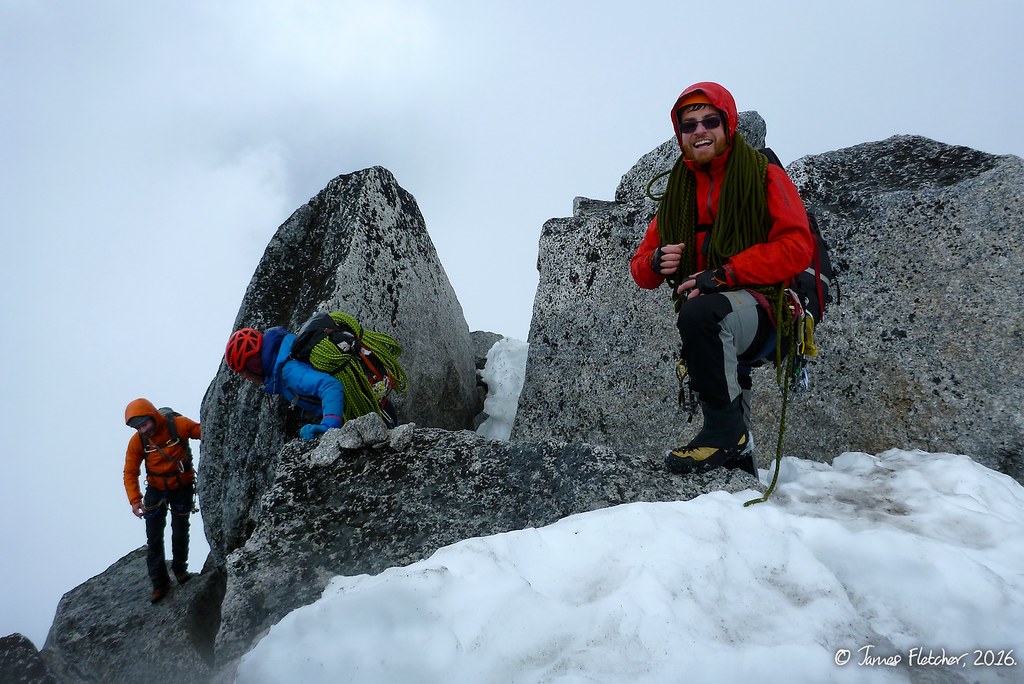
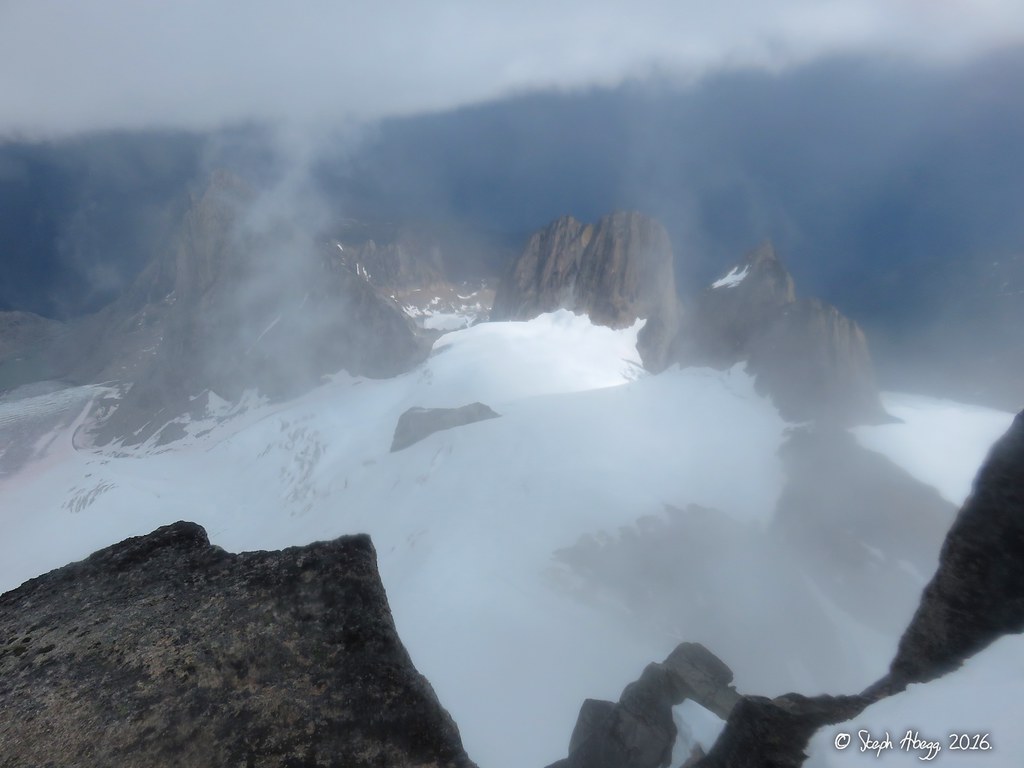
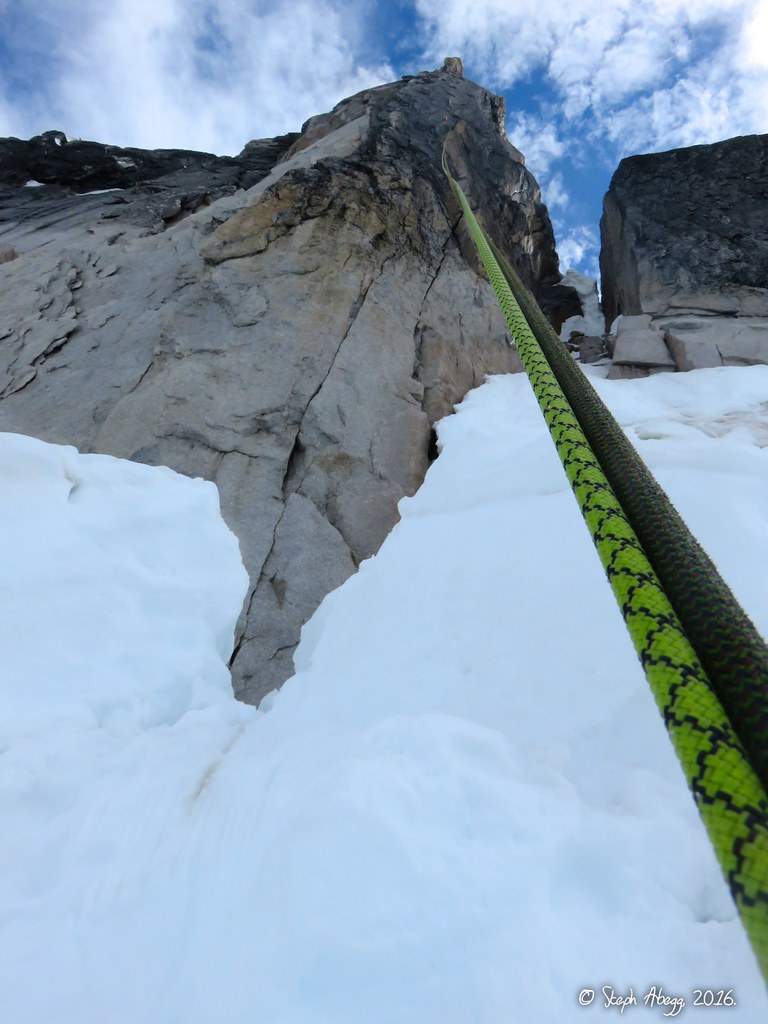
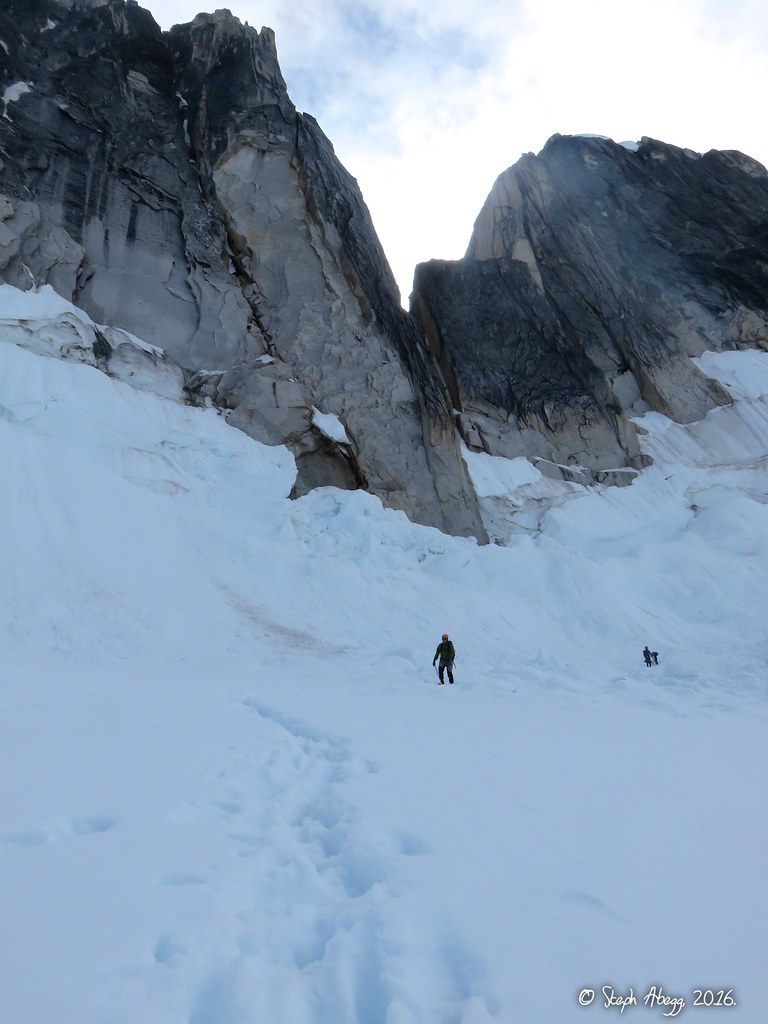
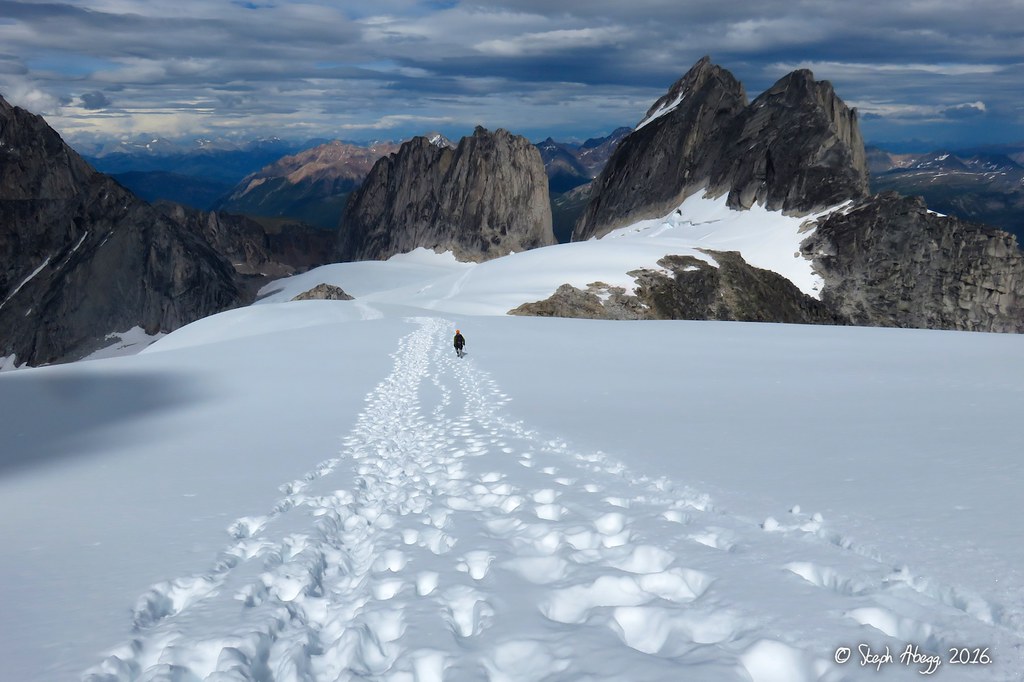
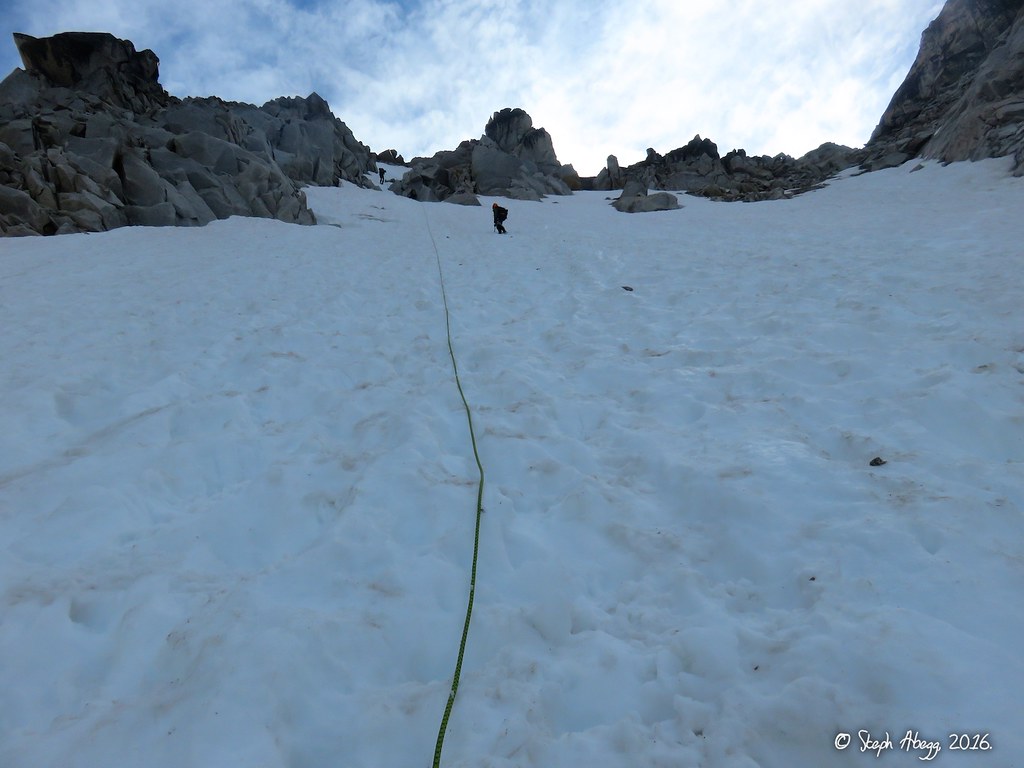
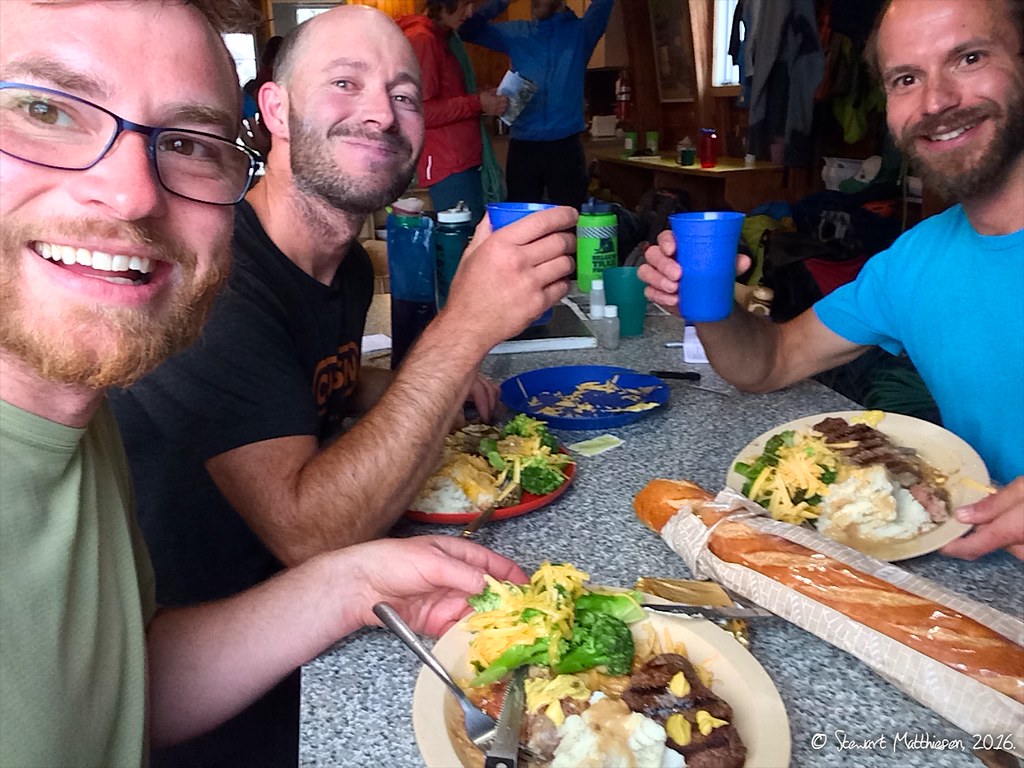
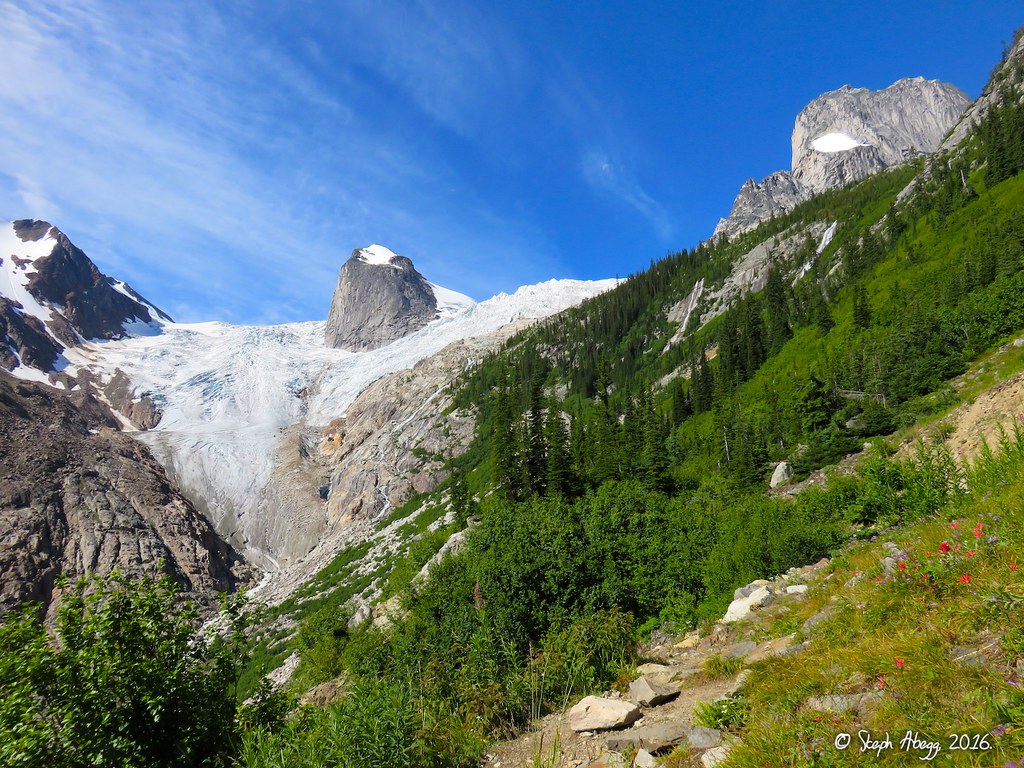
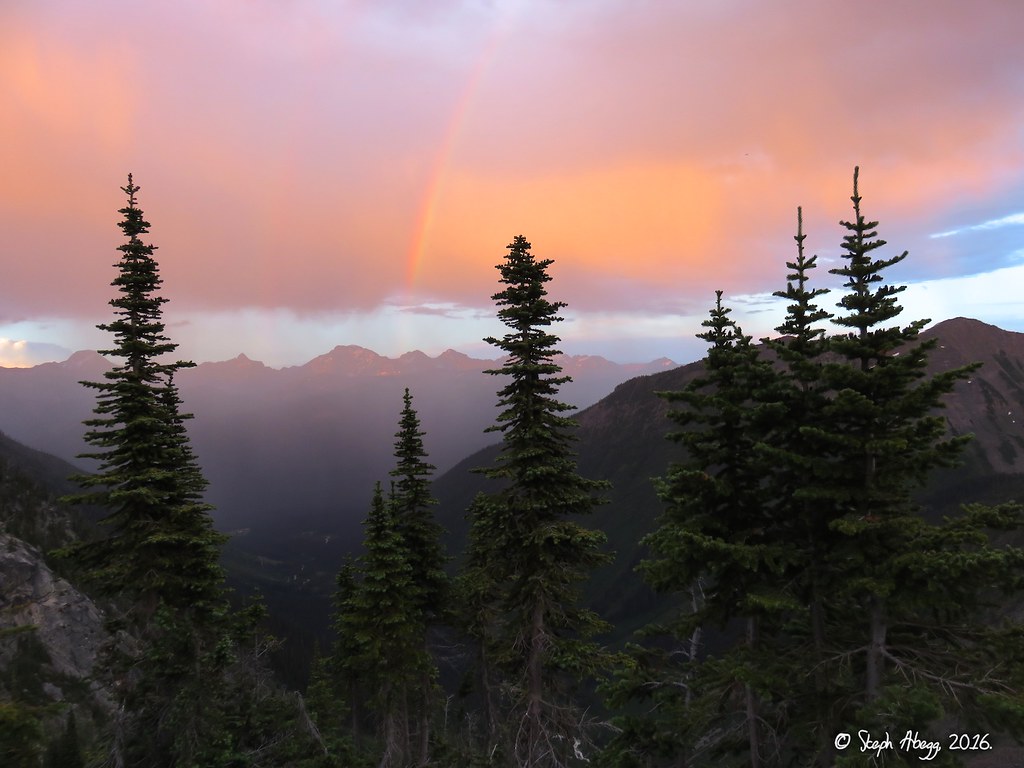
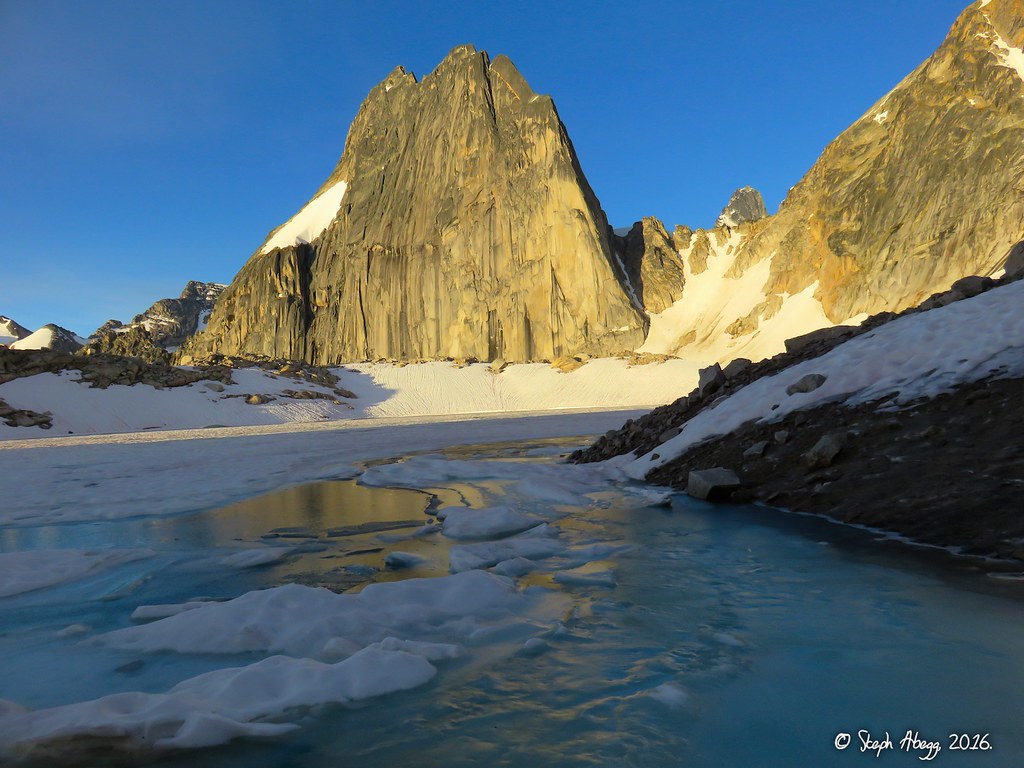
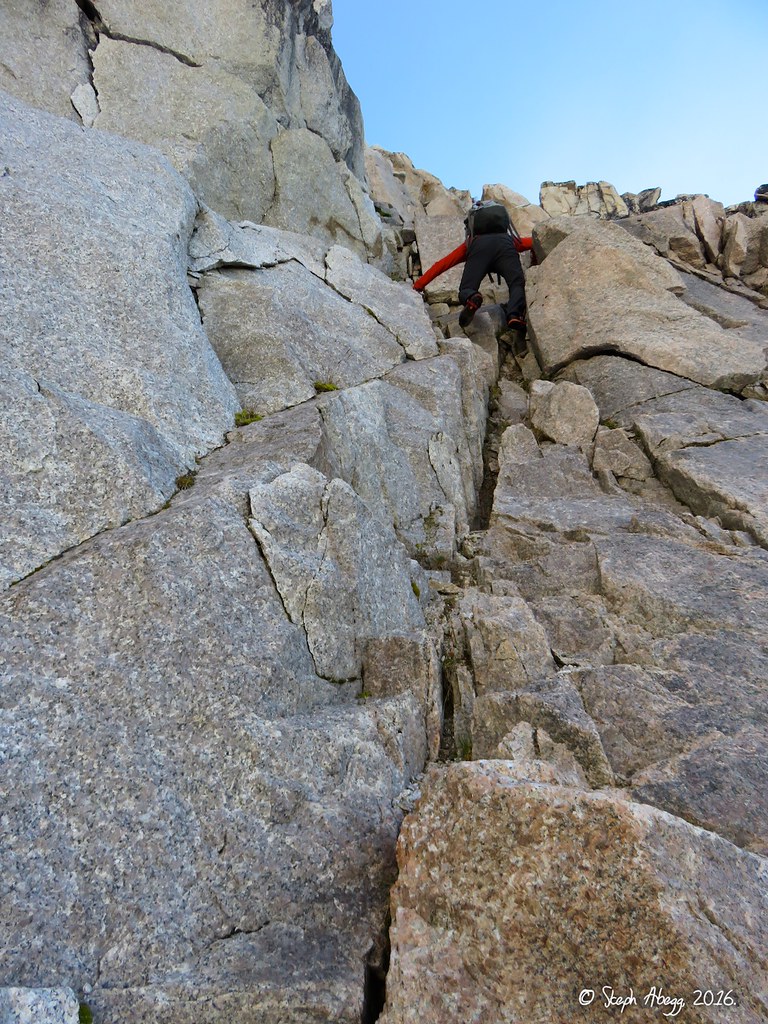
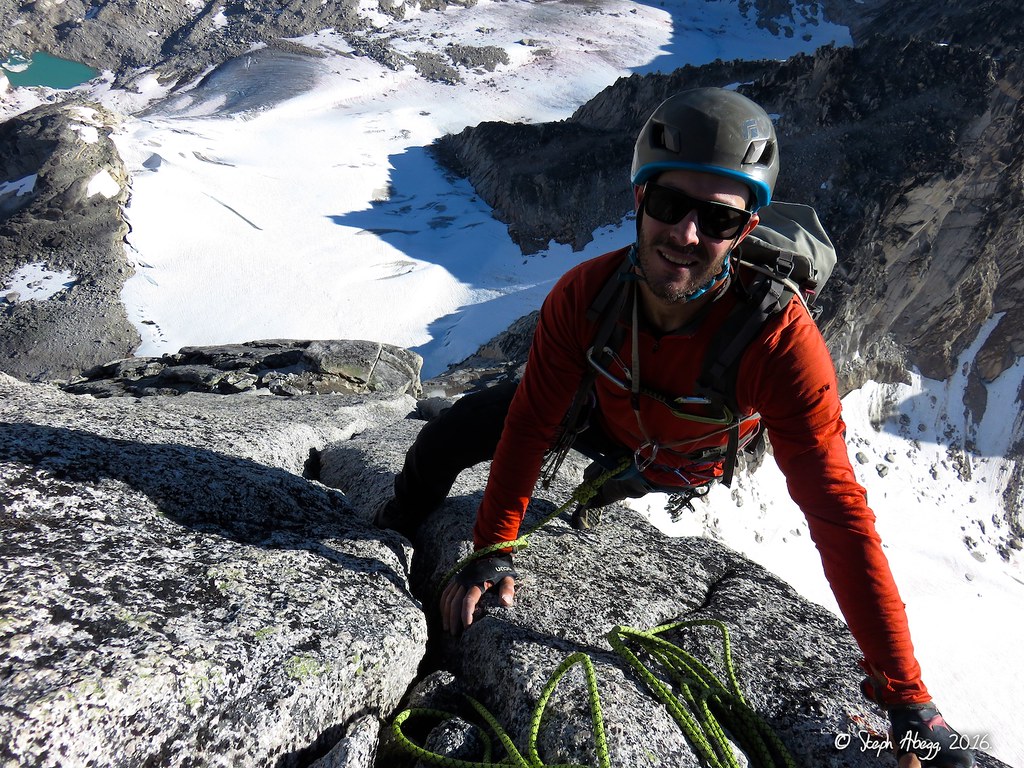
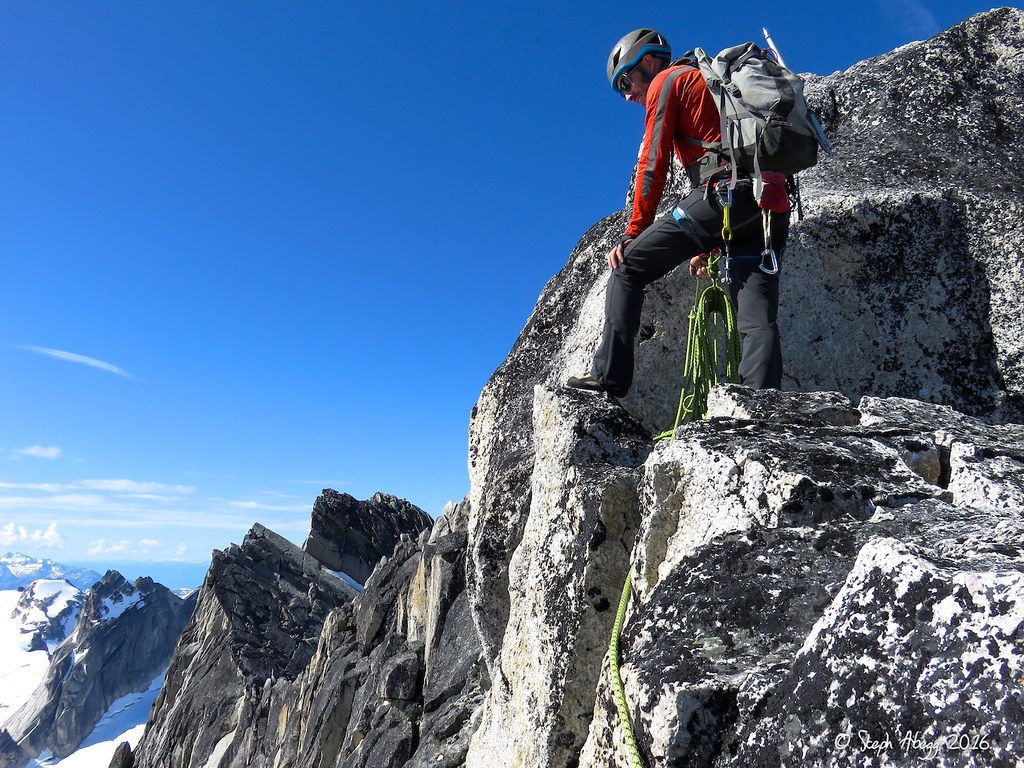
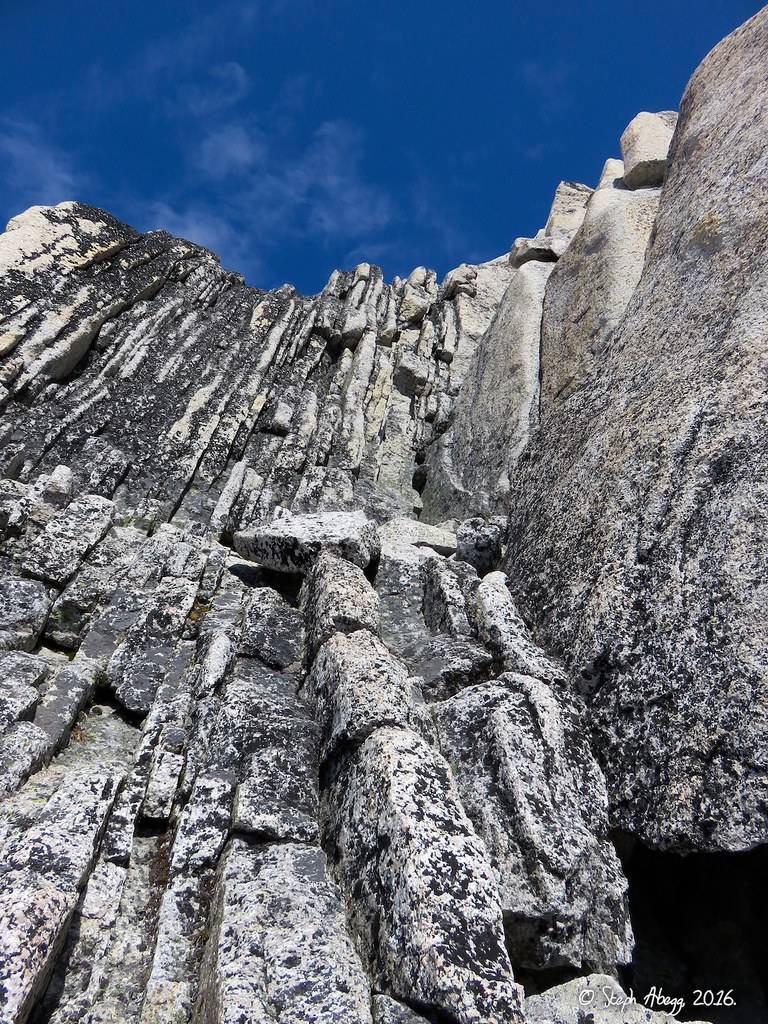
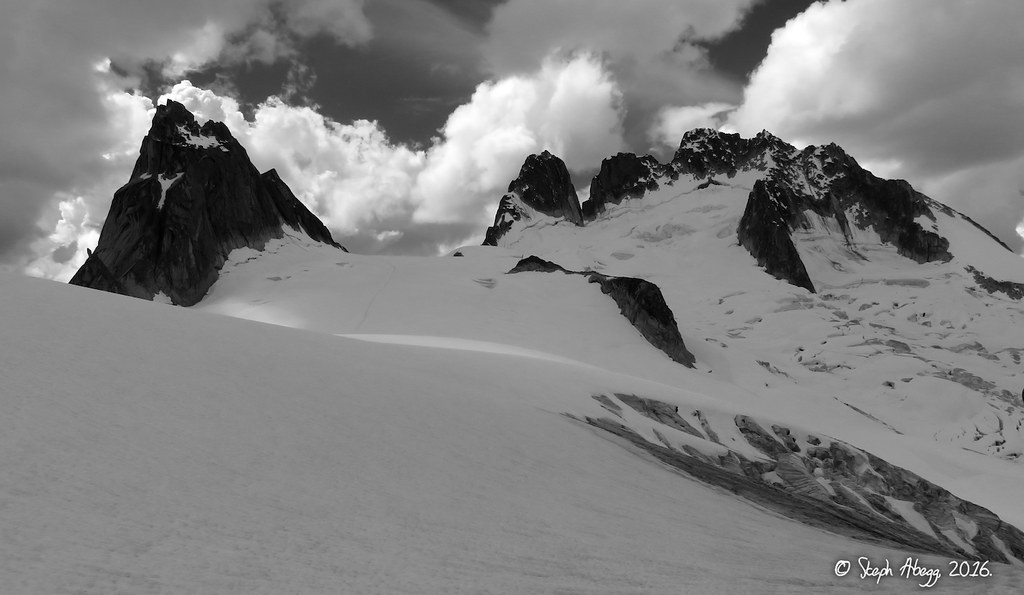
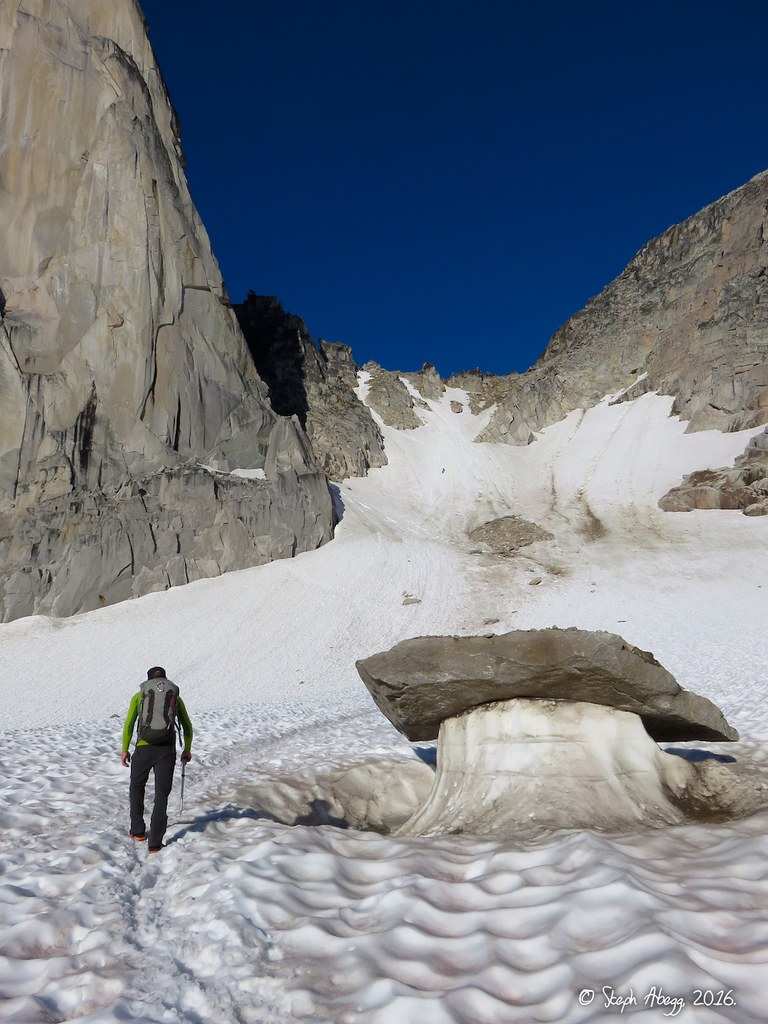
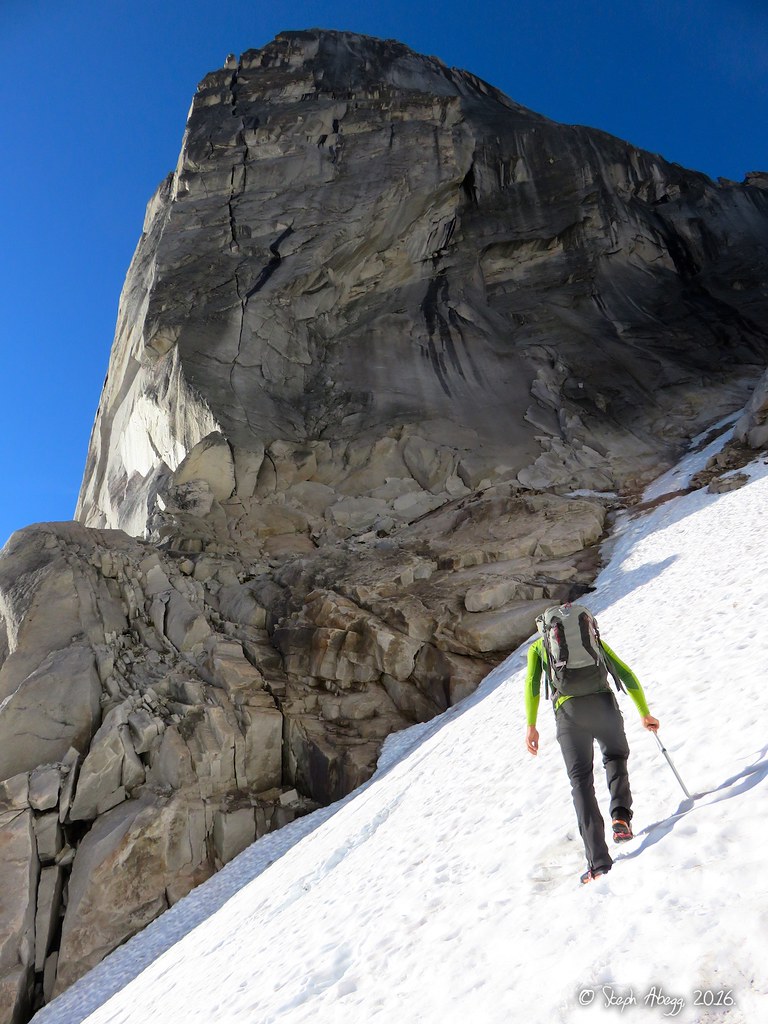
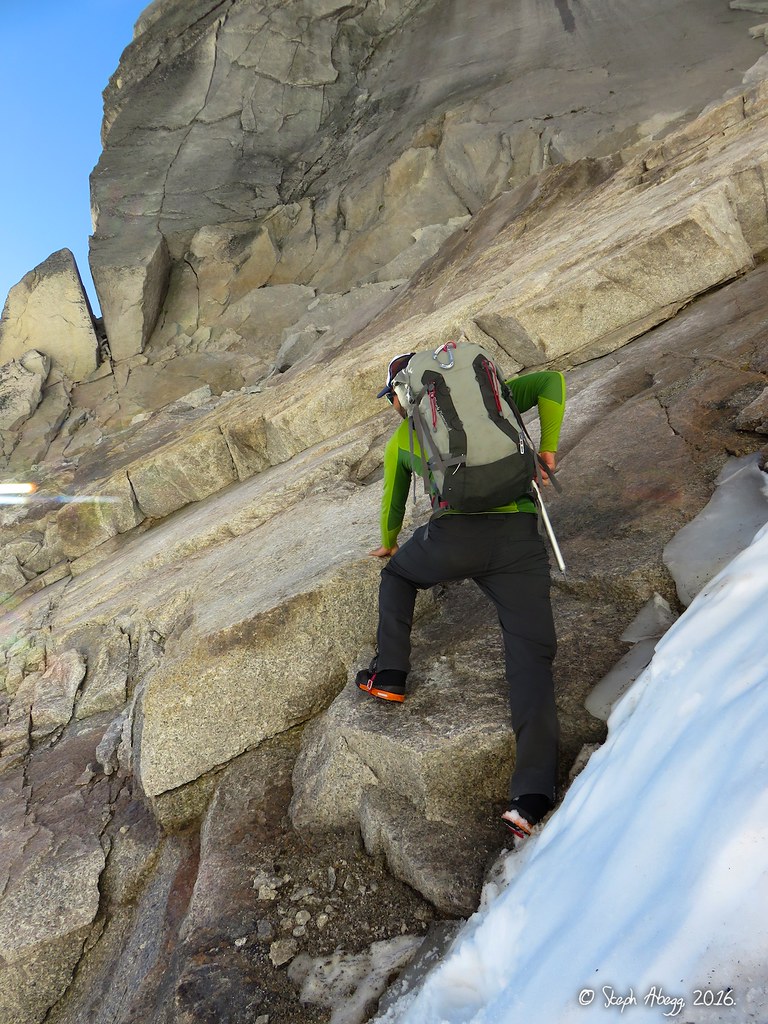
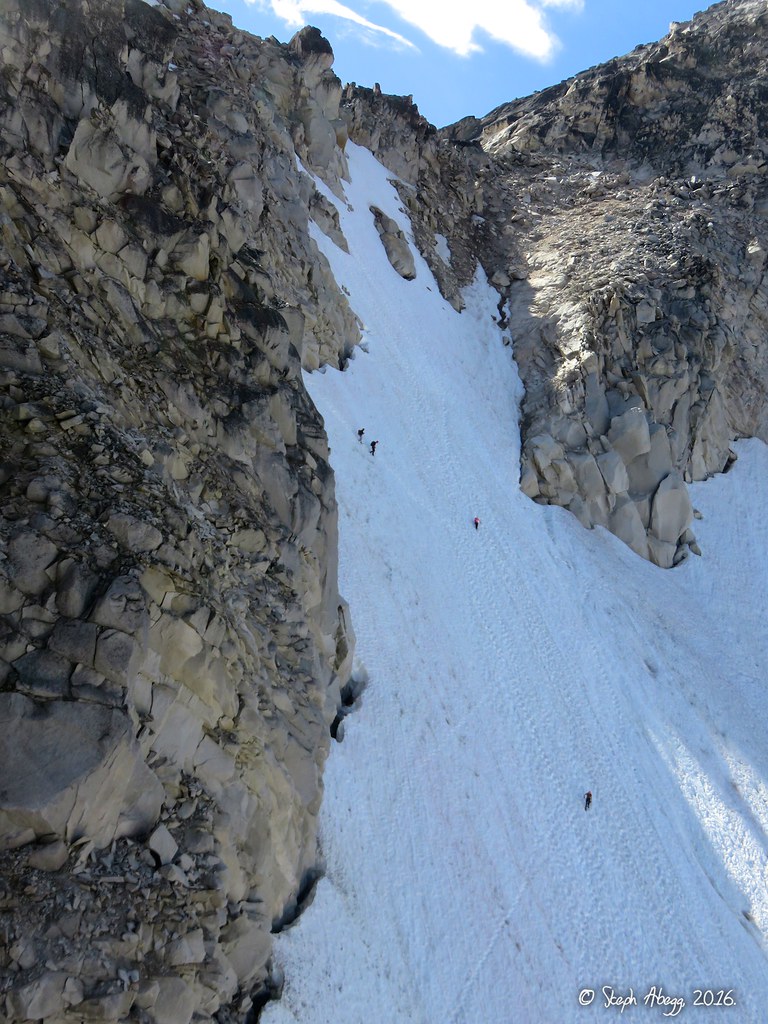
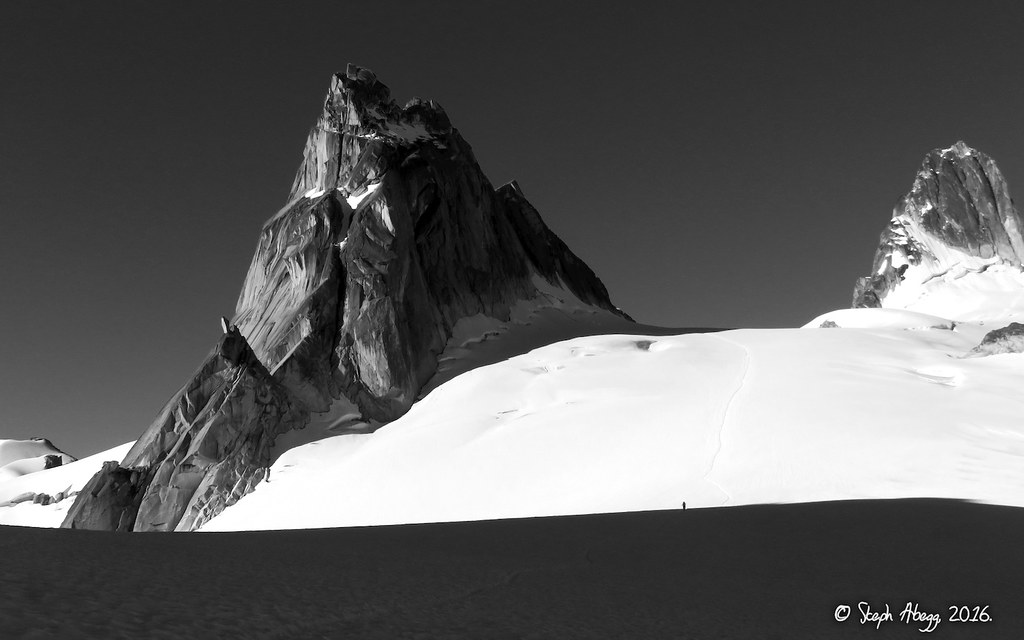
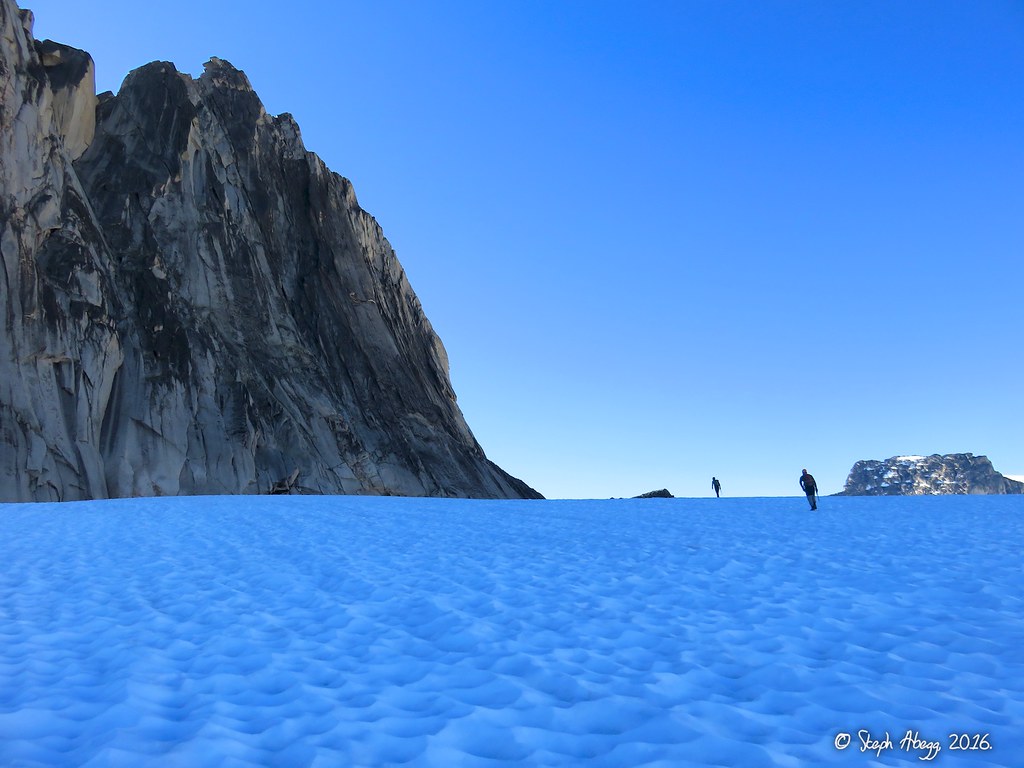
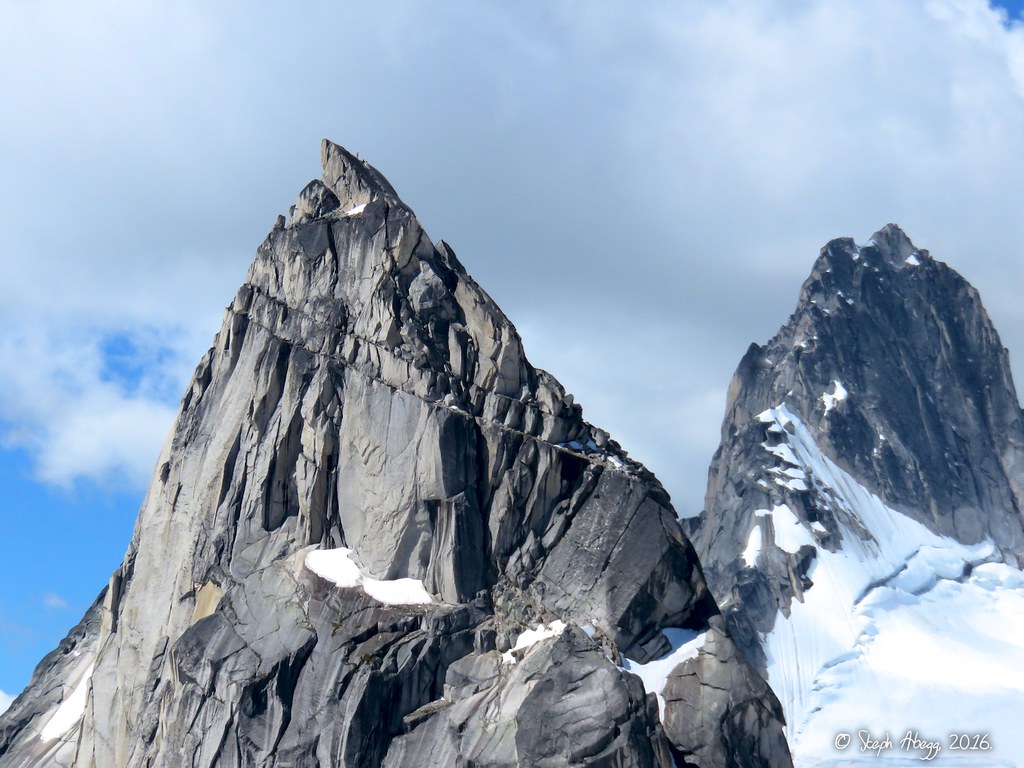
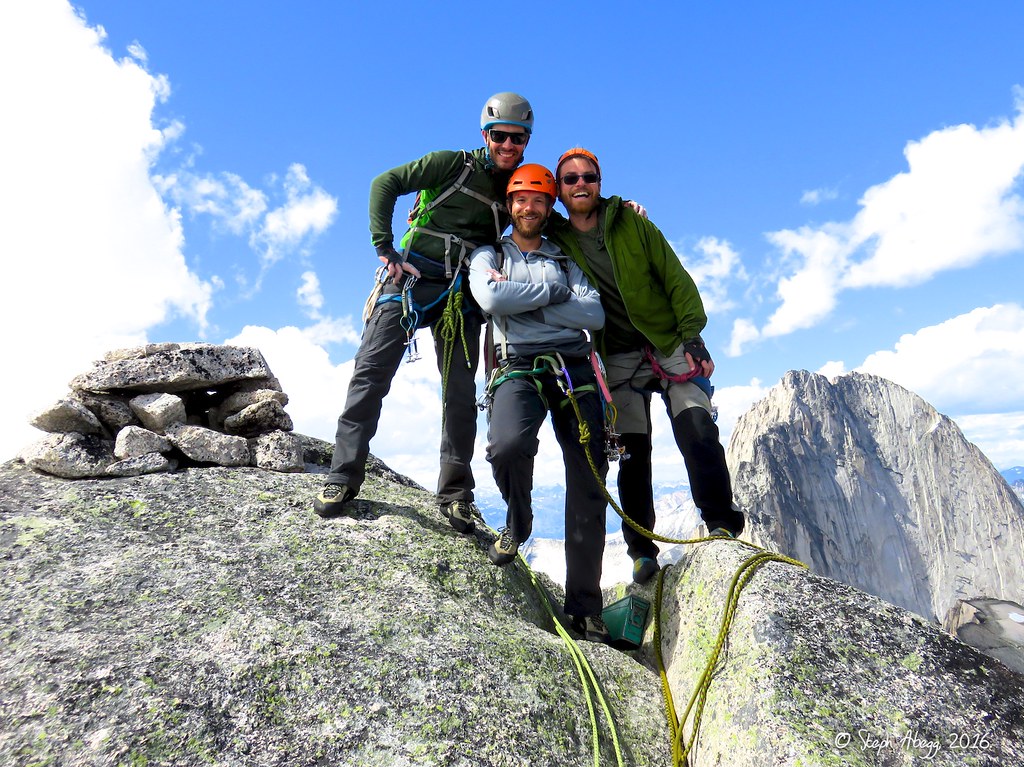
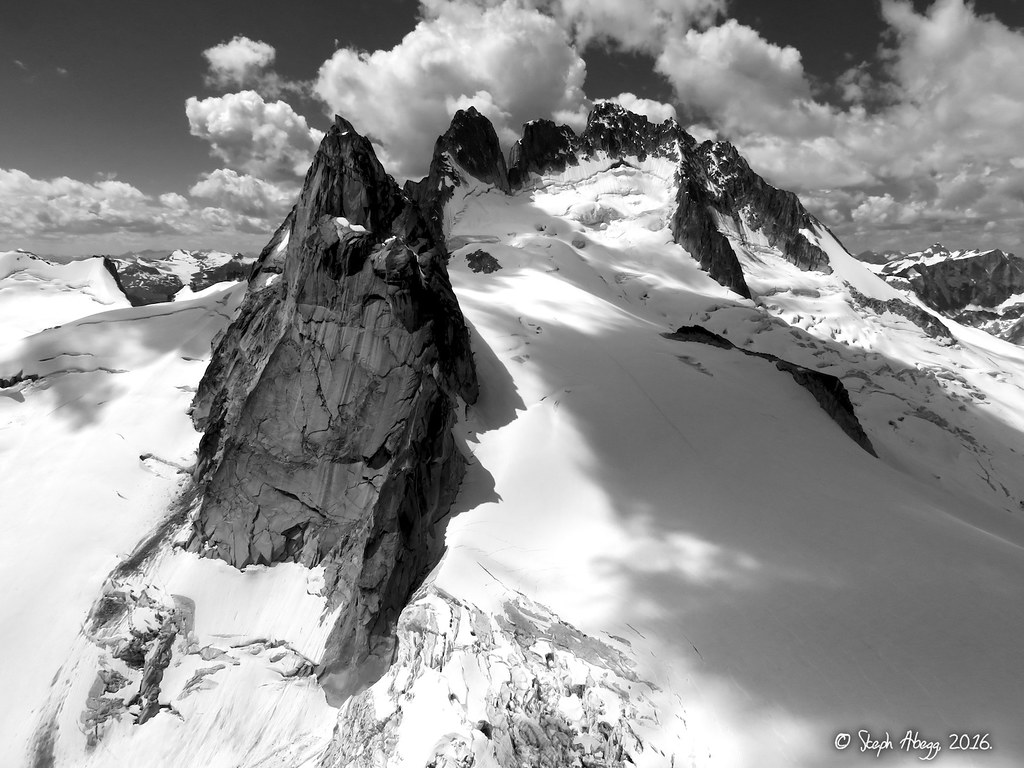
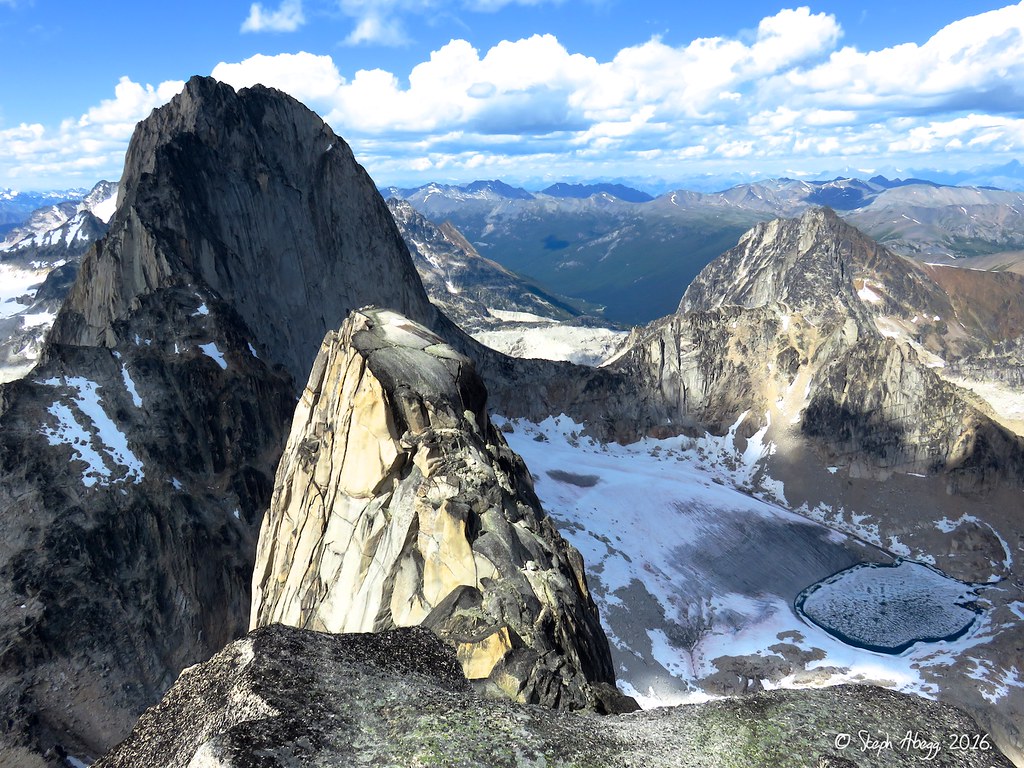
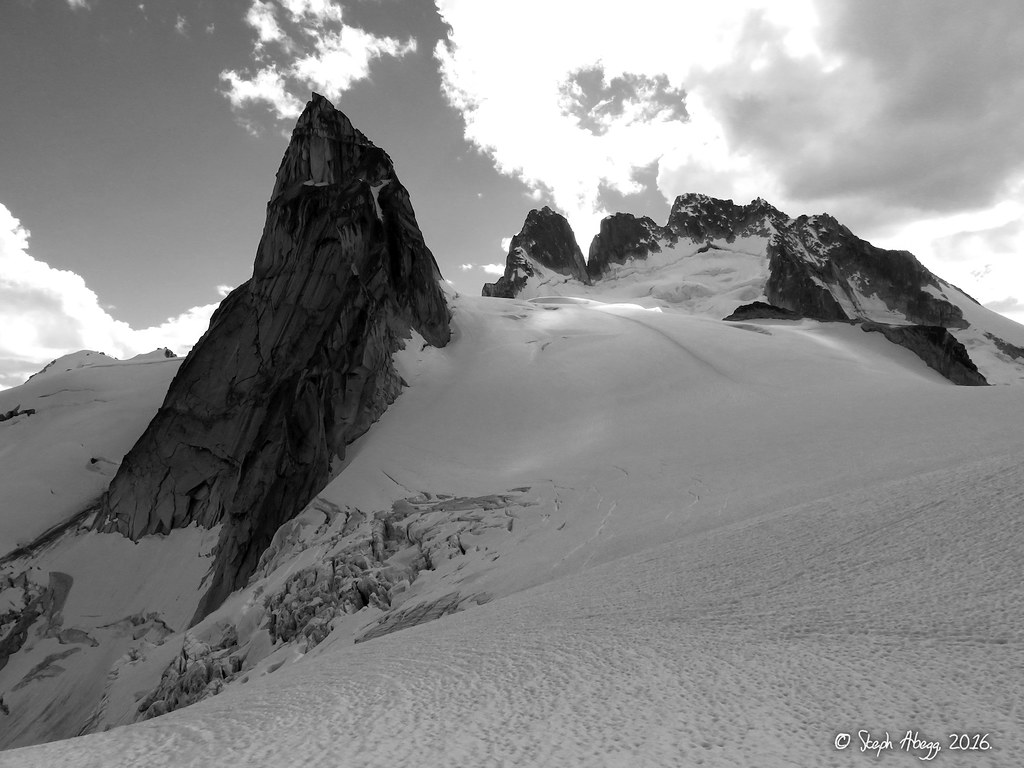
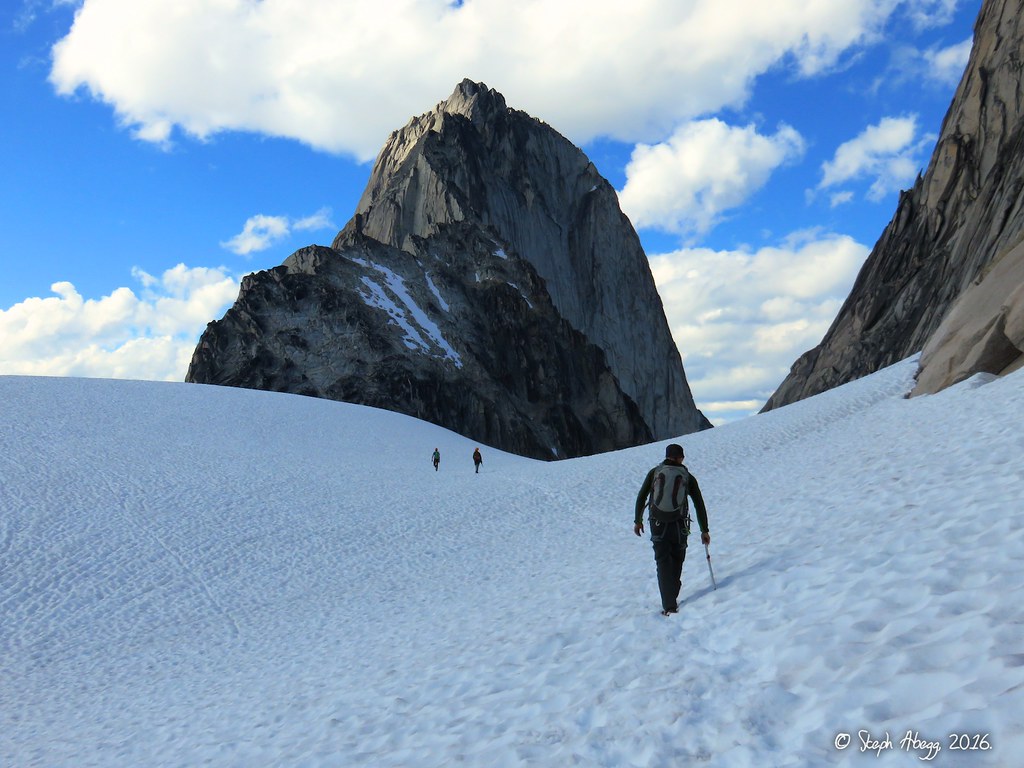
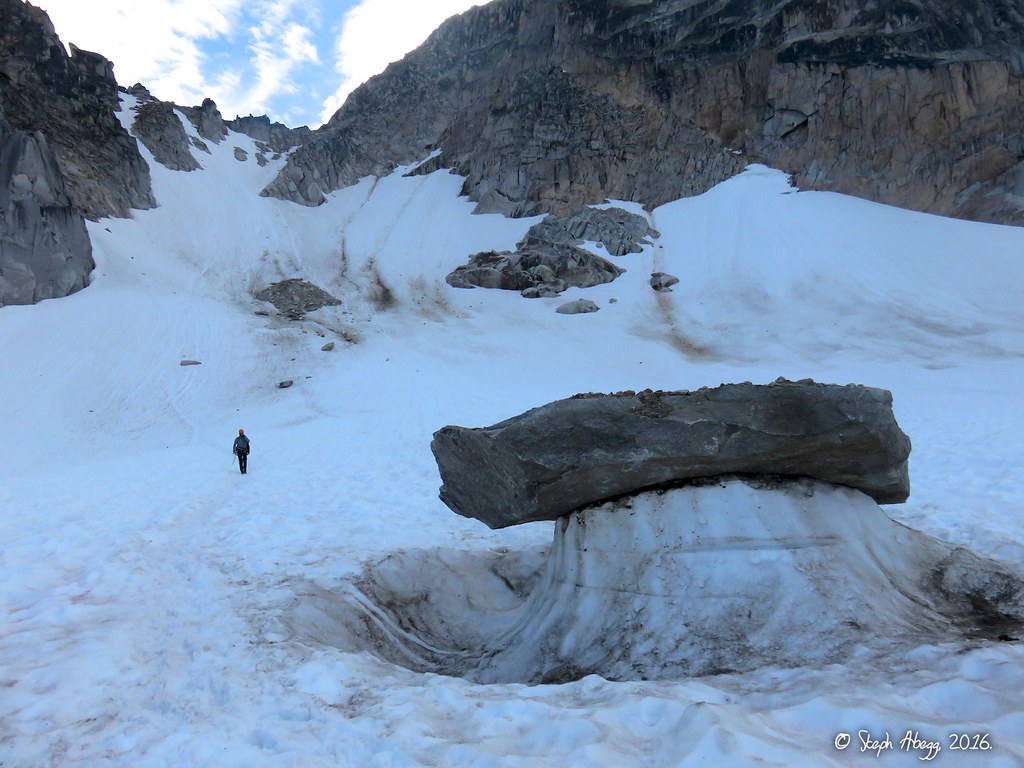
It had been nearly a decade since my last trip to the Bugaboos. So I jumped at the chance to join Jon Pobst, Stewart Matthiesen, and James Fletcher on a trip to the Bugaboos during the last week of July 2016. Even though we had planned our trip months in advance, we got lucky and nailed a weather window. We climbed 5 out of the 6 days we were there, and we could have climbed every day if we wanted to. All of the climbs we did were spectacular. We started off by climbing Beckey-Chouinard on South Howser Tower (I had climbed this world-class route in 
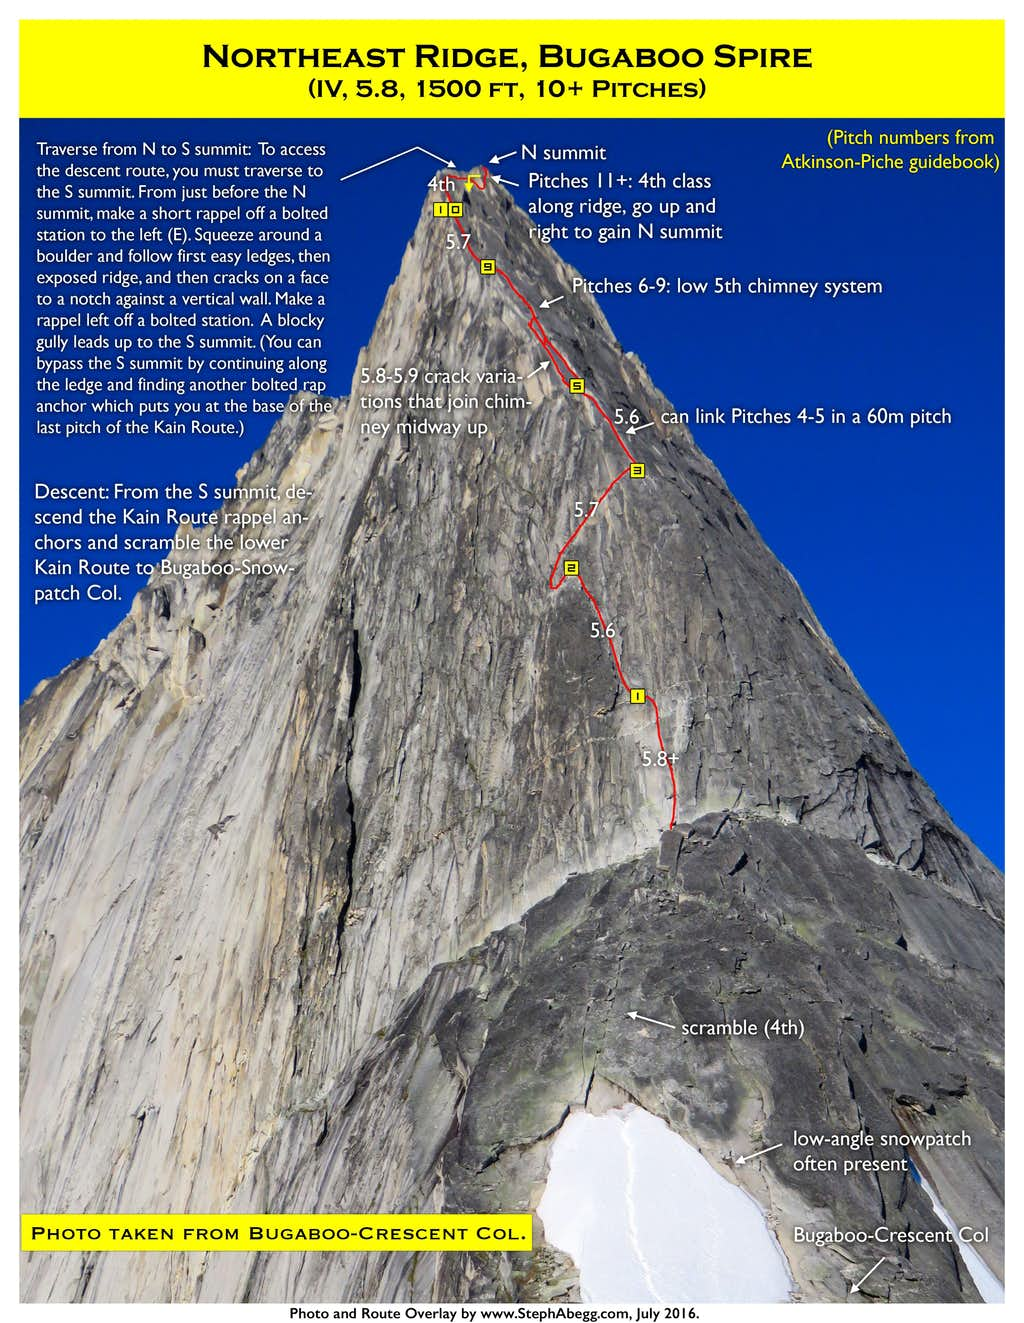
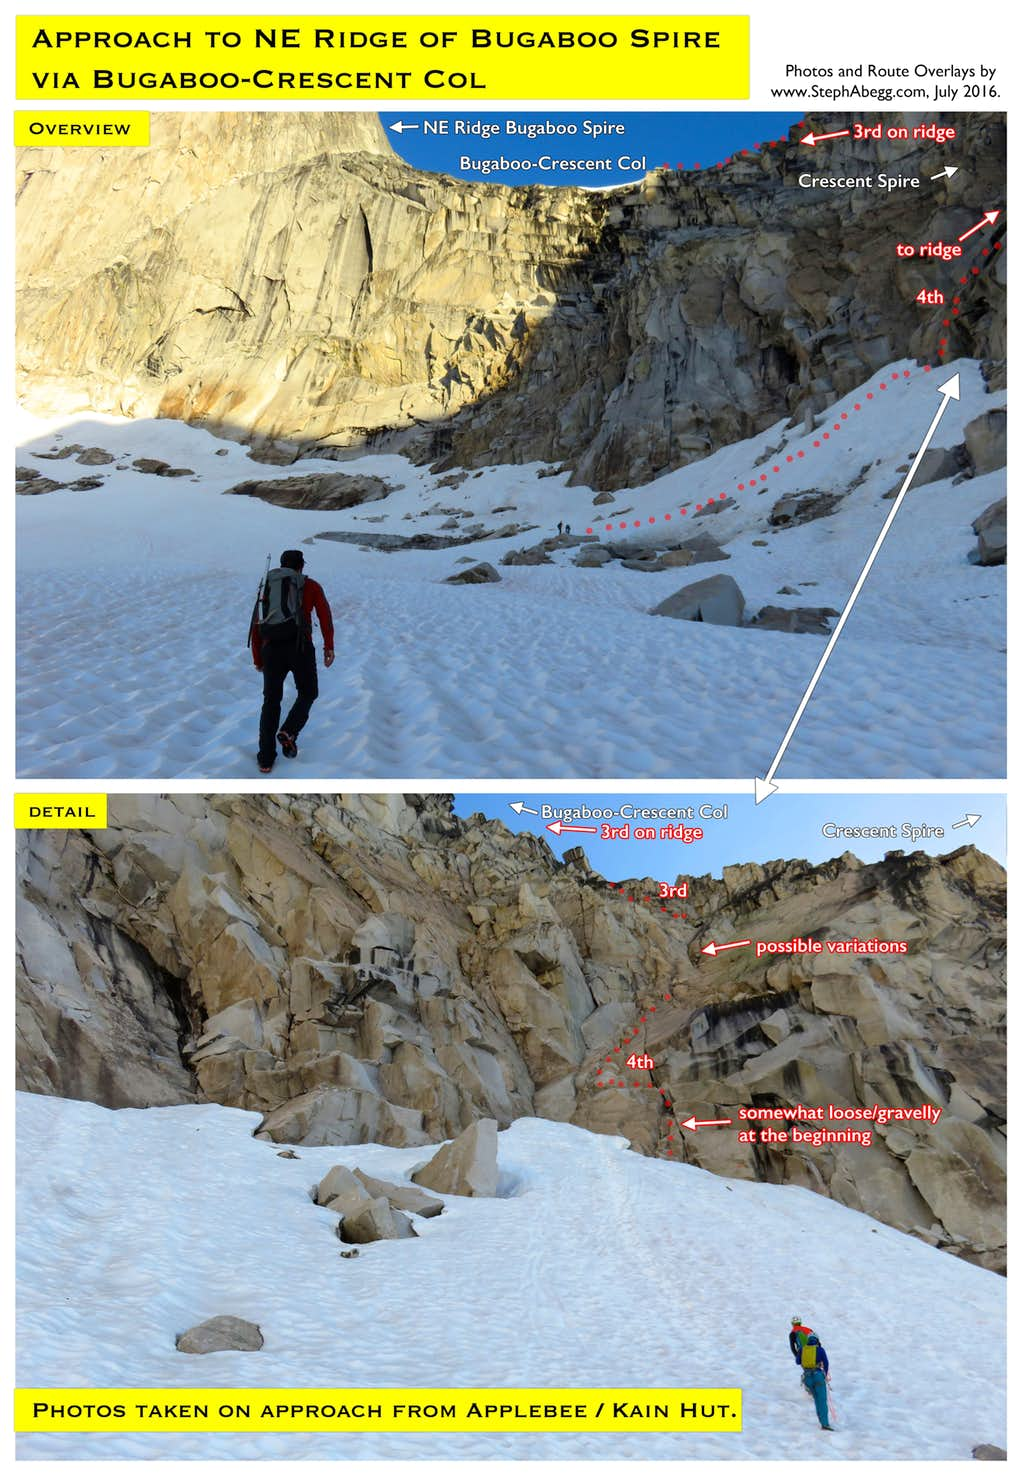
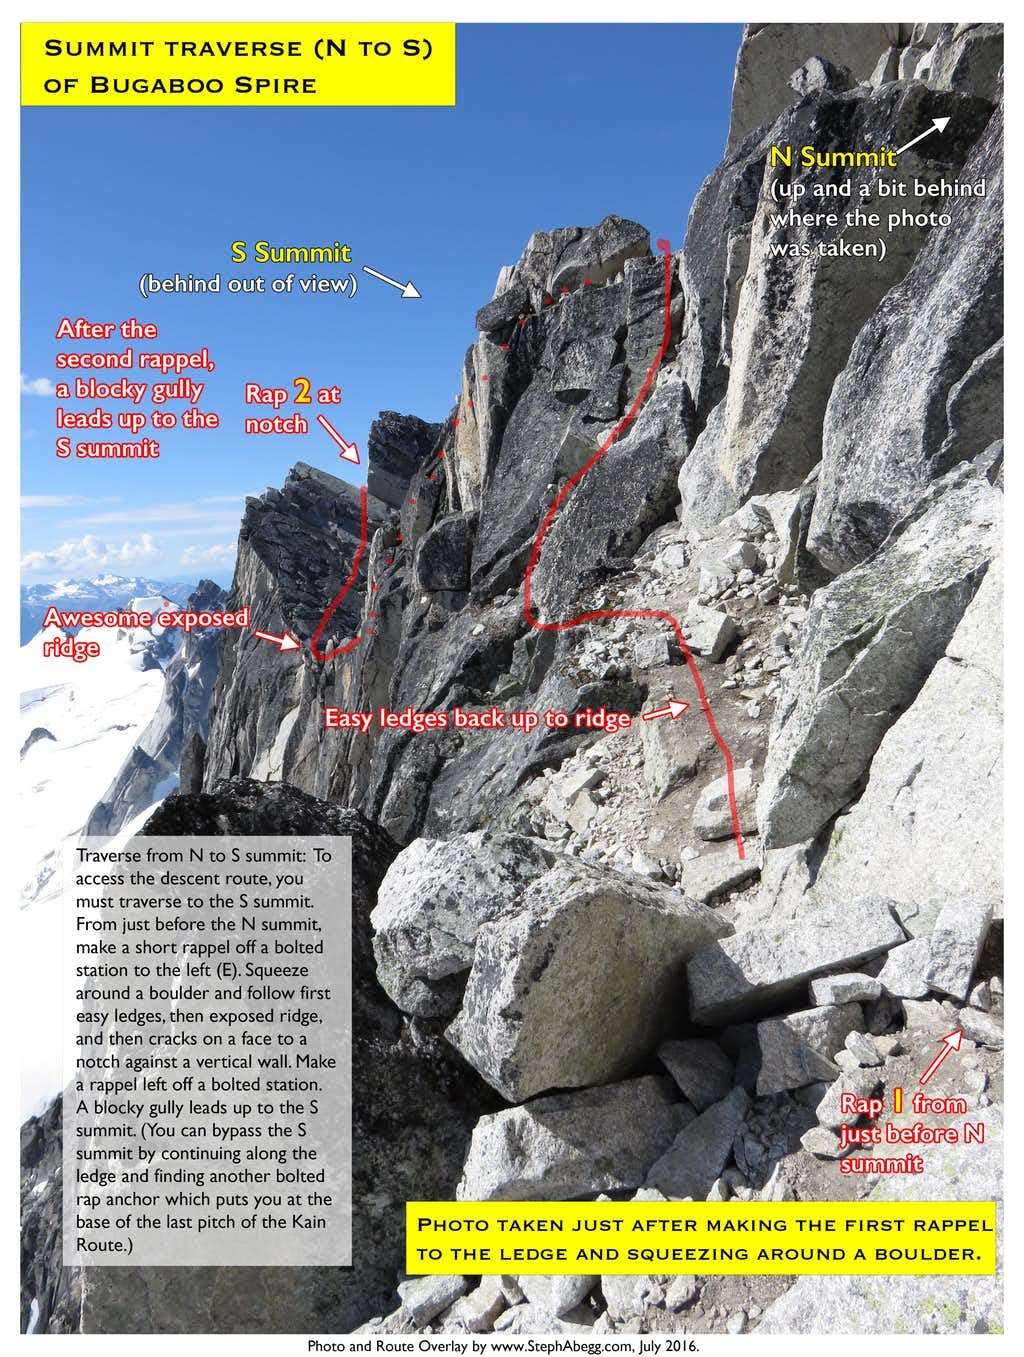
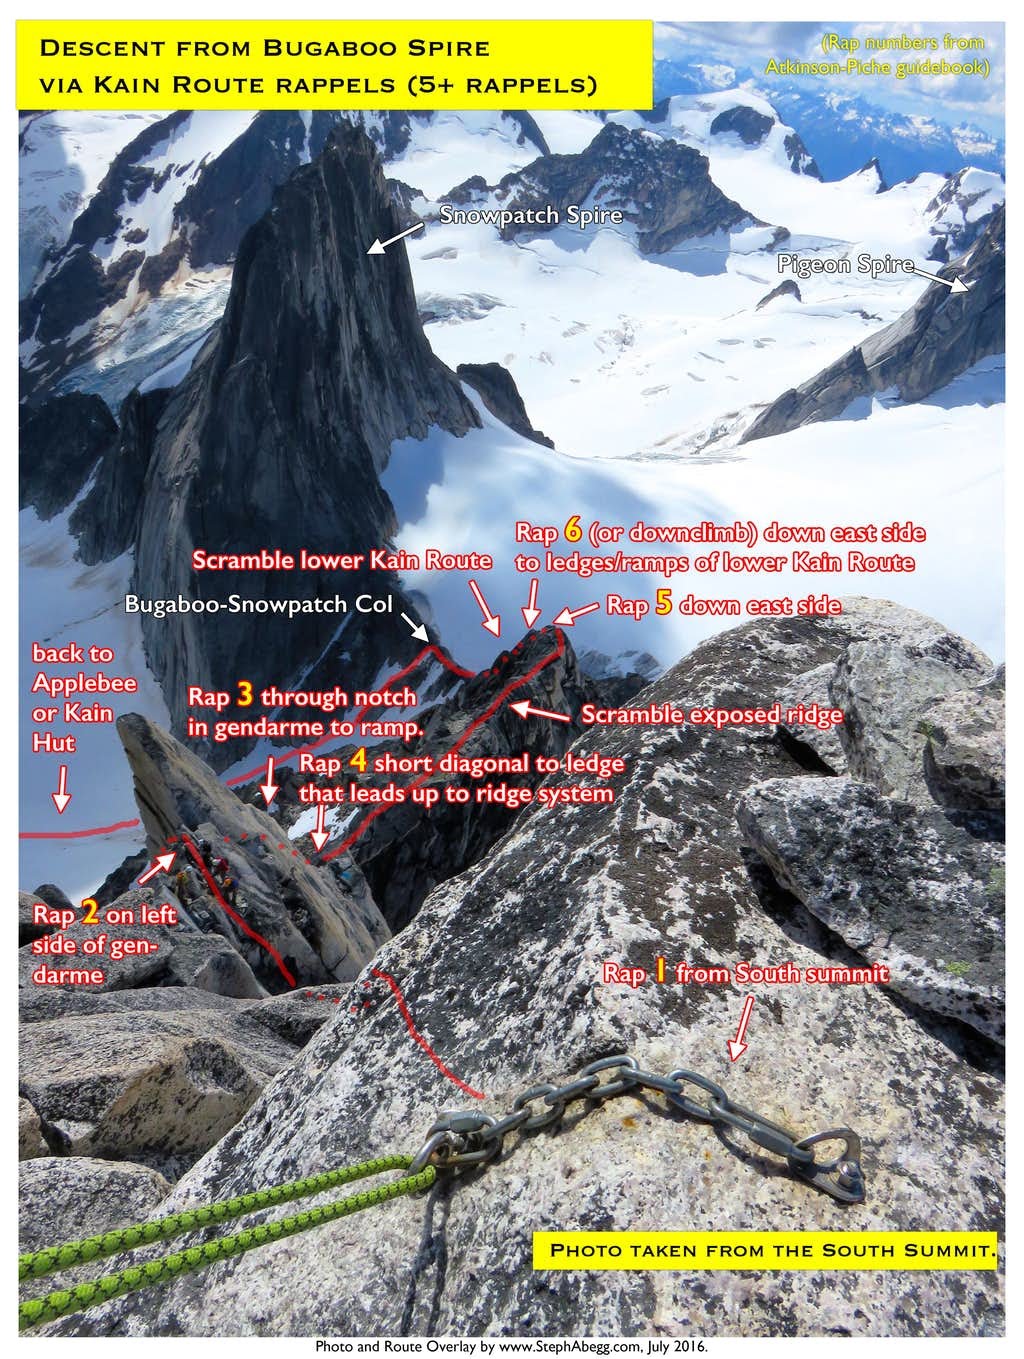
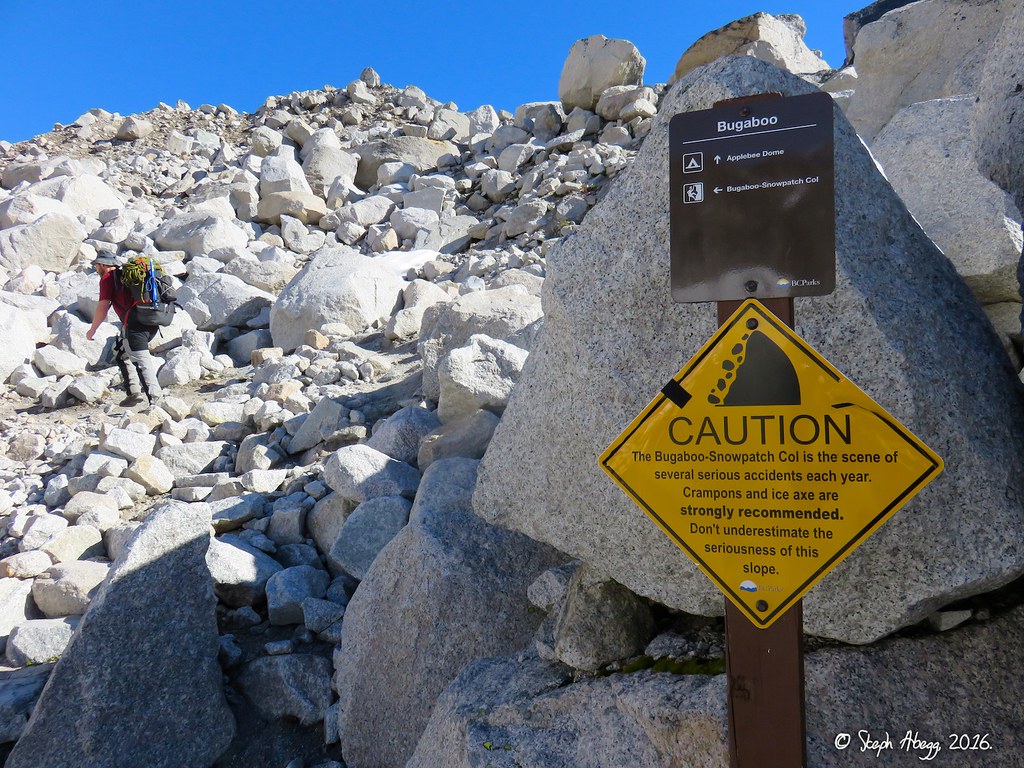
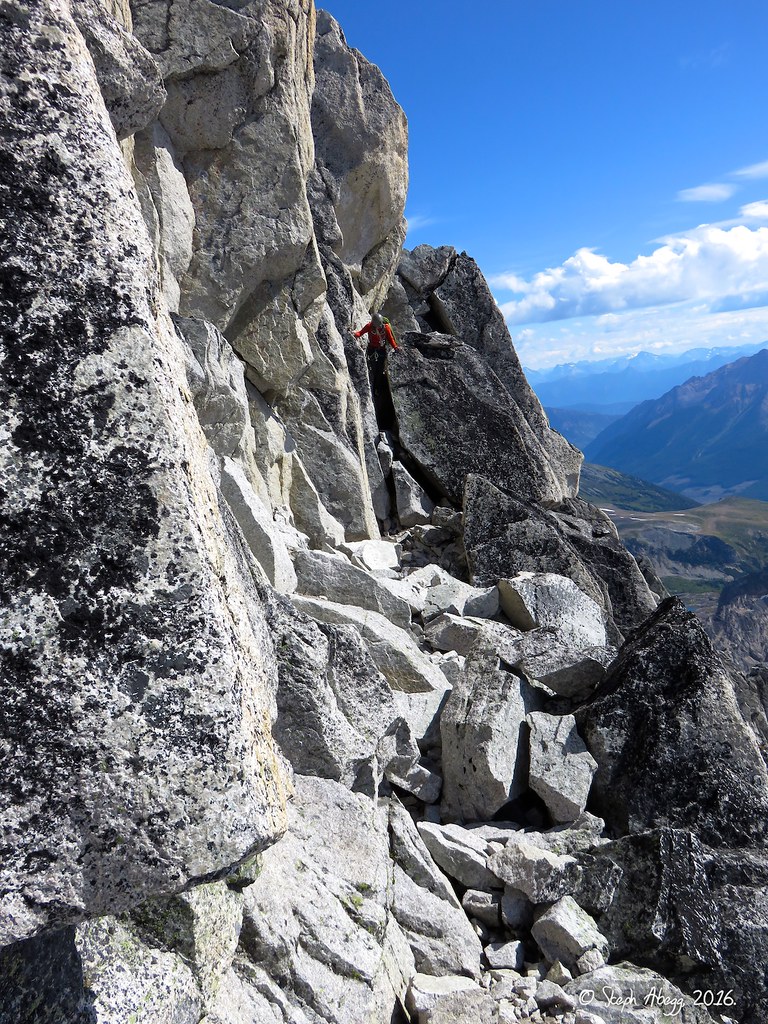
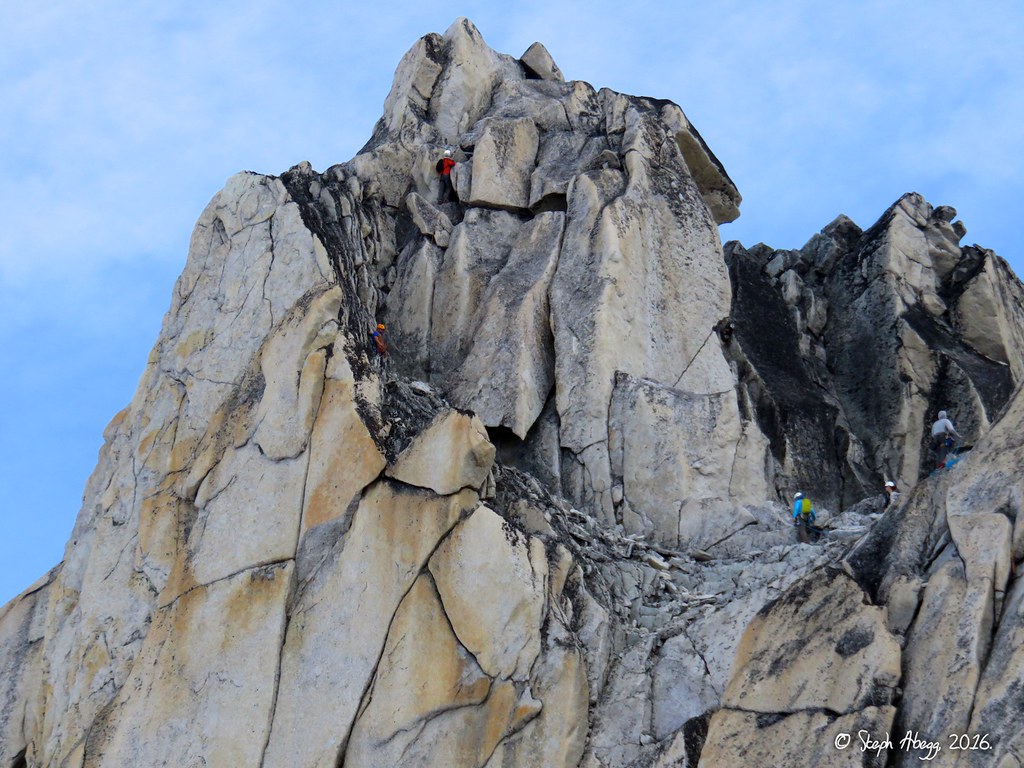
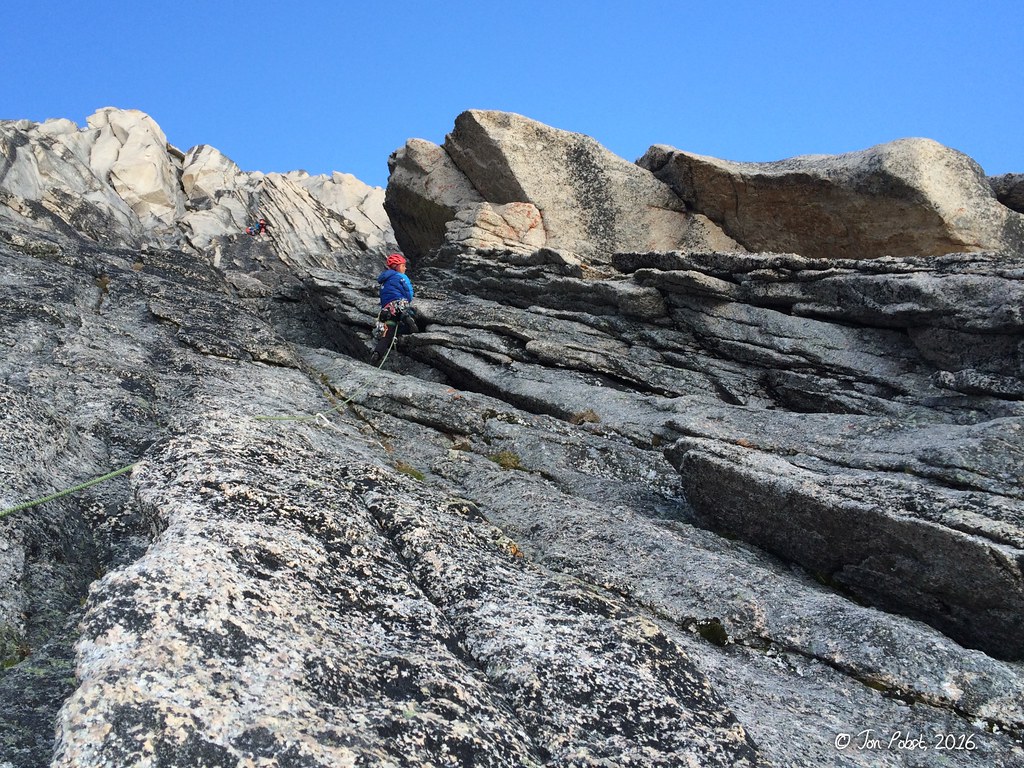
2007, but the three guys had not climbed it, and I was more than happy to climb it again). Next, Jon and I nabbed a rare chance to be first in line on the Northeast Ridge of Bugaboo Spire (an iffy weather forecast for the day scared most climbers away); I had also climbed this route before (in 
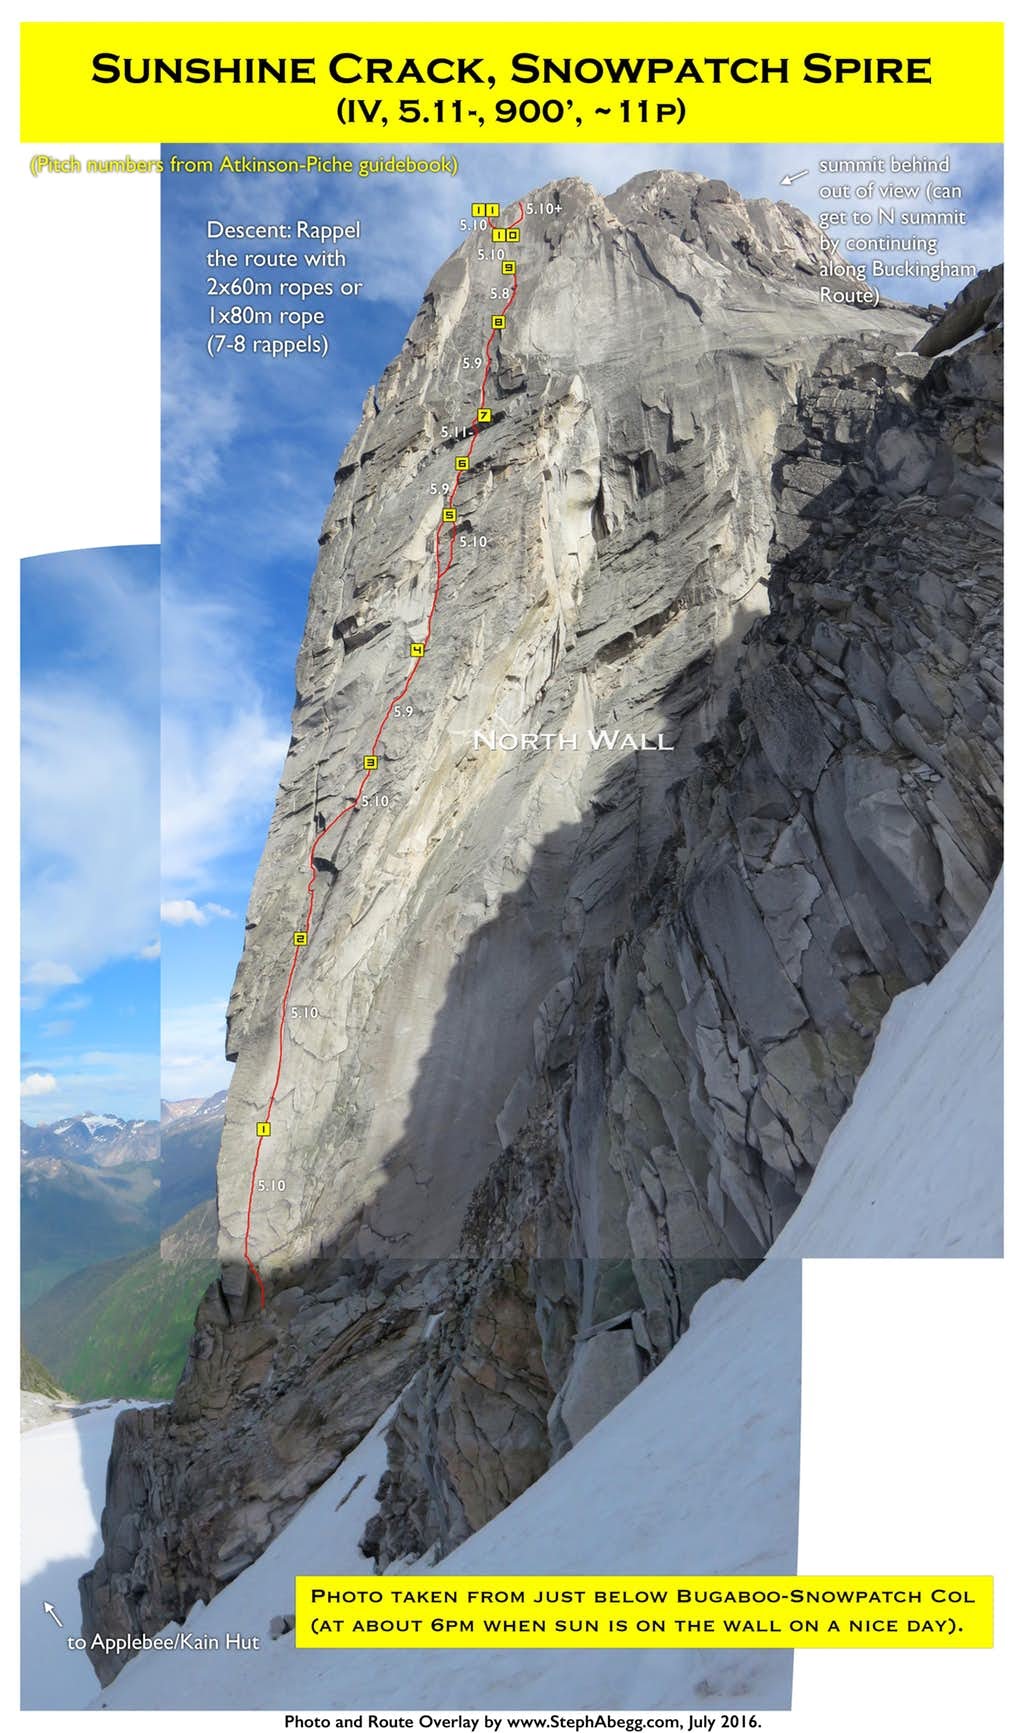
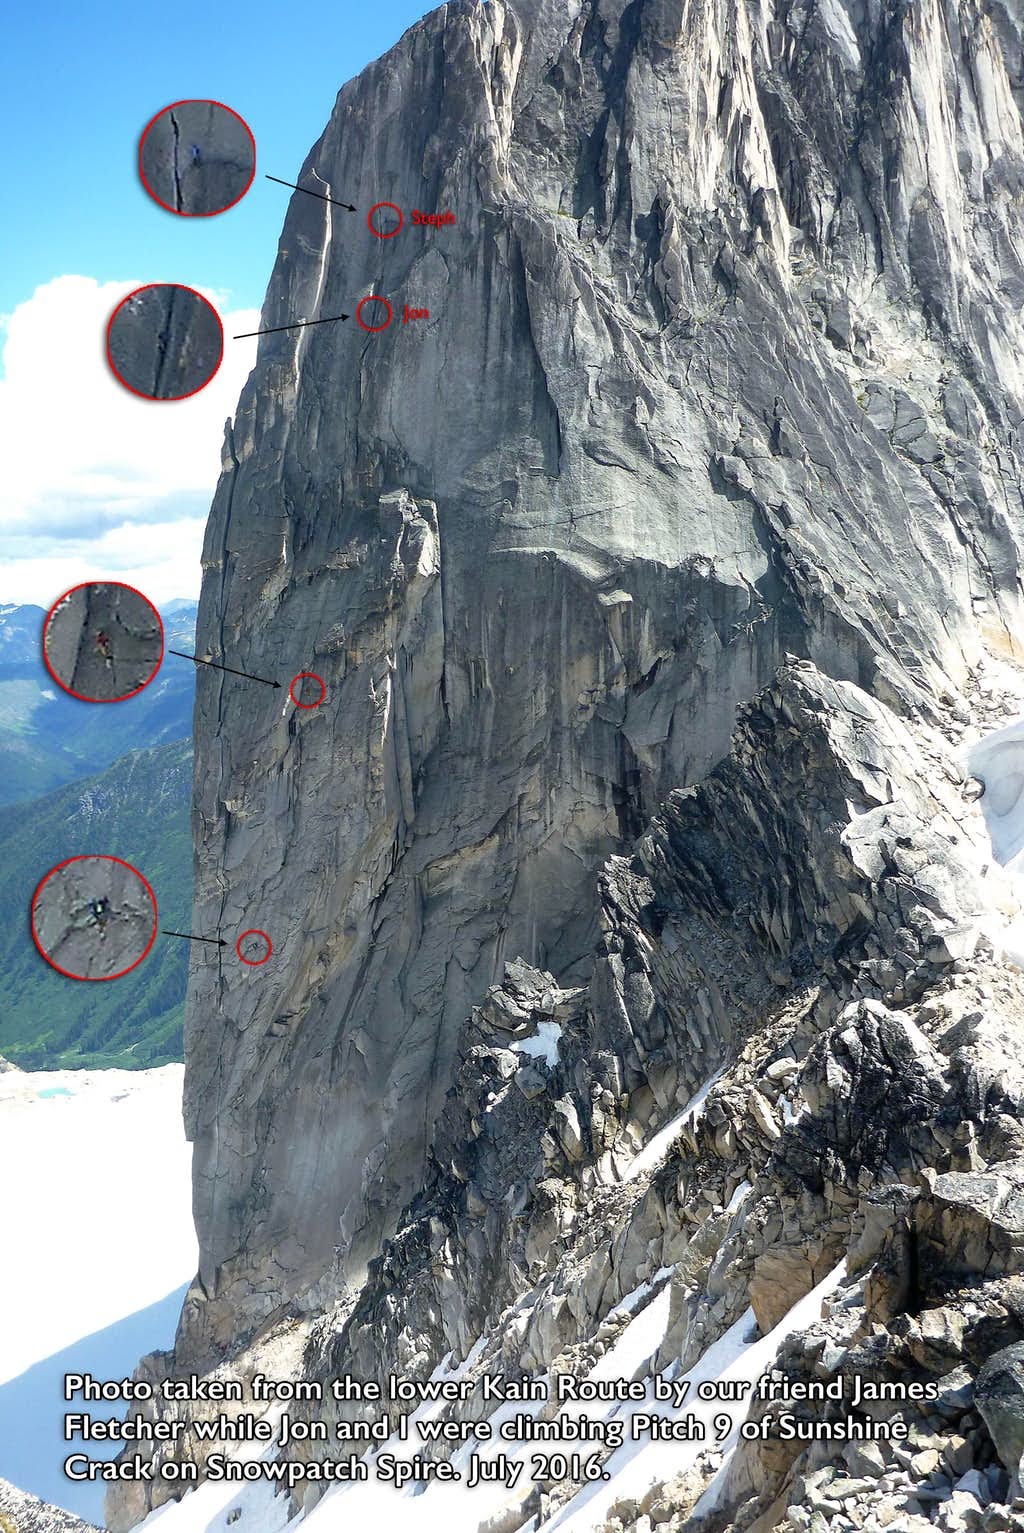
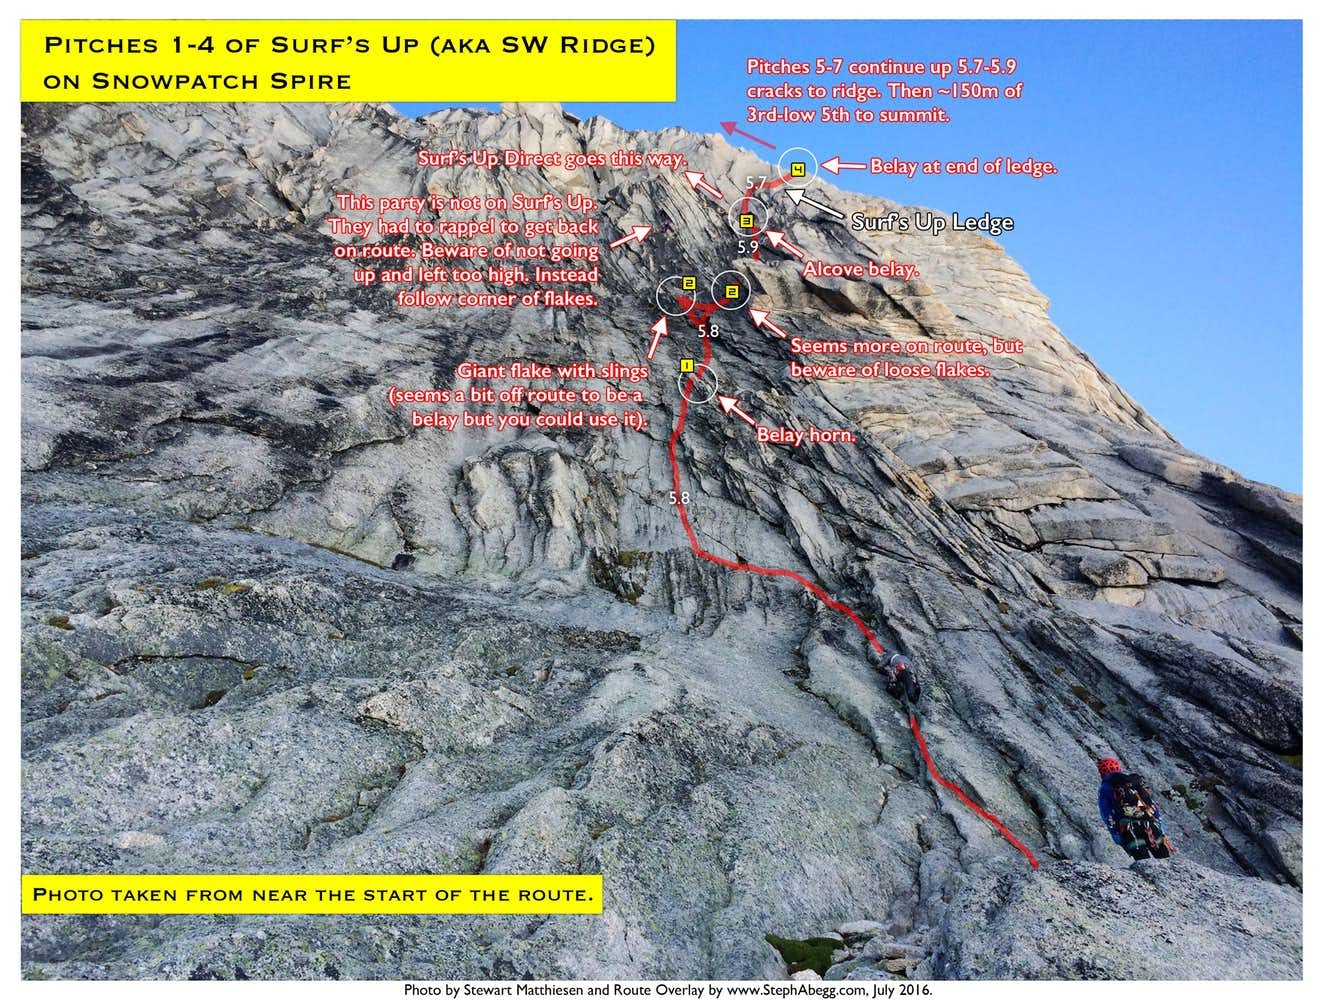
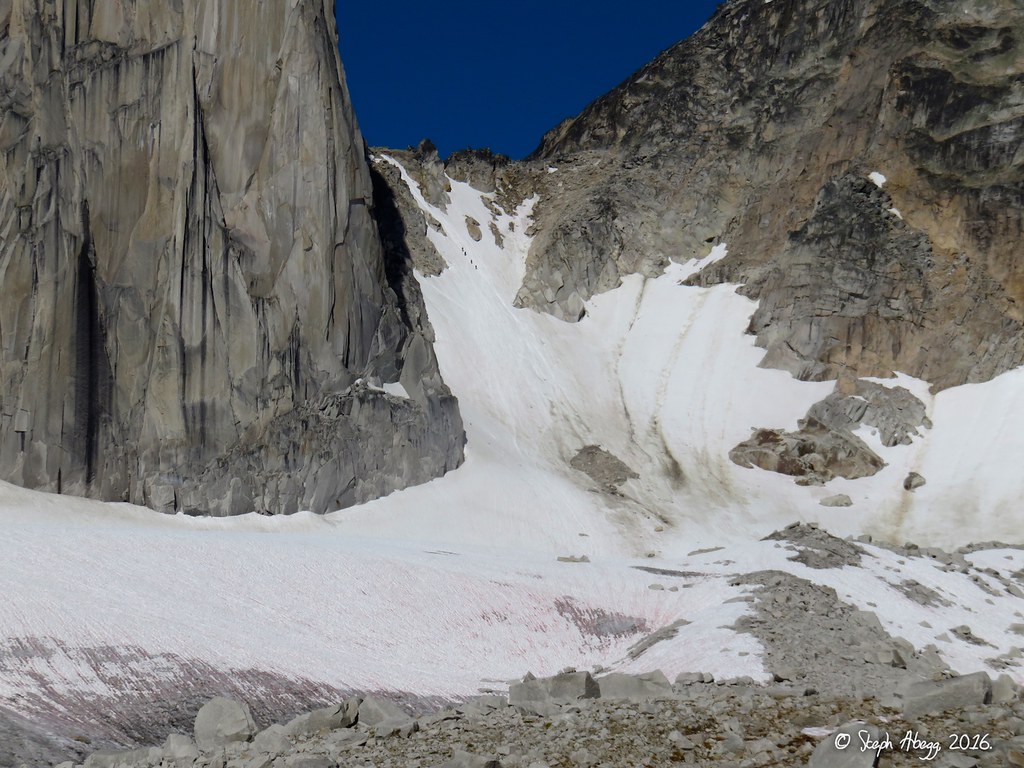
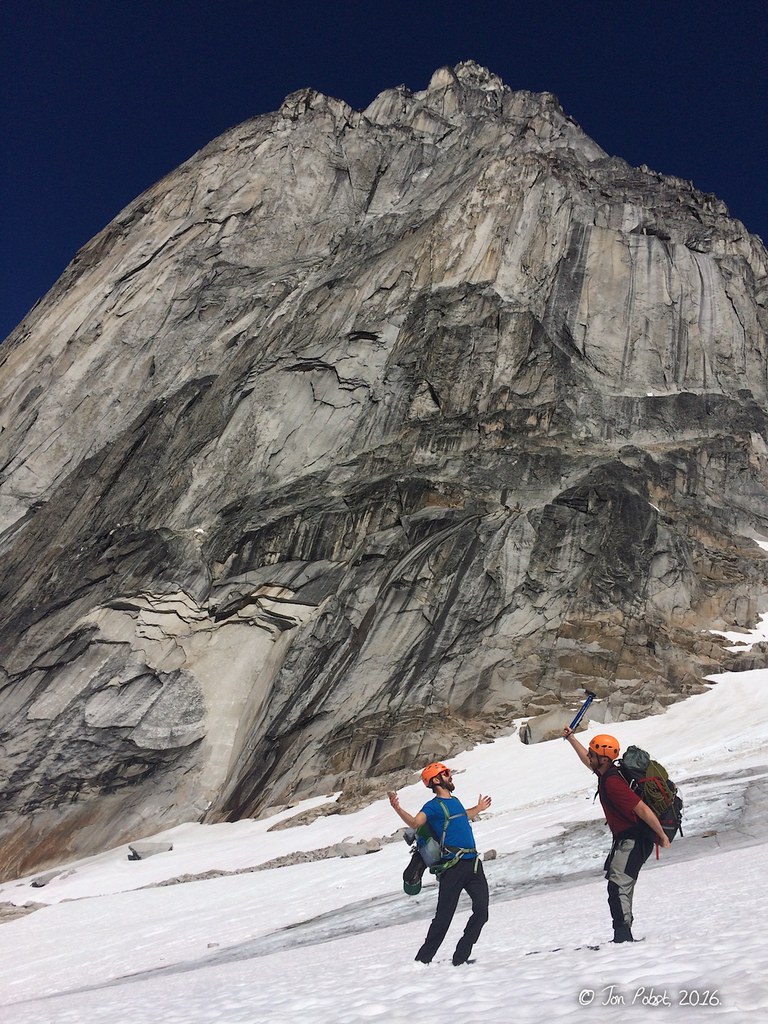
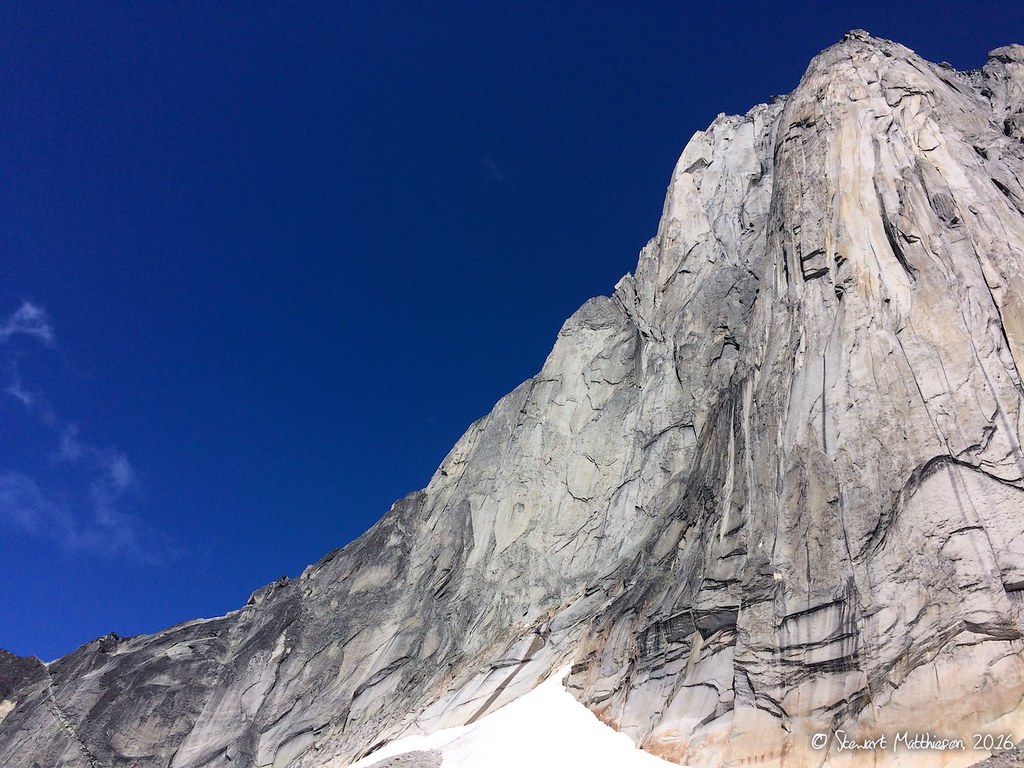
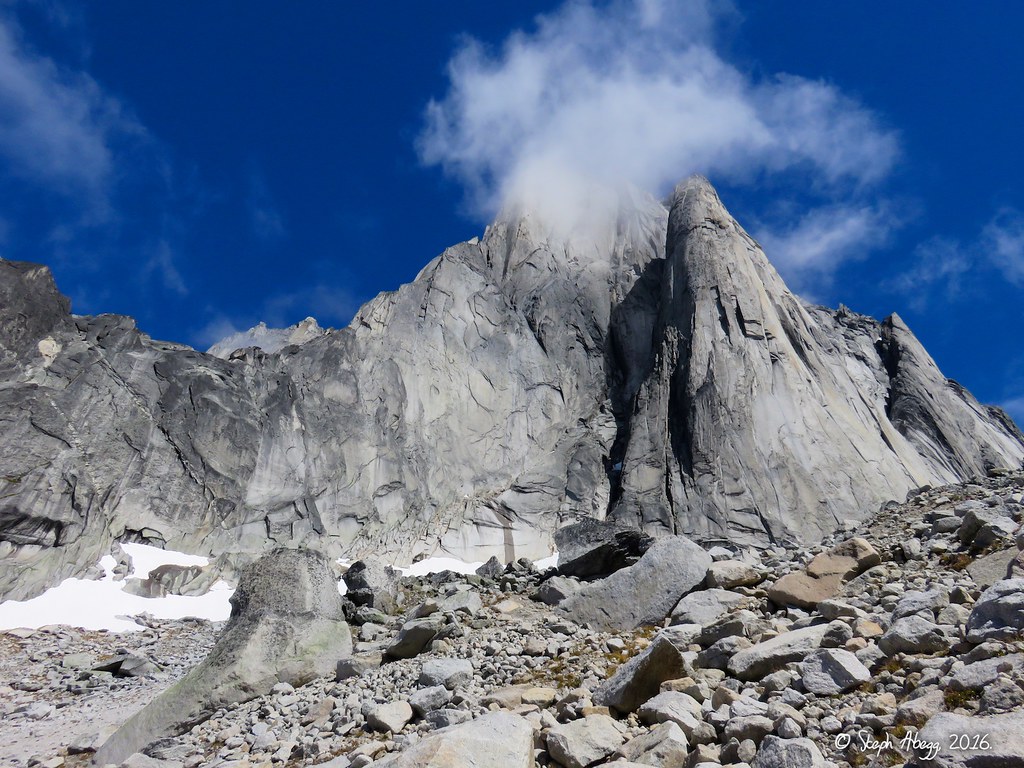
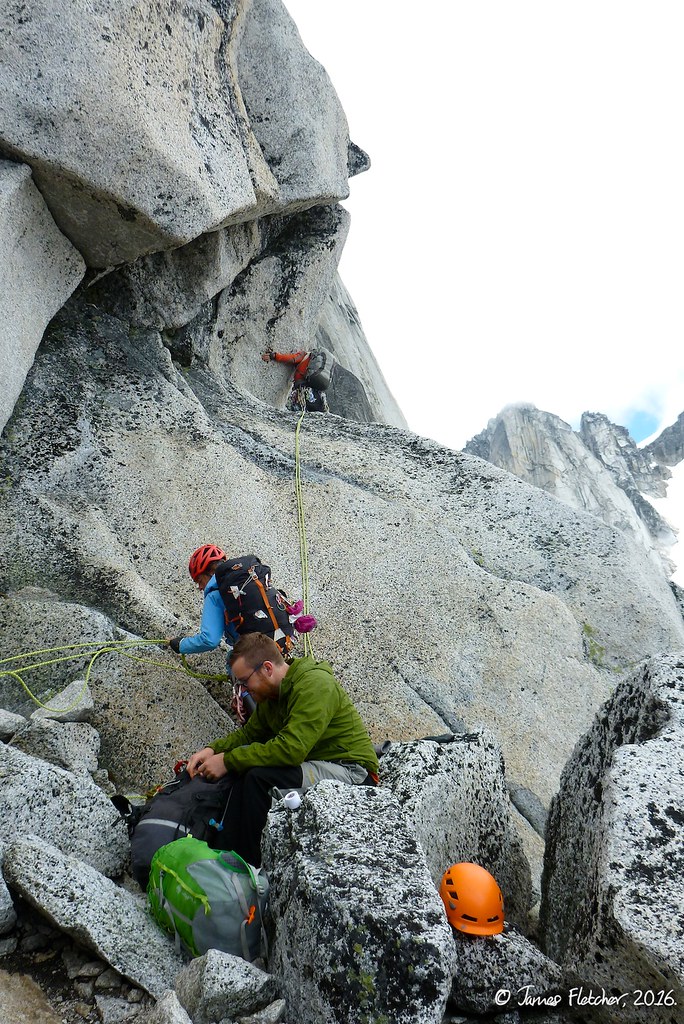
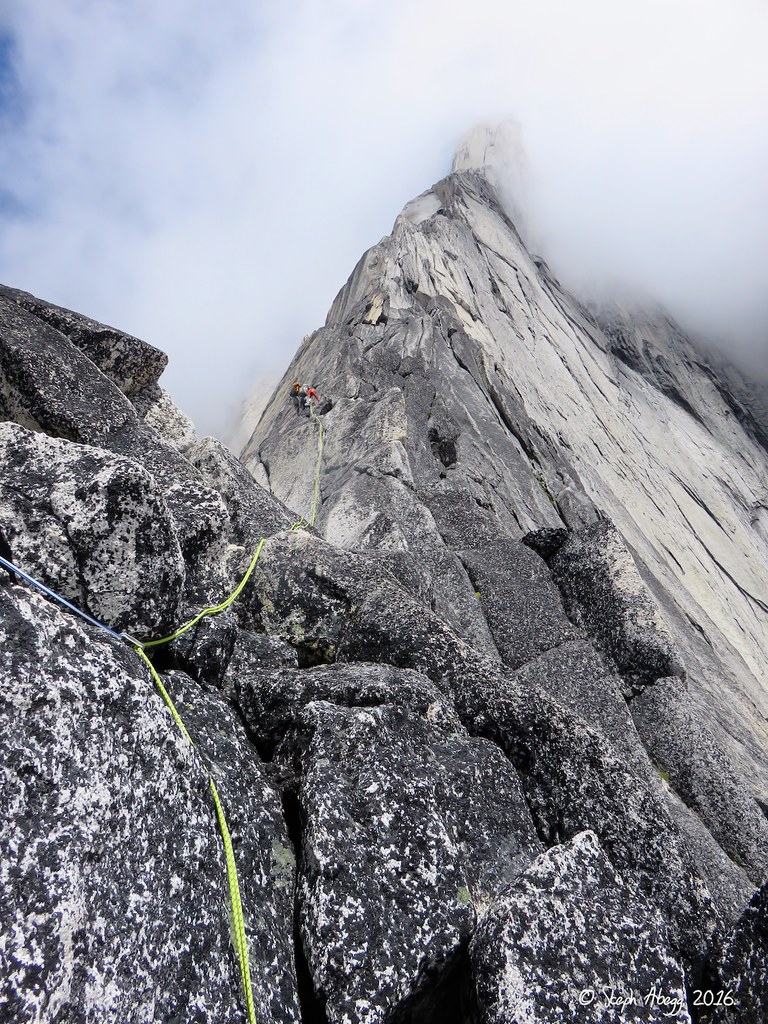
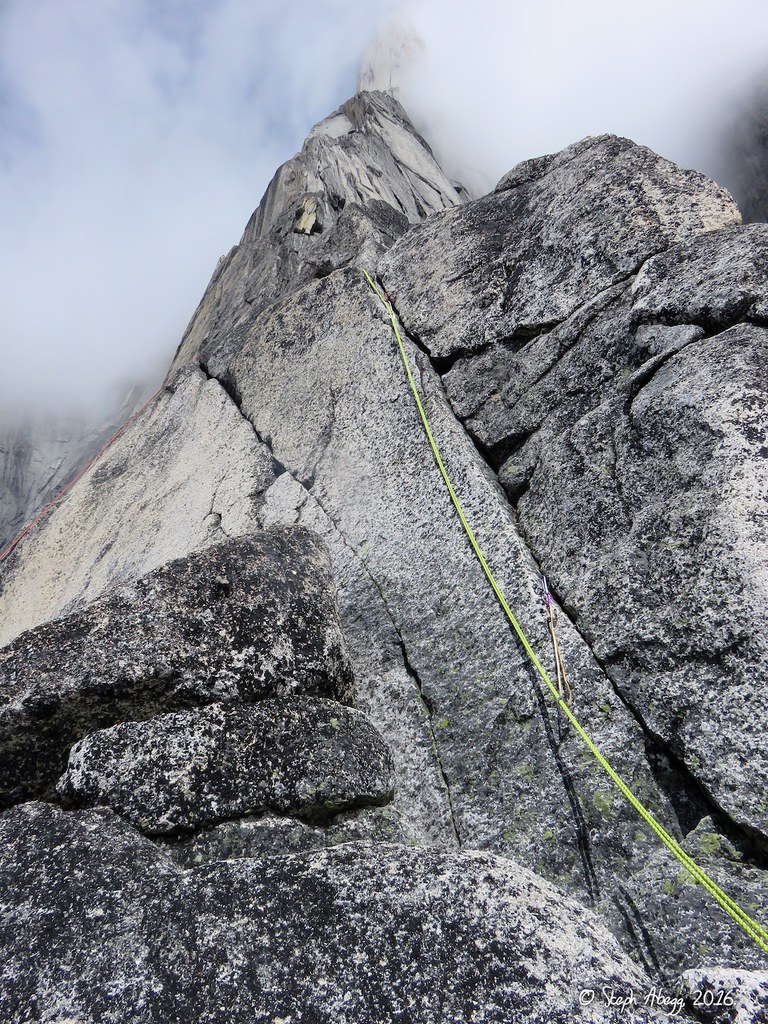
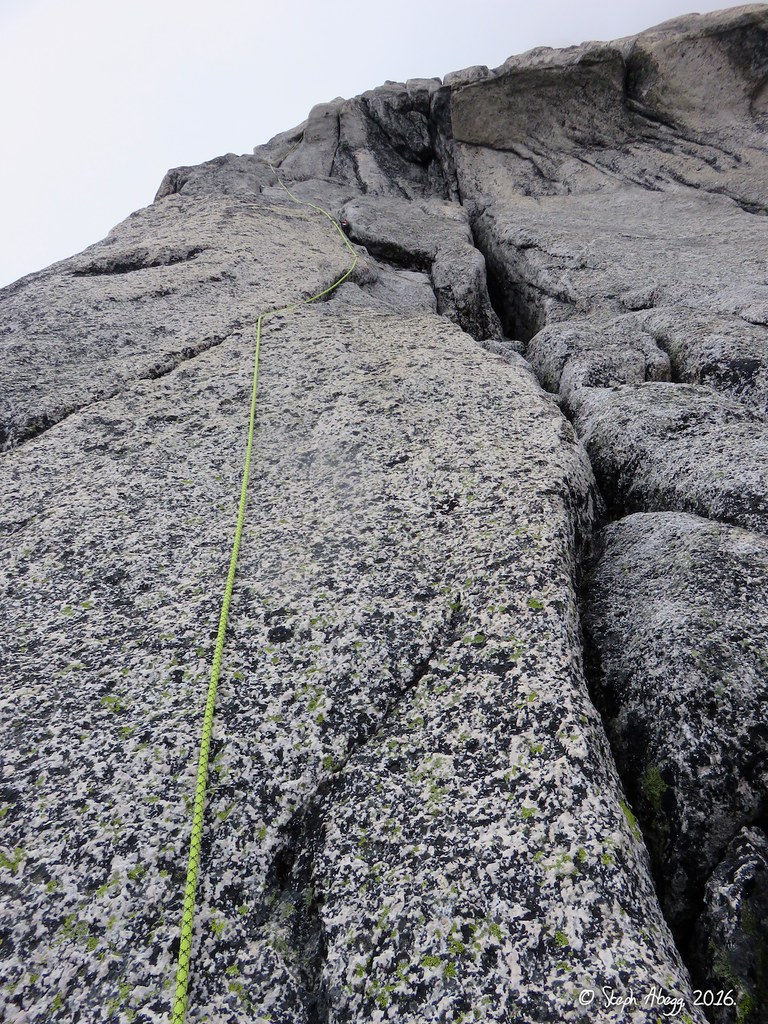
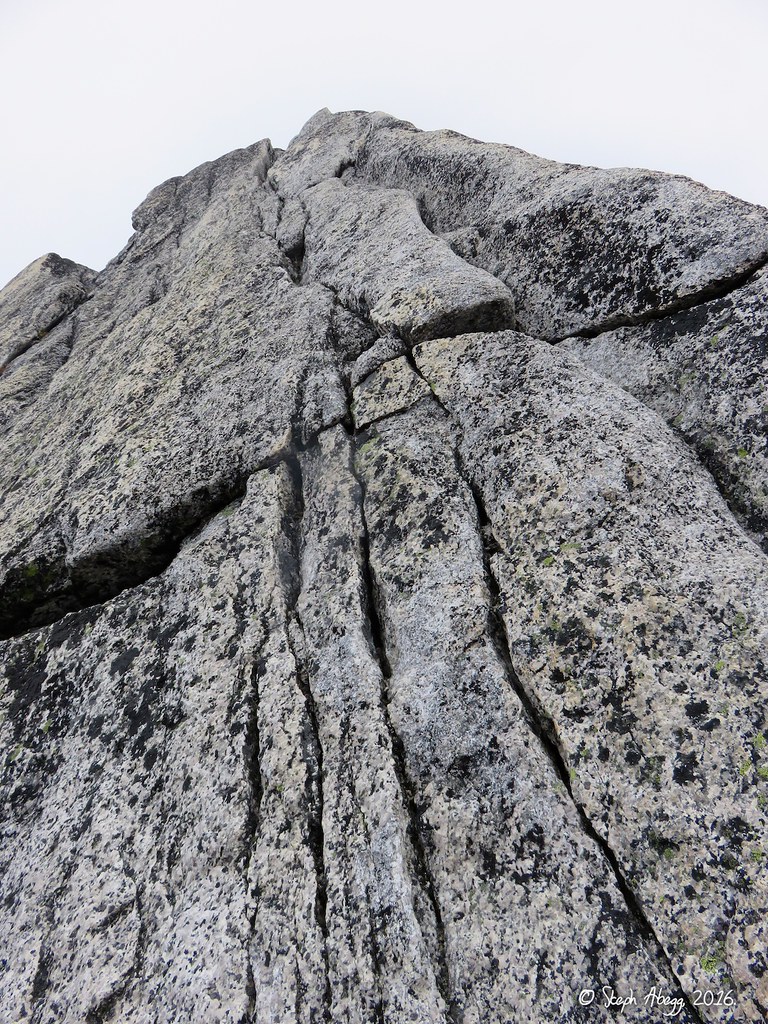
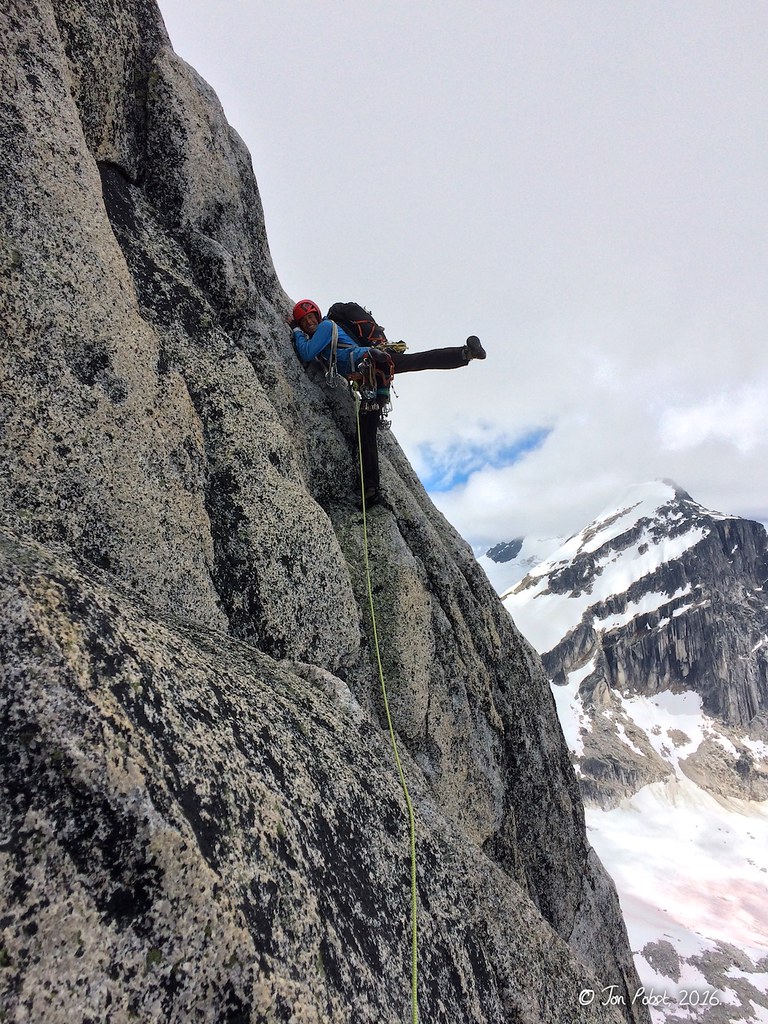
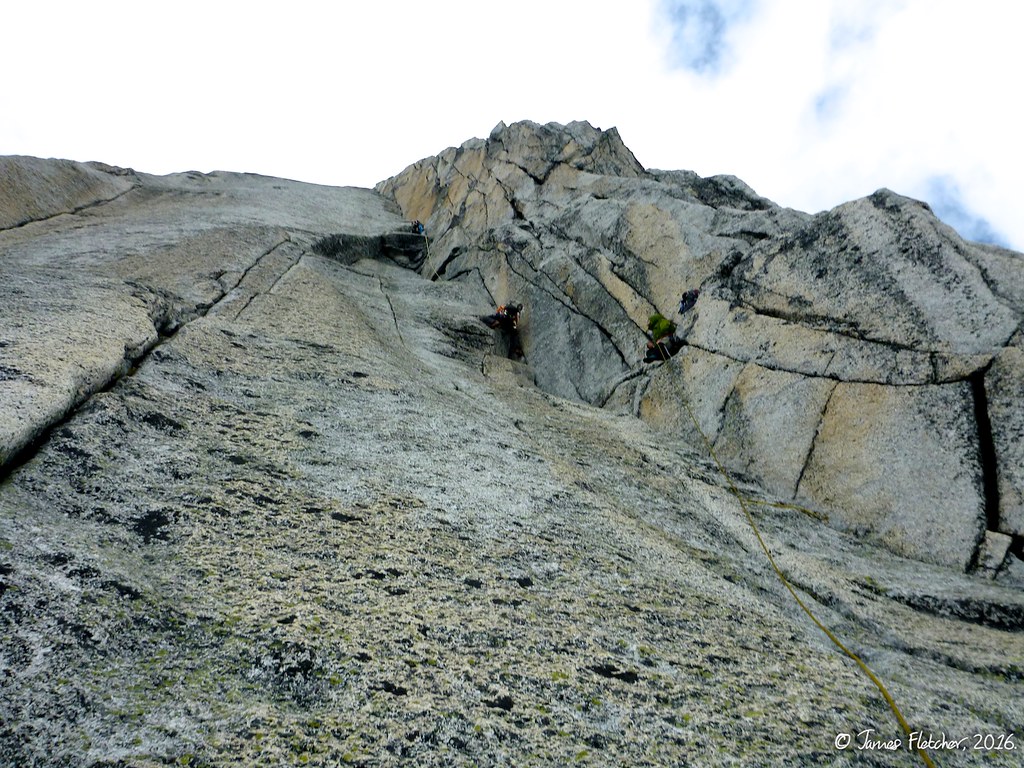
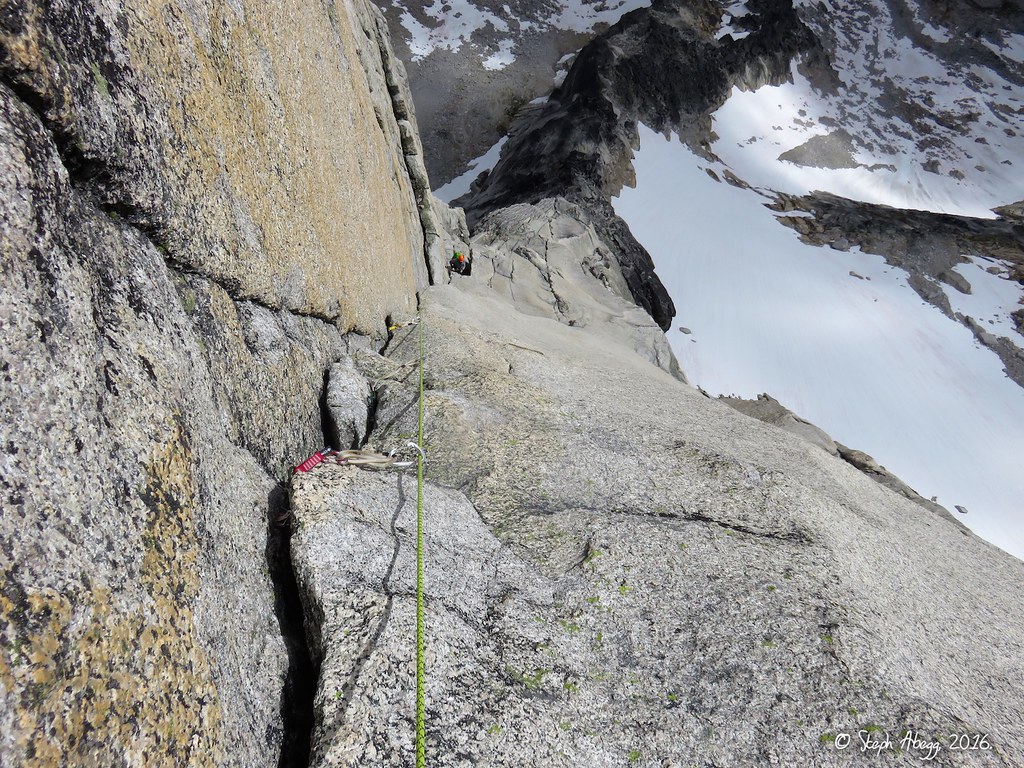
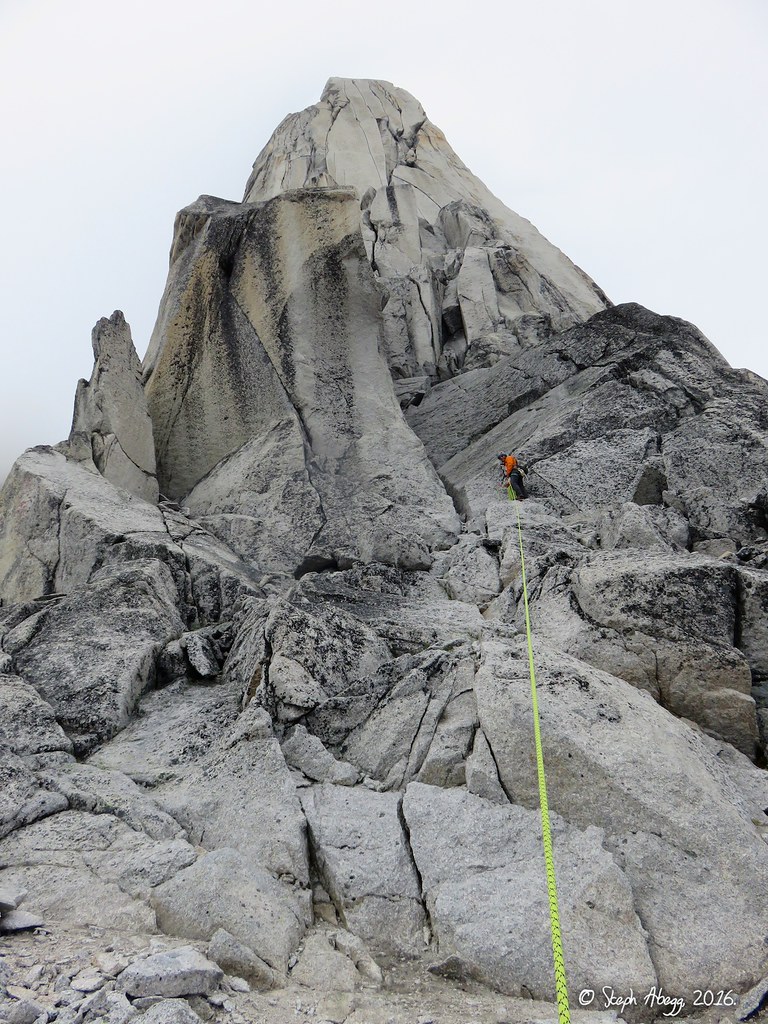
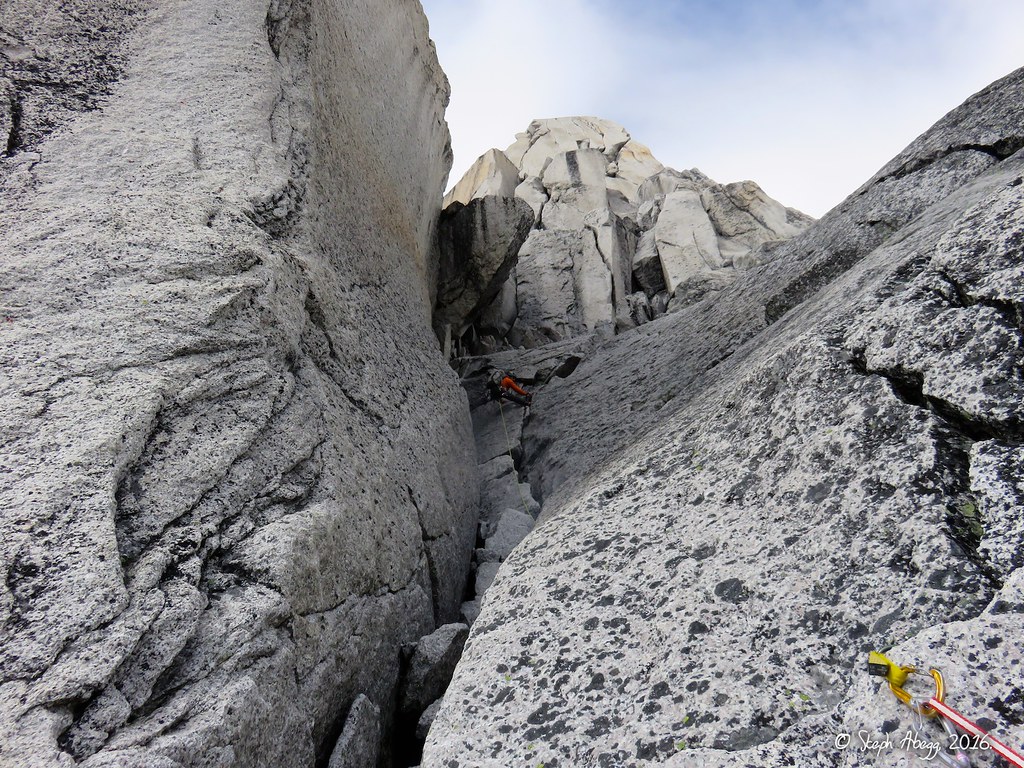
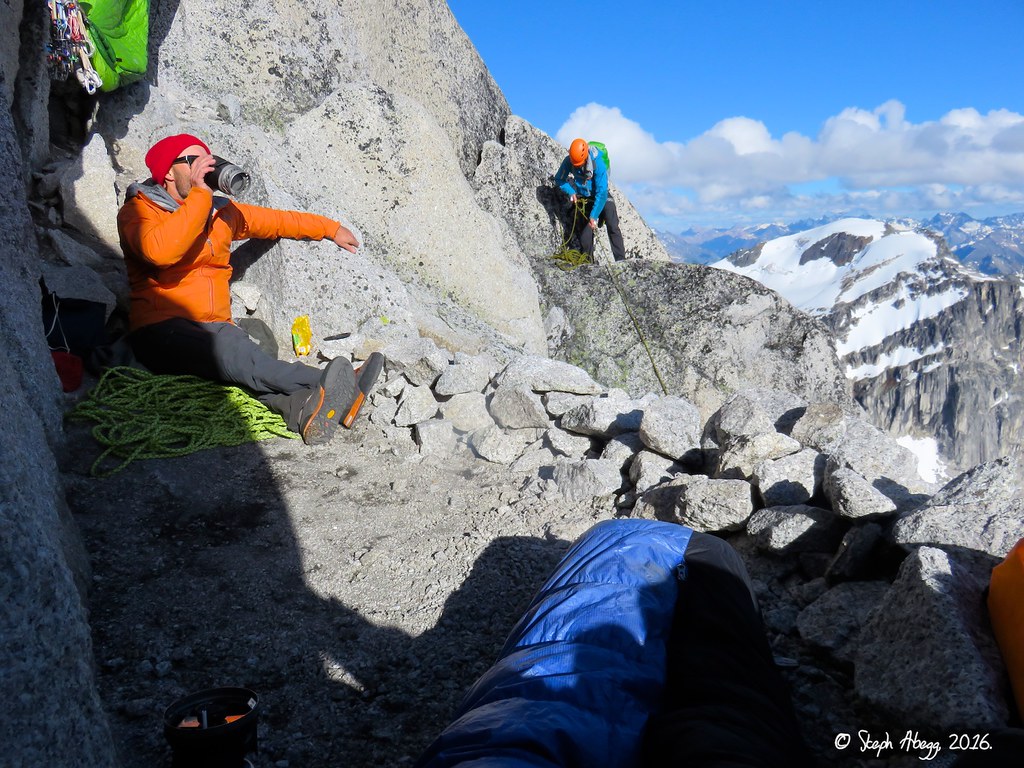
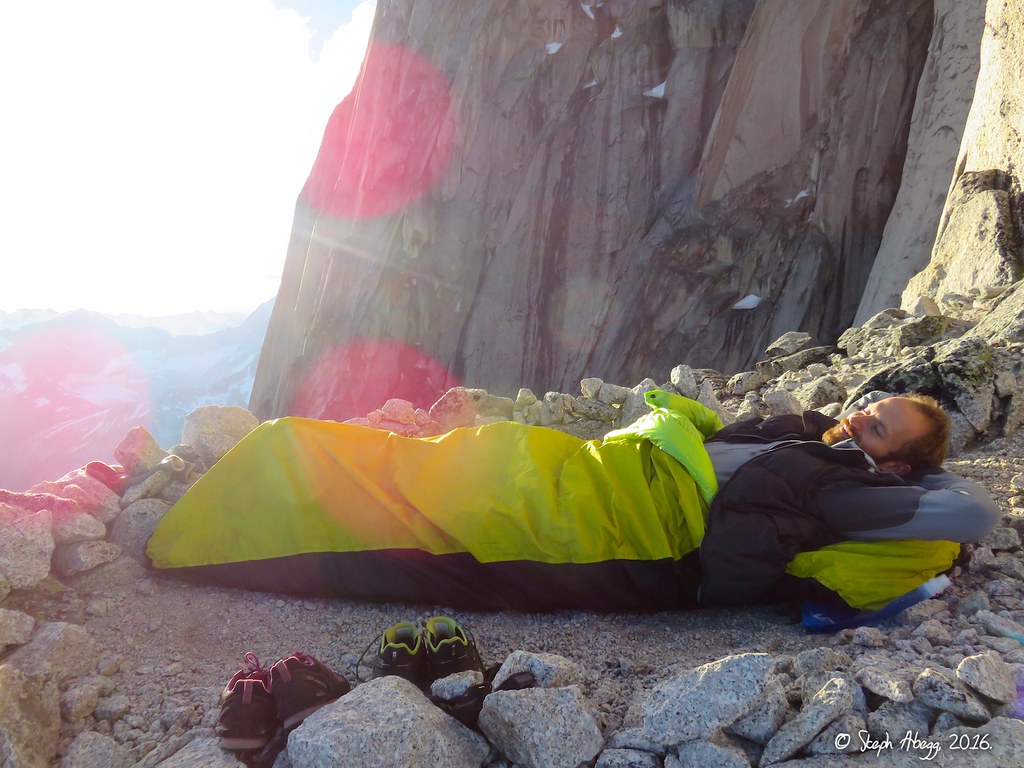
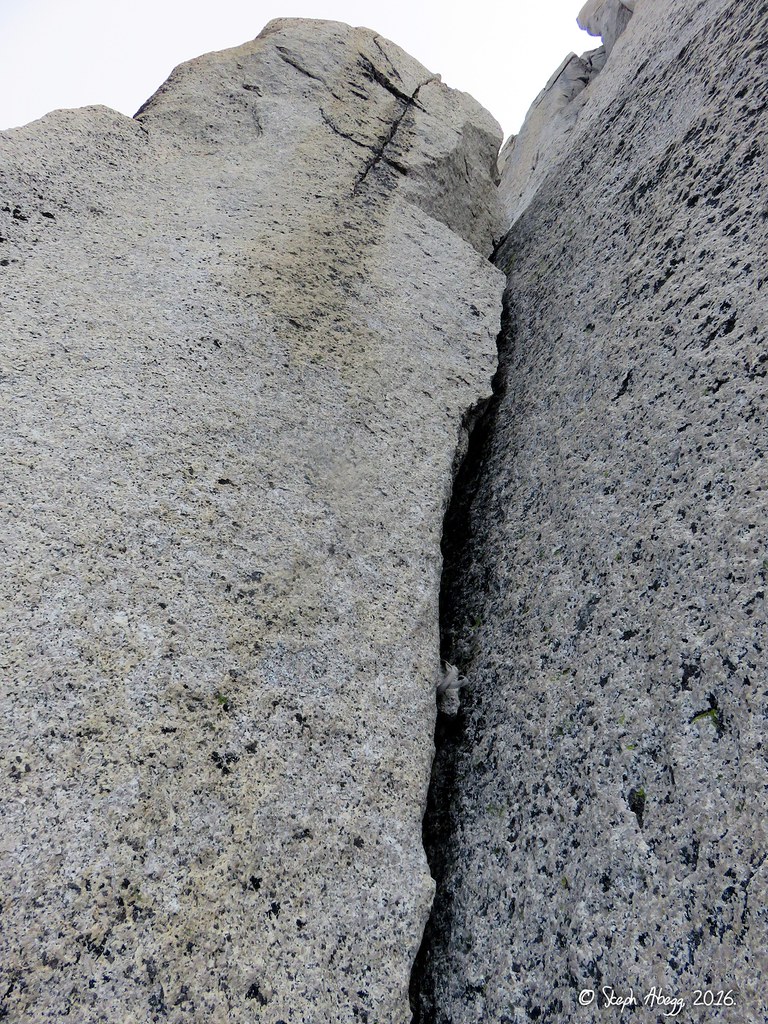
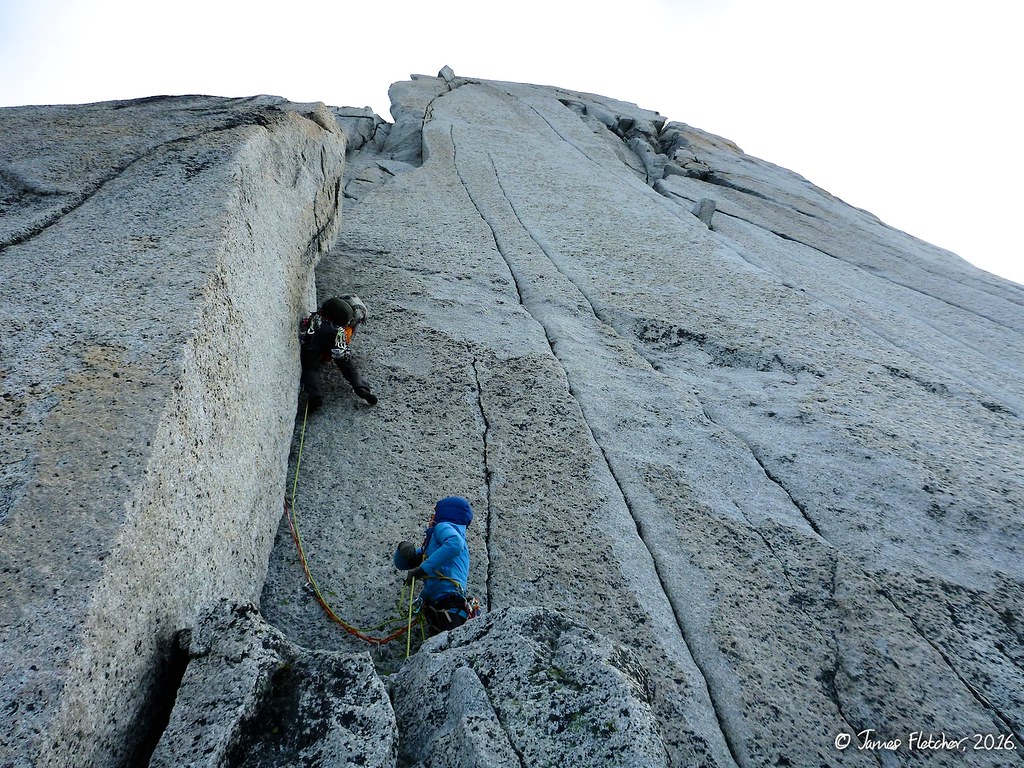
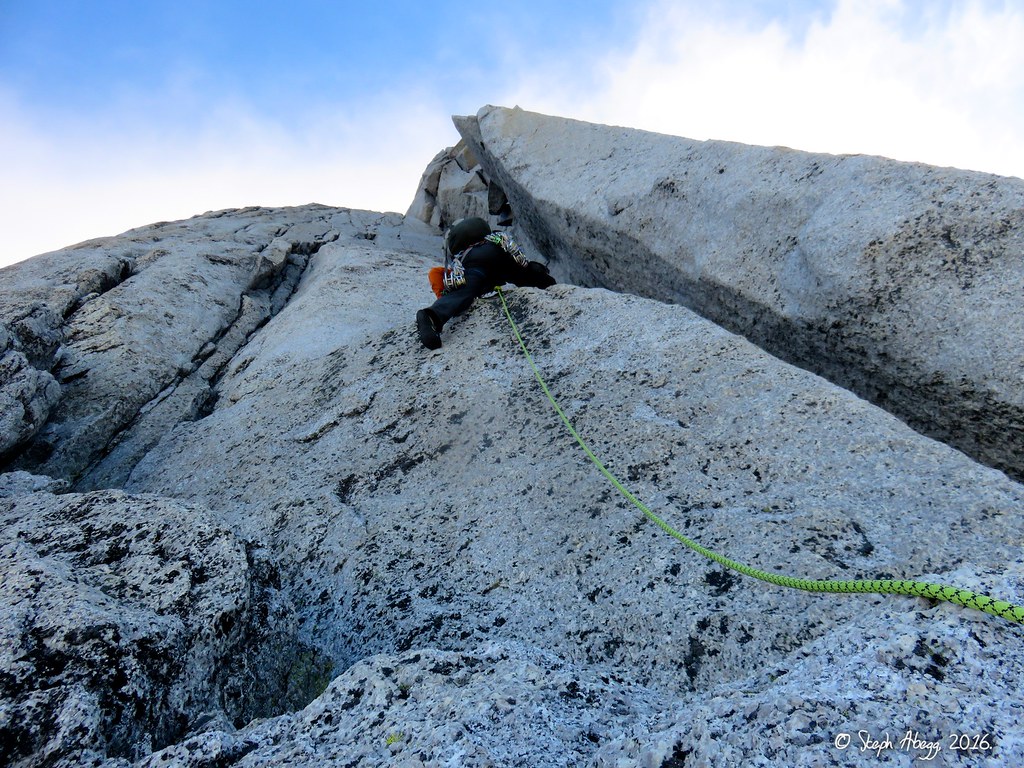
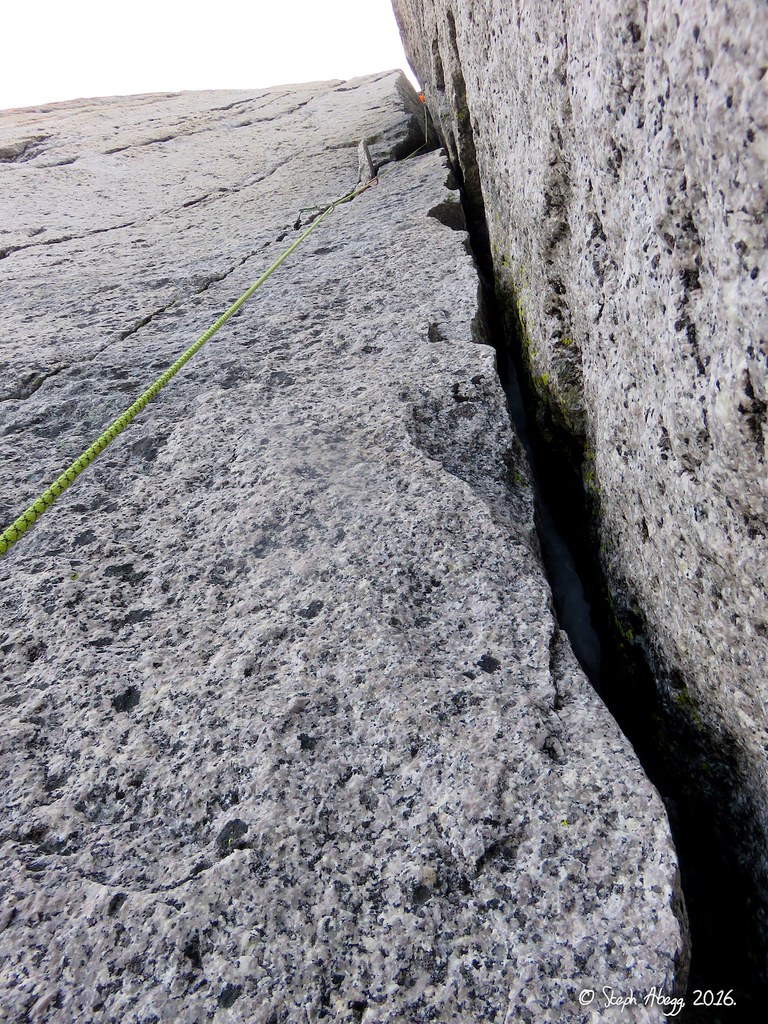
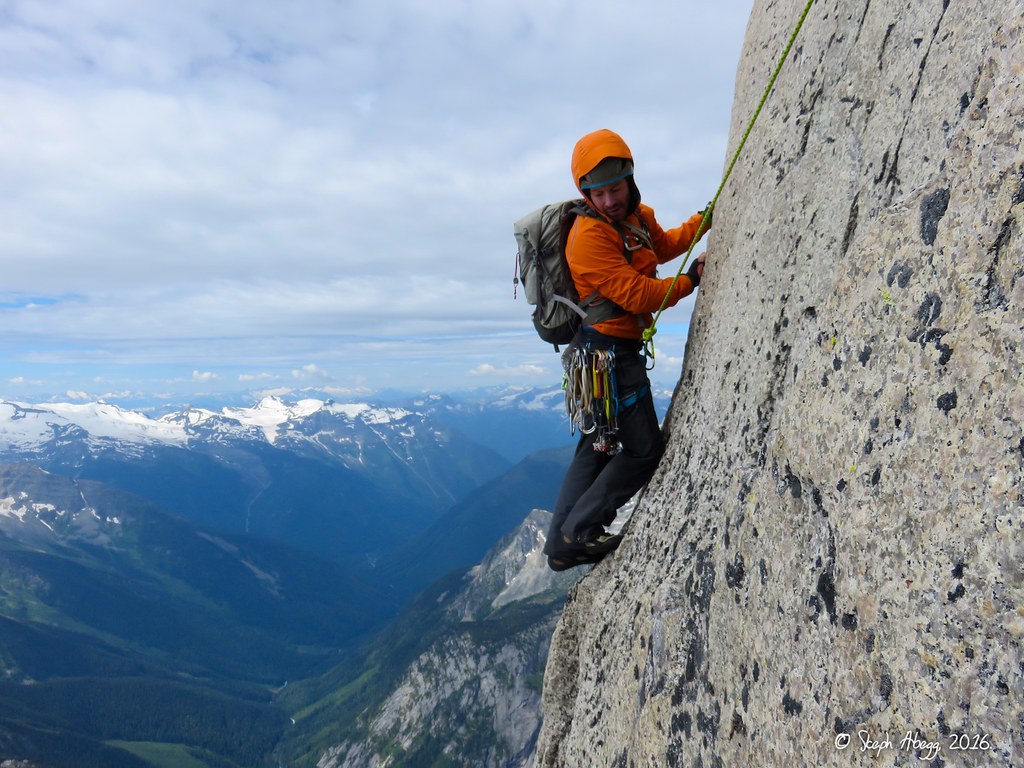
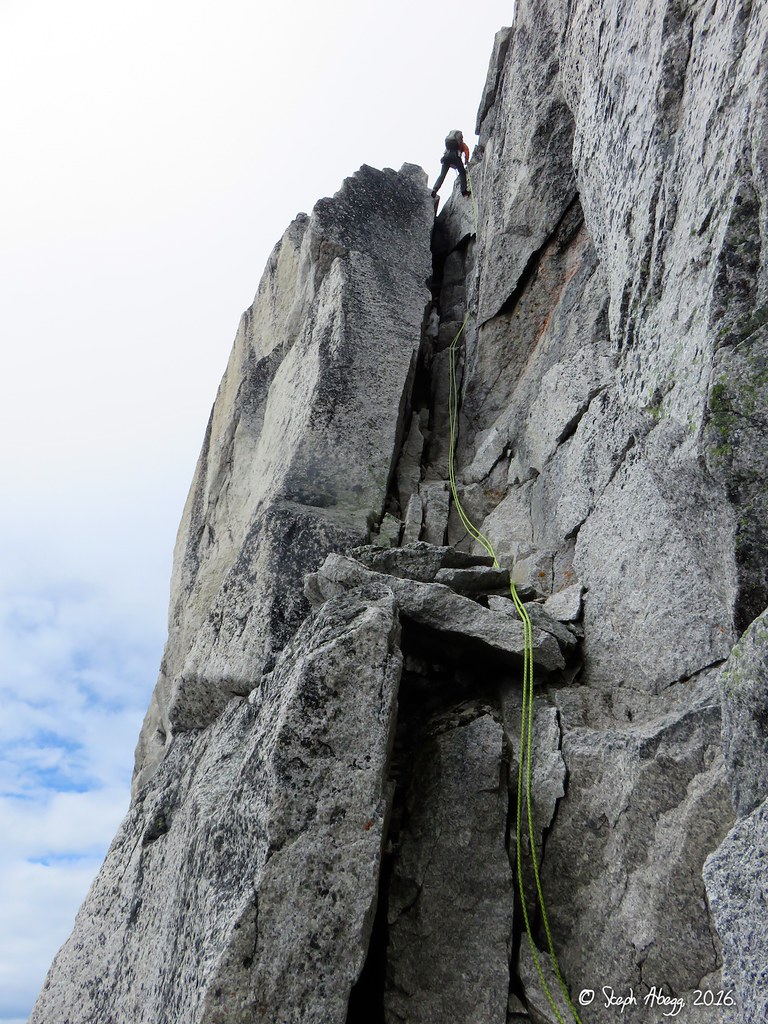
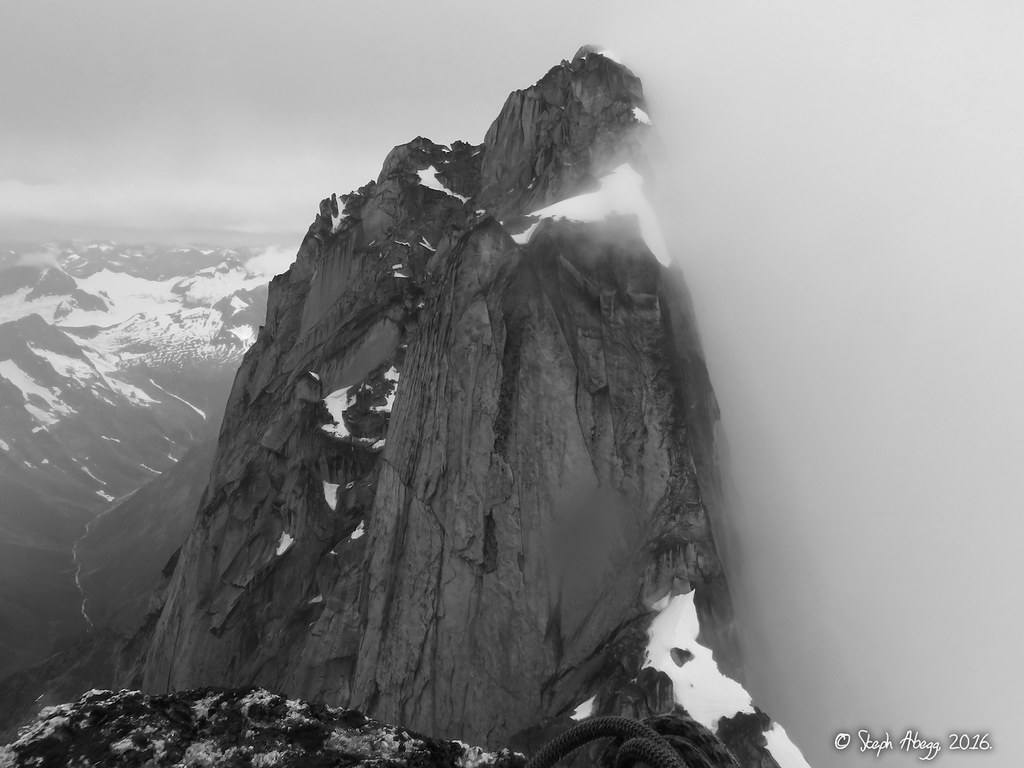
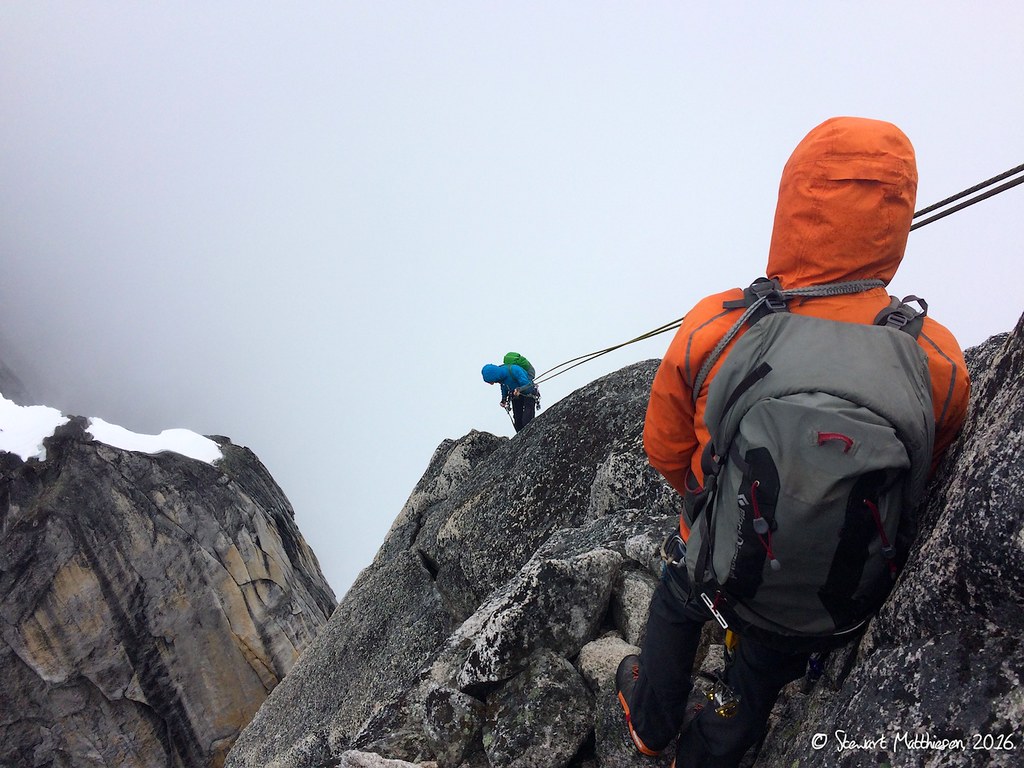
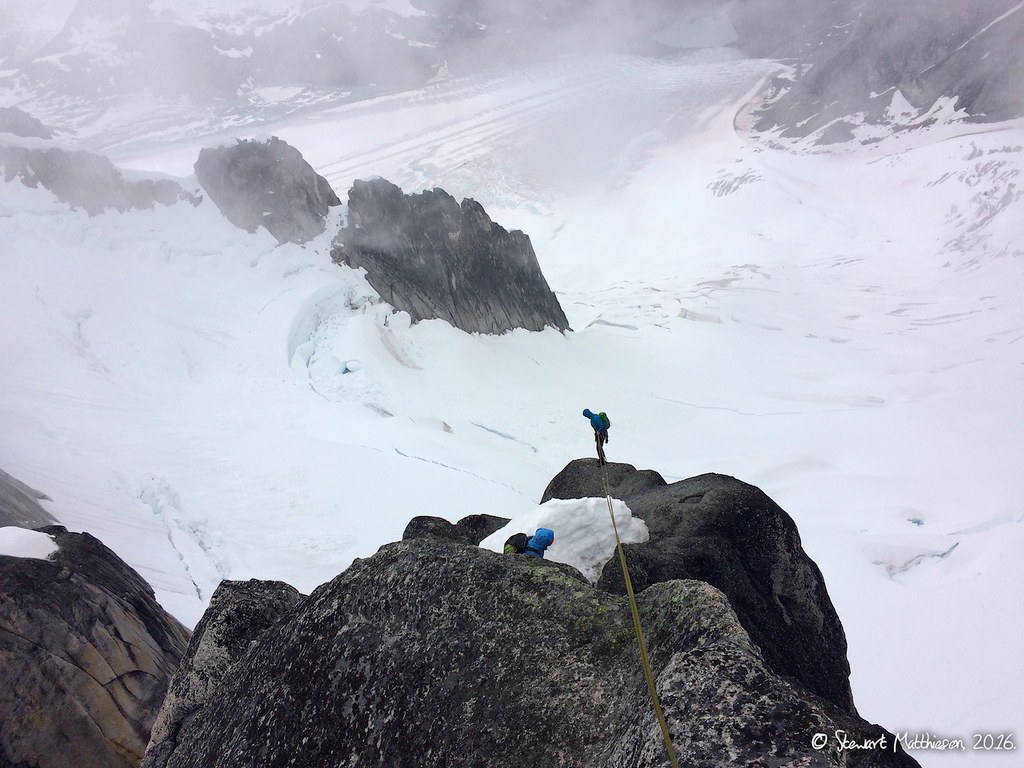
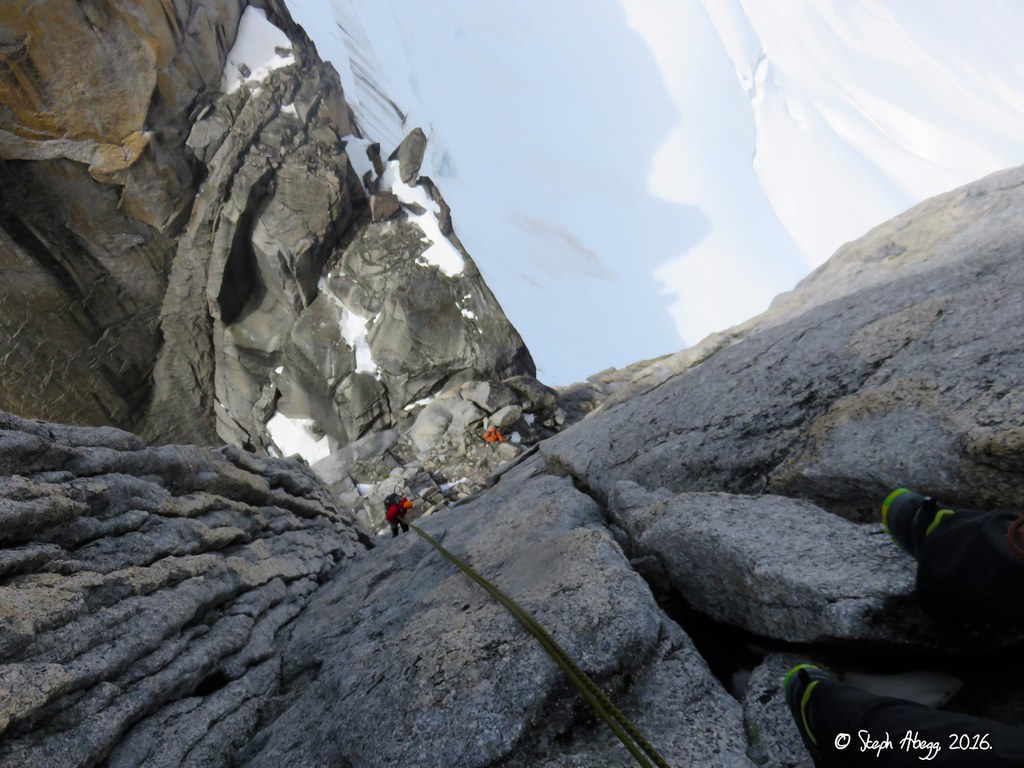
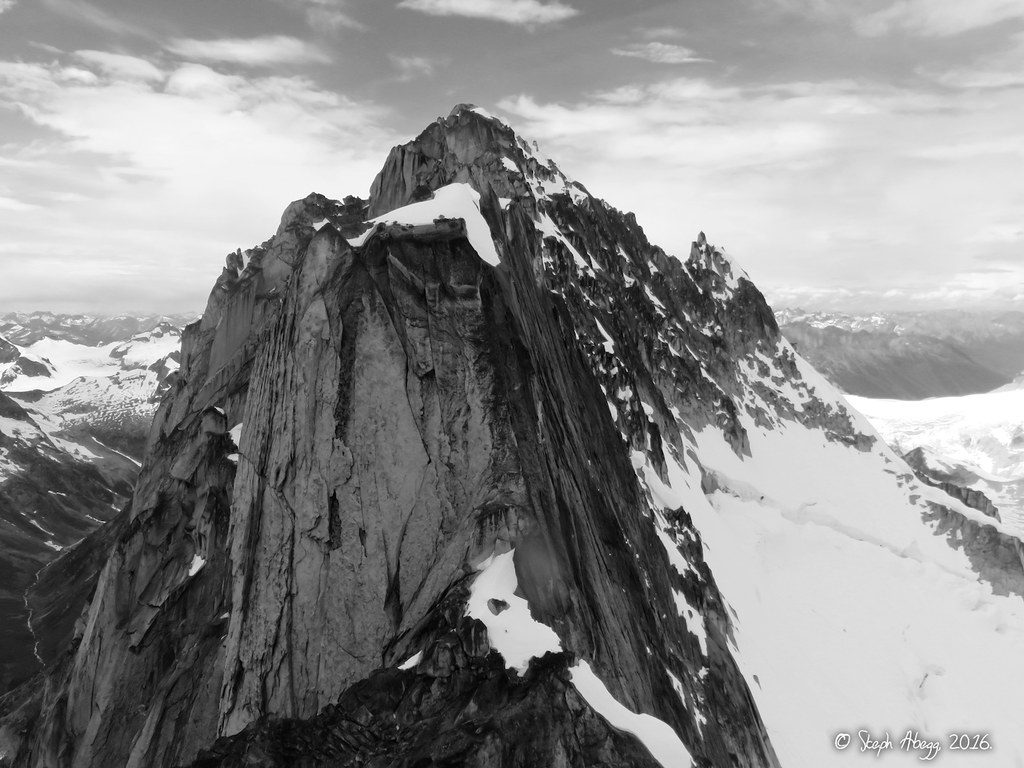
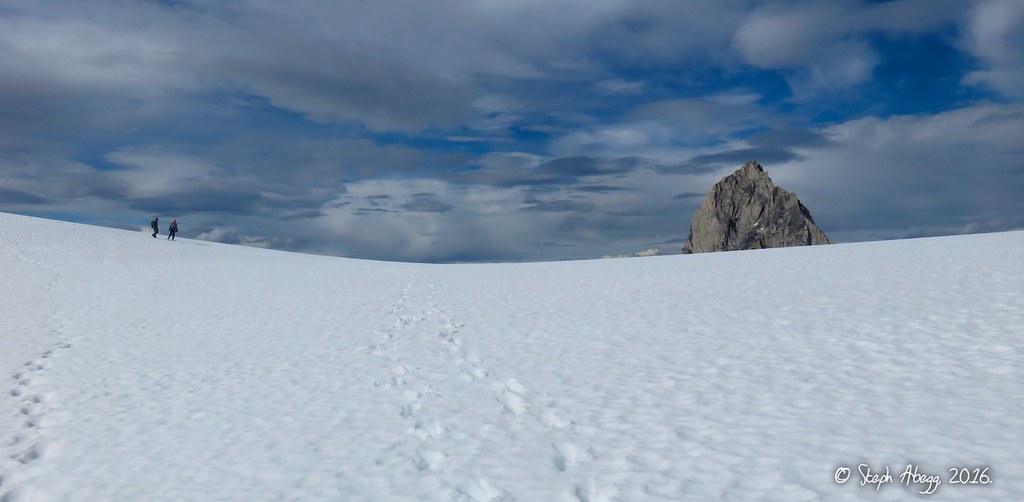
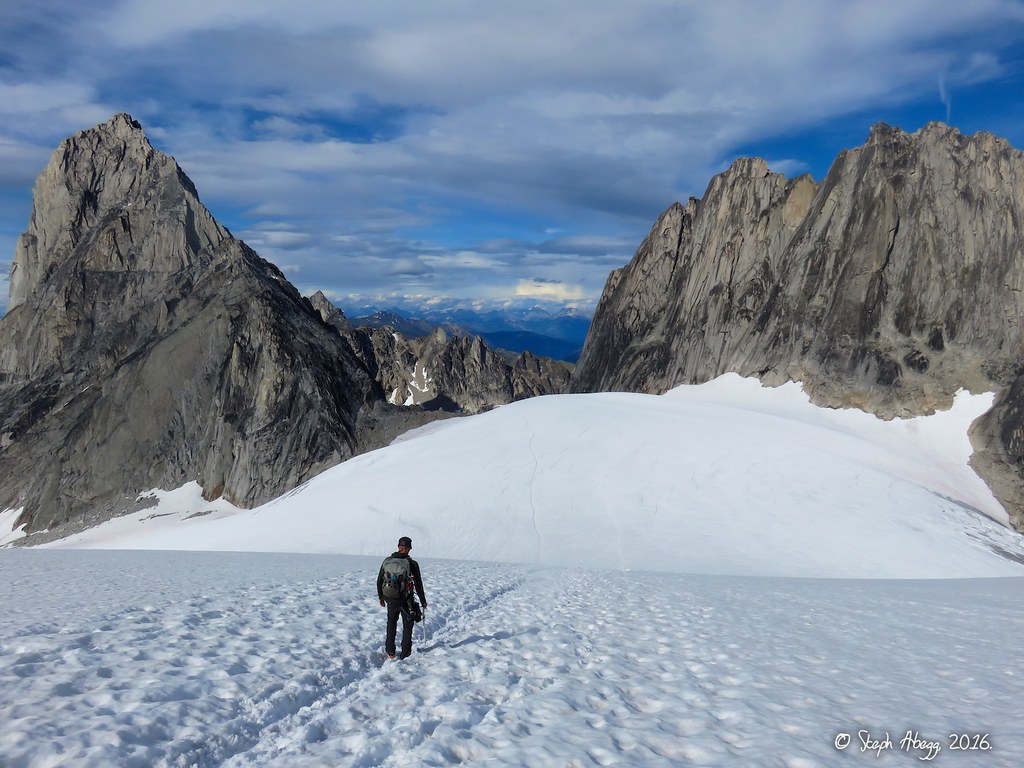
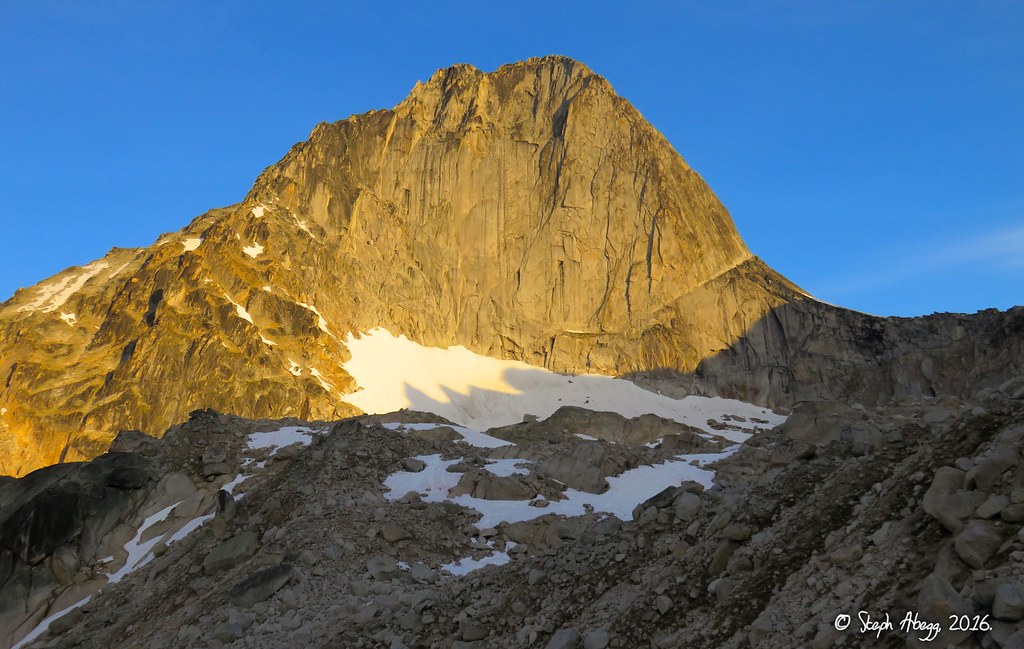
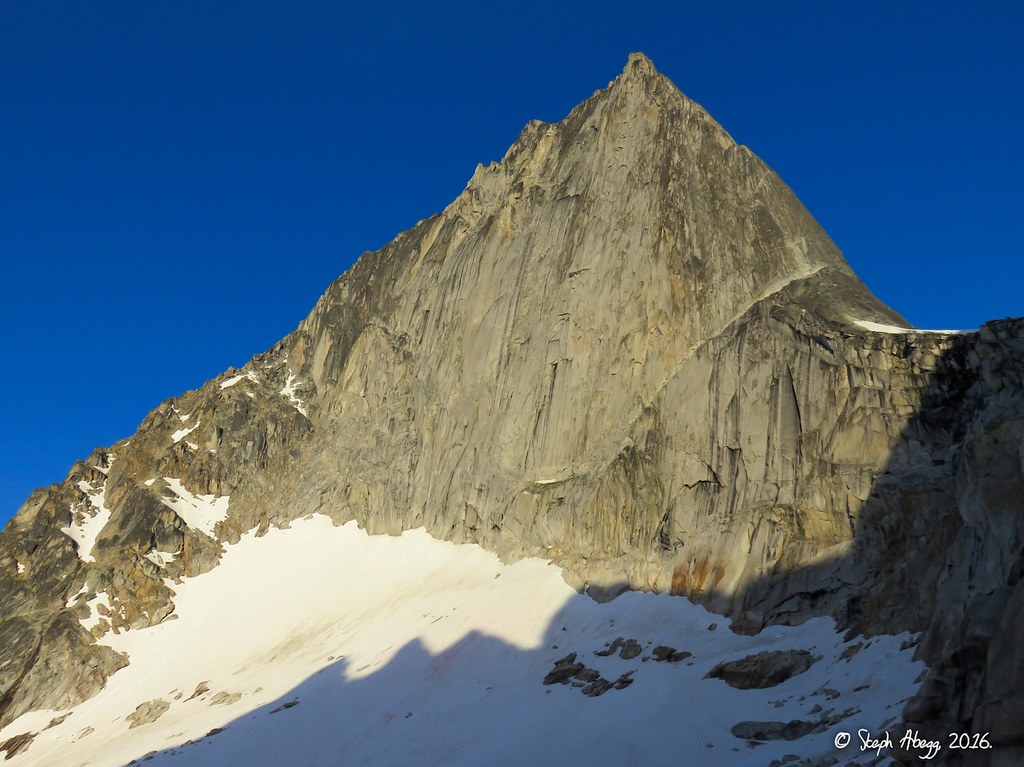
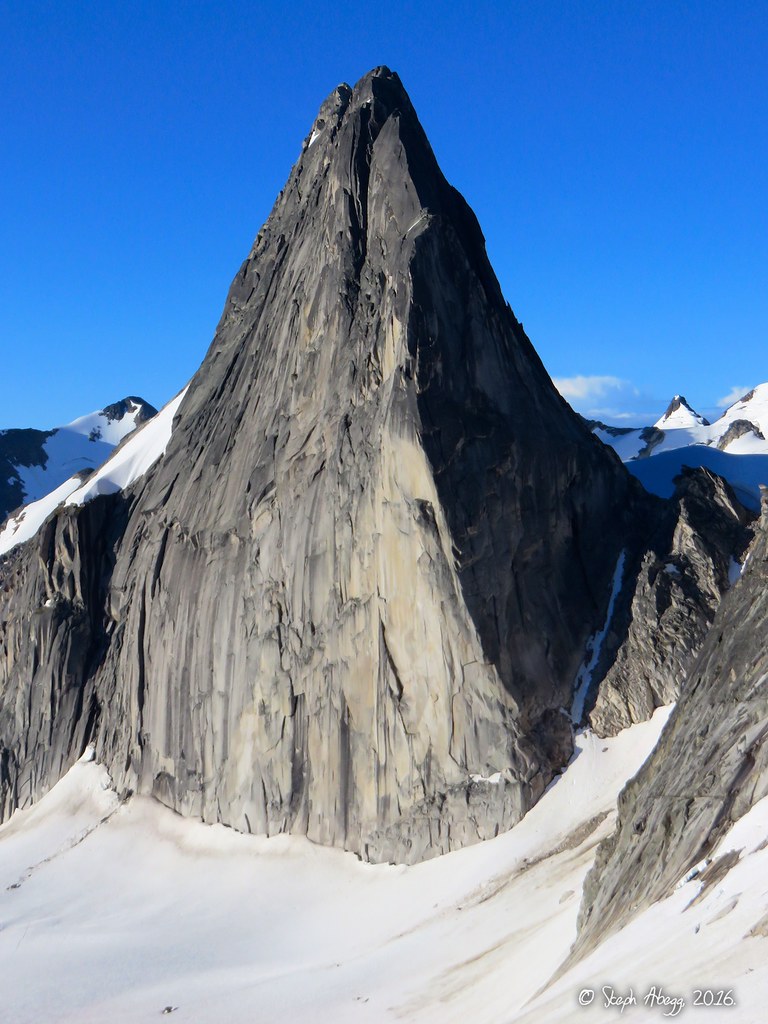
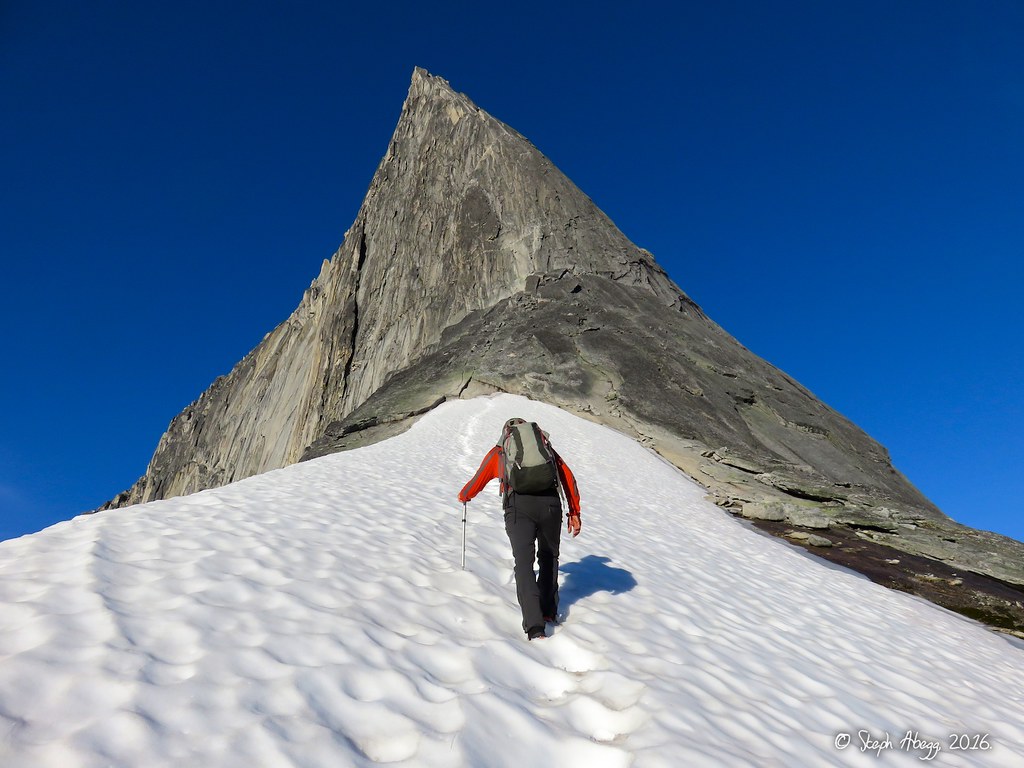
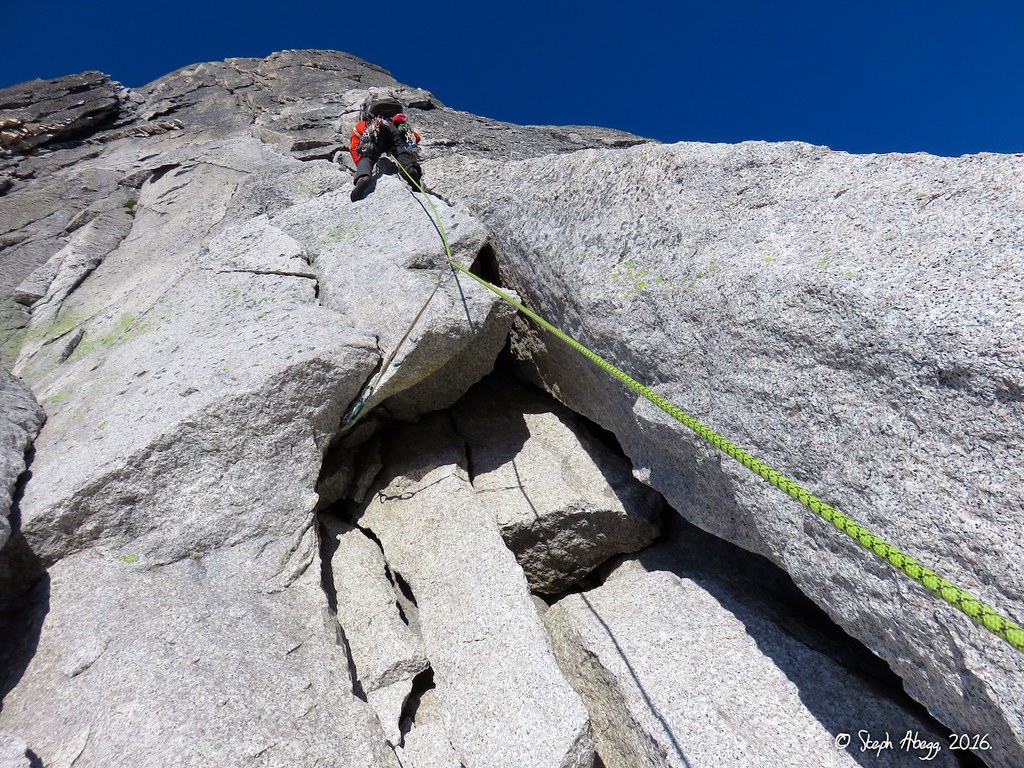
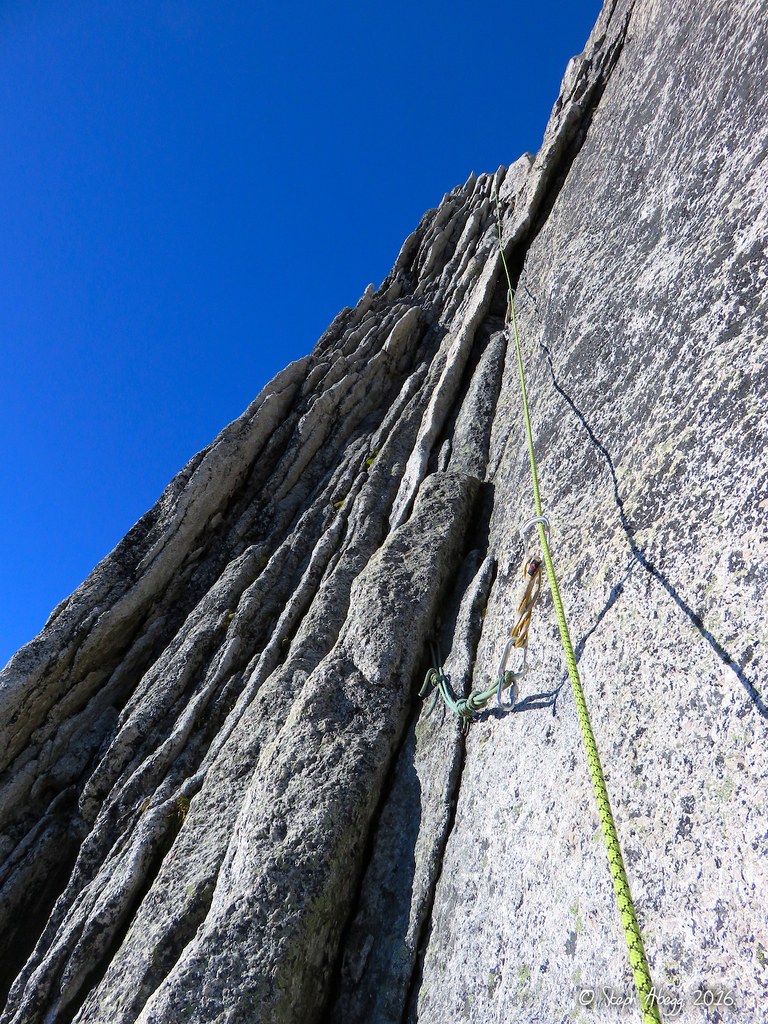
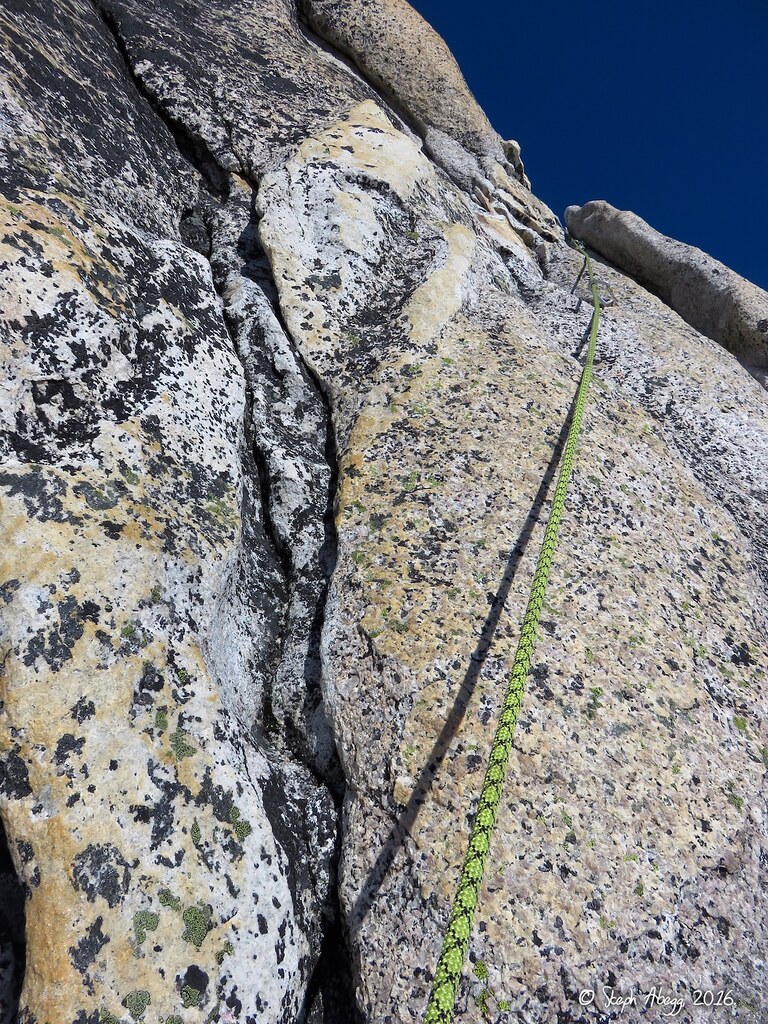
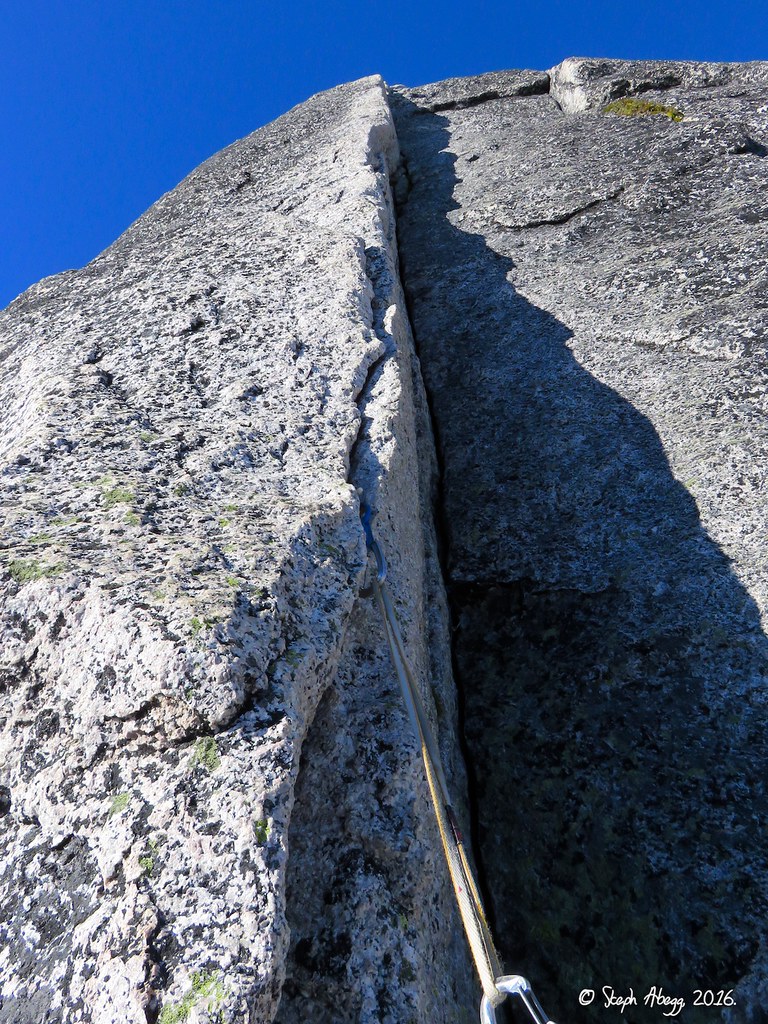
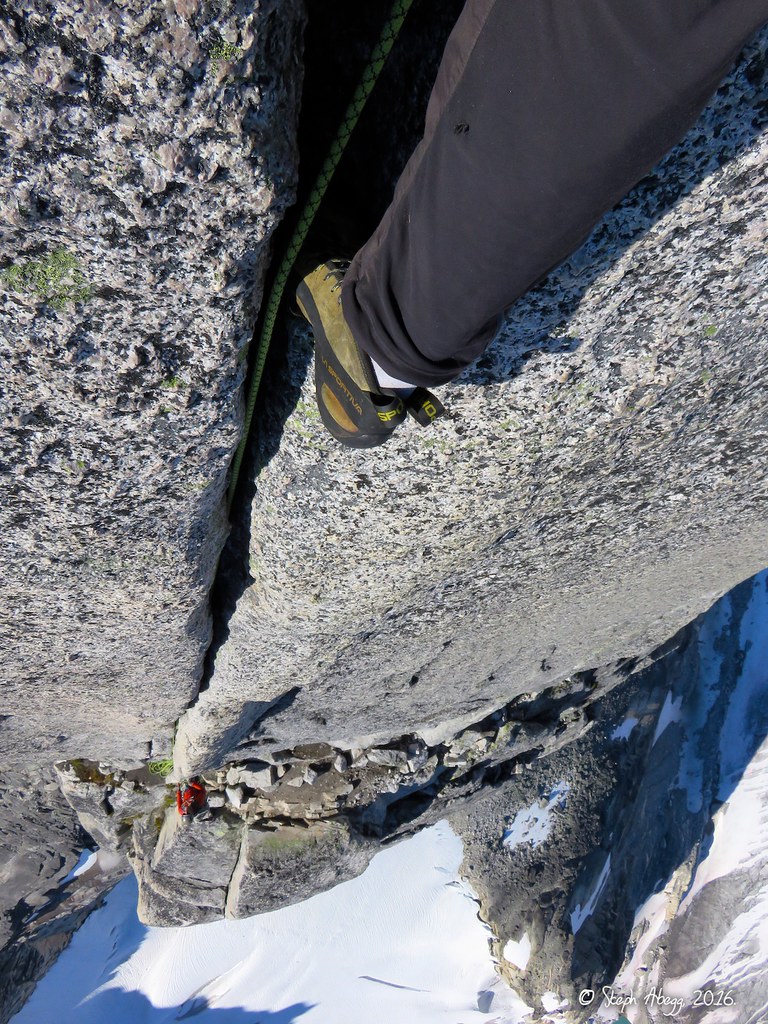
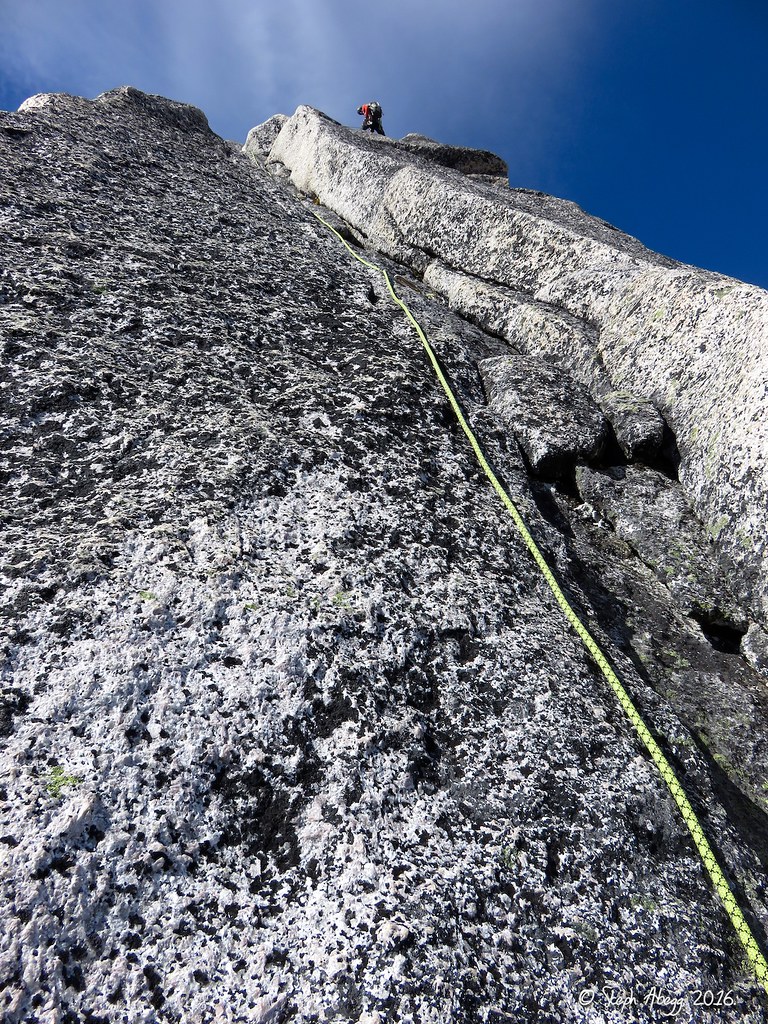
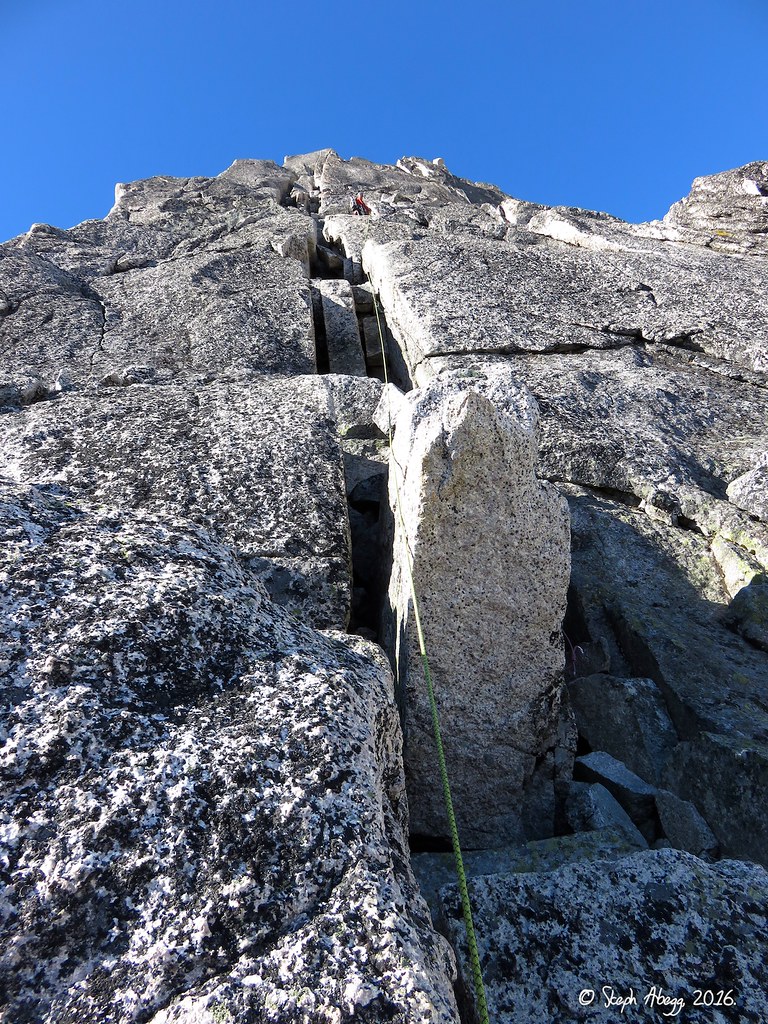
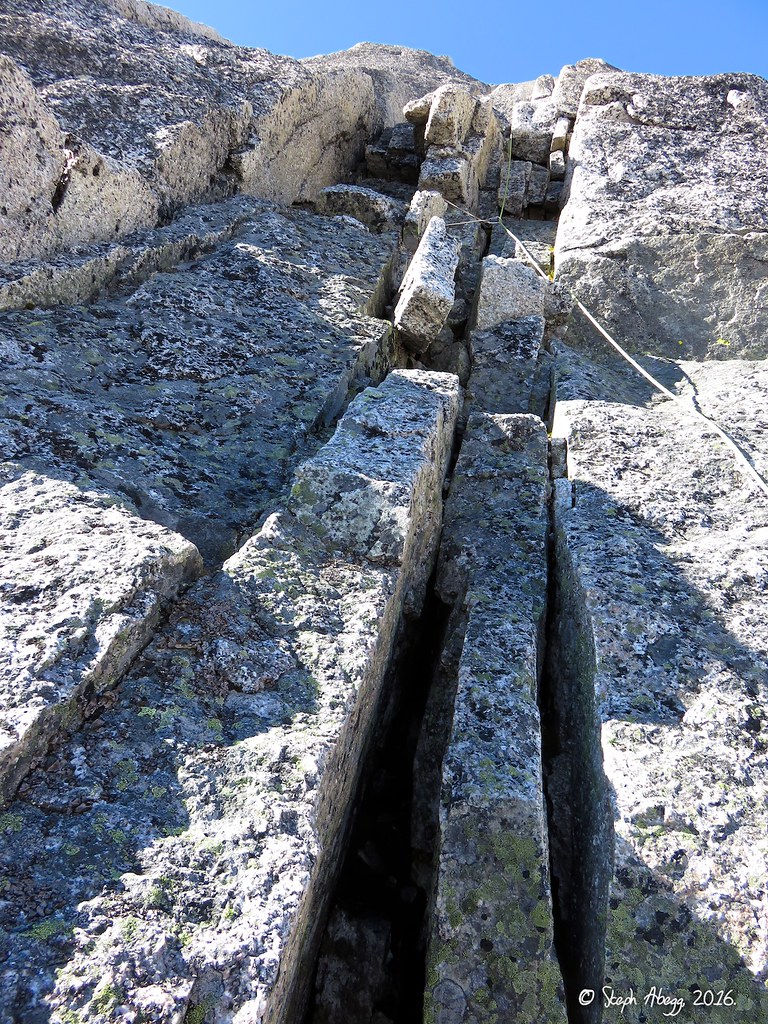
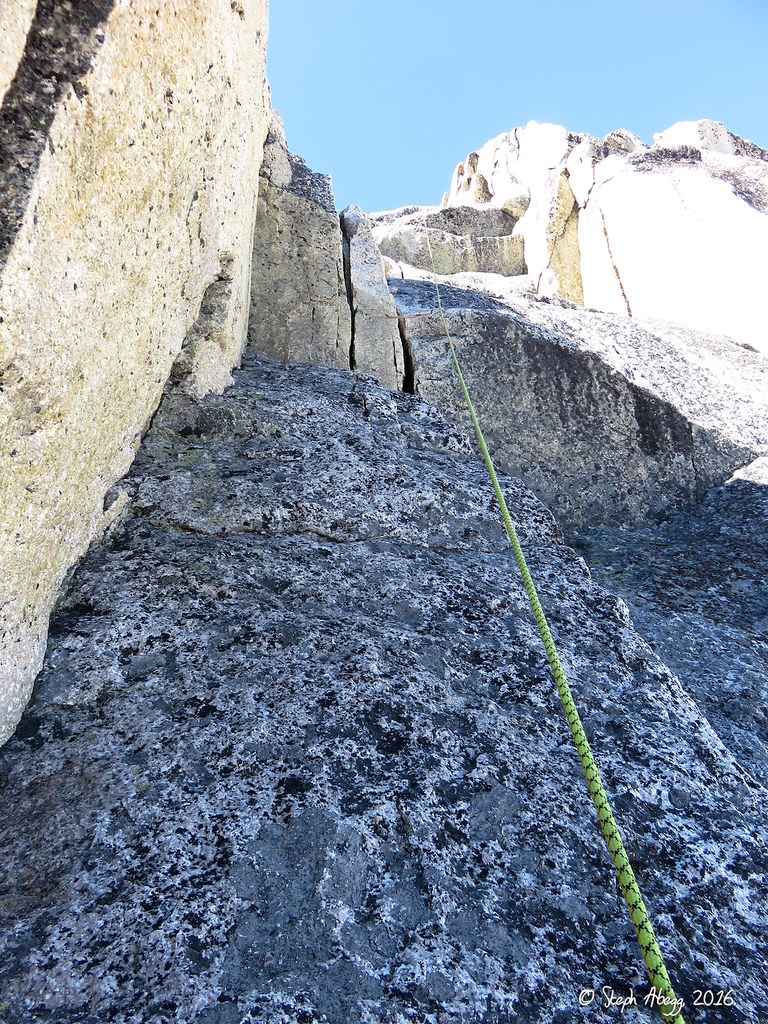
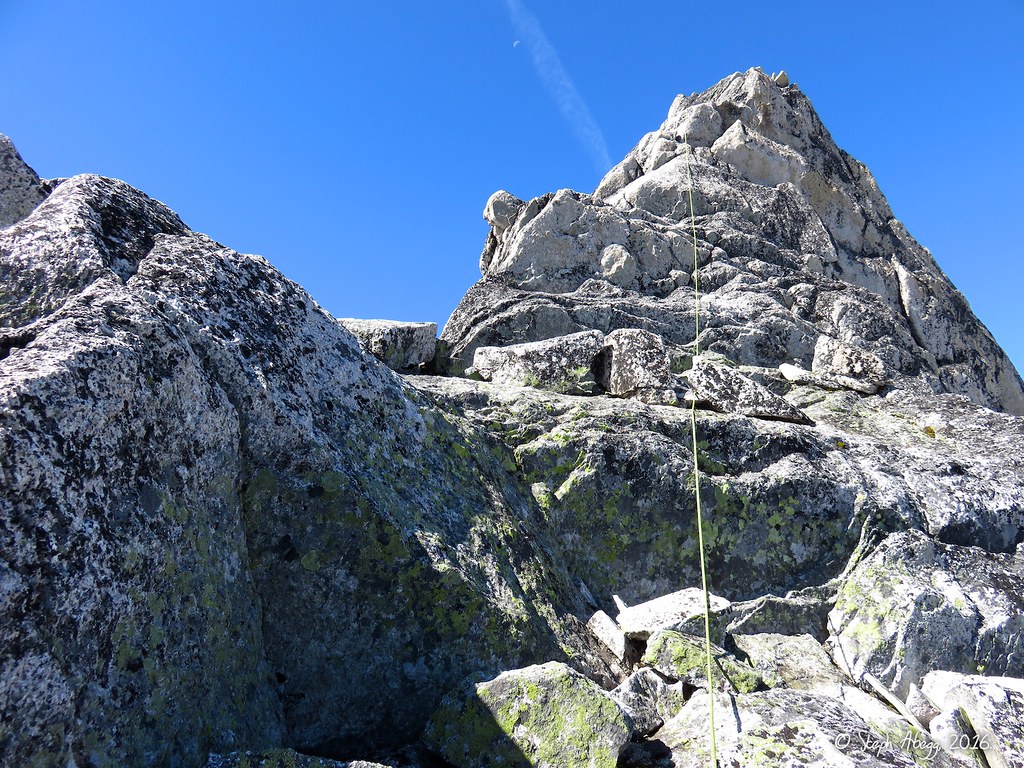
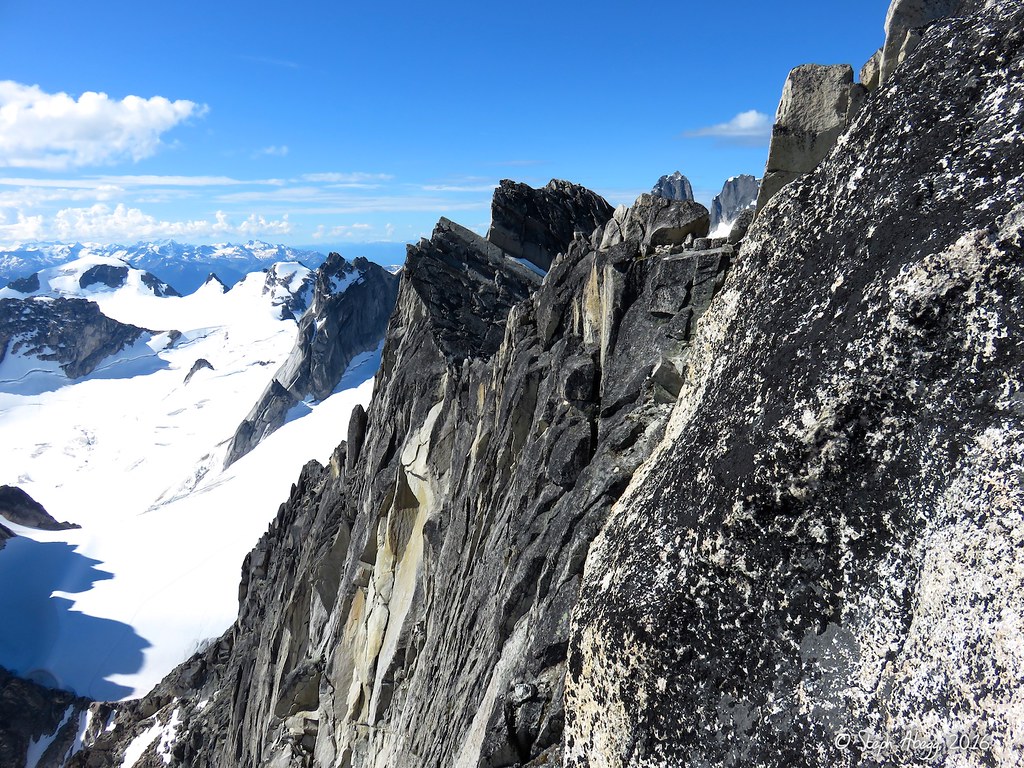
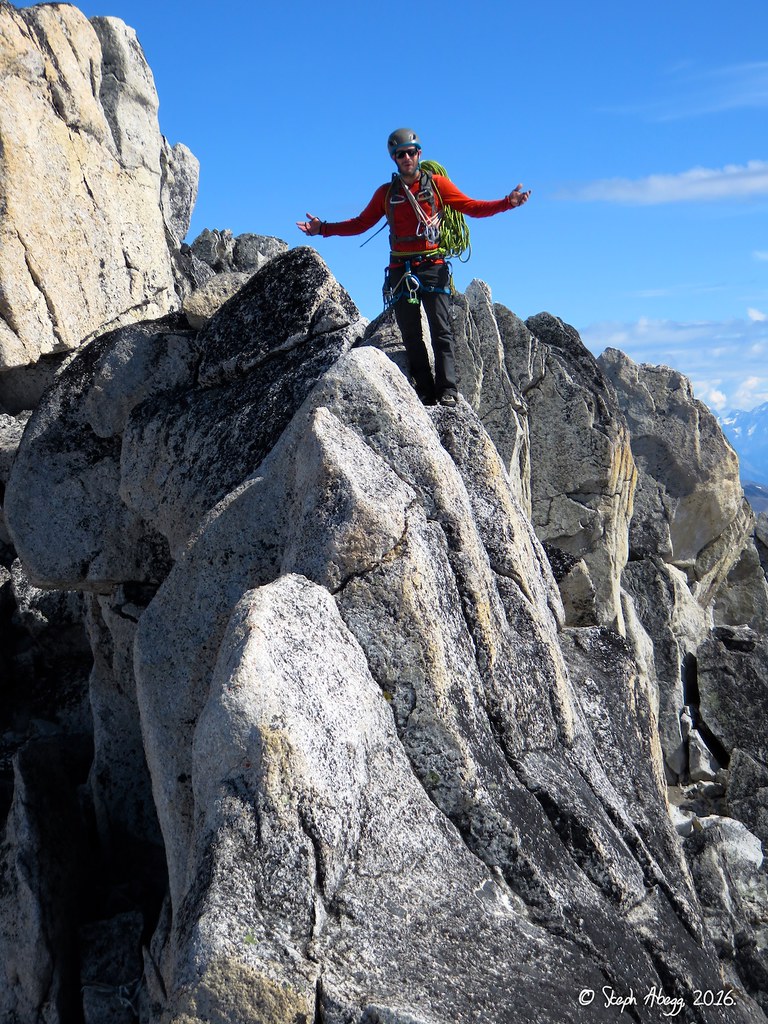
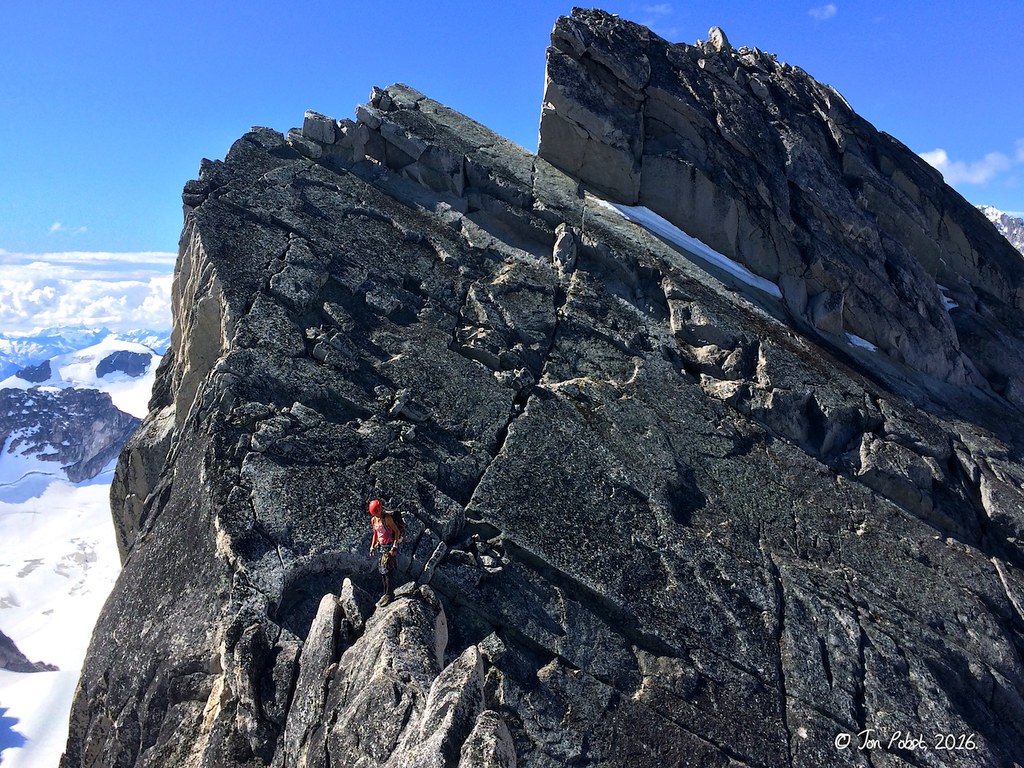
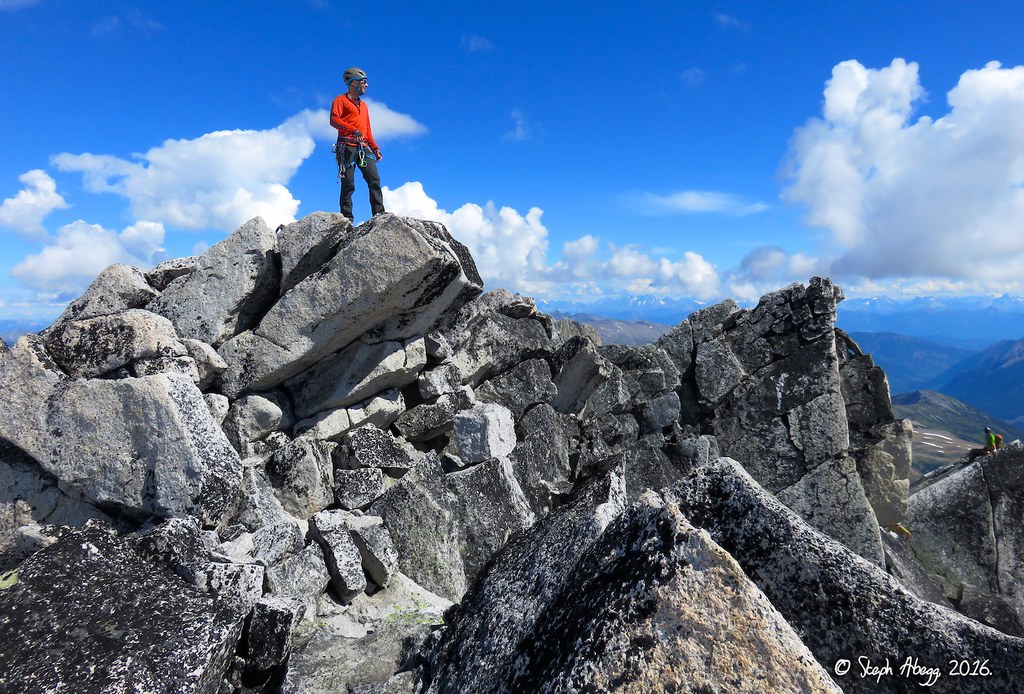
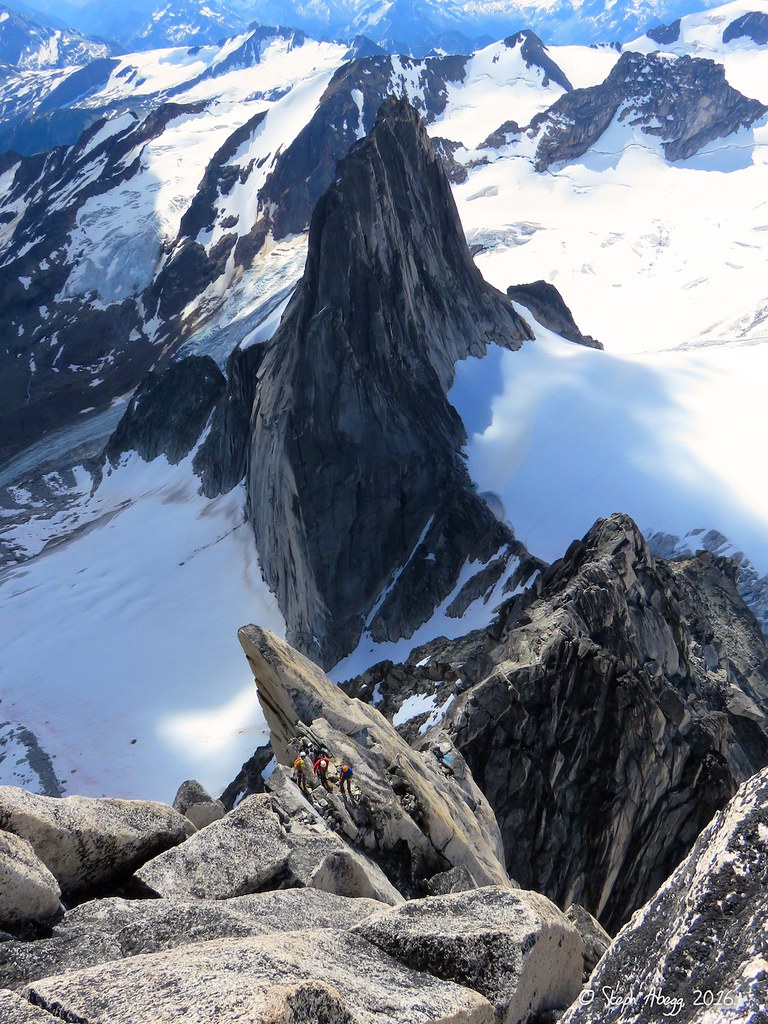
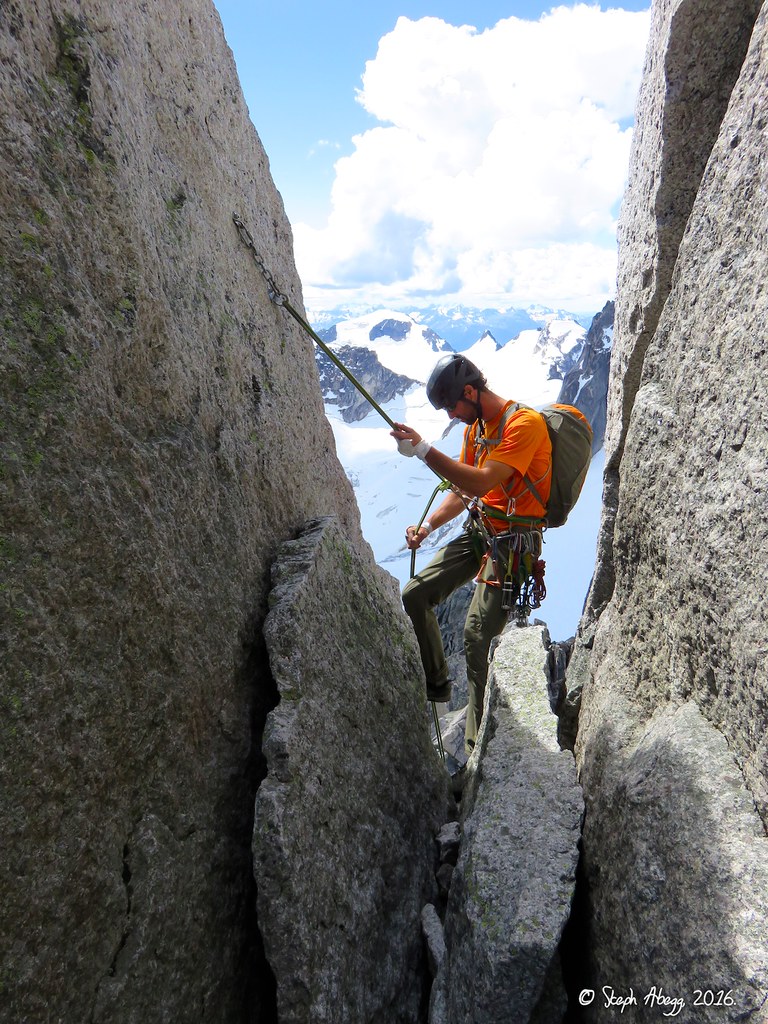
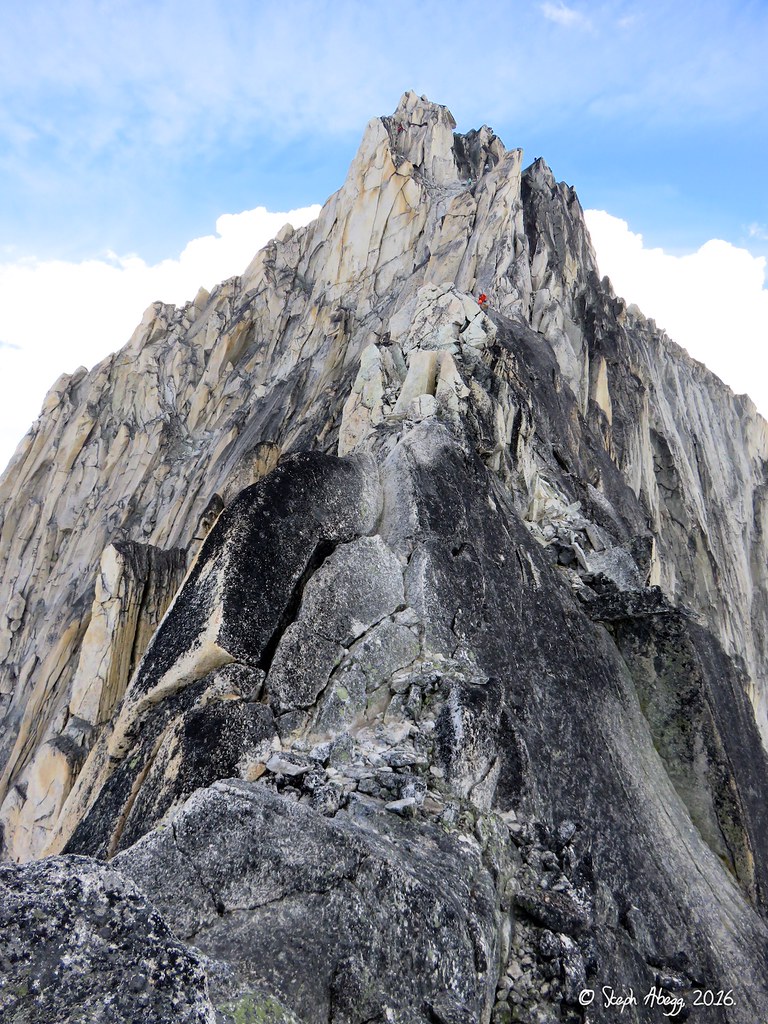
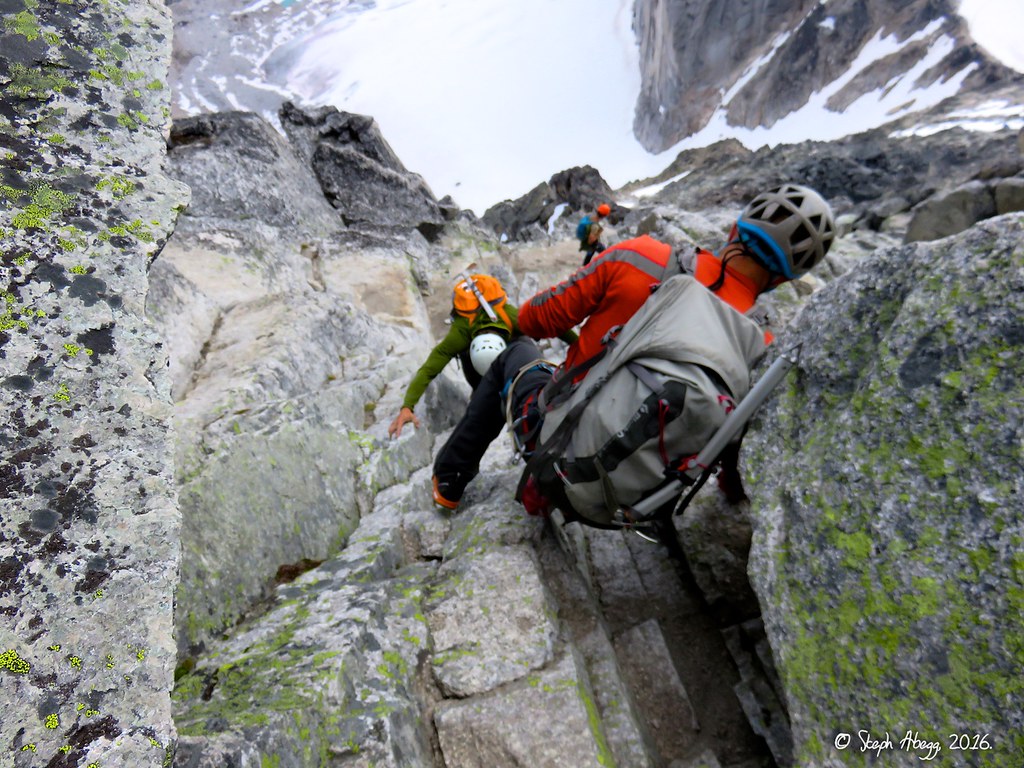
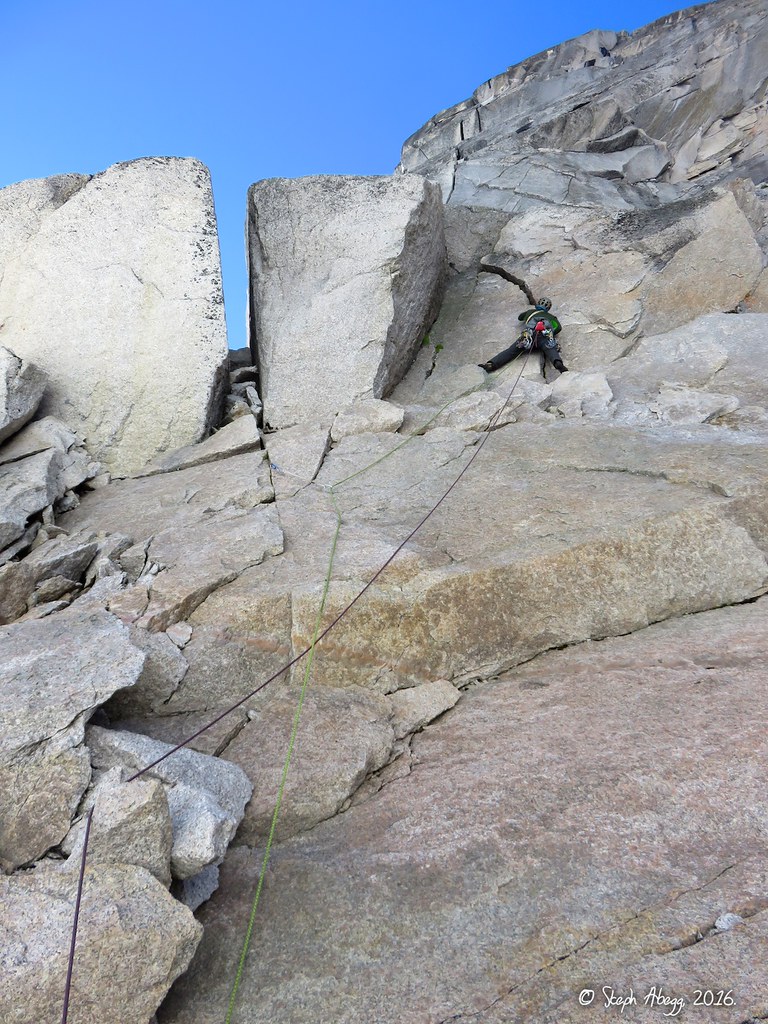
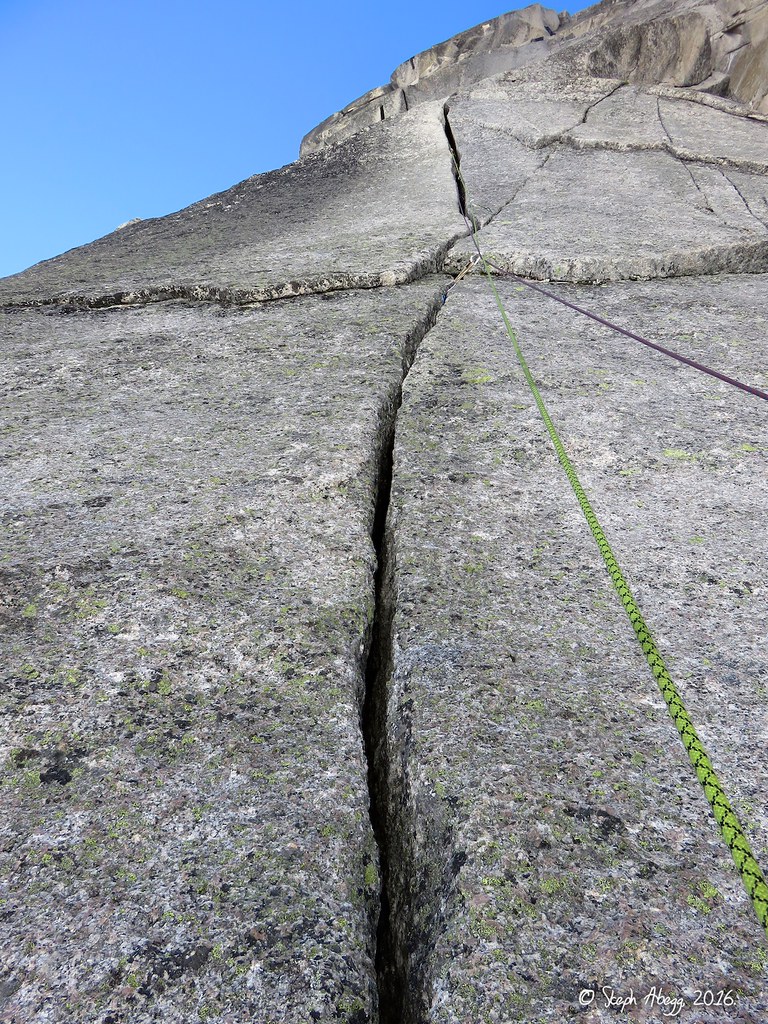
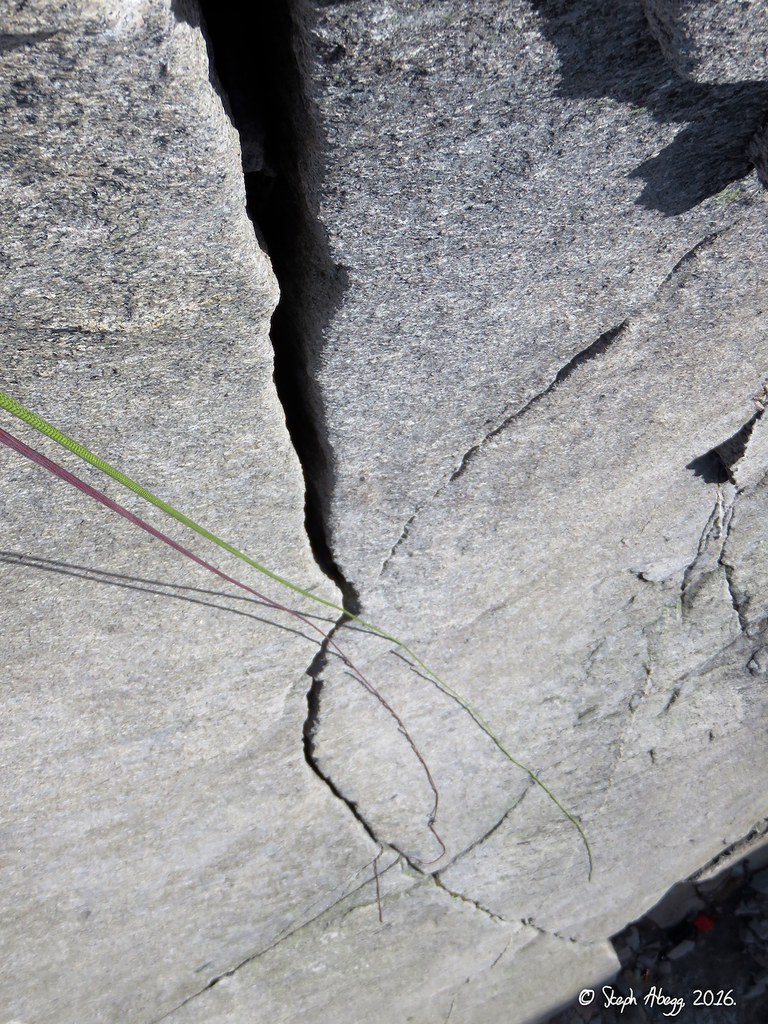
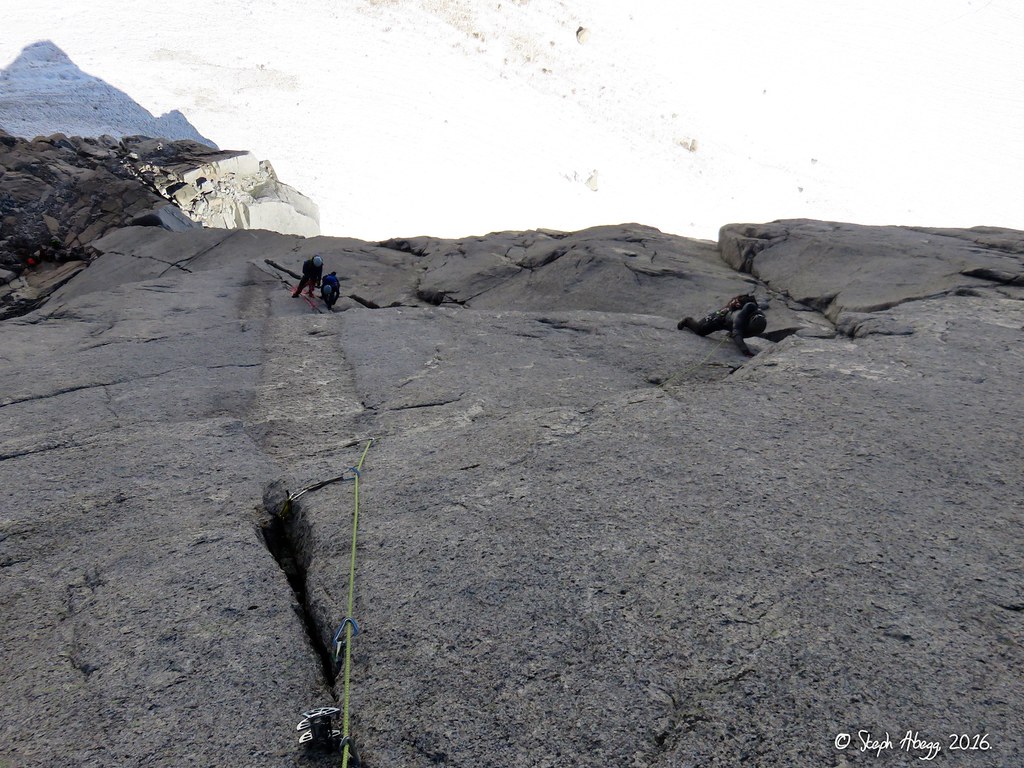
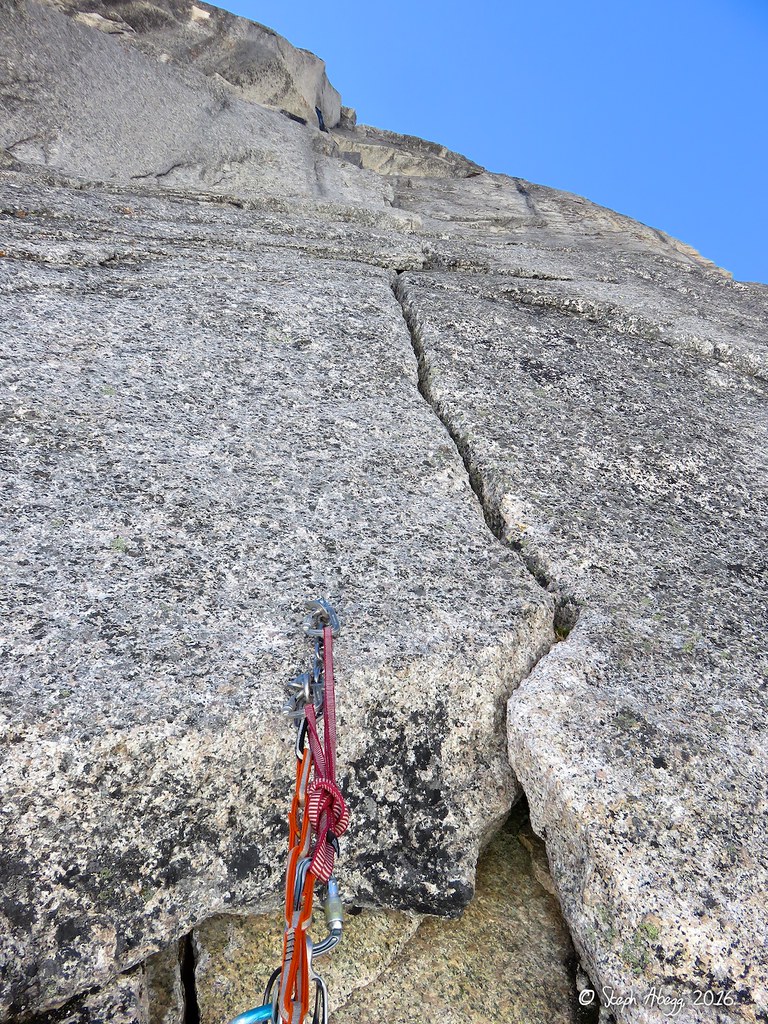
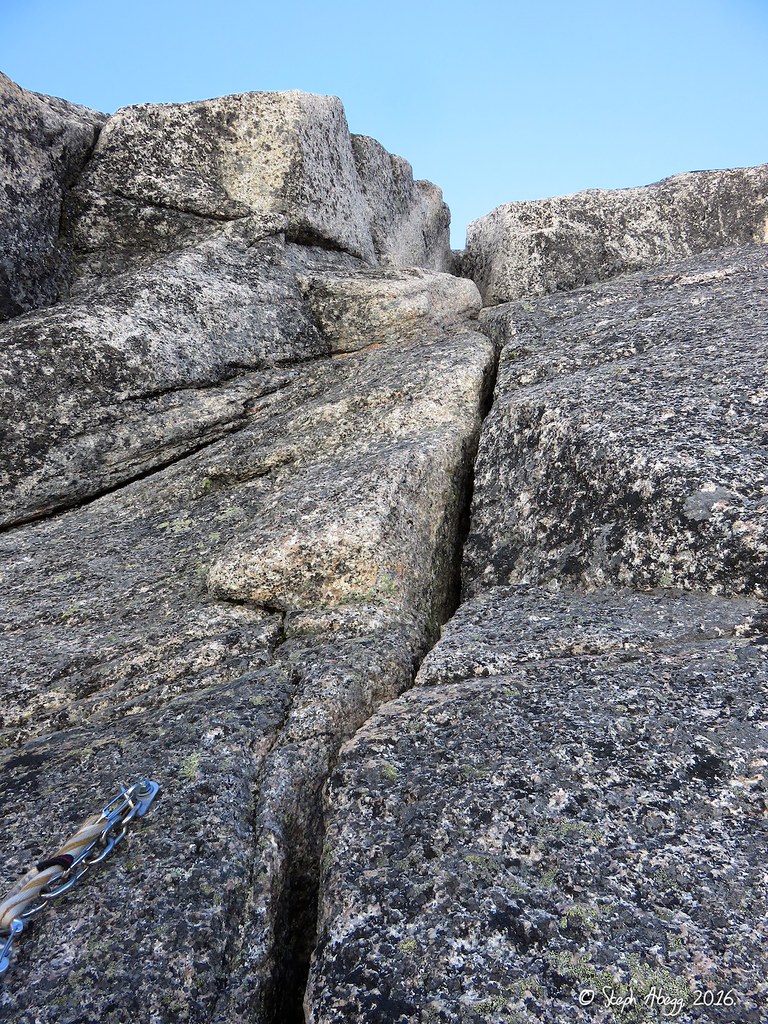
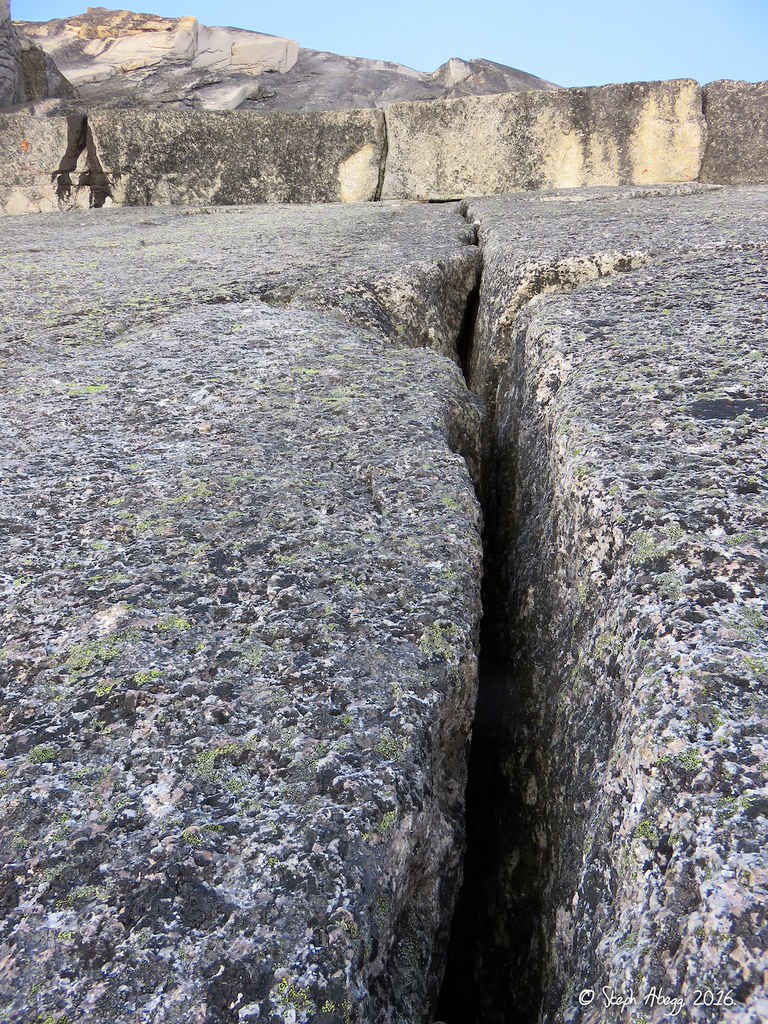
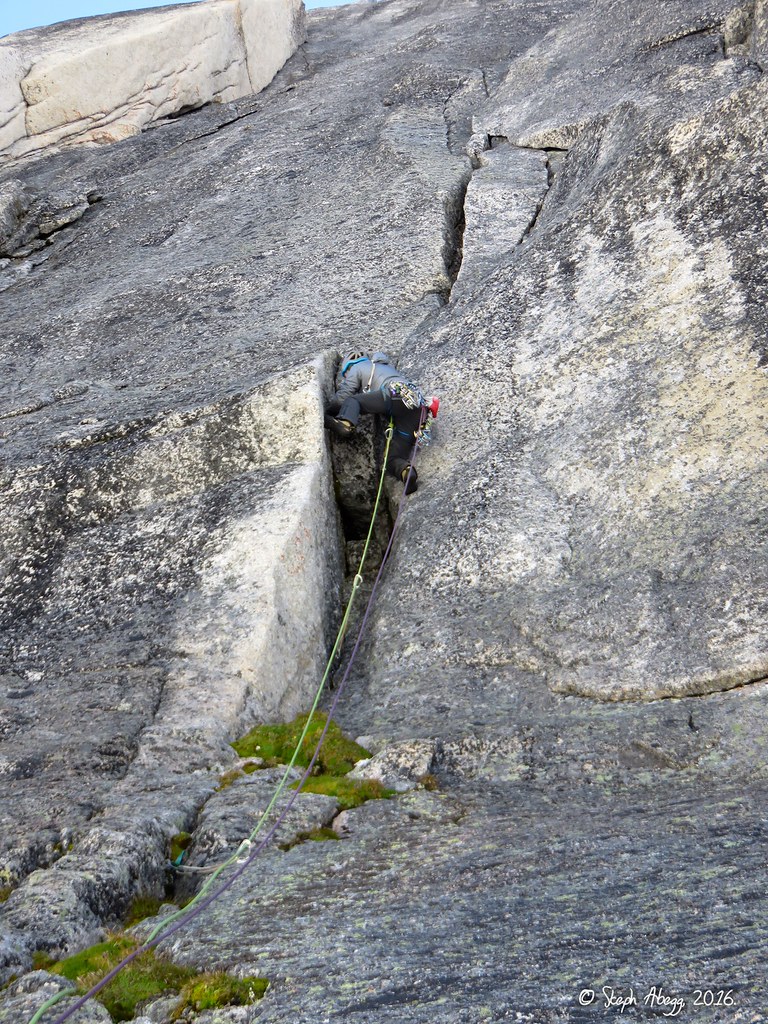
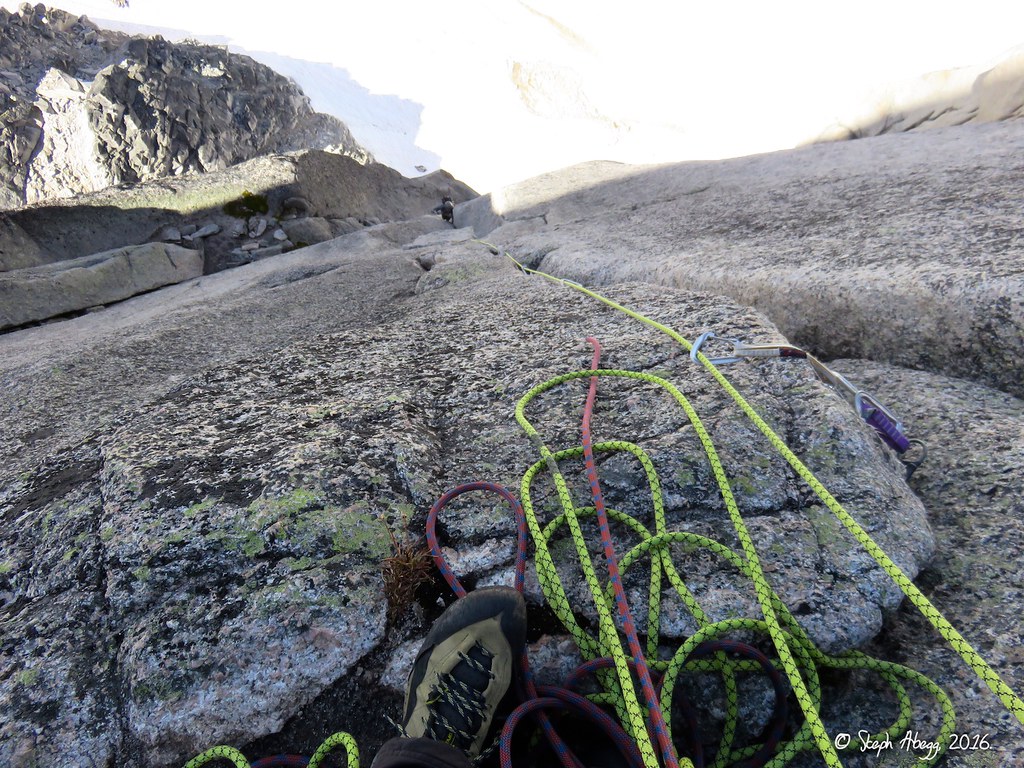
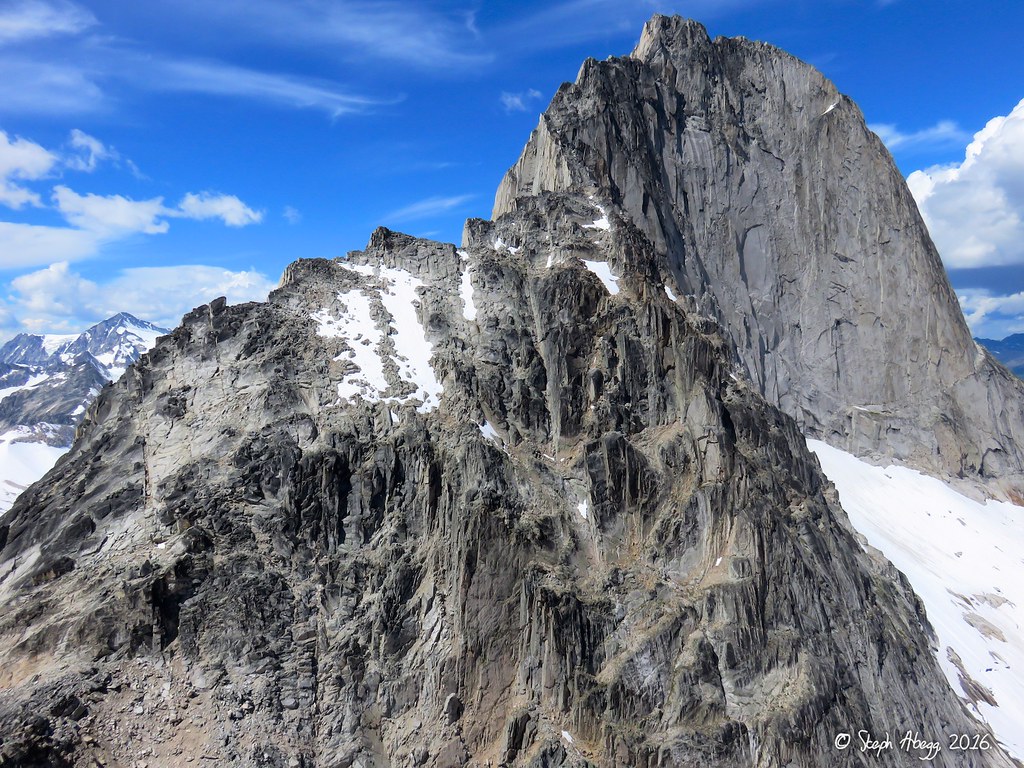
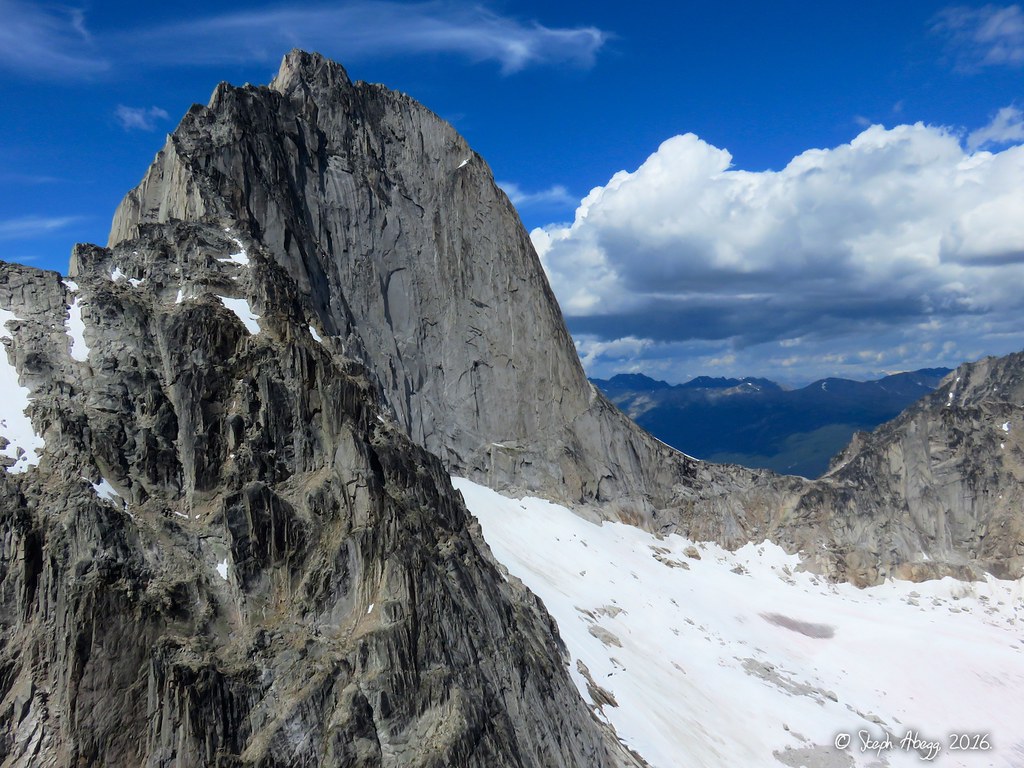
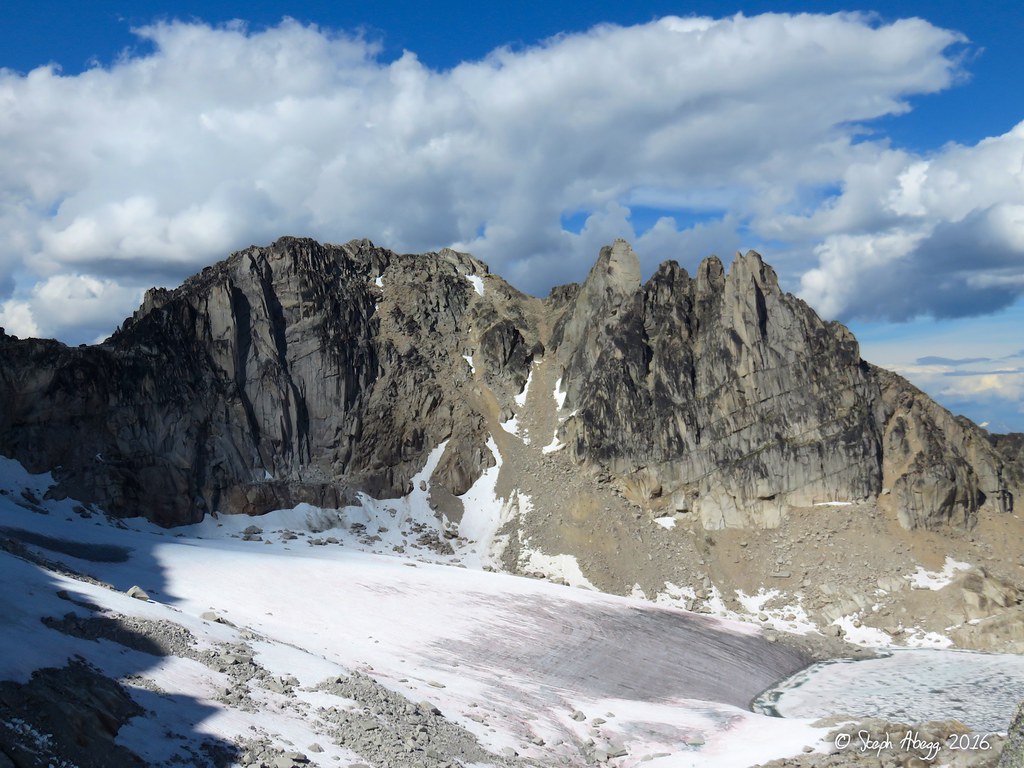
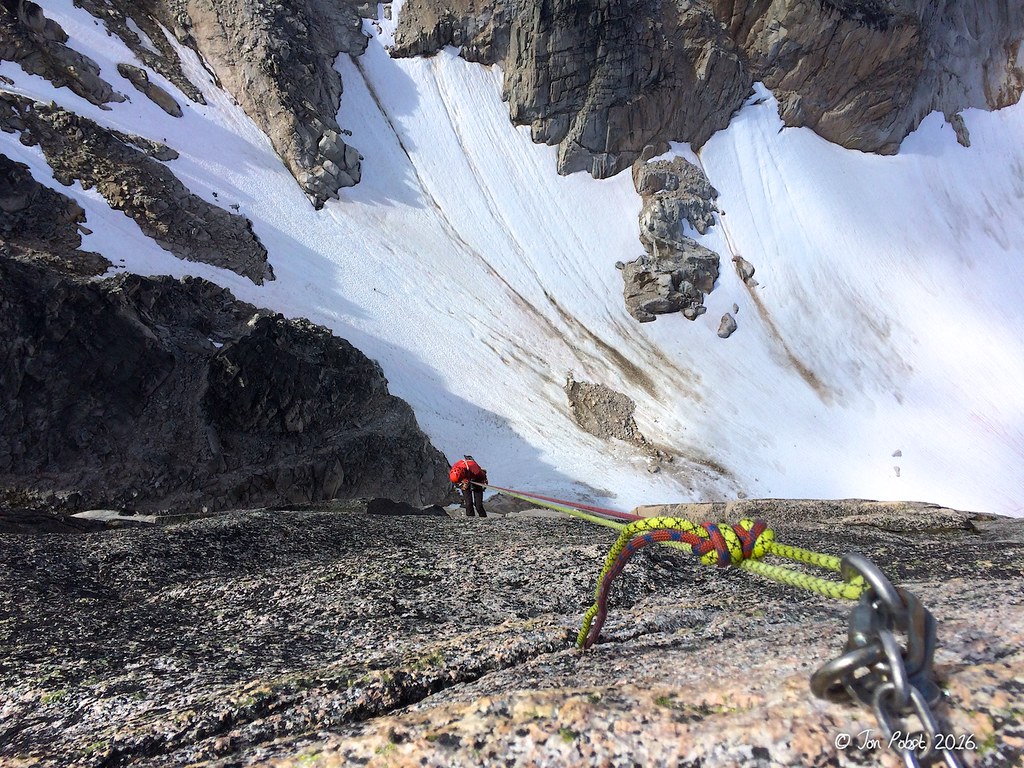
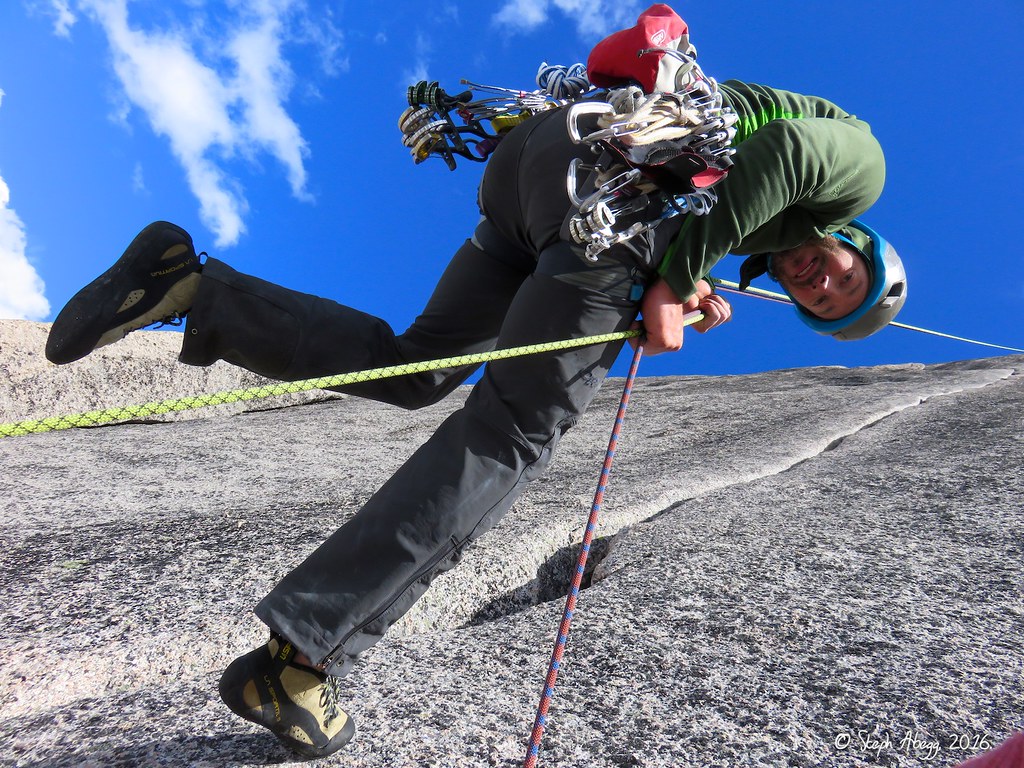
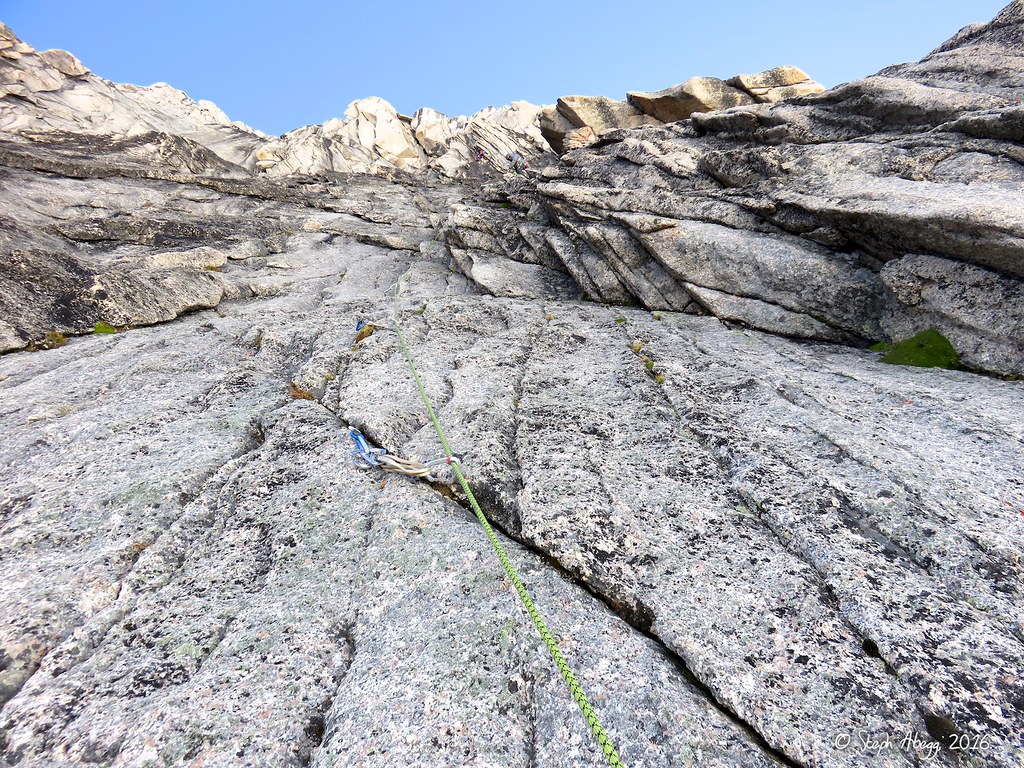
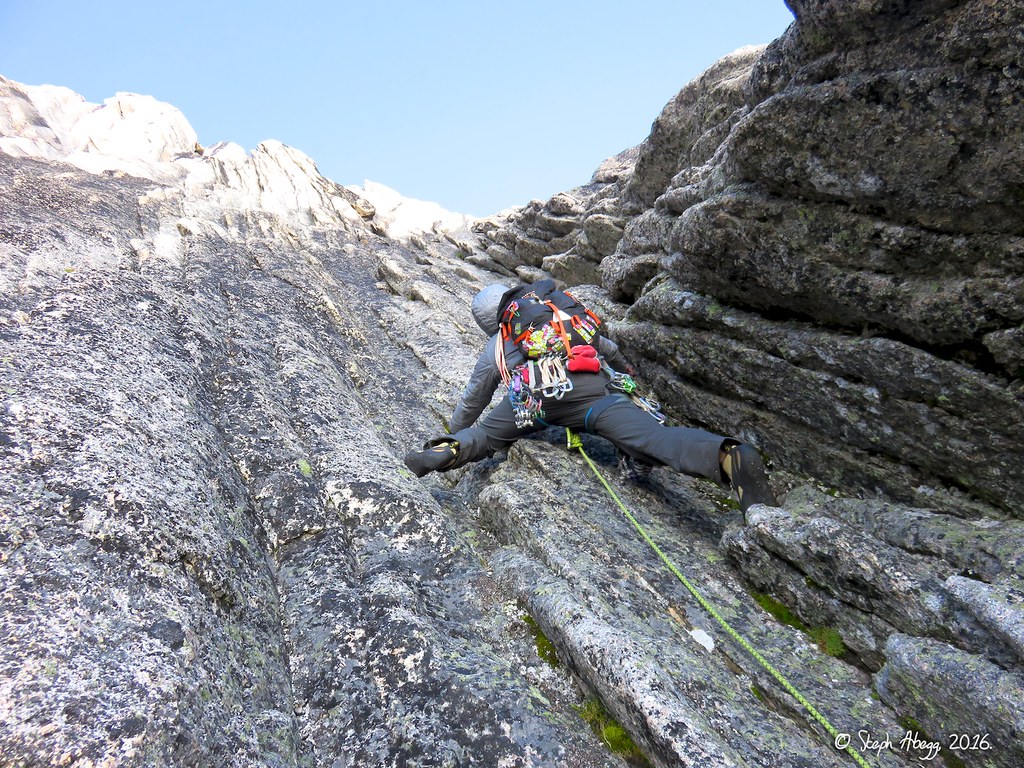
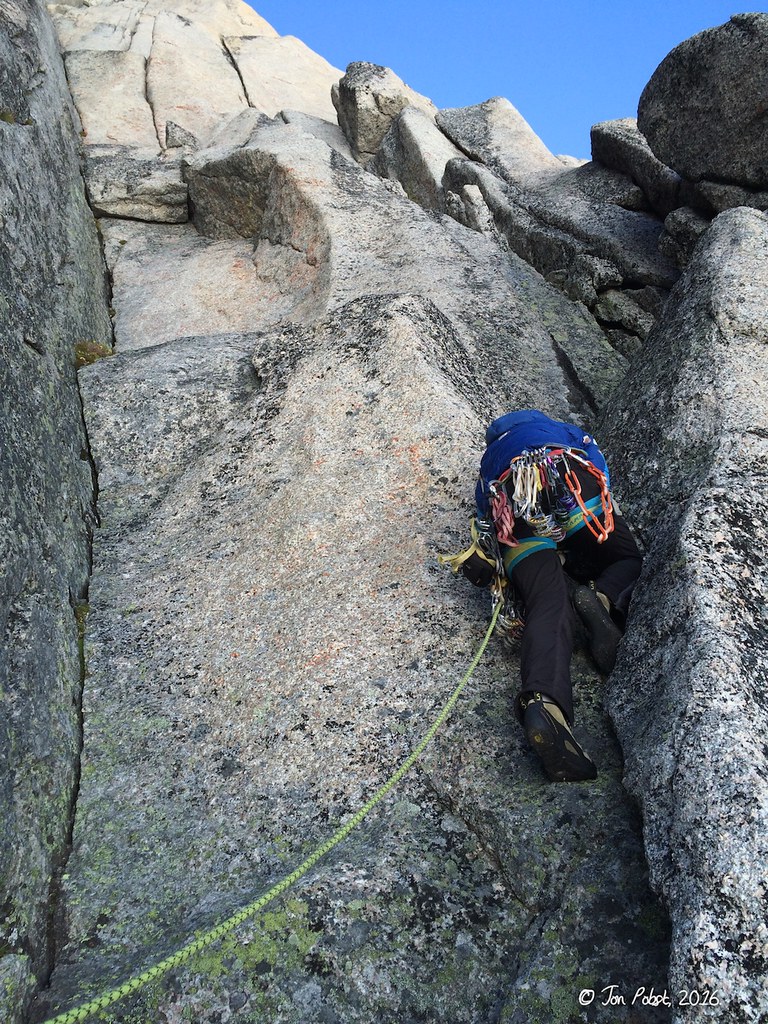
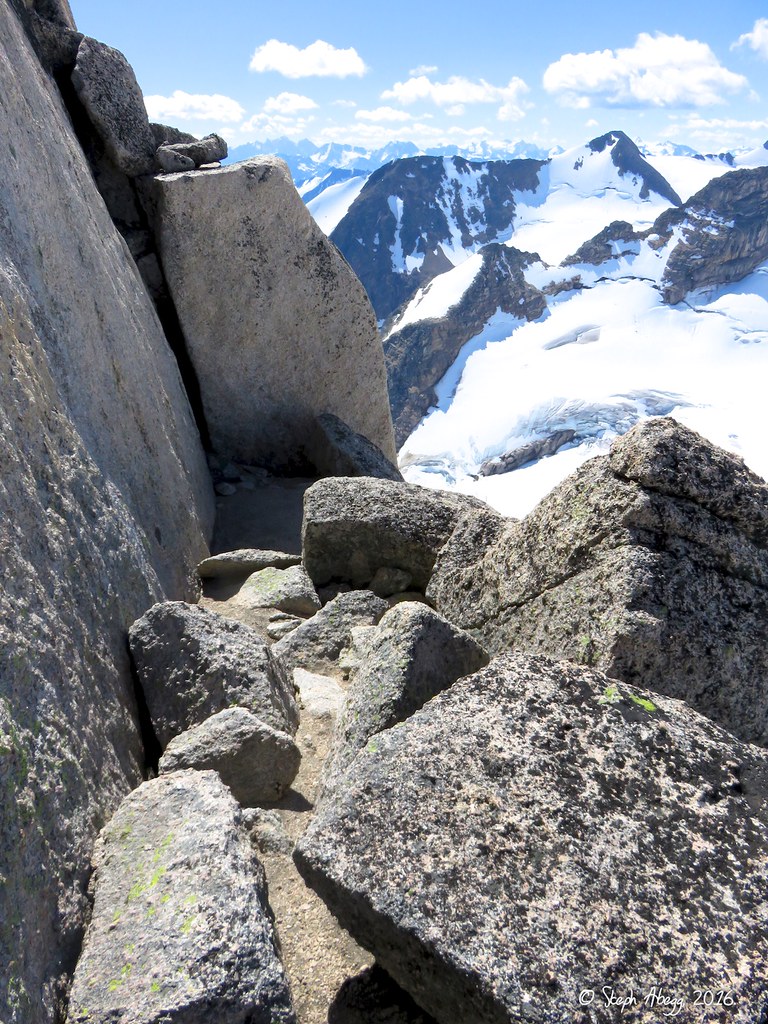
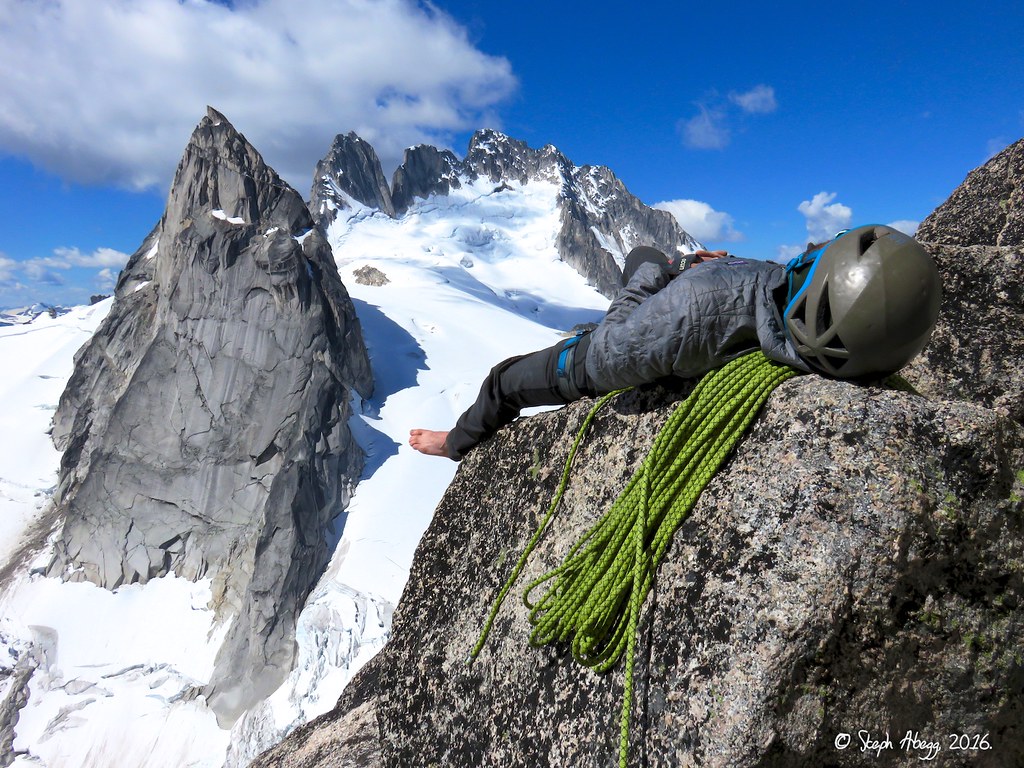
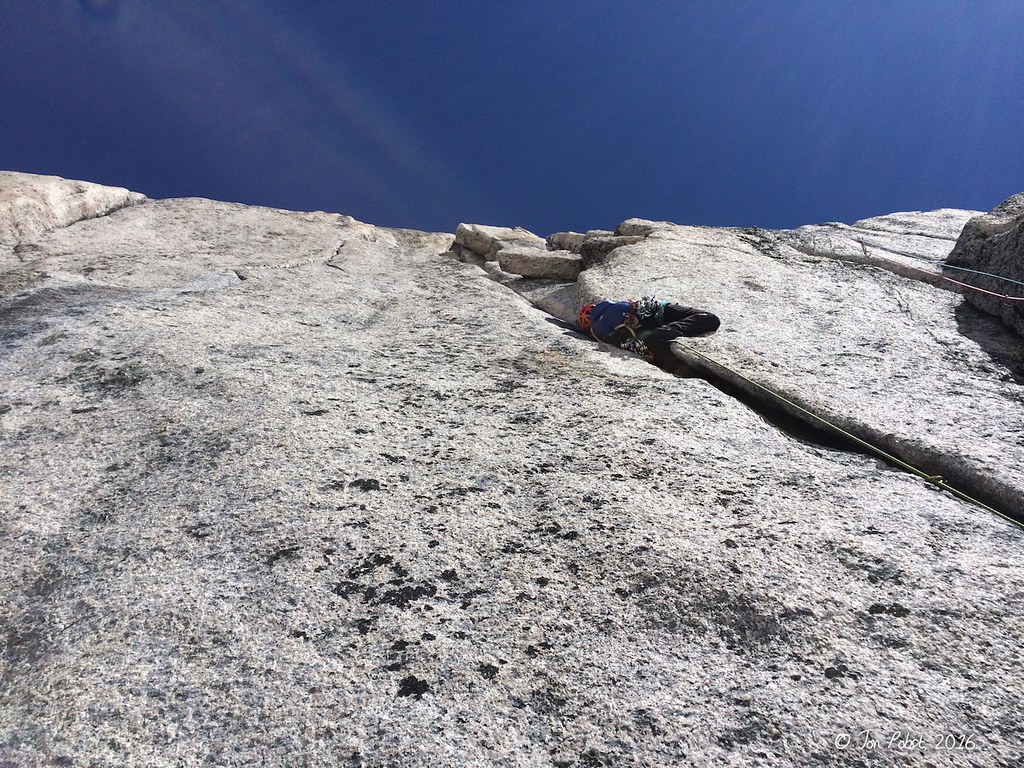
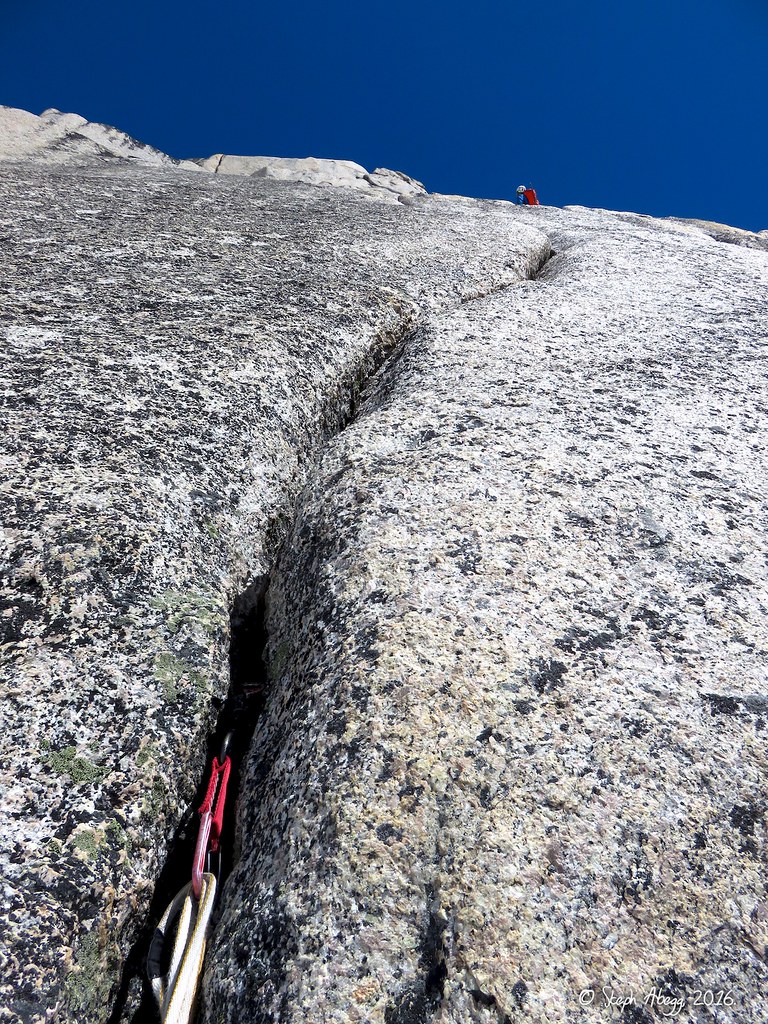
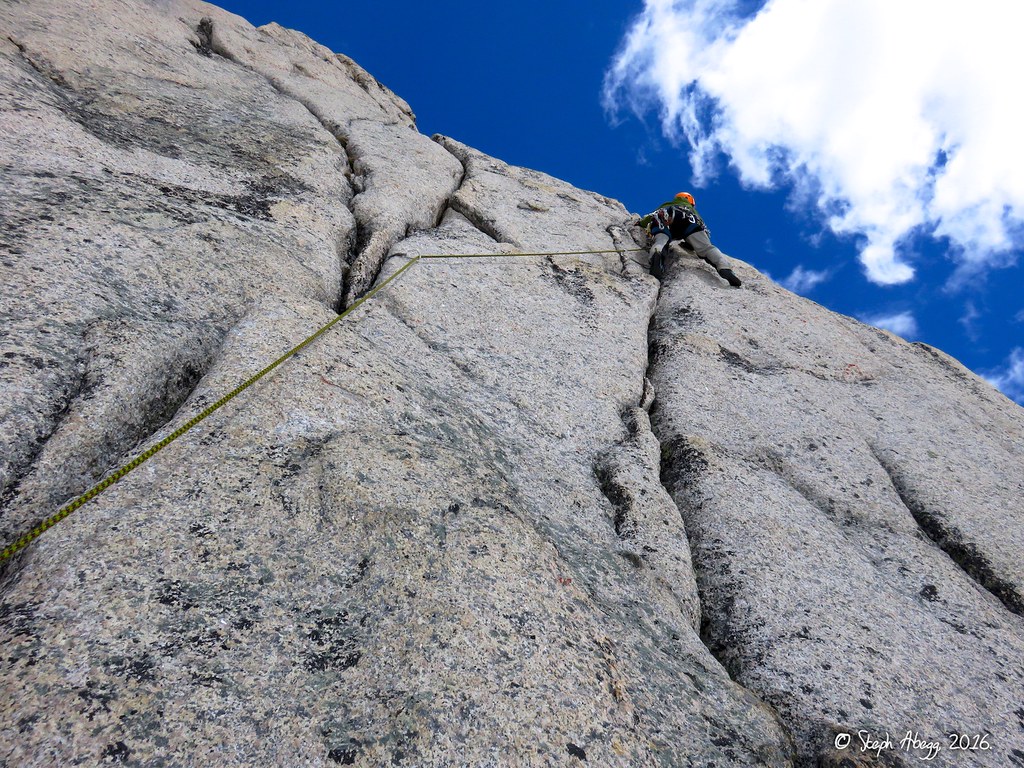
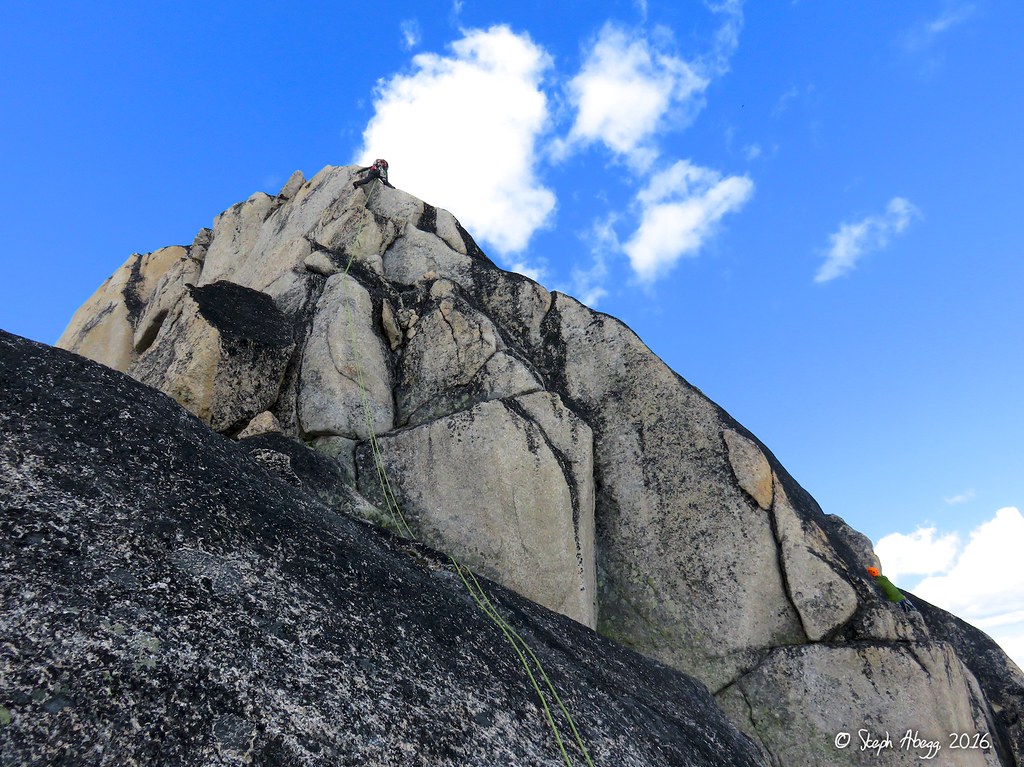
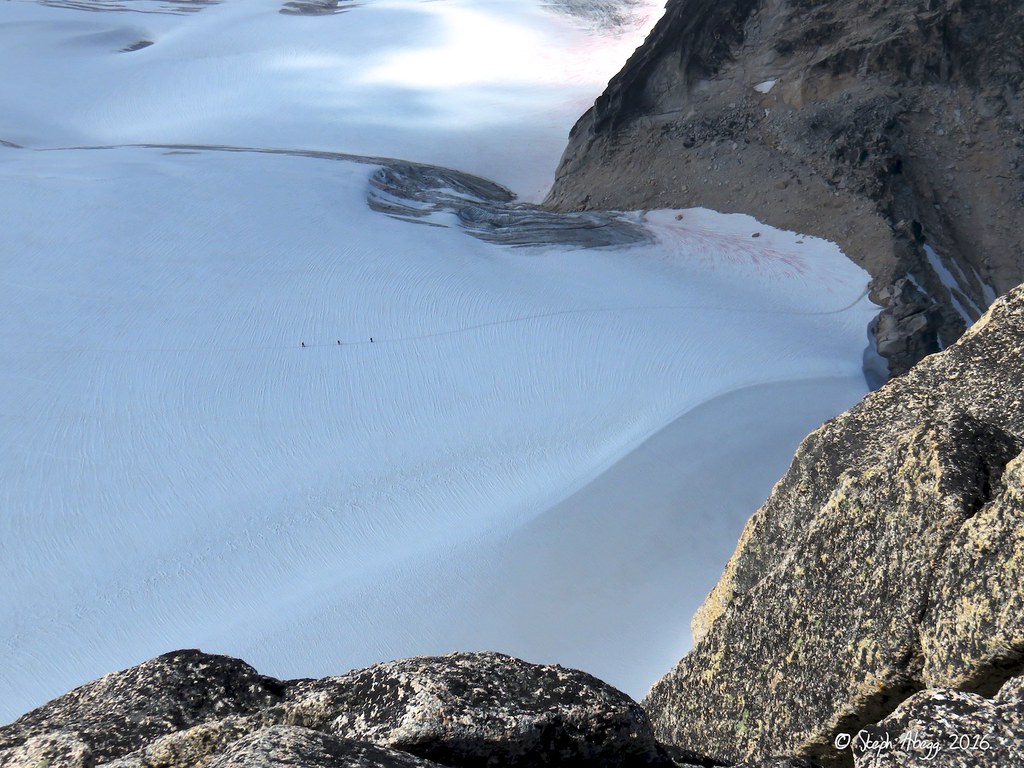
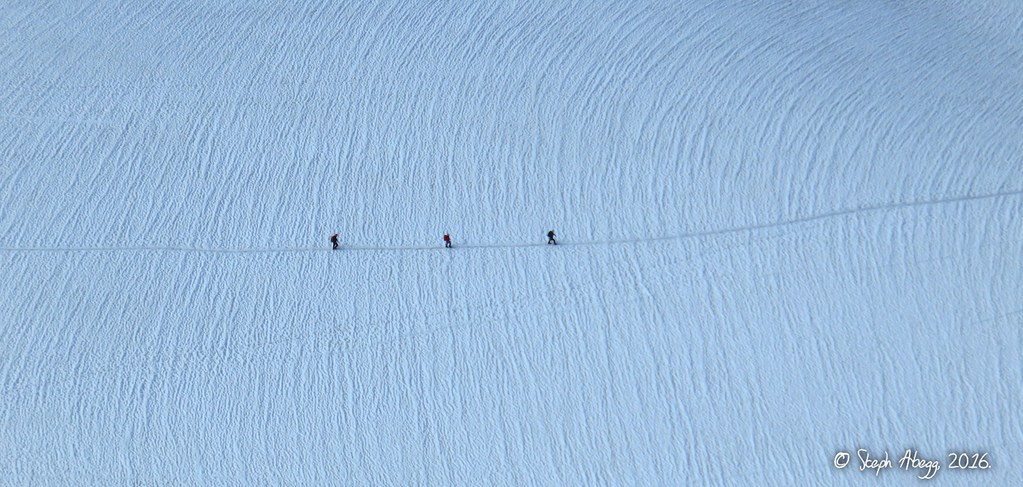
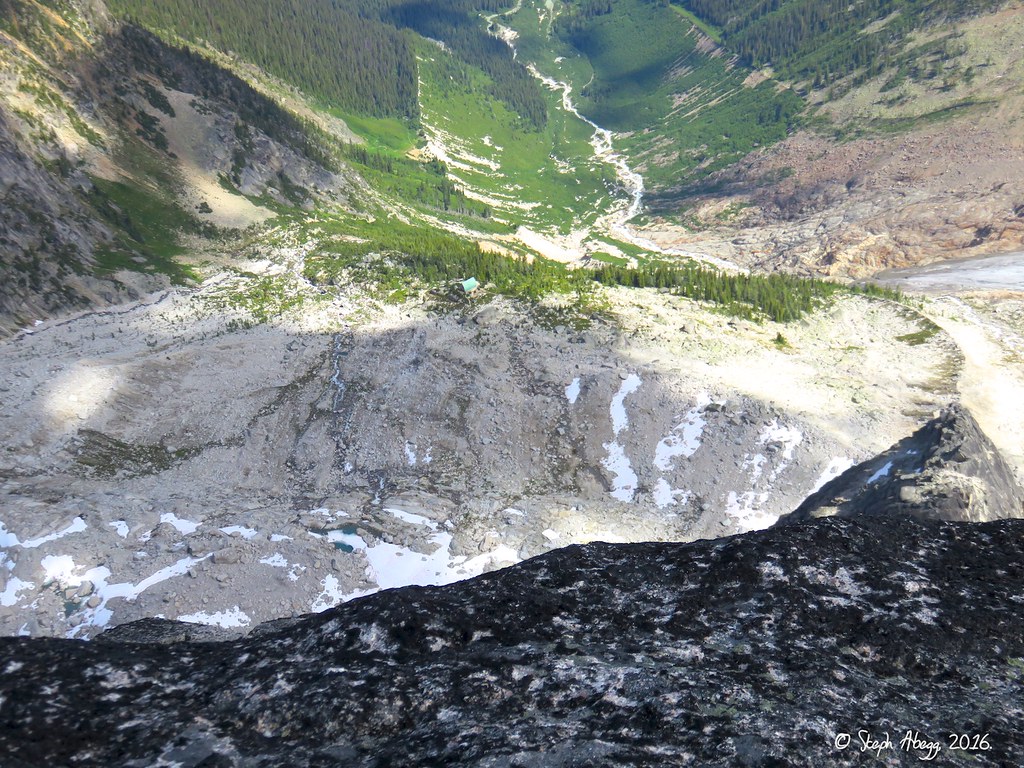
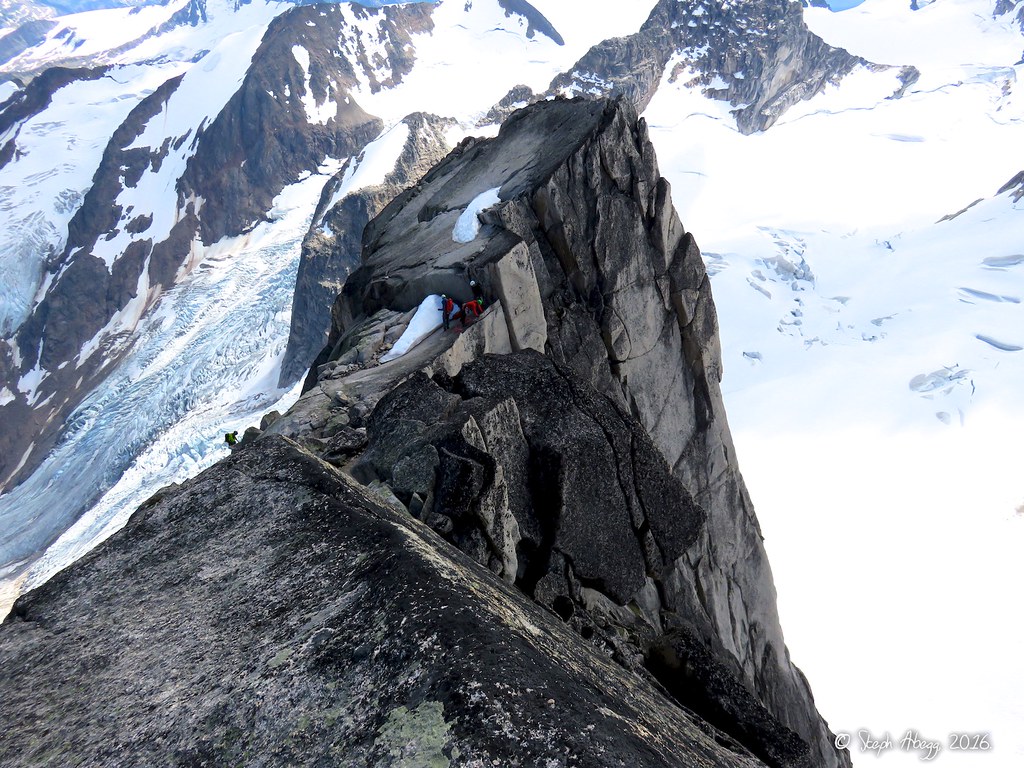
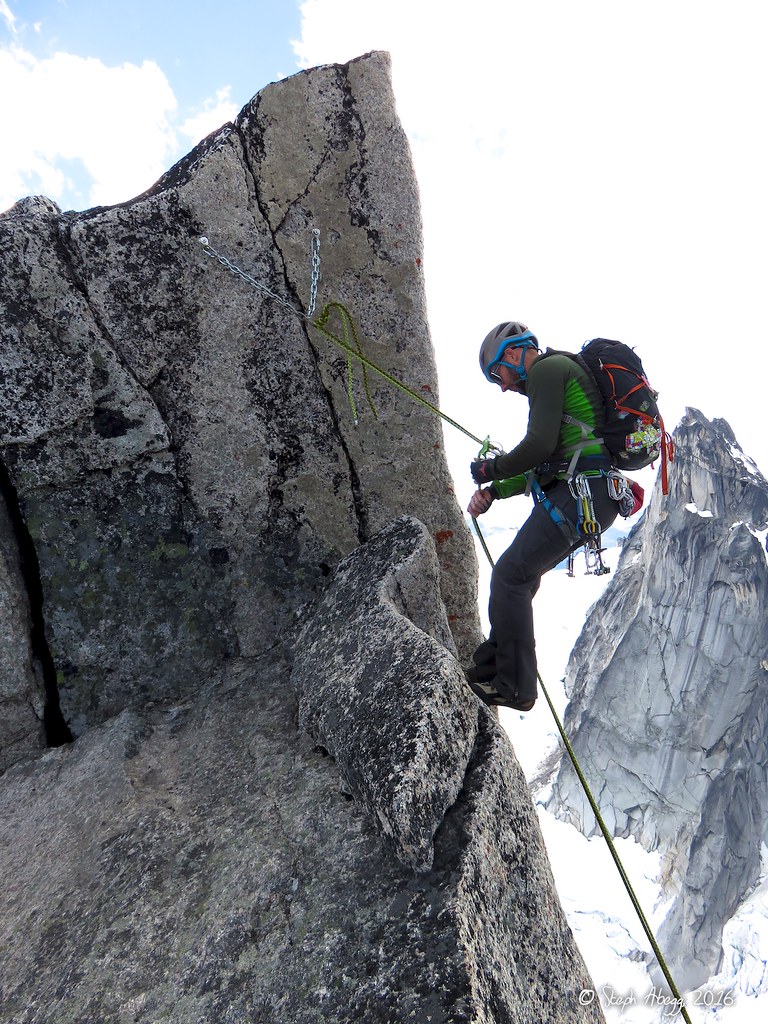
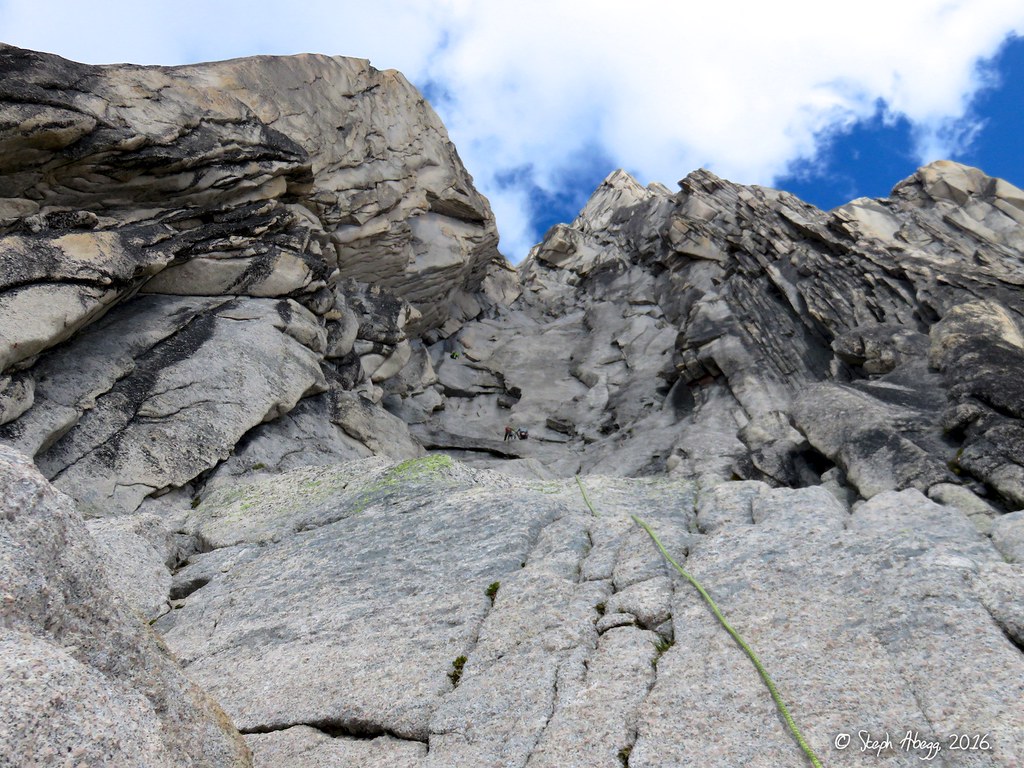
2006) and Jon had climbed it before too, but we were happy to climb it again, especially when we could move unhindered by the typical Fifty Classic crowds. The last two climbs of the trip were both on the massive Snowpatch Spire: first, Sunshine Crack, 11 pitches of sustained 5.9-5.10 crack climbing that was my main climbing goal of the trip; and second, Surf's Up, a popular moderate route with fun climbing and great position that tops out on the spectacular summit (Sunshine Crack does not). It was an awesome line-up of climbs. And to top things off, it was just such as awesome group of guys to be with. We had a blast together.

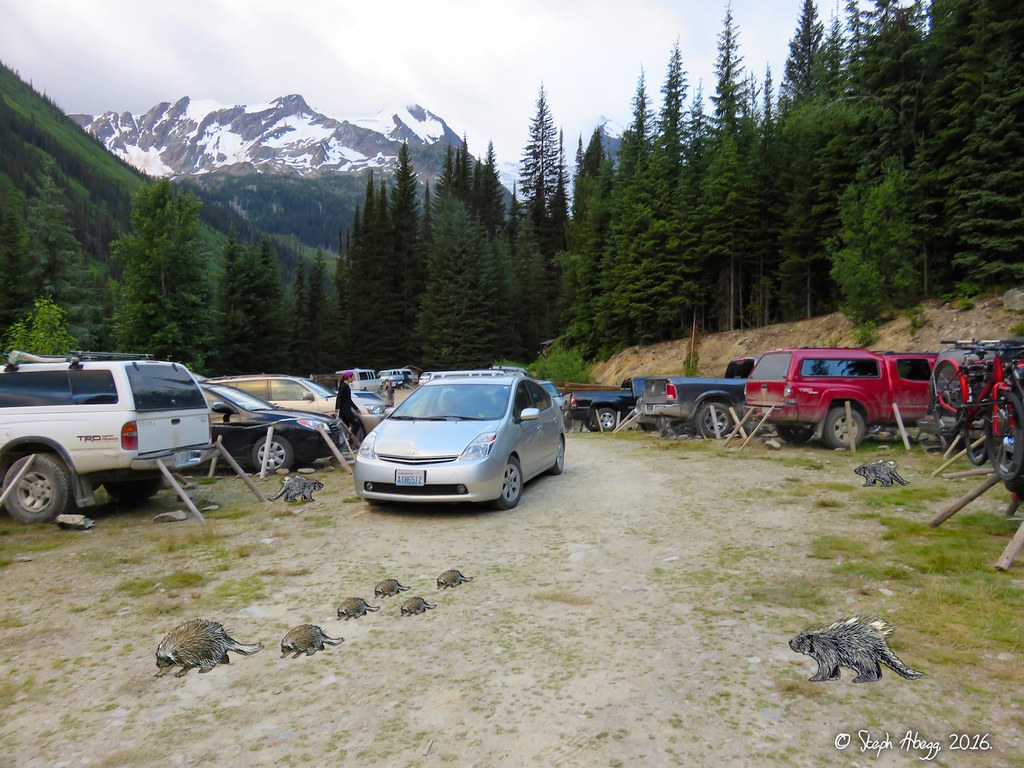
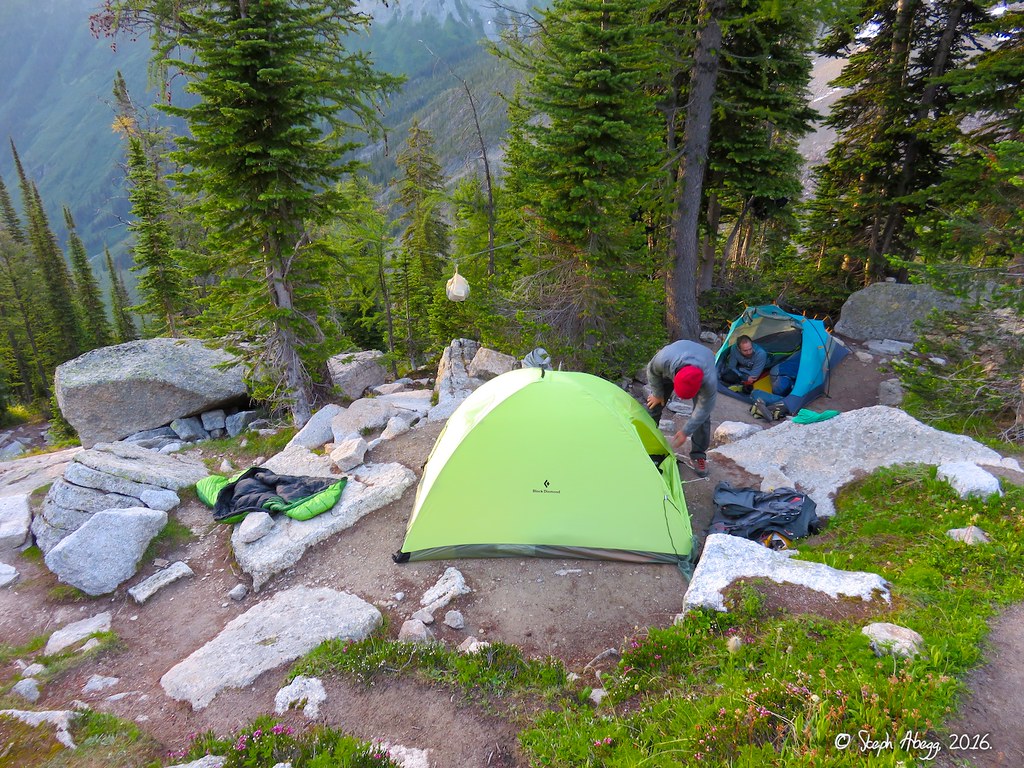
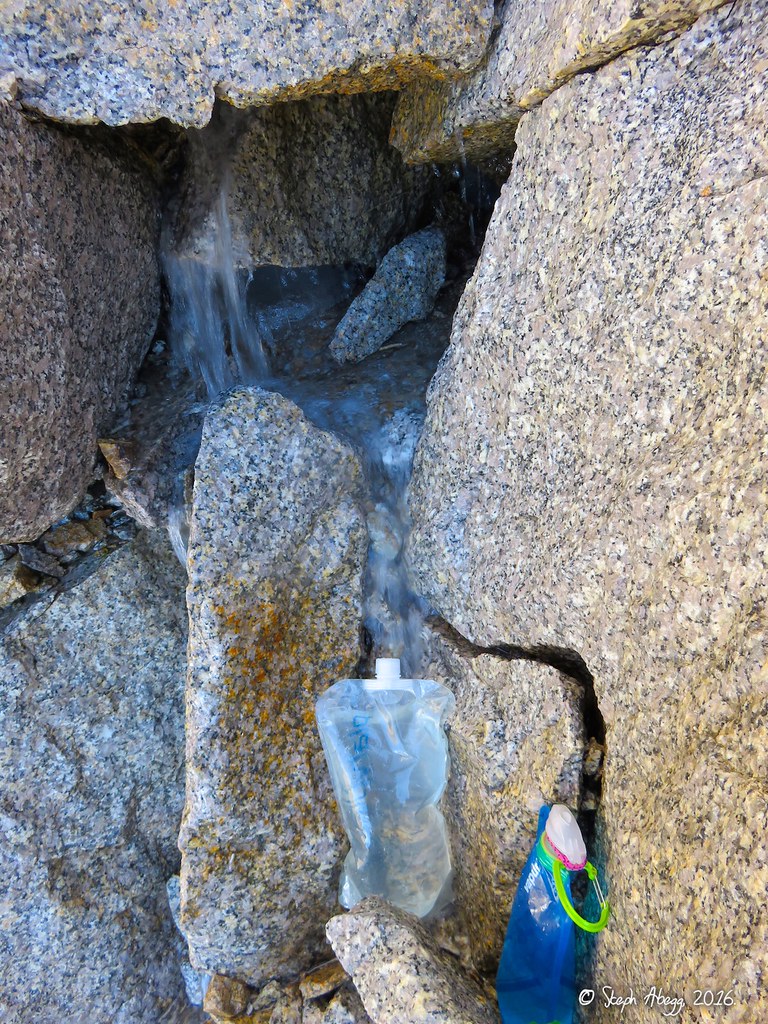
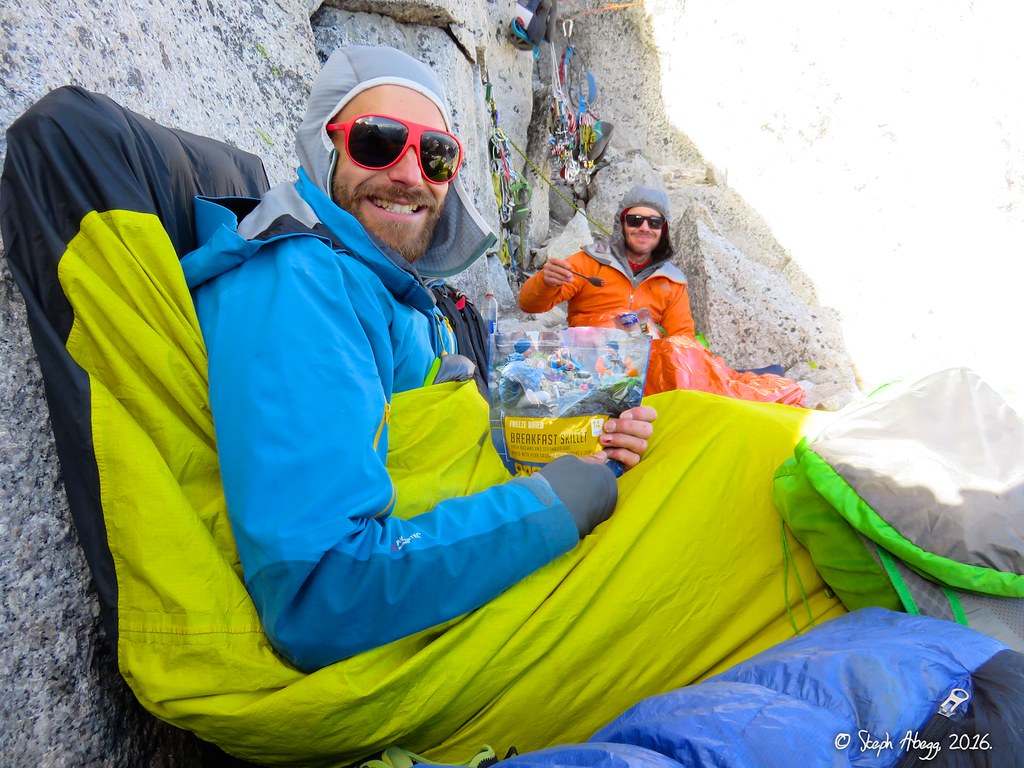
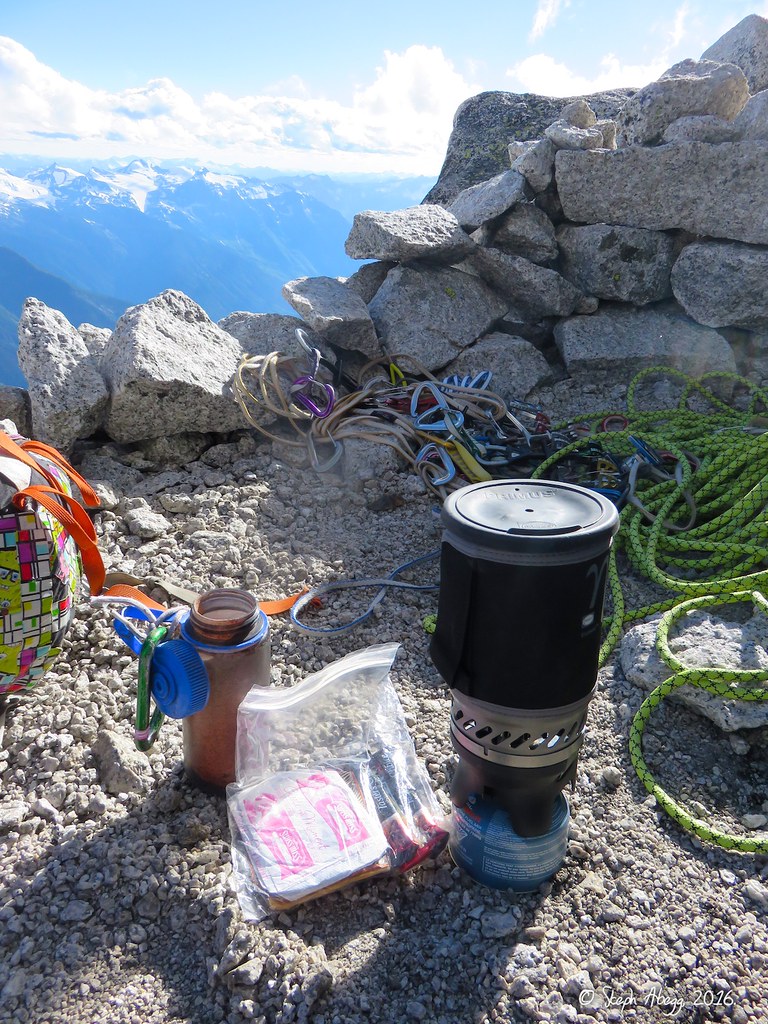
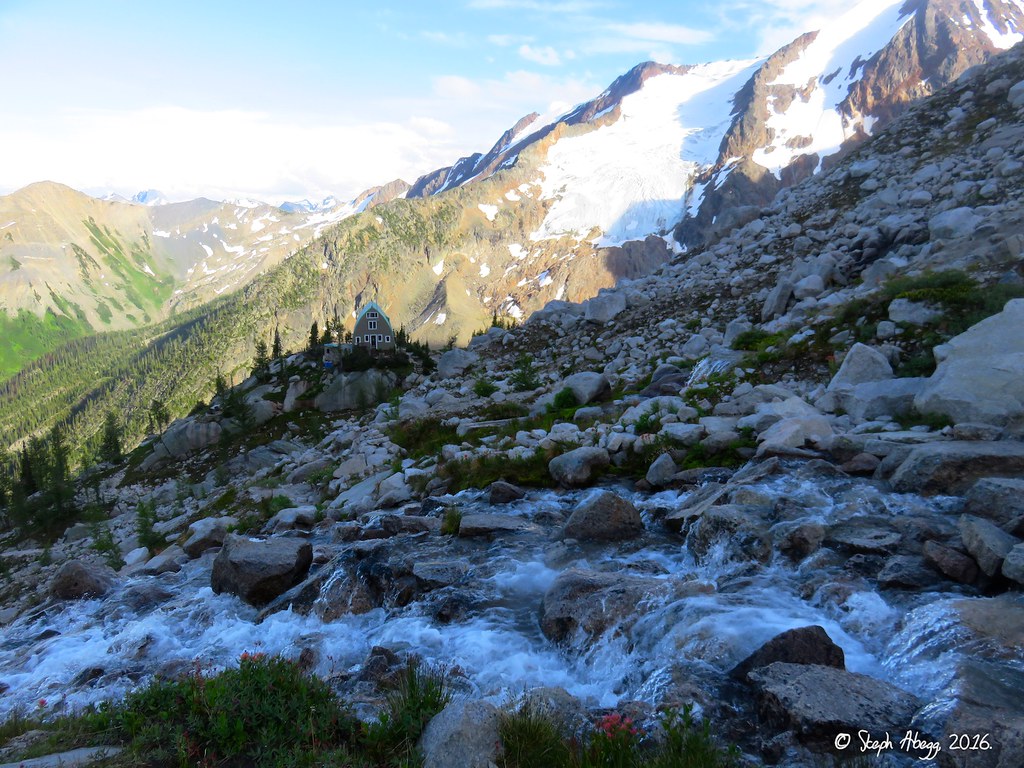
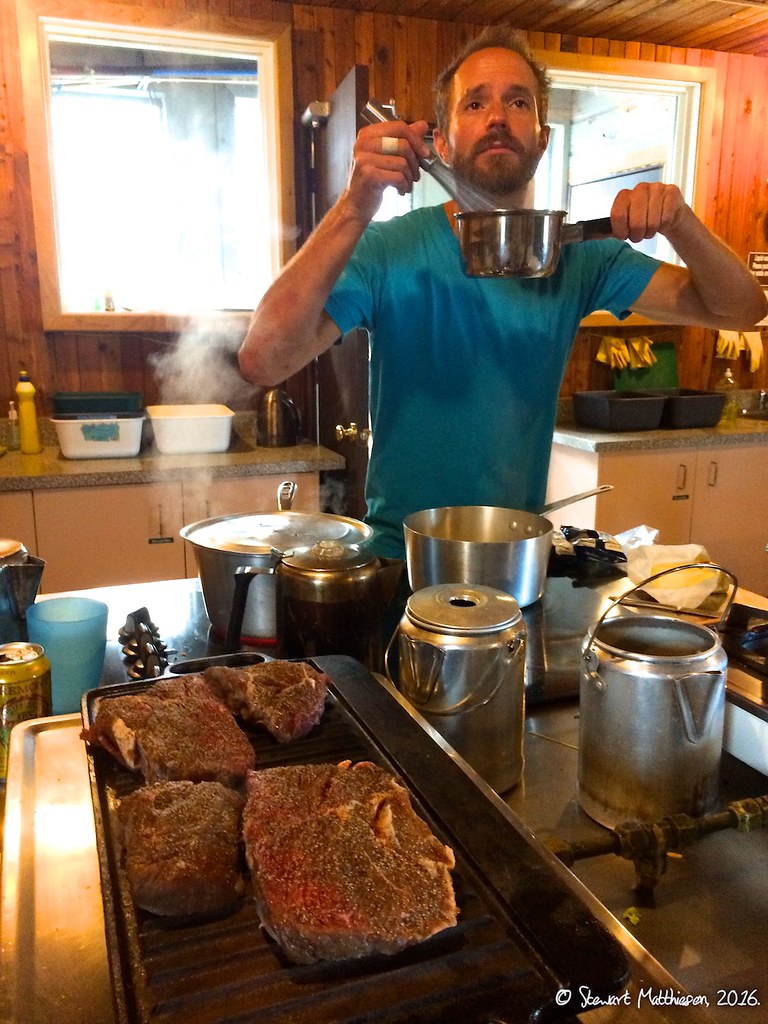
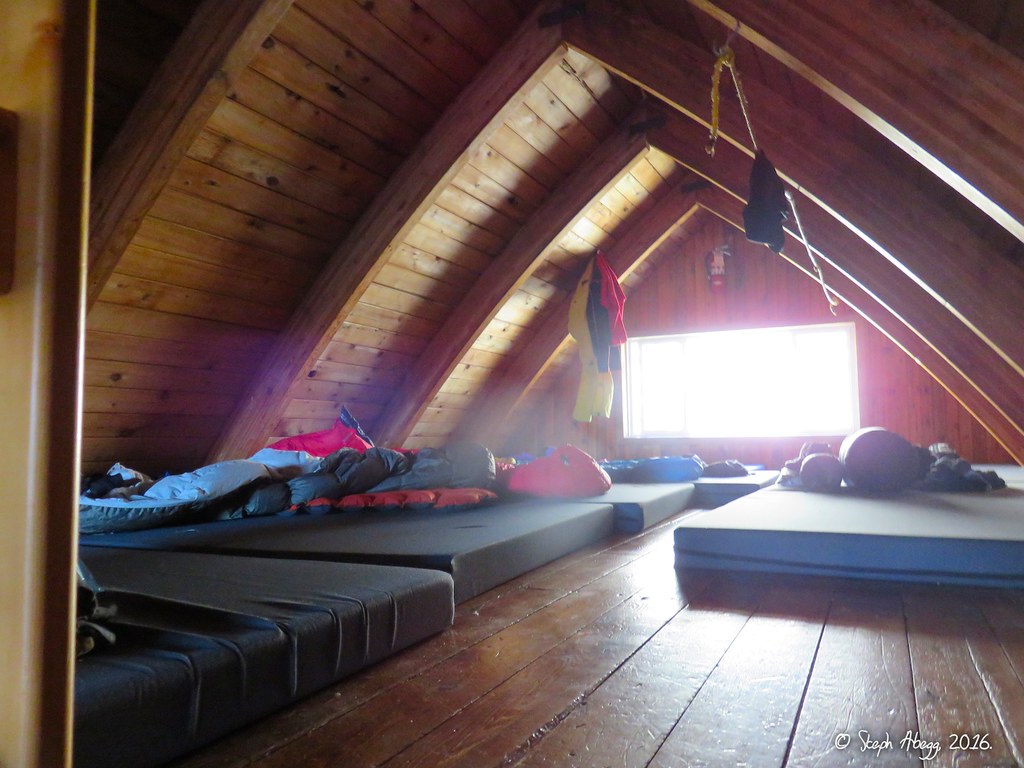
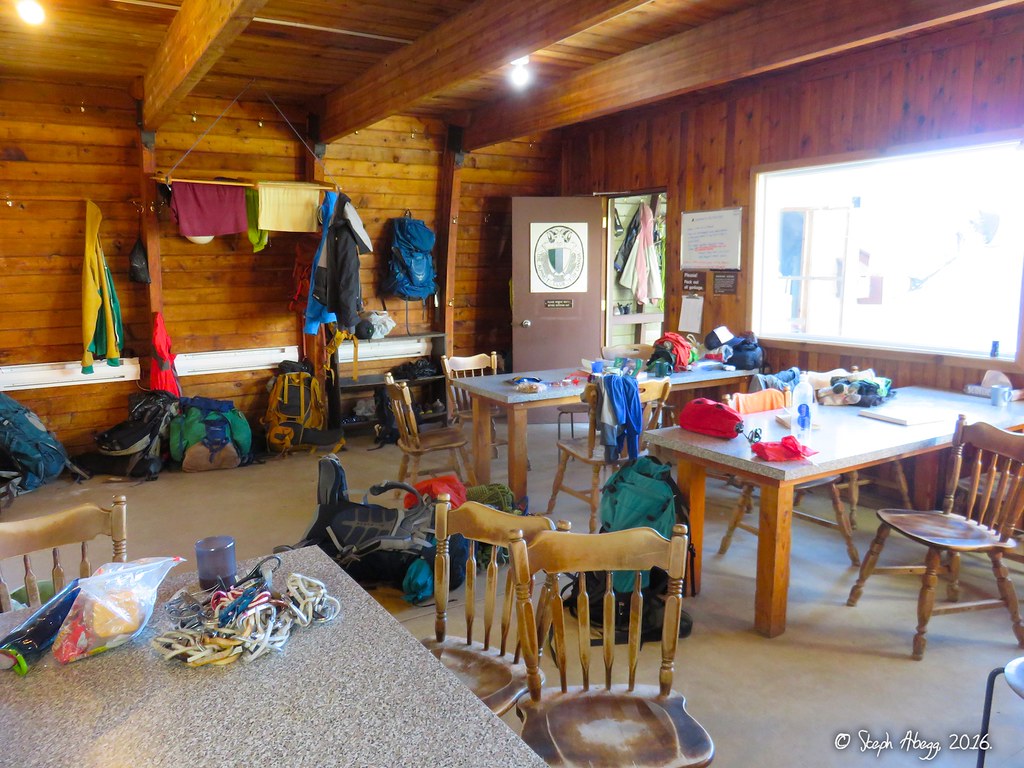
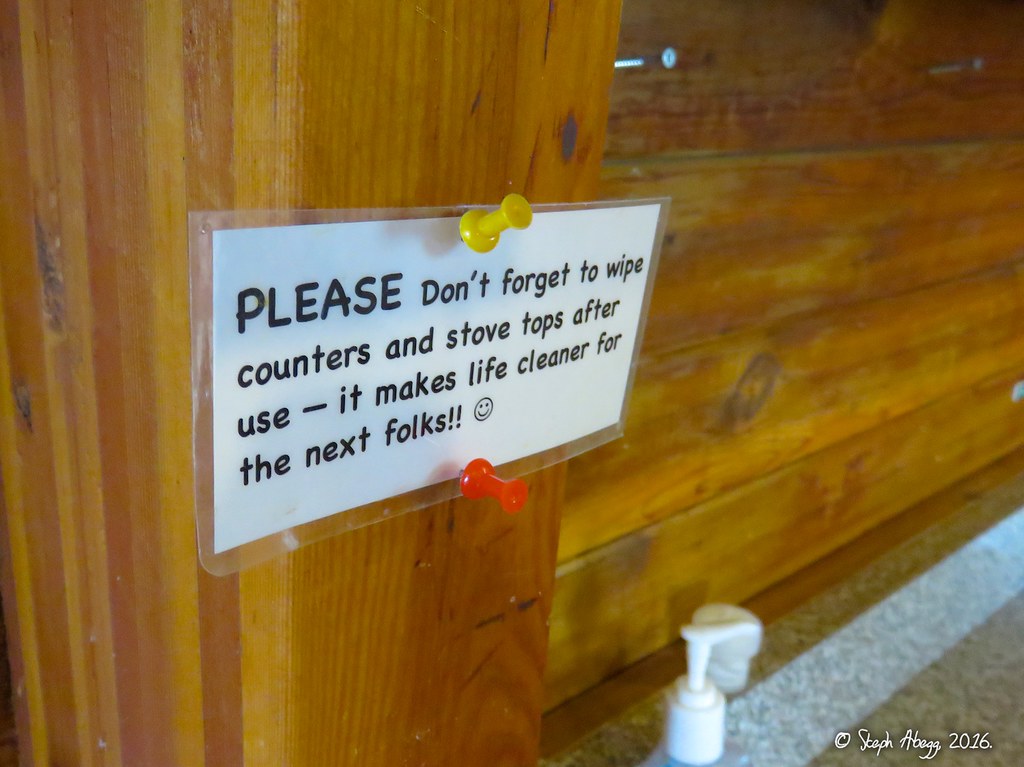
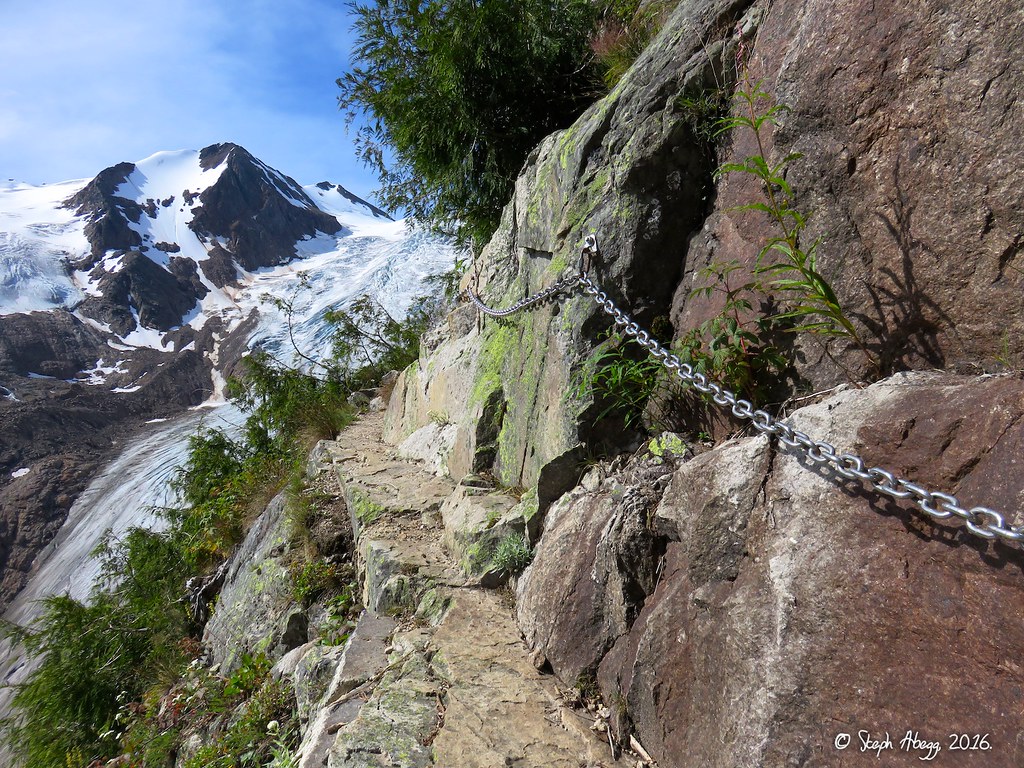
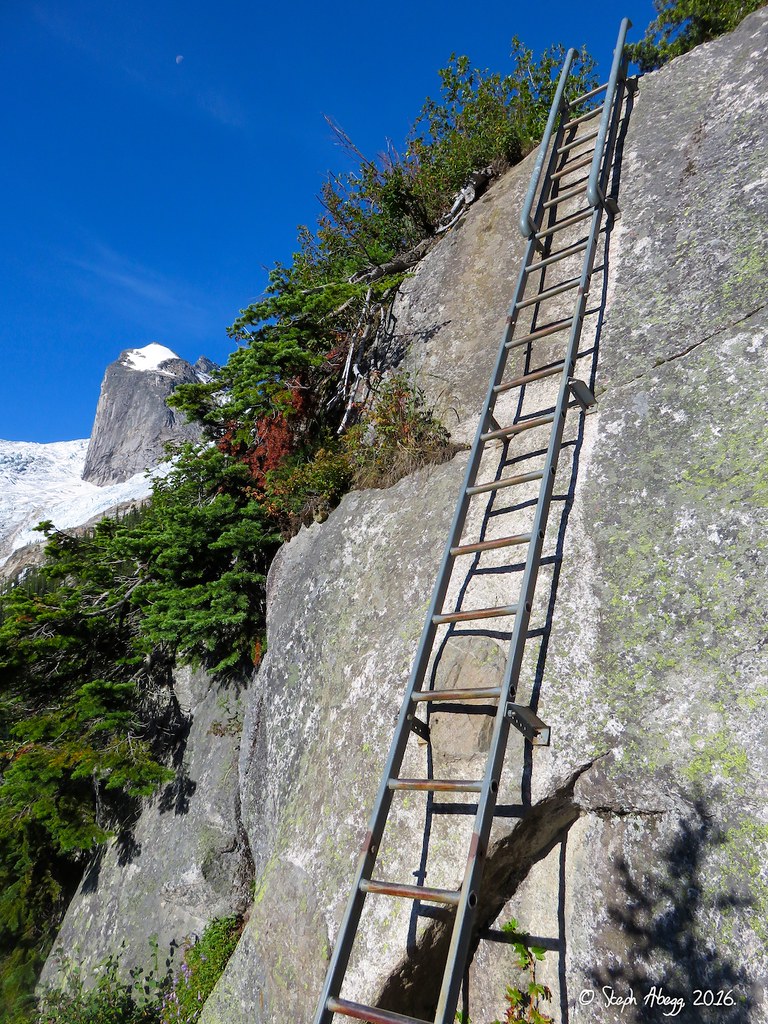
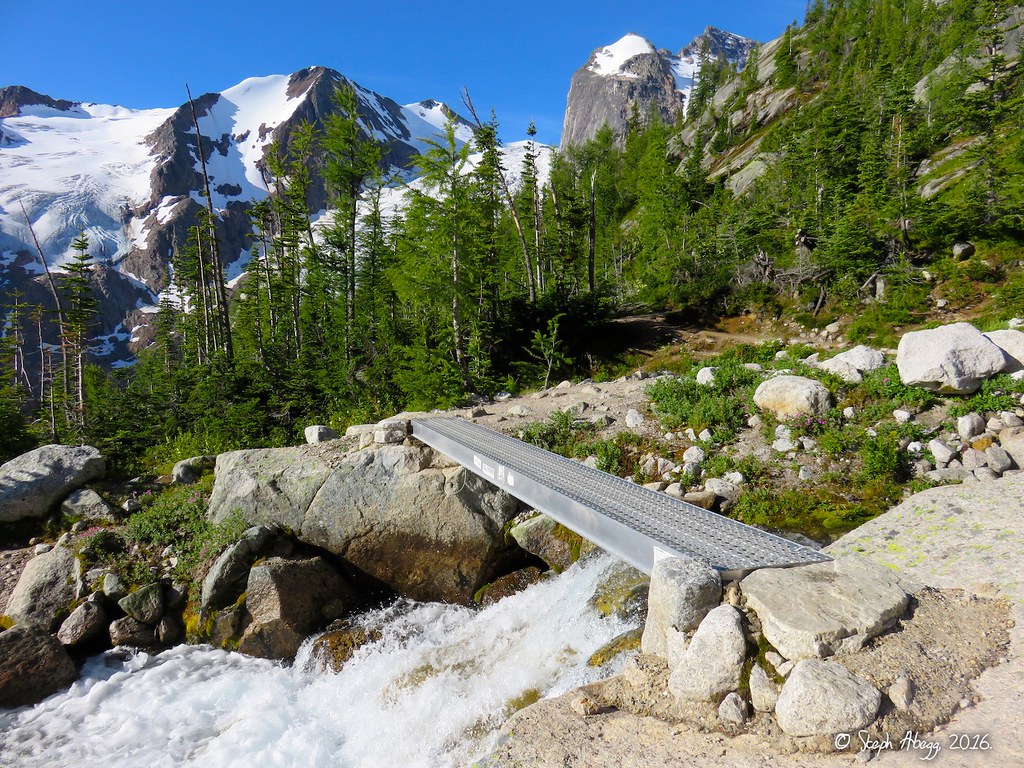
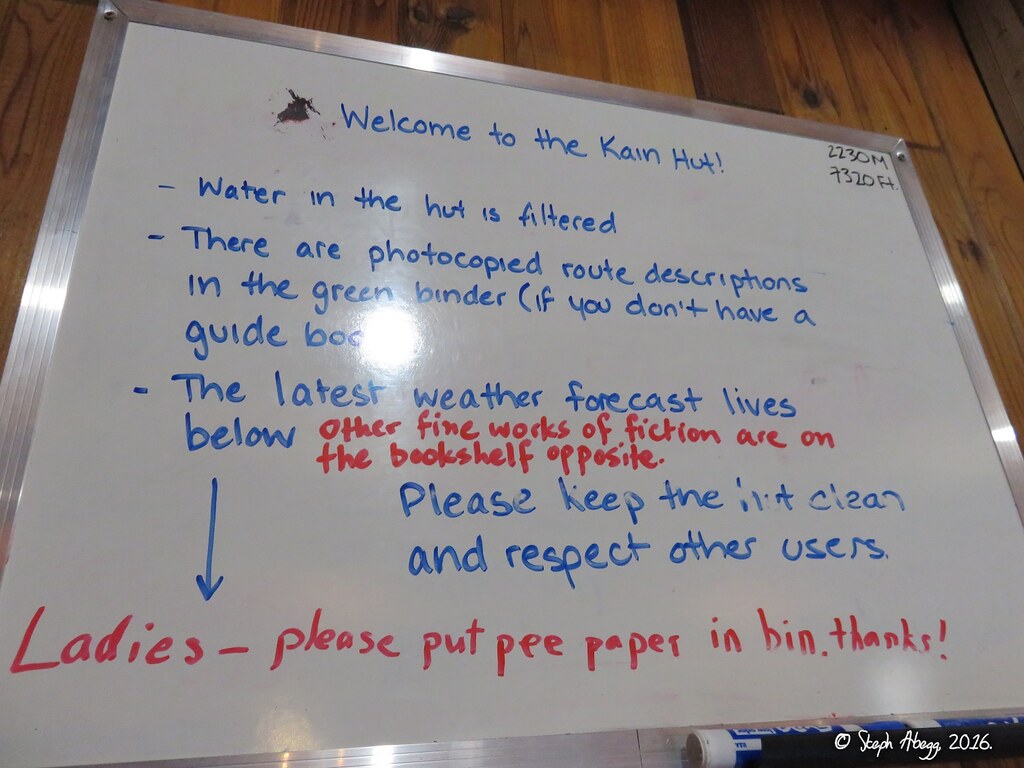
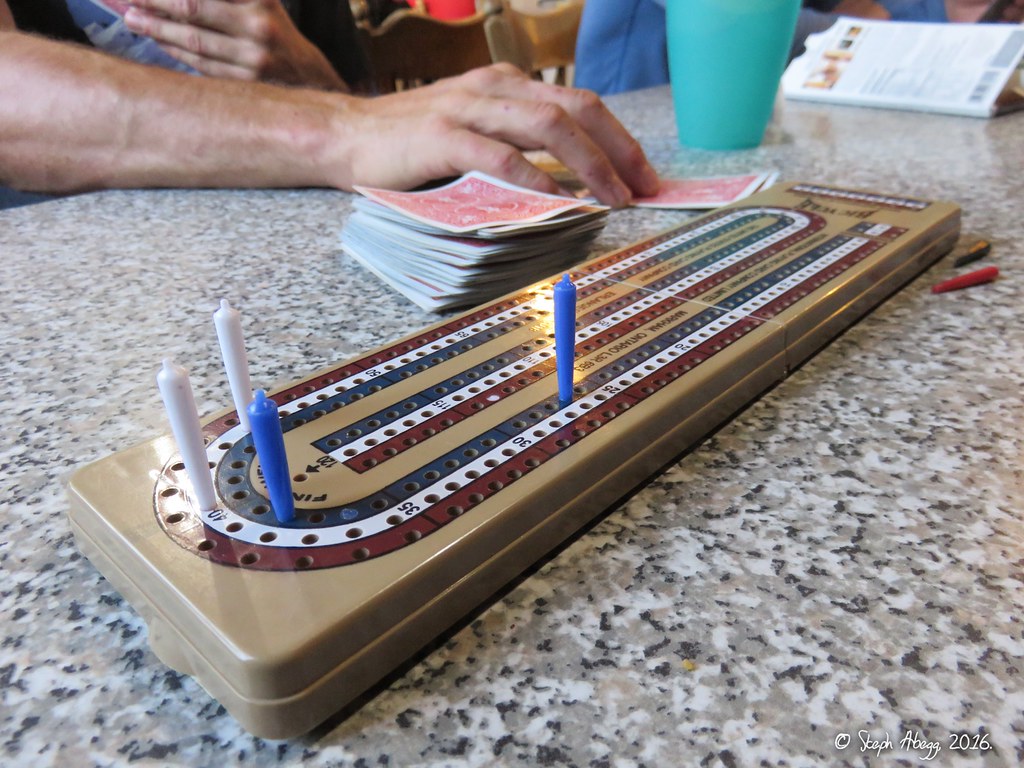
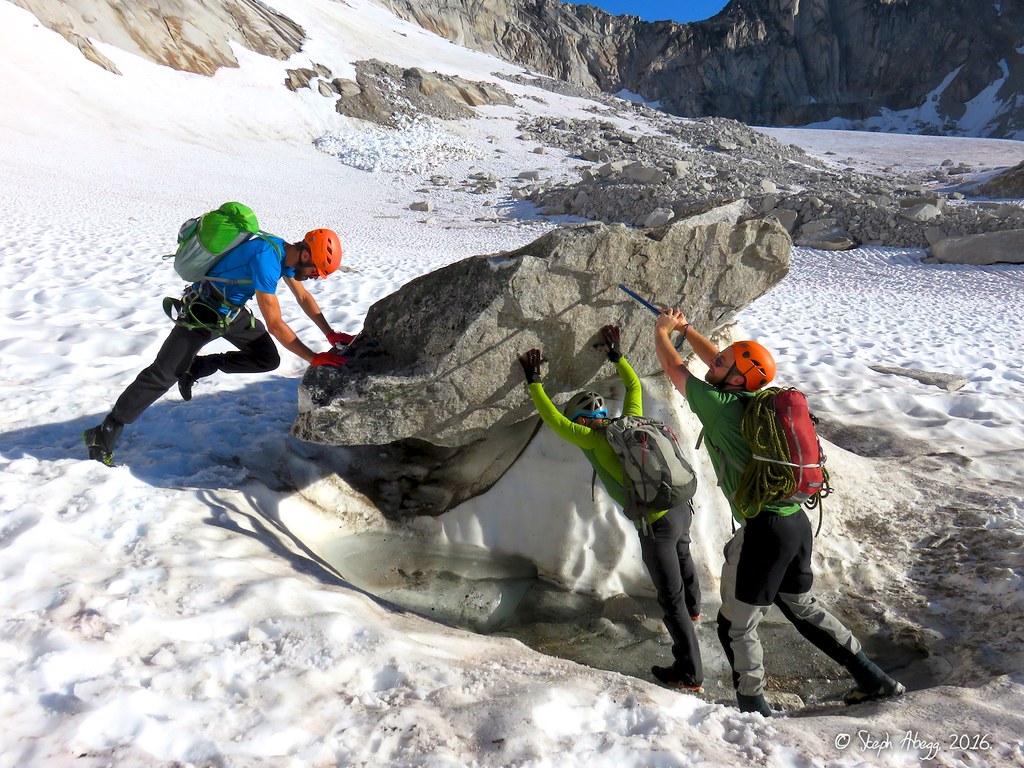
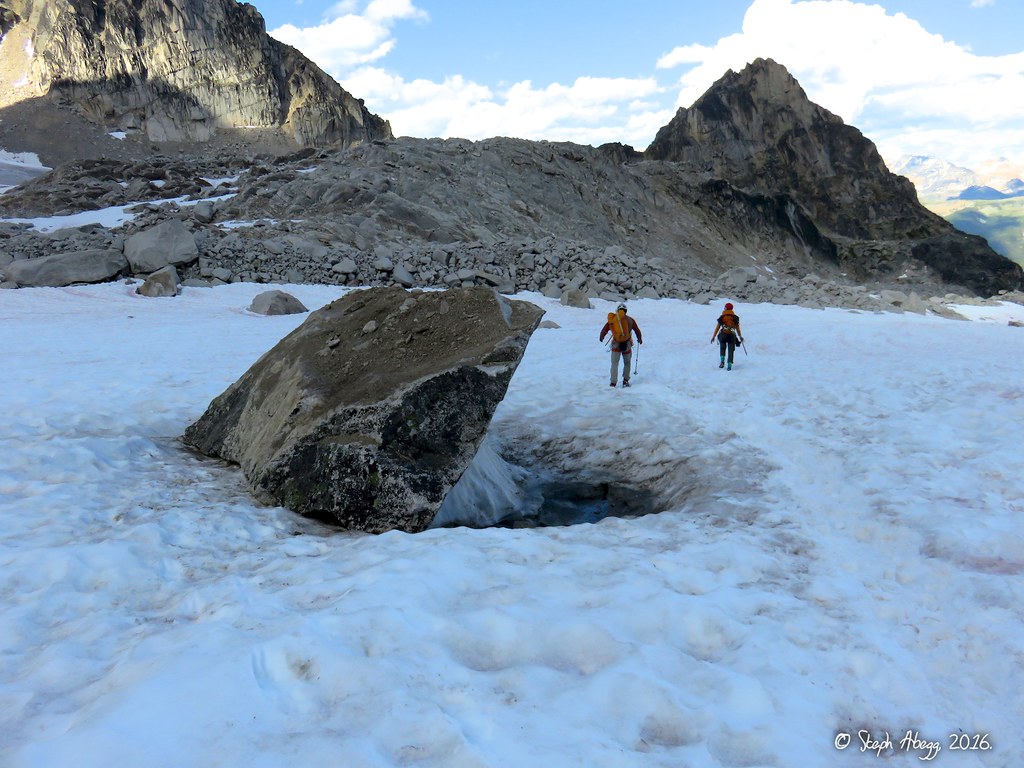
Another aspect that made this trip what it was was that we stayed at Kain Hut. This was sort of a last-minute idea, and we made our reservations just a few days before hiking in (at first we were unable to find spots for all of us every night, but a couple of spots opened up every day). As of 2016, it costs $25 to stay in the hut as opposed to the $10 camping fee. I stopped grumbling about the cost of staying in the hut a few minutes after I walked in the door. Perhaps it is a sign I am getting old, but the comfort/convenience is well worth it. I cannot think of a better way to spend a summer day than climbing all day on towering spires and then romping back to the hut to cook a warm meal, download photos, play cards, drink hot chocolate, and sleep in a warm loft.

This was the kind of climbing trip that will be hard to beat. Thanks Jon/James/Stewart for the great memories! The following page gives a trip report for our week in the Bugaboos.

Climbs We Did

CLICK ON DAY TO DROP DOWN CONTENT

July 23 - Drive to trailhead, pack up, wrap cars in chicken wire, hike in, set up tent at Boulder Camp and sleep for a few hours.
Photos:
1.    
2.    
3.    
4.    
5.    
Photo Descriptions:
1. Nearing the trailhead. (The trailhead is 28.5 miles on good dirt road from Brisco on Highway 95). The three peaks in the photo are Anniversary Peak, Hound's Tooth, and Snowpatch Spire.
2. The crowded parking lot of chicken-wire-wrapped cars. The chicken wire is to prevent porcupines from chewing on rubber brake lines and tires.
3. Hiking in in the dark. It's only 3 miles to the Hut (a tad bit more to Applebee Camp) but the trail is pretty steep and we had heavy packs so it took a couple of hours. 
4. Since we arrived at Kain Hut (where we planned to stay for the week) at around 1am, we decided to pitch our tents down at Boulder Camp, which is just past and a bit down from Kain Hut. We slept for a few hours.
5. Morning light on Hound's Tooth as seen from our camp at Boulder Camp. We only stayed there this one night and the rest of the trip we were able to secure enough spots in Kain Hut that none of us had to stay in a tent (we had made reservations a few days before our trip, but there were not enough spots available for all the nights when we reserved, but every day at least a few spots opened up when climbers left early or failed to arrive.)

July 24-25 - The weather forecast looked good (i.e. no afternoon or evening precip) so we decided to start off our trip with the Beckey-Chouinard route on South Howser Tower, since our plan was to bivy below on the route below the Great White Headwall. We figured that the advantages of this tact (i.e. no need to descend back into East Creek Basin to retrieve bivy gear after the climb, avoid the nice-day-8-party-backup on the route by getting a later start, leave hut and arrive back at hut at comfortable times, awesome place to spend the night) outweighed the disadvantage of climbing with heavier packs. Indeed, we had an awesome two days on this climb. It definitely set the bar high for the rest of the trip. (I had climbed this route in 2007 as a single camp-to-camp push; here is a link to my 2007 trip report.)

Route Overlay

Time Stats

Day 1
9:00 am - leave Kain Hut
10:06 - Bugaboo-Snowpatch Col
10:55 - Pigeon-Hoswer Col
12:06 - base of ridge
12:40 - base of roped climbing
1:11 - begin roped climbing
6:15 pm - bivy site below Great White Headwall

Day 2
8:13 am - start climbing
11:40 - top of Pitch 15
(wait 1h30min for James and Stewart)
2:20 - summit
2:25 - begin rappels
4:47 - Vowell Glacier
6:10 - Bugaboo-Snowpatch Col
7:10 pm - Kain Hut

Kain Hut to Base of Ridge: 3:06
Base of Ridge to Bivy below Great White Headwall: 6:09
Bivy to Summit (without wait): 4:37
Summit to Kain Hut: 4:45

Pitch-by-Pitch Photos

Photos: Photo descriptions: 
Approach 
Kain Hut to East Creek Basin    
6.    
7.    
8.    
9.    
10.    
11.    
12.    
13.    
14.    
15.    
16.    
17.    
18.    
19.    
20.    
21.    
22.    
23.   
6. By the door of Kain Hut is a weather forecast that is updated daily. The forecast called for no precipitation for Sunday through Monday afternoon, so we decided it was the perfect time to do the Beckey-Chouinard route (it turned out that the rest of the week reverted to the usual pattern of afternoon rain showers so we were glad we made this decision).
7. Getting to the route involves going through Bugaboo-Snowpatch col. We hiked up from the hut and turned left at the junction of the trail to the col and the trail up to Applebee Camp.
8. Approaching the Bugaboo-Snowpatch Col. Snowpatch Spire is the obvious spire with the large Snowpatch.
9. A closer view of the Bugaboo-Snowpatch Col. It was in great shape during the week we were there. Not icy at all and the bergshrund had not yet begun to open. We used crampons the first time we went up it, but didn't use them the rest of the trip.
10. The view from Bugaboo-Snowpatch Col across the Upper Vowell Glacier toward Pigeon-Howser Col, where we headed next.
11. Nearing Pigeon-Howser Col, with the north side of the Howser Towers above us. The fixed rappel route comes down the skyline of the closest tower.
12. We decided to leave our crampons and three of our axes at the Pigeon-Howser col and not have to bother bringing them up the route. The snow was soft enough that we figured (correctly) we could get down into East Creek Basin safely without them. We did bring one axe just in case we had to chop steps anywhere.
13. A quick snack break at the col overlooking East Creek Basin.
14. We found some running water just below Pigeon-Howser Col and filled up, unsure if we would find more water at the base of the route and figuring it wise to fill up while we could. We ended up finding water running off snowpatches at the base of the scramble, but this might not be the case all times of year. Each of us had between 2-3 L of water when we started up the route. There was no water on the route until some snowpatches near the summit, which may or may not generate running water depending on the time of day.
15-16. Descending snow slopes into East Creek Baisn.
17. We nearly lost James to an ice axe massacre, but we talked Stewart out of it just in time.
18. The sweeping ridge in profile. The Beckey-Chouinard route goes up the ridge.
19. Morning clouds wafting over the upper South Howser Tower. The Minaret is the beautiful tower to the right in the photo.
20. Approaching the base of the ridge.
21. Looking up the ridge from the base of the scramble. There is about 1000' of 3rd class scrambling to get to the base of the roped climbing.
22. Looking up at the beautiful ridge we are about to climb from close to the end of the scramble up the lower ridge.
23. At the split boulders that mark the start of the roped climbing. Because of our late start, the closest party on the route was at least a few pitches up already.
Pitch 
1
5.5
24.    
25.     
24. Starting off Pitch 1. You can also start about 20 feet lower to avoid having to downclimb a bit on the other side of where Jon is in the photo. 
25. The 5.5 climbing on Pitch 1.
Pitch 
2
5.5
26.     
26. More 5.5 climbing on Pitch 2. We simulcimbed Pitches 1-3.
Pitch 
3
5.7
27.      
27. Fun 5.7 climbing on Pitch 3. We simulcimbed Pitches 1-3. There are several climbable options so it is easy to get a bit off route on the first few pitches, but in general look for the easiest way that has the cleanest rock and evidence of being climbed.
Pitch 
4
5.10-
28.     
28. Looking up from the belay below Pitch 4. This pitch has a 5.10- bulge which is just at the top of the photo.
Pitch 
5
5.8
29.     
29. Fun 5.8 climbing on Pitch 5. We were leading in blocks (Jon led Pitches 1-3 and Pitch 4) so I took over the lead here and led Pitches 5, 6, and 7.
Pitch 
6
5.8
30.    
31.      
30. Starting off Pitch 6. This moves over the ridge crest where I am in the photo.
31. The second half of Pitch 6 is in the beautiful corner system.
Pitch 
7
5.8
32.     
33.    
34.    
32. Jon at the alcove belay between Pitches 6 and 7.
33. Pitch 7 continues up the beautiful 5.8 corner system. This photo is taken looking down while leading the pitch. Jon is belaying below.
34. Stewart leading the pitch in our wake.
Pitch 
8
3rd
35.     
35. Pitch 8 is an easy scramble to where Jon is in the photo.
Pitch 
9
5.6
36.      
36. Jon leading off Pitch 9. This is a short pitch that ends just above Jon in the photo. Eager to get to our bivy site, he decided to link it with Pitch 10. This worked out well, but be wary of possible rope drag if you do link the pitches. 
Pitch 
10
5.8
37.     
37. Looking up the last bit of Pitch 10. The crack on the right is a bit easier than the one of the left. 
Bivy below Great White Headwall

38.    
39.    
40.    
41.    
42.    
43.    
44.    
45.     
46.    
38. Looking up at the Great White Headwall basking in the late afternoon sun. The Beckey-Chouinard route goes up a chimney/crack system just visable on the left in the photo. The splitter crack above is called Lost in the Towers and goes at 5.10-5.11.
39. Another photo of the Great White Headwall. The Beckey-Chouinard route goes up the chimney/crack system on the left side of the photo.
40. Jon relaxing at the bivy spot while James belays Stewart up the final pitch.
41. We decided this should be the new Mountain House package photo.
42. The stove was well worth the weight to be able to have hot dinner and coffee in the morning.
43. Hot chocolate at the bivy.
44-5. A couple more views of the comfy bivy spot. It was spacious enough to be a little room to walk around. It slept 3 comfortably but 4 was tight.
46. There is a second bivy spot about 20 feet from the one in the previous photos. It was more exposed and hence pretty windy. But since the less-exposed bivy slept 3 comfortably, and James had the most skookum bivy setup, he offered to sleep at the windy bivy. He did have a pretty awesome view of the sunset.
Pitch 
11
5.10-
47.    
48.    
49.      
47. Looking up the start of Pitch 11.
48. Starting up Pitch 11 in the morning chill. The sun does not come on these upper pitches until afternoon.
49. The second half of Pitch 11.
Pitch 
12
5.9
50.    
51.    
52.      
50. Jon starting off Pitch 12 with a balance move back into the crack.
51. Great 5.9 crack climbing in the middle of Pitch 12.
52. The "tough squeeze" is near the top of this photo. We had feared it would be tough with packs on, but it ended up being a bit of wetness in this area that made it tougher rather than the packs.

Pitch 
13
5.9
53.     
53. Pitch 13 surmounts the blocks and continues up the corner.
Pitch 
14
5.8
54.      
54. Aesthetic, fun climbing on Pitch 14.
Pitch 
15
5.6 A0 or 5.10
55.    
56.    
57.    
58.     
55. Jon on the face traverse at the start of Pitch 15. This can be done on tension off of a pair of pins or climbed free at 5.10. Jon climbed it free.
56. The pins at the start of Pitch 15. This can help the leader get tension for the starting moves.
57. The 5.6 gully after the tension traverse.
58. Jon at the top of Pitch 15.
To Summit 
4th+short 5th moves
59.    
60.    
61.    
62.    
63.     
59-60. From the top of Pitch 15, make a 20m rappel to easier blocky terrain.
61. Stewart and James were no where in sight, but we wanted to wait and go to the summit and do the descent together. Jon and I waited 1.5 hours (there had been some issues with the wet squeeze on Pitch 12....), but we found a small snowpatch and made hot juice and coffee to make use of the wait (it had been a cold morning so the hot drinks really hit the spot for me).
62. The start of the "scramble" to the summit. This involves ~150-200m of 4th class with several short 5th class moves. 
63. Midway through the "scramble" to the summit. Weather had begun to move in on us (it was actually starting to rain and there was some worrysome thunder that seemed to be moving closer), so we roped up for this final bit. Under drier/sunnier conditions we probably would have done it unroped.
Summit 
11,194'
64.    
65.    
66.    
67.     
64. James and Stewart on the summit.
65. With the rain and thunder, we didn't hang out, and began looking for the first rappel anchor off the north side. A pair of rap bolts is just around the block Jon (in orange) is standing at in the photo.
66. The view from the top towards Bugaboo Spire, Snowpatch Spire, and Pigeon Spire.
67. North Howser Tower as seen from the top of South Howser Tower.
Descent 

Fixed rap line down north side to Vowell Glacier. 11 raps with a single 70. 

Rappel Route (posters in Kain Hut): 

(Click to enlarge.)
68.    
69.    
70.    
71.    
72.    
73.    
74.    
75.    
76.    
77.    
78.    
79.    
80.   
68-69. On the rap route. With the wind and the lower angle of the first half of the rappel route, we decided to rap the first half with a single 70 rather than double ropes. The basic idea for Rappels 1-3 is to stay on the ridge and don't wander towards North Howser. See the annotated photo (to the left) showing the locations of the rappel anchors.
70. Rappels 4-5 go down this corner system that faces North Howser.
71. Rappel 6 is horizontally along a ledge. There was a fixed line there that we used, along with a bit of downclimbing.
72. View of North Howser from midway though the rappel route. As the photo shows, the weather was improving. The storm that had moved in as we got to the summit had moved out by the time we were a few rappels into the descent.
73. Looking up from the base of the rappel route. We used double ropes for the last two rappels (Rappels 8-9 and 10-11). The lower ridge steepens, so this worked well. My advice would be to use single rope rappels for the first 7 rappels, and then use double ropes to combine Rappels 8-9 and 10-11, as we did.
74. James on the final rappel.
75. The final rappel (double rope from Rap ancor 10 or single rope from Rap anchor 11) gets you past the bergschrund and puts you on a flat part of the glacier.
76. Mellow snow slopes back to our gear we left at Pigeon-Howser Col.
77. Jon and Stewart on the Upper Vowell Glacier. The summit poking over the snow is the top of Bugaboo Spire.
78. Heading towards Bugaboo-Snowpatch Col.
79. Descending from Bugaboo-Snowpatch Col. We made use of a fixed line at the top and then made a rappel off a bolted station on a rock outcrop, and then downclimbed/plunge-stepped down the snow from there. It was is great shape.
80. Approaching the Kain Hut.
At Kain Hut 

81.    
82.   
81. James, the master chef.
82. Dinner at Kain Hut. The kitchen is open for use by anyone staying at the hut. 

July 26 - Rest day. I discovered that the Kain Hut had plugs (there is a micro-hydro generator in the creek that supplies the hut with electricity for lighting, heat, and hot water), so I hiked back out to the car to grab my laptop so I could process photos and make route overlays (okay, I am a tad obsessed, but trip reports take a lot of time, and it is nice when I can absorb some of this time into a trip, which means less non-climbing days after the trip). Jon, James, and Stewart relaxed by the stream near the hut.
Photos:
83.    
84.    
85.    
86.    
87.    
88.    
89.    
90.    
91.    
92.    
93.    
94.    
95.    
96.    
97.    
98.    
99.    
100.    
101.    
102.    
103.    
Photo Descriptions:
83-87. Some photos of the Kain Hut. The facilities (kitchen, cupboards, loft, drying room, gear racks) are open to use by anyone staying at the hut. As of 2016, it costs $25 a night to stay there, as opposed to $10 a night to stay at Applebee. Well worth it from my evidently-aging perspective. 

88. Outhouses at Kain Hut.
89. There is a urine-only outhouse closer to the hut.
90-94. I hiked down to the trailhead to grab my computer. It had been dark when we hiked in, so now I took a bunch of photos of the chicken-wire-wrapped cars and the approach. Without a heavy pack, it took me 1:15 down and 1:!5 up between Hut and Trailhead (I'm slow down and fast up I guess). For comparison, with a heavy pack my time is about 1:30 to/from the Hut. It's only 3 miles, but it is steep....
95. The micro-hydro generator in the creek that supplies the hut with lighting, heat, and hot water.
96. Ptarmigan.
97. Indian Paintbrush.
98. Pika.
99. My new office. It was a lot of fun to be able to download everyone's photos each day and have a little slideshow of the day's adventures.
100. The guys enjoyed the rest day. 
101. I particularly like the note about "other fine works of fiction...". Our rest day was forecasted to be a rainy day, yet it ended up being one of the sunniest days of the week. Seems the best tact in the Bugaboos is just to wake up early, and if you have clear skies go climb, and plan to be off the summits by early- to mid-afternoon since afternoon thundershowers are common.
102. We capped off the rest day with a game of cribbage.
103. Beautiful evening lighting to the north.

July 27 - The weather forecast called for afternoon thundershowers, so the plan for the day was to climb on Crescent Spire, a nice destination for a half-day or when the weather is more questionable. Jon and I would climb Paddle Flake Direct (5.10, 500') while Stewart and James climbed McTech Arete (5.10-, 500'). But as we approached Crescent Spire, it was hard not to notice the beautiful sweeping NE Ridge of Bugaboo Spire basking in the morning sun. Due to the forecast, the typical morning backup of parties at the base of the route was nonexistent. It was too hard to resist, so Jon and I decided to see if we could squeeze in a climb up the NE Ridge of Bugaboo Spire before the afternoon storms hit, while Stewart and James decided to stick to their plans to climb McTech Arete (here's a Route Overlay for McTech Arete and a photo of Stewart leading a pitch on the route). Indeed, all of us made it back to the Hut by early afternoon just as the rain started. It was a fun day. (I had climbed the NE Ridge in 2006 on my first trip to the Bugaboos when I was rather new to climbing; here is a link to my 2006 trip report.)

Route Overlay

Time Stats

6:10 am - leave Kain Hut
7:21 - base of scramble to Bugaboo-Crescent col (after hiking up to McTech Arete first)
7:48 - base of route
8:06 - begin roped climbing
10:44 - N summit
11:39 - S summit
11:53 - begin descent
1:25 - Bugaboo-Snowpatch Col
2:19 pm - Kain Hut
Total hut to hut time: 8:09 

Pitch-by-Pitch Photos

Photos: Photo descriptions: 
Approach

Kain Hut to Bugaboo-Crescent Col

Annotated photo showing the location of the approach ramp to Bugaboo-Crescent Col:

(Click to enlarge.)
104.    
105.    
106.    
107.    
108.    
109.    
110.    
111.    
112.   
 
 
104. Applebee Camp.
105. Hiking around the lakes towards Crescent Sprire.
106. Morning sun on Snowpatch Spire and the Bugaboo-Snowpatch Col.
107. Looking up at the Paddle Flake/McTech arete area. Here is an overlay for McTech Arete. It is great climbing but it does have more of a cragging feel then the main spires in the Bugaboos.
108. Morning light on Bugaboo Spire. The NE Ridge is on the right skyline.
109. The NE RIdge was hard to resist.....and the forecasted rain looked a ways off stil...
110. Heading up the 4th class ramps towards Bugaboo-Crescent Col. Climbers often struggle with locating this ramp. See the annotated route overlay (to the left) for the approach to Bugaboo-Crescent col.
111. Snowpatch Spire as seen from Bugaboo-Crescent Col. The sun-shade line separates the east wall from the north wall. The Sunshine Crack route (which Jon and I climbed the next day) goes up in the shade on the left side of the north wall.
112. Approaching the base of the NE Ridge. There is often a small snowpatch but it is low angle and should not require crampons or axe (although most climbers would want at least an axe for the descent from Bugaboo-Snowpatch col).
Pitch 
1
5.8+
113.     
113. Jon leading off Pitch 1. He linked Pitches 1-2 but I think I had to do a bit of simulcimbing at the start).
Pitch 
2
5.6
114.     
114. Pitch 2.
Pitch 
3
5.7
115.     
115. Pitch 3 heads up and right along a dike system. It has some juggy holds and is fun climbing.
Pitches 
4-5
5.6
116.     
116. Looking up the start of Pitch 4. This is easily linked with Pitch 5 to a nice ledge (I am not sure why you wouldn't link it, actually).
Pitches 
6-9
low 5th (in chimney) to 5.8-5.9 (crack variations on left)
117.    
118.    
119.    
120.    
121.    
122.    
123.      
117. Pitches 6-9 of the standard route head up a low 5th chimney system. But we chose to take a nice-looking crack on the left for Pitch 6. This was excellent climbing.
118. Jon nearing the top of Pitch 6 (crack variation).
119. For Pitch 7, we continued up the crack system. I starts off easily enough, but gets hard about hafl a pitch up, so we traversed back right (had to make a few airy face moves rightward) back to the chimney system.
120. Jon stepping right back to the chinmey ssystem.
121. Looking down into the chimeny system of Pitches 6-7 of the standard route.
122. Somewhere on Pitch 8 of the chimney system.
123. Somewhere on Pitch 9 f the chimney system. We linked Pitches 8-11 into one long simulclimbed pitch.
Pitch 
10
5.7
124.    
125.      
124-125. Climbing on Pitch 10, which was part of our long simulclimb of Pitches 8-11.
Pitch 
11
4th
126.    
127.       
126. Nearing the North summit on Pitch 11, which was part of our long simulclimb of Pitches 8-11.
127. Jon at the belay at the top of Pitch 11. The North is a short scramble up and right from here. There is a bolted rap anchor here to begin the summit traverse.
Summit Traverse 

4th-5.6 depending on route

Annotated photo showing the summit traverse:
(Click to enlarge.)

128.    
129.    
130.    
131.    
132.    
133.    
134.    
135.      
128. Looking at the ridge between the North and South summits from the bolted rap station just beneath the North summit. Here the annotated photo (to the left) of the ridge traverse.
129. Jon rapping down to the ledge on the left (east).
130. In this photo, Jon is squeezing around a boulder that is at the base of the rappel.
131-132. Enjoying the exposed ridge between the summits. We did not rope up for the summit traverse.
133. Head across the face on cracks towards the small notch. There is a rap station here. Apparently you can get up to the South summit by climbing the steep wall (5.10), but it is easier to rap first and then go up on the other side.
134. The rappel from the notch in the previous photo.
135. After the rappel, the guidebook recommends climbing blocky terrain to the summit. This is probably the shortest way to the top. But we did not have the route description with us, so we continued to traverse across the ledge, found another fixed rap station, and rappelled onto the Kain Route. This photo is taken looking up at the last pitch of the Kain Route, which we climbed to the South summit.
South Summit (higher summit)
10,512'
136.    
137.     
136. Jon on the South summit.
137. View of the Howser Towers from the top of Bugaboo Spire.
Descent 

Kain Route rappels + donwclimbing

Annotated photo showing location of Rappels on descent:
(Click to enlarge.)
138.    
139.    
140.    
141.    
142.    
143.    
144.    
145.   
138. Looking down at the descent route. This follows the Kain Route, which is also a popular ascent route. There are 6 established rappels, the first of which is off the south summit. The second is to the left of the gendarme in the photo below. See the annotated photo (to the left) of the locations of the 6 rappels.
139. A closer view of the gendarme.
140. The second rappel is through a notch that is a bit up from the base of the first rappel. Unaware climbers sometimes miss this rappel station station and go too low, so don't be tempted by rap slings you might see below.
141. Looking back towrads the summit area from the ridgeline leading to Rap 4.
142. Climbers on the upper Kain Route.
143. An old sardines tin on the Kain Route. Who knows, maybe Conrad Kain himself ate these.
144. Scrambling down the lower Kain Route after the rappels.
145. The view of Pigeon Spire and Howser Towers from the Bugaboo-Snowpatch Col. I never get tired of this view, especially since the clouds and lighting are different every time.

July 28 - Jon and I climbed Sunshine Crack on Snowpatch Spire while Stewart and James climbed NE Ridge on Bugaboo Spire.

Route Overlays

Time Stats

7:30 am - leave Kain Hut
8:23 - base of route
8:57 - begin climbing
3:36 - top of route
4:45 - begin rappels
4:43 - base of route
6:00 pm - Kain Hut
Total hut to hut time: 10:30 

Pitch-by-Pitch Photos

Photos: Photo descriptions: 
Approach 
Kain Hut to base of route a third of the way up towards Bugaboo-Snowpatch col
147.    
148.    
149.   
 
147. Approahing the base of the route. It is just past the nose of Snowpatch in the photo, about 1/3 of the way up the slopes to the Bugaboo-Snowpatch col. 
148. Nearing the end of the snow. The route starts in the obvious crack system on the left.
149. Leaving the snow. We did not have any moat to deal with.
Pitch 
1
5.10
150.     
150. Jon starting up Pitch 1, which follows Pitch 1 of Bugaboo Corner route (Sunshine Crack and Bugaboo Corner share the same first two pitches). From the top of the arching crack go left rather than right (right will put you on a scary face traverse into the main crack system).
Pitch 
2
5.10
151.    
152.    
153.     
151. Looking up Pitch 2, which continues up the Bugaboo Corner route. We linked this with Pitch 1. The crack above is a 4-5-inch offwidth. A #4 will not fit. We did not bring a #5. But once up there, we wished we had, especially since the crack was a bit wet. There were a few manky slings in the offwidth slung around chockstones and nuts set way back in, which provided a bit of mental comfort. This offwidth was the hardest and least enjoyable part of the route for us; I think if it had been dry and we had a #5 it would have been more enjoyable. After that, everything on the route felt well-protected. Unless you feel really comfortable in this size of offwidth, I would advise bringing a #5 for this pitch. You won't need it though for the rest of the route and it is a heavy piece to carry upwards if you don't need it. I suppose you could leave the cam hanging from the anchor at the top of Pitch 2 and collect it on the way down, but I would personally be a bit wary of leaving the cam just hanging there on such a popular route, for a few reasons. One option would be for the leader to lower down a short ways from the anchor and clean the #5 and then lower the cam on a rope to the partner still at the base of the route; this would work if you had two ropes and linked Pitches 1 and 2. Or avoid the shenanigans and just have the follower carry the cam up the route.....
152-153. More views of the offwidth while rappelling the route later that day. It looked a lot drier when we rappeled, which would have made it a more secure lead.
Pitch 
3
5.10
154.     
154. Looking down at Jon following the hand rail on Pitch 3. There was some fun and varied climbing on this pitch.

Pitch 
4
5.9
155.    
  
156.      
155. Looking up at the start of Pitch 4.
156. Looking down from the belay at the top of Pitch 4.
Pitch 
5
5.10
157.     
157. The roof on Pitch 5. The route line on our route description seemed to go over the roof just right of the crack on the lower wall. This move was an athletic jug pull over the roof with a somewhat desperate clip of a fixed nut. It felt 5.10. On the rappel we saw a party surmounting the roof further left, which looked a bit easier. That way had been a bit wet in the morning so we had not even really considered it. But it might be the easier way to go if dry. Either way works and is great climbing.
Pitch 
6
5.9
158.     
158. Looking up the start of Pitch 6, a hand/fist crack with a nice roof move near the top. The pitch ends shortly after the roof in the photo. I don't recall seeing bolts at where the pitch officially ends. Hence, I continued up Pitch 7 thinking I was still on Pitch 6.....
Pitch 
7
5.11-
159.     
159. Looking up Pitch 7. I didn't see a bolted anchor anywhere (perhaps I missed it or perhaps there isn't one), so thinking I was still on Pitch 6 I continued upward. Indeed, I remember thinking that the roof seemed awfully stout for 5.9, but it protected very well and I made it over. By the time Jon reached the belay, I realized I had just led us through the crux (5.11-) roof. That was a nice surprise.
Pitch 
8
5.9
160.      
160. Fun 5.9 climbing on Pitch 8.
Pitch 
9
5.8
161.    
162.      
161. Looking down from the belay at the top of Pitch 9, which is fun and sustained 5.8 climbing.
162. The sun finally came around the edge of the ridge as Jon was climbing this pitch. (Photo taken at 2:30pm, July 28).
Pitch 
10
5.10
163.    
164.     
163. Splitter fist-crack on Pitch 10. I don't normally feel secure in fist-cracks, but because of the rough texture of the rock I found the climbing to be super secure. Hand stacks worked well for me.
164. A view of the splitter fist crack on the rappel.
Pitch 
11
5.10
165.    
166.      
165. The final pitch has two options: Either make a 5.10 bouldery move out left to gain a 5.8 crack or climb a 5.10+ crack to the right. We went left (pictured n the photo). The bouldery move was pretty tricky, but at least it was protectable. Jon took a good fall trying to free it (fortunately it's a super clean face), and in the end both of us ended up pulling on a cam to avoid a barn door. We were in "get 'er done" mode at this point.
166. The final 5.8 crack to the top of the route.
Top of route 

167.    
168.    
169.    
170.    
171.   
167. Jon at the anchor at the top of the route. The North summit is behind and left in the photo. The route ends here, but it is possible to gain the North summit by contiuing on the Buckingham Route, but this involves descending via the Beckey-Greenwood rappel route and dealing with some snow travel getting back to the base of Sunshine Crack (so hence you need to at least bring approach shoes up the route). Most parties just stop here. So did we.
168-169. Bugaboo Spire as seen from the top of Sunshine Crack.
170. Crescent Spire and Crescent Towers as seen from the top of Sunshine Crack.
171. Climbers descending snow slopes north of the Bugaboo-Snowpatch Col. One nice thing about the Sunshine Crack route is that you do not have to deal with the col.
Descent 

Rappel route (2x60m)
172.    
173.   
172. The first rappel. All of the rappels are off the belay anchors on the route. We made 8 double-rope rappels (rapped from anchors at tops of: P11, P9, P8, P7, P5, P4, P3, P1) to get down although I think we could have done it in 7 (could probably rap all the way to P2 from P). You definitely need two ropes (or a single 80m rope) to rappel the route, as some pitches are up to 40m long.
173. Jon rappelling past the splitter fist-crack of Pitch 10. Since the rap route descends the route, you can leave the approach shoes and snow gear at the base.

July 29 - After a couple of days of climbing separate routes, we wanted to all climb a route together. Plus we wanted to get to the summit of Snowpatch Spire, which sits so prominently in the middle of the main climbing area. So we decided to climb Surf's Up on Snowpatch Spire, a relatively popular moderate route on the southwest side of the spire. The lower half of the route leading up to Surf's Up Ledge is flakes and knobs and horns, while the upper half of the route above Surf's Up Ledge is nice cracks. The climbing is varied and fun. We had an enjoyable day of climbing together, and the summit view gave us an awesome perspective of everywhere we had been that week. We had tentatively planned to tick off the West Ridge of Pigeon Spire afterward, but we had to wait a bit due to another party on the route and we lost our window (fortunately, we timed our wait to be at the comfortable and sunny Surf's Up Ledge). After the climb, we romped back over to Bugaboo-Snowpatch Col, descended the col (for the 3rd time that week; it had melted out a bit over the week but was still in reasonably mellow shape), and enjoyed one last evening at the cozy and comfortable Kain Hut.

Route Overlays

Time Stats

7:30 am - leave Kain Hut
8:34 - Bugaboo-Snowpatch Col
8:55 - base of route
9:29 - begin climbing
11:42 - Surf's Up Ledge
(wait 1 hour for a party on the route)
12:47 - Leave Surf's Up Ledge
2:26 - top of Pitch 7
3:08 - summit
3:36 - begin rappels
4:30 - base of route
5:25 - leave base
6:42 pm - Kain Hut
Total hut to hut time: 11:12

Pitch-by-Pitch Photos

Photos: Photo descriptions: 
Approach 

174.    
175.    
176.    
177.   
 
174. Bucket steps going up towards Bugaboo-Snowpatch col. Someone must have had some pretty heavy boots to make these. The steps were so deep we felt no need for crampons even though the snow was quite firm that morning.
175. Shadow fun from Bugaboo-Snowpatch Col. Howser Towers in distance.
176. Tiny climbers approaching Pigeon Spire. Even though Pigeon is one of the "smaller/easier" summits in the Bugaboos, it's still impressive in size. Especially the East Face....
177. Approaching Surf's Up, which is on the SW side of Snowpatch (just around the skyline in the photo).
Pitch 
1
5.8
178.    
178. This photo was taken midway up Pitch 1, where the climbing steepens. The first half of Surf's Up follows interesting horns and ribs and flakes rather than cracks. Even without cracks it still protects pretty well.
Pitch 
2
5.8
179.      
179. In this photo I am leading Pitch 2. I am looking for the 5.8 bulge, which was still above me. I figured this out and continued up the slot to my left in the photo, and exited it about 20 feet below a large horn wrapped in slings. The 5.8 move was pretty easy. The routefinding on the lower pitches is a bit tricky. The description makes a note of not being suckered up too high.

Important note: The Atkinson guide mentions a "flake belay" at the top of Pitch 2. So I set a belay at a pretty large flake/horn that seemed to fit the position/description. The flake seemed pretty solid when I knocked on it, but I put in a #2 for backup anyway. I didn't think anything of it and Jon and I continued up Pitch 3. Stewart set his belay at the horn as well. Then a climber from another party (this party had gone up too high and left and rappelled and intersected the route at the top of Pitch 2) pulled sideways on the flake as he climbed past, and it teetered quite a bit. It is not at all firmly attached to the mountain. Scary to think we had set our belay anchors on it. I am not sure if this is the belay flake mentioned in the Atkinson route description, but nevertheless be wary of possible loose flakes/horns in that location. There is a giant flake/horn wrapped in slings about 20 feet up and left of where I belayed, but it seems too far up and left of the route (there is a note in the Bugaboo Rock guide saying to stay in the corner and not get lured too far left to slings left by parties retreating). In either case beware of the loose flake/horn at the top of Pitch 2. You can get in good gear (a #2 for instance) and avoid the horn altogether. 
 Pitch 
3
5.9
180.    
181.     
180. Jon leading off Pitch 3, which continues up the corner of flakes. I took this photo from the location of the loose belay horn.
181. Another party climbing Pitch 3. This party had been suckered up and left and had realized they were off-route about the time we started climbing Pitch 1. In the photo, Stewart is at the belay at the wobbly flake/horn and the belayer from the other party is at the giant horn wrapped in slings (the leader had to downclimb 20 feet to get into the corner so the nest of slings on that horn are more likely bail slings rather than belay slings).
Pitch 
4
5.7
182.    
183.    
184.    
185.      
182. In this photo I am starting up Pitch 4, which goes up for about 10m and then steps right and then goes down to a large ledge (Surf's Up Ledge).
183. Surf's Up Ledge.
184. Jon napping on Surf's Up Ledge as we wait for Stewart and James (the other party had intersected between us forcing Stewart and James to have to wait in the cold awhile until they could climb Pitch 3). The view of the East Face of Pigeon is pretty spectacular.
185. Climbers on top of Pigeon Spire.
Pitch 
5
5.9
186.    
187.      
186. Starting up the 5.9 crack off the right side of the ledge. Really fun climbing. In the photo you can make out ropes (from the other party) going up the 5.7 variation off right. This variation avoids the 5.8-5.9 climbing of Pitches 5-6. But we thought that Pitches 5-6 had some of the best climbing on the route so it would be a shame to bypass it (although the 5.7 variation is probably good climbing too). Beware of another large loose block just at the start of the 5.7 variation.  The rock on the route is in general very solid (as most Bugaboo rock is), but it seems like this route has a bit more loose rock than other routes I've climbed in the Bugaboos.
187. James leading up the 5.9 crack.
Pitch 
6
5.8
188.      
188. Looking up the 5.8 handcrack that comprises Pitch 8. Super splitter with great hand jams. I cannot imagine the 5.7 variation off right is quite as good as this pitch....
Pitch 
7
5.7
189.     
189. Stewart leading Pitch 7 to the ridge crest. I had stopped at the top of Pitch 6 and Stewart had led up behind me but now that the other party was off Pitch 7, he climbed past Jon and me at the belay and linked Pitches 6-7, which works well since Pitch 7 is very short.
To Summit
~150m (3rd to some 5th)
190.    
191.     
190-191. From the top of Pitch 7 is ~150m of climbing along the ridge, which is 3rd with some 5th class steps. We simulclimbed the ridge.
Summit
11,978'
192.    
193.    
194.    
195.    
196.    
197.    
198.    
199.    
200.     
192. Jon, James, and Stewart on the summit of Snowpatch.
193. Me (Steph), Jon, James, and Stewart on the summit of Snowpatch.
194-195. Awesome view of the East Face of Pigeon Spire with the Howser Towers behind. Snowpatch gives a nice perspective of that East Face of Pigeon. I really want to climb Cooper-Kor on that east face....sounds like another trip to the Bugaboos is in my future....
196-197. Climbers traversing the Upper Vowell Glacier en route to Bugaboo-Snowpatch col far below.
198. Kain Hut far below.
199. The North summit of SNowpatch is in the foreground. Bugaboo Spire, Crescent Spire, and Crescent Towers are in the background.
200. We discovered why the deck of playing cards we found in the hut had only 51 cards.
Descent 

Krause-McCarthy Rappel Route
201.    
202.    
203.    
204.    
205.    
206.    
207.    
208.    
201. The three climbers in the photo are at the rap station at the start of the Krause-McCarthy Rappel Route. The climber on the left is coming up from the Snowpatch Route. All routes that react the South summit desced via the Krause-McCarthy Rappel Route. The guidebook says you need two ropes, but you can also rap it with a single 70m rope (the party after us did). Not sure if a single 60m rope would work. We made four double-rope rappels. We got our rope stuck (twice!) on the third rappel and the party above us freed it (twice!). The rappel route dumps you off ~100m of scrambling from the base of Surf's Up, so we were able to leave our approach shoes and ice axes at the base of the route and not bring them up the climb.
202. Jon starting the rappels.
203. Rappelling.
204. The Krause-McCarthy Rappel Route goes down this gully. The gully is not loose at all, and feels kind of like being in a canyon.
205. Another photo of Pigeon and Howser Towers. The west side of Snowpatch gives a nice perspective of that East Face of Pigeon.
206. Traversing back towards Bugaboo-Snowpatch Col. Bugaboo Spire in distance.
207. A pretty blue tarn we spotted on the east side of the col. Crescent Spire and Crescent Towers in distance.
208. Heading down the Bugaboo-Snowpatch col for the last time of the trip. The top part had melted out a bit more each day we had been there. The fixed line was useful for getting down onto the snow.

July 30 - Hike out and drive home. It was hard to leave after such an amazing week.
Photos:
209.    
210.    
Photo Descriptions:
209. The logbook at Kain Hut.
210. A fat squirrel who probably dines off the crumbs and occasional stolen power bar from passing hikers. 

The collapse of the "mushroom boulder" below the Bugaboo-Snowpatch Col
July 25 6:30 pm
July 29 8:07 am
July 29 8:08 am
July 29 6:04pm

Video

Video taken while flying around the Bugaboos doing aerial photography, March 9, 2013. 
Link to Bugaboos in a Day Aerial Photography Adventure.

Comments Pertaining to this Page / Trip Report

Useful beta. Updated route information. Corrections. Historical notes. Interesting facts. No fluff please.
Leave a Reply

Your email address will not be published. Required fields are marked *