A route that felt like more of an accomplishment than quality climbing. One of the bigger (yet obscure) walls of granite in the North Cascades.
Region: Washington
Elev: 8,280 ft
Rock type: Granite
Type:
Date(s): June 21, 2016 (Tue)
Partner(s): Sam Bedell
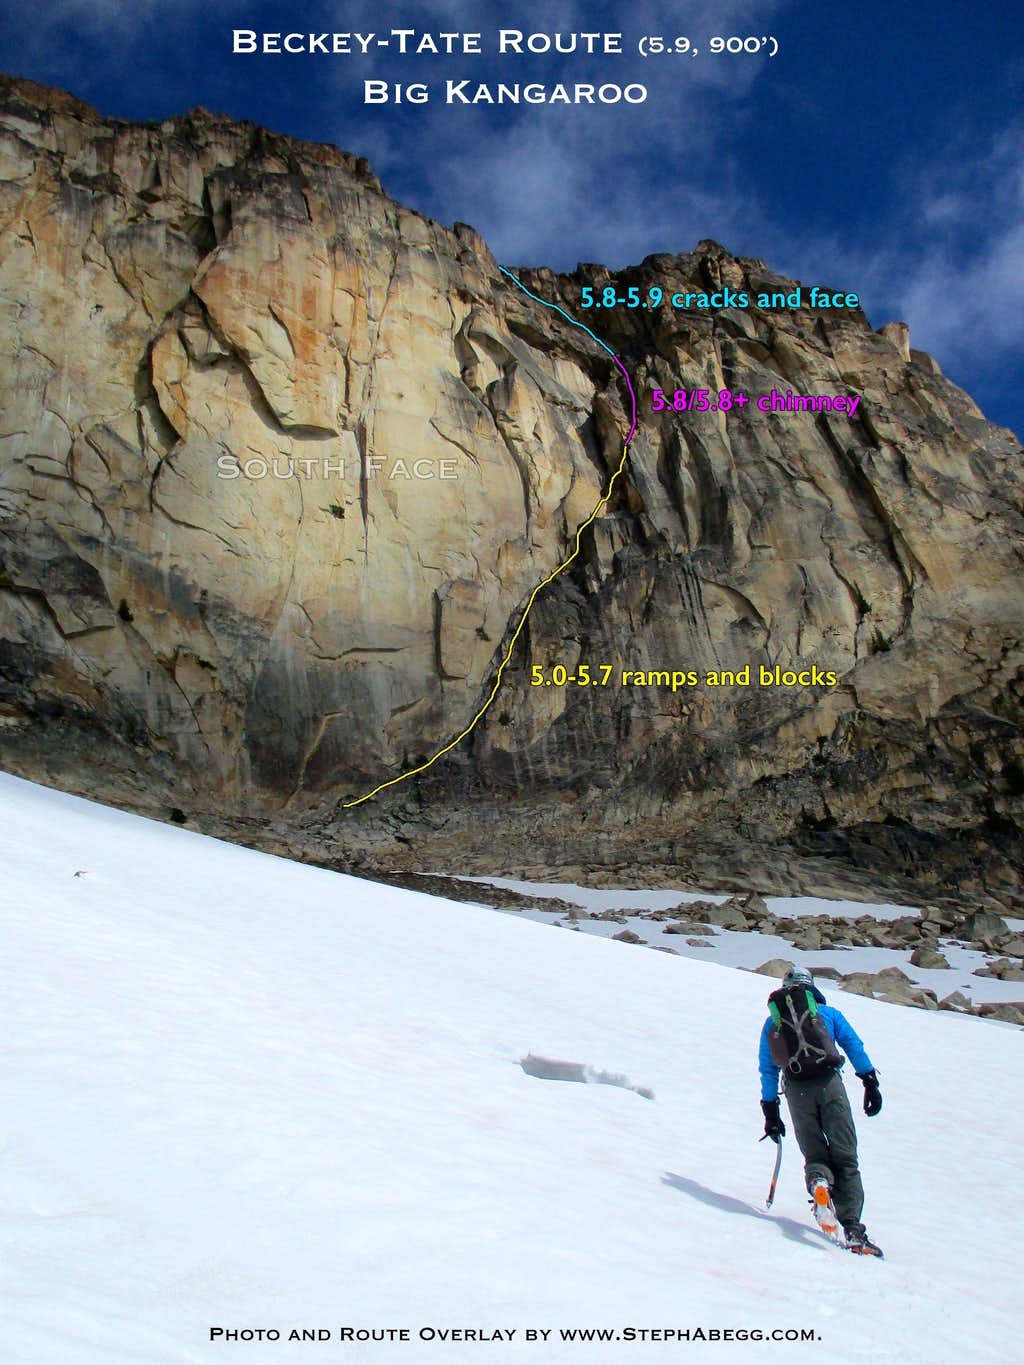
Route Overlay
CLICK TO ENLARGE
Intro
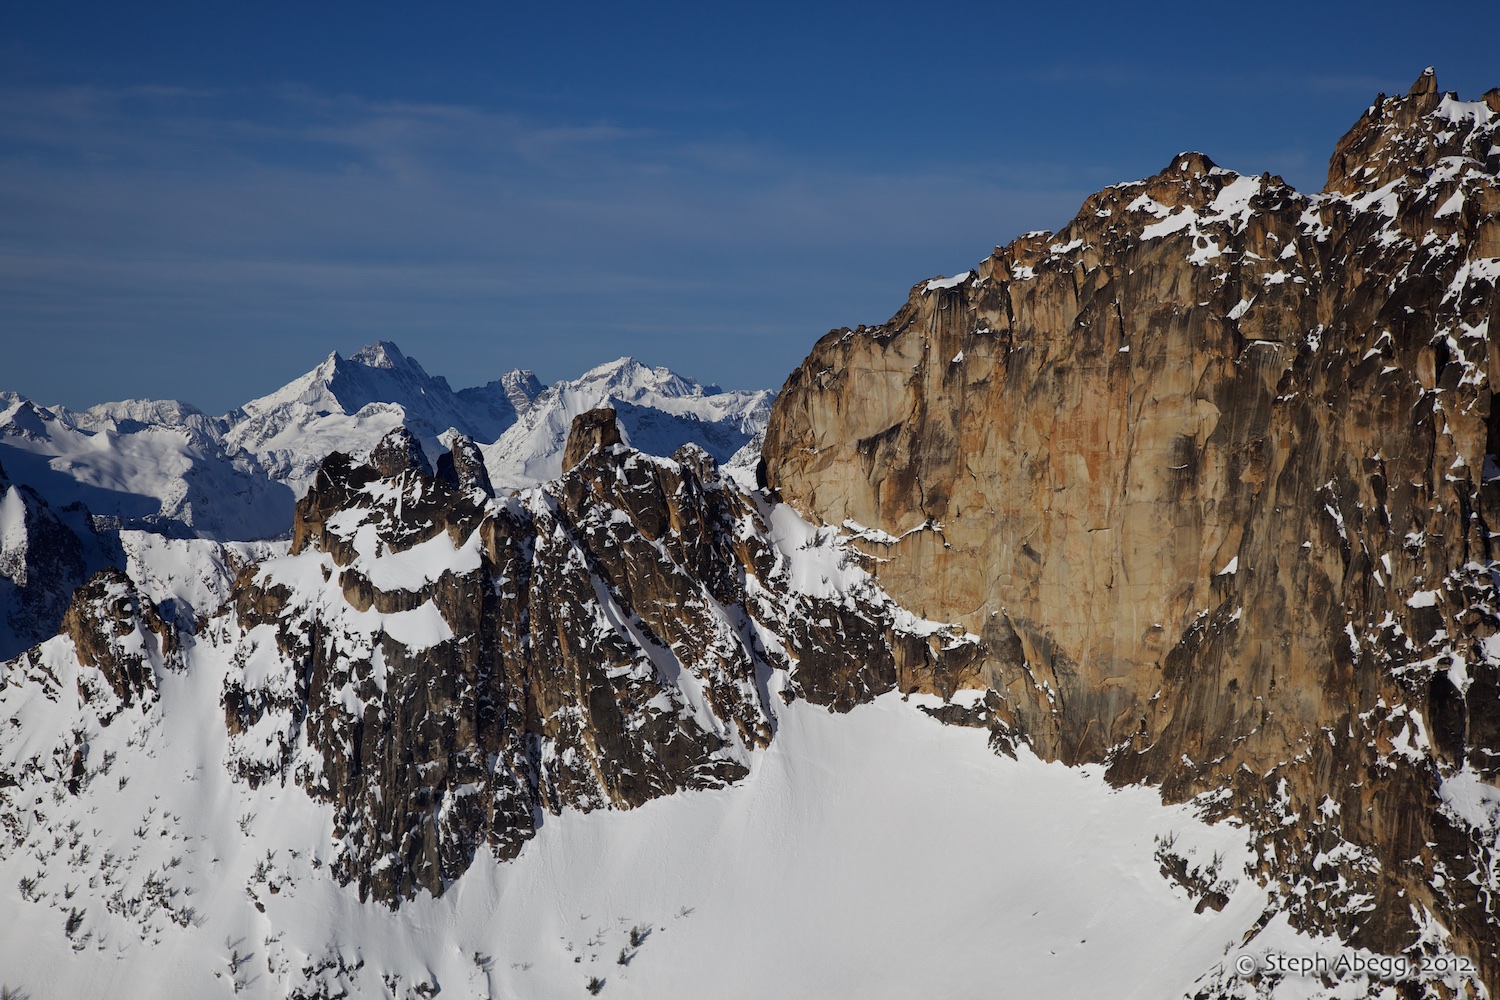
In February 2012, while doing some aerial photography of the Liberty Bell group with John Scurlock, we were flying a bit east of the group when I noticed a southeast-facing wall of golden granite on Big Kangaroo, the high point on Kangaroo Ridge. Even in the wintery conditions, this wall was devoid of snow, an indication of its steepness. It looked similar in quantity and quality to the popular south side of South Early Winter Spire. This wall faces away from the WA Pass spires so I had never known of its existence.
Curious, I did some research. I learned that this SE-facing wall on Big Kangaroo has a few routes on it. Many of these routes were established in a flurry of activity in 2010-2012 (since the wall is hidden it has remained largely undiscovered by many climbers). Most of these routes are hard, in the 5.11-5.12 range. The easiest route up the wall was first ascended by Beckey (no surprise there, that guy seemed to find every climbable rock in the Cascades) in 1967, when he and Dan Tate put up a route following a central ramp and corner in the middle of the face. The route has 3 distinct parts: the start of the route is mostly low 5th class climbing up a ramp; the middle of the route has slightly runout and burley chimneys the final section has finger cracks and technical face climbing and is the best (and technically the hardest) climbing on the route.
In June 2016, my friend Sam and I climbed this route. We each brought lightweight crampons and an axe for the early season snow. Apart from the quality finger crack and wavy hand crack of the upper two pitches of the route, we thought that most of the climbing was pretty moderate and mediocre, and had a slightly unsettling flavor of looseness (to be expected due to the fact the route goes up a gully weakness and the lack of climbing traffic on this wall). However, the position of the route and the achievement of climbing one of the larger steep walls of granite in the Cascades made up for the quality of climbing.
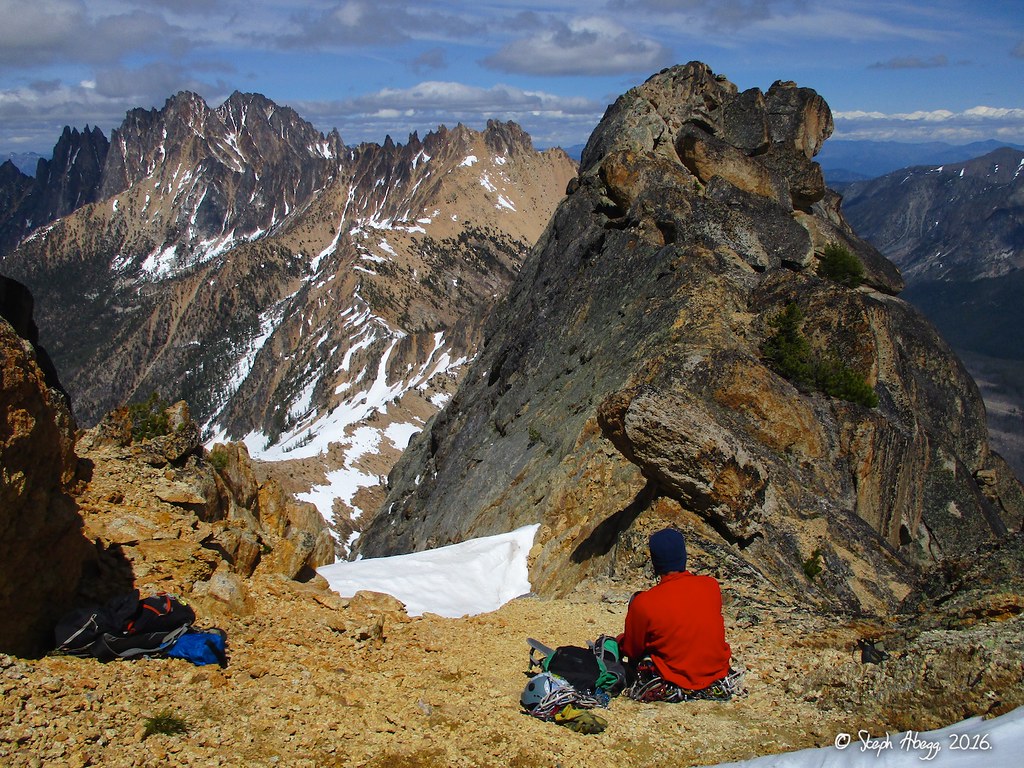
The south face ends a few hundred feet below the summit. From there, the West Face route, first climbed in 1942, is the best way to climb to the summit. This involved ascending a snow-filled gully to the left (north) side of the summit block, climbing a final 20-ft exposed and unprotected face to the summit, and then tentatively downclimbing while on toprope off an old bolt on the summit. In a way, climbing the West Face route was the most enjoyable climbing of the day, and it certainly added to the overall feeling of achievement to reach the summit. From our packs, we simply descended a gully (scree and snow) to the Hairpin Turn. It was a full value day of Cascades climbing.
The following page gives a route overlay and photos from the climb.
THIS TRIP REPORT IS STILL MOSTLY IN THE EMBEDDED HTML FORMAT OF MY OLD WEBSITE.
Photos
Photo descriptions
1.
2.
3.
4.
5.
6.
7.
8.
9.
10.
11.
12.
13.
14.
15.
16.
17.
18.
19.
20.
21.
22.
23.
24.
25.
26.
27.
28.
29.
30.
31.
32.
33.
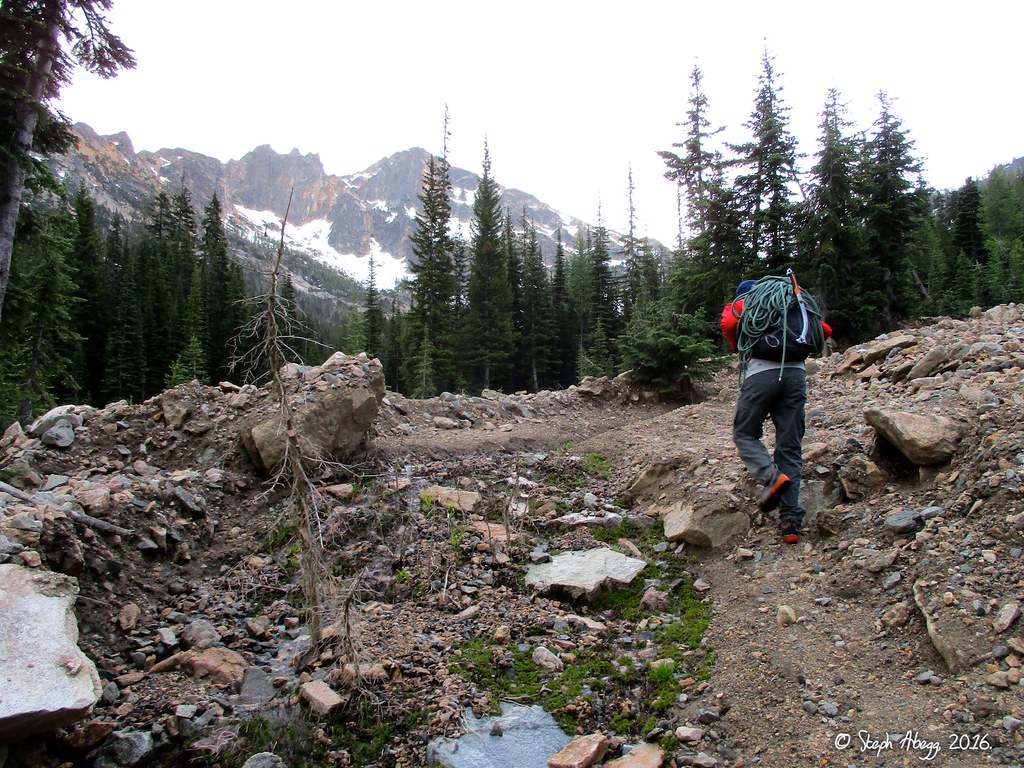
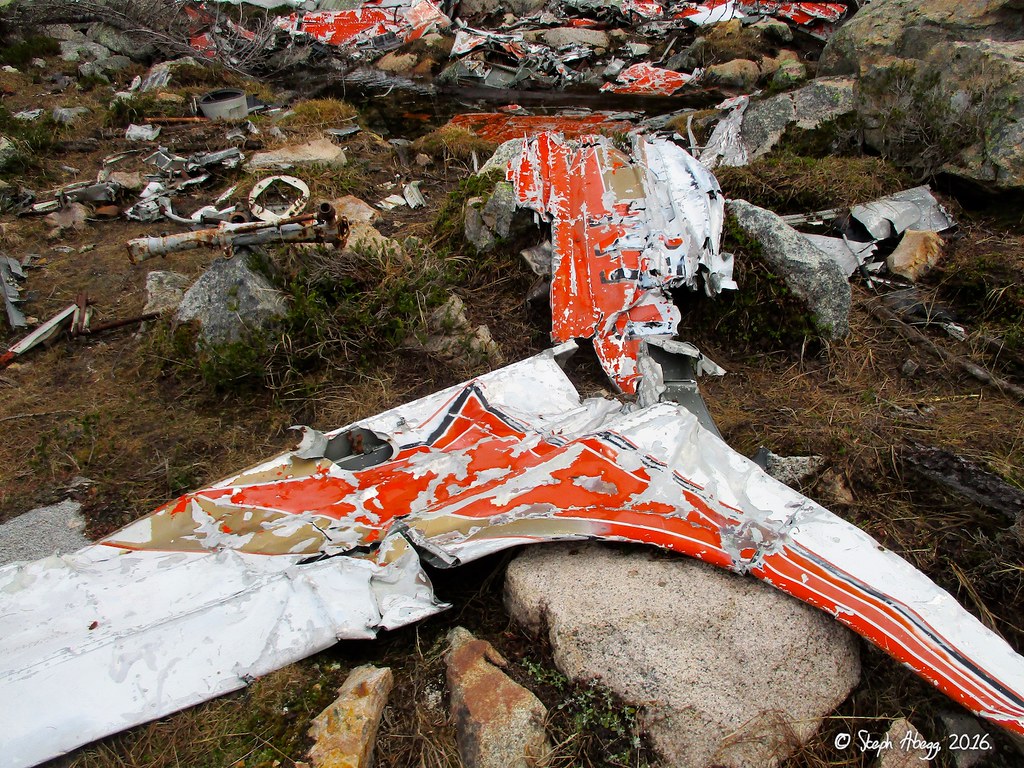
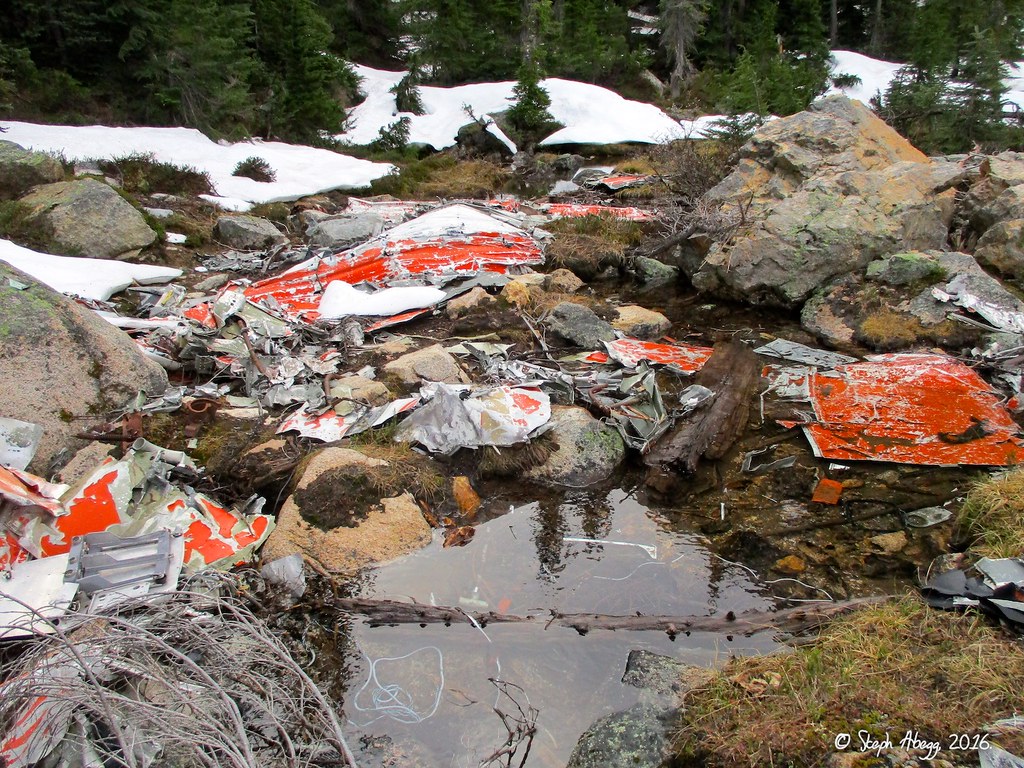
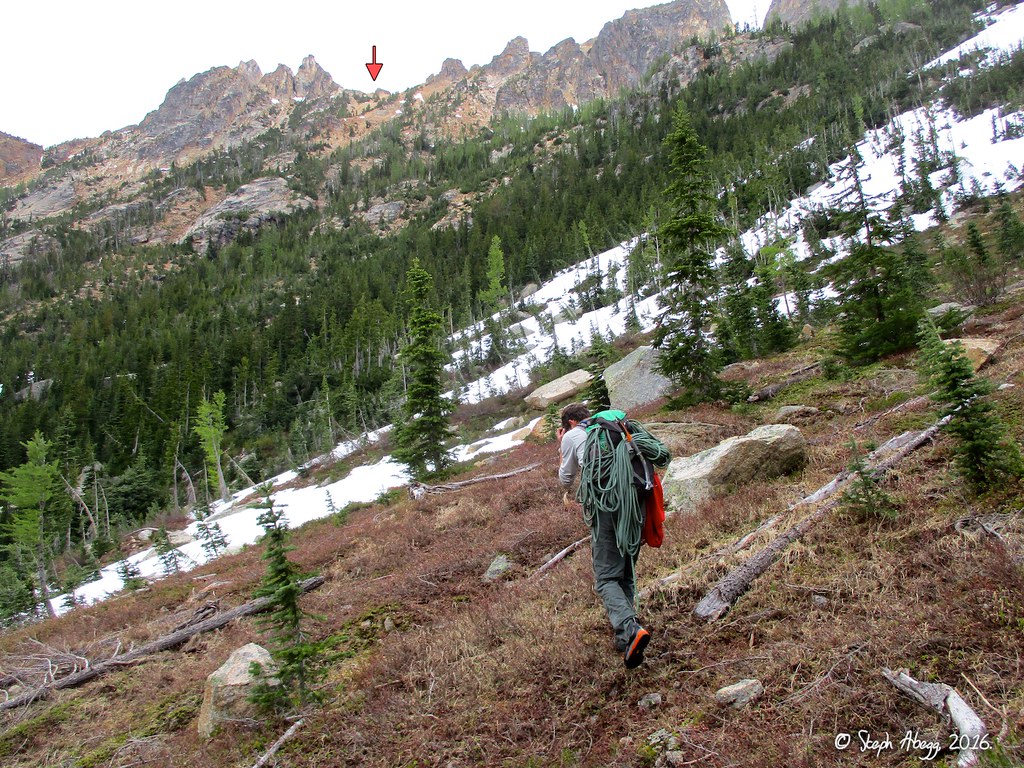
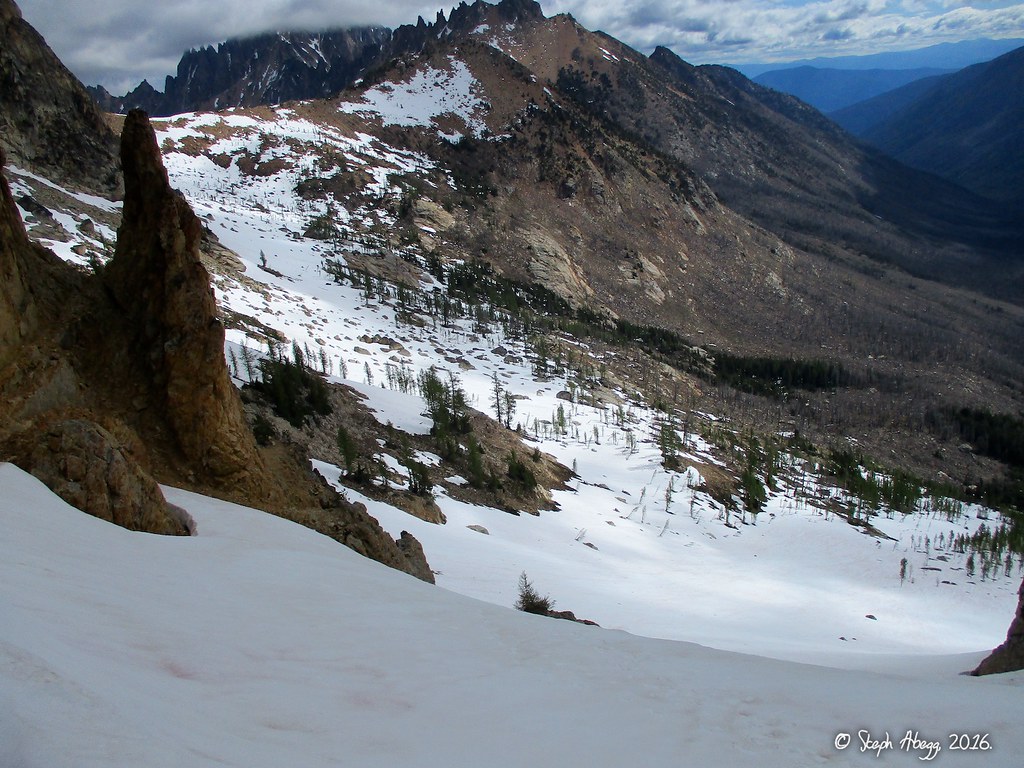
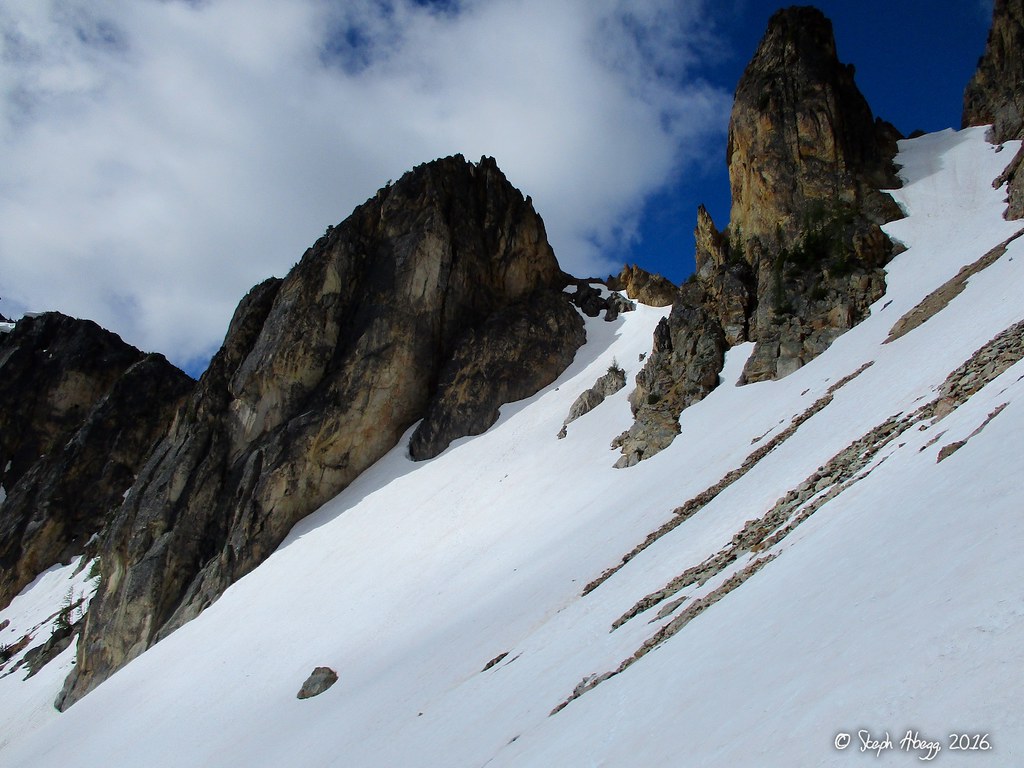
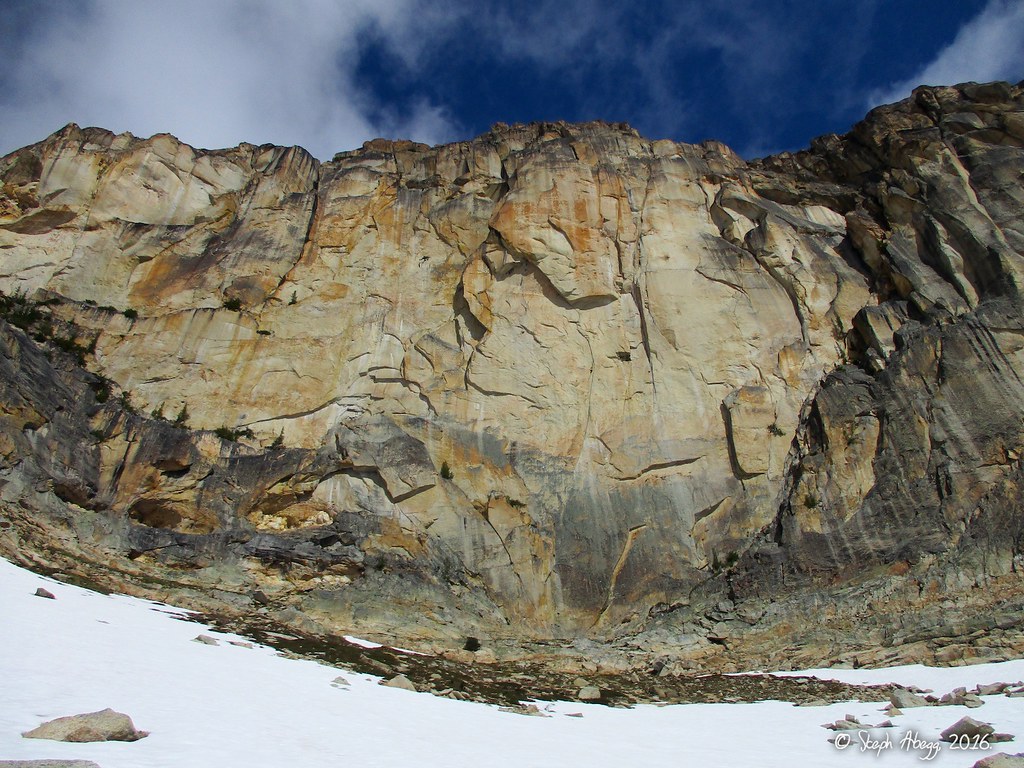
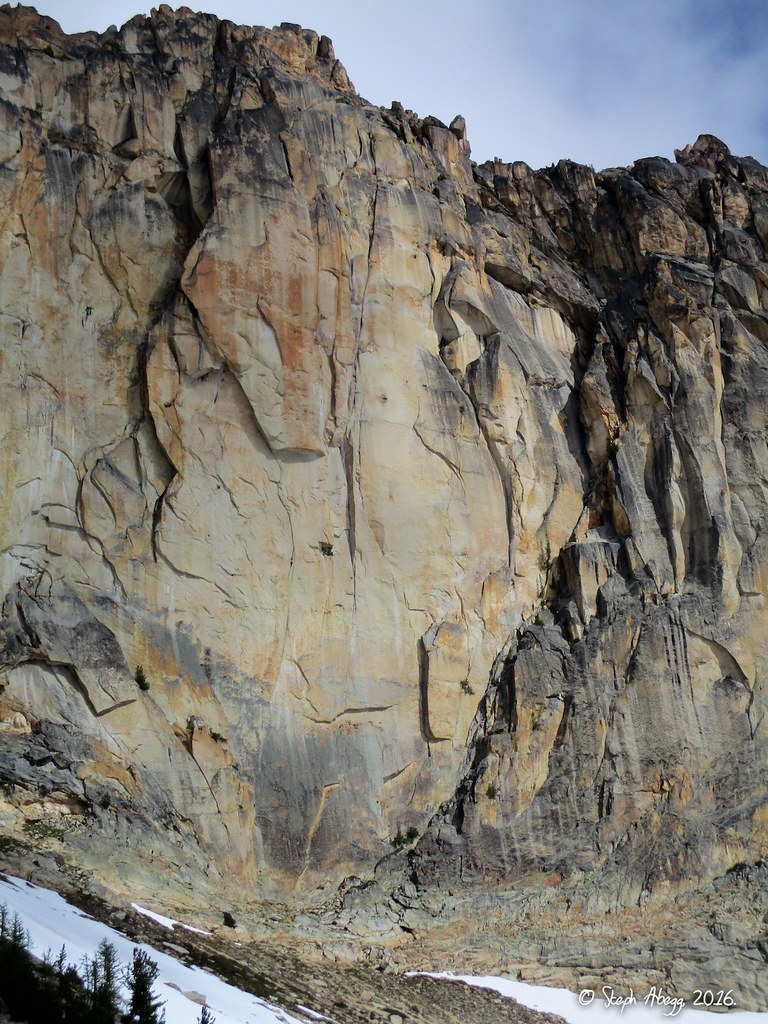
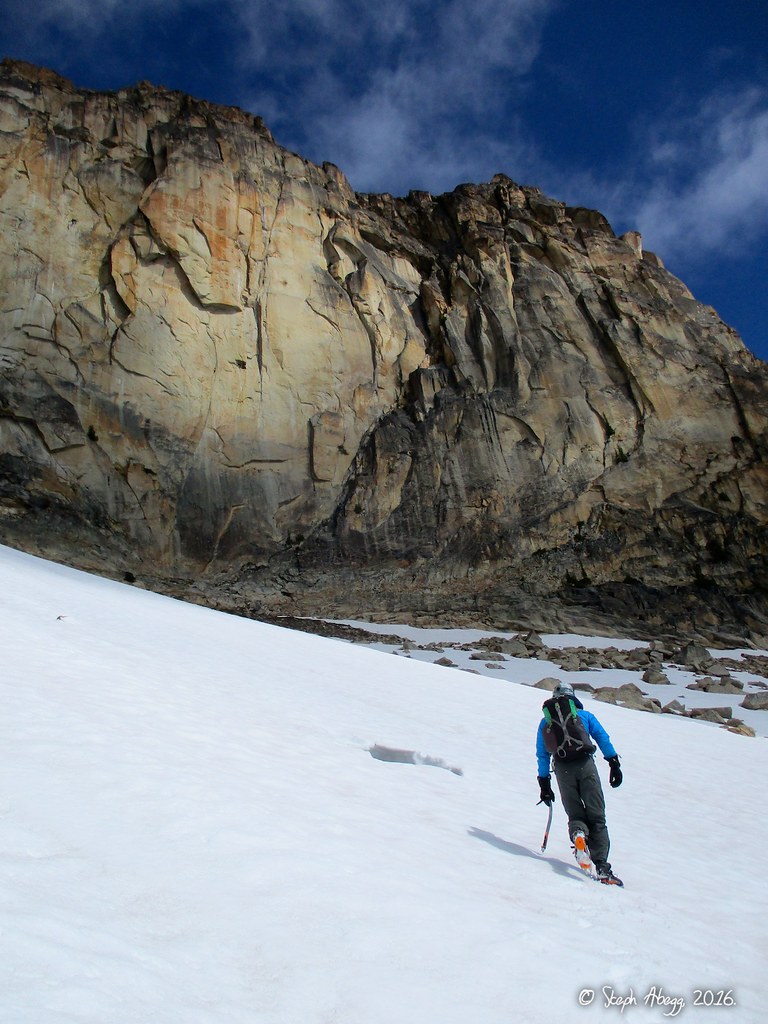
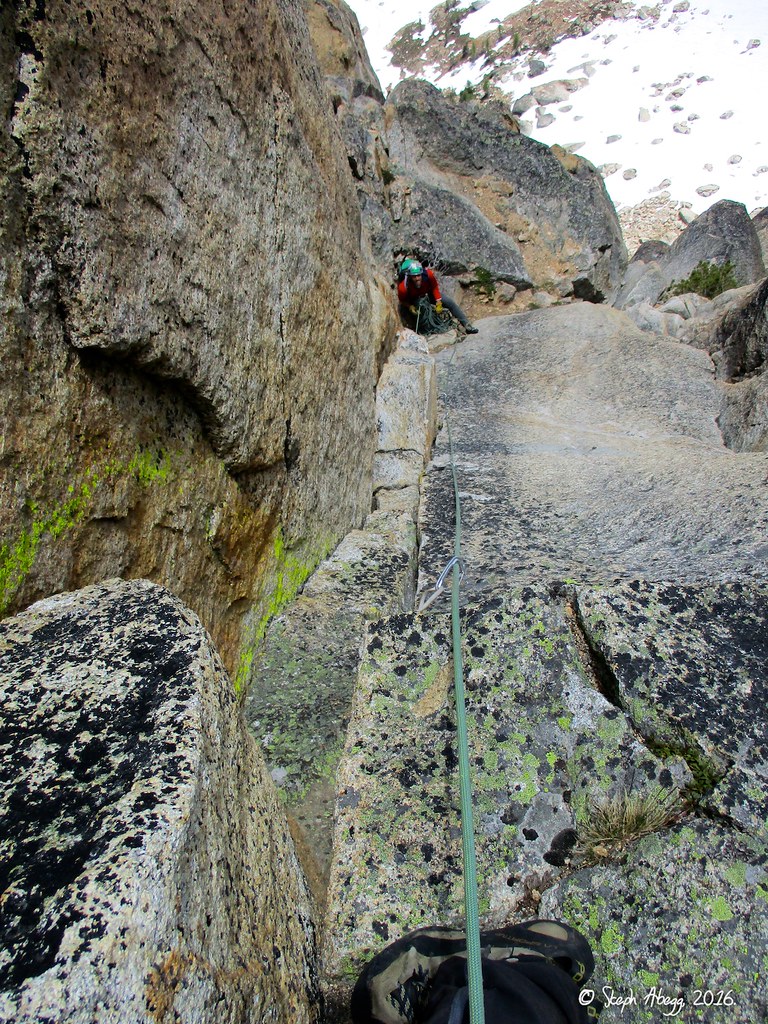
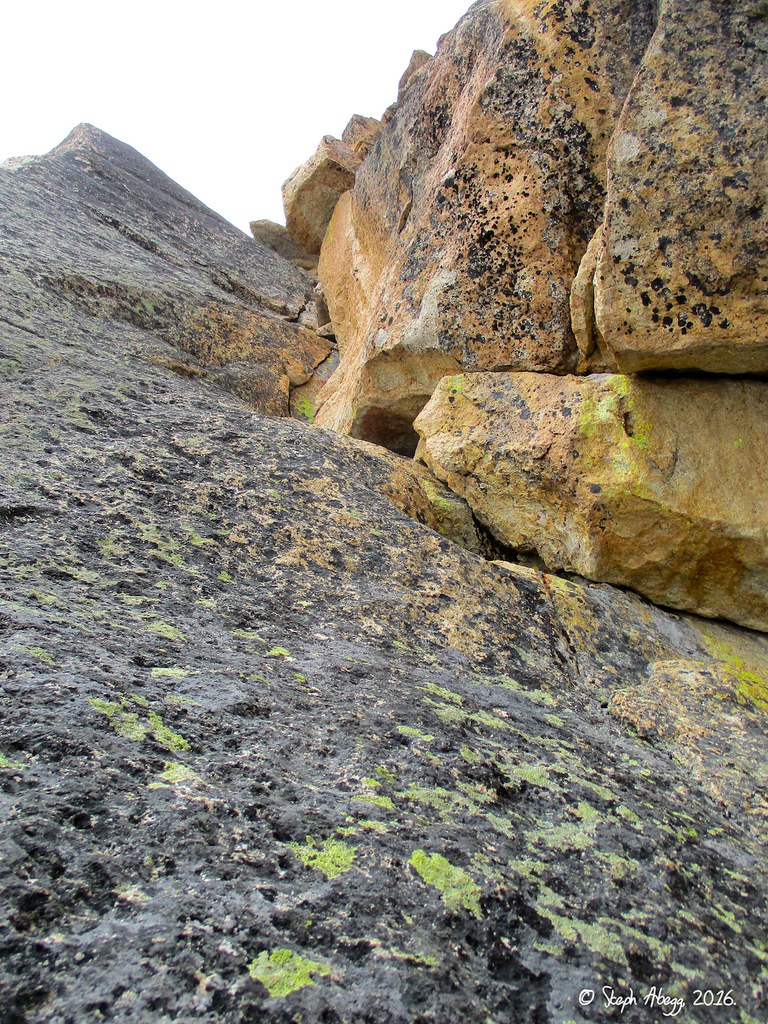
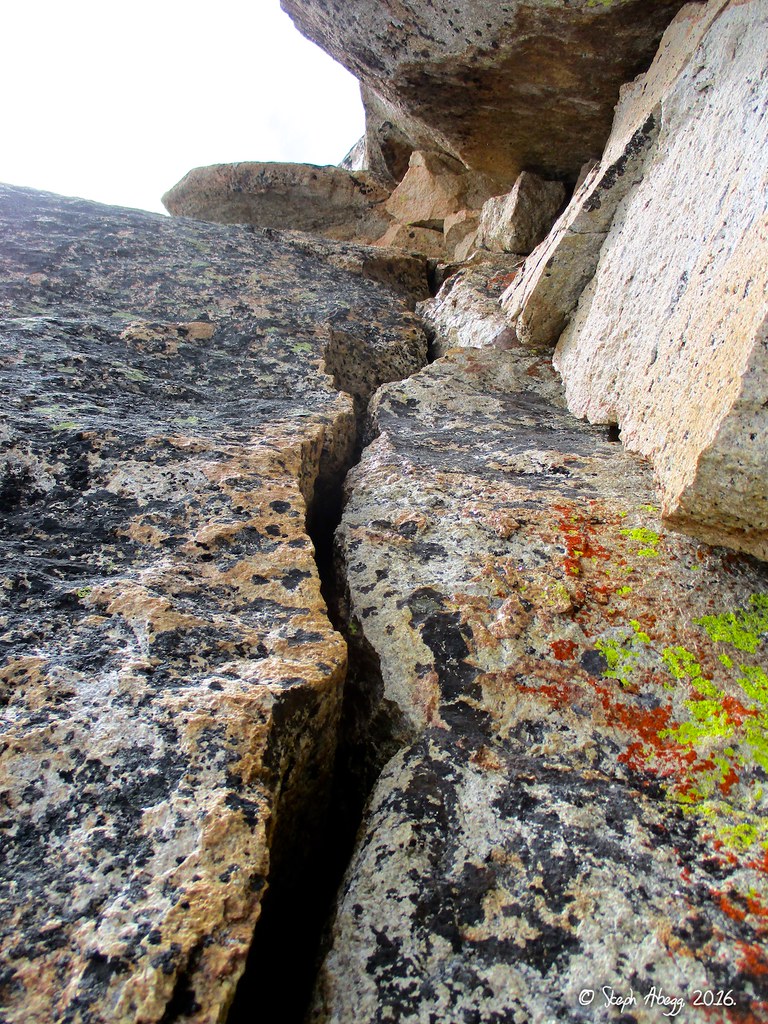
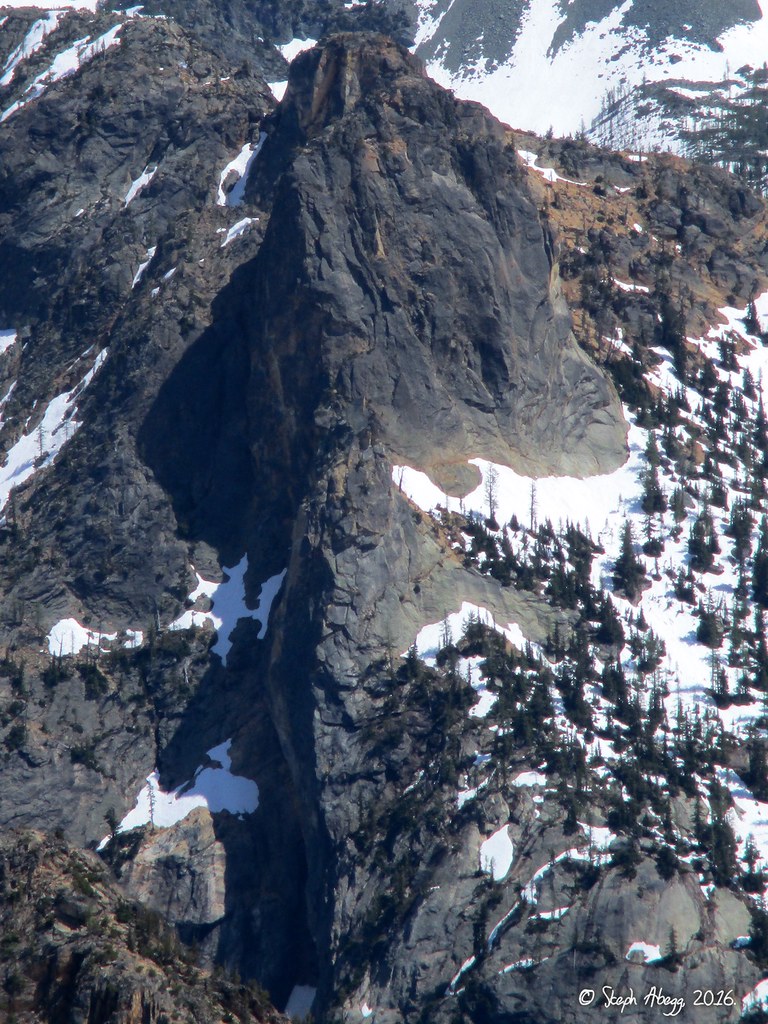
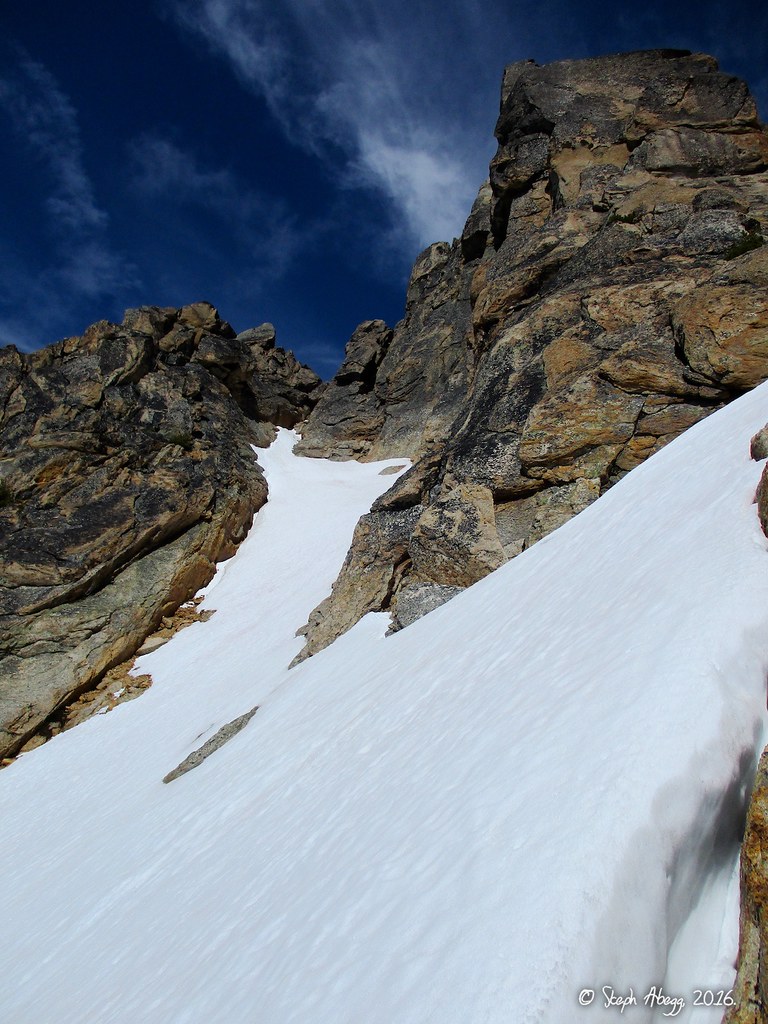
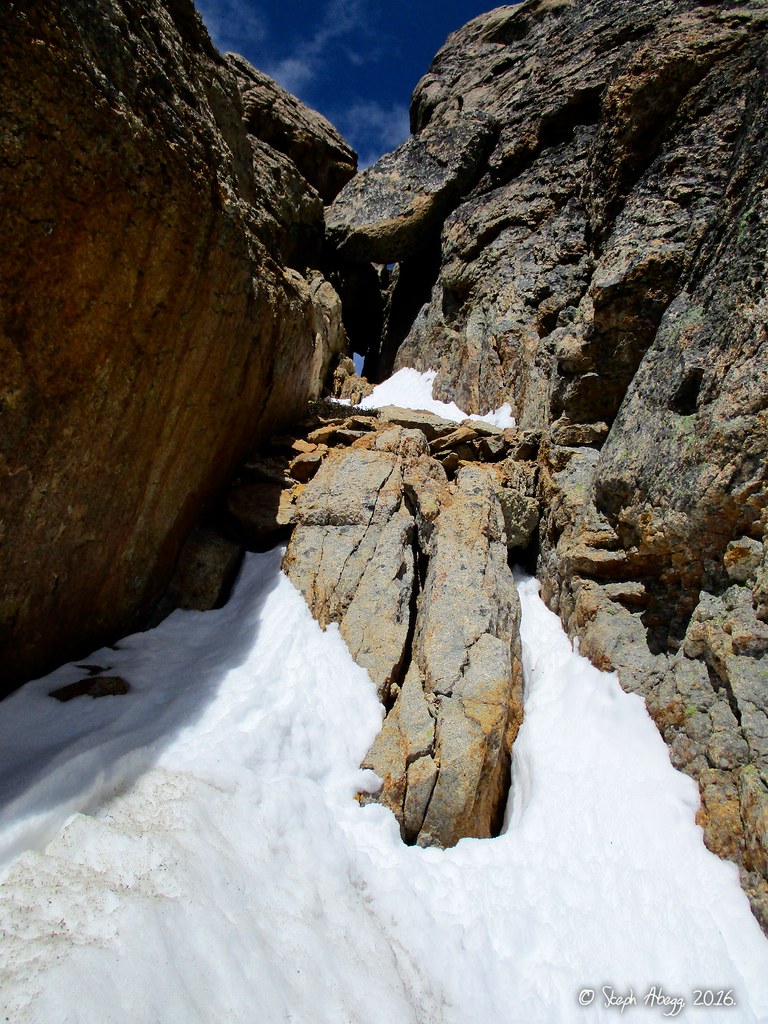
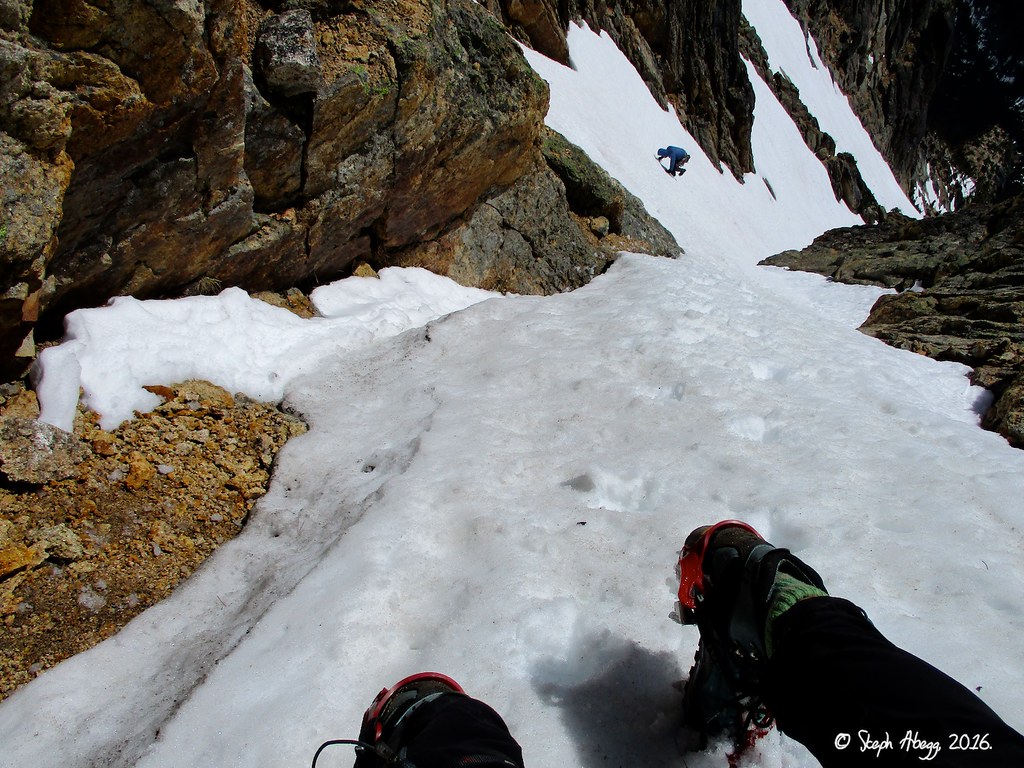
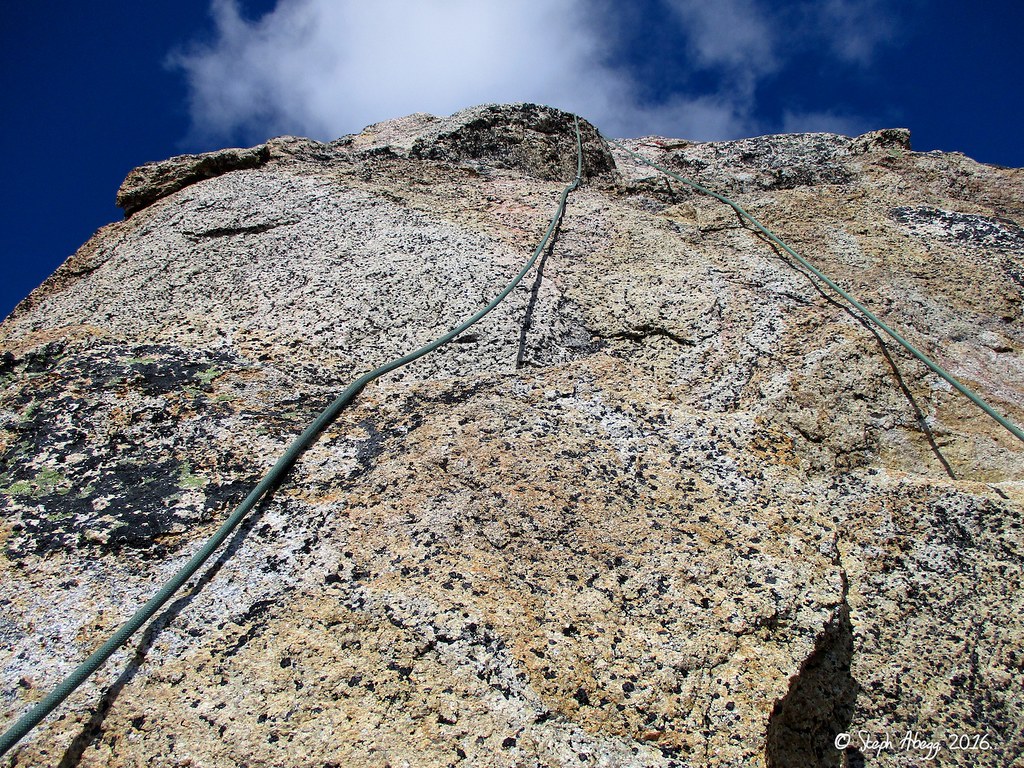
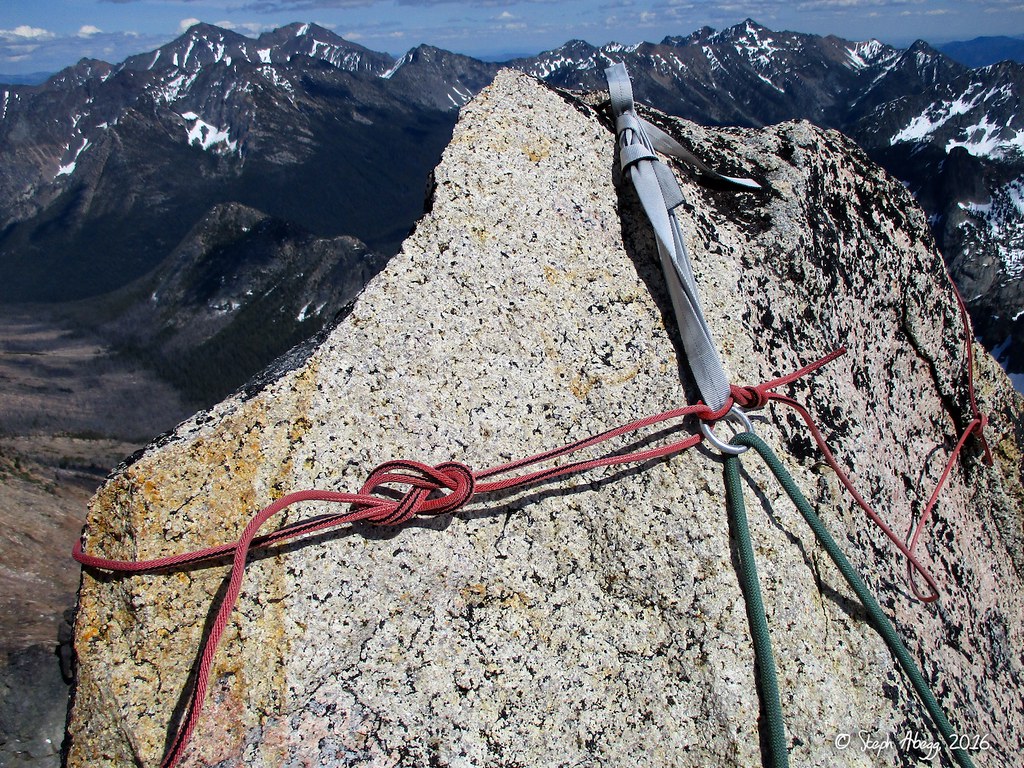
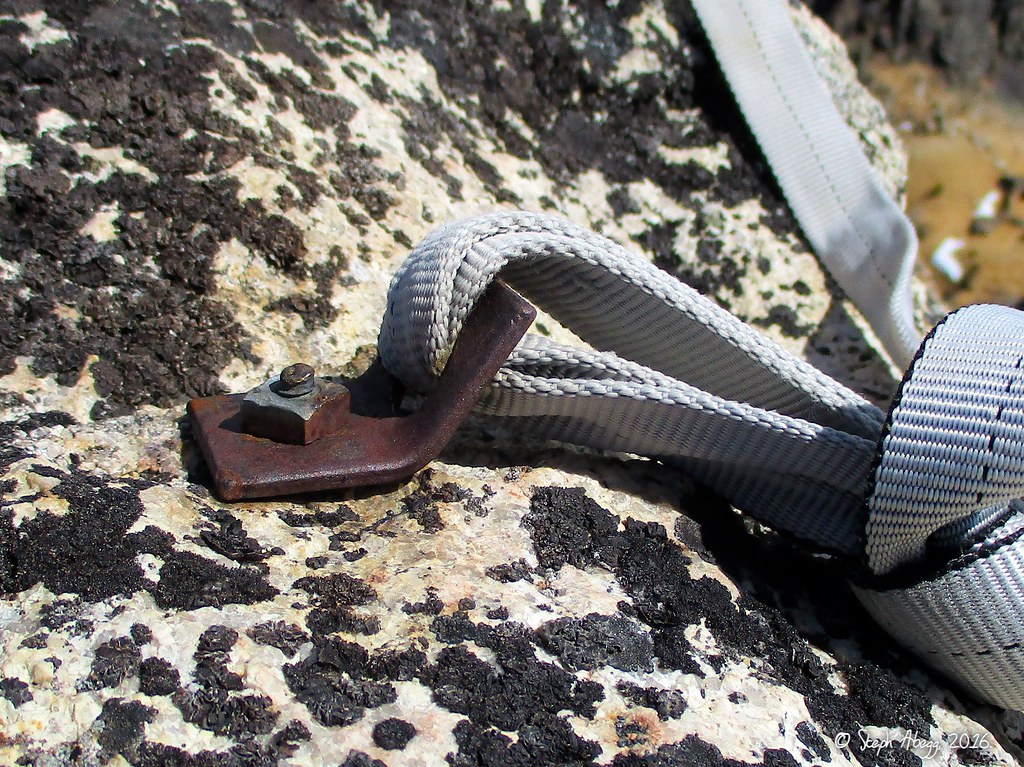
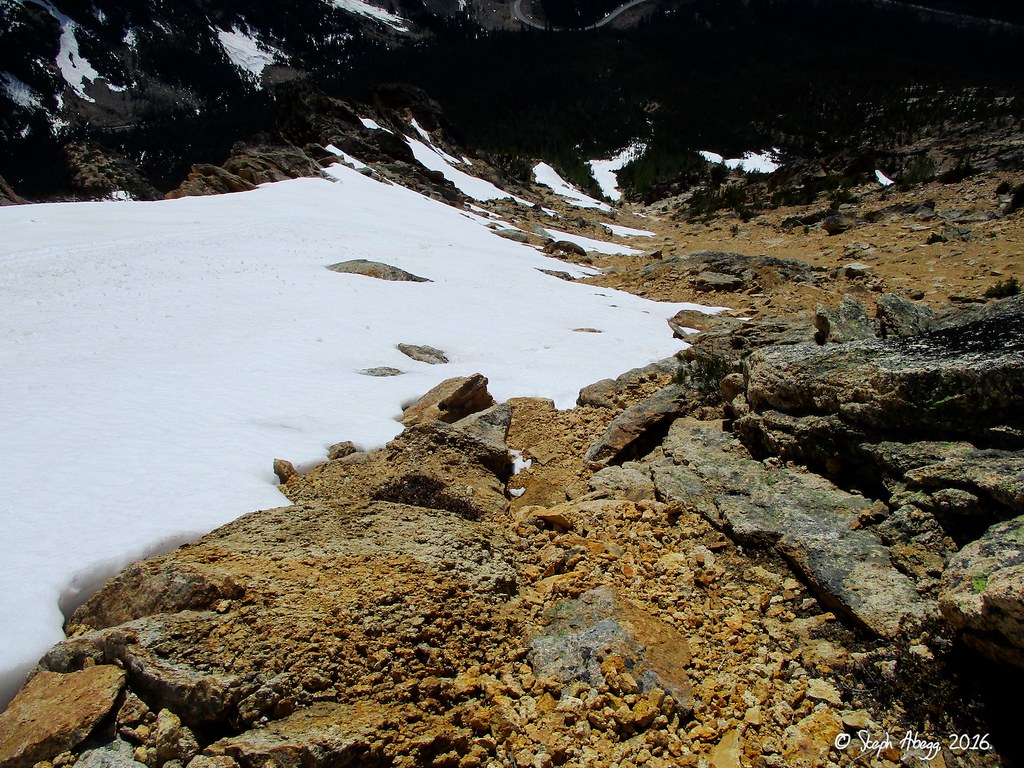
1. Beginning the approach from the Hairpin turn. This follows the right side of Early Winters Creek and then cuts left at the head of the basin towards the low point on the ridge between Big Kangaroo and Half Moon. 2-3. While hiking up Early Winters Creek, we came across the wreckage of a small two-seater plane. Apparently this wreckage is from the early 1980s. Other climbers have come acorss this wreckage (see this CacsadeClimbers.com post). 4. Once you get to the head of Early Winters Creek, turn left and head for the low point on the ridge between Big Kangaroo and Half Moon. 5. The view of the Liberty Bell group (SEWS, NEWS, Lexington, Concord, Liberty Bell) from Early Winters Creek). 6. Looking down into the basin south of Big Kangaroo, from the low point in the ridge between Big Kangaroo and Half Moon. 7. Looking back at the low point in the ridge, from the descent into the basin on the south side. We did this route in late June, so had snow on the approach. We each brought lightweight crampnons and an axe for the approach as well as the gullies at the top of the climb. 8. The steep south face of Big Kangaroo. There are a handful of excellent harder (5.11-5.12) routes on this face. 9. The route we did (Beckey-Tate) follows the greatest weakness and hence the easiest (and probably loosest) line up the face. 10. This crack system on the left side of the face is El Capitan (5.10+). I'd like to come back and climb this route. 11. Heading across easy snow slopes towards the south face. 12. Somewhere on Pitch 2 (SuperTopo Pitch numbering). We had soloed up Pitch 1. I led Pitch 2. 13. Ramp/corner on Pitch 3. Pretty good climbing on this pitch. I belayed just past the tree just right of center above the ramp. The chimney of Pitch 4 starts behind the tree (it is not the obvious chimney on the left). 14. Sam climbing up the ramp/corner on Pitch 3. 15. Sam starting into Pitch 4, which is a 5.8+ chimney. Because I belayed at the tree (which is a bit higher than the belay spot given in the SuperTopo topo), we linked Pitch 4 with the first half of Pitch 5. 16. A hex in the 5.8+ chimney that composes the first half of Pitch 5. The hex is not stuck, but we left it anyway since most leaders would find it nice to have an extra piece of fixed protection to clip on this part of the pitch. It feels a bit runnout since gear placement is large (#3 and #4) and pretty far back in the crack. 17. Looking down the slightly runnout 5.8+ chimney composing the first half of Pitch 5. 18. Looking down the 5.9 flinger crack that composes the second half of Pitch 5. This is supposedly the crux (5.9) of the route, but since the climbing was more solid and secure, it did not feel like a crux. Other parts of the route which were technically easier felt harder because they were looser or more insecure. Along with Pitch 6, this was some of the best climbing on the route. 19-20. Looking up the wavy crack/corner on Pitch 6. Along with Pitch 5, this was some of the best climbing on the route. 21. Sam at the top of the south face, enjoying the view of Silver Star in the distance. 22. A rock buttress in the basin below the south face of Big Kangaroo. Looks intriguing.... 23. Since the south face does not top out on the summit, we decided to climb the West Face route to the summit. This involved ascending the gully on the left in this photo (snow in early season, rocky in later season) and then gaining the summit ridge and then doing a 20-ft pitch up 5.6 slab to the top. 24. The chockstone at the top of the gully. 25. Looking down while ascending the snow in the gully. We were glad we had brought our crampons and axes. Crampons and axes would not be necessary in later season when the snow is not present. 26. The final 20 feet of exposed 5.6 slab to the top. This is pretty much unprotectable after the first move. 27. On top, there is an old bolt backed up with a sling around the top of the summit. We downclimbed on toprope rather than trusted our weight on the bolt and sling. 28. The old bolt on the summit. 29. Sam on the summit. 30. The view of the Liberty Bell group (SEWS, NEWS, Lexington, Concord, Libery Bell) from the summit of Big Kangaroo. 31. The descent gully all the way back to the car at the Hairpin turn. It took us a couple of hours to get down from the top. 32. Snow in the descent gully expediated our descent in some sections. 33. Looking back up at Big Kangaroo from the Hairpin Turn. The descent gully is the obvious gully coming down from the top. The south face topped out at the notch just right of the summit block while the west ridge route took the left hand snow finger to the left side of the summit block.
Useful beta. Updated route information. Corrections. Historical notes. Interesting facts. No fluff please. Please do not put links in your comment, as my spam filter will filter those comments out.