Paisano Pinnacle West Ridge (5.8+, 600′) + Burgundy Spire North Face (5.8+, 800′)
Paisano Pinnacle + Burgundy Spire
Routes:
- Paisano Pinnacle, West Ridge (5.8+, 600')
- Burgundy Spire, North Face (5.8+, 800')
Beckey calls Burgundy Spire the hardest principal summit in the Cascades to be reached via any route. I first climbed Burgundy Spire in 2009 as a fun overnight adventure to cap off a great summer of climbing. Seven years later I climbed it again, this time linking it with Paisano Pinnacle for more pitches of excellent climbing!
THIS TRIP REPORT IS STILL MOSTLY IN THE EMBEDDED HTML FORMAT OF MY OLD WEBSITE. MOBILE Tip: Try Landscape mode. It is generally more mobile friendly.
Overview
The Route
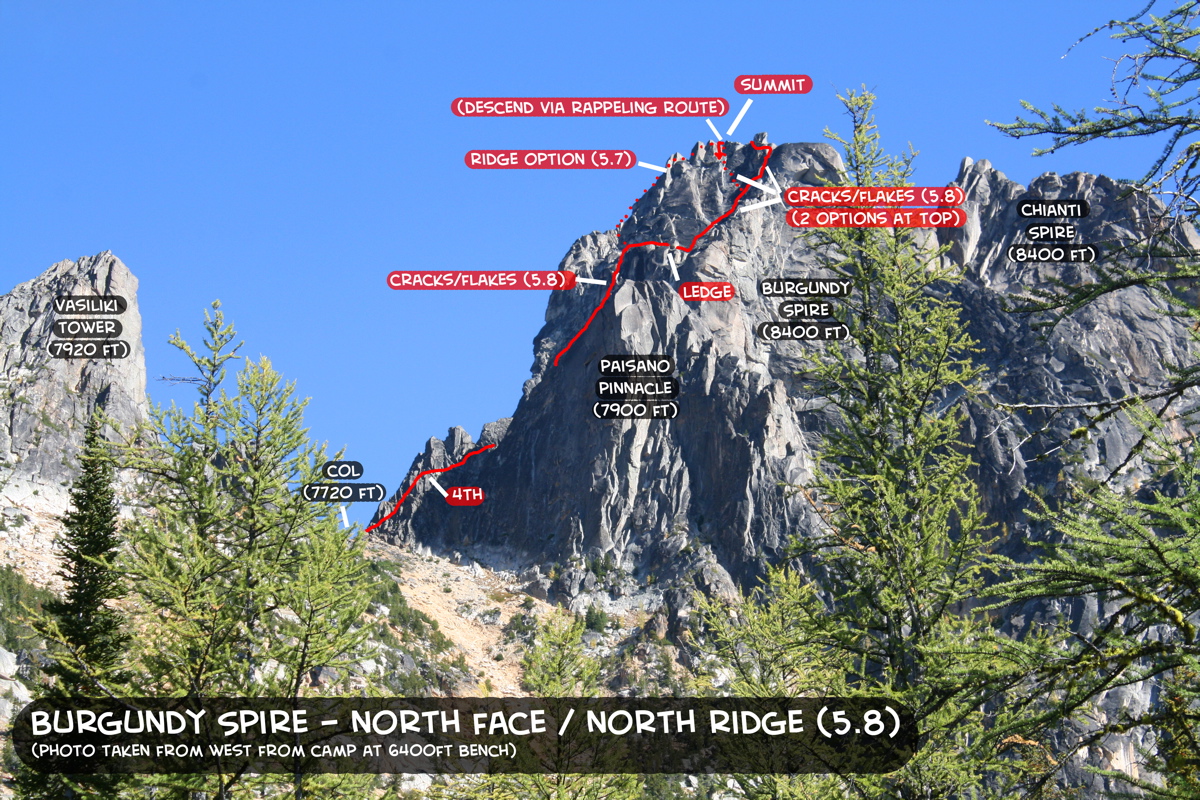
Photo overlay of North Face route
(Click on image to enlarge)
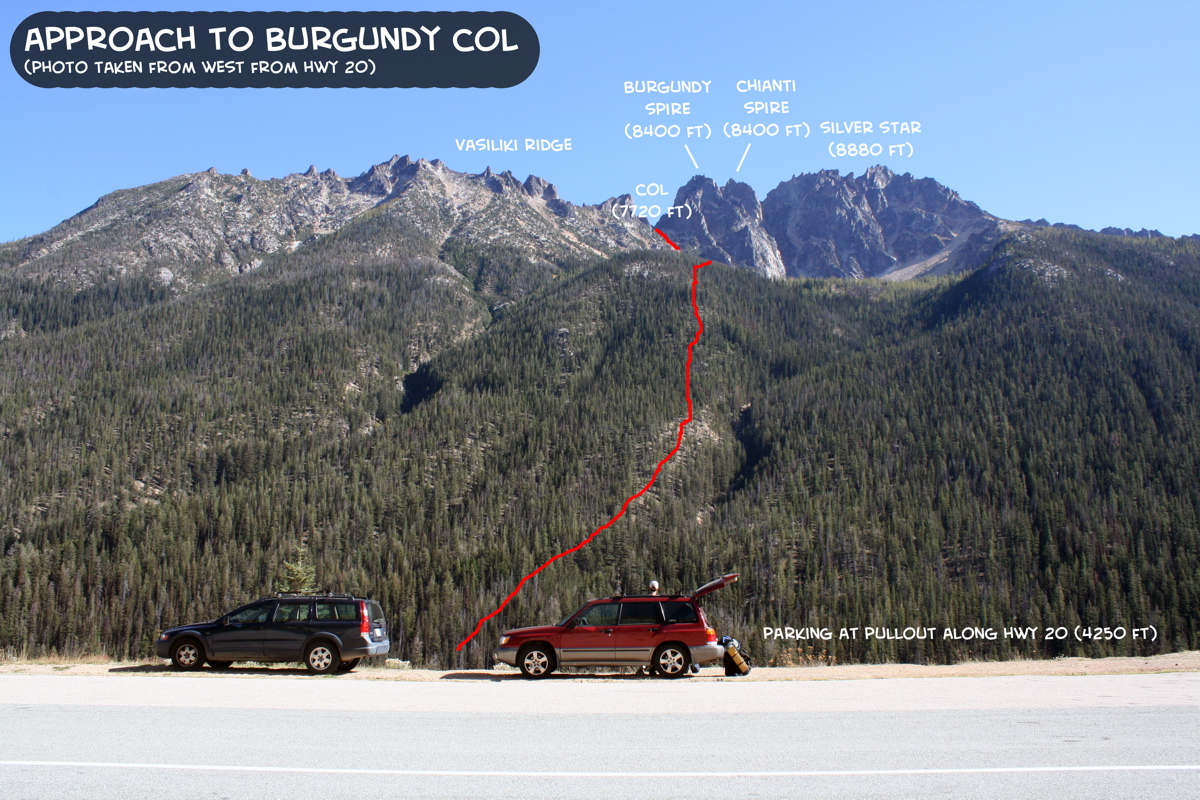
Approach from HWY 20
(Click on image to enlarge)
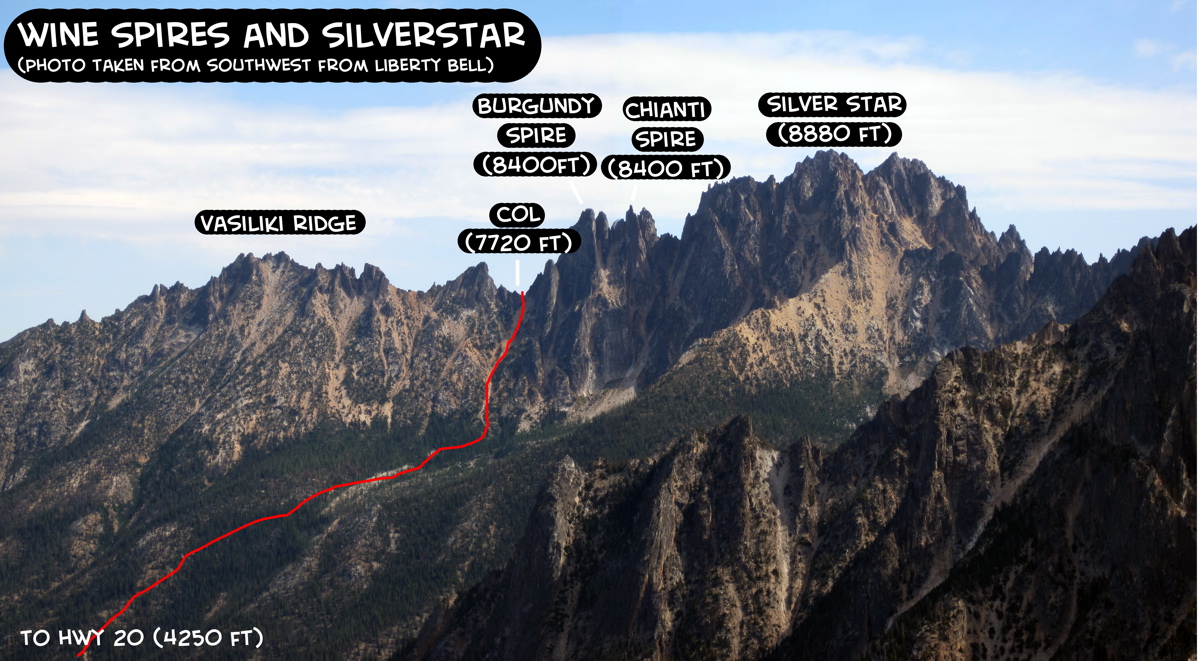
Wine Spires as seen from Liberty Bell
(Click on image to enlarge)
Gear
• Standard rack to #4 cam (nice to have the #4 for the final offwidth) • One or two 60 m ropes (many TRs suggest making double-rope rappels, so we brought 2 ropes, but another party on the route with us descended with just one 60m rope, and avoided all the rope hangups inherent to double-rope rappels...)
Getting There
Burgundy Spire is easily seem from Highway 20 about 4 miles east of Washington pass. The deep notch north of the peak is Burgundy Col, starting point for the North Face route. Park your vehicle in the big pullout on the highway (about 4,250ft). Note the location of the timbered rib to the left (north) of Burgundy Creek which drains from the basin below the Wine Spires, as the climber's trail leads up this rib. To get to this trail from the pullout, look for a path down the talus and into the forest to cross Early Winters Creek on a log. Then, follow the steep path up, up, and up. There is a nice camping area in the basin at 6,500ft (2 hrs) or at Burgundy Col at 7,720ft (3 hrs). In the later season, there is no water at the basin camp and at the col there is only rock-hard snow down a bit on east side. Burgundy Spire can be climbed in a long day from the car, although many parties might want to consider a bivy, especially if the plan is to climb to the N Face via Paisano Pinnacle first, a common linkup.
Photo Trip Report
To cap off a great summer of climbing (and a great one the summer of 2009 was!), my friend David and I headed up to climb Burgundy Spire, which is one of the Wine Spires that can be seen just east of Highway 20 near the Liberty Bell group. Beckey calls Burgundy Spire the hardest principal summit in the Cascades to be reached via any route. He means from a technical aspect rather than overall grade (now in the days of rubber climbing shoes, cams, and too much fast food, it's often the approach rather than the climbing that is the route crux!).
(Note: We had planned on linking the West Face (8 pitches, 5.9) of Paisano Pinnacle with the North Face of Burgundy Spire, but we embarrassingly started up the Ramp-Page route, which is a 5.9 to 10d dihedral. After two pitches that were a bit more difficult than our cold fingers had planned on, we decided to rappel (a nest of new rappel slings suggested others had recently done the same) and just attack our main objective. Paisano Pinnacle will have to wait for a warmer and longer day.)
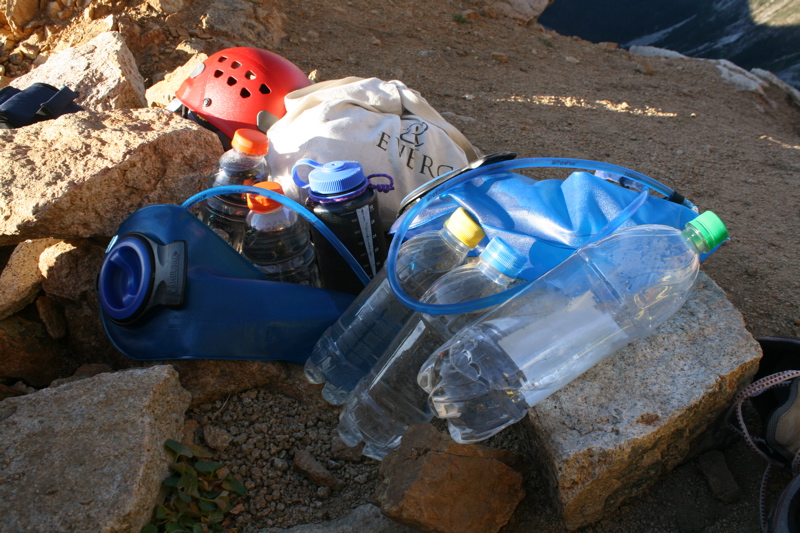
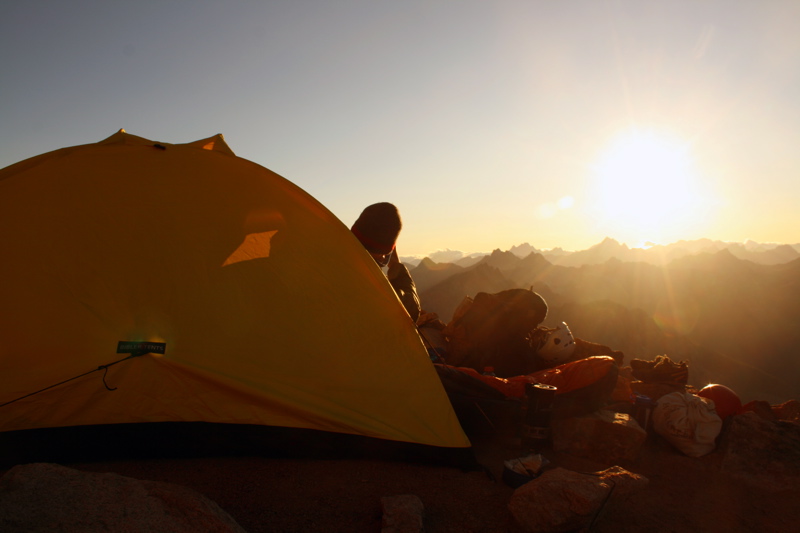
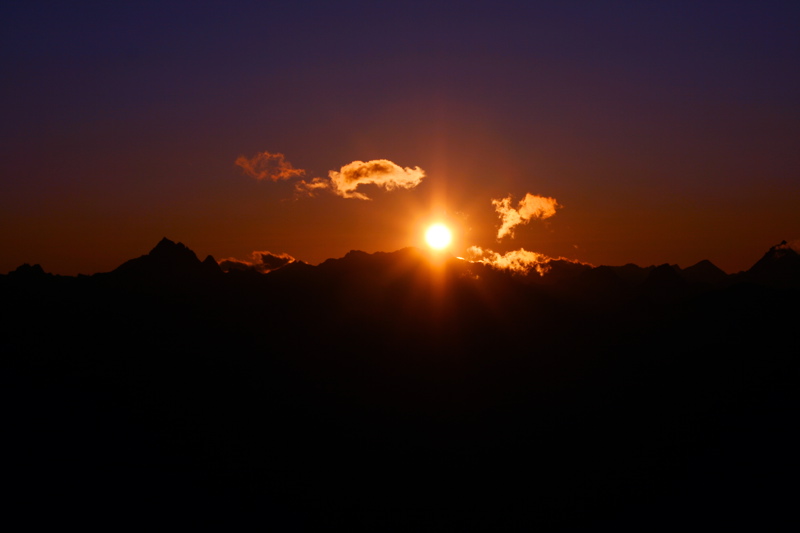
I always relish the opportunity to spend a night in the mountains doing some night photography, so David and I hiked up to Burgundy col the day before, slogging up 6L of water each (that's 26.4 lb of water!) due to the late season dryness. We enjoyed a beautiful sunset, moonrise, moonset, Big Dipper, and sunrise before setting off on the climb up the North Face of Burgundy Spire.
The rest of this page gives several photos from our climb and camp.
Photos from the Climb
TIMES: HWY 20 to 6400ft bench - 1 h 35 min Bench to Col - 45 min Col to summit via N Face - 3 h 20 min Descent (got rope stuck twice) - 1 h 30 min Col to car - 2 hr
ELEVATIONS: HWY 20 Parking Pullout - 4250 ft Basin camp - 6500 ft Burgundy Col - 7720 ft Burgundy Spire, summit - 8400 ft (Paisano Pinnacle, summit - 7900 ft)
PITCH 1:
4th, approx 200ft. From Burgundy Col, we climbed about 200ft of mostly 4th class rock to sandy ledges just left of the top of Paisano Pinnacle.
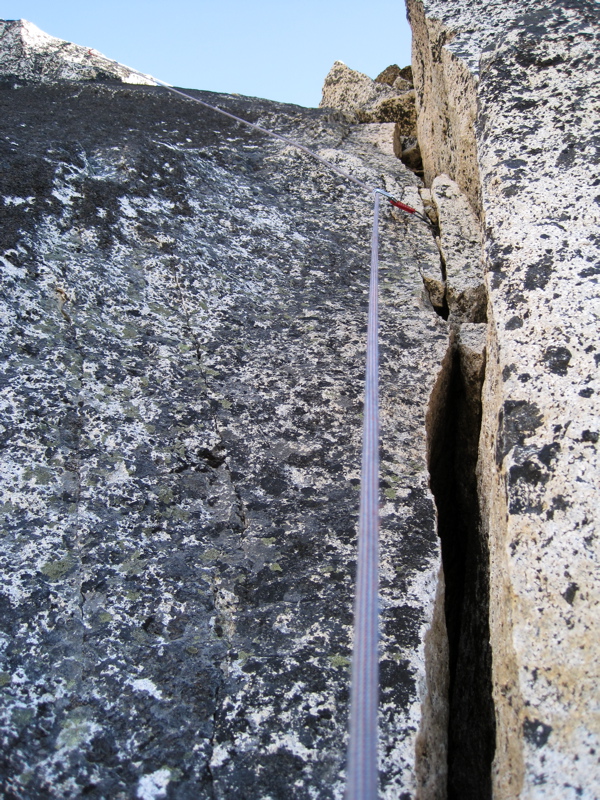
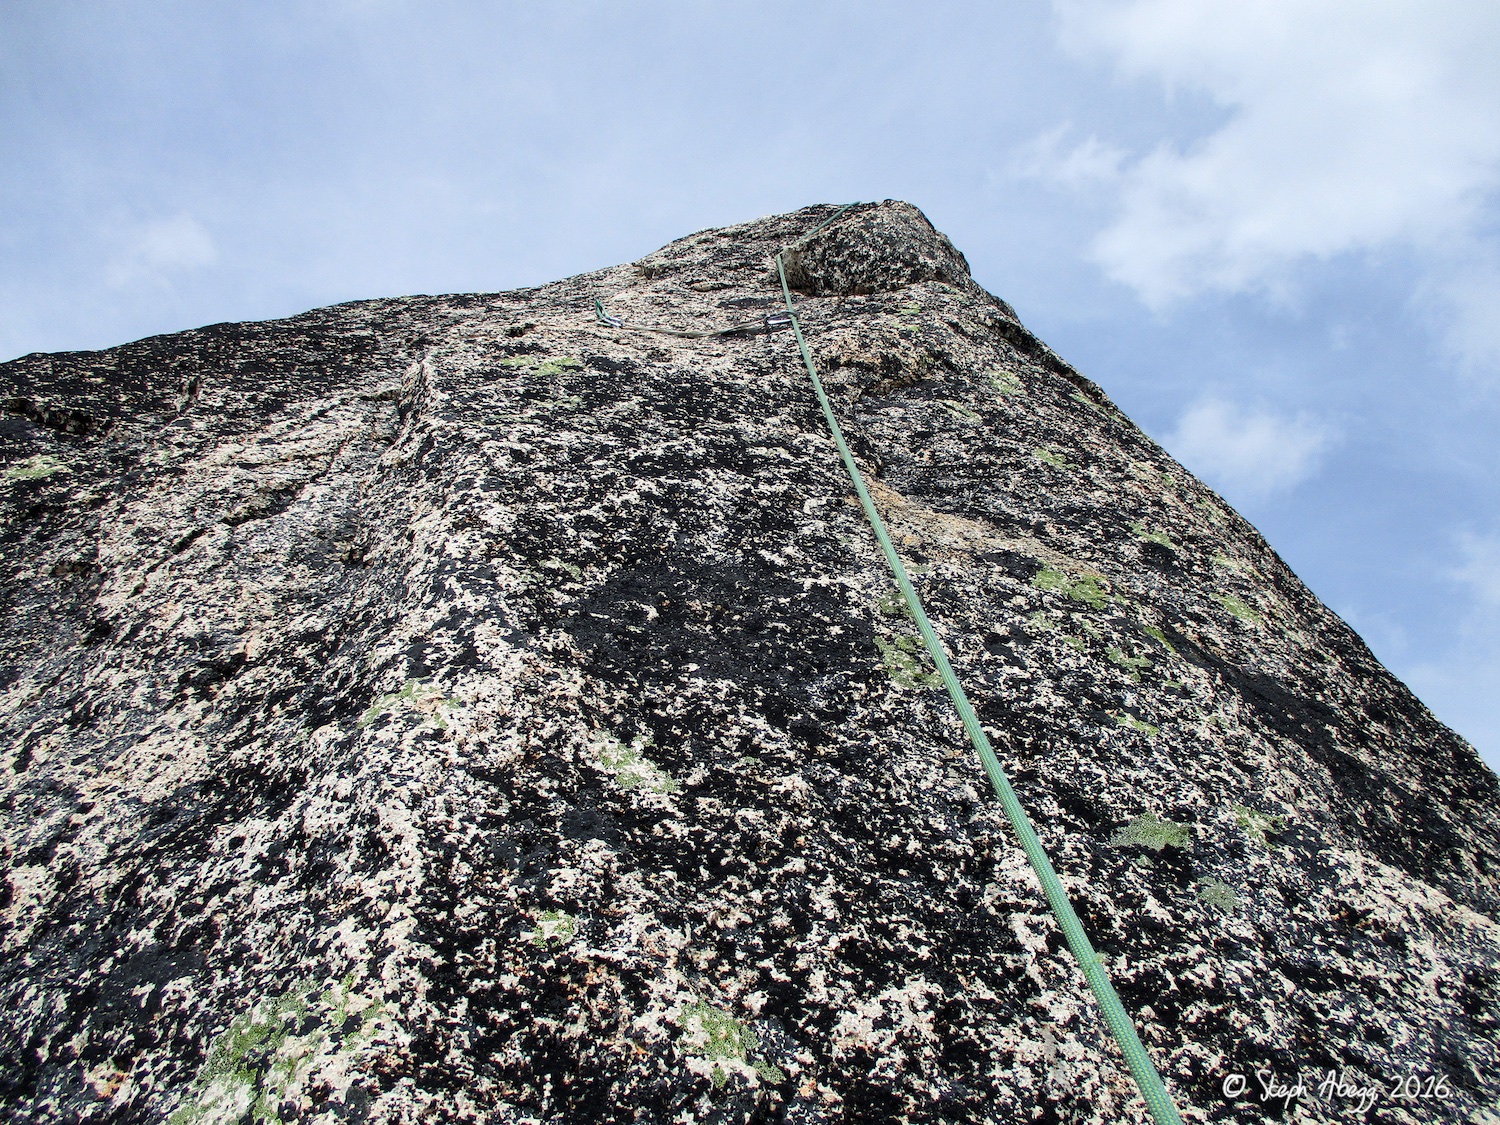
Photo: Looking up first pitch of Burgundy Spire from our camp at the col. (Photo by David)
Photo 1
Photo 2
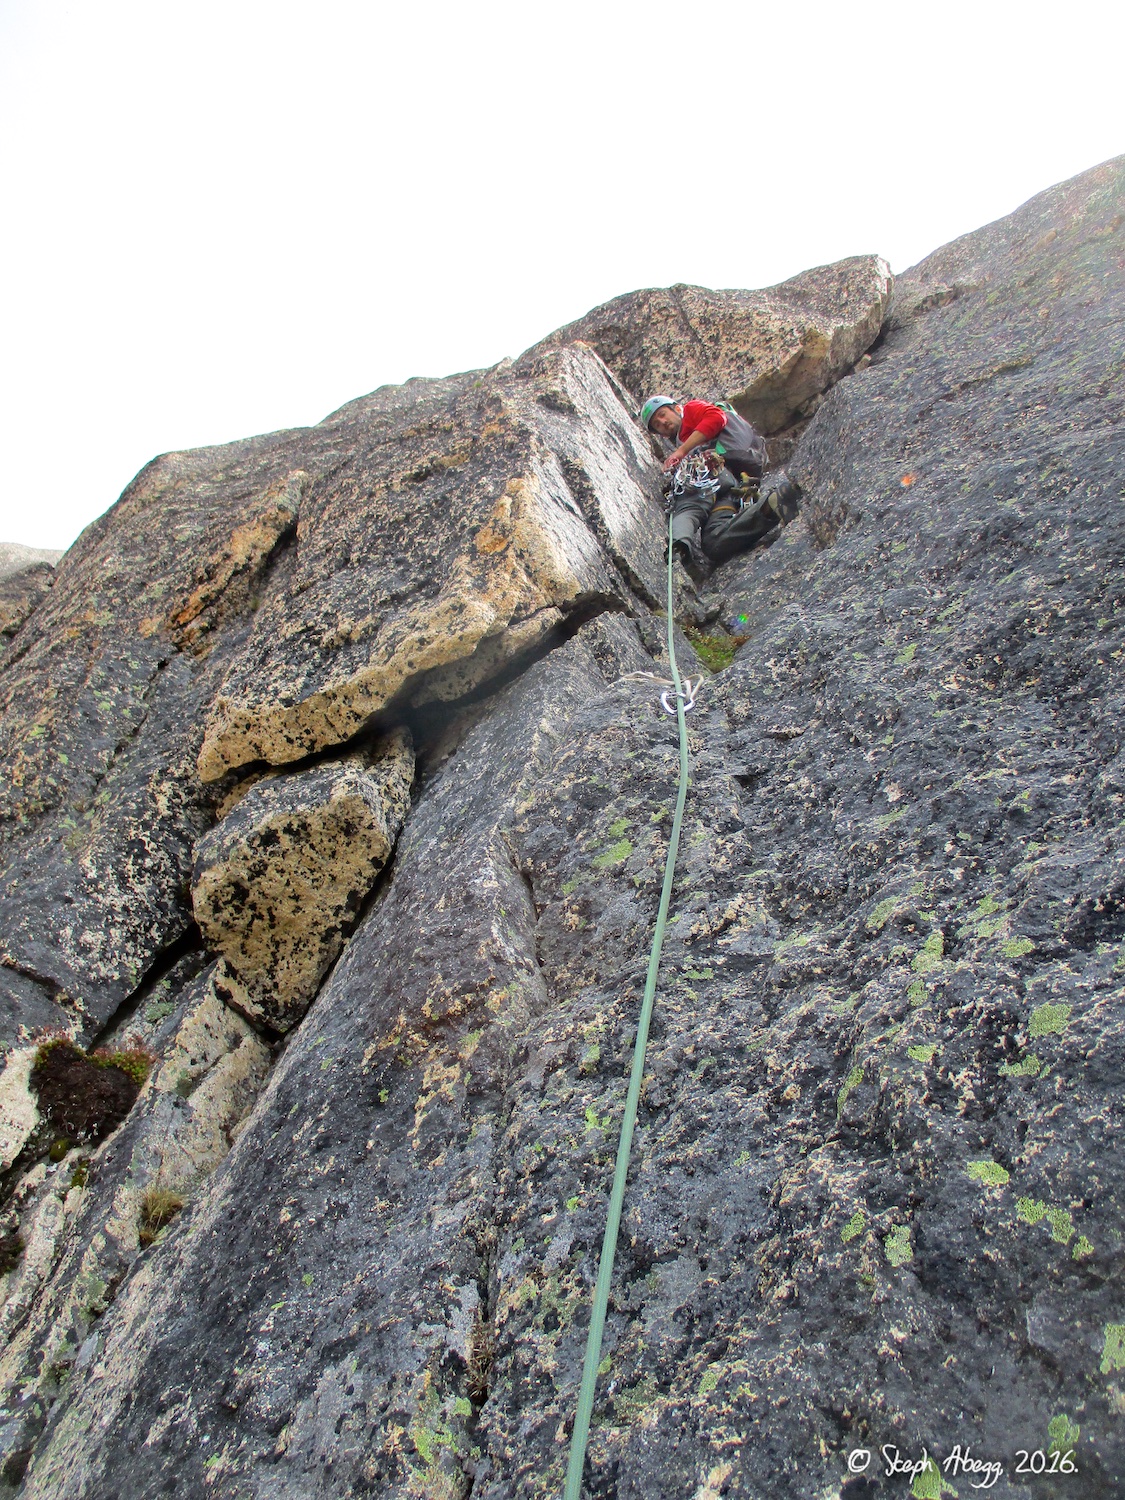
PITCHES 2-3:
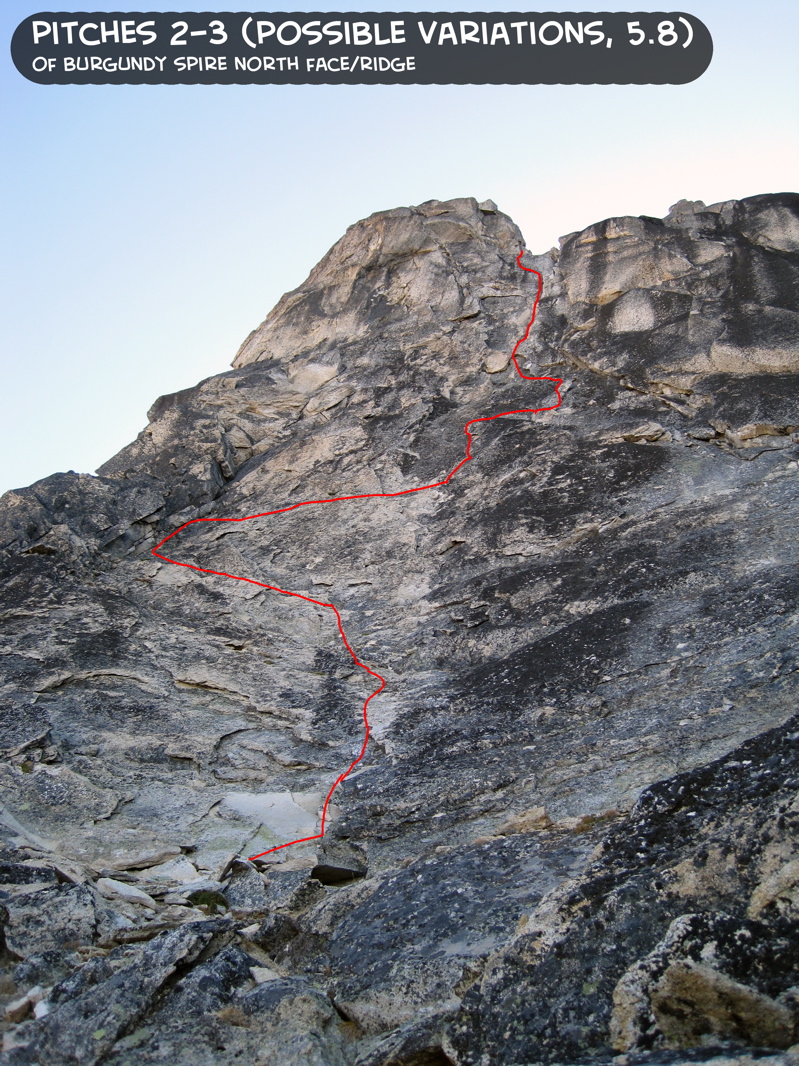
5.8, cracks/flakes. From the sandy ledges left of the top of Paisano Pinnacle, we climbed up cracks and flakes to the obvious ledge 2 pitches up. There are several possible crack and flake options and it seems every party has their own variation here (in 2016, we took a more direct line and did not jog way to the left as we did in 2009). We started up on the left side, and then I saw a great spot to leave the heavy #4 cam to the right, so I traversed over to the crack system here (my strategy was to leave the #4 at the beginning of the pitch so David carried it 90% of the climb.....). The pitch up to the ledges ("Pitch 3") was my favorite pitch of the route.
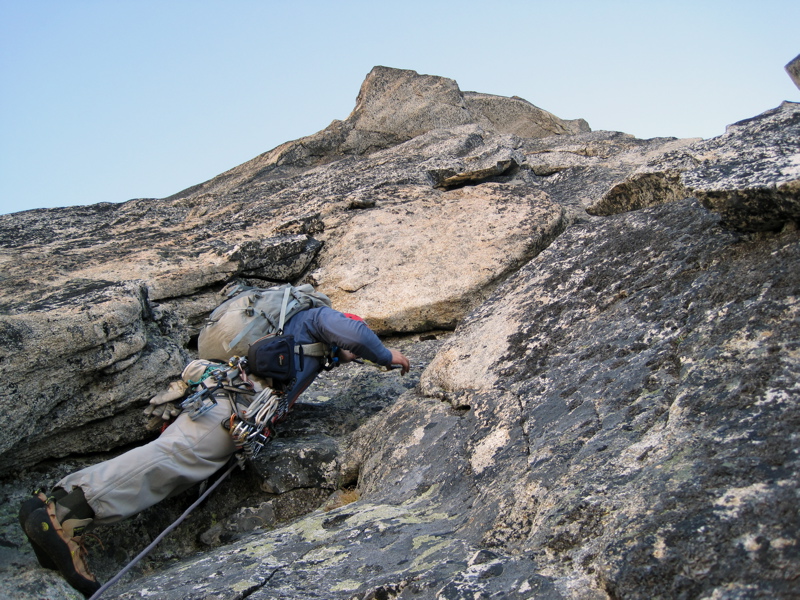
Photo 1: Photo overlay of our route on Pitches 2-3. Photo 2: David leading up the fun cracks and flakes of Pitch 3.
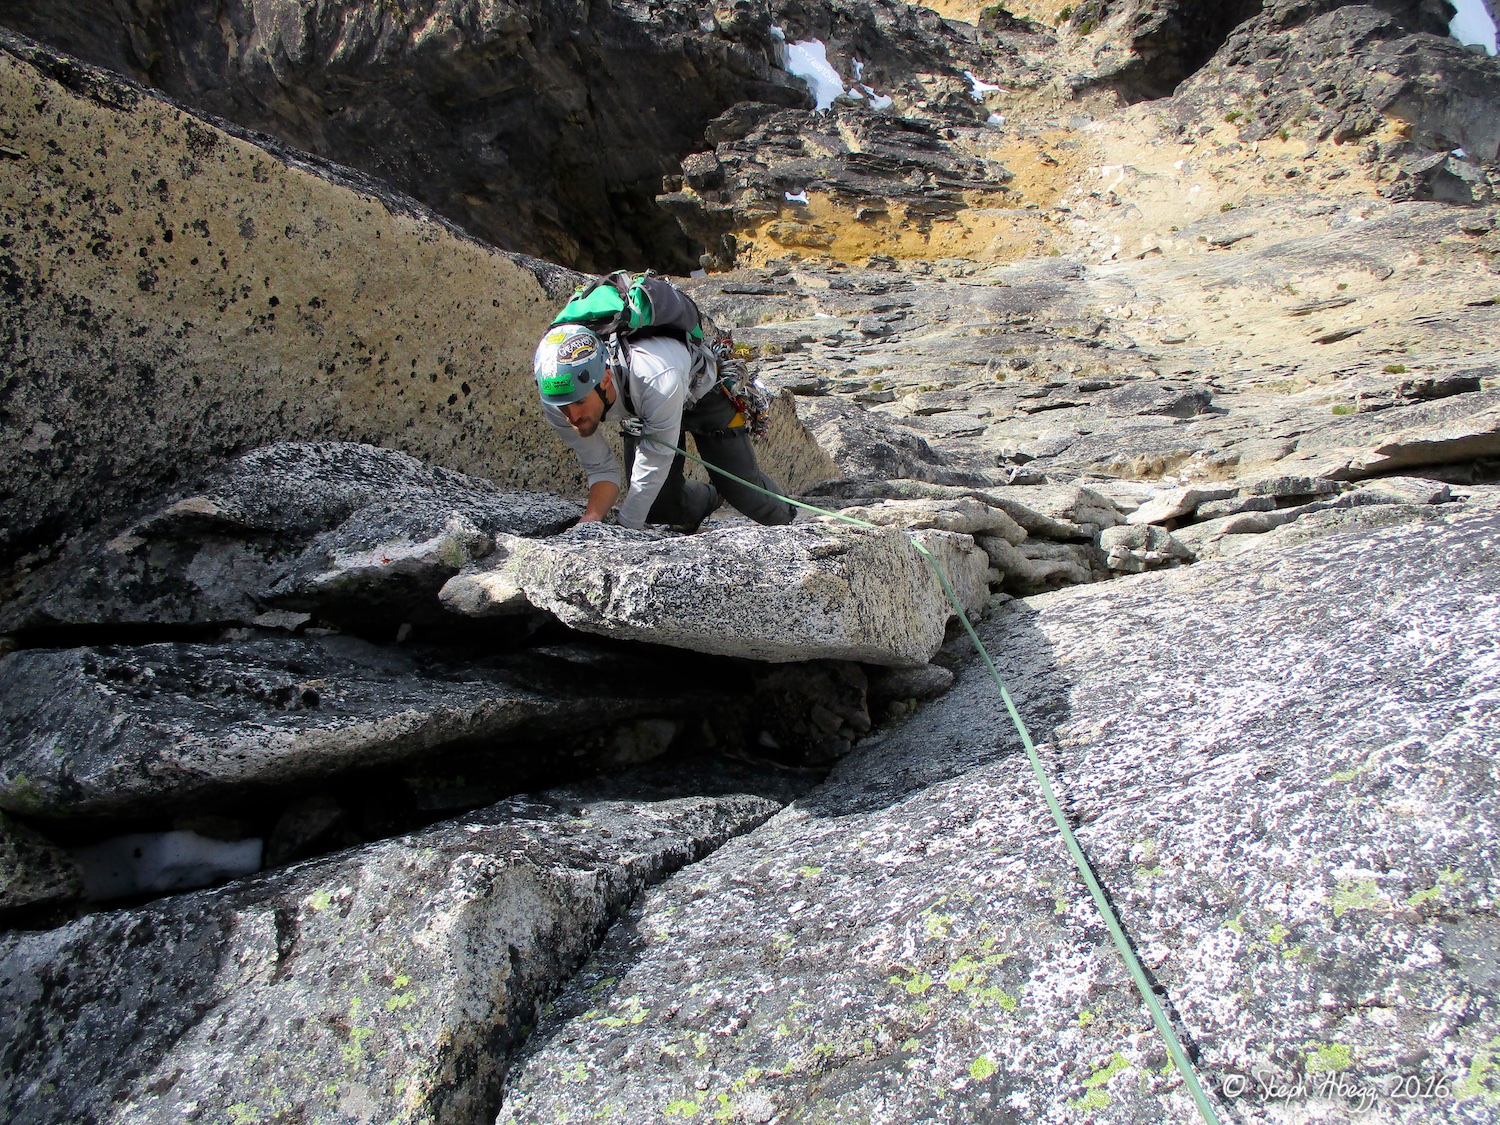
PITCH 4:
2nd-3rd, approx 150ft. There are a couple of options here. You can traverse right (west) on ledges about 150ft below the summit to the top of the Corkscrew route on the west face, or you can make a direct ascent up the exposed ridge crest. Either option is about 5.8. Most parties choose to traverse the ledges, which is what we did.
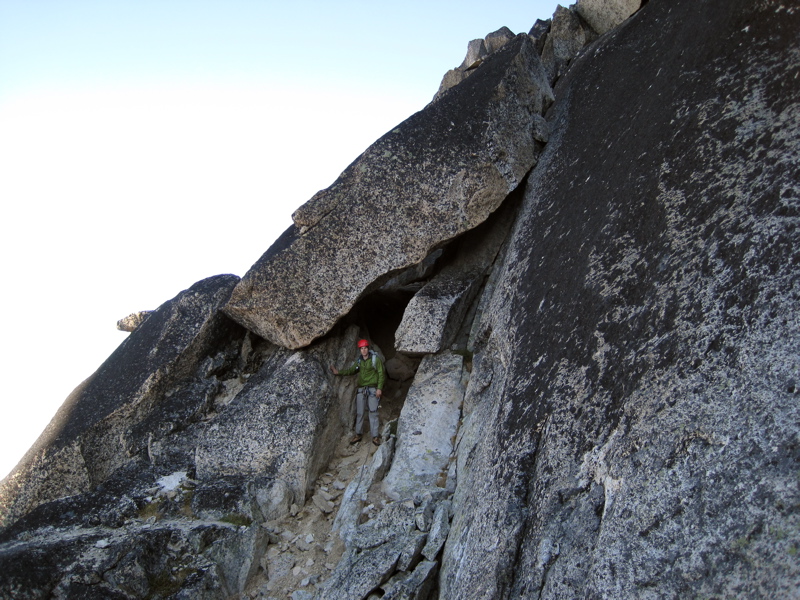
Photo: David traversing under a giant block on the ledge.
Photo 1
Photo 2
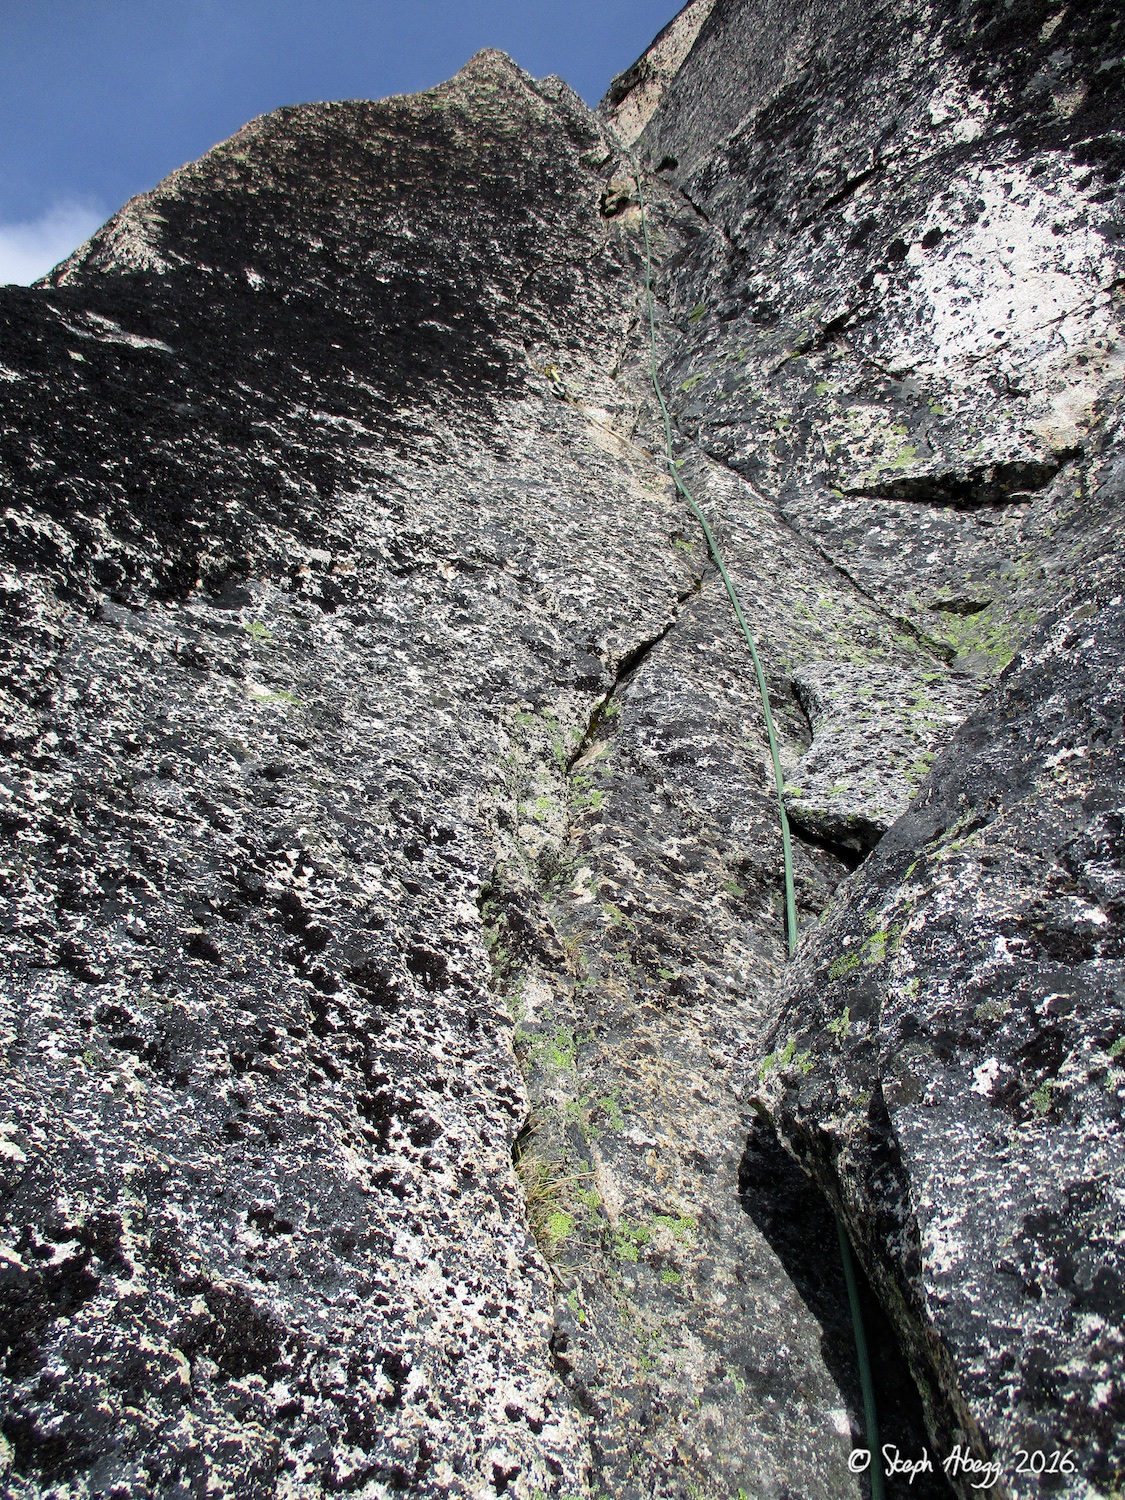
PITCHES 5-6:
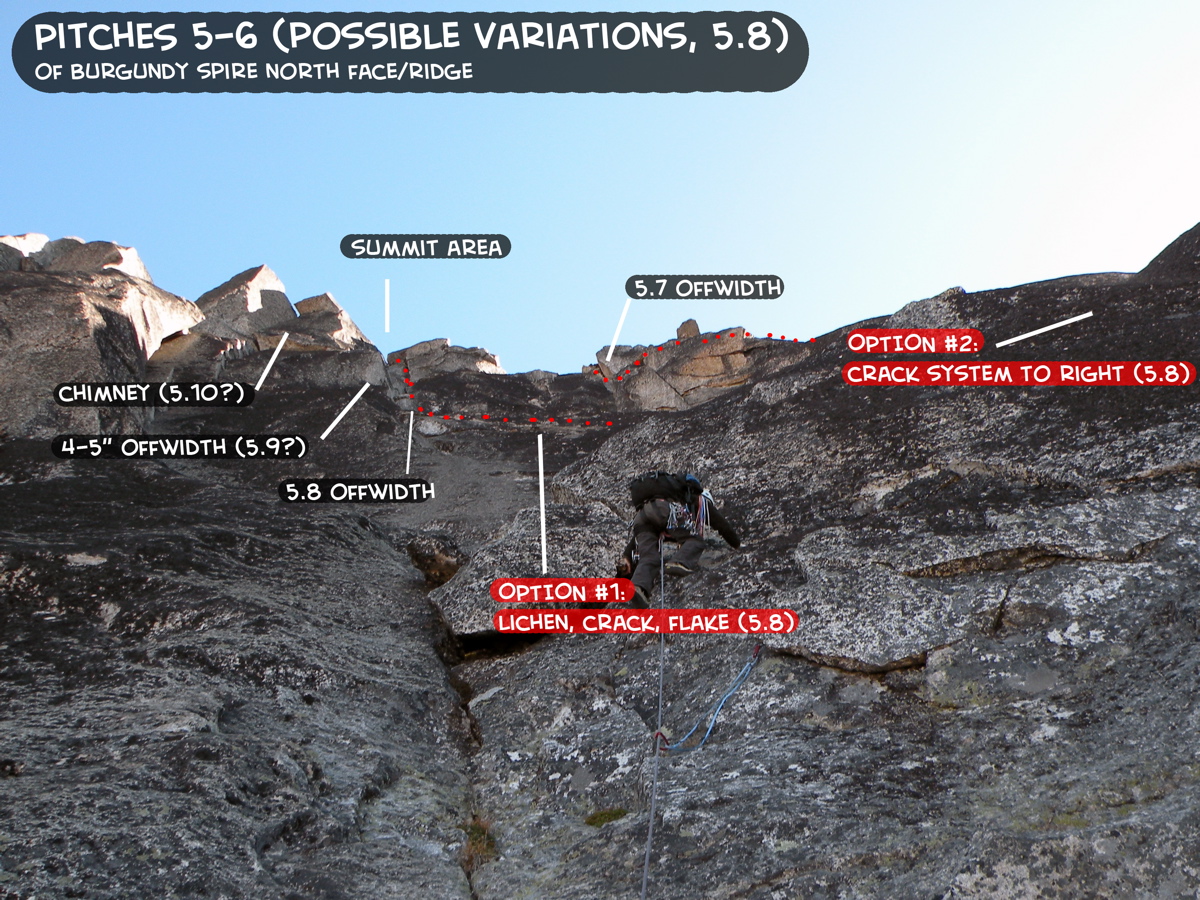
5.8, cracks/flakes. From the ledge, there are again a couple of 2-pitch options to get to the summit. All of them end with moderate offwidths that fit the #4 cam. We chose to climb the right-hand crack system beside a steep slab, and then up a short offwidth to the summitblock. (The other popular option is to climb across the lichen-covered slabs to the bolt anchor under the summitblock and climb the offwidth here to the summit.)
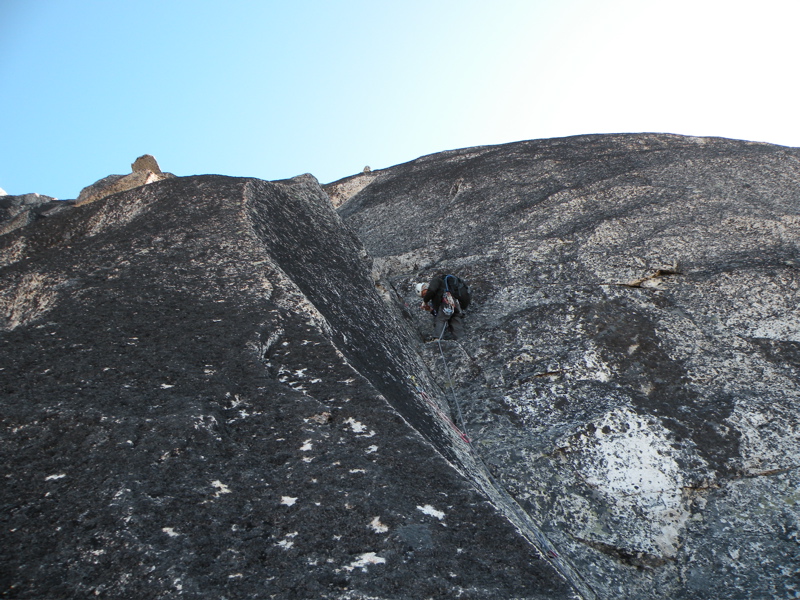
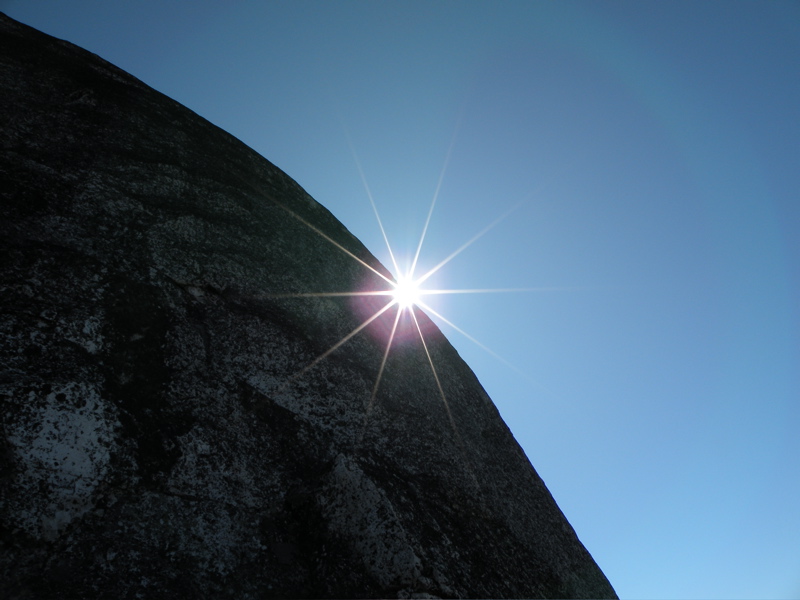
Photo 1: Photo overlay of our route on Pitches 5-6 to the summit, showing the possible offwidth finishes. Photo 2: Looking left at the option of traversing the lichen-covered slabs to the bolt anchor under the summitblock and climb the offwidth here to the summit. (We chose to go right instead.) Photo 3: Steph leading up the right-hand option crack systems. (Photo by David) Photo 4: Sun at last! The north face route is pretty shady, which would be nice on a hot summer day. (Photo by David) Photo 5: The crack system on the right thins towards the top to a fun finger crack (with optional face holds on the left). (Photo by David) Photo 6: The short offwidth on the right-hand option to the summit. It was actually pretty easy and fun. It was nice to have the #4 to protect the bottom move, but we later agreed we would probably not bring it next time unless we climbed a different offwidth finish.
Photo 3
Photo 4
Photo 5
Photo 6
Photo 1
Photo 2
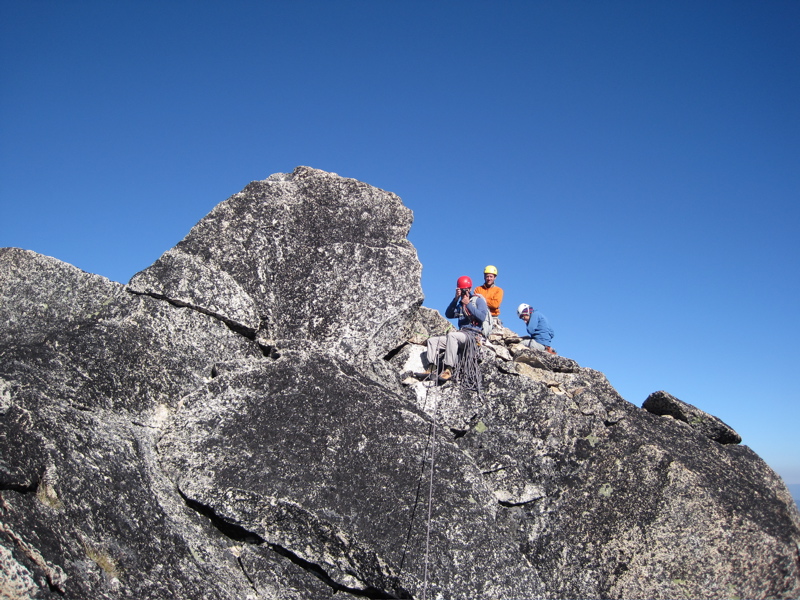
ON THE SUMMIT:
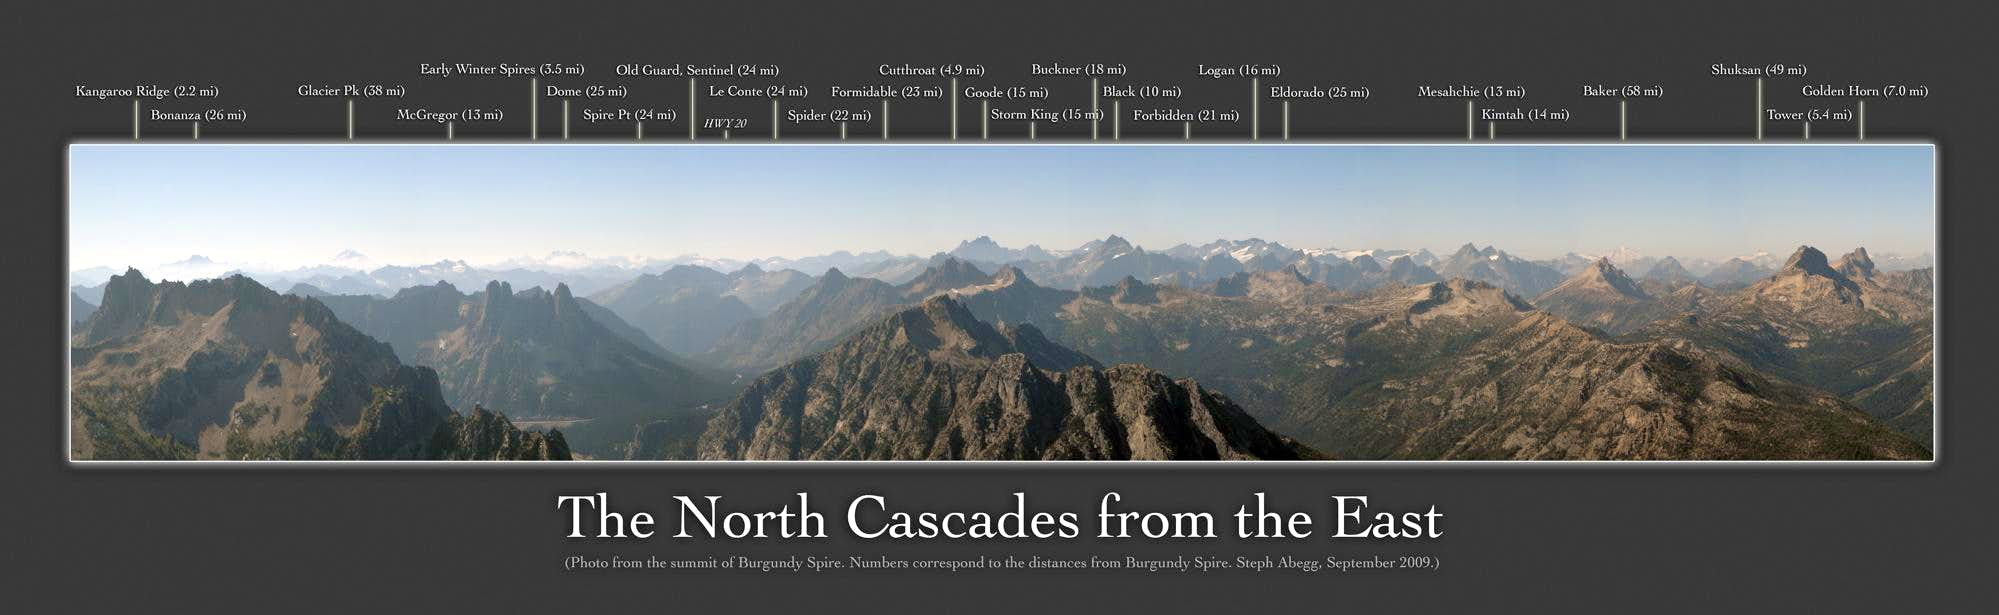
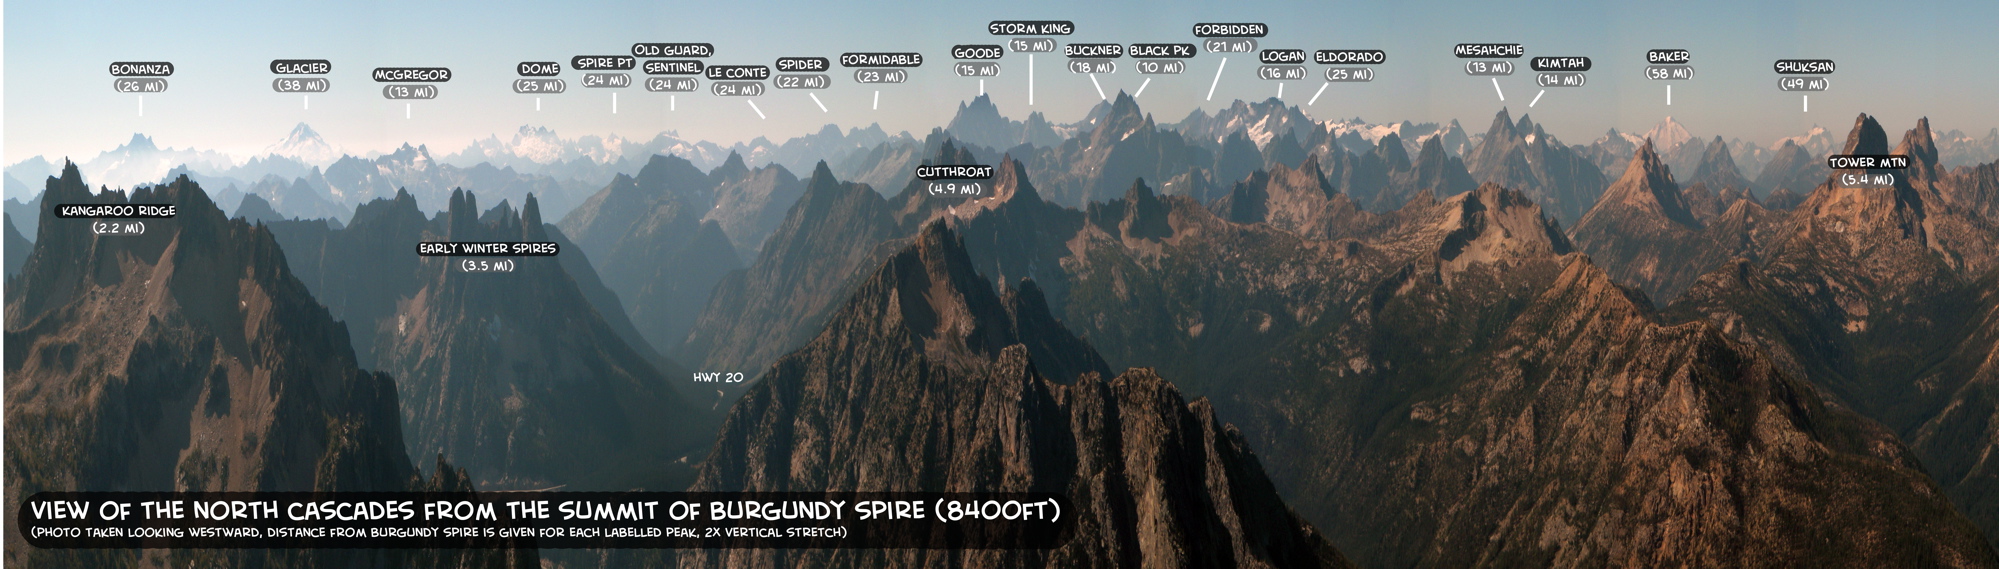
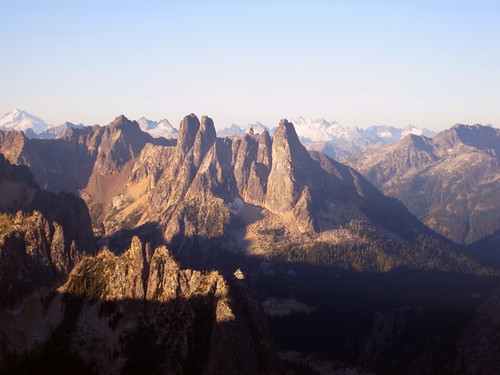
We enjoyed a leisurely lunch on the summit seeing how many peaks we could identify. The summit of Burgundy Spire has a great view of the North Cascades.
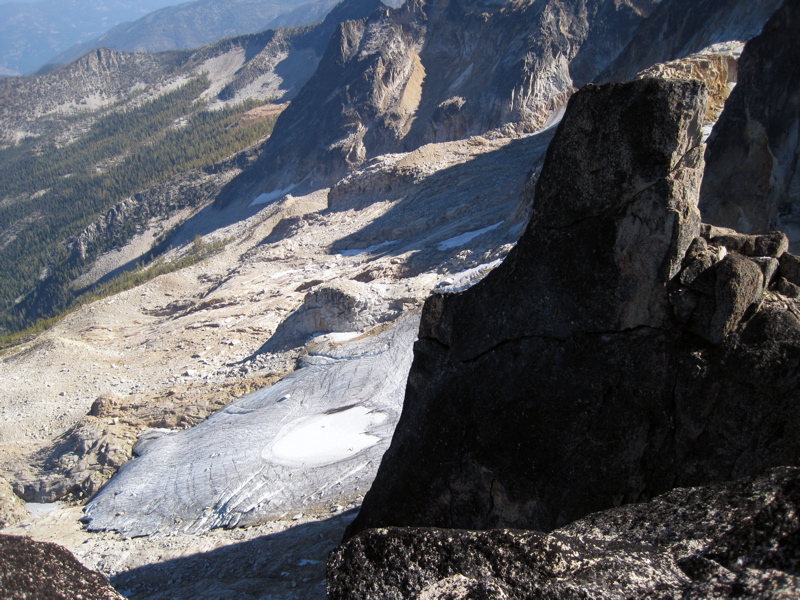
Photo 1: David and another party on the summitblock. Photo 2: The shrinking Silver Star glacier on the east side of the spires. If you look in the upper left middle distance you can see an orange rock pile extending down into the woods. That "orange pile" is one of the few rock glaciers in the Cascades. Rock glaciers look like earthflows but still have interstitial ice, hidden by the vast quantity of rock (essentially they are remnants of "real" glaciers with way too much rock load). Photo 3: Labeled summit panorama. (Click to enlarge) Photo 4: Labeled summit panorama, 2x vertical stretch. They look pretty steep now! (Click to enlarge)
Photo 3
Photo 4
Photo 1
Photo 2
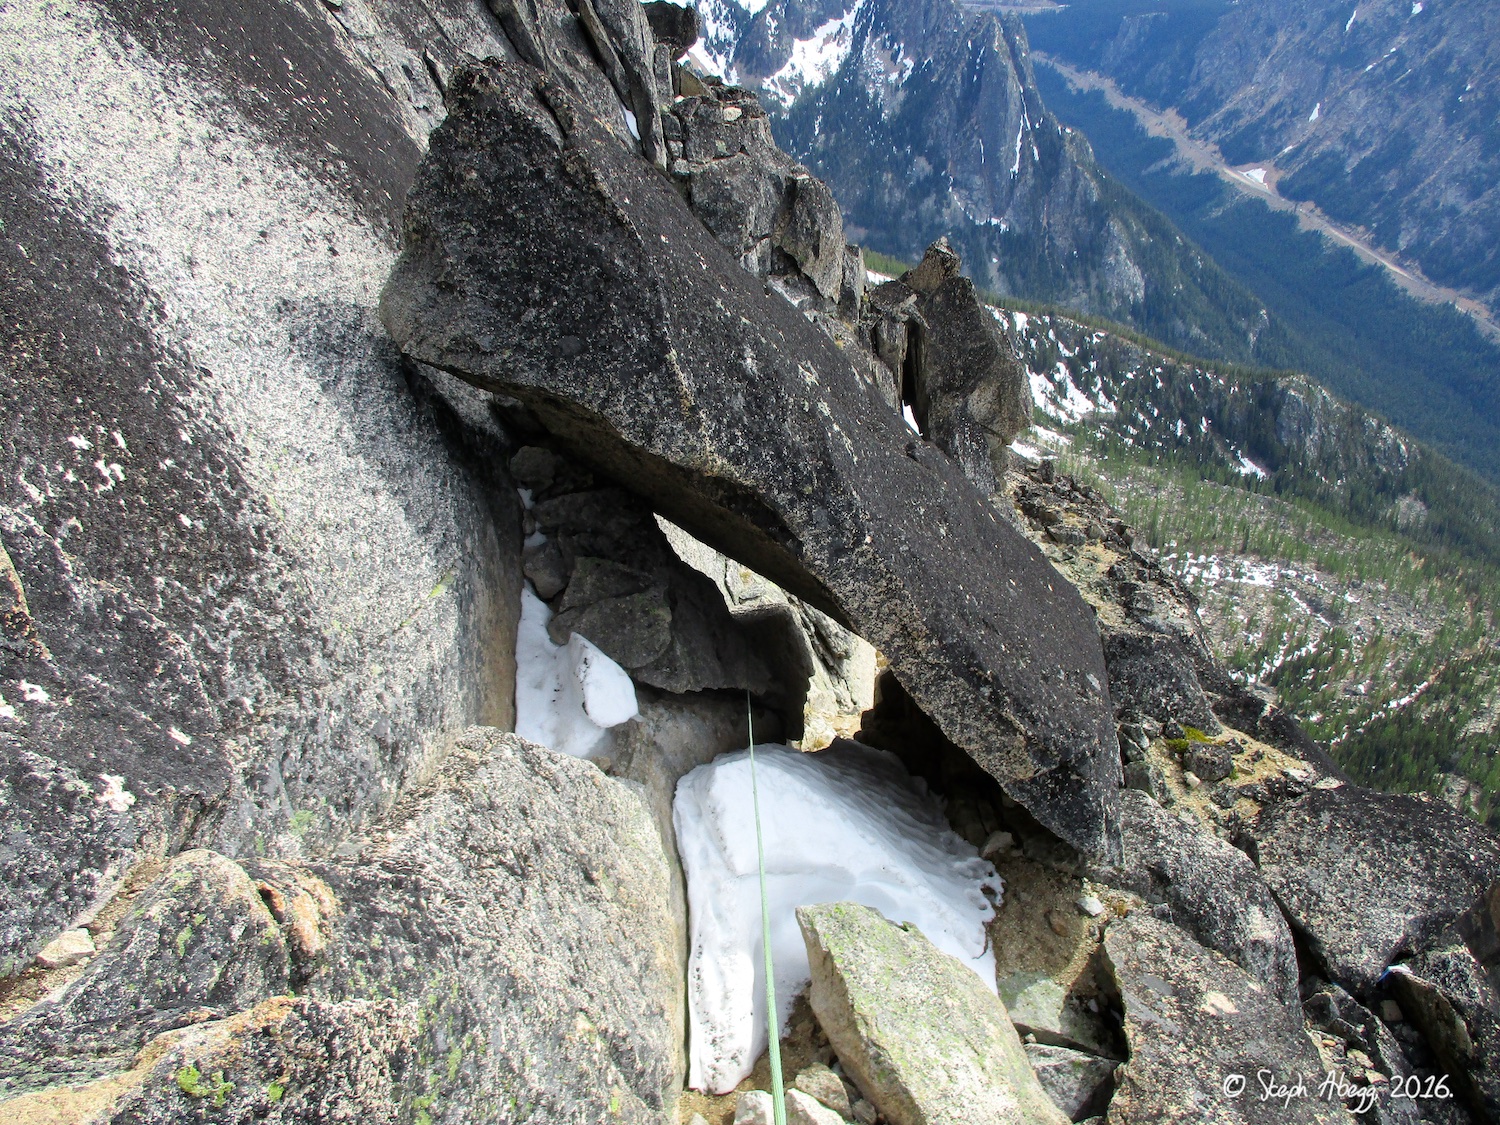
DESCENT:
The descent pretty much rappels the route. It can be done with a single 60m rope, although several route descriptions recommend bringing 2 ropes (we brought 2 ropes and ended up hastling with ropes getting stuck a couple of times; a party descending with us only had one 60m rope and had no problems except for 10 ft of downclimbing after the first rappel).
Specifics: Rappel from the summitblock down to the only bolted anchor on the rap route (this is the only place where a 60m rope falls a bit short, as it leaves you about 10 ft above the bolts; so you can either (a) carefully downclimb easy 5th to the anchor, (b) bring a 70m, or (c) bring 2 ropes). From the bolts, a couple of rappels bring you to the ledge. Traverse the ledge and make a few more rappels to the sandy terraces, and then a couple more rappels bring you to the col.
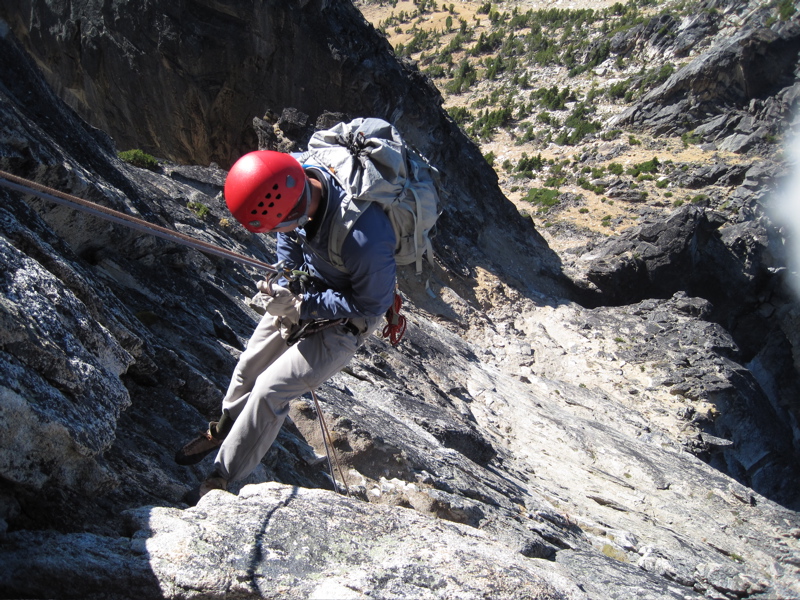
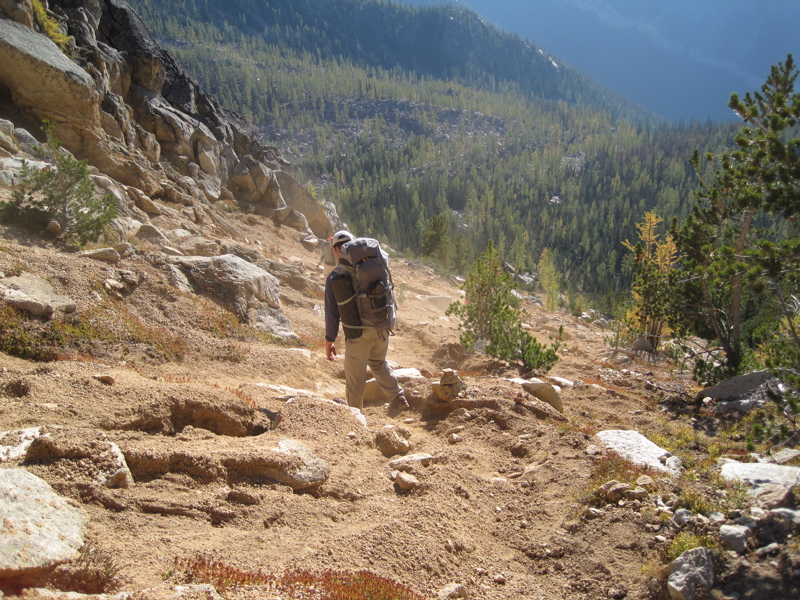
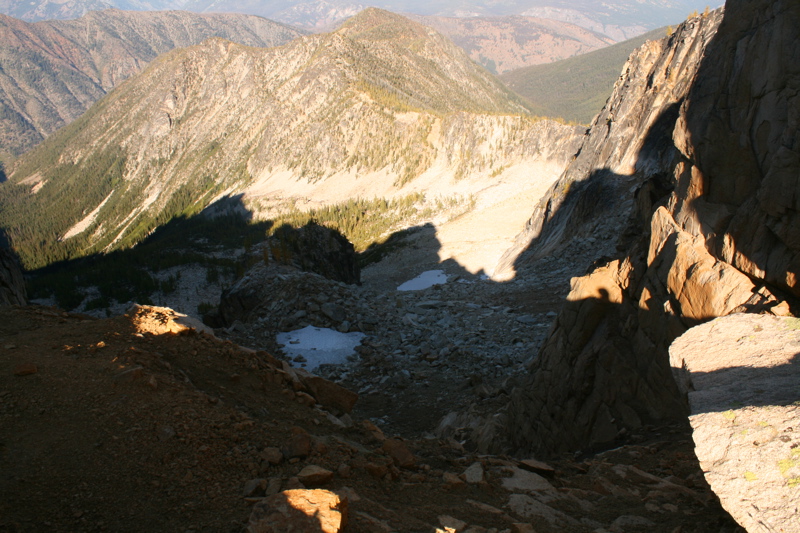
Photo 1: David rappelling from the summit block to the bolted anchor. Photo 2: The only bolted anchor on the rap route is the one just below the summit rappel. Photo 3: Rappelling to the sandy terraces. We rappelled down into the notch in right-center of the photo, which brings you to the ground about 50ft below the col. Photo 4: Now for some classic North Cascades oatmeal scree and steep climbers' trail back to the car.
Photo 3
Photo 4
Photos from Camp
We camped at Burgundy Col, and enjoyed a beautiful sunset, moonrise, moonset, Big Dipper, and sunrise before we even began climbing. Spending a night high in the mountains is well worth schlepping the extra weight of tent and water. I was awake much of the night taking photos. Here are some of my photos from camp.
We brought 6L of water each. That's almost 30lbs of water!
Enjoying a beautiful evening at camp at the col.
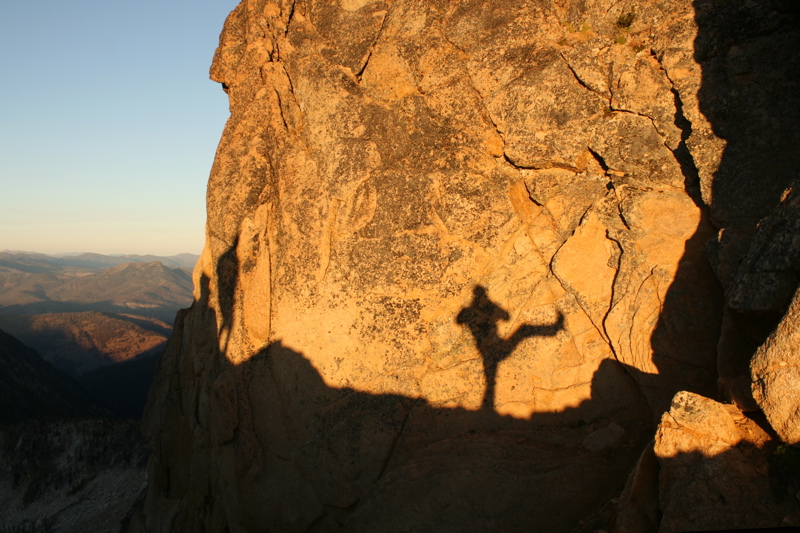
My shadow can climb 5.12.
Sunset photo. David and I had a fun discussion on how the construction of the aperture of the camera affects the shape of the lens flare. His camera gave pentagonal lens flares due to the 5-lobed construction of his aperture. I get more complicated flare due to the multiple elements of my lens....
Another sunset photo. I find you can avoid lens flare by adjusting the angle of your shot.
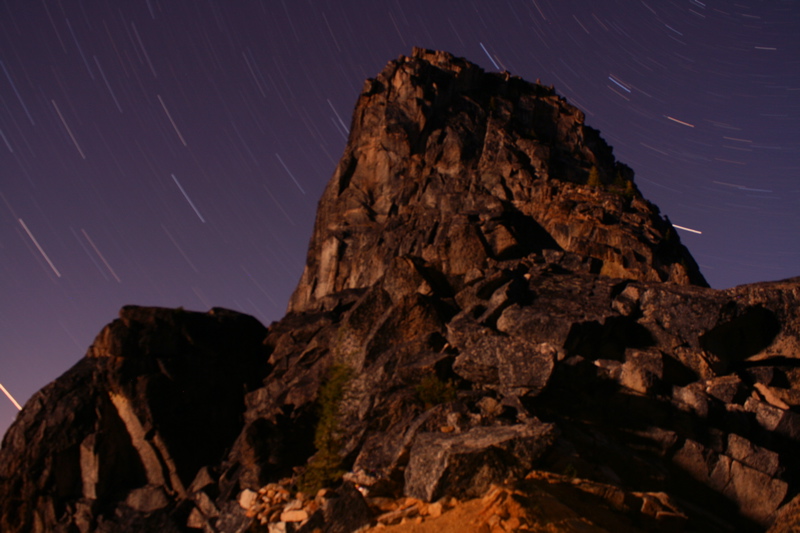
Stars and moonlight on Vasiliki Tower above the bivy of another party that arrived at the col (30 sec exposure).
Star trails above a moonlit Vasiliki Tower (23 min exposure).
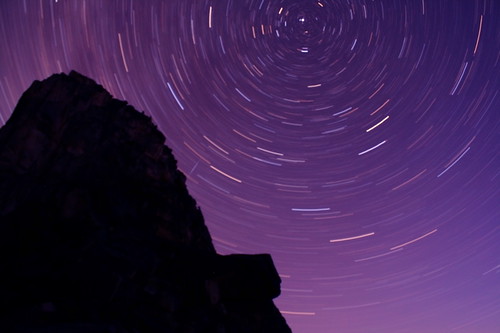
Star trails around North Star above Vasiliki Tower after the moon set (48 min exposure).
Lights of cars on Highway 20 at night (13 min exposure).
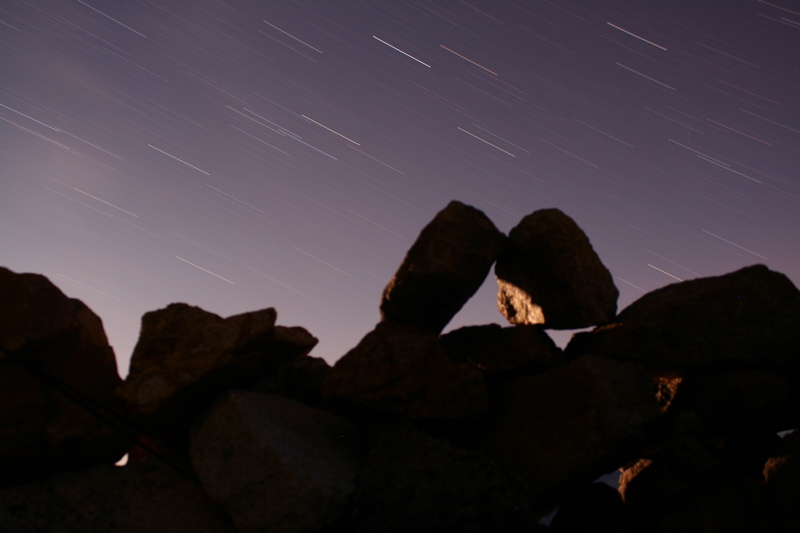
Star trails above some moonlit rocks (20 min exposure).
Another cool "Alpine Start Long Exposure" of making breakfast in the tent before beginning the climb. It stays dark out until 7am in late Sept. (11 min exposure)
September sun on Liberty Bell group.
Lots of mountains to the west of Burgundy Spire.
Burgundy Col, east side view. The Silver Star glacier is around the corner to the right, getting smaller every year. In late season, the only water on the approach is at these snow fields below the east side of the col. We packed up our own water to avoid the hassle of finding, chopping, and melting hard snow.
THIS TRIP REPORT IS STILL MOSTLY IN THE EMBEDDED HTML FORMAT OF MY OLD WEBSITE. MOBILE Tip: Try Landscape mode. It is generally more mobile friendly.
INTRO
Sam and I had climbed Beckey-Tate route on Big Kangaroo the previous day, which was a great adventure, but we felt like the quality of climbing was only so-so. So we were looking for a route with a fair amount of solid rock. A Paisano-Burgundy link-up seemed like a great choice. (From the SuperTopo guidebook: "The West Ridge of Paisano Pinnacle is a classic of the range, one of the better 5.9s in the state. When combined with the North Face of Burgundy Spire, it makes an incredible 13-pitch IV outing in the 5.8+/5.9 range. Paisano has exceptional rock, even in an area know for its solid granite. The West Ridge is more “splitter” than most other routes in the range featuring many excellent cracks."
It was indeed a great choice for the day. We left the cars at 7:15 am, started up the West Ridge at 10:30 am, got to the top of Paisano at 3 pm, got to the top of Burgundy at 6:25 pm, got to the base at 8 pm, and got back to the car by 10 pm, eeking out just enough daylight to not need to put on headlights. We felt we could have been faster, but we had some route-finding shenanigans getting to the base of Paisano, found the route finding on Paisano itself to be a bit more heads up, and got a rope stuck on the descent. But a certain level of these sorts of things are to be expected so overall we made fairly efficient work of the day. I love these kind of full days of movement combined with some good pitches of climbing and excellent views.
Below is a route overlay and some photos from the link-up.
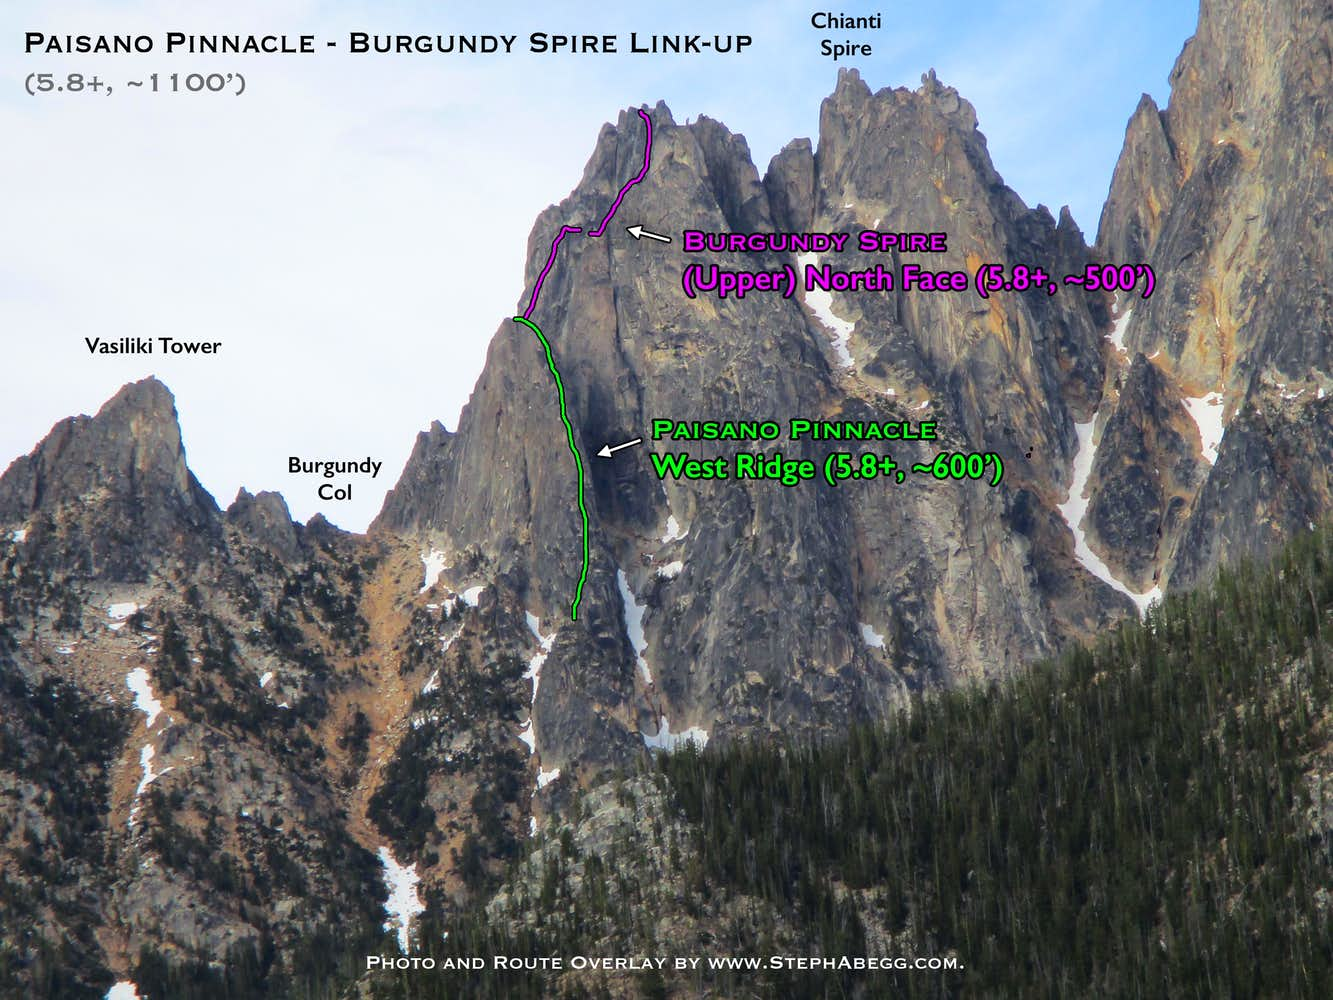
ROUTE OVERLAY for PAISANO PINNACLE WEST RIDGE and BURGUNDY SPIRE (UPPER) NORTH FACE
Typo Alert! The spire labeled Chianti is actually Pernod Spire. Chianti is closer to Burgundy.
PHOTOS FROM THE CLIMB of PAISANO PINNACLE WEST RIDGE
Photos
Photo descriptions
1.
2.
3.
4.
5.
6.
7.
8.
9.
10.
11.
12.
13.
14.
15.
16.
17.
18.
19.
20.
1-2. The Liberty Bell group (SEWS, NEWS, Lexington, Concord, Libery Bell) from the approach to Paisano/Burgundy.
3-4. Kangaroo Ridge from the approach to Paisano/Burgundy. Big Kangaroo is the tallest point on the left (south) end of the ridge. The South Face (which has the Beckey-Tate route we had climbed the previoud day) is out of view around the left side of the ridge.
5. The chockstone that marks the start of the West Ridge of Paisano Pinnacle. As I discovered in 2009, the start of the route can be a bit difficult to identify so make sure to pay attention to the topo and the approach description.
6. Looking up Paisano Pinnacle from the start of the route. Pitches 1 and 2 have a choose-your-own-adventure mix of tree-battling, quality rock, and rope drag and eventually reach the crest below a splitter 5.7 hand crack.
7. Sam starting up the splitter 5.7 hand crack of Pitch 3.
8. Looking up the splitter 5.7 hand crack of Pitch 3.
9. Looking up the double cracks of Pitch 4, which features the crux 5.8+/5.9- climbing of the route. I led this pitch and thought it was some of the best climbing on the route.
10. Sam following the double cracks of Pitch 4.
11. Moving the belay at the top of Pitch 4 (there are three options for Pitch 5, and we chose the left-most, which is the one noted to be the "most fun" in the SuperTopo guidebook.
12. Sam leading Pitch 5, a nice 5.8 layback and wide corner.
13. Looking up the 5.4 splitter on the crest, on Pitch 6.
14. Sam relaxing at the belay on a nice ledge at the top of Pitch 5.
15. Looking down while leading Pitch 6. This pitch is long and goes through a lot of terrain, so I ran out the easy sections to avoid rope drag.
16. Sam leading the final pitch to the top (Pitch 8).
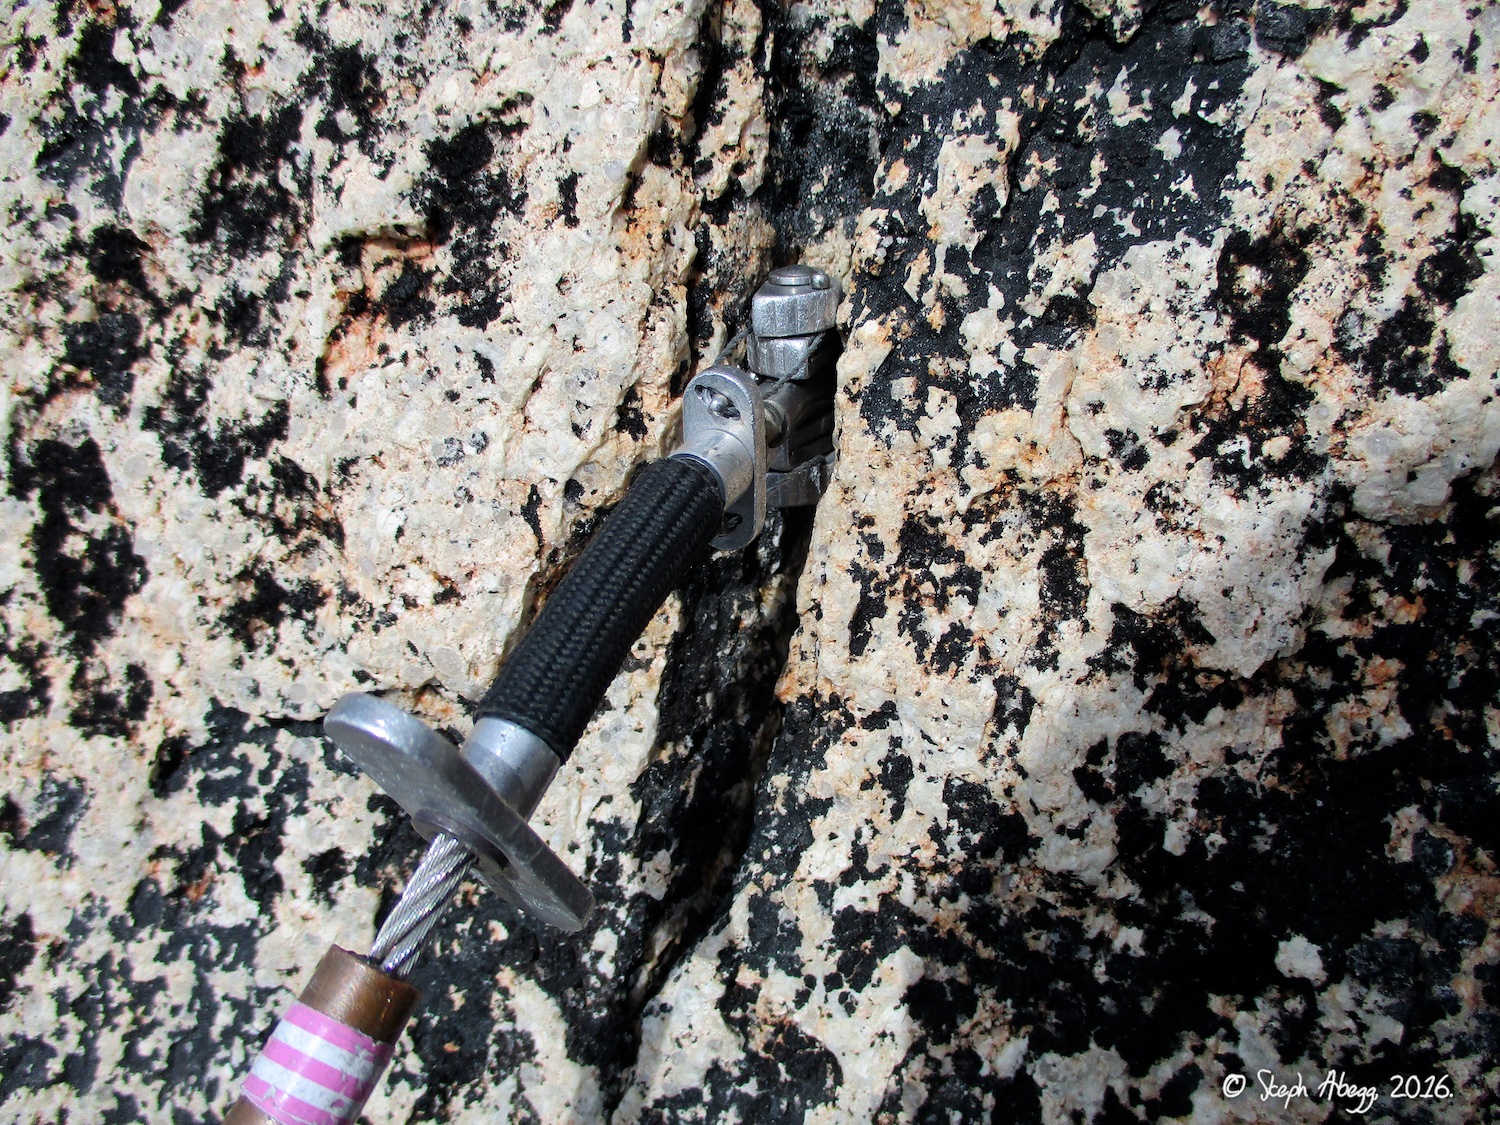
17. The final face of Pitch 8. This is a little bit runnout. SuperTopo calls it the mental crux of the route.
18. There is a spot for a rather poor placement of a green alien. More for mental comfort than anything, but it probably would not hold a full on fall.
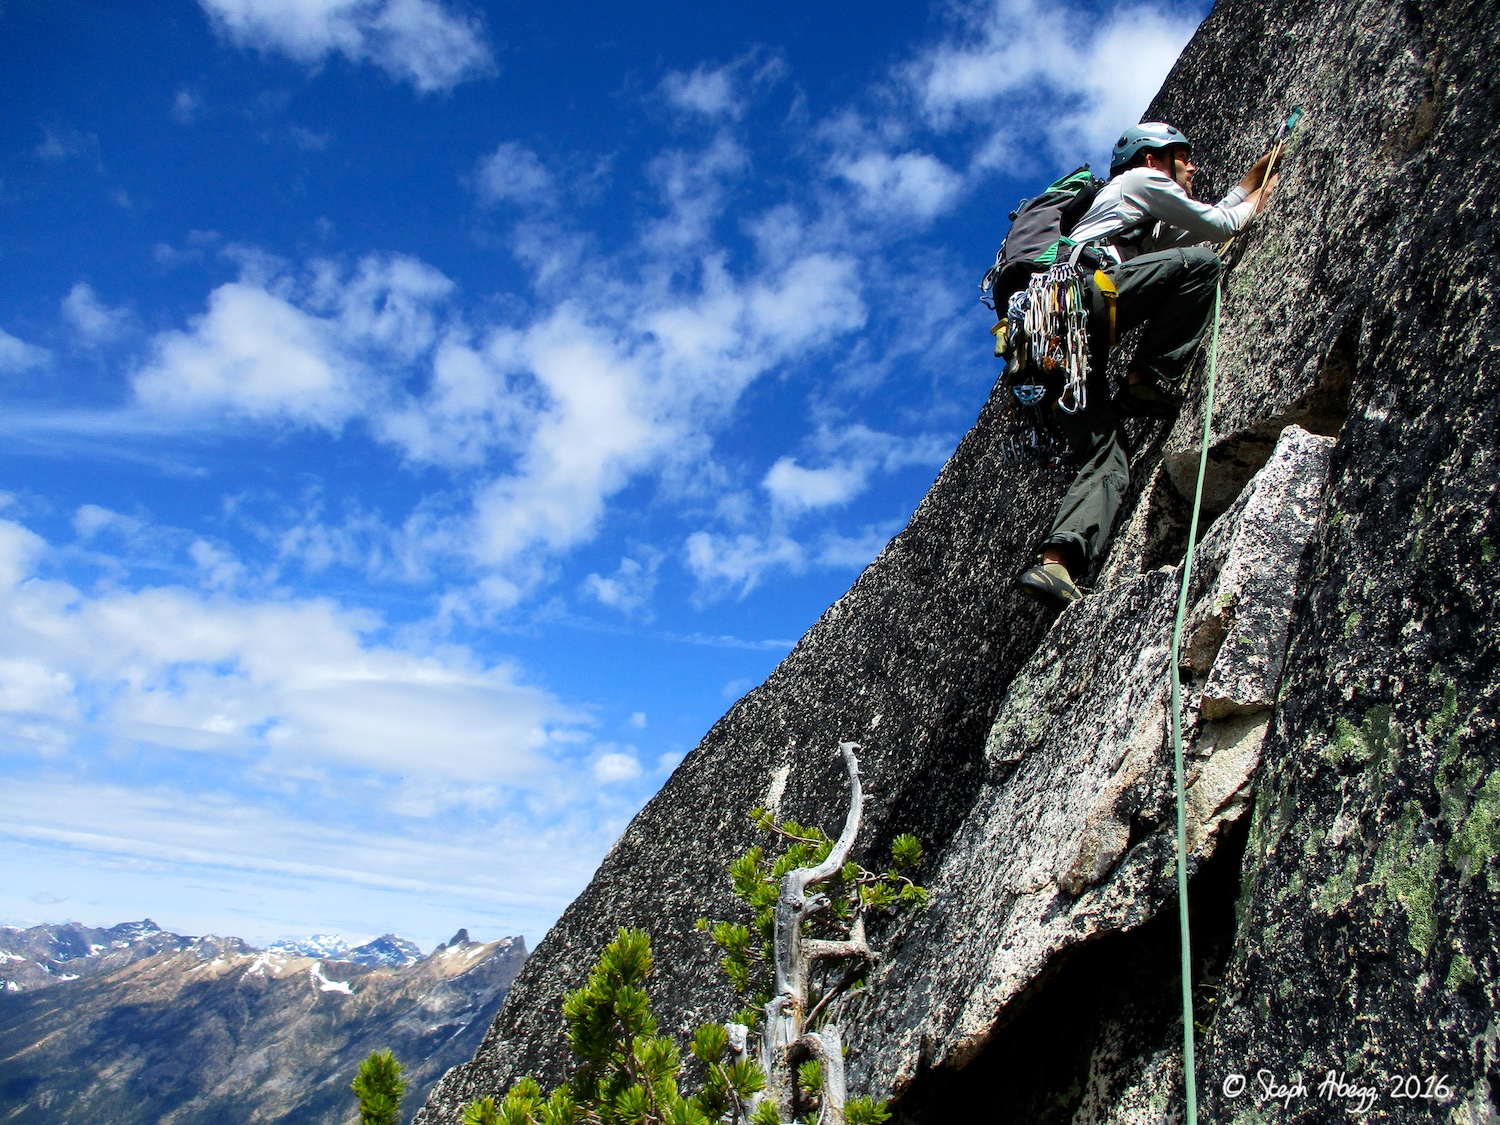
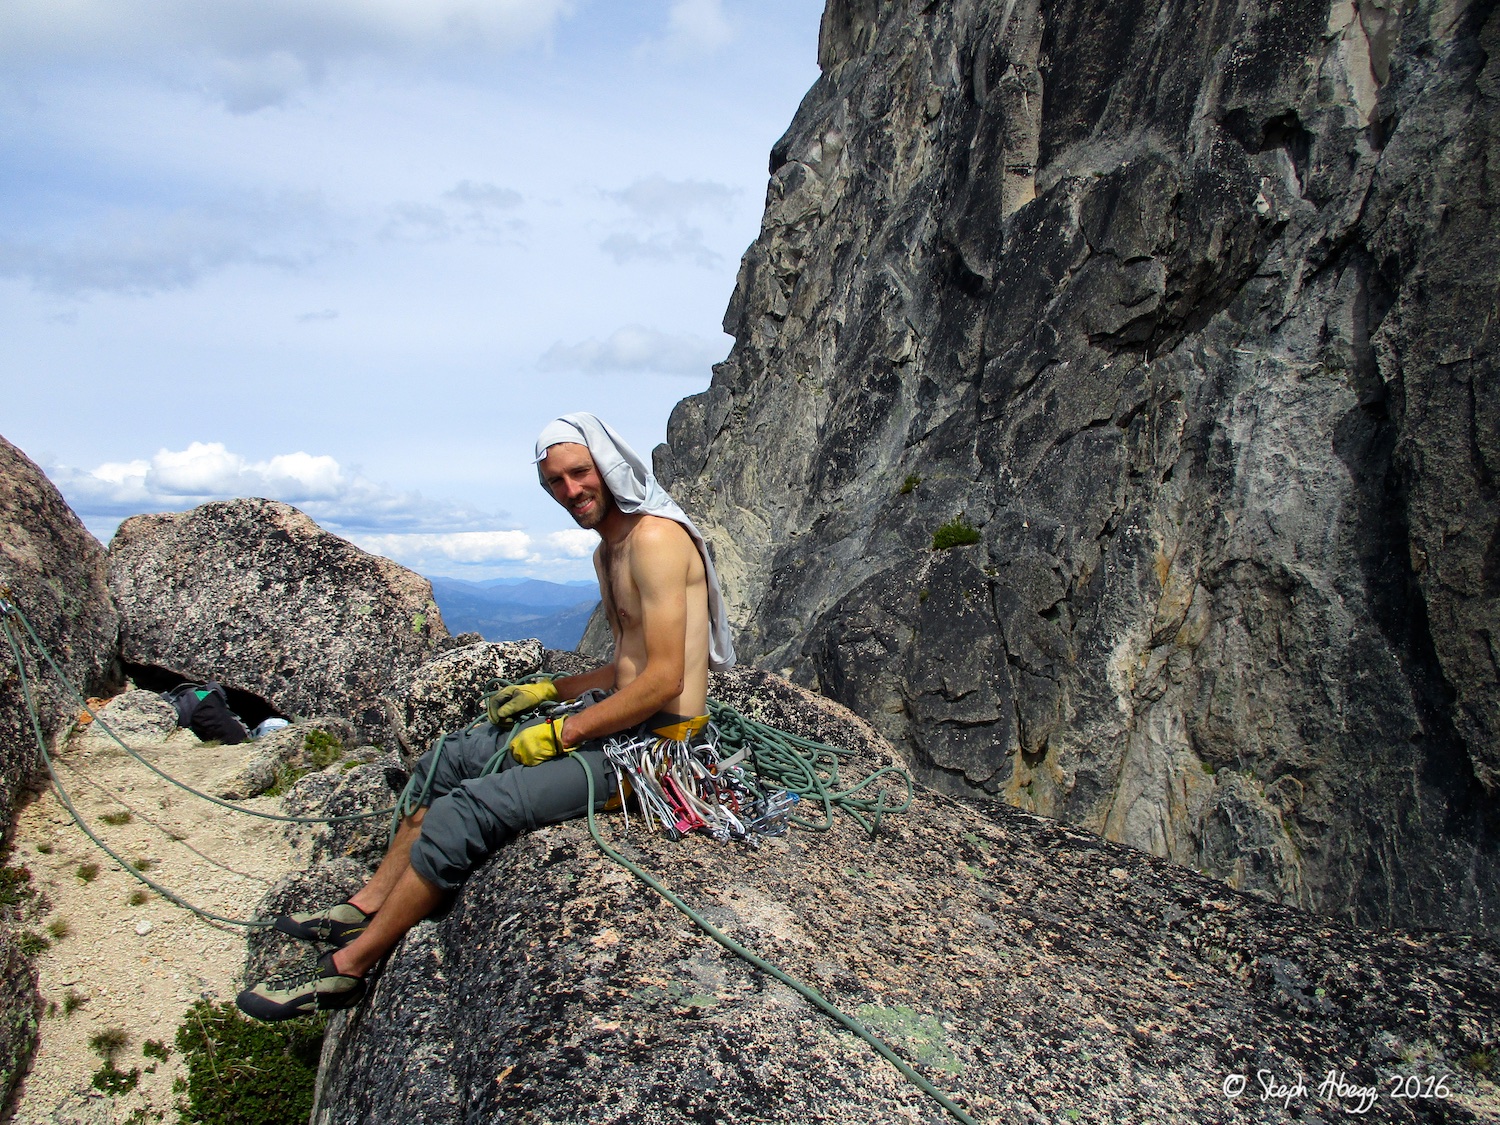
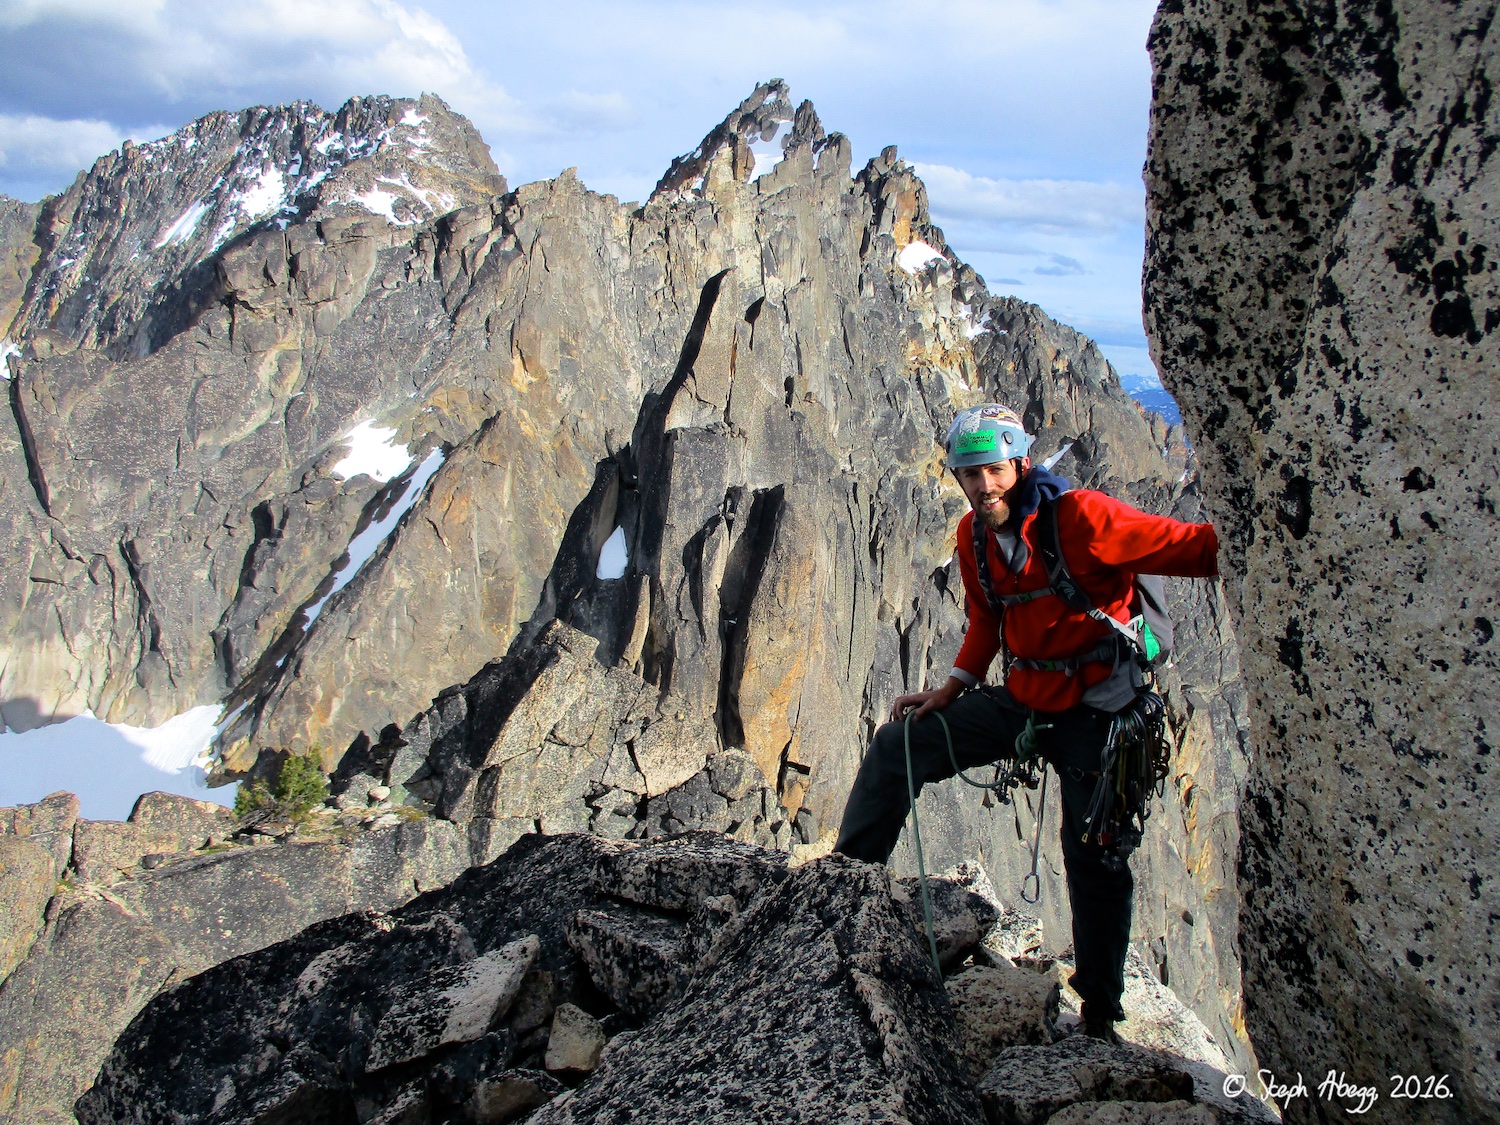
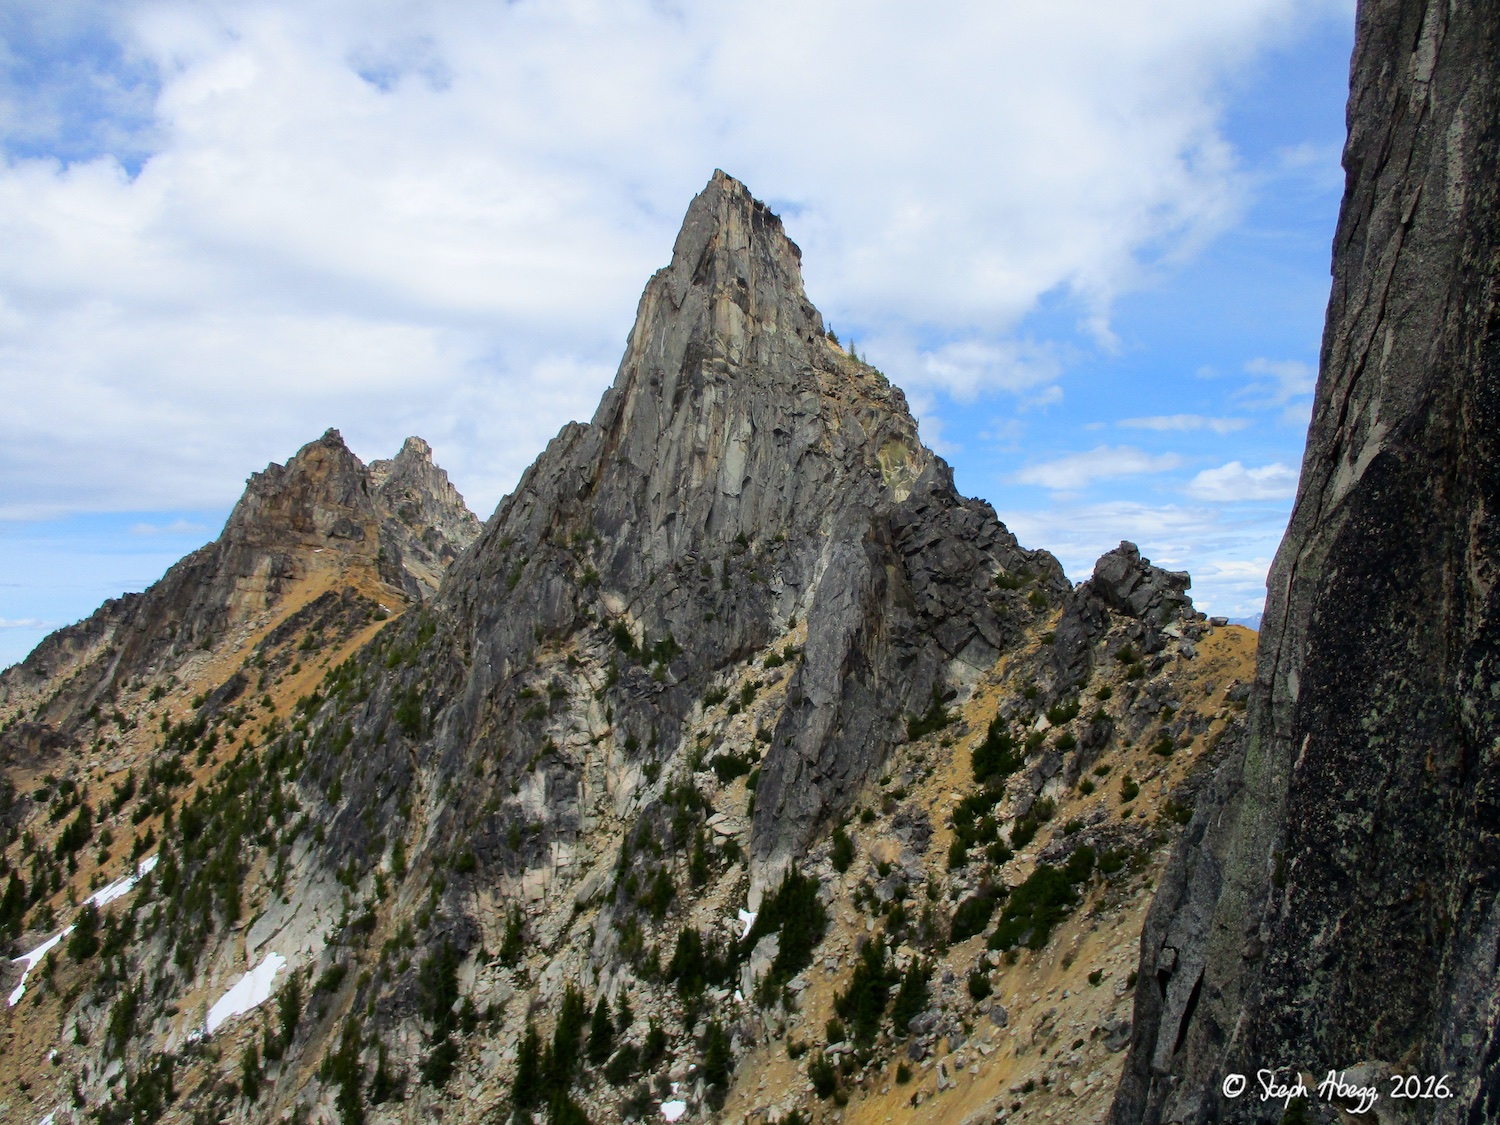
19. Sam relaxing on the summit of Paisano Pinnacle, with the walls of the north face of Burgundy Spire towering behind him.
20. Looking over at the top of Paisano Pinnacle from the north face of Burgundy. It is a short class 4 scramble from the top of Paisano to the north face of Burgundy, which we climbed next.
PHOTOS FROM THE CLIMB of BURGUNDY SPIRE (UPPER) NORTH FACE
Photos
Photo descriptions
21.
22.
23.
24.
25.
26.
27.
28.
29.
30.
31.
32.
33.
34.
35.
36.
37.
38.
39.
40.
21. Looking up at the north face of Burgundy Spire from the top of Paisano Pinnacle.
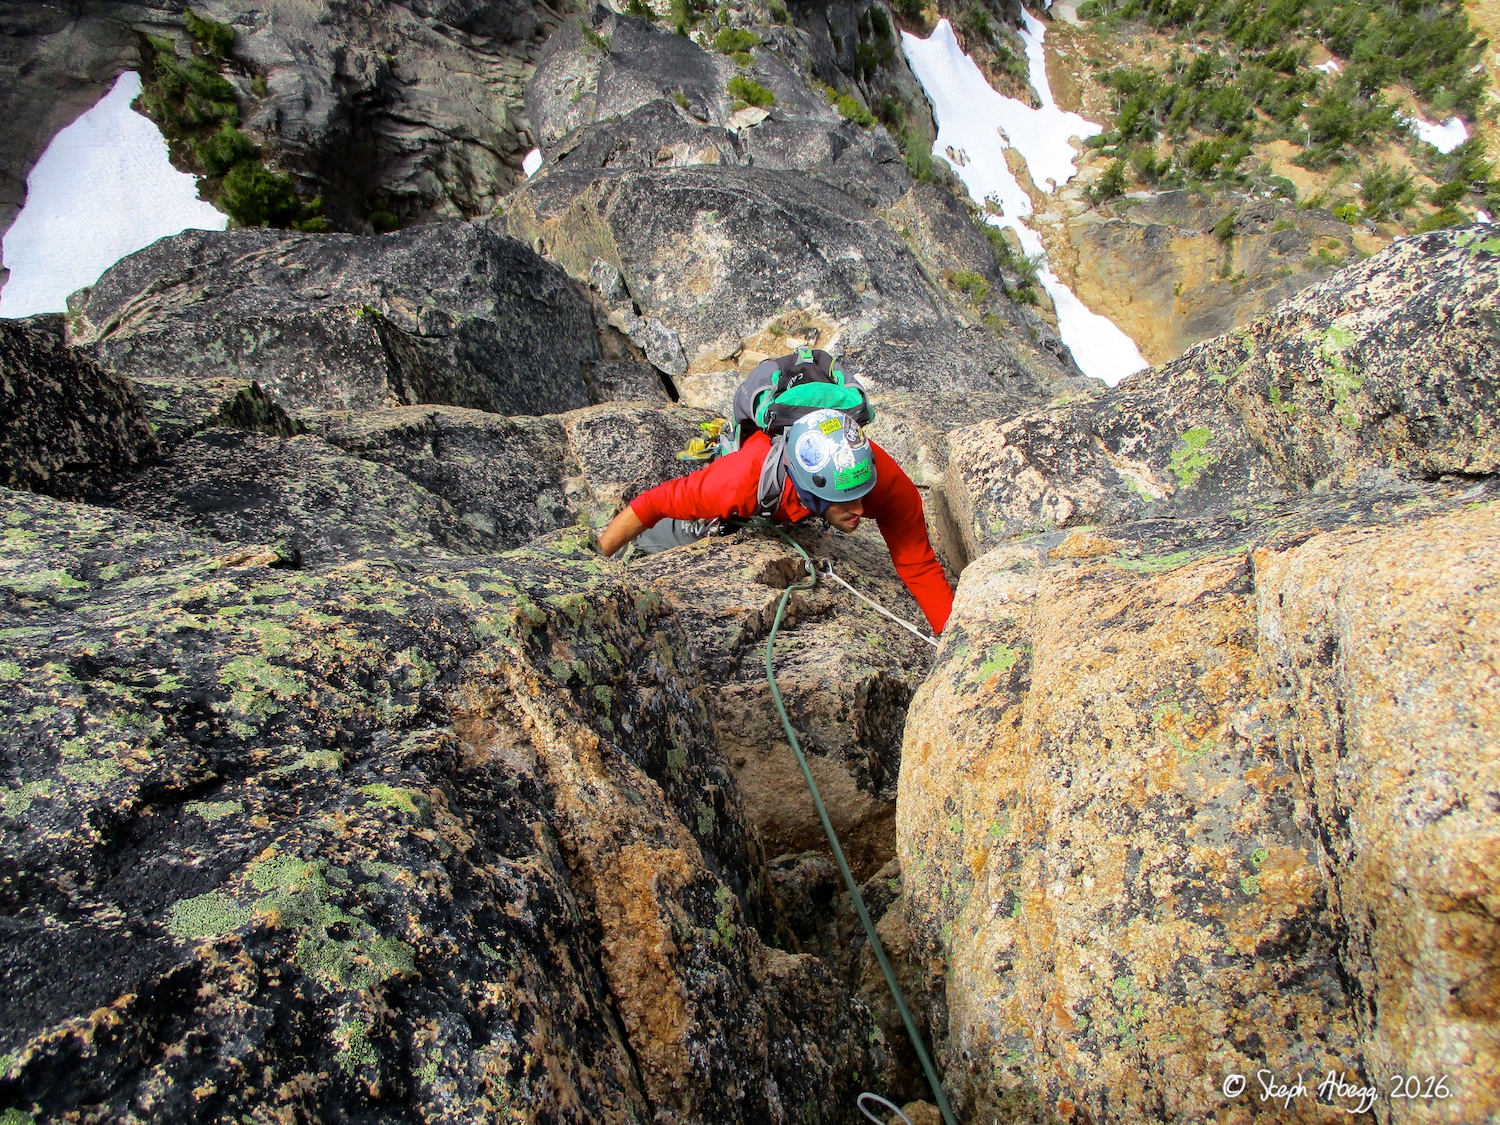
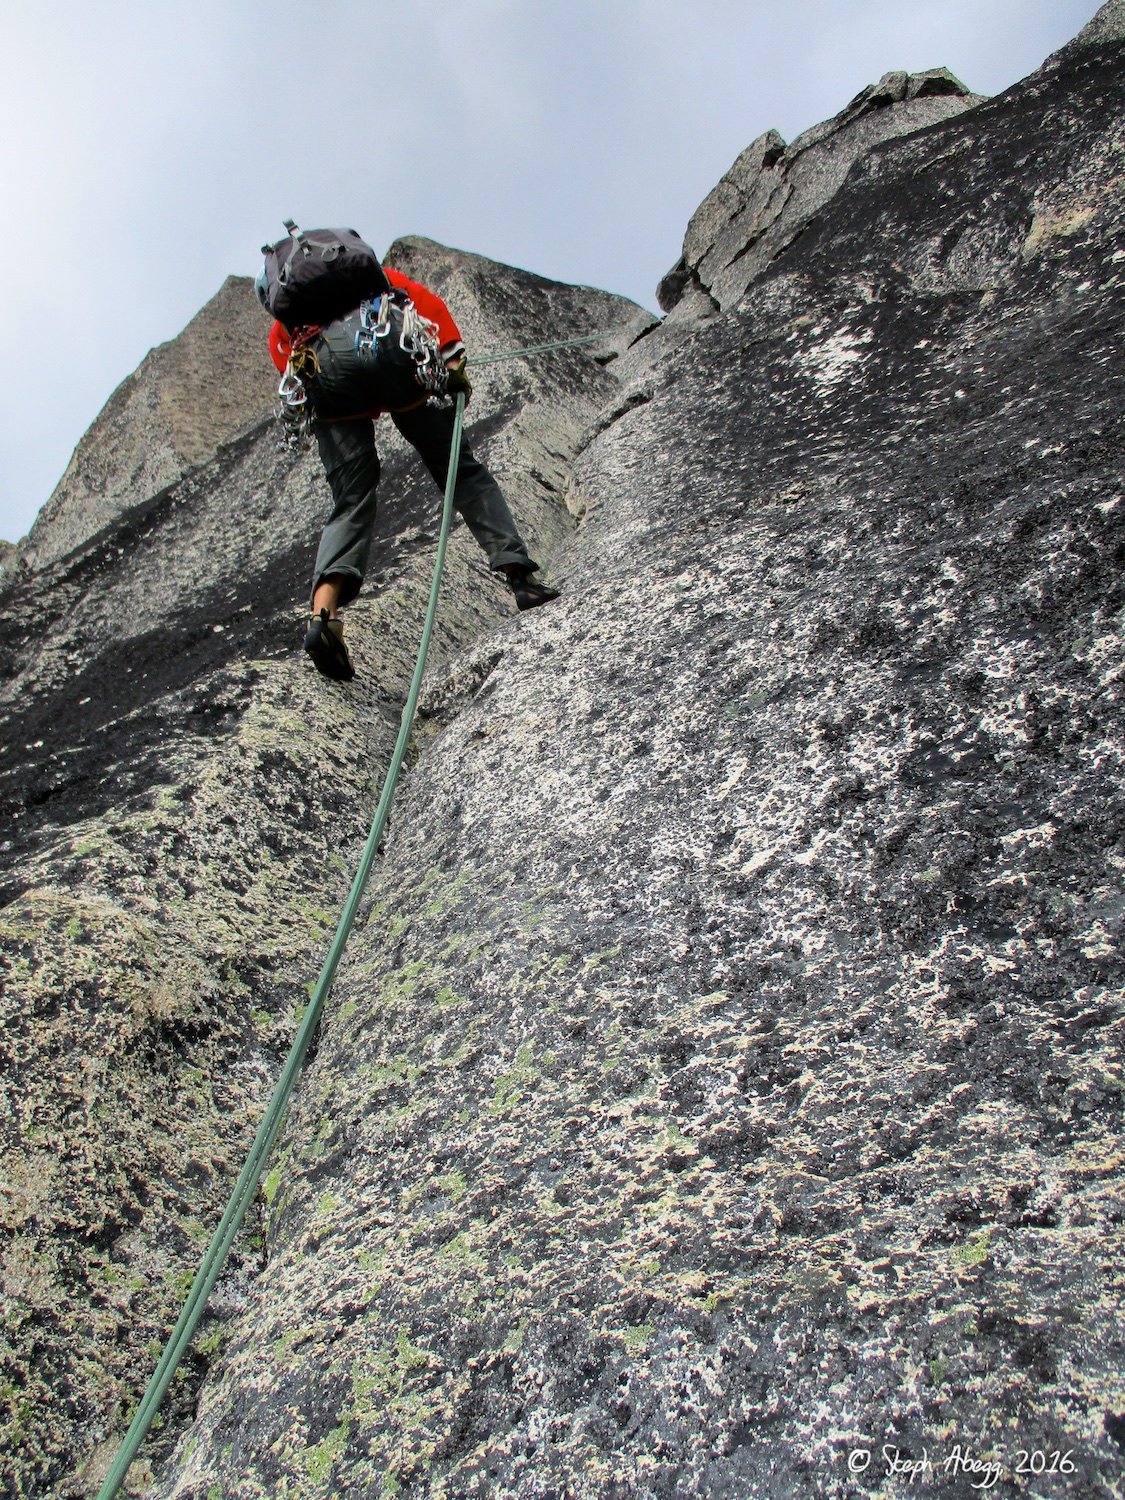
22. From Paisano Pinnacle, it is a hop, skip, and a jump to the start of Pitch 3 of the North Face of Burgundy Spire. This photo is taken looking up at Sam leading Pitch 3.
23. Sam leading Pitch 4.
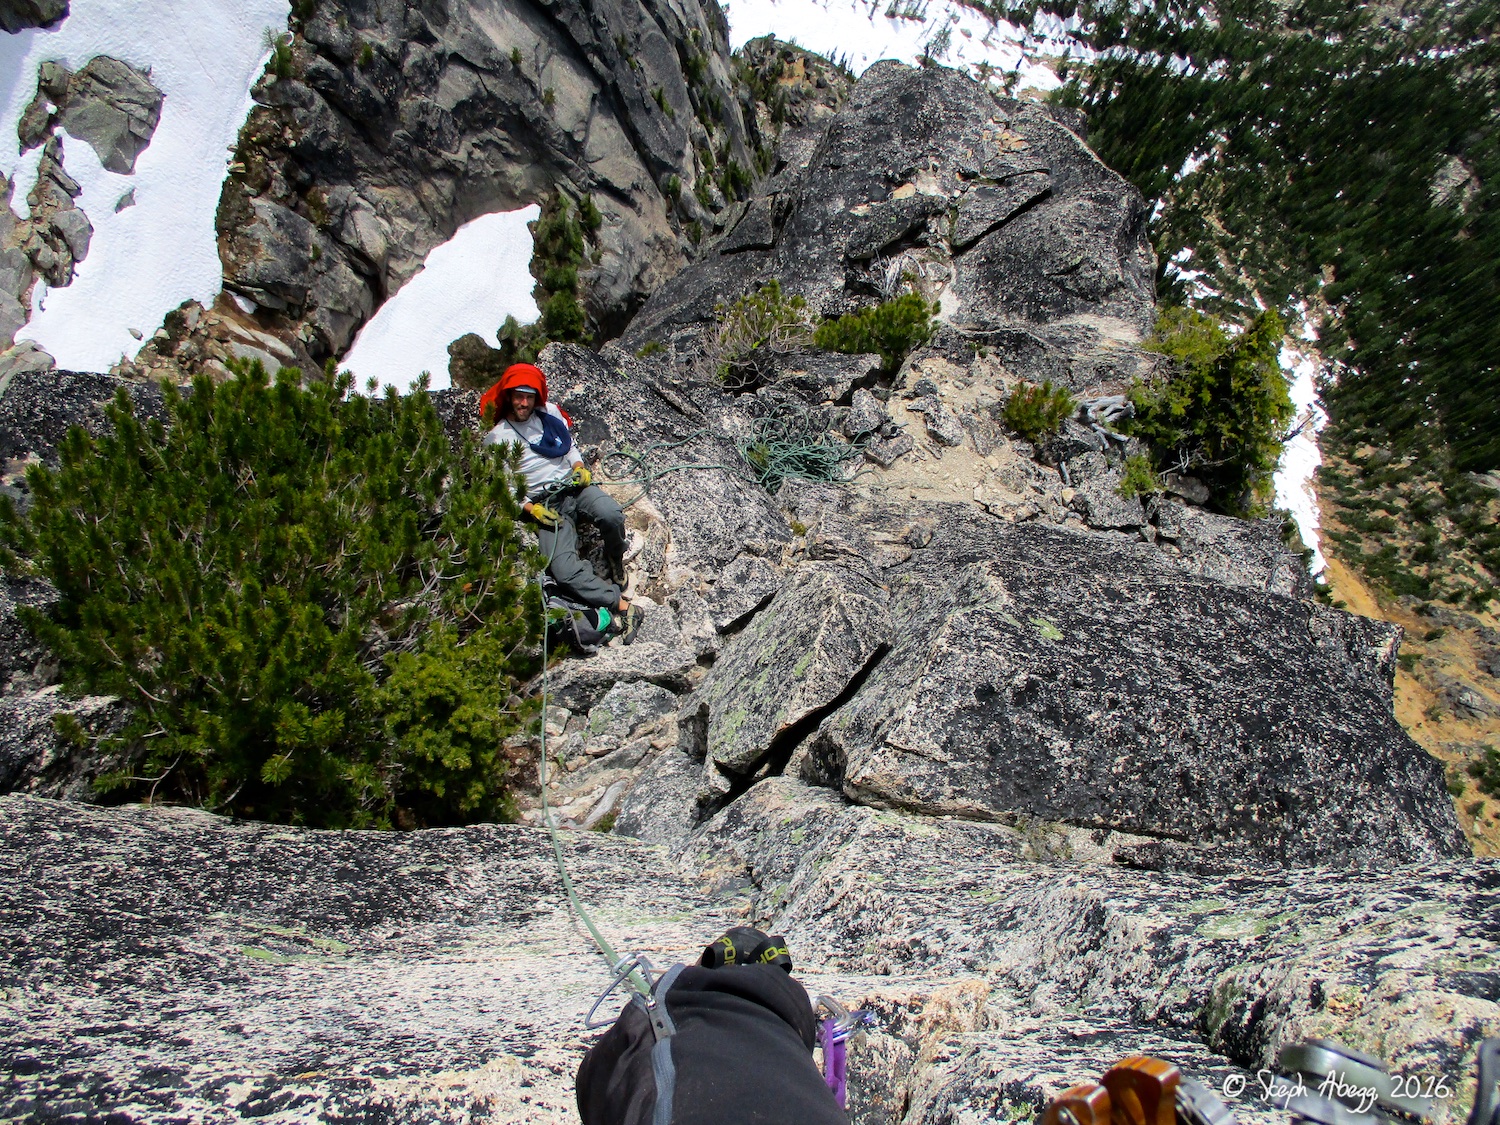
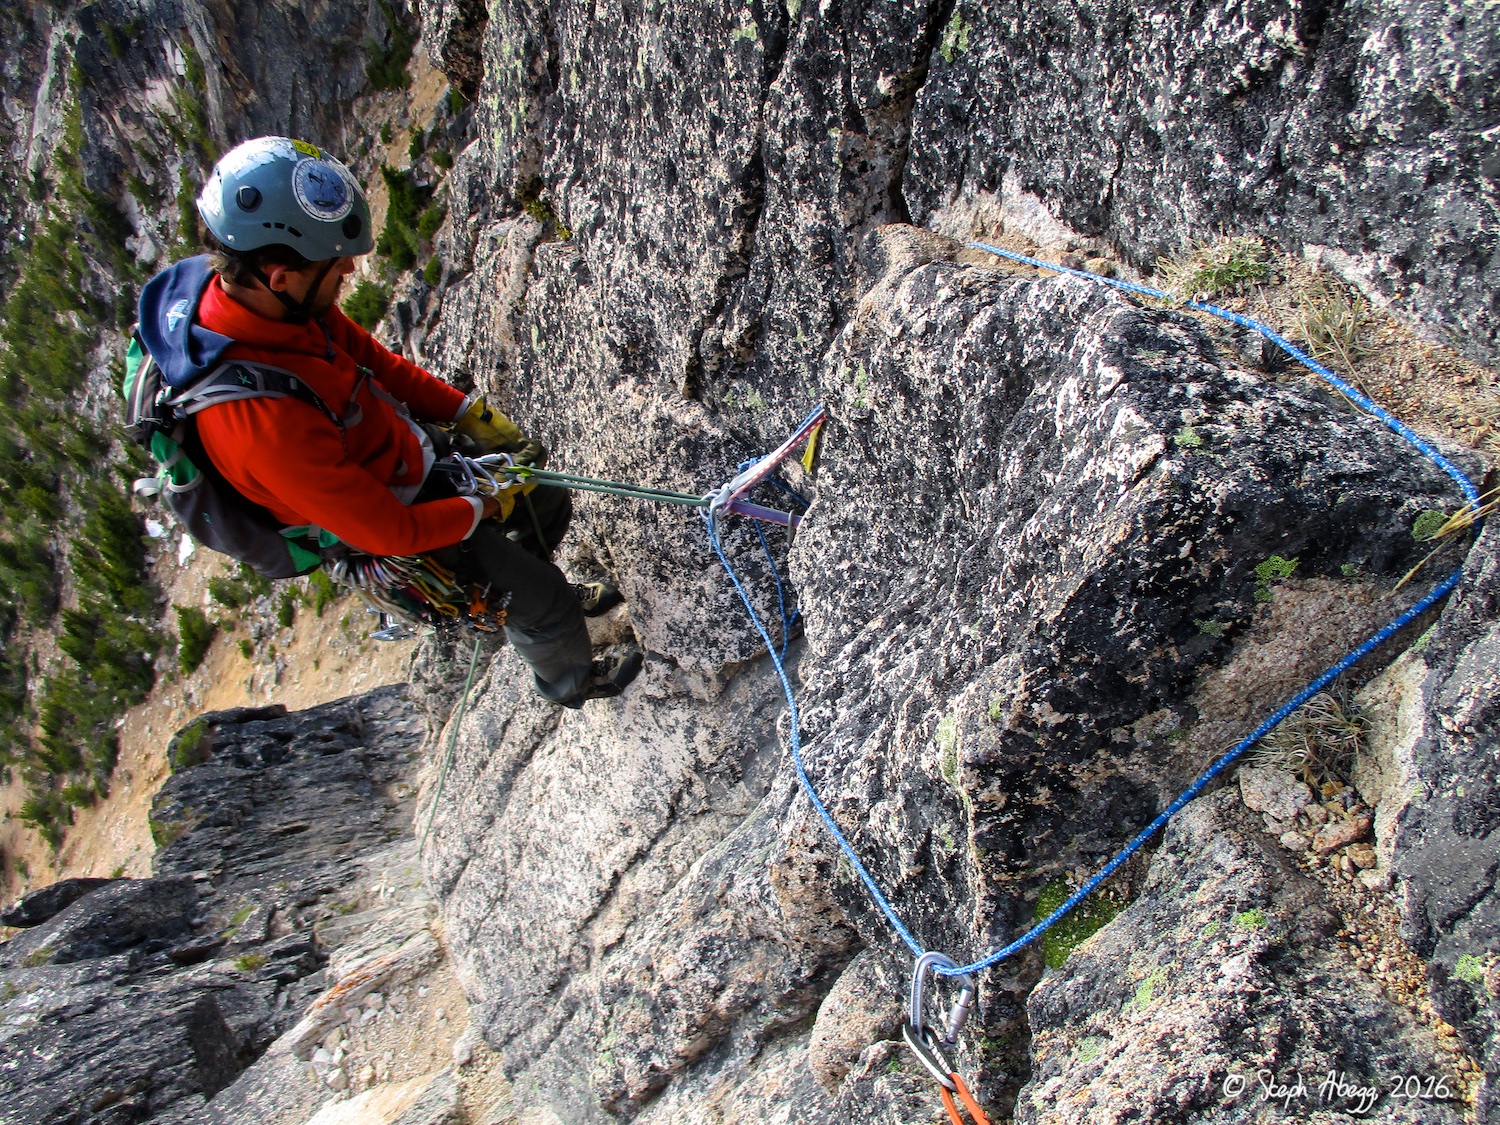
24-25. From the top of Pitch 4, you move the belay about 200 feet the other side of the ledge. To get there, you walk behind the huge boulder on the ledge.
26. Sam leading Pitch 5. We linked this with Pitch 6.
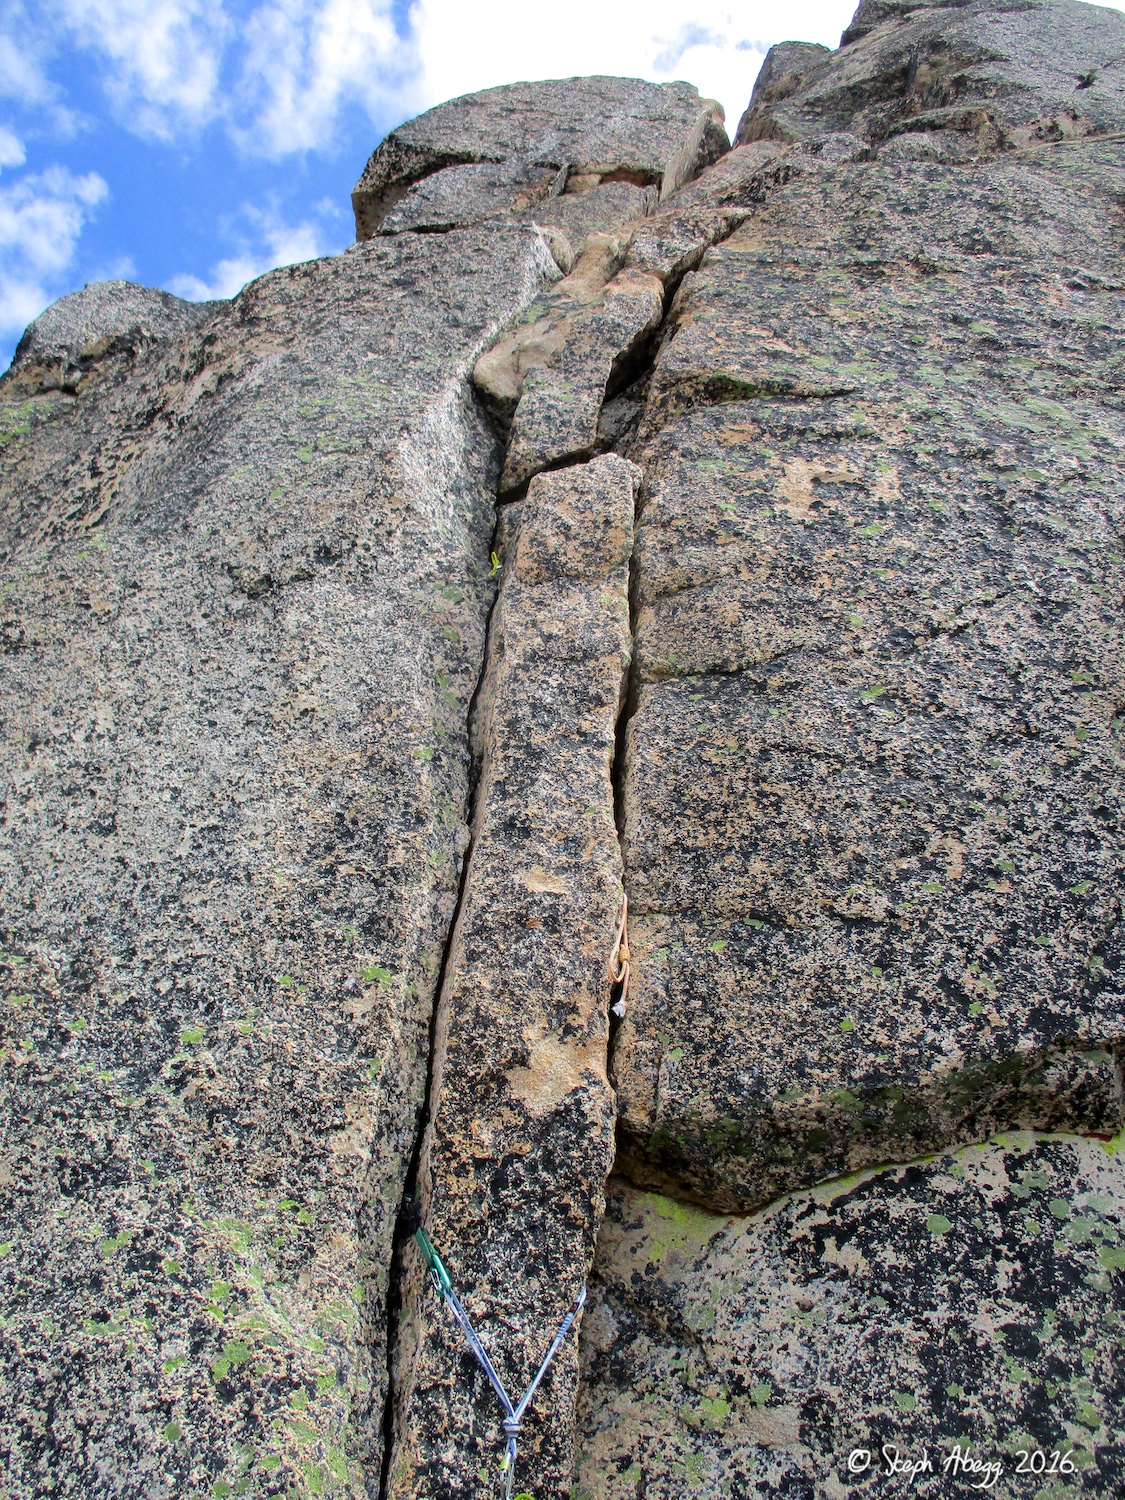
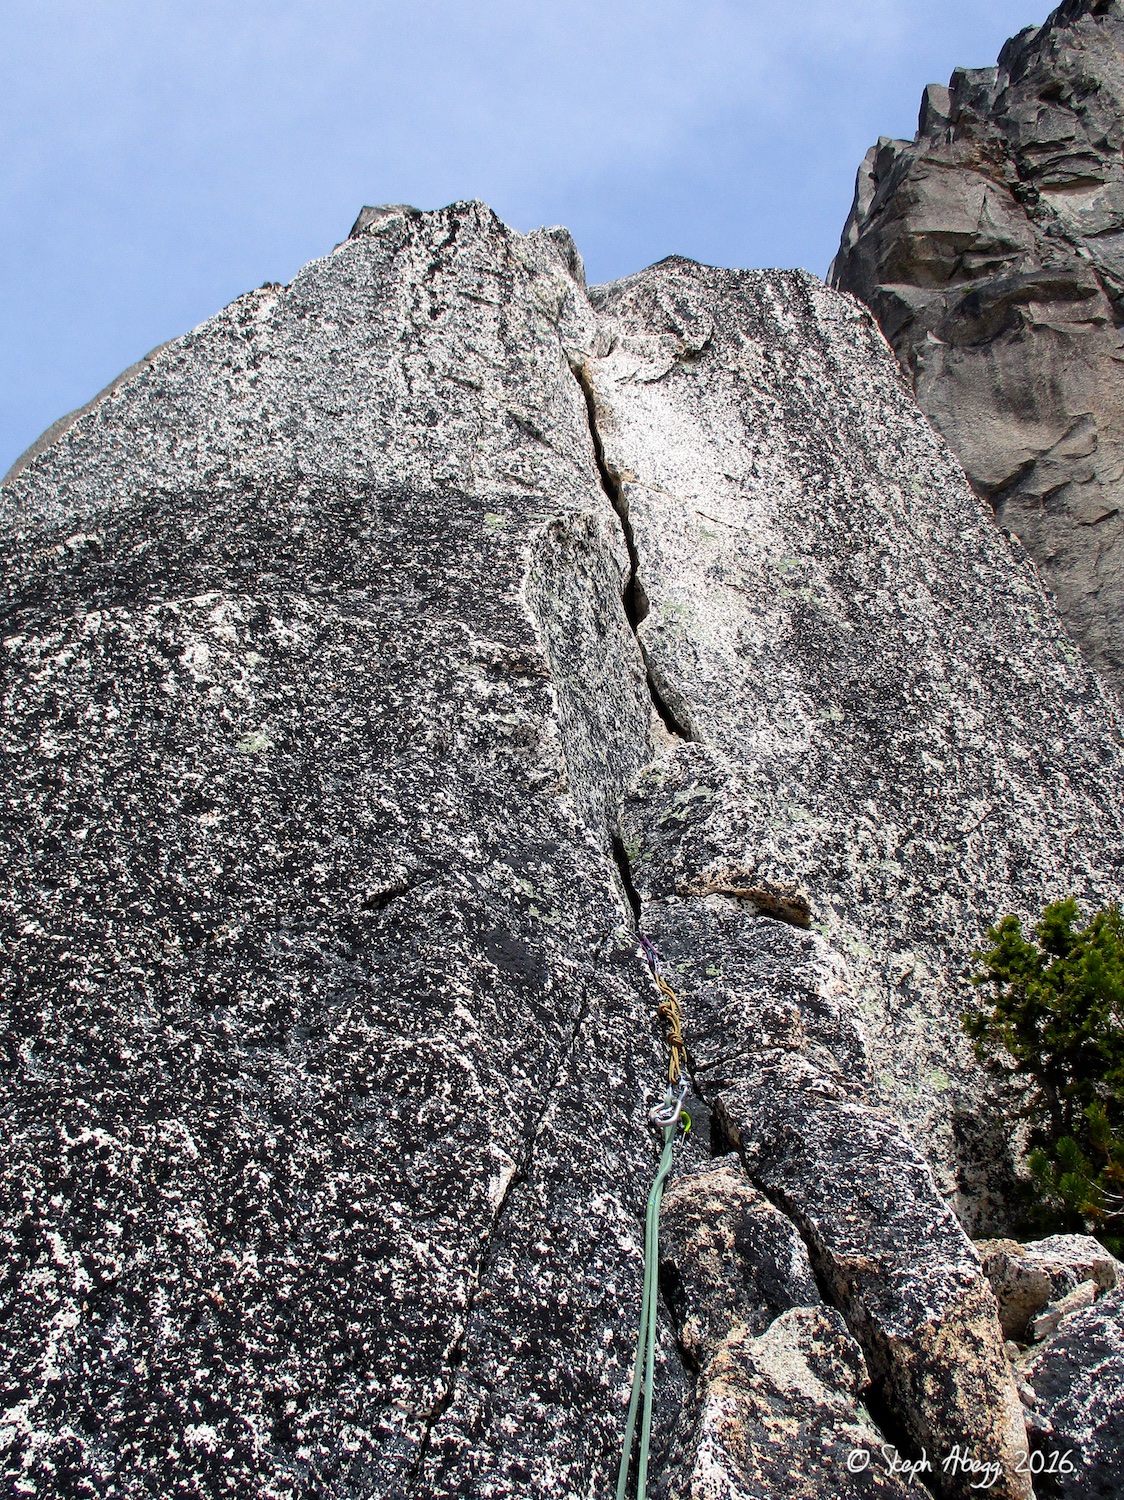
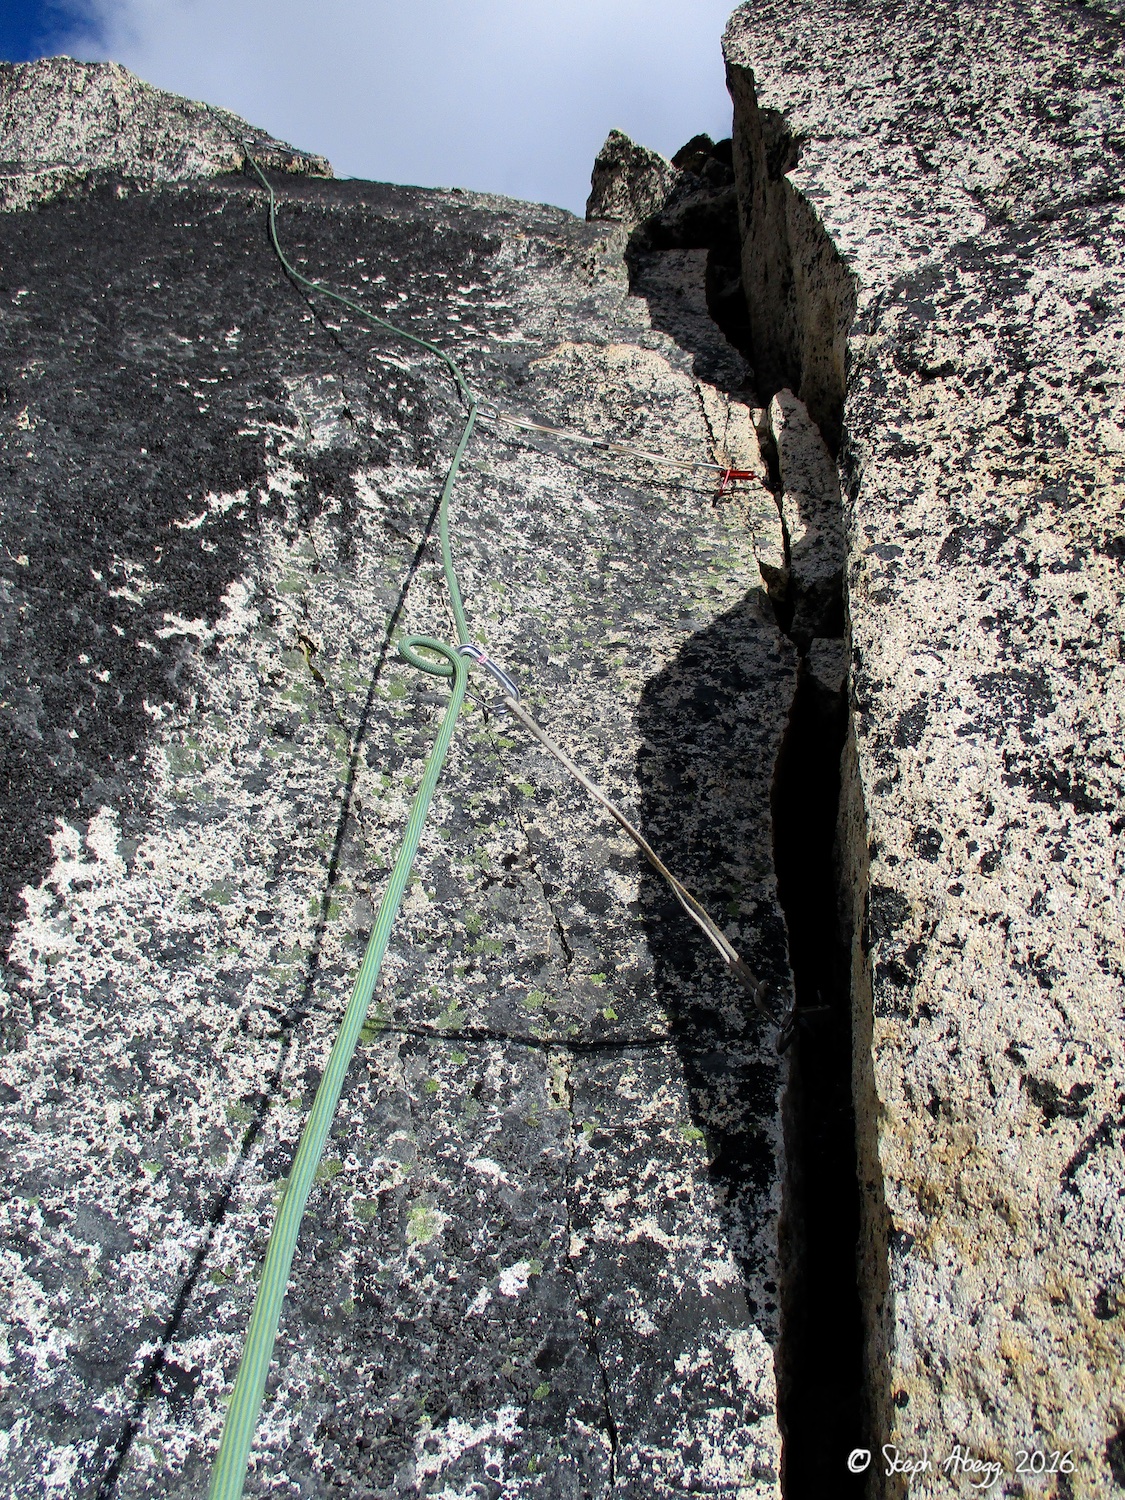
27. The right hand (and probably the most popular) option for Pitch 6 goes up this corner/crack system.
28. The corner at the top of Pitch 6. Takes medium nuts.
29. The final crack to the summit. The crack is wide (4-5") but the climbing seems pretty mellow.
30. Sam on the summit of Burgundy Spire. Chianti Spire is behind him.
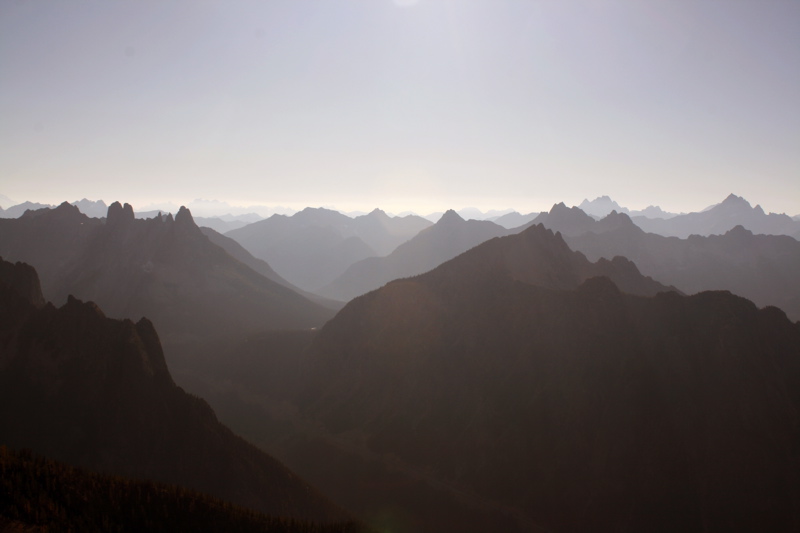
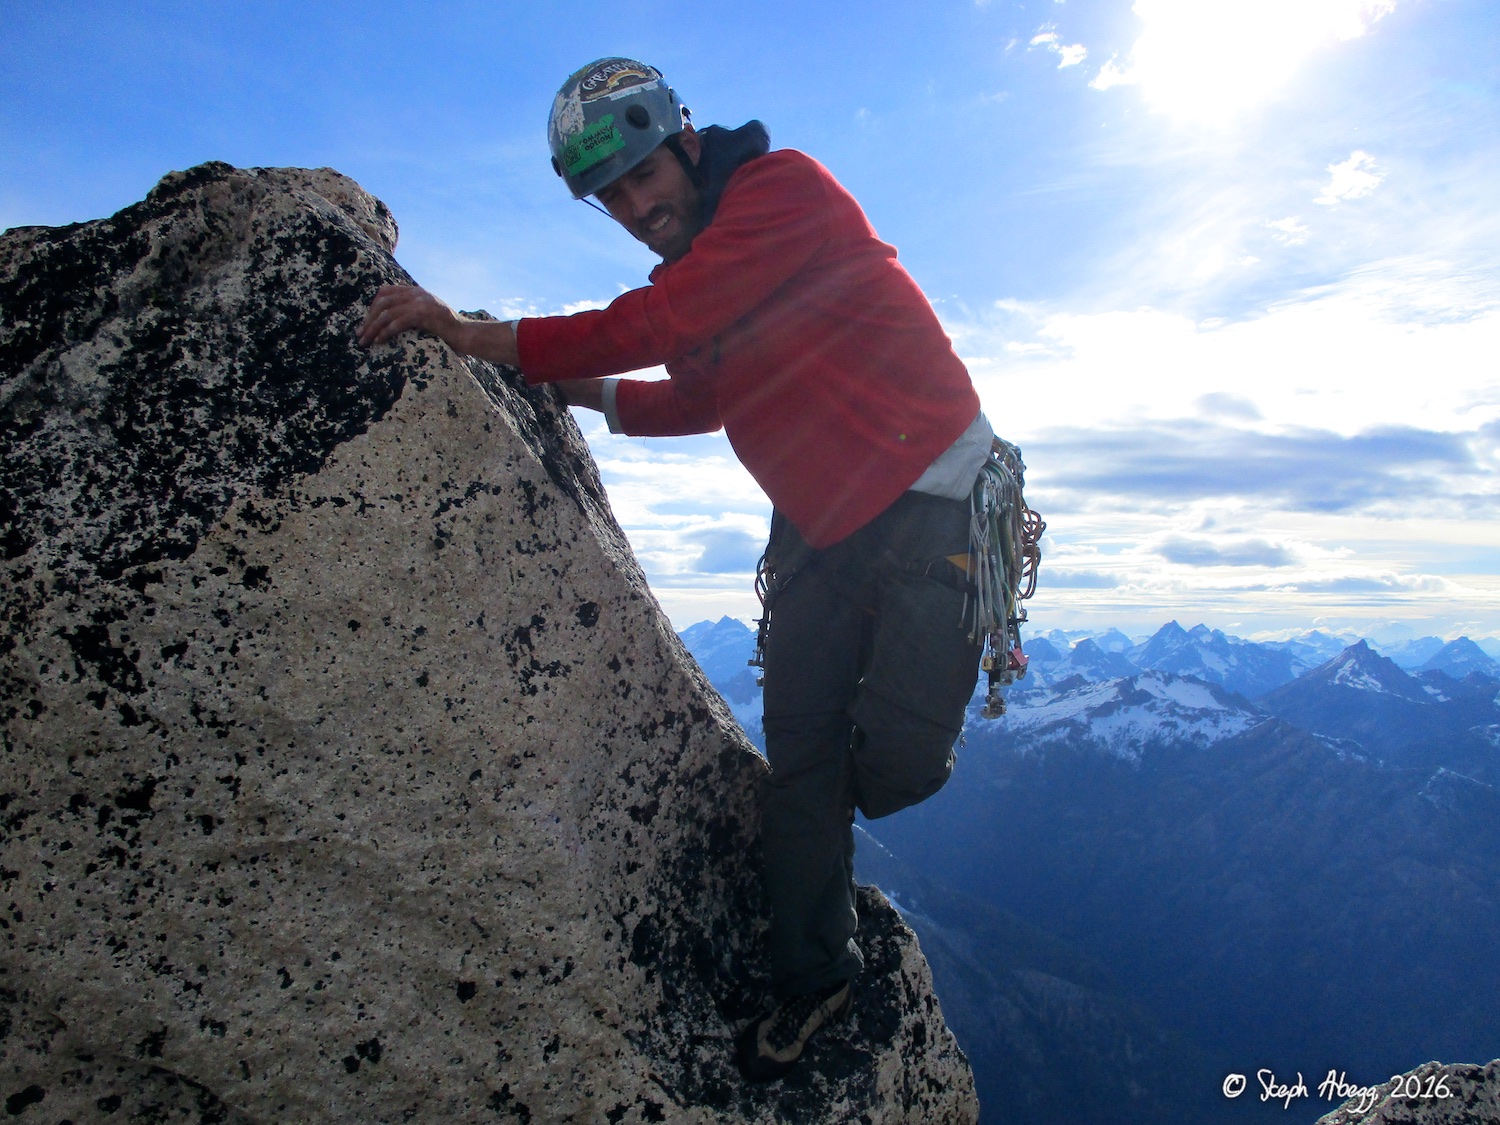
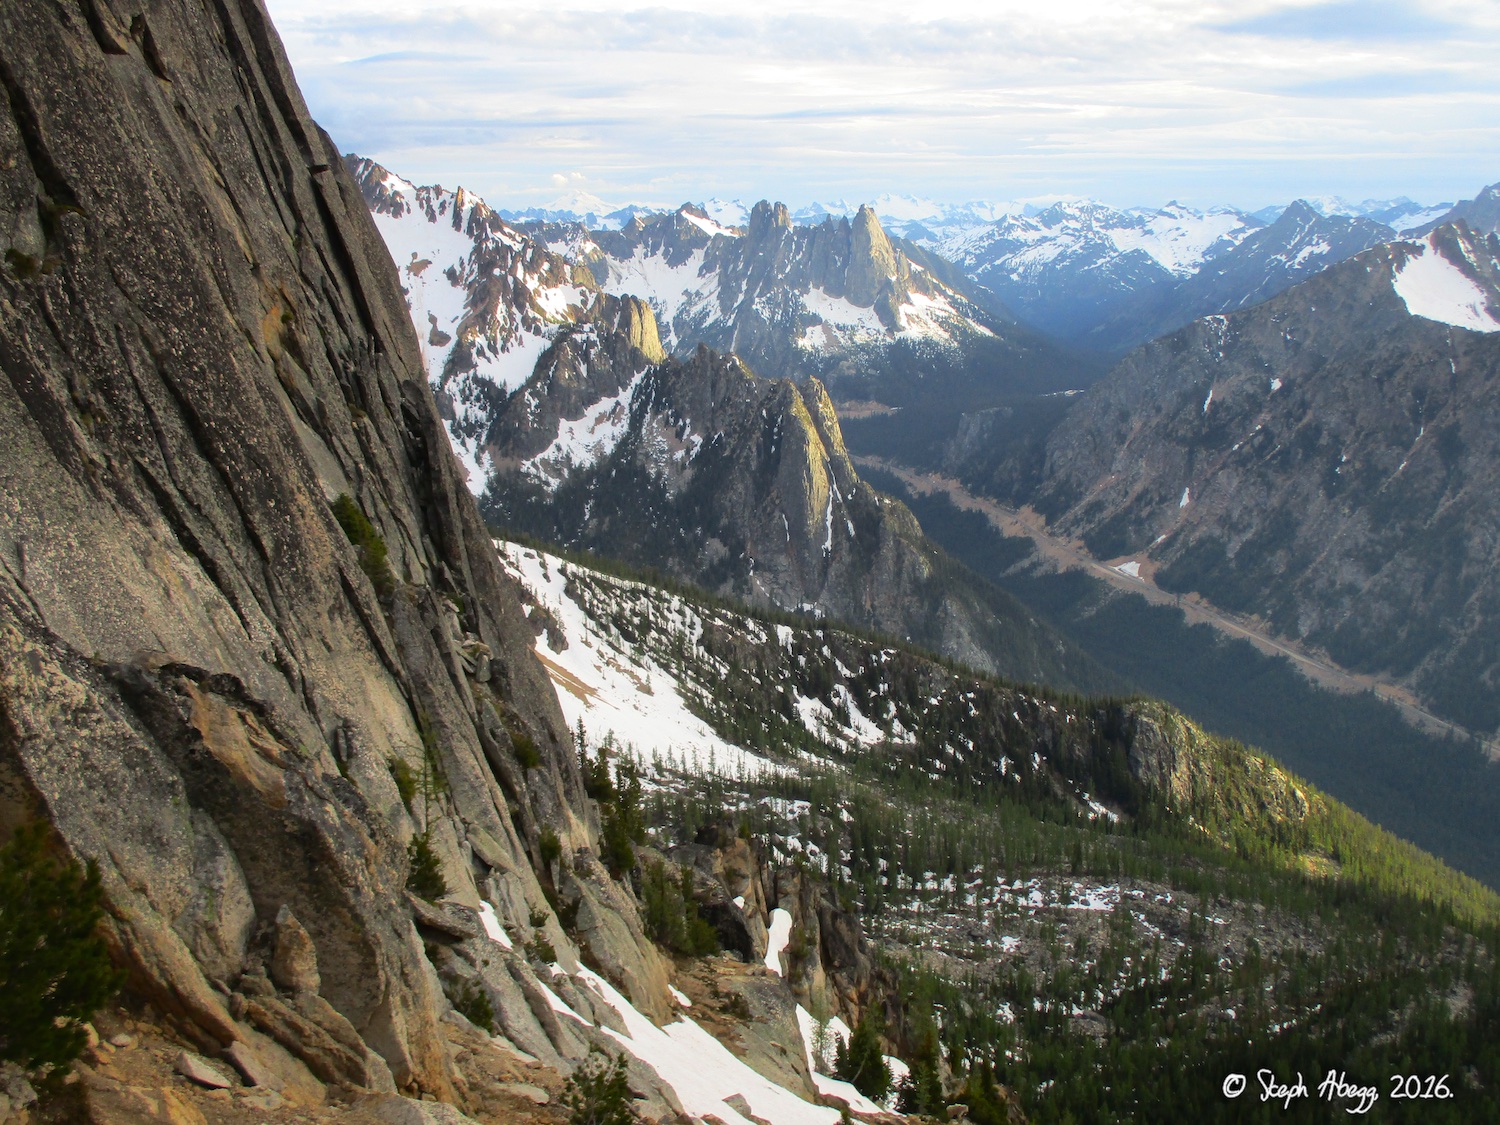
31. Sam on the summit of Burgundy Spire, enjoying the sea of the Cascades stretching out to the west.
32. Sam on the summit of Burgundy Spire.
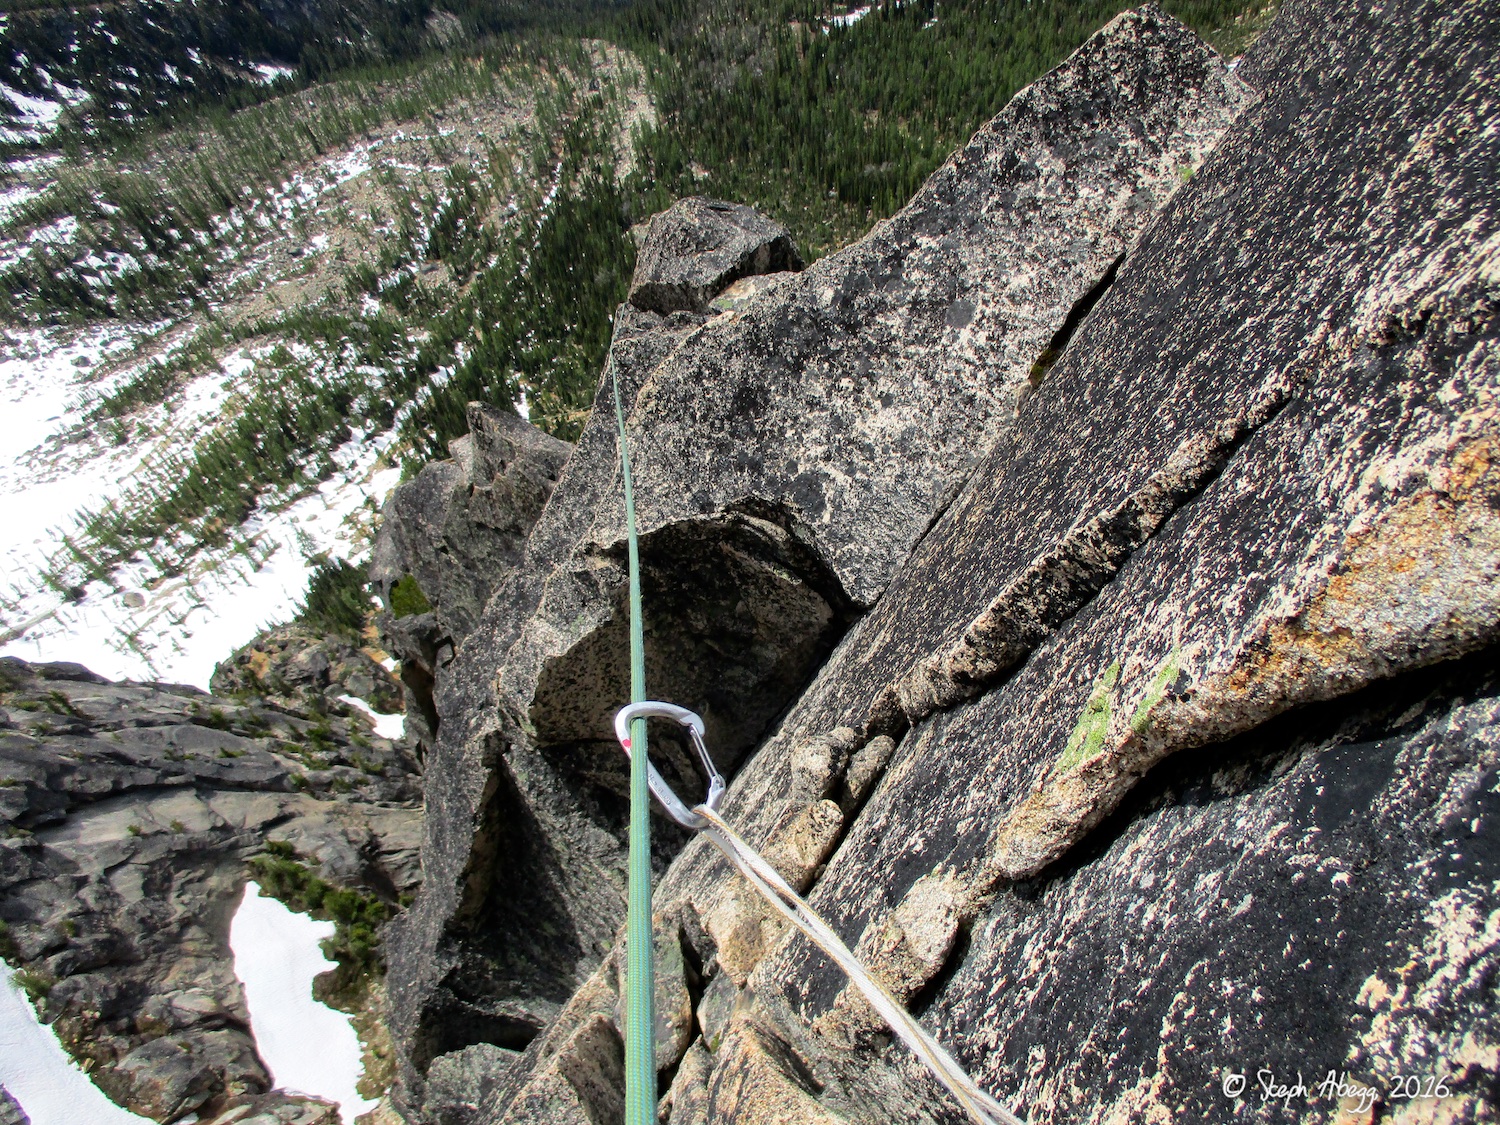
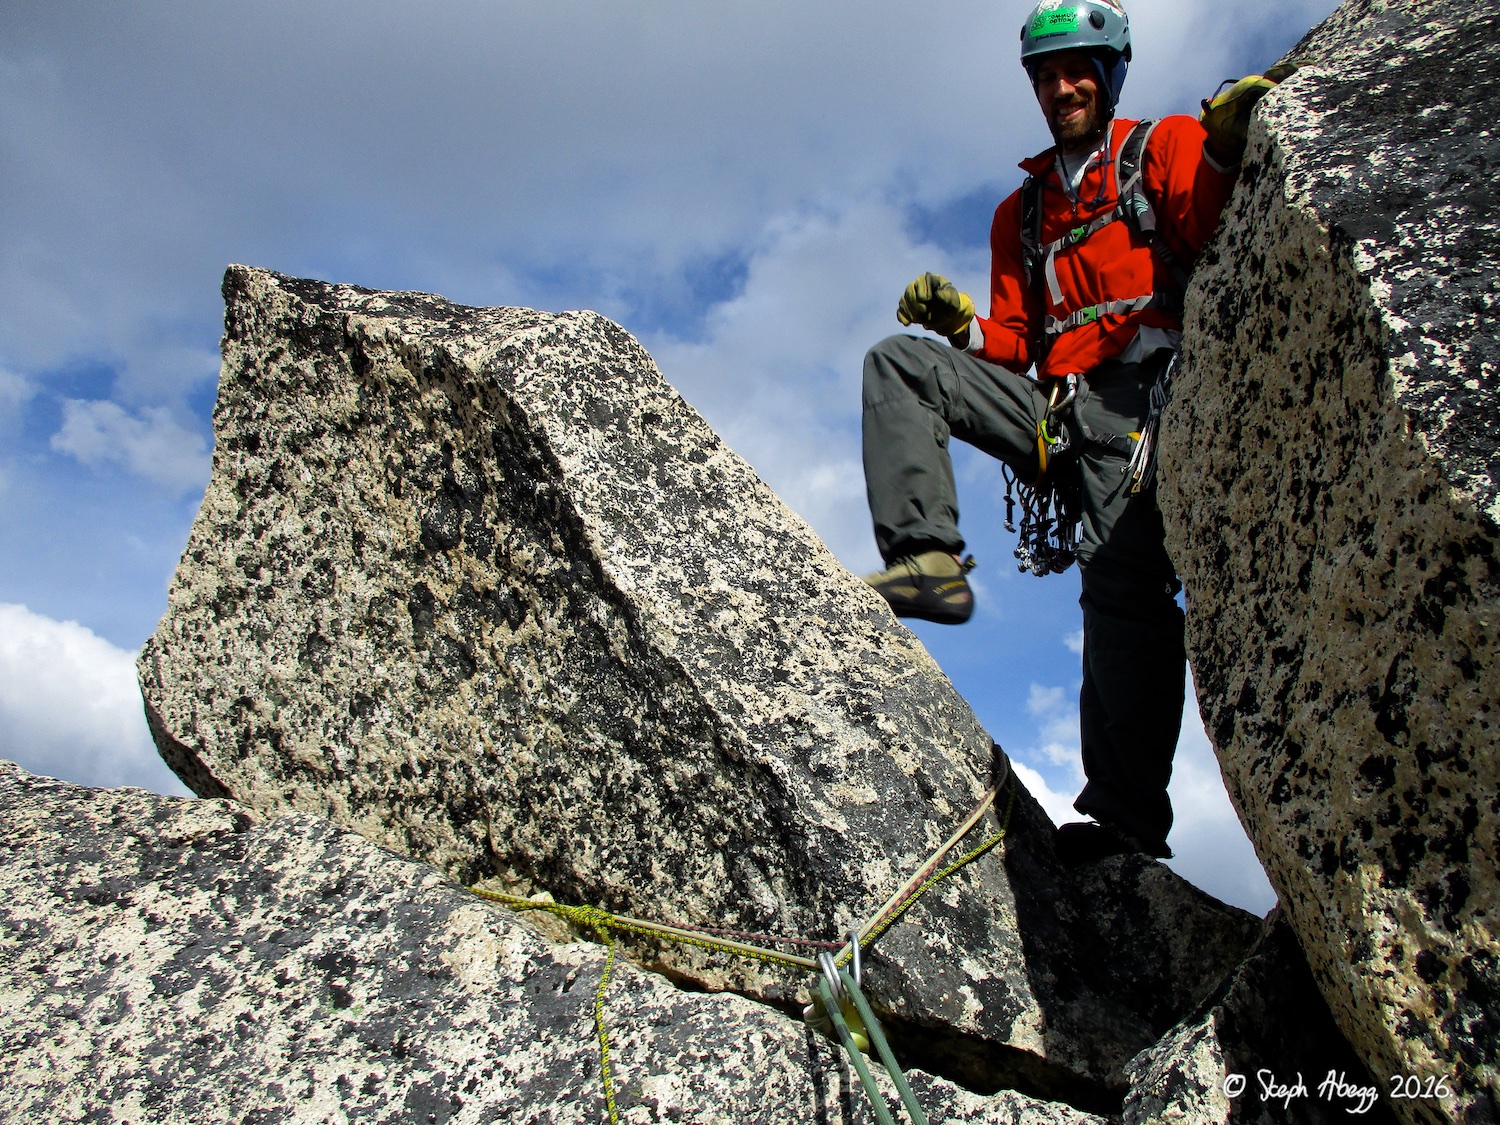
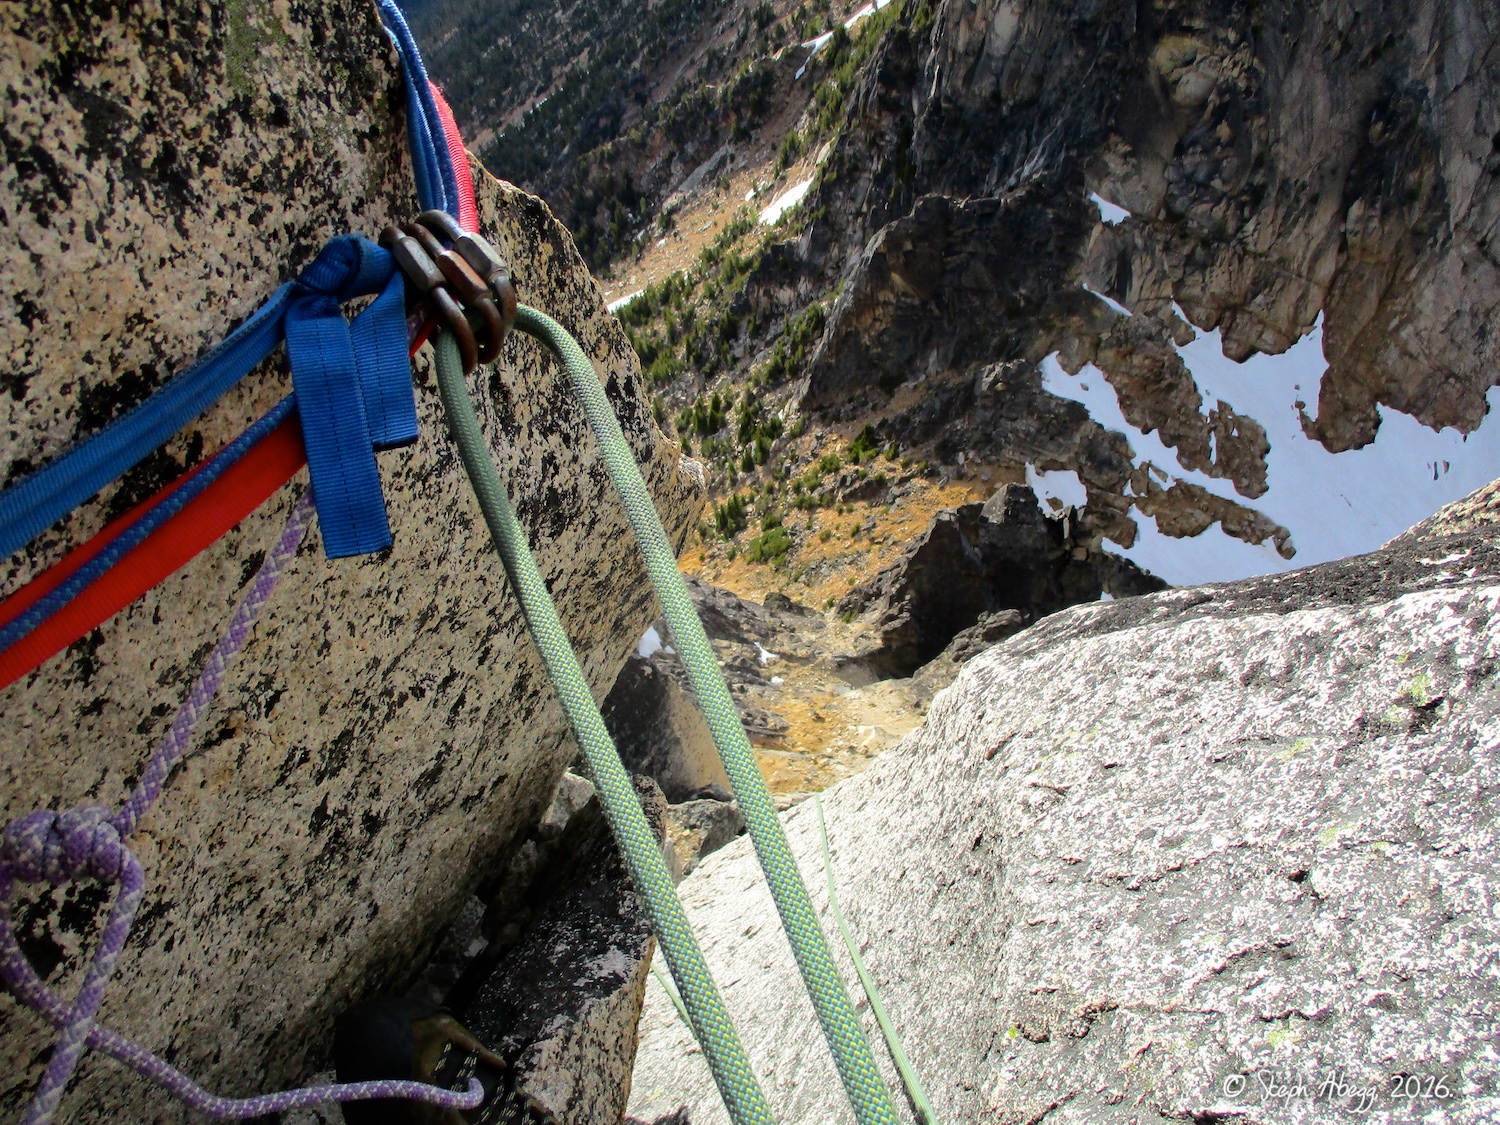
33. The descent involves rapping the route. The first rappel is from this boulder on the summit. A single 70m rope is ideal (a 60m woud work but require several more rappels, and double ropes would be annoying and get stuck).
34. The first rappel from the summit. The crack in the photo is one of the variation options of the upper north face route, and leads to an awesome looking (but wide, big gear required) crack above. We ended up getting the end of our rope stuck in a constriction at the just above the crack in this photo, and had to lead up it to free the rope. Fortunately it was pretty good and moderate 5.8 climbing.
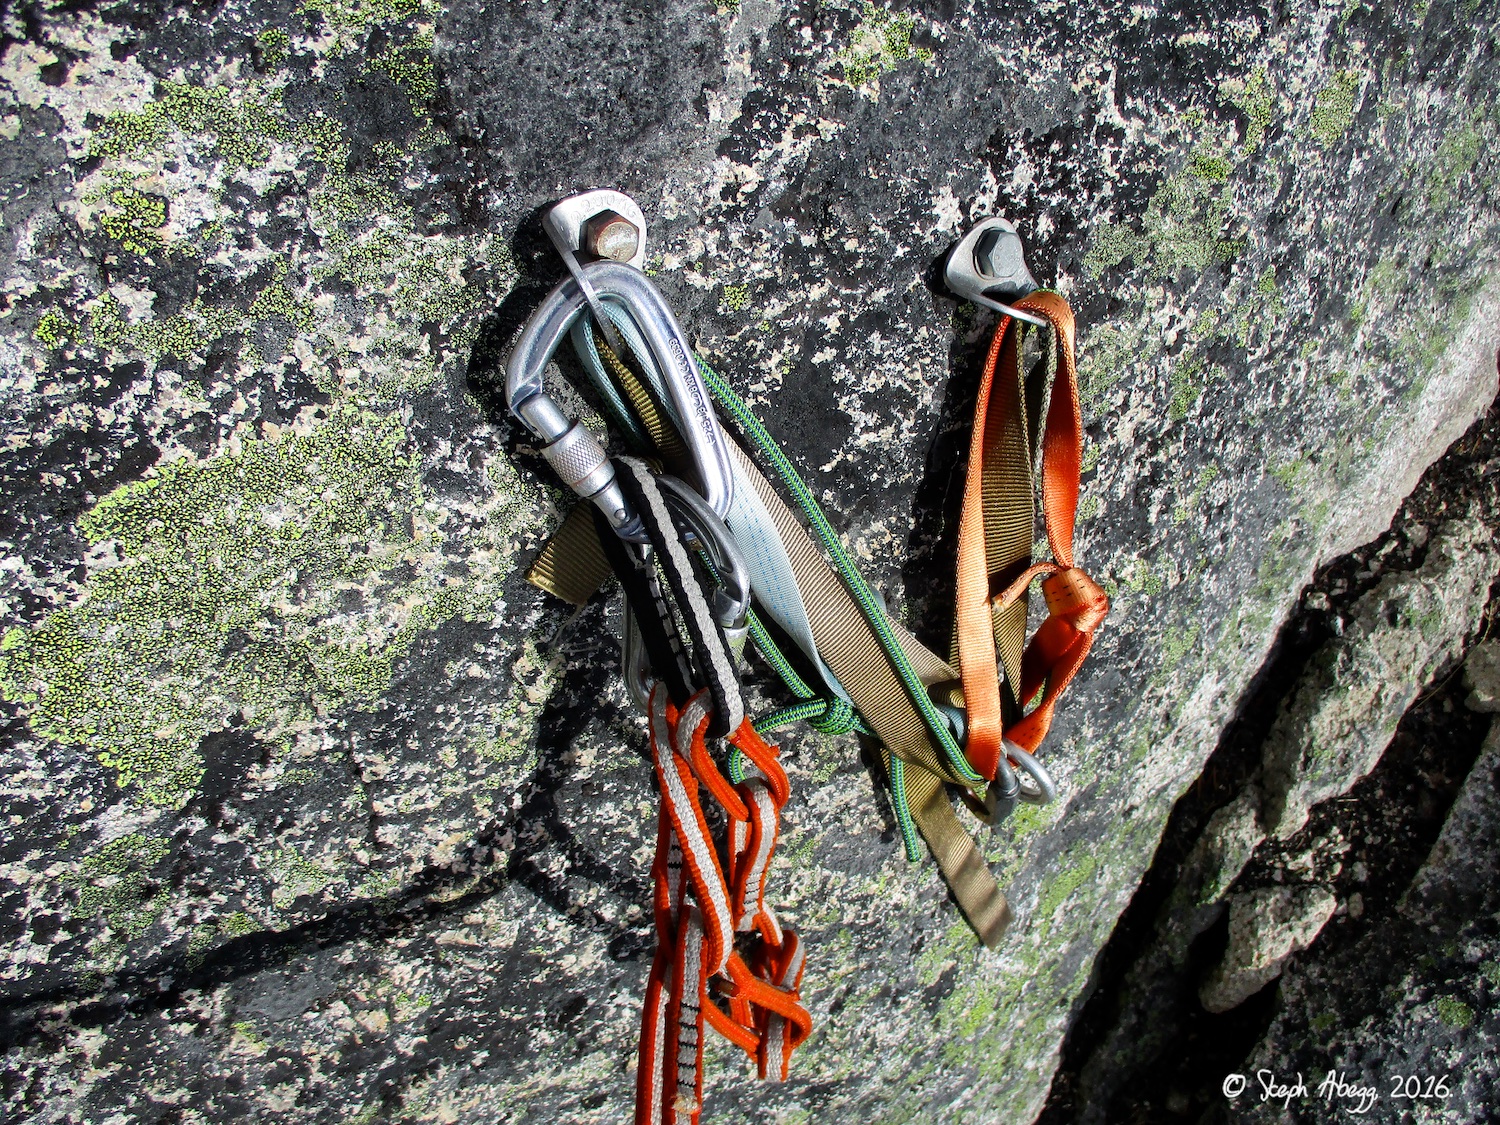
35. A bolted rap station on the upper north face. This was our second rappel.
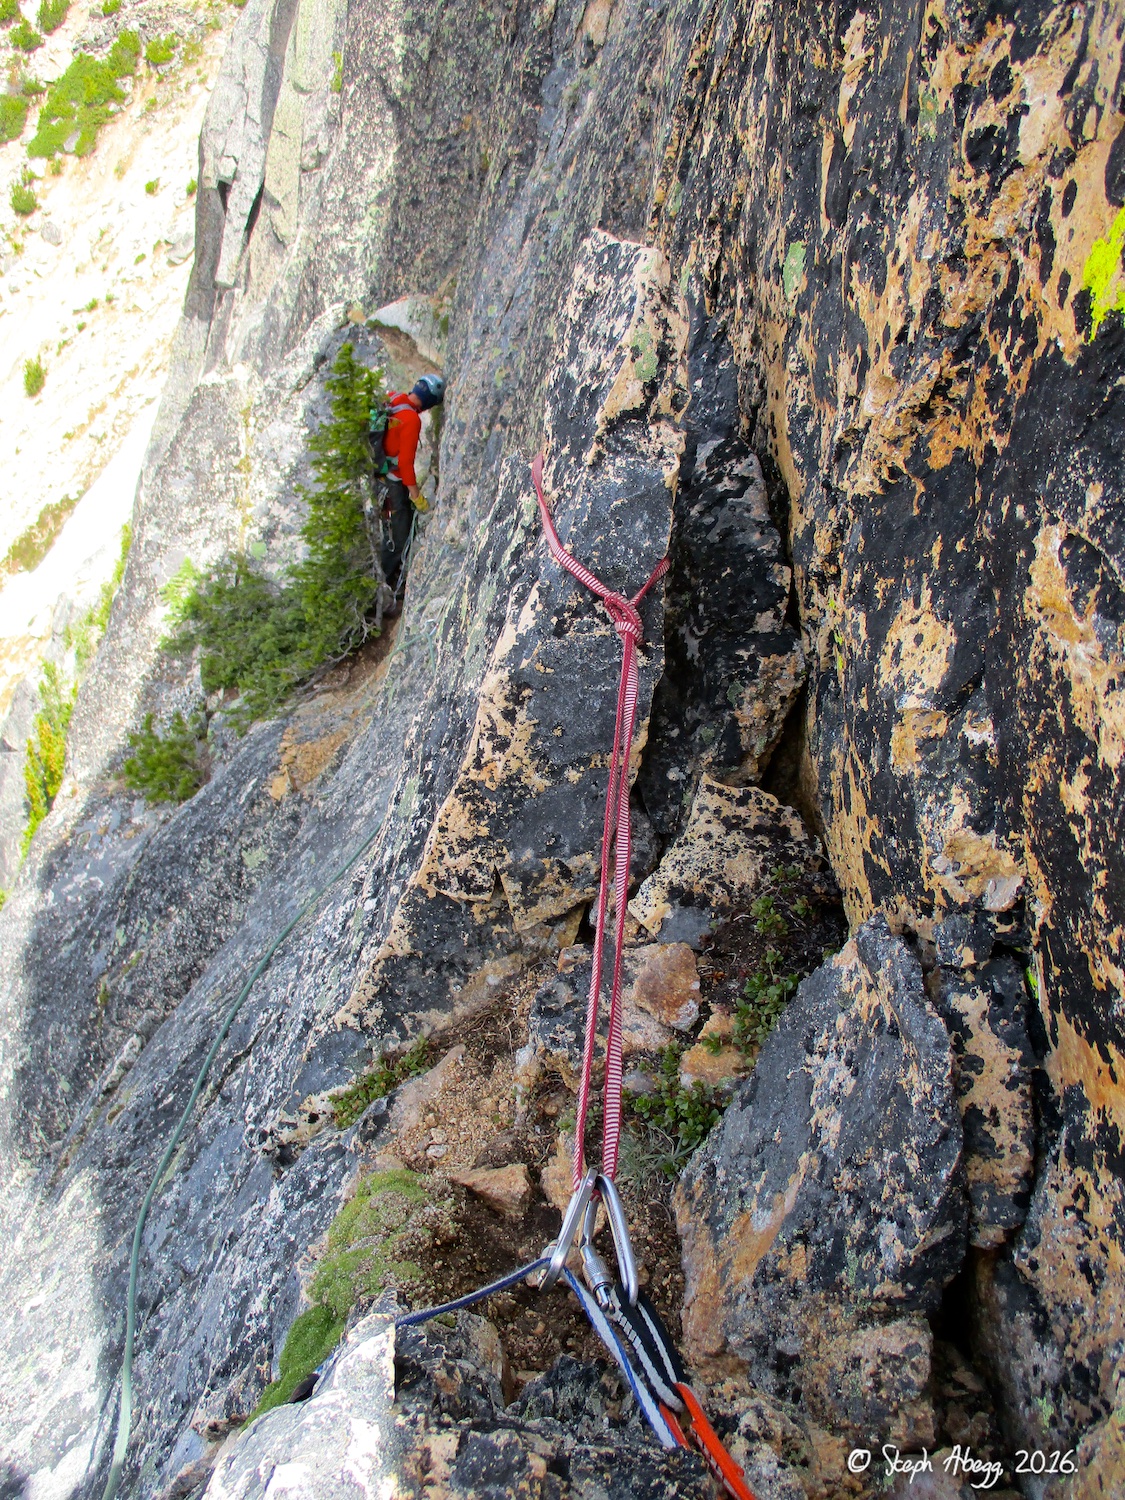
36. The rappel station off the edge of the ledge at the top of Pitch 4.
37. The rappel station at the top of Pitch 2.
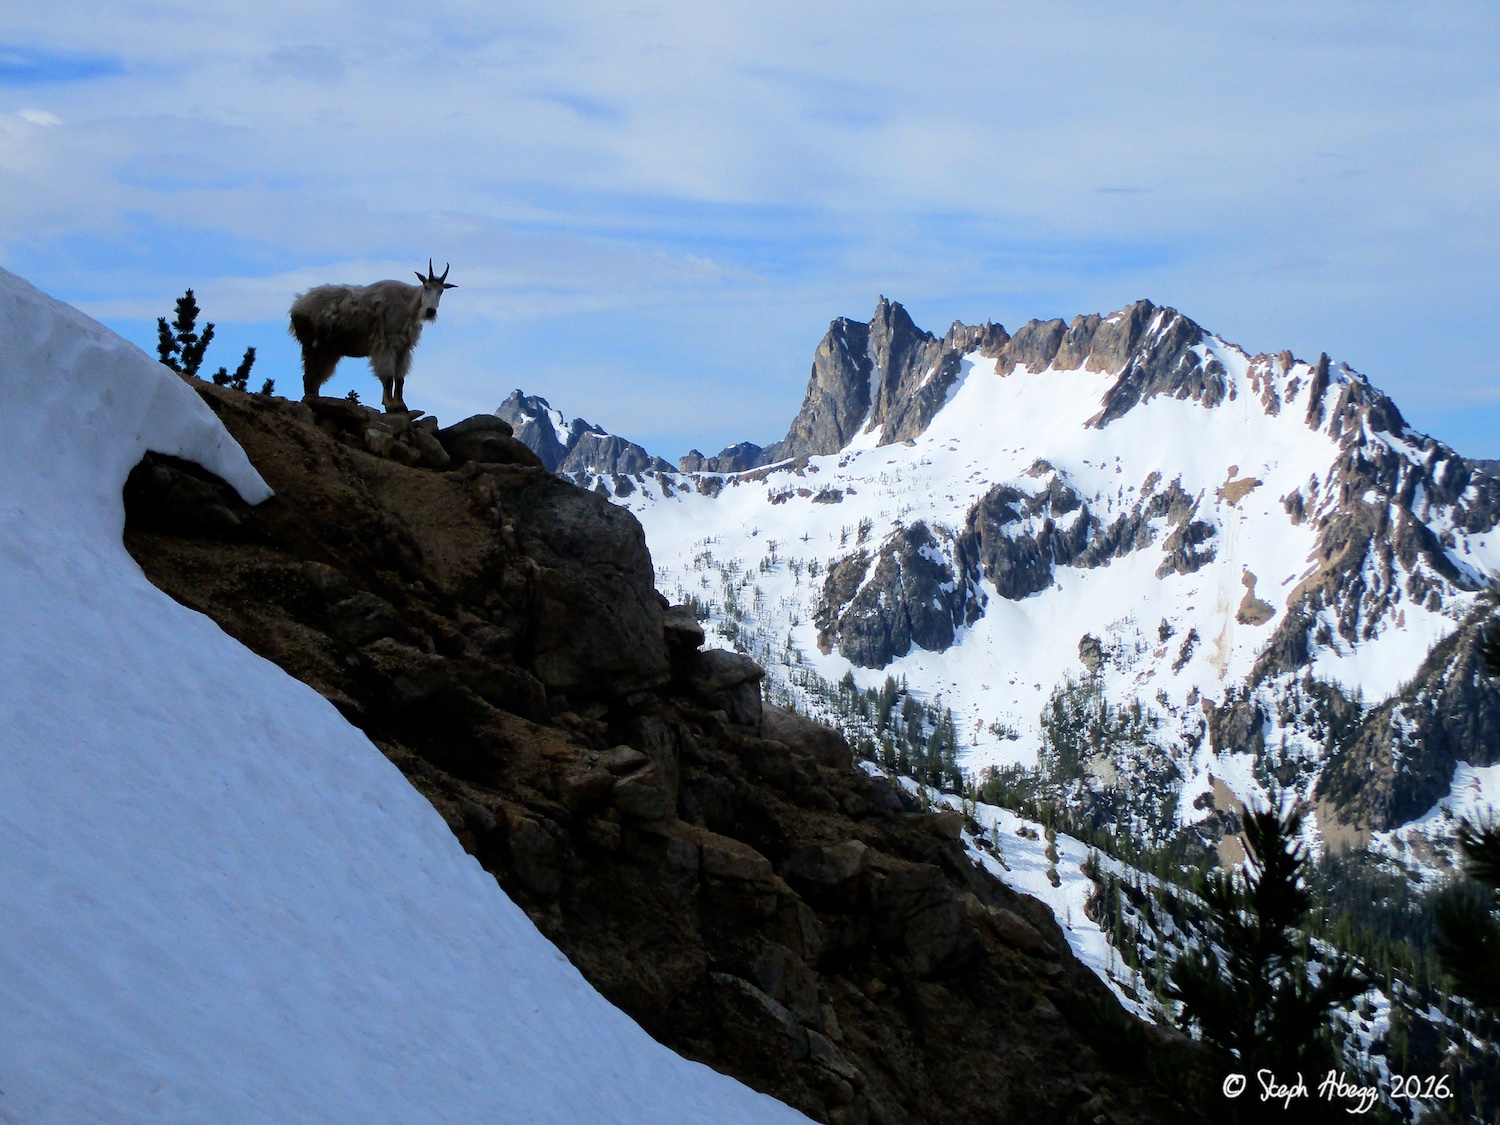
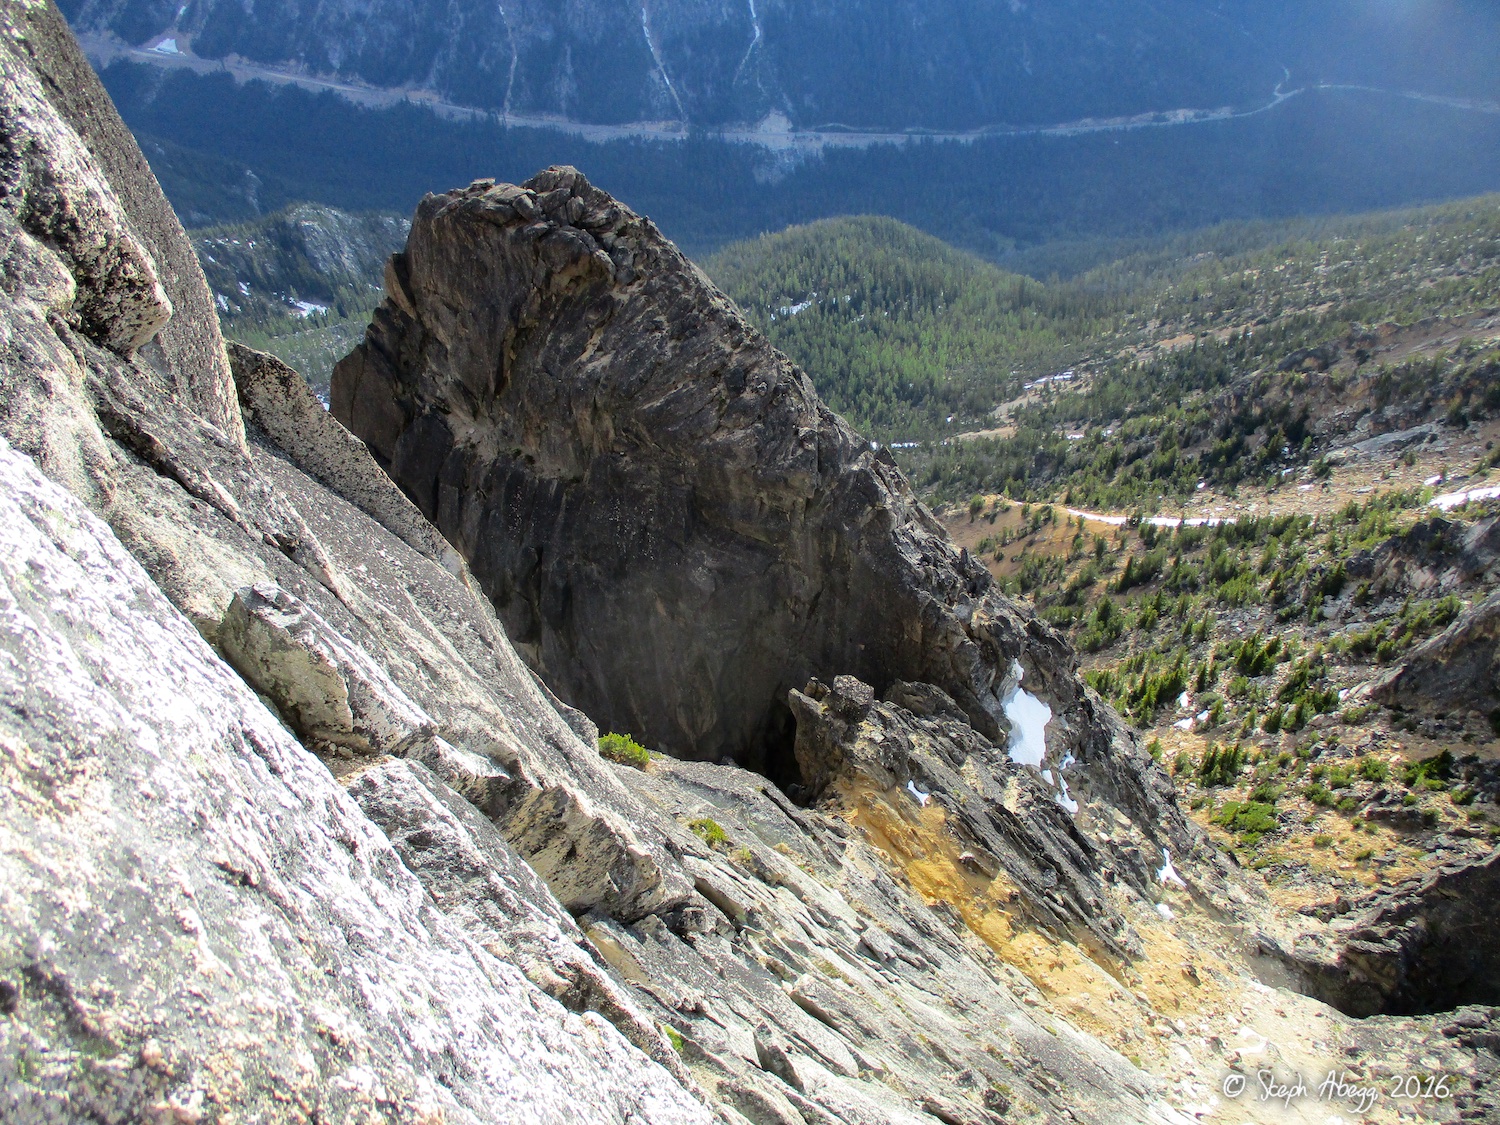
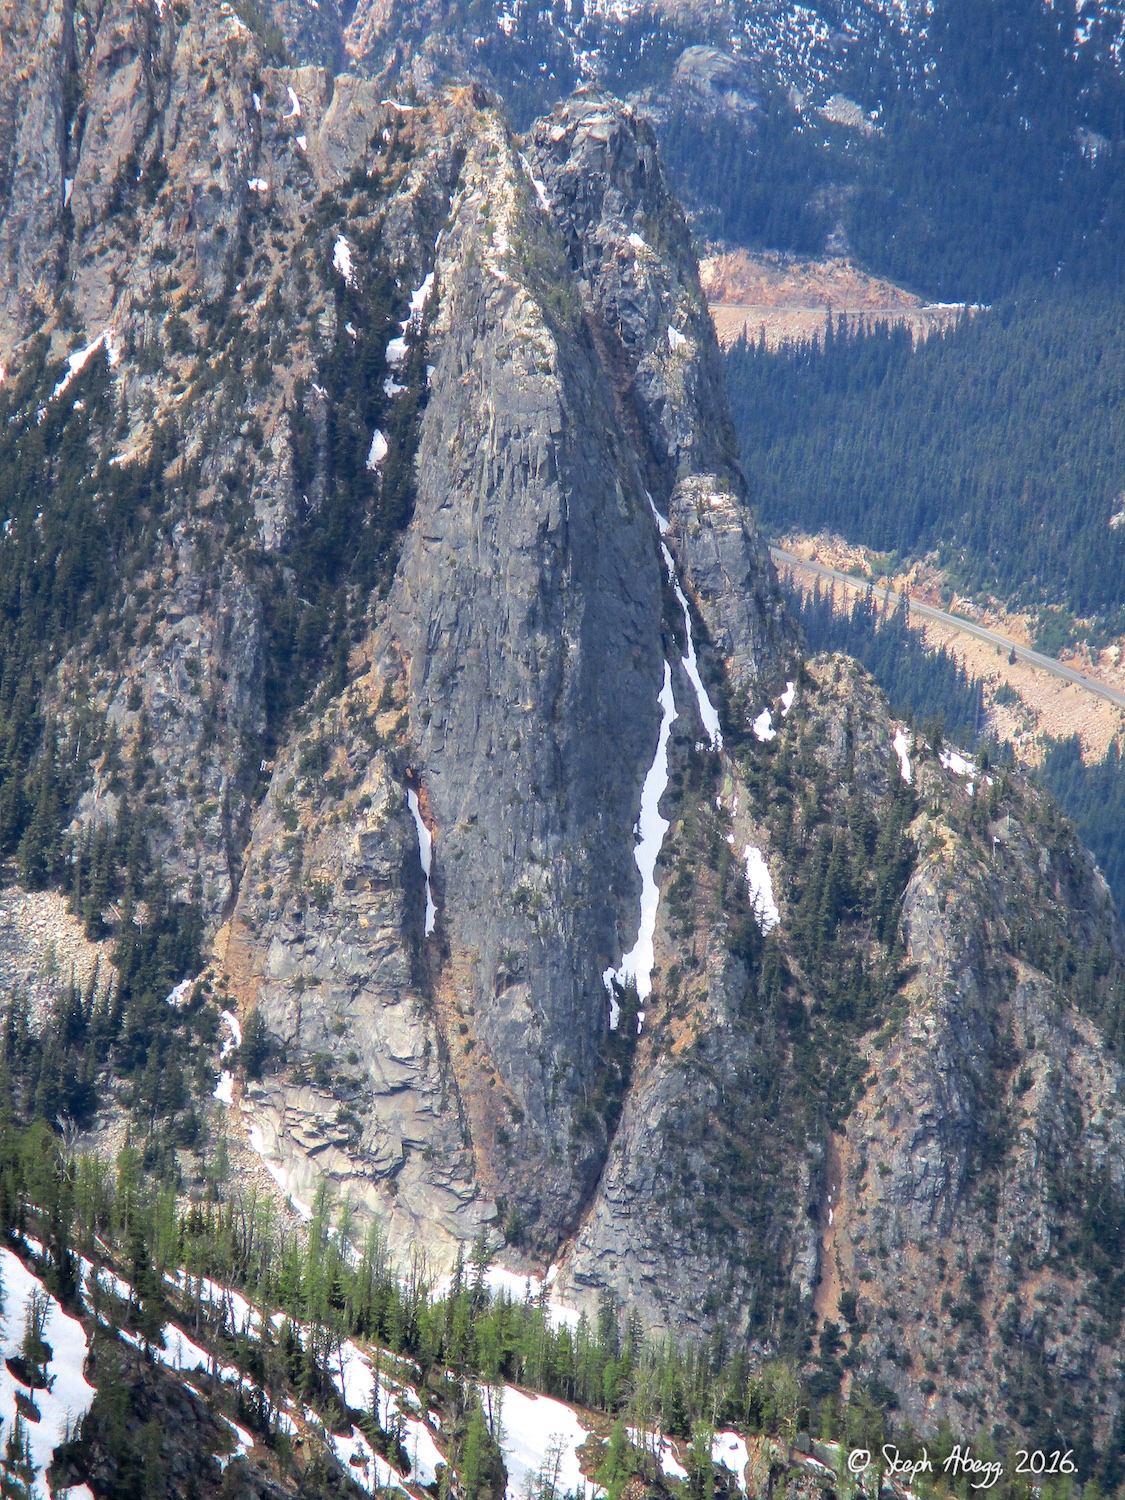
38. We noticed this rock buttress on the north end of Kangaroo Ridge, facing the Wine Spires but facing away from the highway. I wonder if there are any routes on it?
39. Vasiliki Tower as seen from Burgundy Spire. This is the tower rising above the north end of Burgundy Col.
40. The view out towards Kangaroo Ridge and the Liberty Bell group from Burgundy Spire. We enjoyed the evening light as we hike out. We made it to the car without needing to pull out headlights.
Useful beta. Updated route information. Corrections. Historical notes. Interesting facts. No fluff please. Please do not put links in your comment, as my spam filter will filter those comments out.