THIS TRIP REPORT IS STILL MOSTLY IN THE EMBEDDED HTML FORMAT OF MY OLD WEBSITE.
Back in February, Brian and I started to plan a multi-day climbing adventure in the North Cascades for the summer ahead. Two of our favored options were the Chilliwack Group area (Redoubt, Spickard, Mox, etc.) and the Thunder-Bridge-Park Creek area (Goode, Storm King, Logan, etc.). We couldn't decide. So we came up with a good solution: do both!
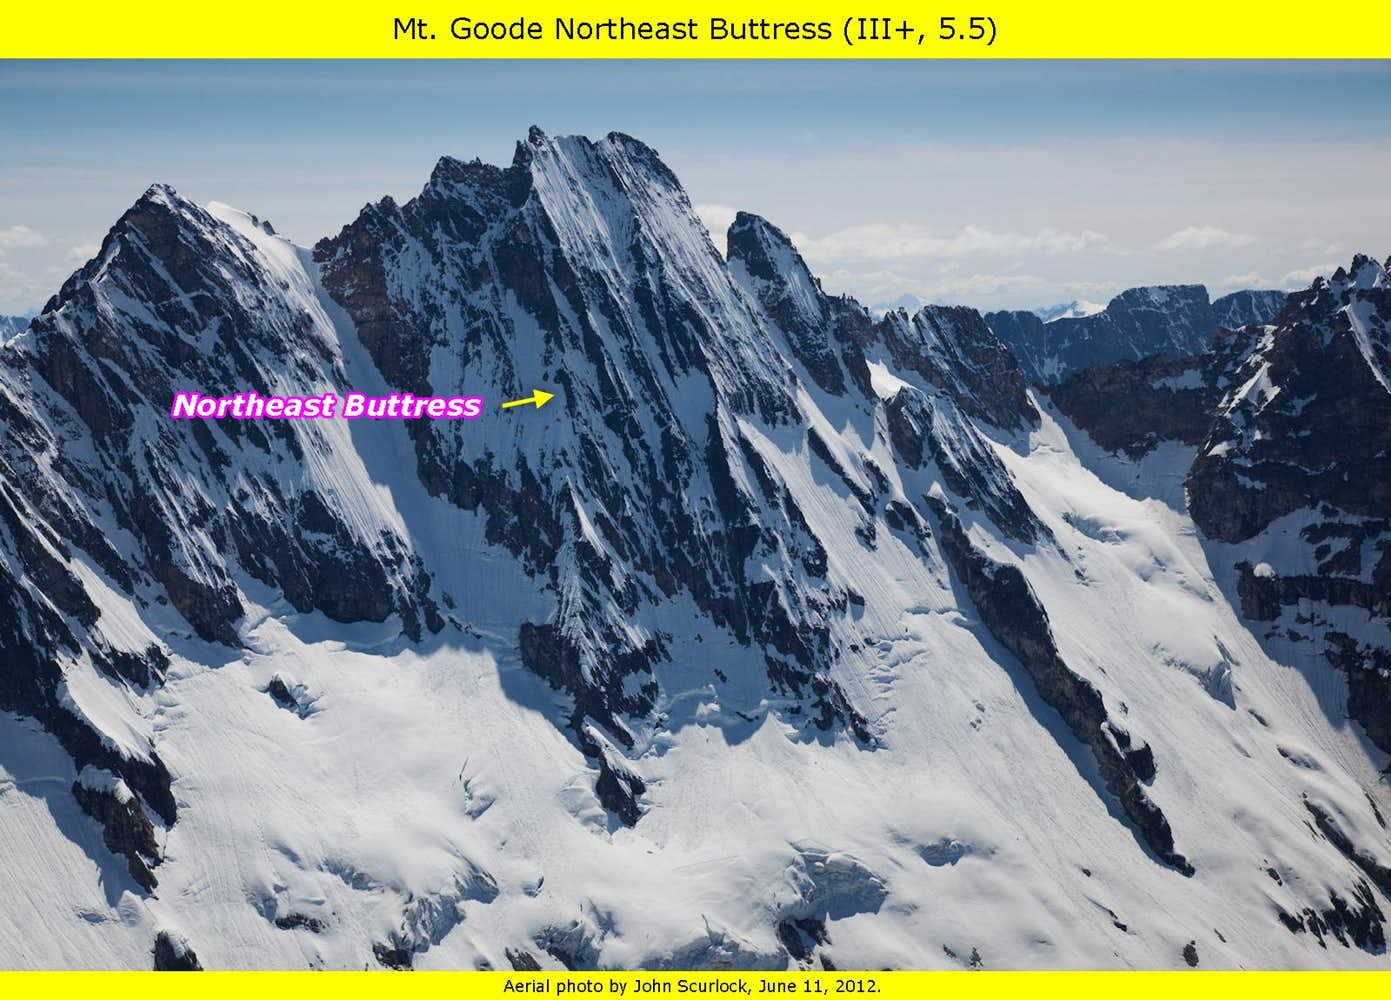
The first week of July had been a fun and successful five-summit romp through the Chilliwack area, which was still rather snowy in the early season conditions. Now with a month of snowmelt (particularly off the NE Buttress of Goode, which we preferred to be dry) and the a solid high pressure system having settled over the Cascades, it was time to enact our Thunder Slam.
For six days we traversed through some of the highest and most rugged and beautiful terrain in the North Cascades, carrying our full packs over two of the highest summits in the Park and scrambling up two others. We included in our itinerary one of the most spectacular camp spots in the North Cascades: on the summit of Mt. Goode, the highest point in NCNP. We occasionally hit a trail, but only briefly before we scampered back into the wilder cross-country terrain. Besides for the first few miles on either end of the trip, we did not encounter a single human being the entire time.
The following page gives maps, route overlays, photos, commentary, and the adventures of a particular tiny stuffed mountain goat. Enjoy!
Itinerary
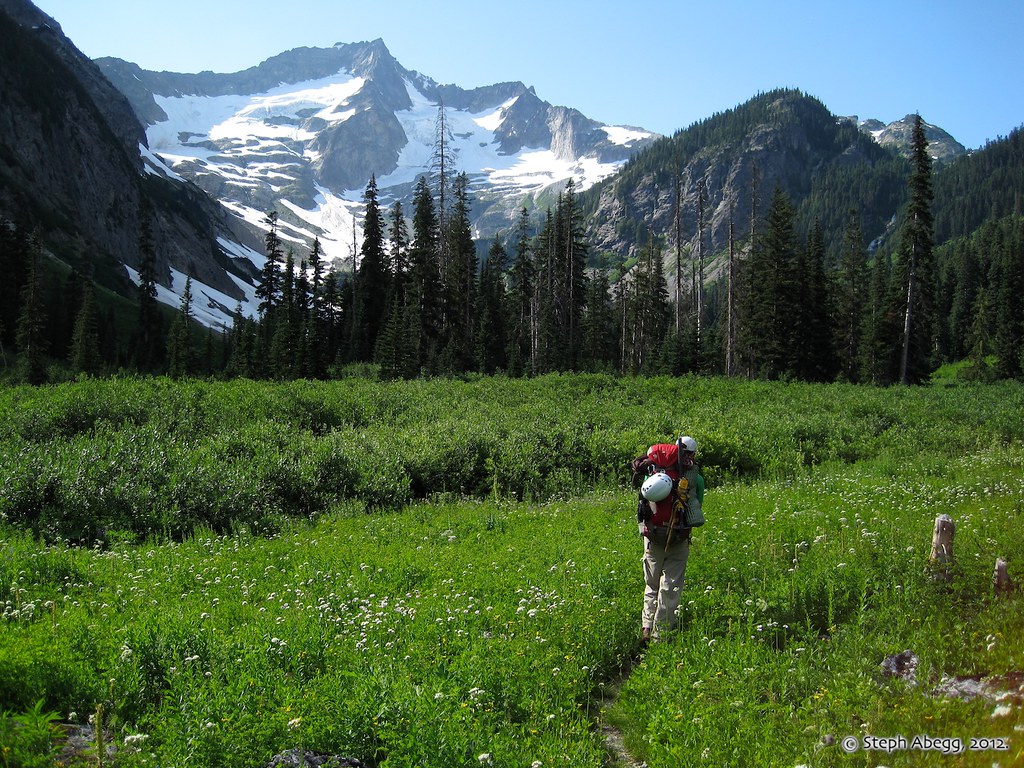
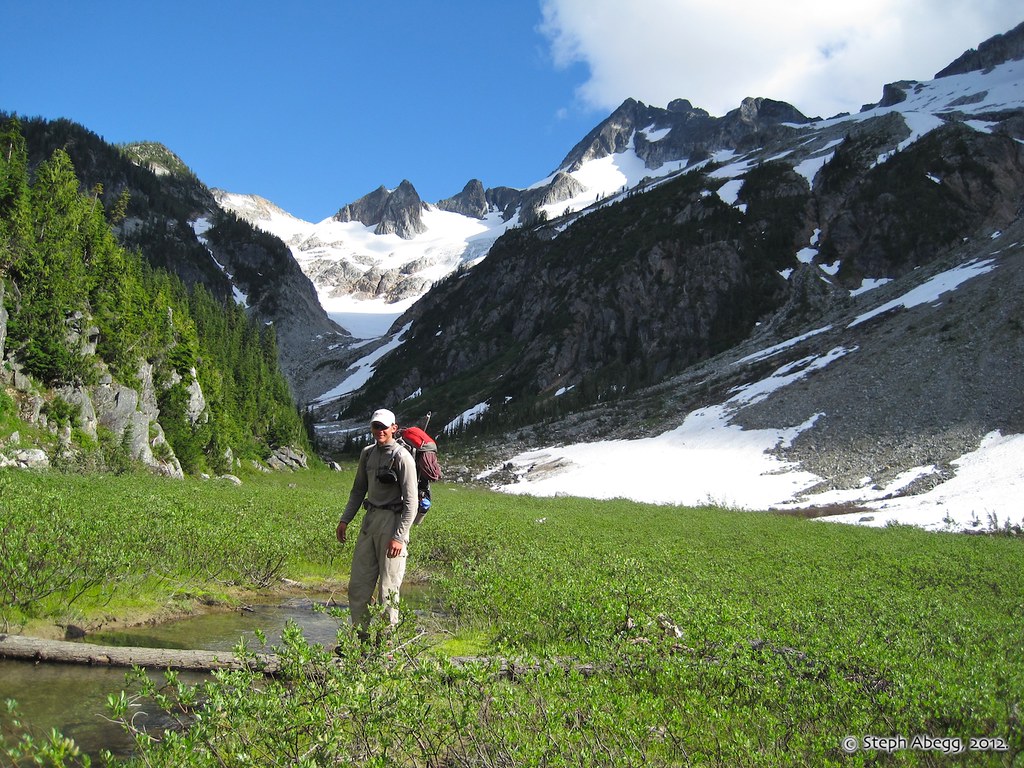
Day 1:We started at the Bridge Creek trailhead (4400 ft) on HWY 20 and followed the PCT ~10 miles to the North Fork Bridge Creek trail. Followed the North Fork trail ~5 miles to ~1.5 miles past Grizzly Creek and ascended slabs/brush/meadows to high camp (~5200 ft) below the base of the NE Buttress of Mt. Goode.18 miles, 3800 ft elev. gain, 3000 ft elev. loss, 11:15
Day 2:With full packs, we climbed the NE Buttress of Mt. Goode (9220 ft). Camped on summit.2 miles, 4200 ft elev. gain, 200 ft elev. loss, 11:55
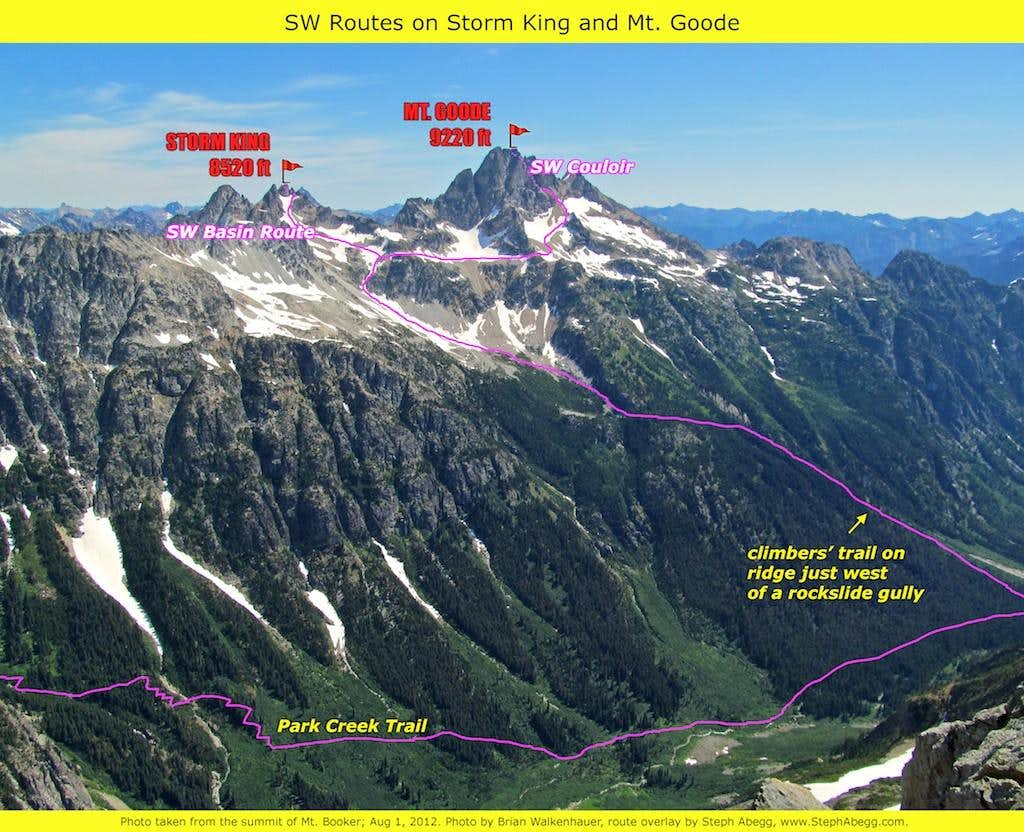
Day 3: Descended the SW Couloir of Goode. Traversed westward, dropped packs, and climbed the standard SW basin route up Storm King (8520 ft). Then descended route, picked up packs, and descended climbers' path to the Park Creek trail. Hiked along thetrail~3 miles and camped at knoll (6000 ft) just SW of Park Creek Pass.9.3 miles, 4300 ft elev. gain, 7490 ft elev. loss, 12:00
Day 4: With day packs, climbed the NW route (via Booker-Buckner Col) on Mt. Booker (8280 ft). Returned to camp and packed up, then followed the Thunder Creek Trail north ofPark Creek Pass (6040+ ft), leaving the trail after 0.4 miles and traversing ~2 miles to Mt. Logan. Camped at 8000' on the Fremont Glacier.10.9 miles, 7730 ft elev. gain, 5760 ft elev. loss, 12:40
Day 5: With full packs, ascended Mt. Logan (9087 ft) via the Fremont Glacier. Due to white-out conditions, we also summited several subsummits on the way. Descended Banded Glacier and worked our way north to the Fisher Creek Trail (3600 ft). Hiked along the trail for ~5 miles to Fisher Camp (5200 ft).10.6 miles, 3930 ft elev. gain, 6720 ft elev. loss, 12:20
Day 6: Followed the Fisher Creek trail 2.1 miles to Easy Pass (6520+ ft), then hiked 3.6 more miles out to HWY 20 (3700 ft). Hitchhiked to car 8 miles away at Bridge Creek Trailhead.5.6 miles, 1300 ft elev. gain, 2800 ft elev. loss, 2:55
Trip Report by Day
CLICK ON DAY TO DROP DOWN CONTENT
DAY 1: Hike in to camp below Goode.
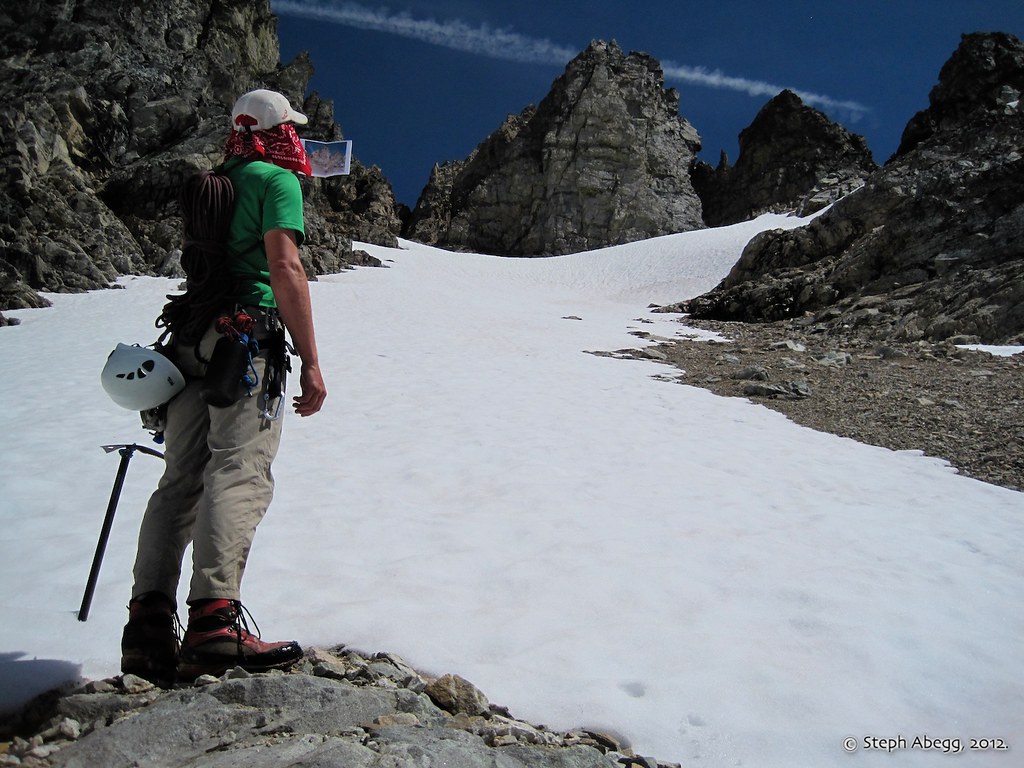
Hmmm...how to fit it all in? And then carry it over a 9200+ ft summit? At the Bridge Creek (PCT) trailhead on HWY 20 about to start our 6-day adventure.
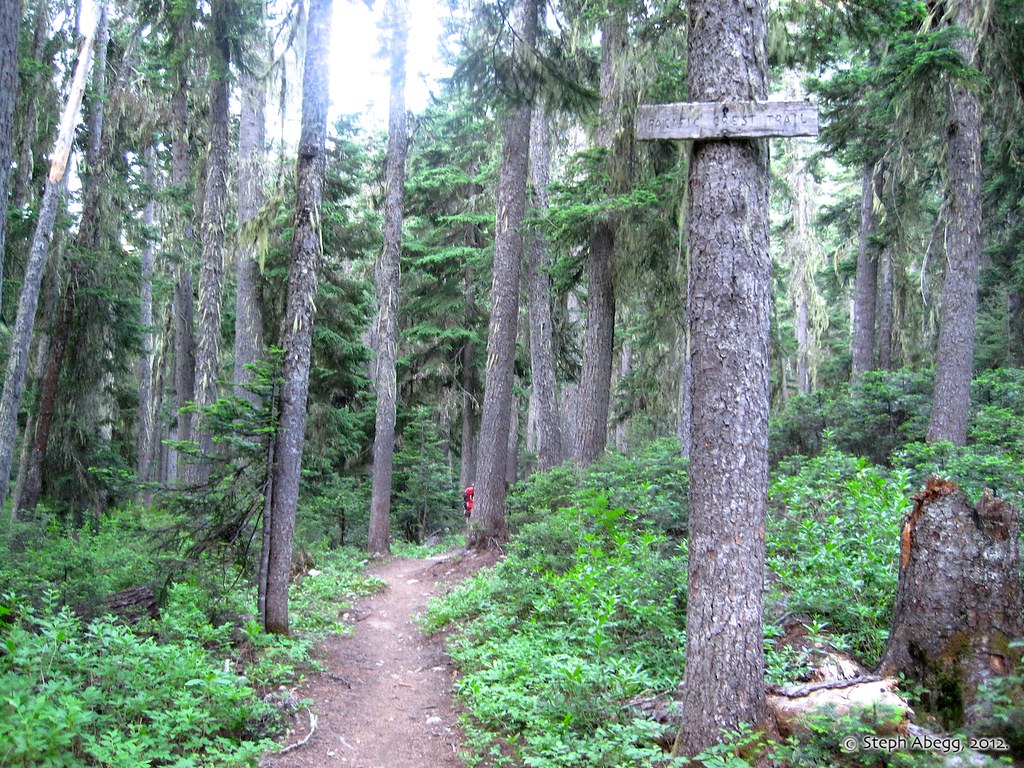
We hiked 10 miles on the PCT to the North Fork Bridge Creek turnoff.
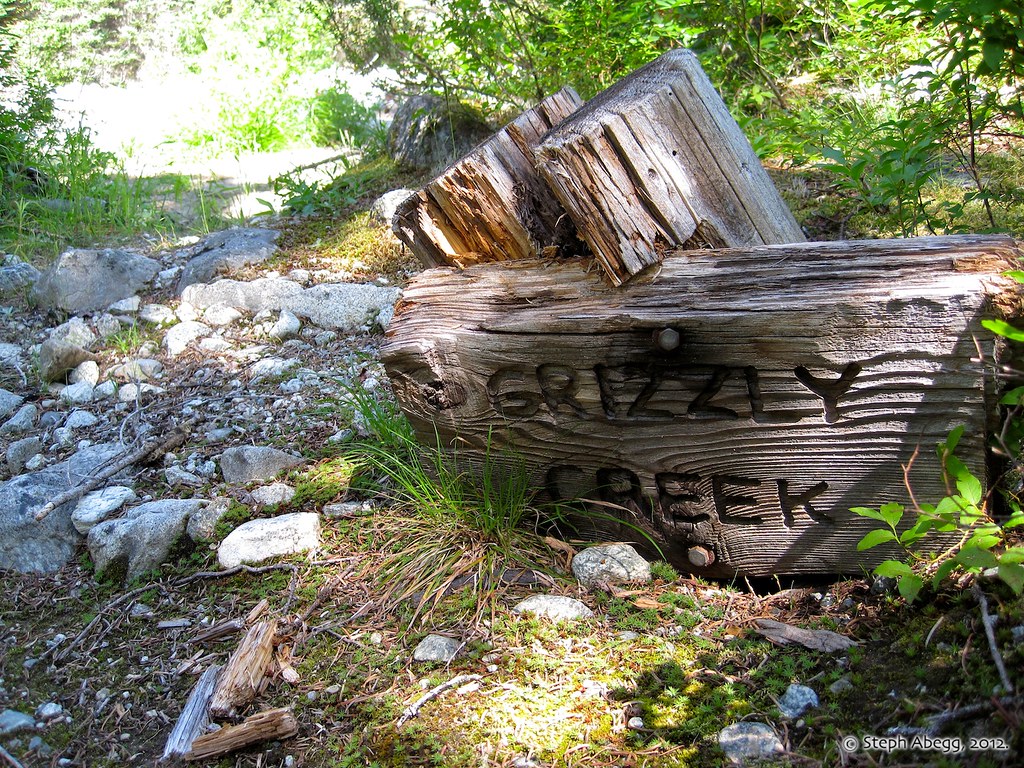
Grizzly Creek is just over 3 miles along the North Fork Bridge Creek Trail. We waded the creek. Per Beckey's approach to the NE Buttress (see below), we hiked about 1.5 miles past Grizzly Creek until we turned off to head up to the bivy below the NE Buttress of Goode.
The North Fork Bridge Creek Trail gets a bit brushy after Grizzly Creek, but it was still relatively easy to follow. Mt. Goode towers above.
Tiger Lily and Mt. Goode behind.
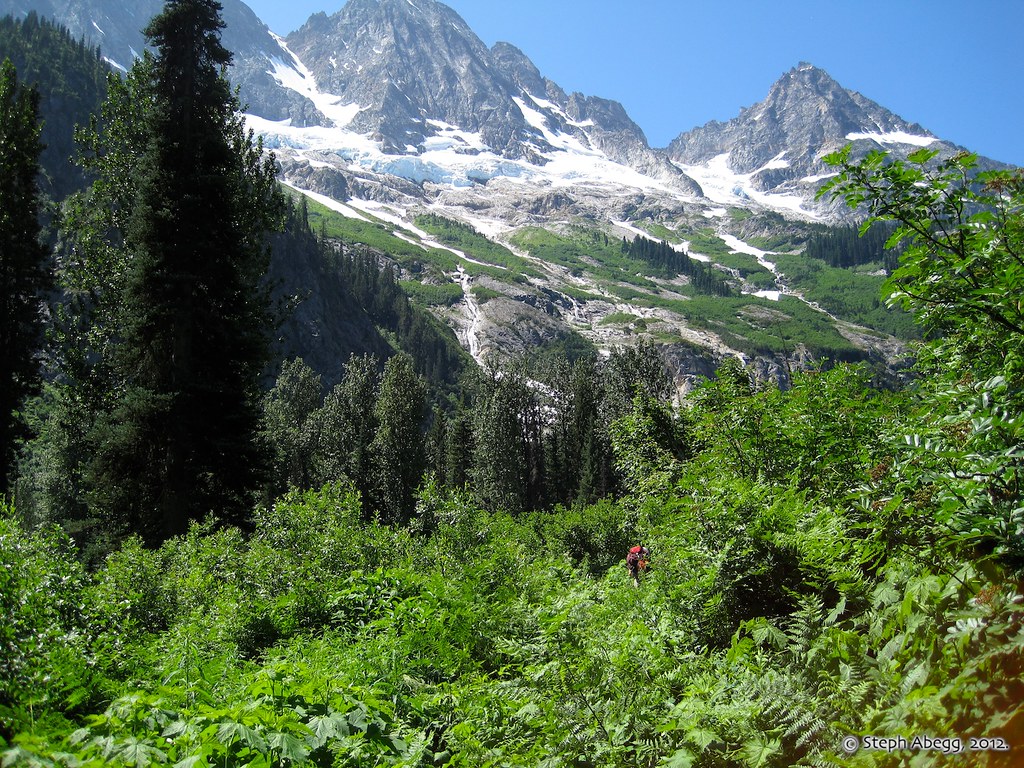
Crossing the North Fork Bridge Creek. It was flowing pretty good, but we were able to wade it. Mt. Logan is at head of valley.
We decided to try Beckey's route to
the NE Buttress, which involves following the trail about 1.5 miles past
Grizzly Creek to 3800 ft. The advantage is
that there is "easy slab" and "virtually no brush." The disadvantage
is that it is a lot less direct than the standard approach of approaching from directly below the buttress.Photo by Brian Walkenhauer.
"Virtually no brush"...easier said than done.
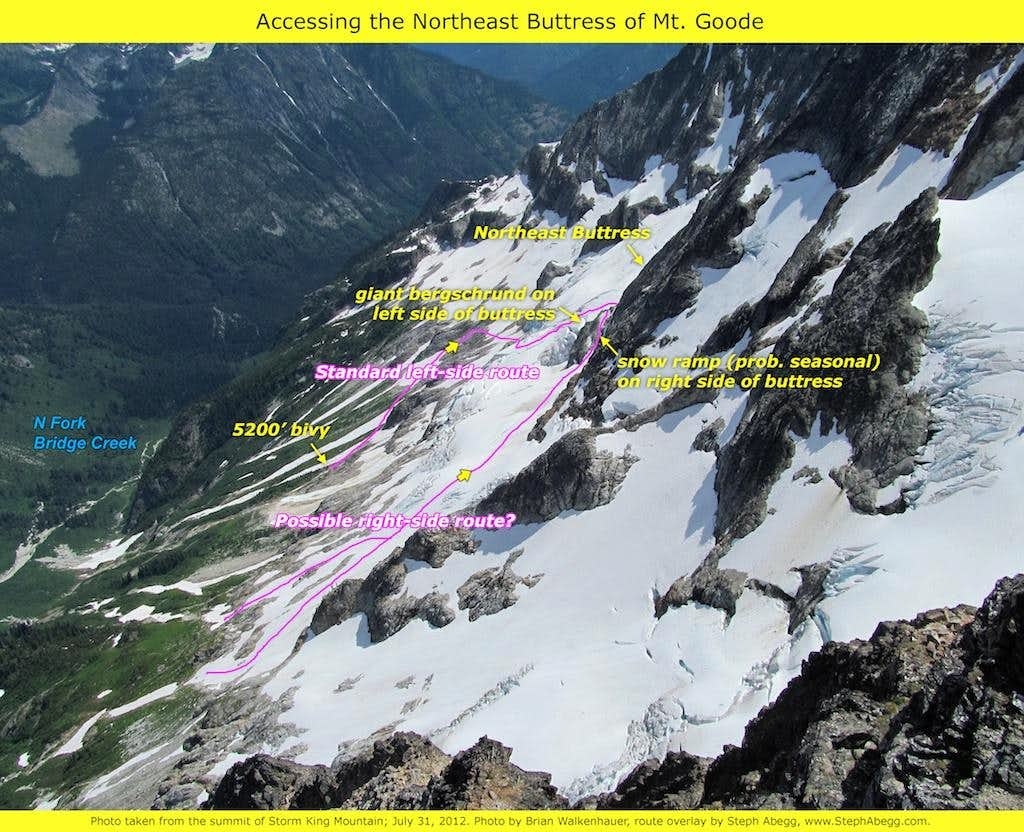
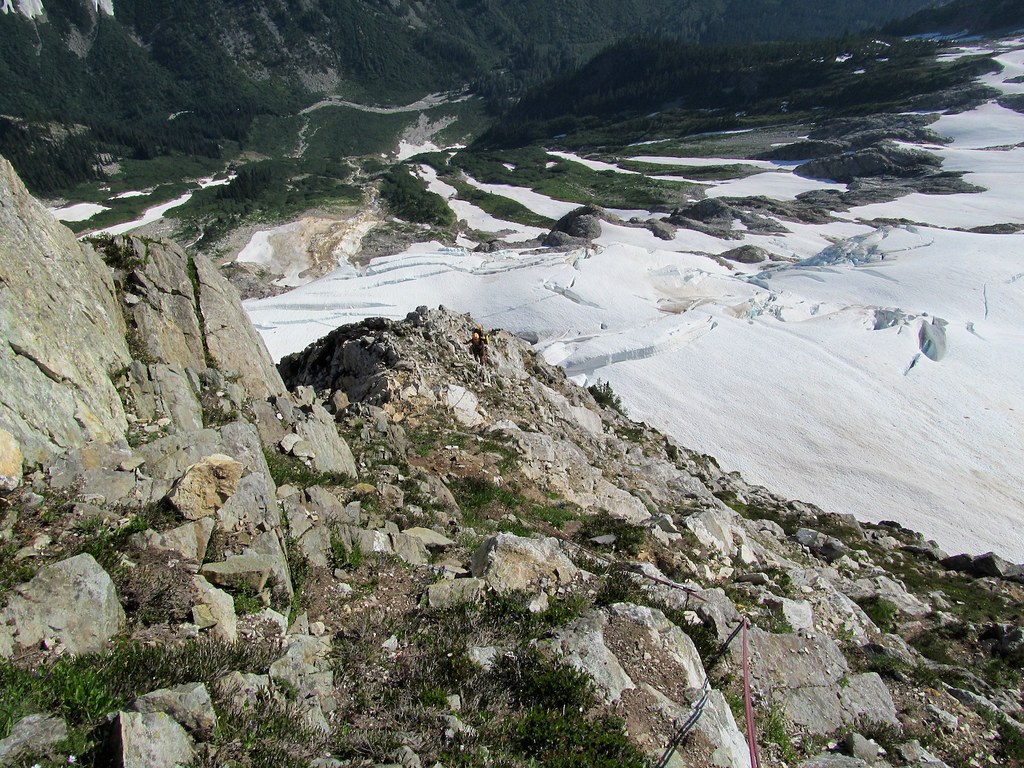
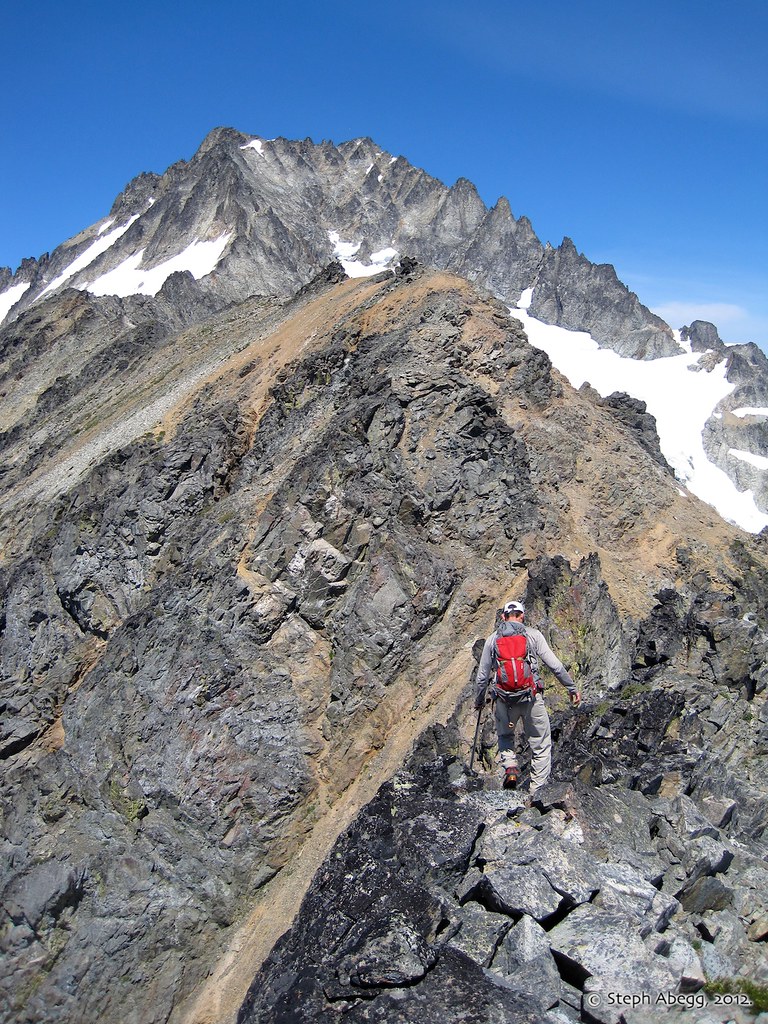
As shown in this photo, Beckey's route involves traversing in from the right so that the NE Buttress of Goode is on the skyline. As we approached this way, it looked very possible to take snowfields directly to the right side of the buttress. I was skeptical and figured there was some impassable crack that we couldn't see from below, so we defaulted to the standard approach to the left side of the buttress. However, a view from the summit of Storm King a couple of days later seemed to suggest that a right-side approach to the buttress would have worked after all and we could have saved some time. Sorry Brian for not trusting your instinct!
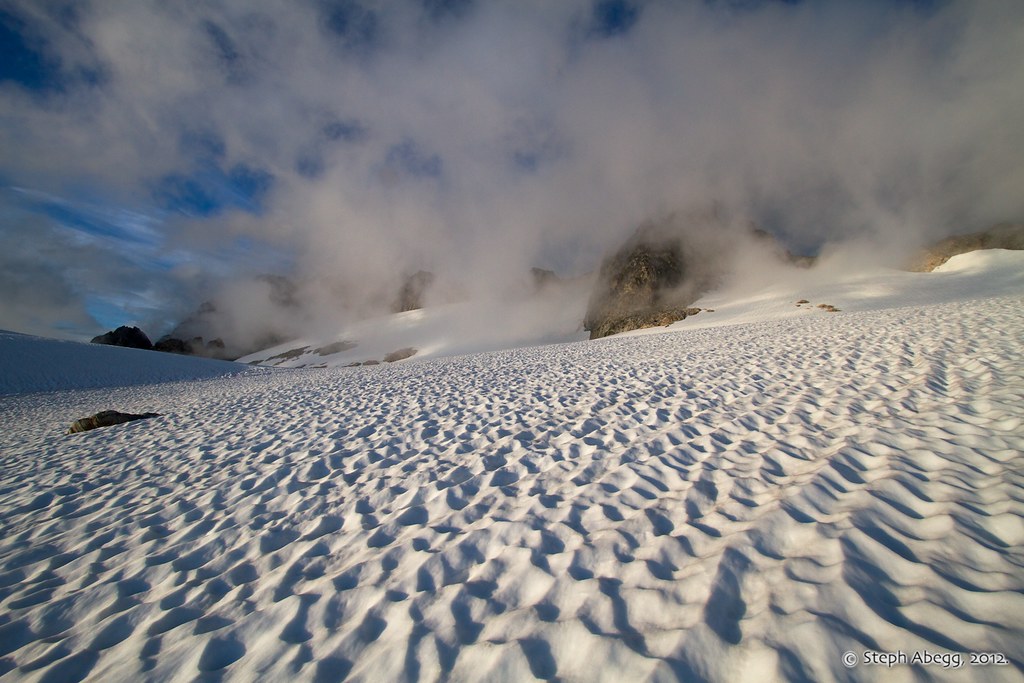
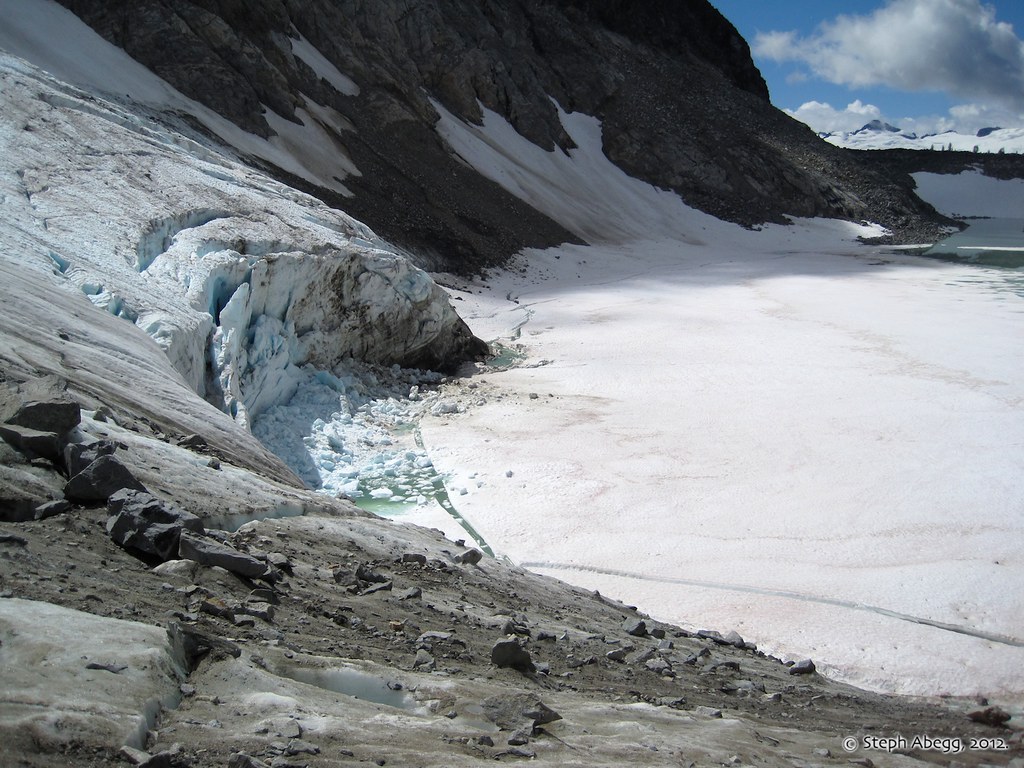
The view of the NE Buttress of Goode from a standard camp spot on a 5200' knoll. We discovered the next day that there is an equally flat campsite at around 5400' about 20 minutes further along the route.
Spelling out Goode with my Power Bars. My ration was one letter a day.
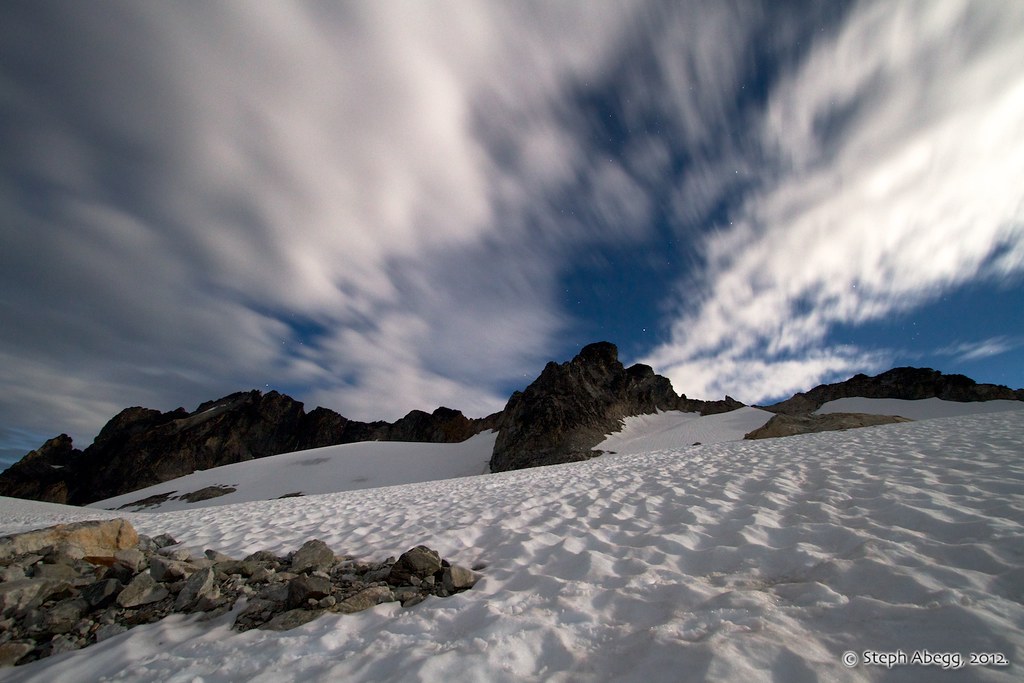
Glowing tent and moonlit hills behind. Exposure: 3 min, f/6.3, ISO 800.
DAY2: Climb NE Buttress ofMt. Goode, bivy on summit.
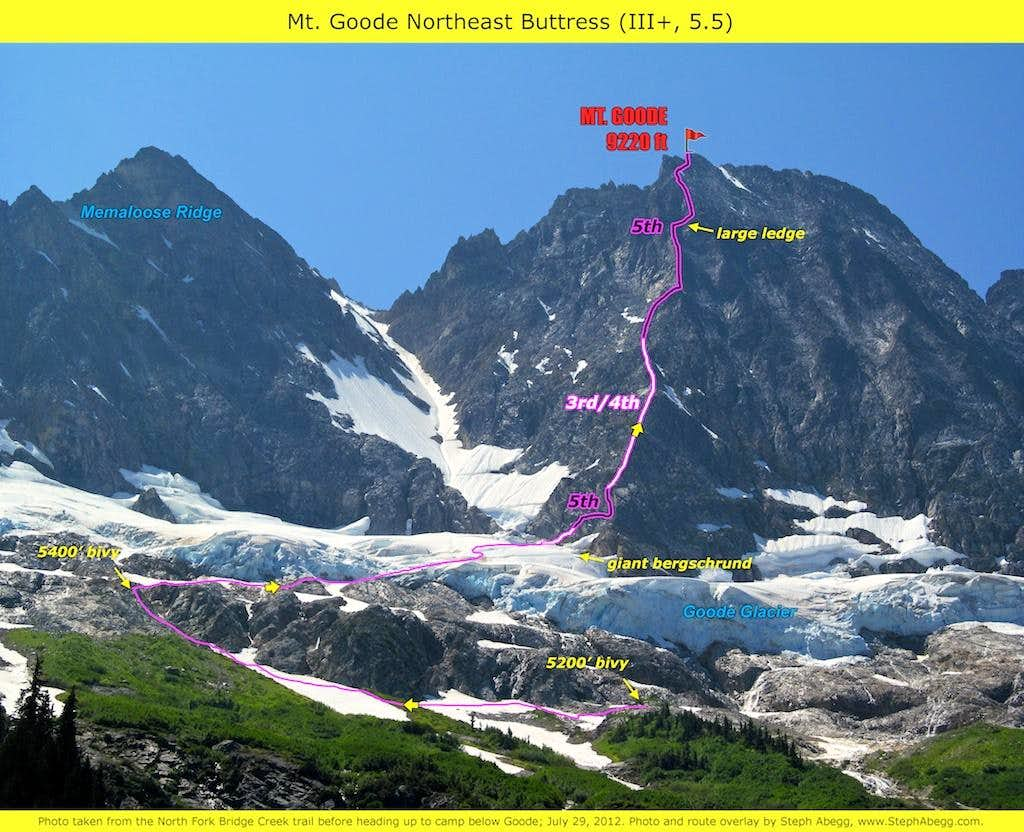
Route overlay of the Northeast Buttress of Goode, on a John Scurlock aerial photo from June 2012.
Route overlay of the Northeast Buttress of Goode, on a photo taken from the North Fork Bridge Creek valley the day before our climb.
(CORRECTION: This photo incorrectly labels the East Ridge of Goode as Memaloose Ridge. Memaloose Ridge is actually further to the SSE, as it is correctly placed on USGS Topo maps. Google Earth (which is the resource I used when labeling this photo), however, gets it wrong.)
This photo was taken the next day from the summit of Storm King, looking down on the lower NE Buttress. At least at the time this photo was taken, it sure looks like the approach to the right side of the buttress poses a lot less crack and 'schrund issues than the more standard left-side approach.
Update: Shortly after I posted this TR, I had 2 separate parties confirm that they had accessed the buttress from the right (one party had climbed the route a week before us, and the other party had climbed it a decade before).
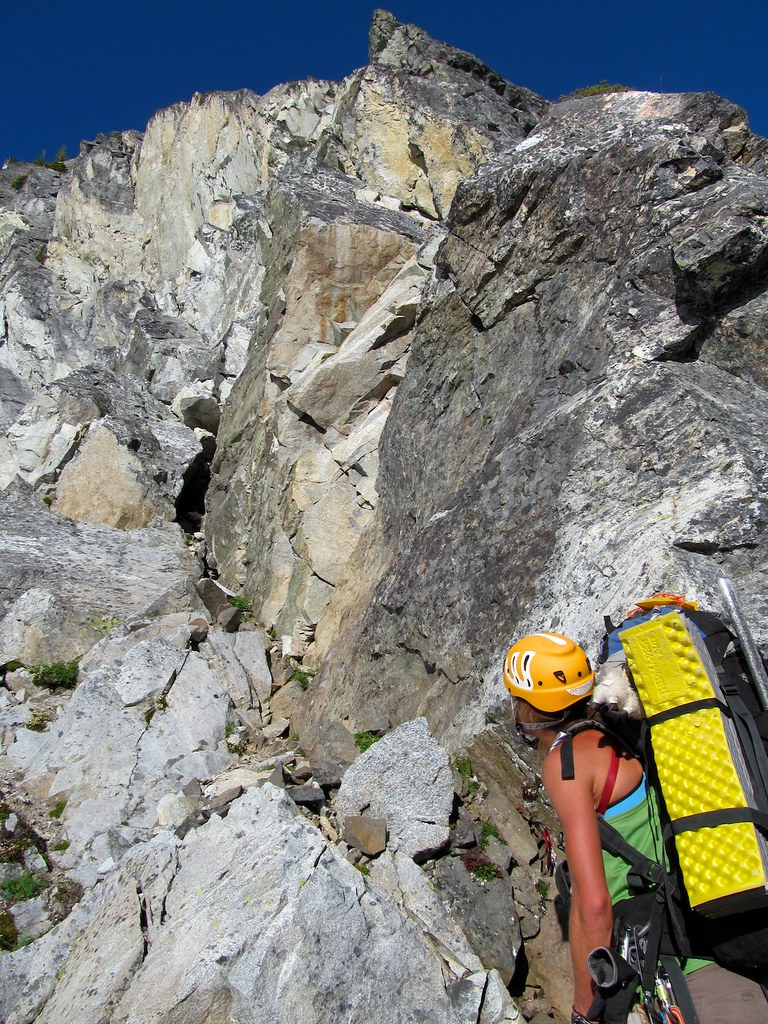
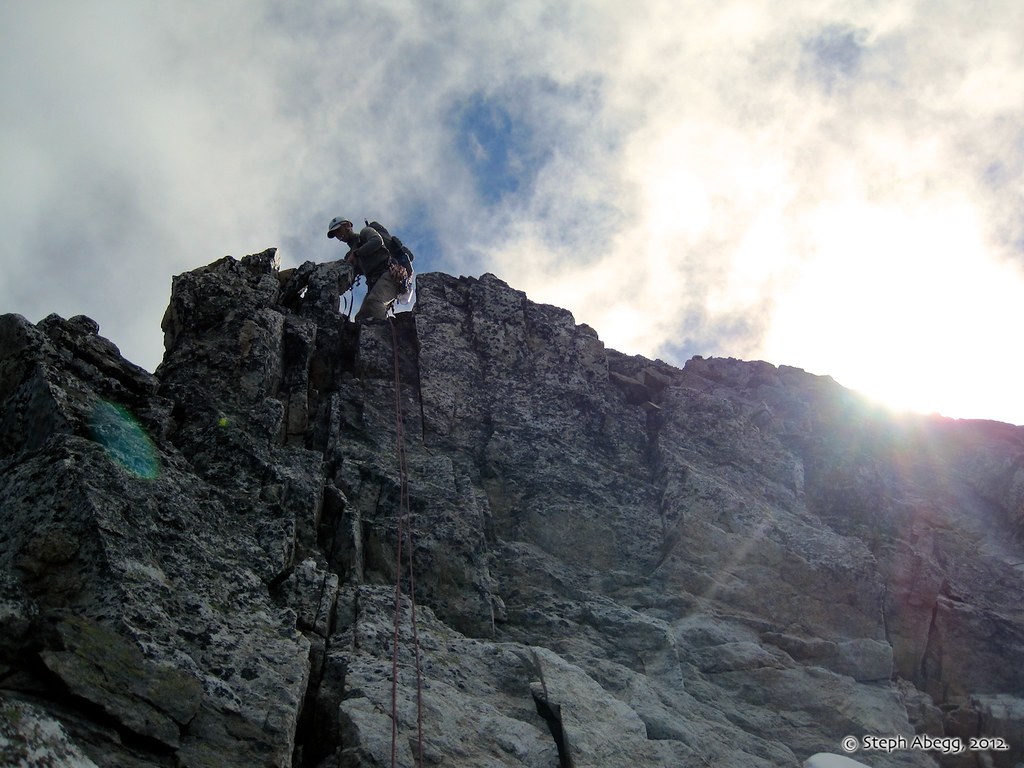
Brian approaching the morning-sun-lit NE Buttress of Goode from the standard left side approach.
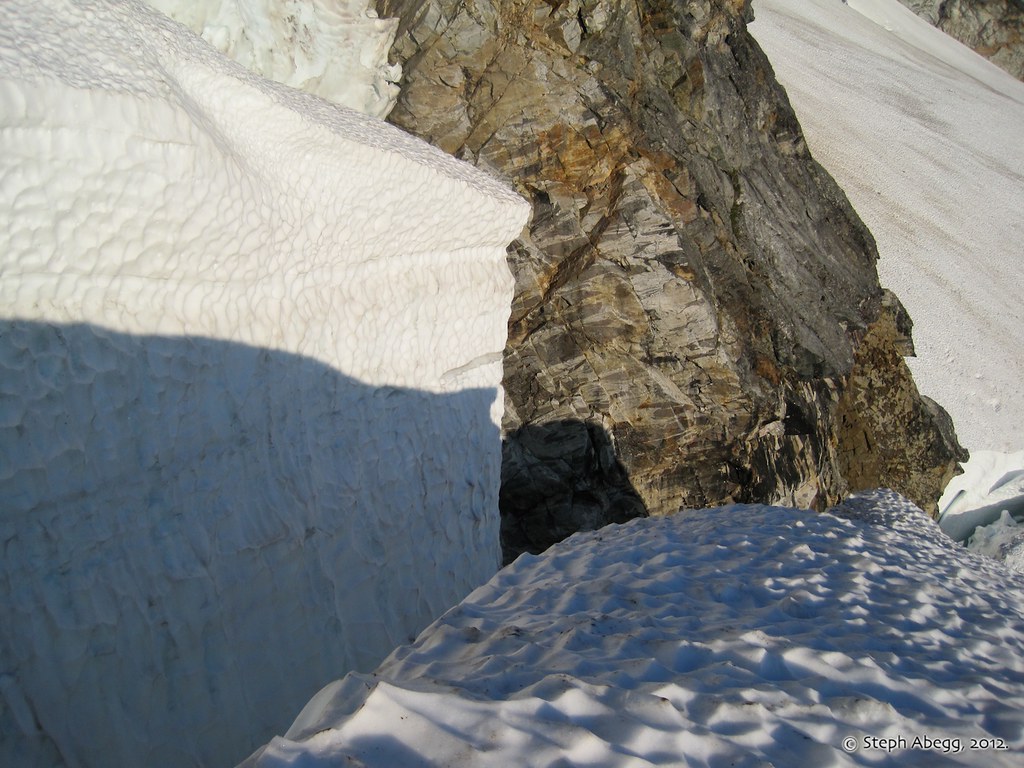
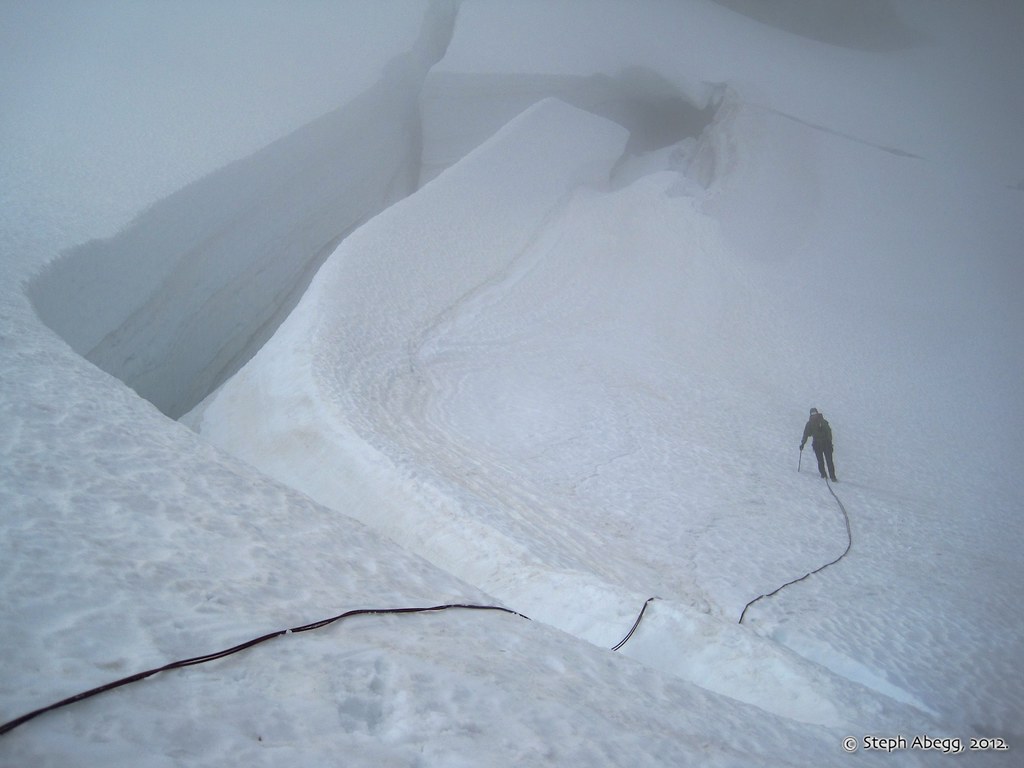
The notorious bergschrund was indeed gaping. There was no way we could get across this.
Another view of the 'schrund. There were giant man-eating gaps between the snow and the rock.
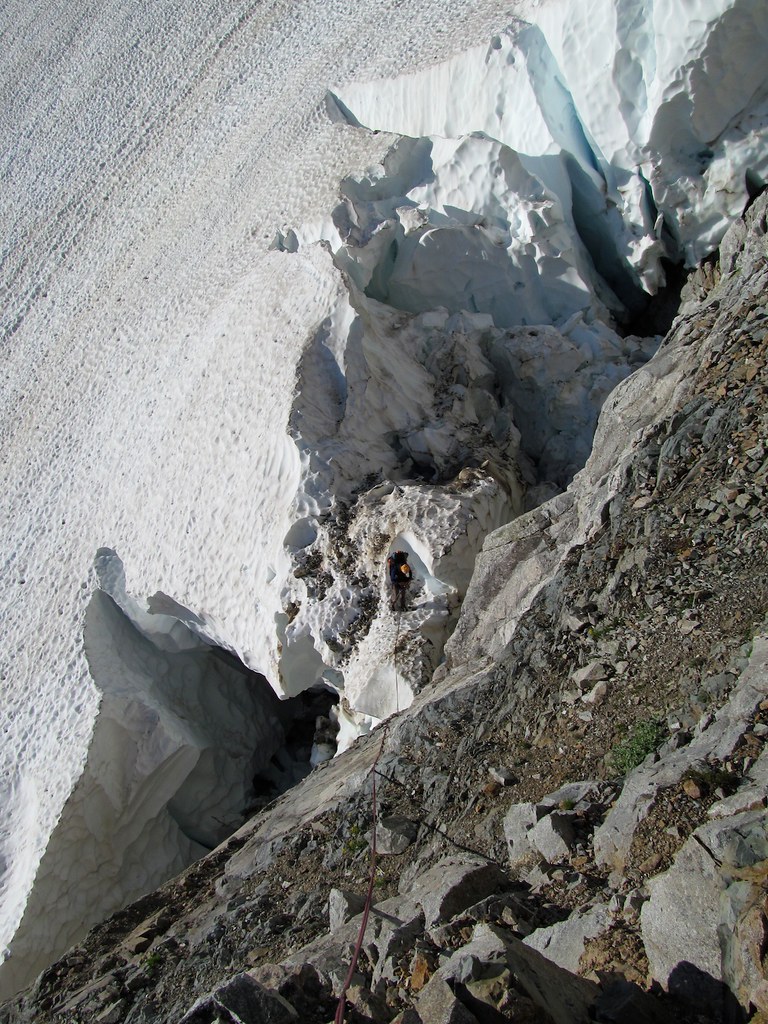
Fortunately, we found a snow bridge to the left that allowed us to get above the gaping 'schrund and onto a snow/ice ramp that led right onto the rock. Photo by Brian Walkenhauer.
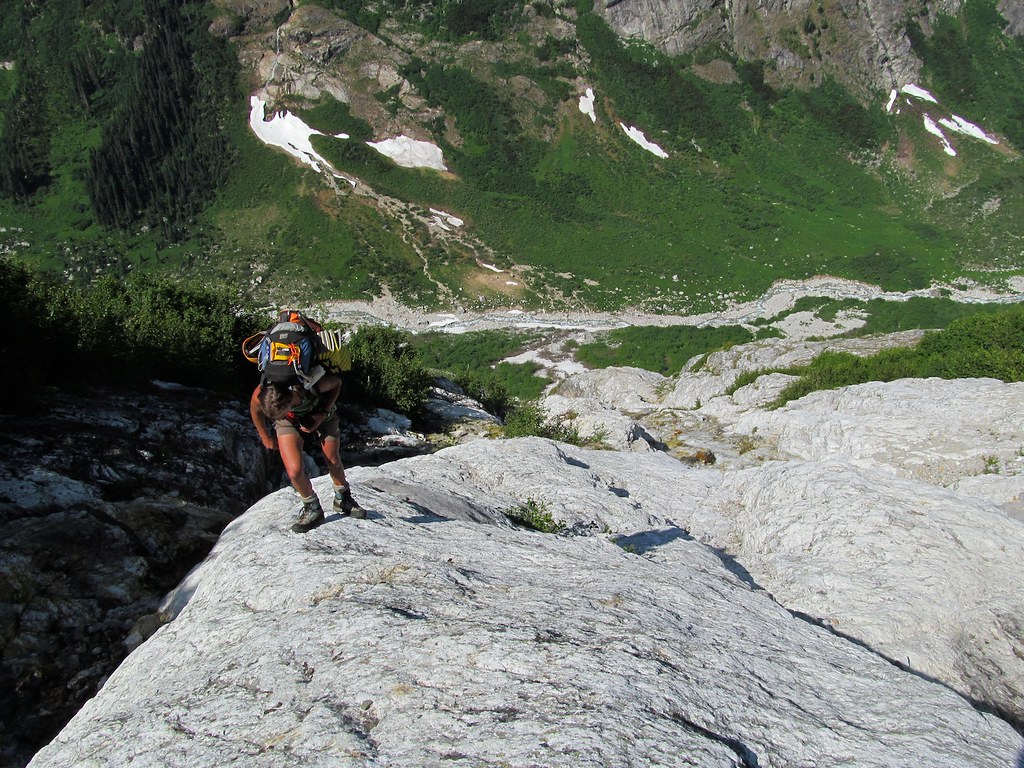
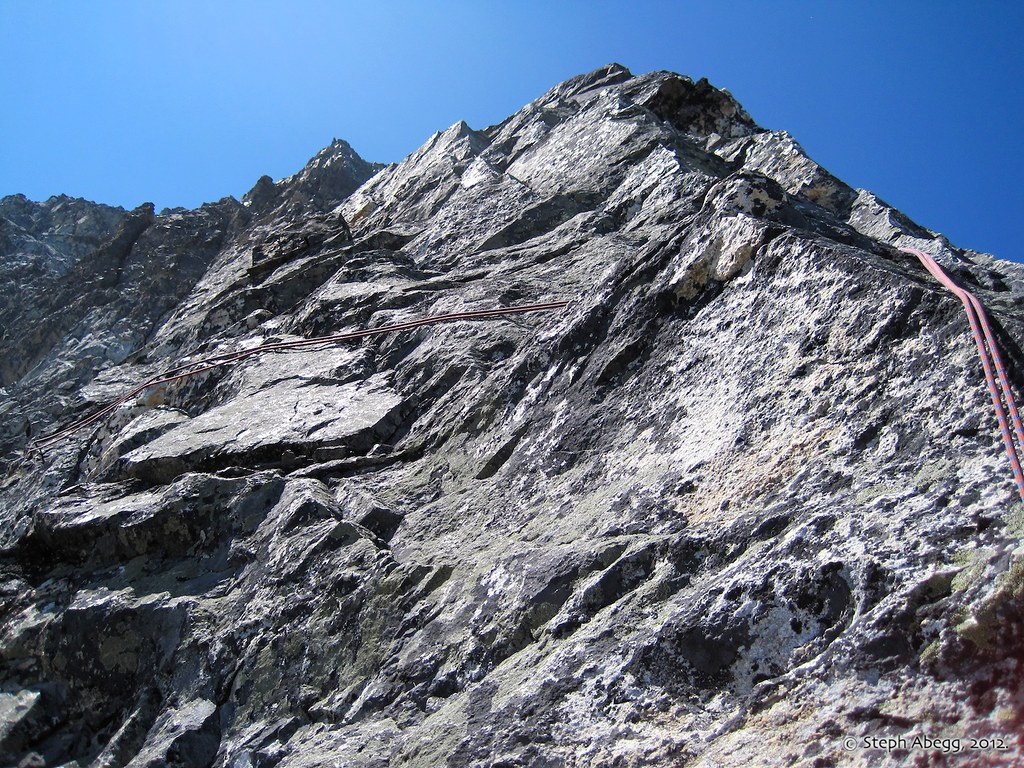
Looking up the NE Buttress from where we accessed it from the glacier. The first ~2 pitches are low 5th; the rock is not that great. The goal is to get on the crest. Photo by Brian Walkenhauer.
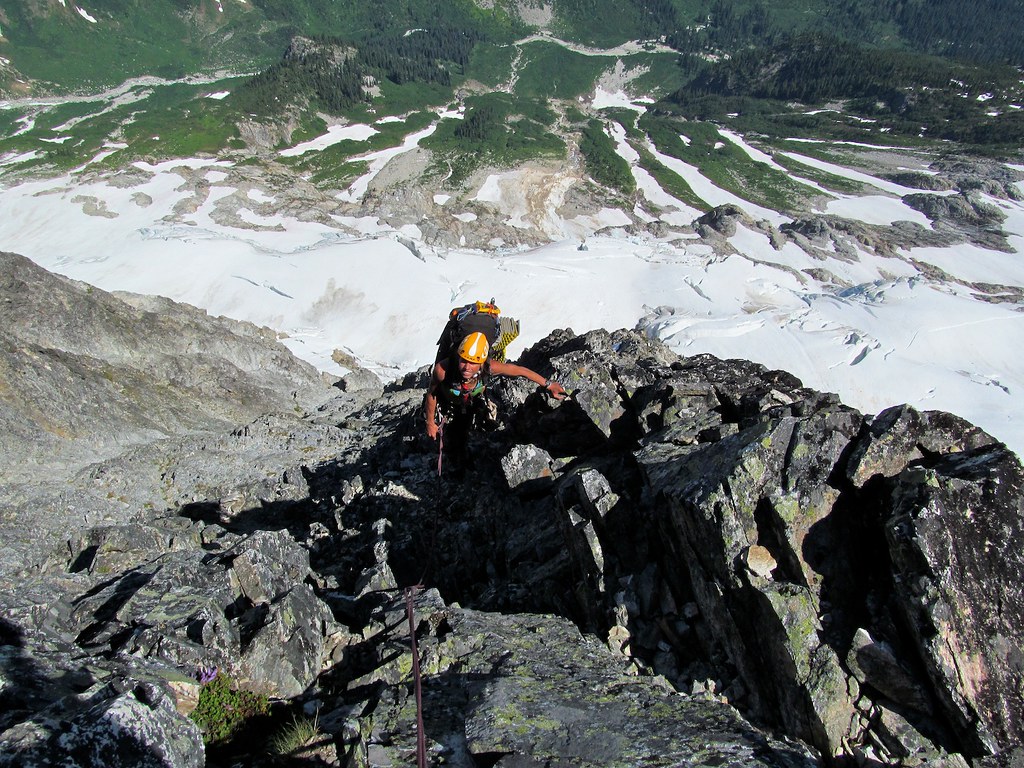
Brian on the crest of the NE Buttress. From here, there is a long section of easy stepping 3rd/4th class with much pro available and positive holds.
Simulclimbing the long stretch of Class 3/4 terrain on the lower half of the NE Buttress. We climbed halfway up the buttress in two long simulclimb pitches. Photo by Brian Walkenhauer.
Brian was quite efficient with the gear. After simulclimbing for perhaps a quarter of the buttress we finally had to stop when he had only three nuts left.
About halfway up, things steepen into 5th class terrain. Again, pro is good and rock is good. We stayed within 20 feet of the arête the entire way up.
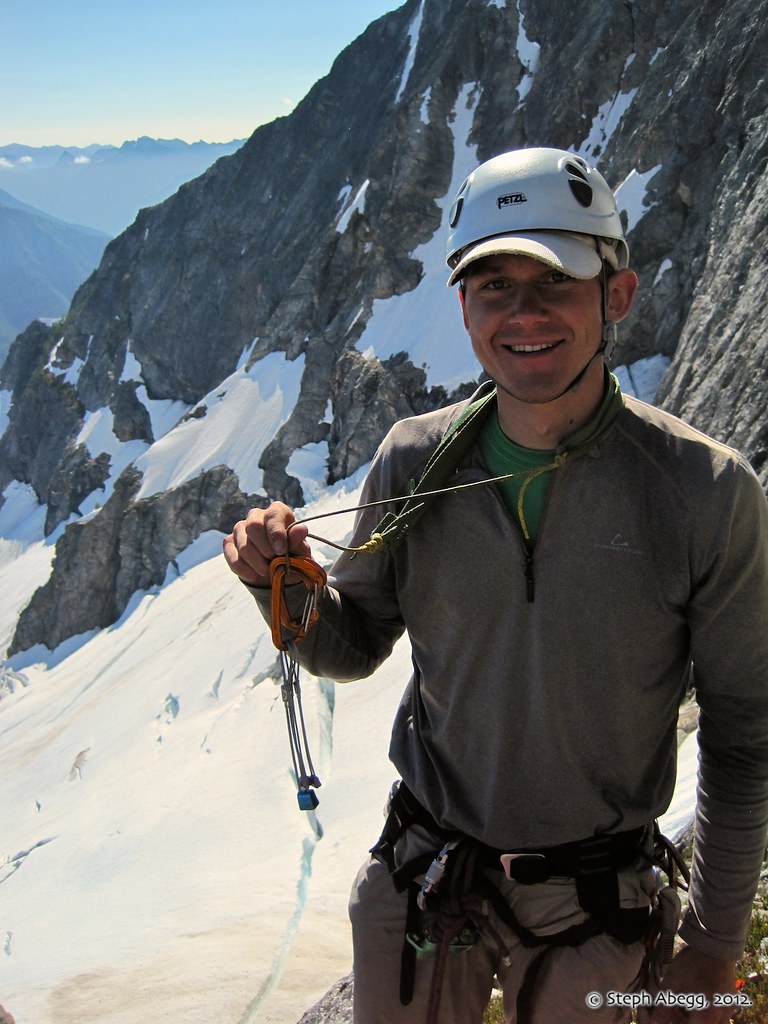
Exposure and views are great. Photo by Brian Walkenhauer.
This was the crux section for us, where we traversed left about 20 feet on ledges to get to class 4 terrain that led back up to the buttress crest. I think of all places on the buttress, this is where people are most likely to get off route by straying too far from the buttress.
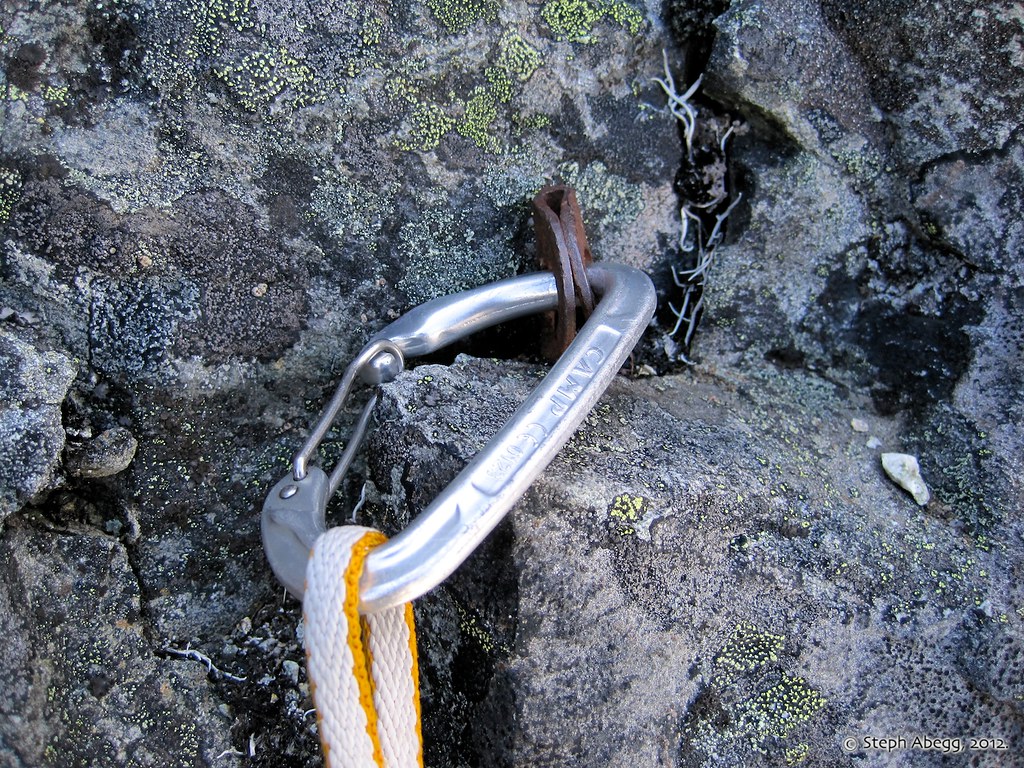
An old piton. Always fun to find.
About 3/4 of the way up, we arrived at a large ledge. It was early afternoon so we took a nice break. People have bivied here. From here, you can take either the left or the right arête (they meet perhaps 150 feet above). The right looked easier (4th to low 5th) so that is what we took.
I discovered that power bars coated in peanut butter (or in this case sunflower butter) tastes even better than Reese's.
About level with Black Tooth Notch, we encountered a snow patch. Since we planned on camping on the summit, we filled up with water here by collecting drips and speeding up the melting process with a bit of stove-power. (This spot was about 400' below the summit and near some rap slings, which we would descend to the next day to access the SW Couloir descent.)
Brian nearing the summit of Goode. The final 400' involves a rightward angling pitch and more easy 5th to the summit.
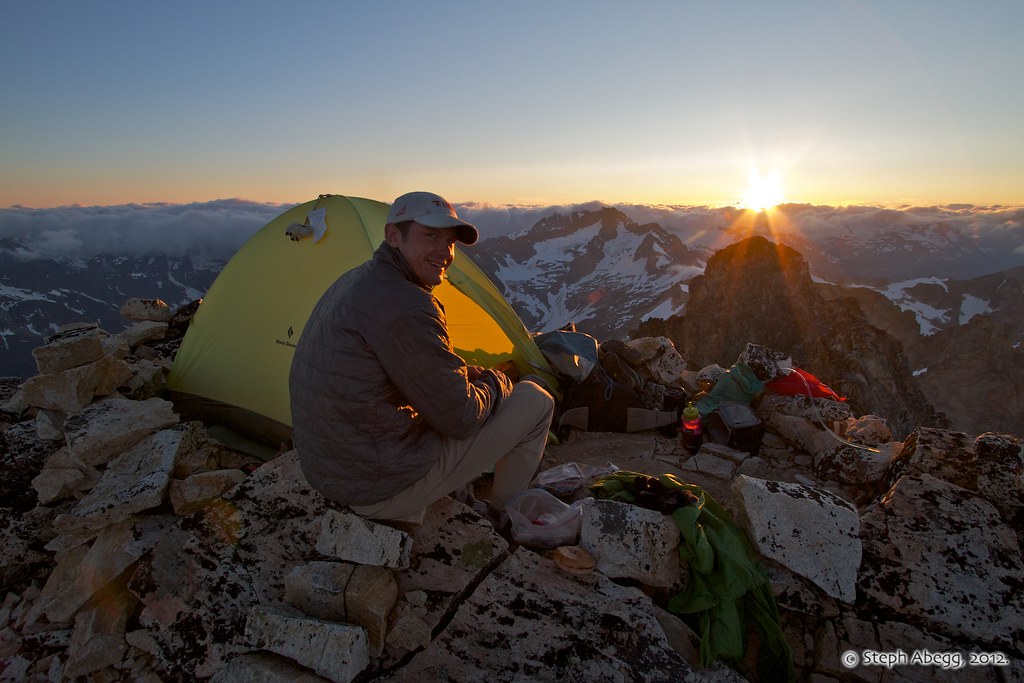
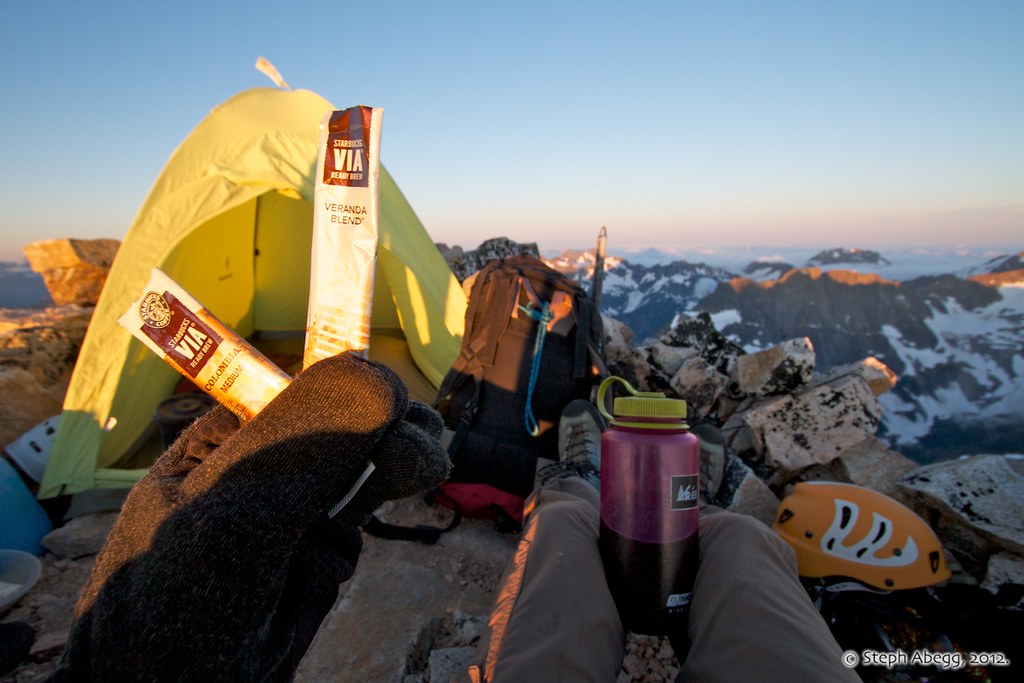
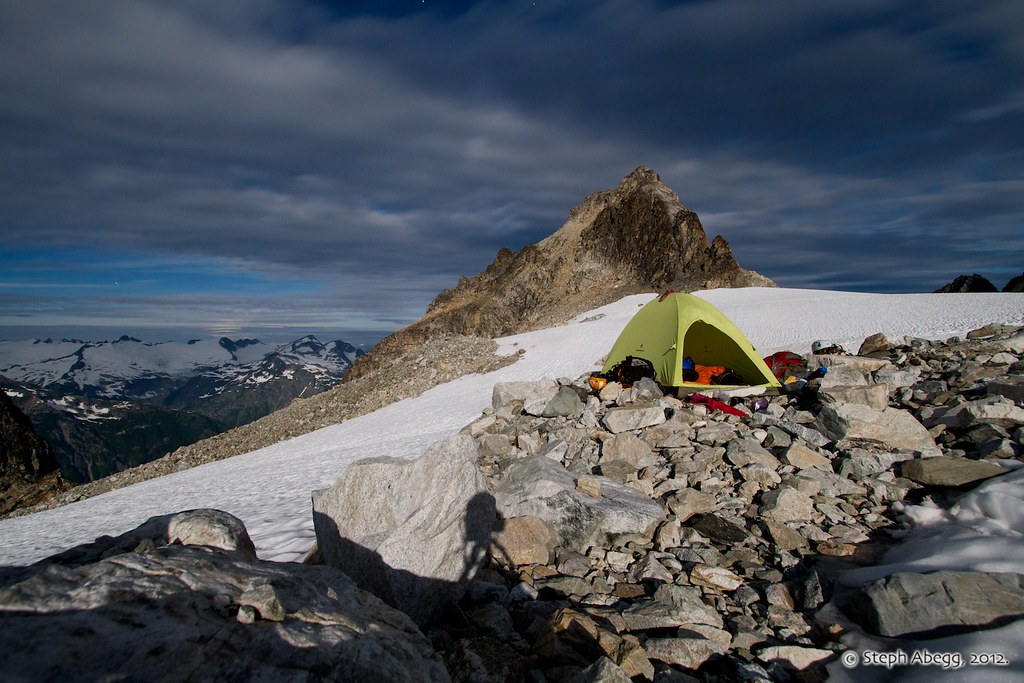
Goode is one of the rare summits that actually is just flat and large enough to camp on (we could even set up my small 2-man tent!). We felt we couldn't pass up this opportunity to camp on the highest point in North Cascades National Park. Wow, what a view!
From wikipedia: "A glory is an optical phenomenon that resembles an iconic saint's halo about the shadow of the observer's head. The effect is produced by light backscattered towards its source by a cloud of uniformly sized water droplets.
The angular size is much smaller than a rainbow, about 5° to 20°, depending on the size of the droplets. The glory can only be seen when the observer is directly between the sun and cloud of refracting water droplets.
Glories are often seen in association with a Brocken spectre, the apparently enormously magnified shadow of an observer, cast (when the Sun is low) on clouds below the mountain the viewer is standing on."
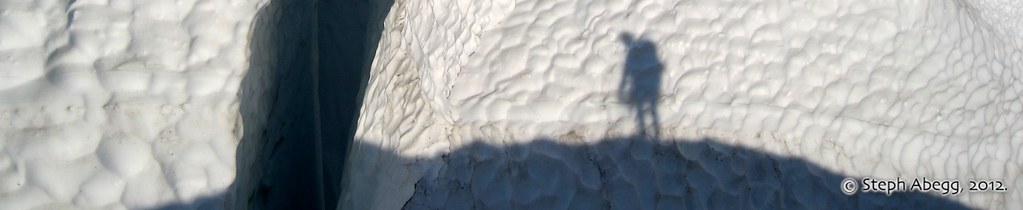
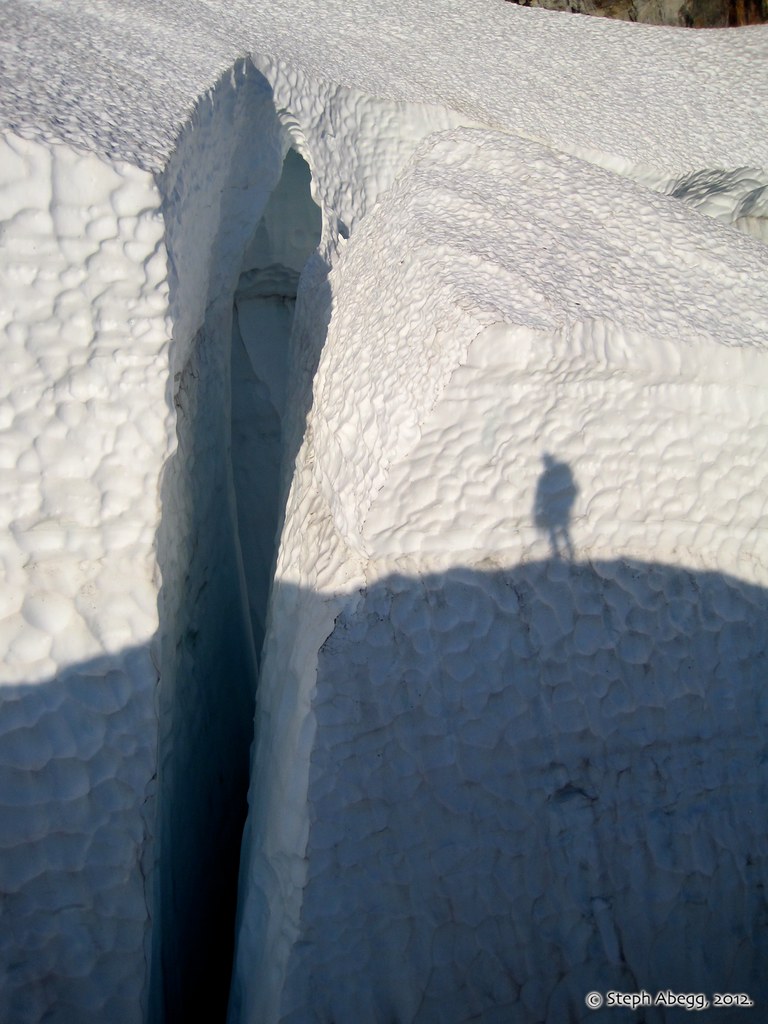
Mountain shadow from our camp on the summit of Goode. Mountain shadows are immensely long tunnels of unlit air, and always appear triangular due to perspective effects.
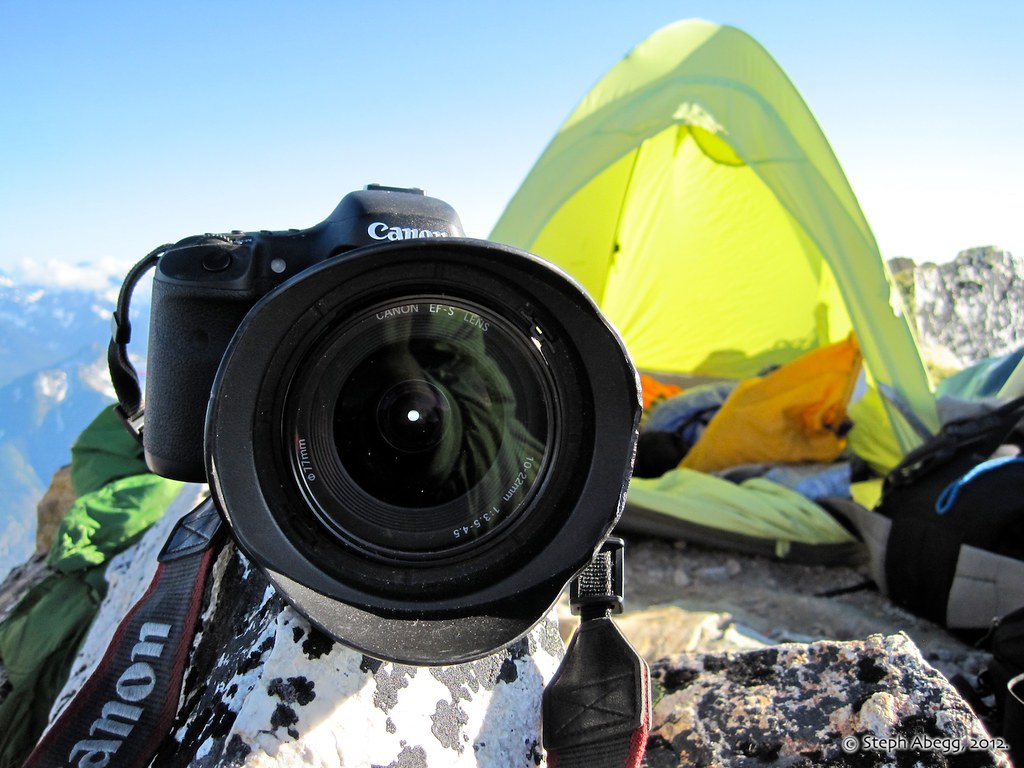
Bet not too many SLRs have ascended Goode!
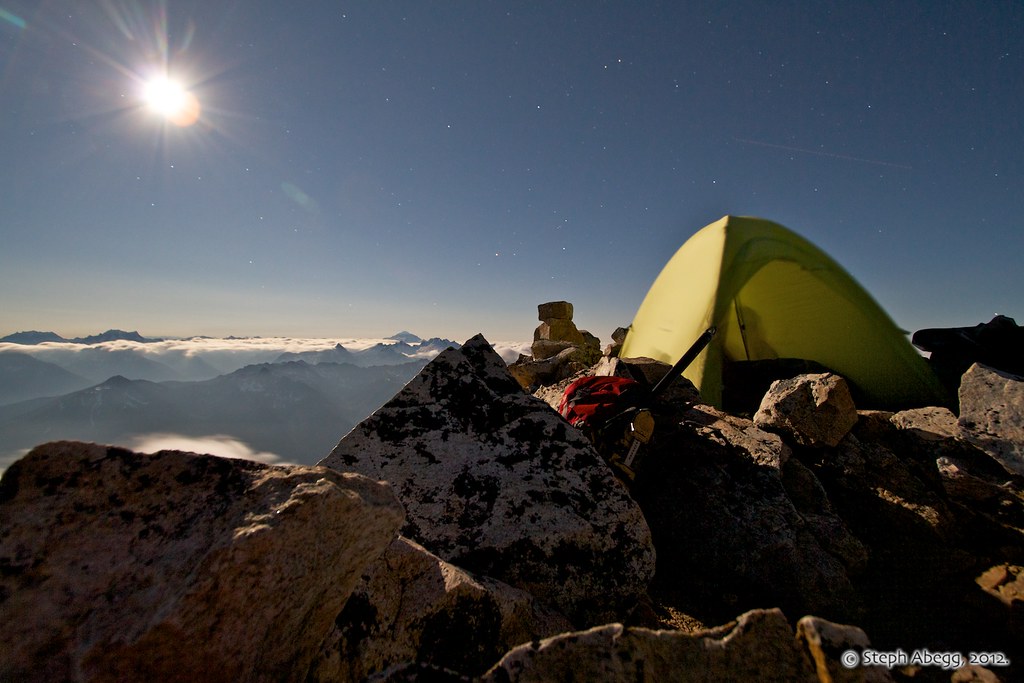
Just due to pure luck on the timing of our trip, the night we spent on Goode was pretty much a full moon. Exposure: 30 sec, f/5.0, ISO 400
DAY3: Descend Goode, climb Storm King, camp near Park Creek Pass.
Another beautiful morning. Good weather makes for much more enjoyable trips in the Cascades.
Starbucks on the highest point in NCNP.
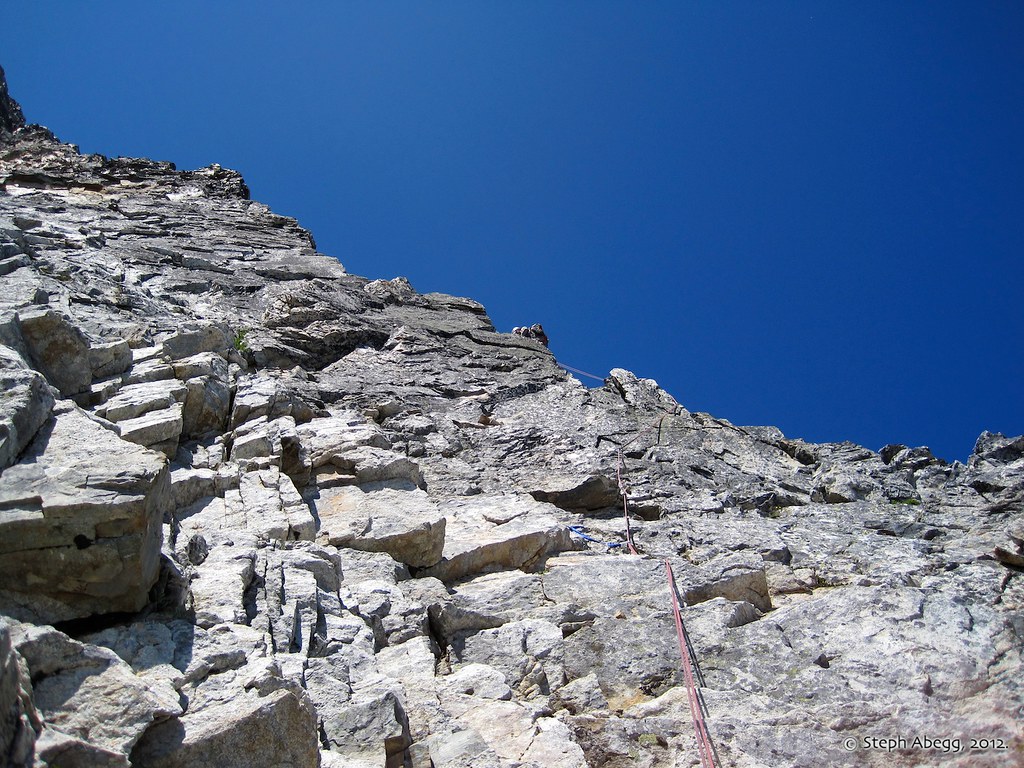
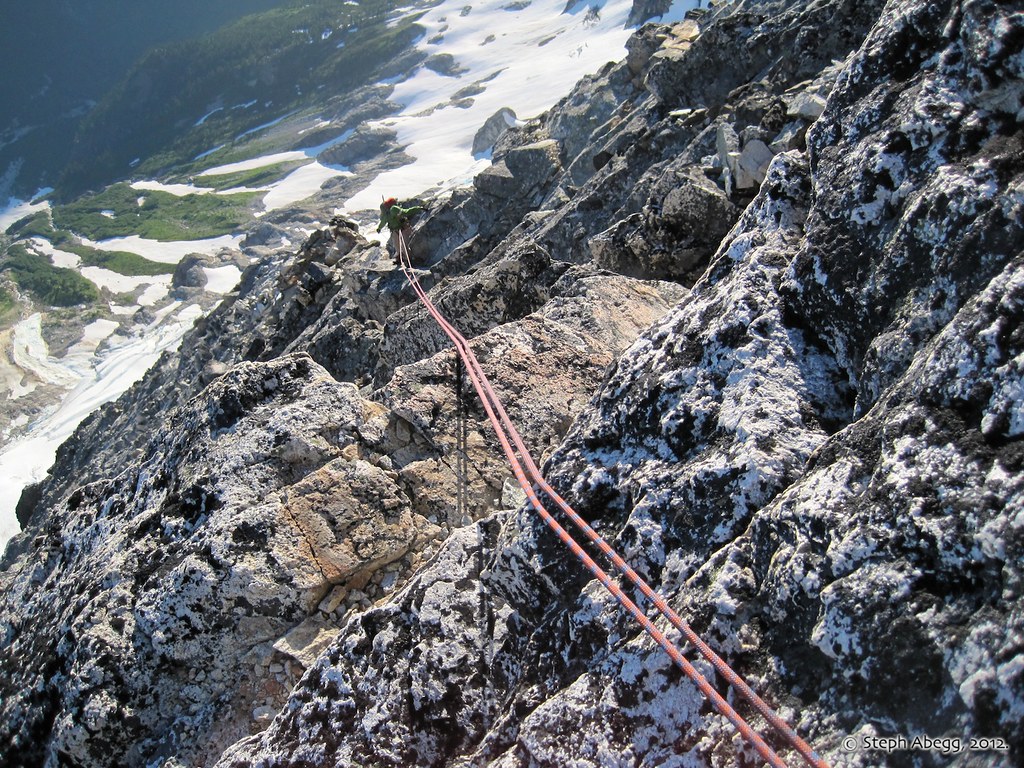
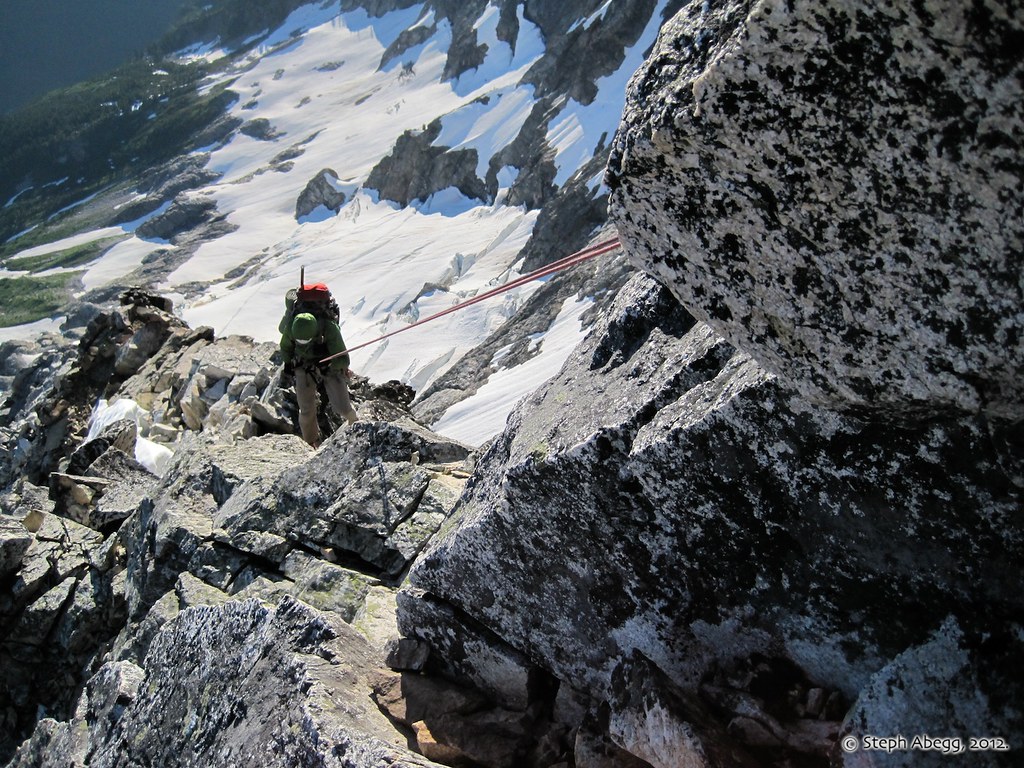
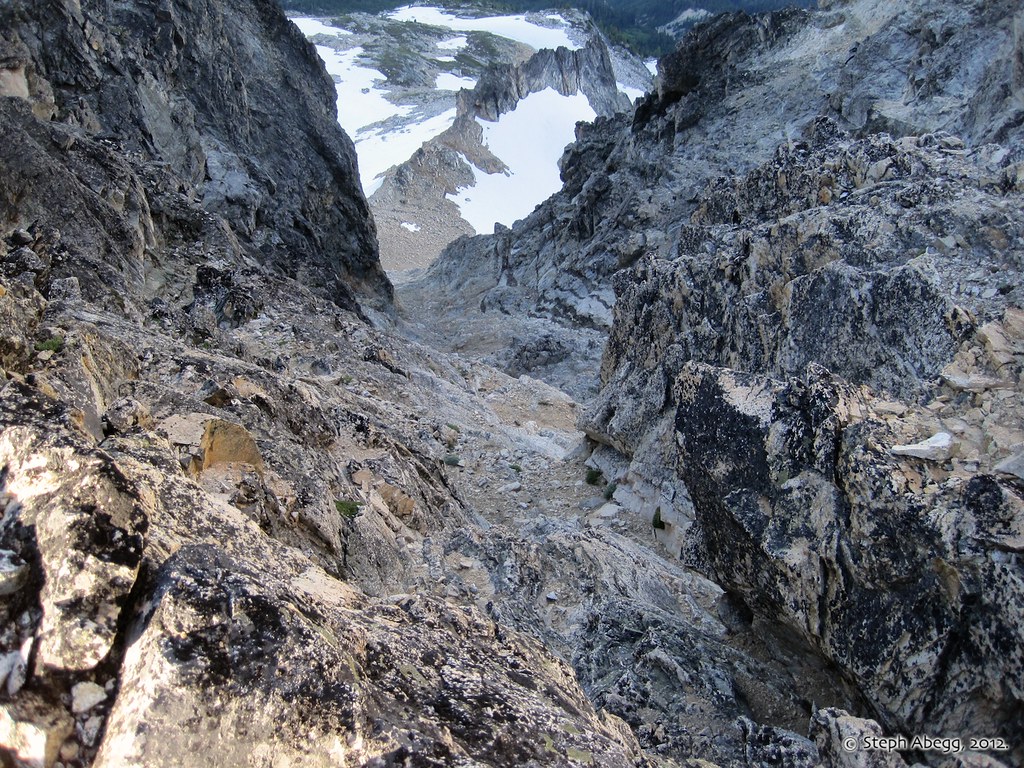
Descent: Downclimb the route about 100 ft to some slings. Downclimb or make two slightly leftward rappels (rappeler's left, slings in situ, this photo shows the first of the two rappels) until nearly level with Black Tooth Notch. Our second rappel ended on a slab, just above another slung horn. Pulling the rope here features some drag. Downclimb (3rd/4th) a few feet to the base of the slung horn, and follow the sidewalk ledge around to Black Tooth Notch. Just below the notch is the SW couloir, which is the standard descent route. We made two rappels at the top of the couloir. Rap slings in place ~30 feet below the notch. Our beta said that the second rappel anchor was to rappeler's left, but we did not find one to our left but we discovered some slings straight down (at the end of our 60m rope). After the two rappels, it was just Class 3 downclimbing to the base of the couloir. Near the end of the couloir where there are cliffs, head left and follow ledges out.
The second rappel down to Black Tooth Notch.
On the ledge to Black Tooth Notch.
Looking down the SW couloir, another one of those chossy 3rd class gullies that are all too familiar in the North Cascades. (3rd class except for two initial rappels.)
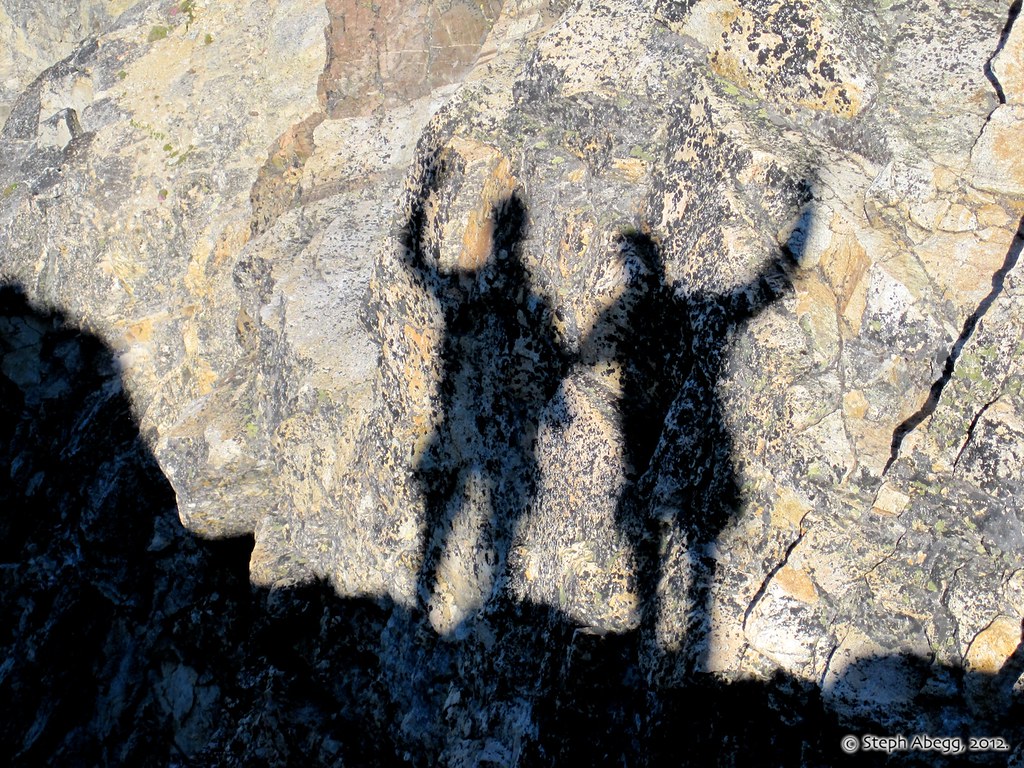
Our shadows on the walls by the SW couloir.
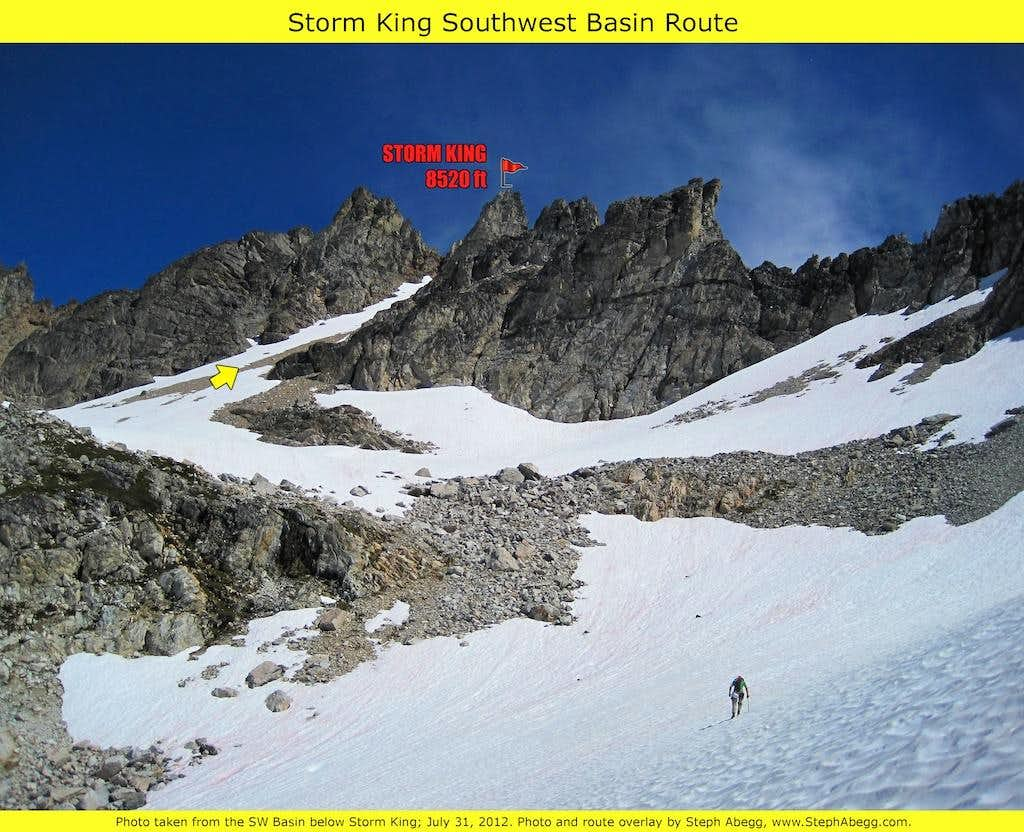
A route overlay showing our travels from the SW couloir over to Storm King and our subsequent descent to the Park Creek Trail in the valley below. This was all easy travel.
The traverse to the standard SW Basin route on Storm King. Besides some unexpected bullet-proof snow in a few areas, it was an easy traverse. The summit area is just visible in the upper right of this photo.
A route overlay showing the general direction of the standard SW basin route up Storm King.
Looking up towards the summit area of Storm King.
The Cascade Alpine Guide told us to ascend to the gully to the left of the middle peak. Summitpost beta described a route that went up the gully on the right. We decided to follow summitpost. It was pretty easy. Abbreviated description below:
To the right of the central, slabby tower is a deep gully with a solitary horn at its top notch. This is the wrong gully. Climb up the gully right of the gully with the small horn (Class 2/3). At the notch, look left. There is a ledge that traverses the backside of the southern tower. There is a slight overhang that requires a squeeze under (Class 3). Traverse all the way across the backside of the summit (middle) tower to a small spur. Turn left and scramble (Class 3) up the spur to the small notch on the north side of the summit. From this final notch you can choose to climb a short, solid Class 4 face of 15 feet to easier ground. Alternatively, you can wrap around the left side and scramble up Class 3 blocks.
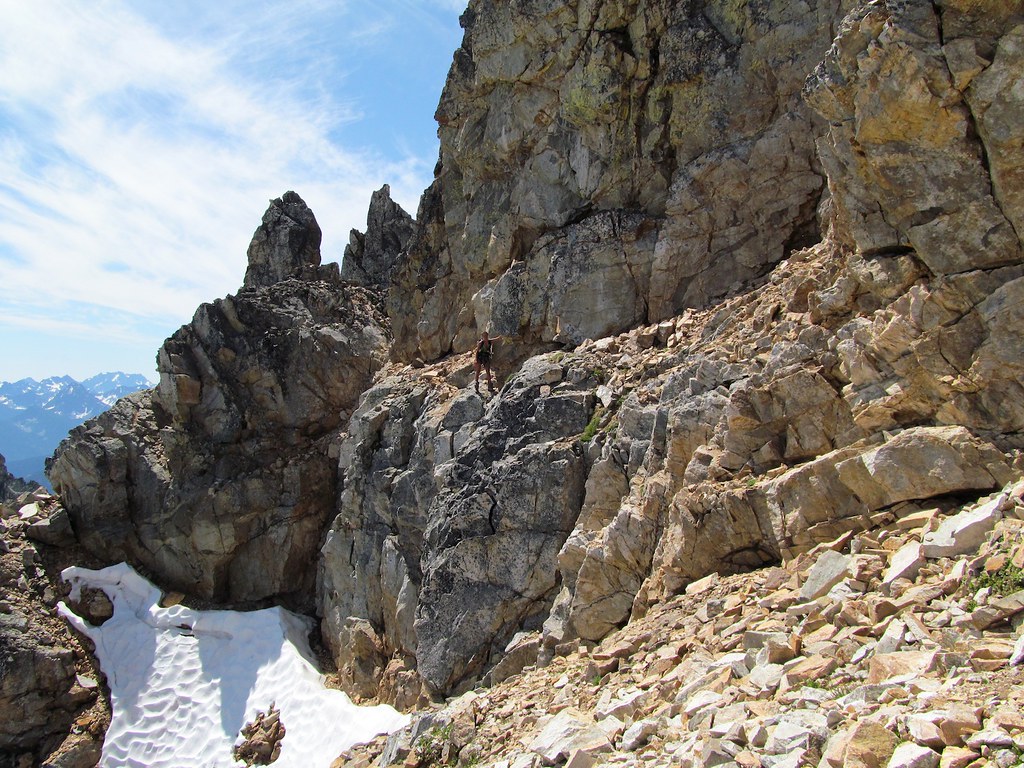
Traversing the Class 3 ledge around the backside of the middle peak. I am standing at the slight overhang. Photo by Brian Walkenhauer.
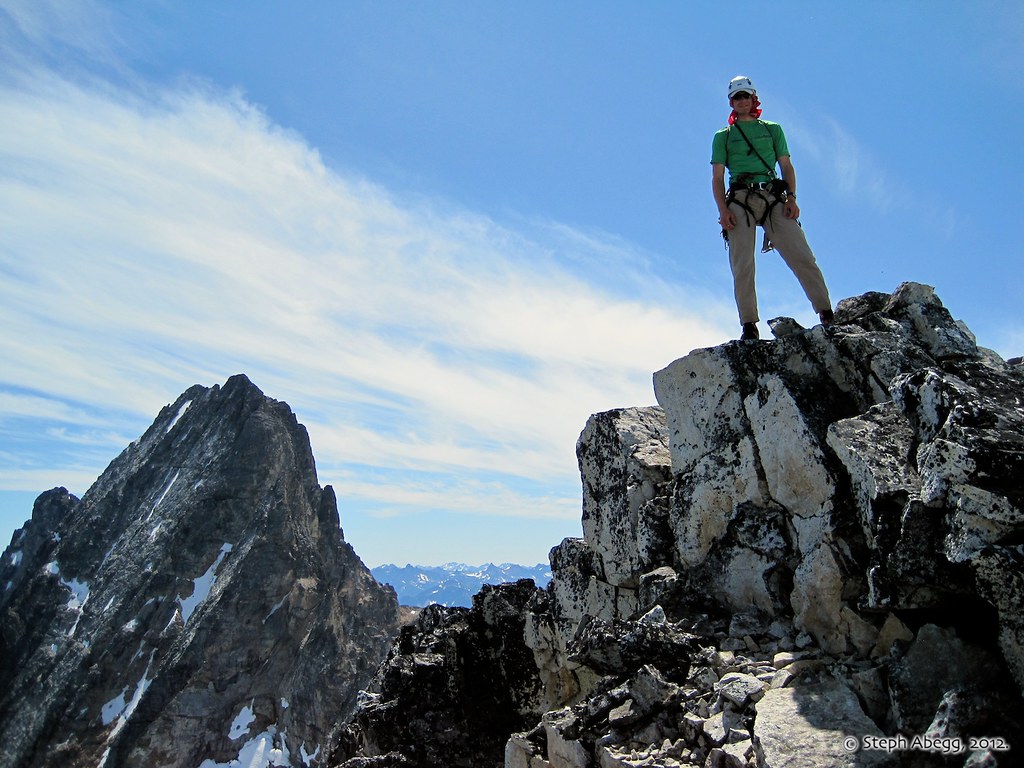
Brian on the summit of Storm King. Goode on the left. A nice profile view of Goode's NE Buttress can be seen from the summit of Storm King. According to the summit register, we were the first party to summit Storm King this year. We decided to downclimb the route rather than rappel, as the slings near the summit suggest some people do for one reason or another.
I stopped to explore a hole in a talus field below the SW side of Storm King. Photo by Brian Walkenhauer.
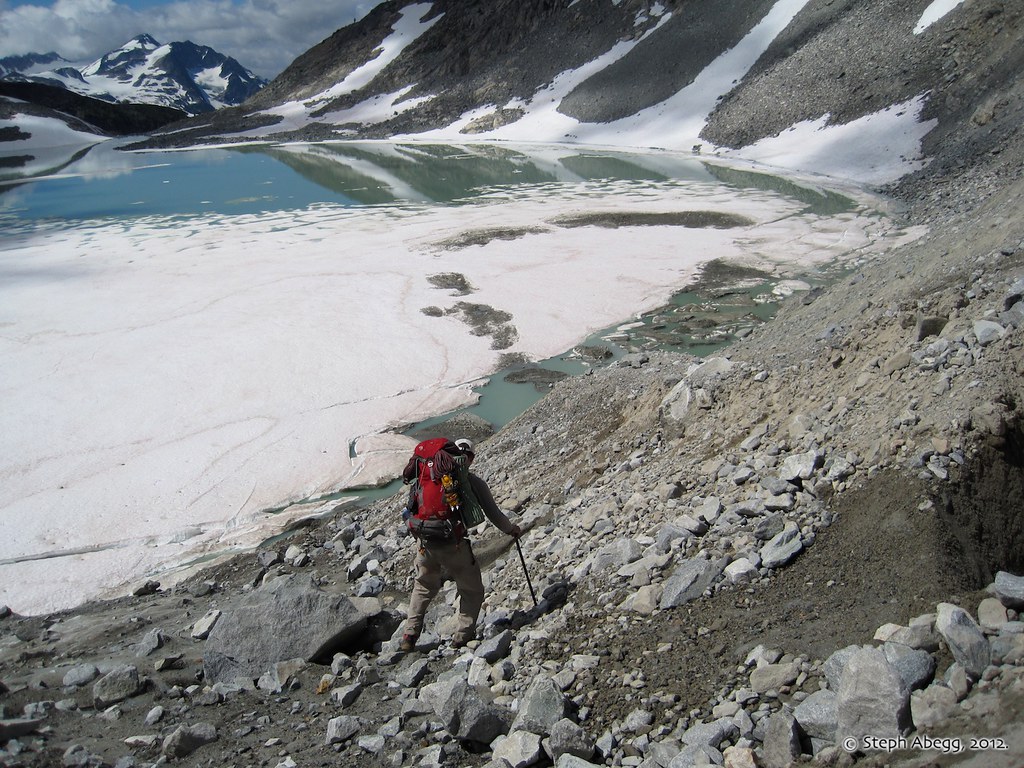
After we climbed Storm King, we descended to the Park Creek Trail. We did this by making a leftward (south) descent through the basin, heading towards the Goode climbers' trail which is just past the ridge in this photo. The climbers' trail is quite good and follows the rib above a deep ravine that flows off Goode. See map and route overlay photo for route. As far as I know there is no Storm King specific climbers' path north of the Goode climbers' path.
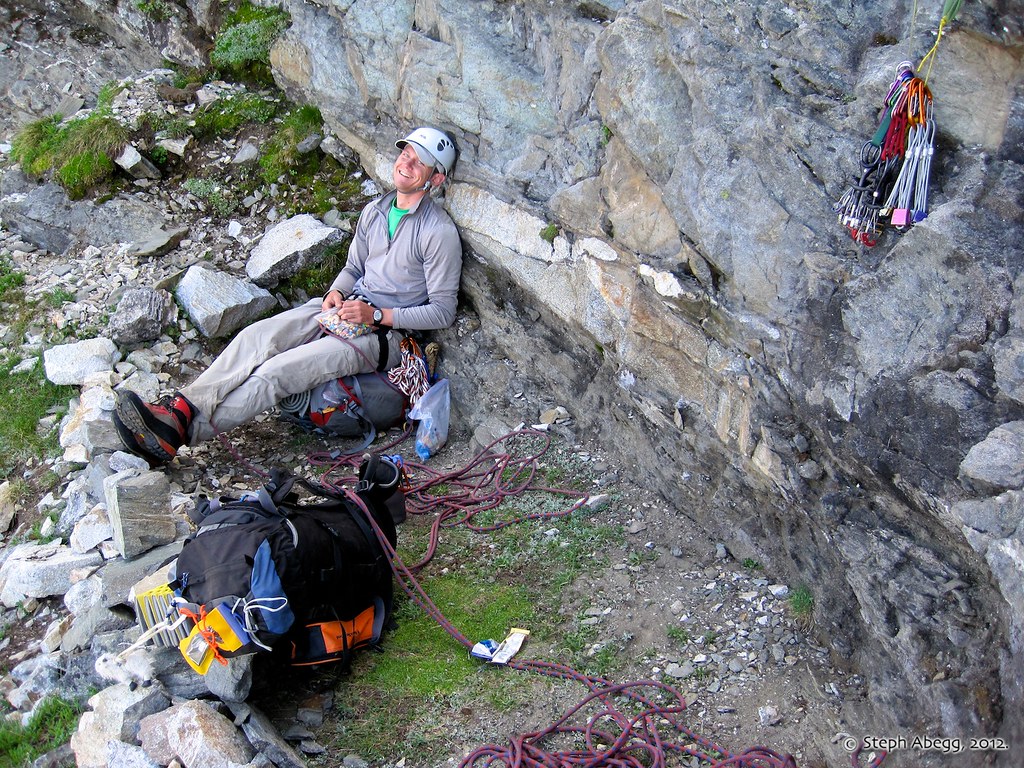
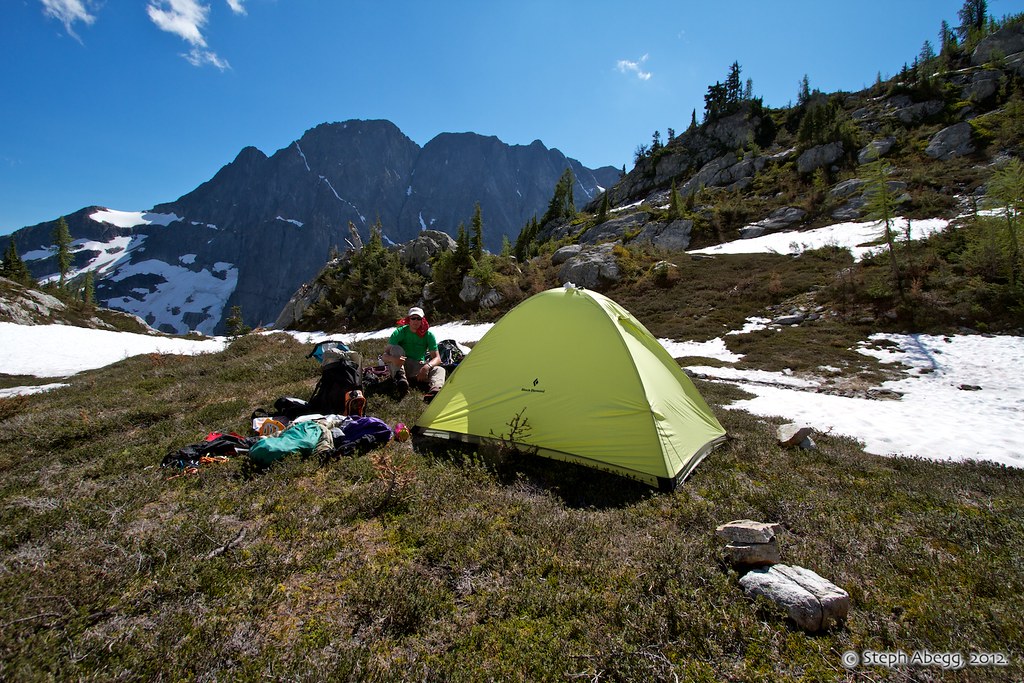
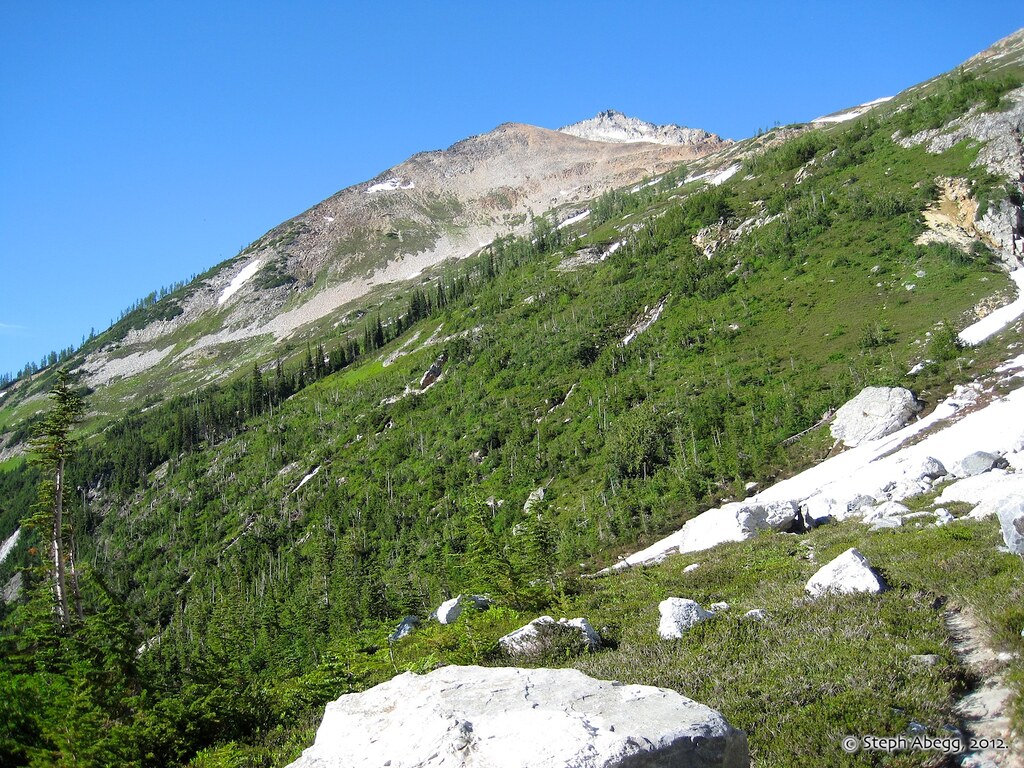
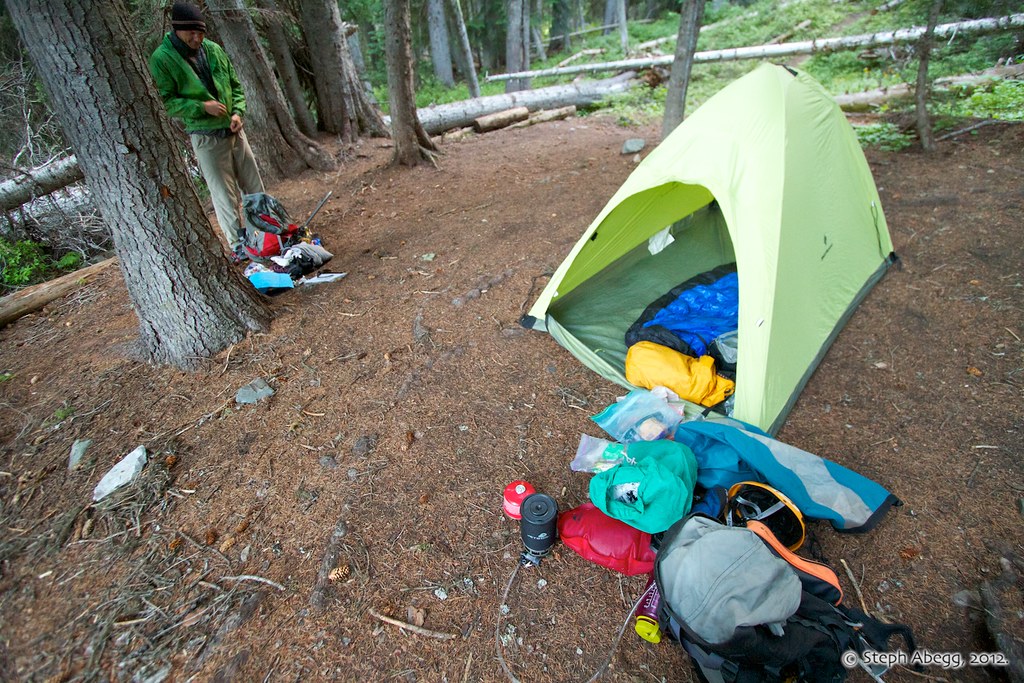
Once on the Park Creek Trail, we hiked about 3 miles along the trail until we found a place to camp about 0.5 miles SW of Park Creek Pass. This photo shows a section of the pleasant Park Creek Trail, with Buckner in the distance.
Our camp at about 6000' about 0.5 mile SW of Park Creek Pass. This was a good camp spot for our next day's plans to climb Booker with day packs and then pack up camp and continue on to Logan. The mountain in the photo is Booker.
DAY4: Climb Mt. Booker, move to high camp on Logan.
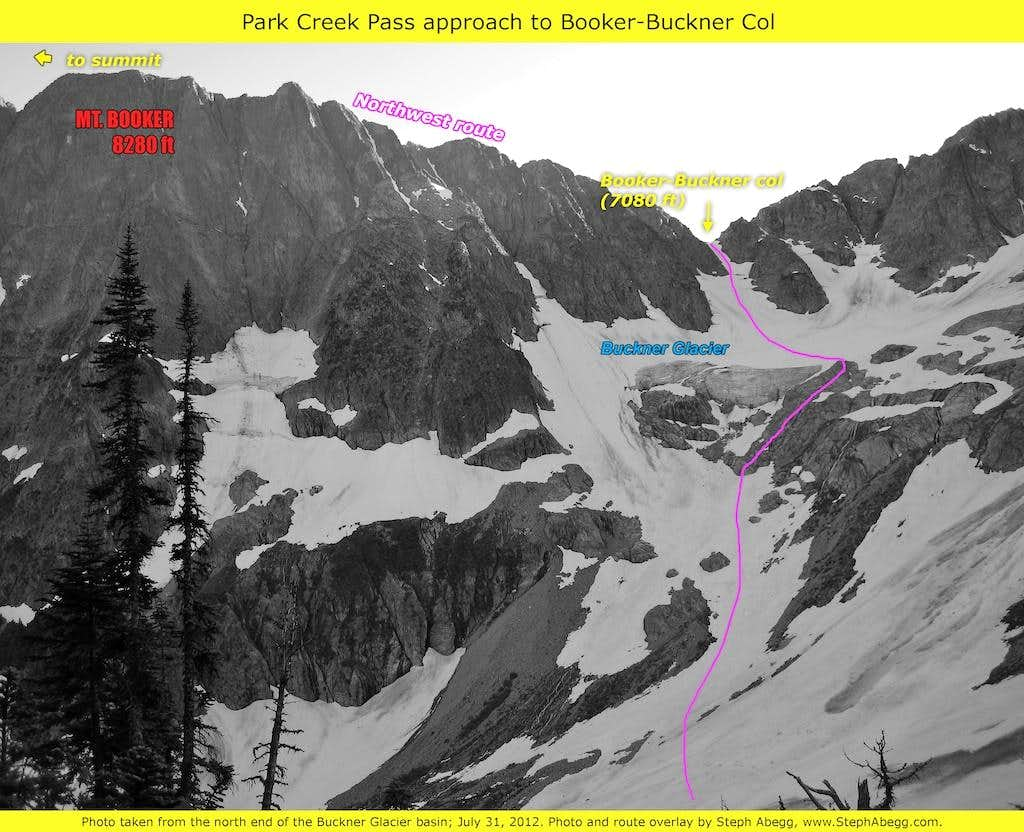
We shouldered day packs and headed out to climb Booker via the
Booker-Buckner col which would access the standard NW Route (class 3).
There were a few cracks leading up to the col but they were easily
bypassed on snowbridges. .
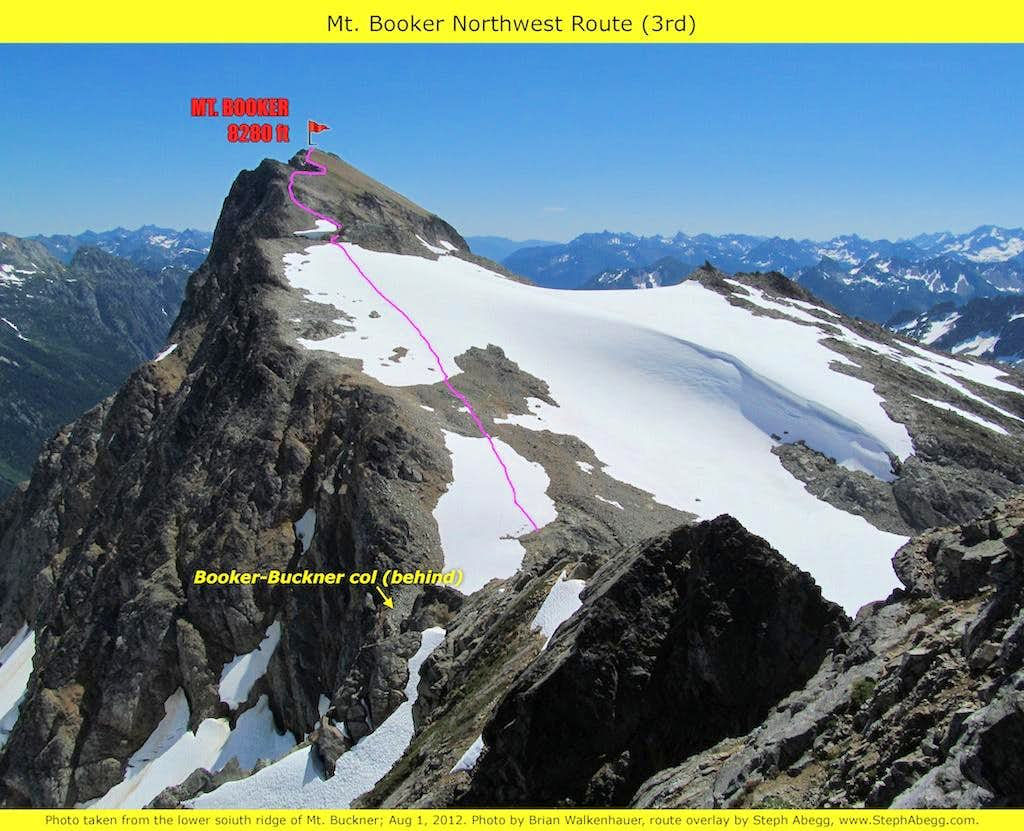
Route overlay showing the easy (Class 2/3) Northwest Route on Booker.
Approaching the Buckner Glacier section below the Booker-Buckner col.
Buckner Glacier below the Booker-Buckner col.
Heading up towards the Booker-Buckner col. Photo by Brian Walkenhauer.
This would be a lot trickier if this snowbridge weren't here. Photo by Brian Walkenhauer.
Interesting note: Less than a week after our trip, another party was crossing this snow bridge when it collapsed between them (here's the link to their TR on CascadeClimbers.com). Fortunately, they were okay, besides the fact that one of the guys was above the 'scrhund and the other was below.....
Summit register on Booker. Despite the easy route and great views and relative proximity to Cascade Pass, this peak is climbed about once a year.
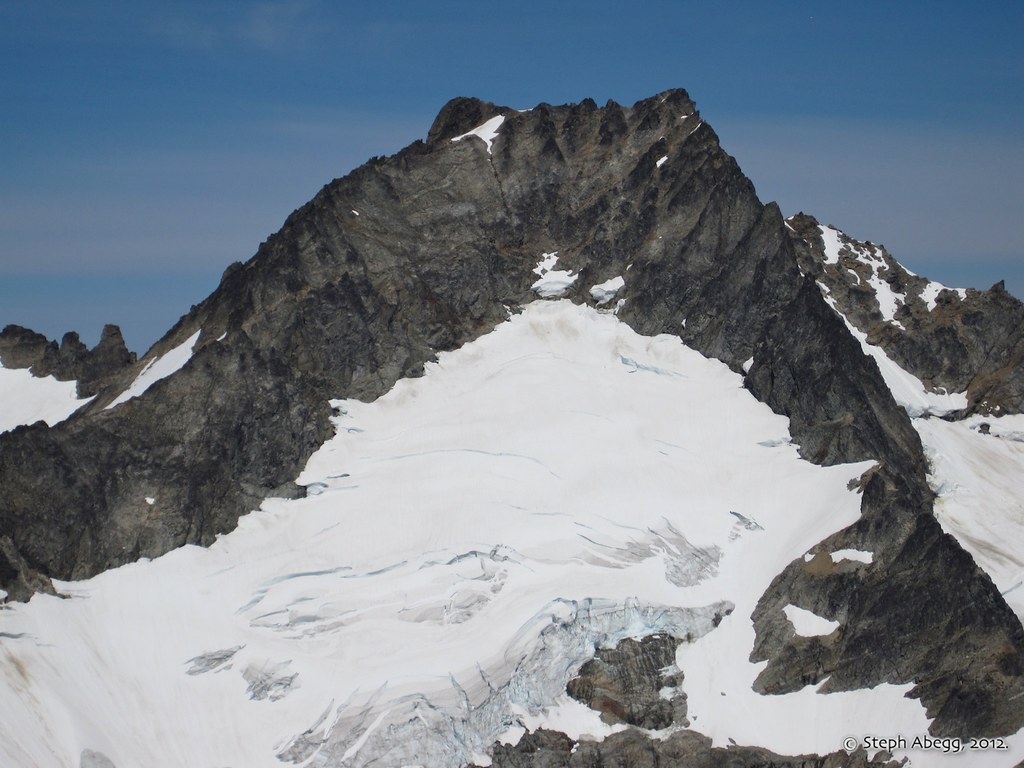
Mt. Buckner is just north of Booker, linked by the Booker-Buckner col. Buckner has two summits of nearly equal height. The SW Peak (left in photo) is estimated to be 2 feet higher than the 9112 ft NE Peak (right in photo). I had a pretty straight on shot in this photo, and it almost appears as if the NE Peak is higher, but this could be due to perhaps the SW Peak being a bit further from me than the NE Peak or a slight tilt of the camera. I'm tempted to haul a survey kit up here and determine more exactly the difference in height between these two summits....
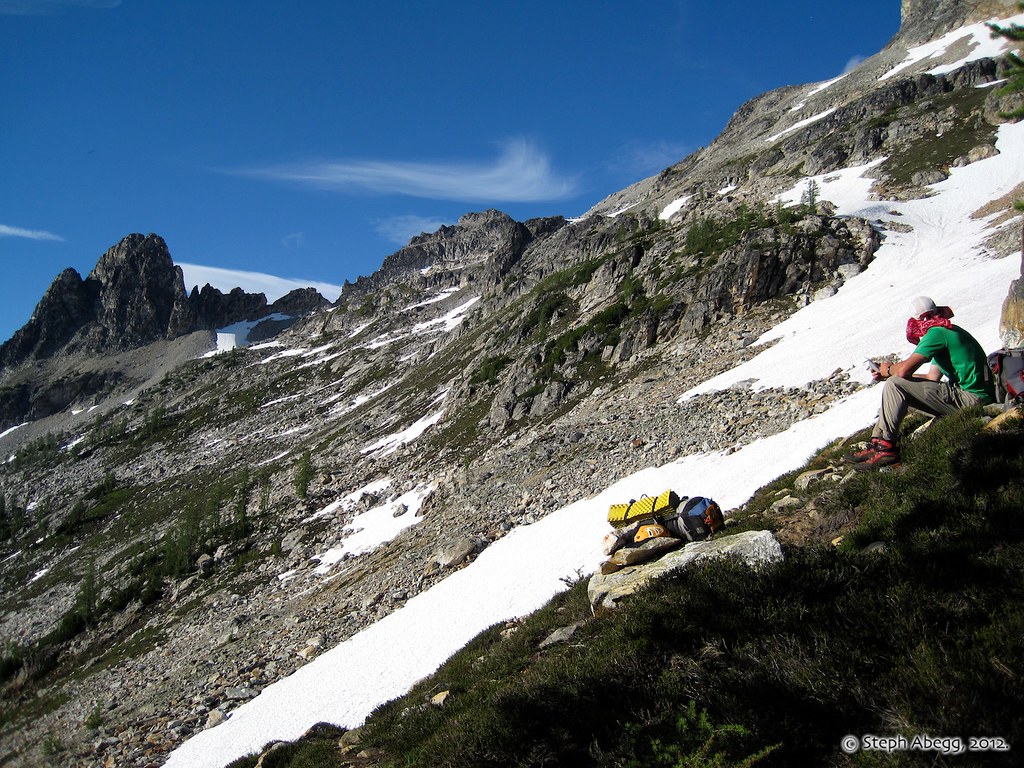
Back to the col by noon, we decided to try to climb Buckner via its South Ridge route, which Beckey describes as mostly Class 3. I was concerned that climbing Buckner would leave us without enough time to establish a high camp on Logan's Fremont Glacier, so when the ridge began to look loose and not too much fun (or safe) to climb, we quickly made the decision to forgo Buckner and head back to move camp to Logan. In this photo we are on the lower South Ridge just before we bailed.
In this photo you can see the loose terrain and even a sling where someone has rappelled in the past. Not a promising sign....
Another benefit of bailing on Buckner was more time to enjoy the flowers that were blooming all around. This is a photo of Indian Paintbrush.
Wormseed Mustard
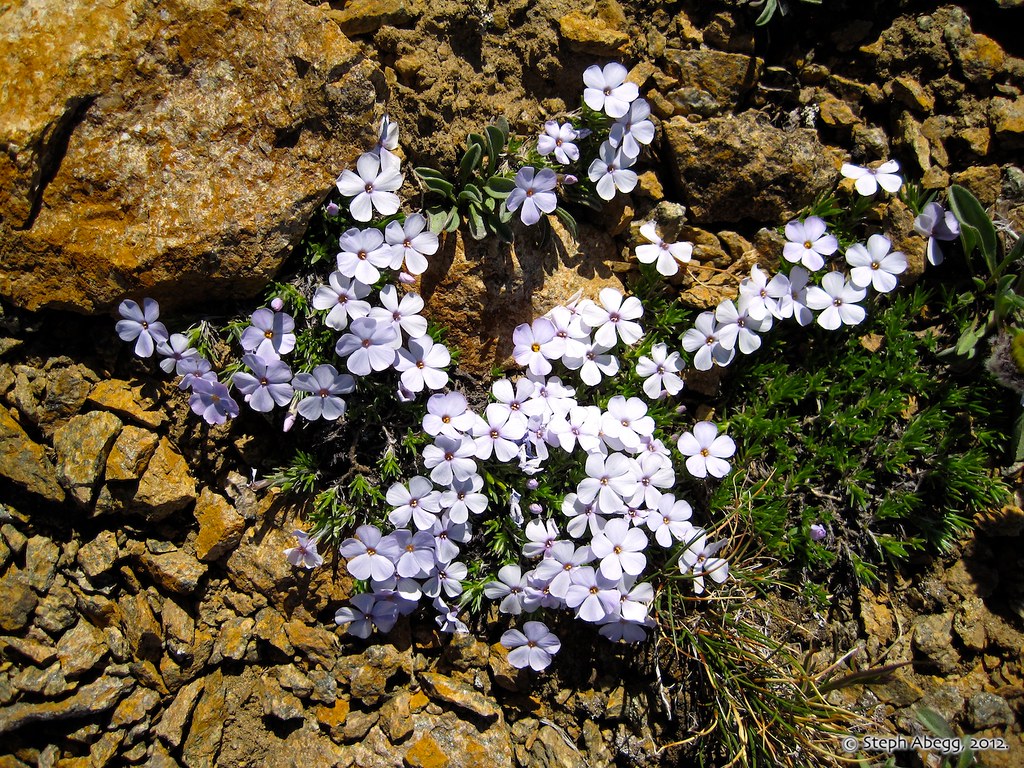
Phlox
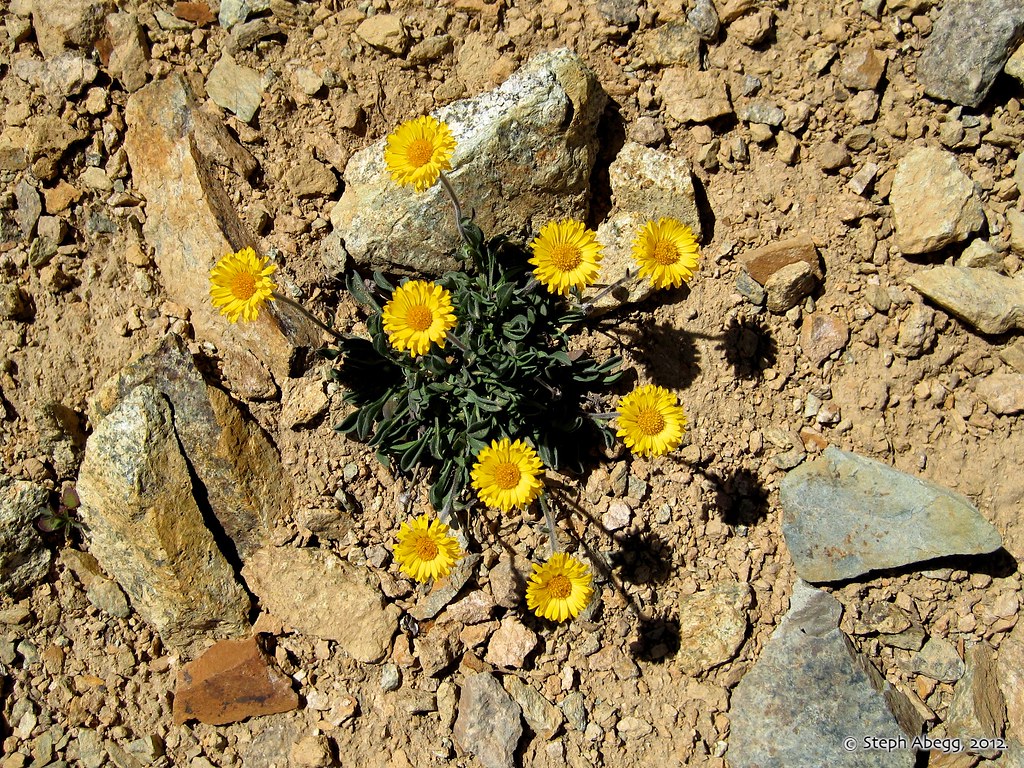
Golden daisies
A mountain goat scuffed area.
On our traverse back to camp, we noticed these bowl-like depressions in the snow. We tried to theorize what might have caused these....ice blocks that since melted, meltwater tunnels below, Sasquatch, ....
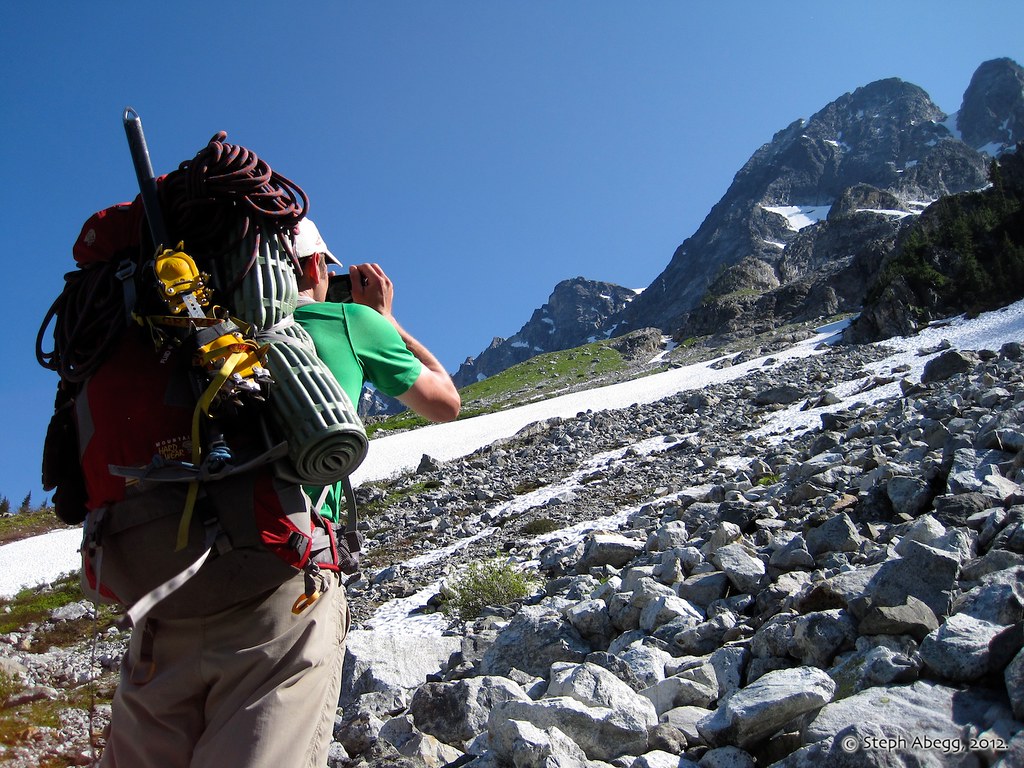
It was mid-afternoon by the time we got back to our camp. We packed up and began our traverse to the Fremont Glacier on Logan.
Nelson's description: "From the pass, descend the Thunder Creek Trail north for approximately 0.4 mile to a rocky flat with a small stream. Look for a climbers track leading out of the flat. Traverse northeast, crossing a broad, sandy gully at 6,900 ft approximately 1 mile from the pass. Continue traversing northeast towards the sharp, rocky point at 7760+ feet. Turn right, uphill, before reaching this peak. Ascend talus or snow to the Fremont Glacier (8000 ft), approximately 2 miles from Park Creek Pass."
Beautiful park-like terrain on the traverse to Logan. Photo by Brian Walkenhauer.
This photo shows the 7760+ ft rocky point on the far left. The Fremont Glacier begins just right of the point.
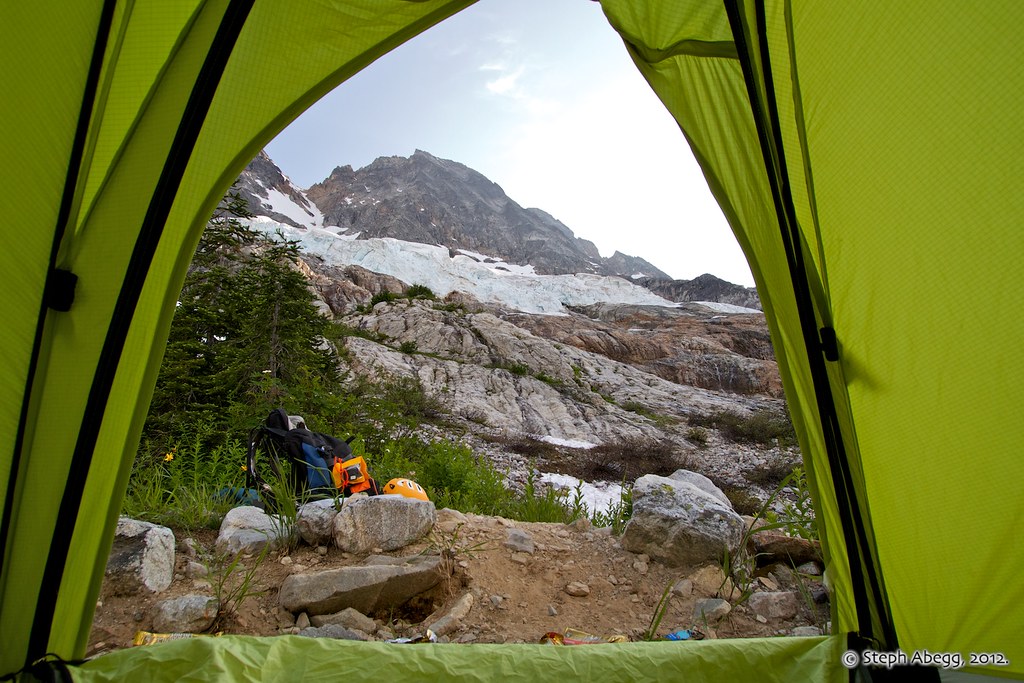
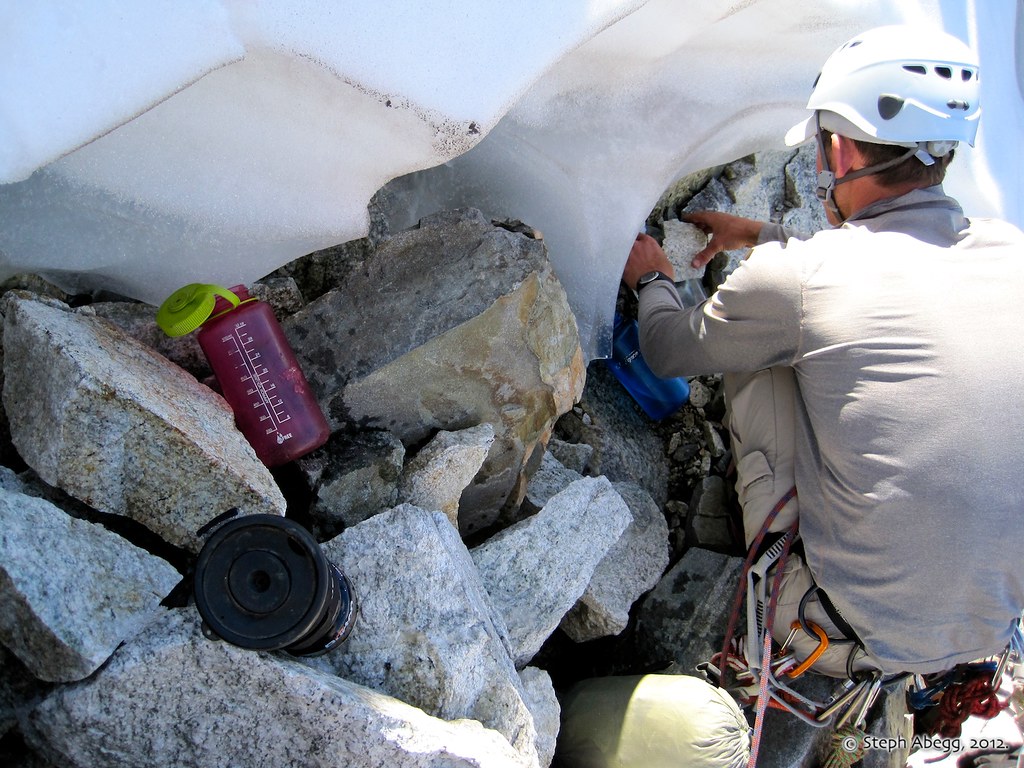
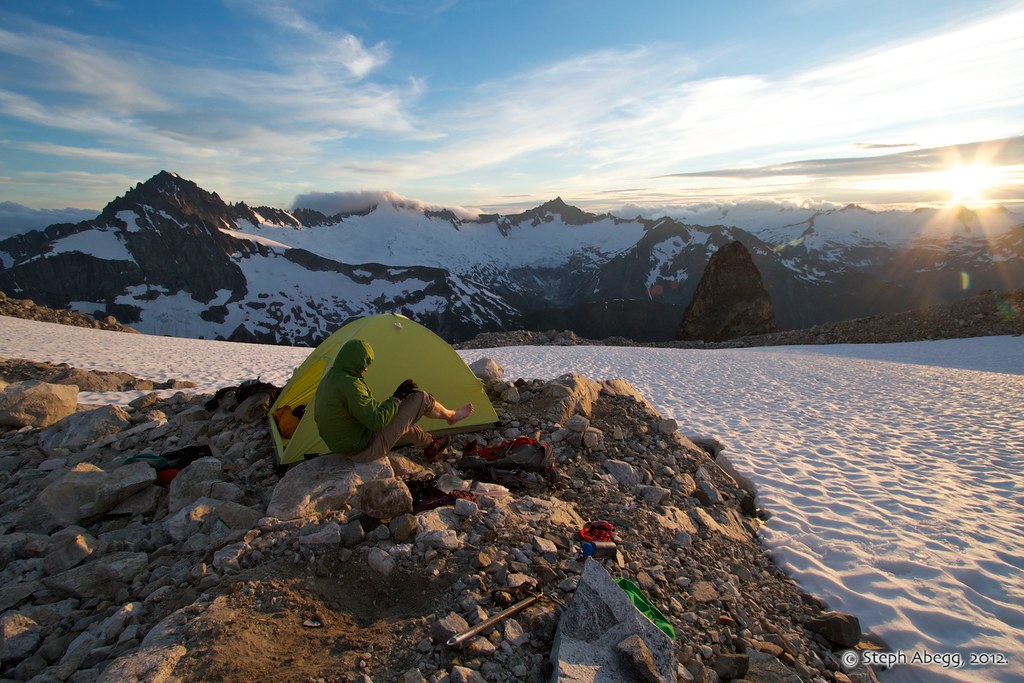
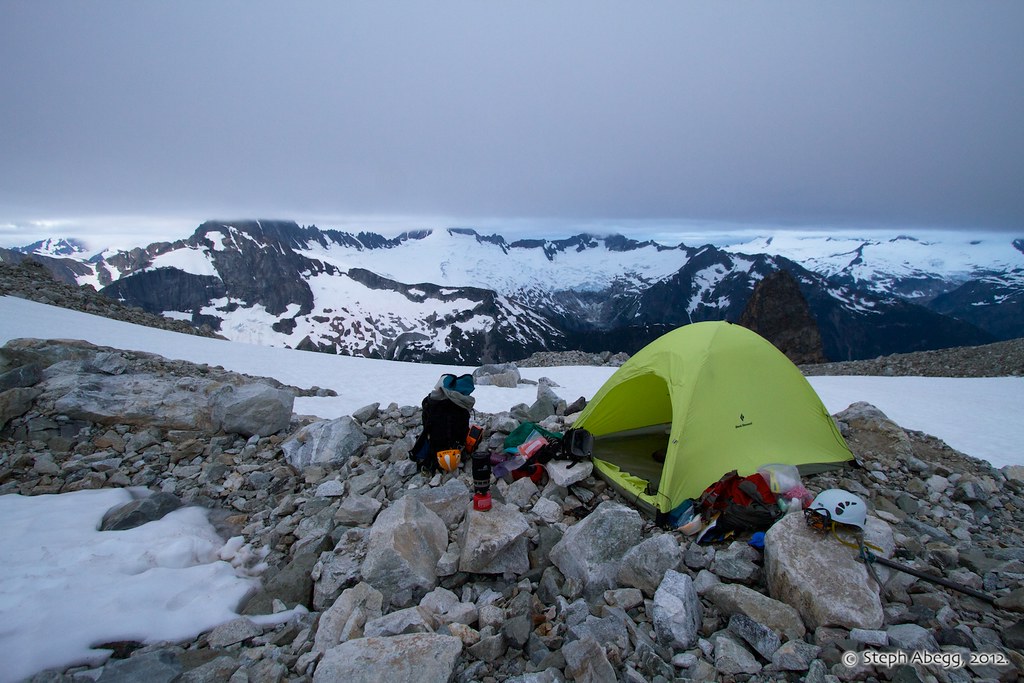
We camped on a rocky outcrop at around 8000' on the Fremont Glacier on Logan. It was a beautiful spot with sweeping views of Logan on one side and Buckner, Boston, and Forbidden on the other.
Looking up towards the summit area of Logan from the base of the Fremont Glacier (8000') where we camped on a rocky outcrop.
Clouds moved in and out quickly, making for some nice photo opportunities.
Lenticular clouds forming over the south summit of Logan. A sign of weather to come....
This photo was taken at midnight. It was quite bright during the nights on our trip because of the nearly full moon. Point 8248 behind. Exposure: 30 sec, f/5.6, ISO 400.
Another midnight photo.L ooking up towards summit area of Logan. Exposure: 30 sec, f/5.6, ISO 400.
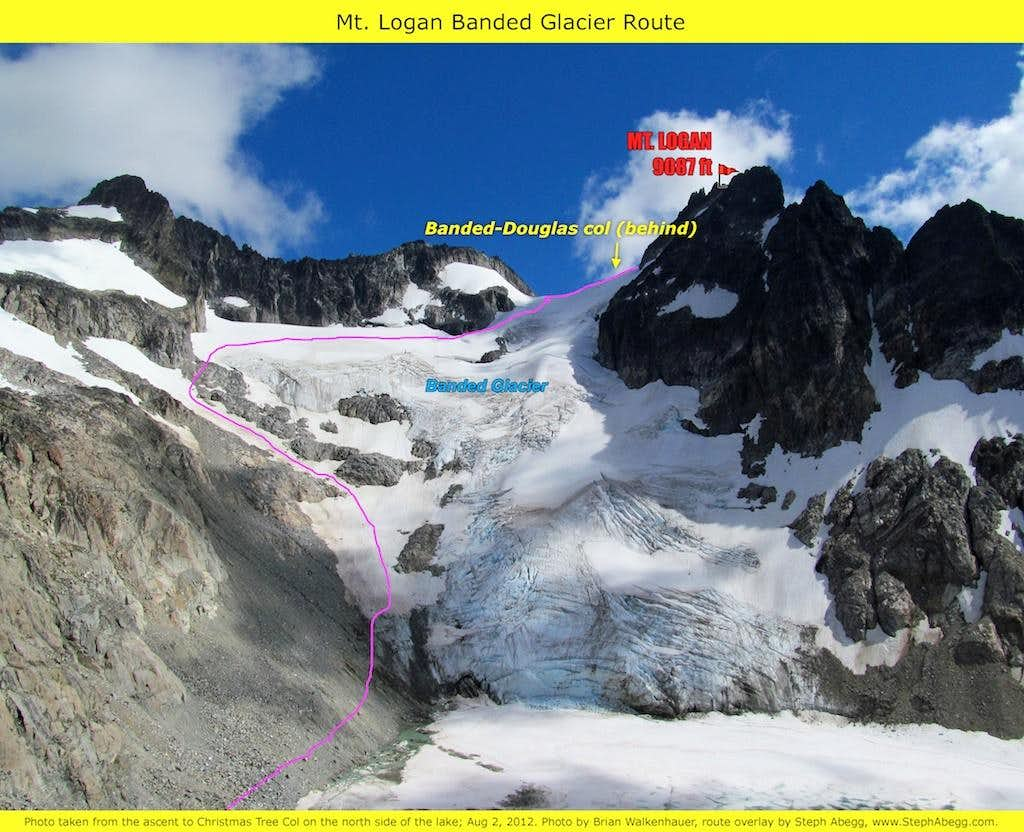
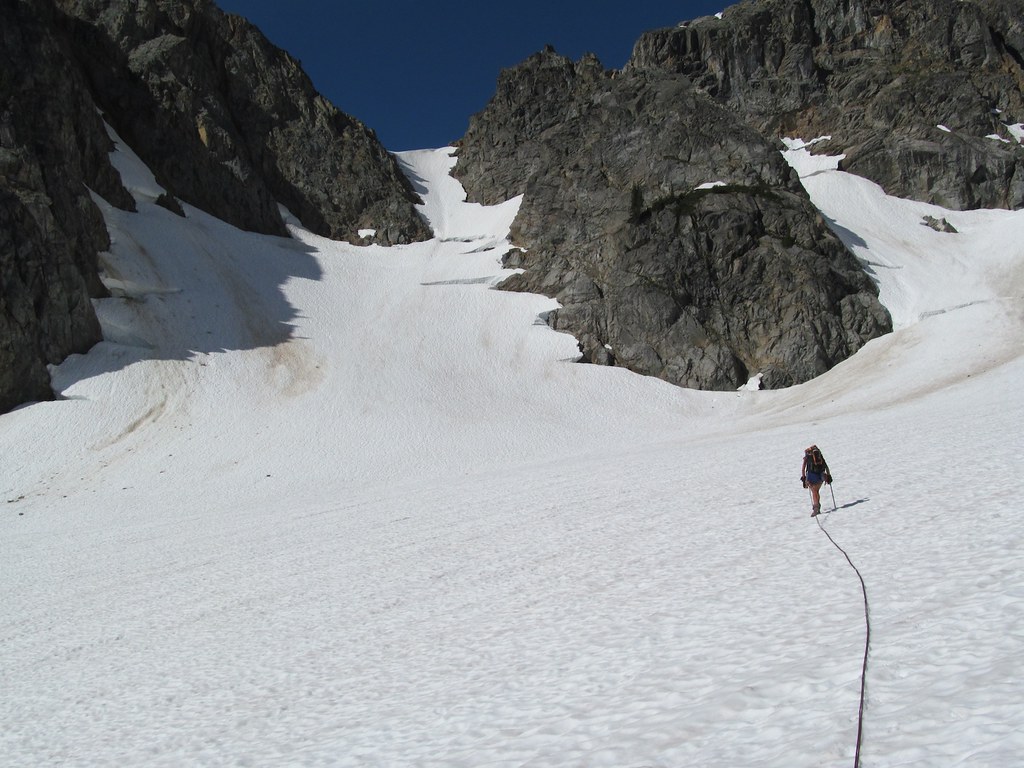
DAY5: Climb Mt. Logan via the Fremont Glacier and descend via the Banded Glacier.
Route overlay for the Fremont Glacier route on Mt. Logan. A pretty straightforward route if you can see where you are going.
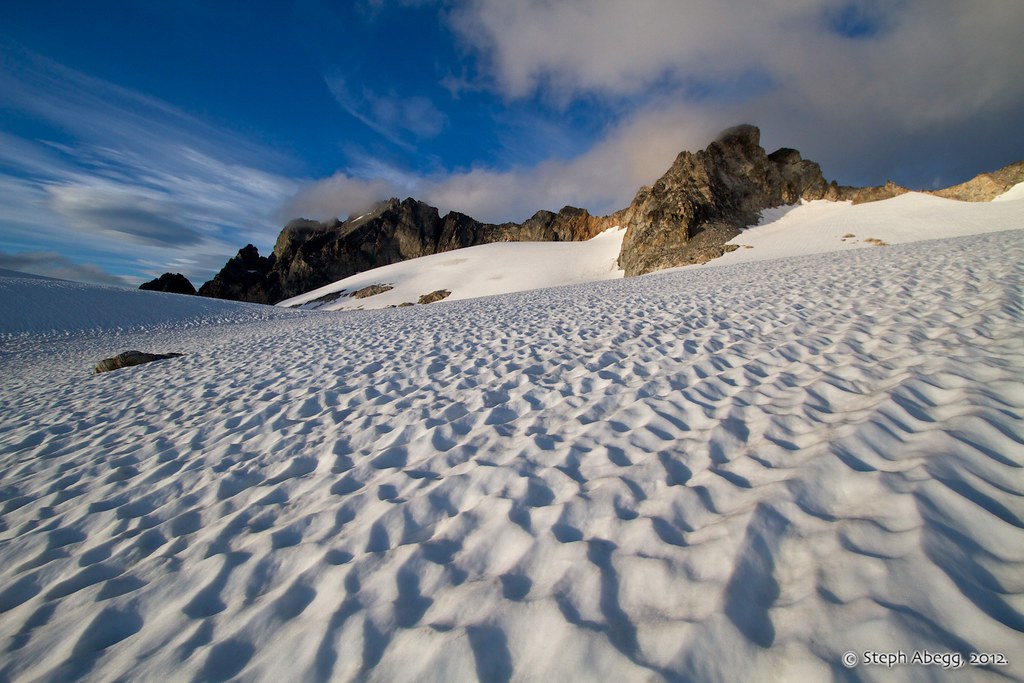
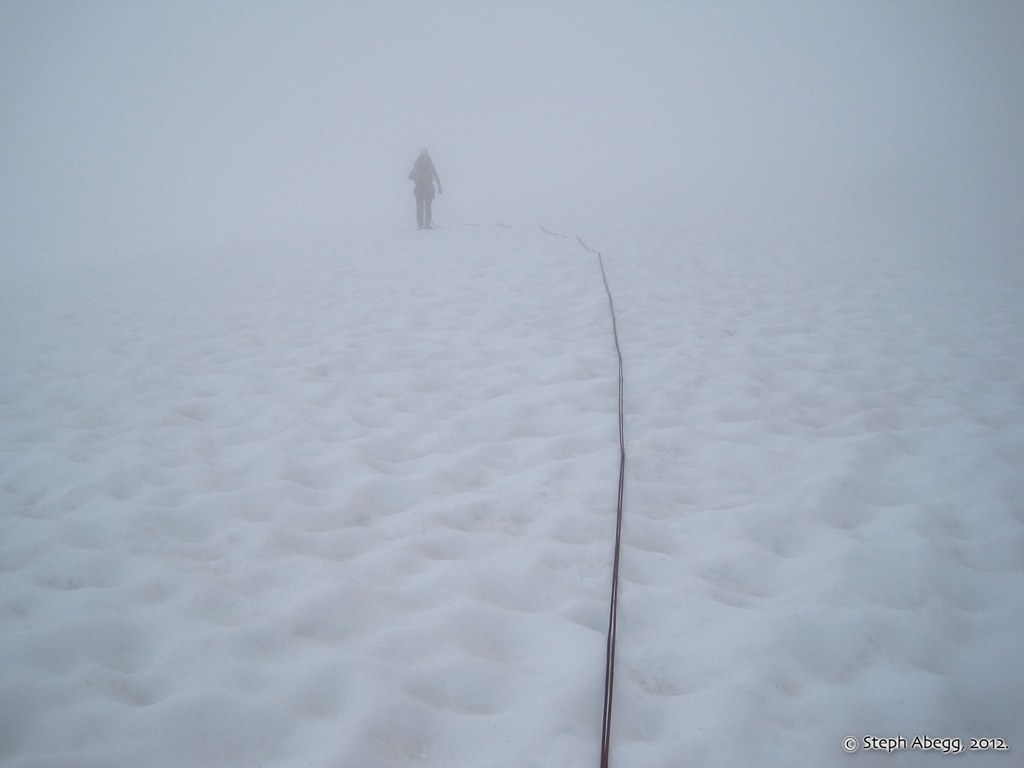
We awoke to a cloud deck not too high above us. The summit area of Logan was completely obscured.
We took our time packing up hoping the clouds would lift, but when
they appeared to be pretty well settled in for at least a few more
hours, we decided to head up into the clouds and just rely on our
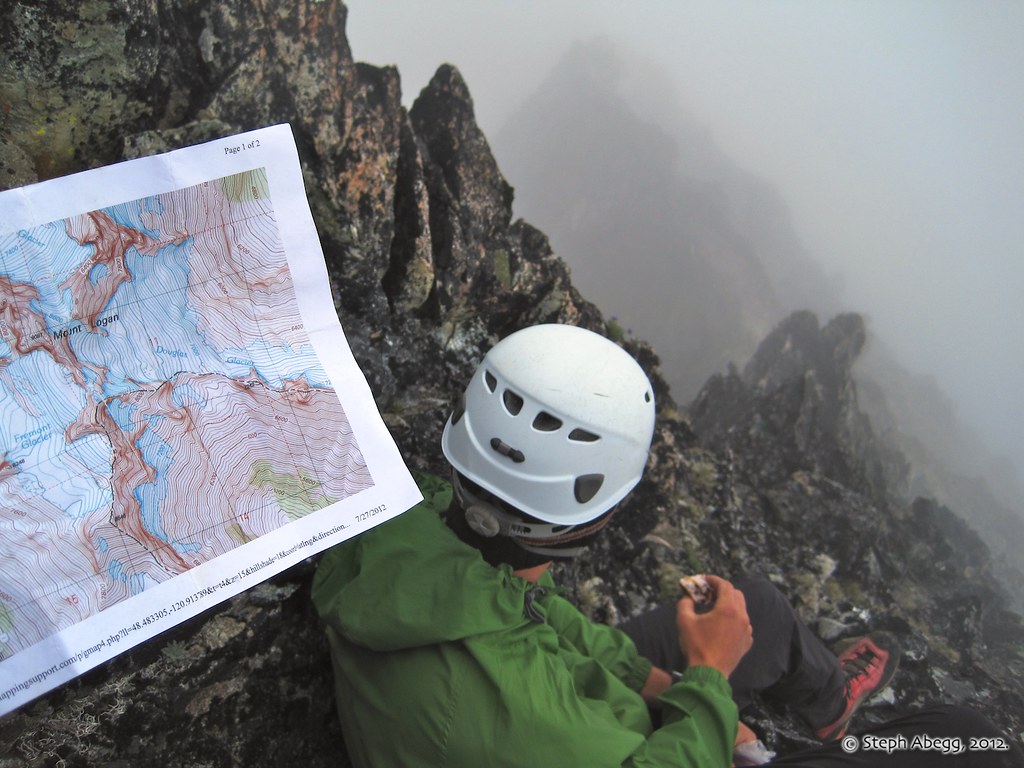
navigation-by-map skills.
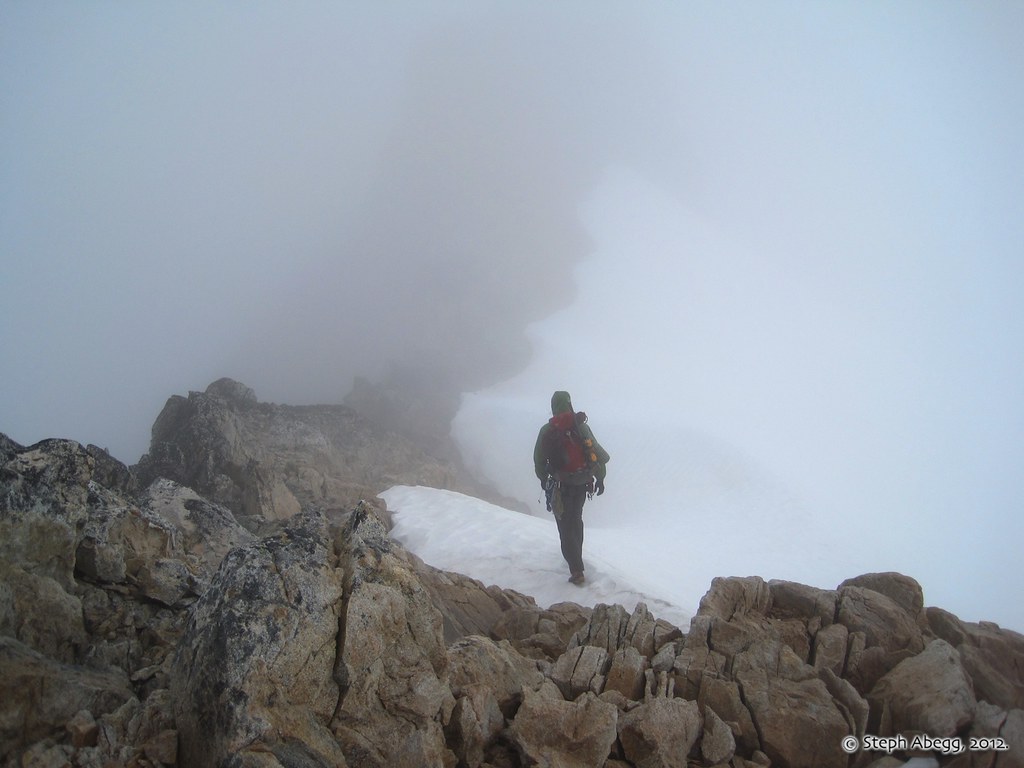
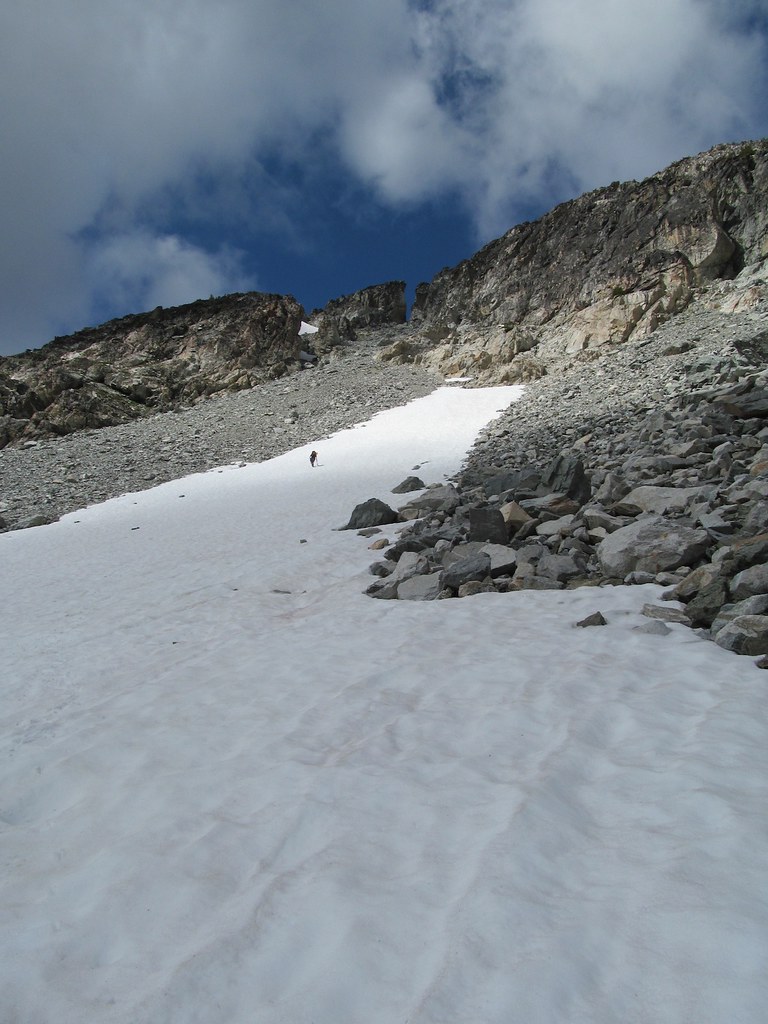
The route description describes Class 2/3 gully to the ridge. The gully we encountered was a bit spicier than this, but we made it to the ridge nonetheless. We knew the summit was to the left, so we started to head that way.
It took us a few false summits to realize that we had come up on the ridge further to the right (south) than we initially thought, and that the actual summit was further away to the left (north). So we kept traversing ledges (mostly class 2/3, occasional class 4 move) on the east side of the ridge.
The more false summits we summited, the more data points we had to determine where exactly we might be on the map.
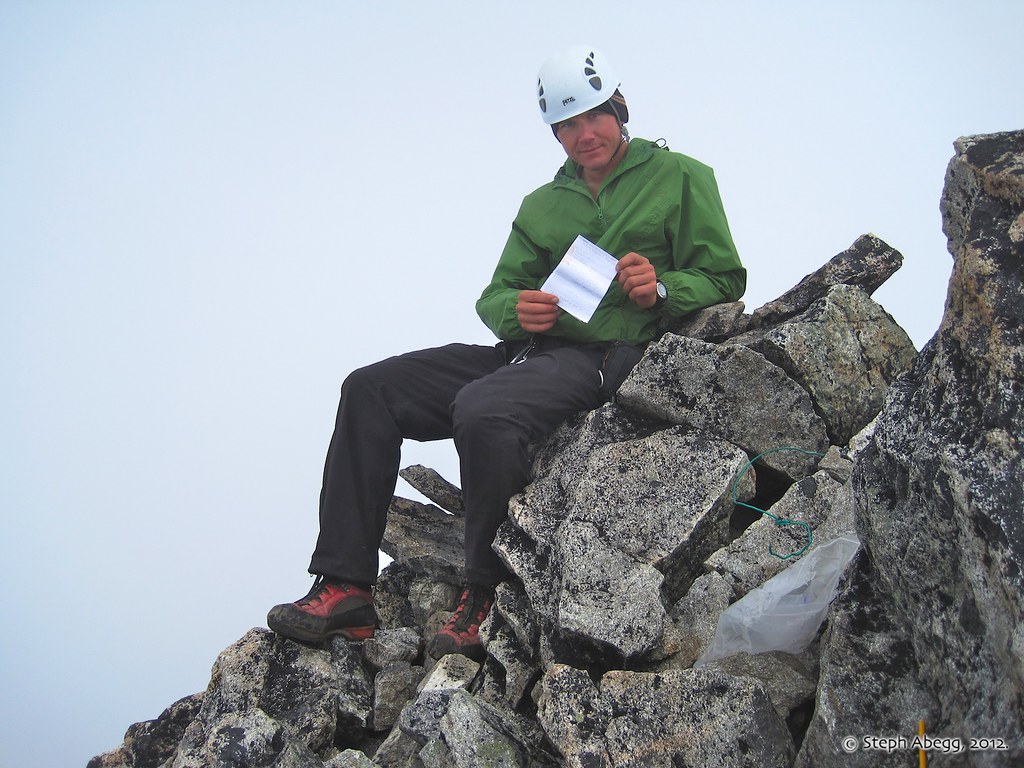
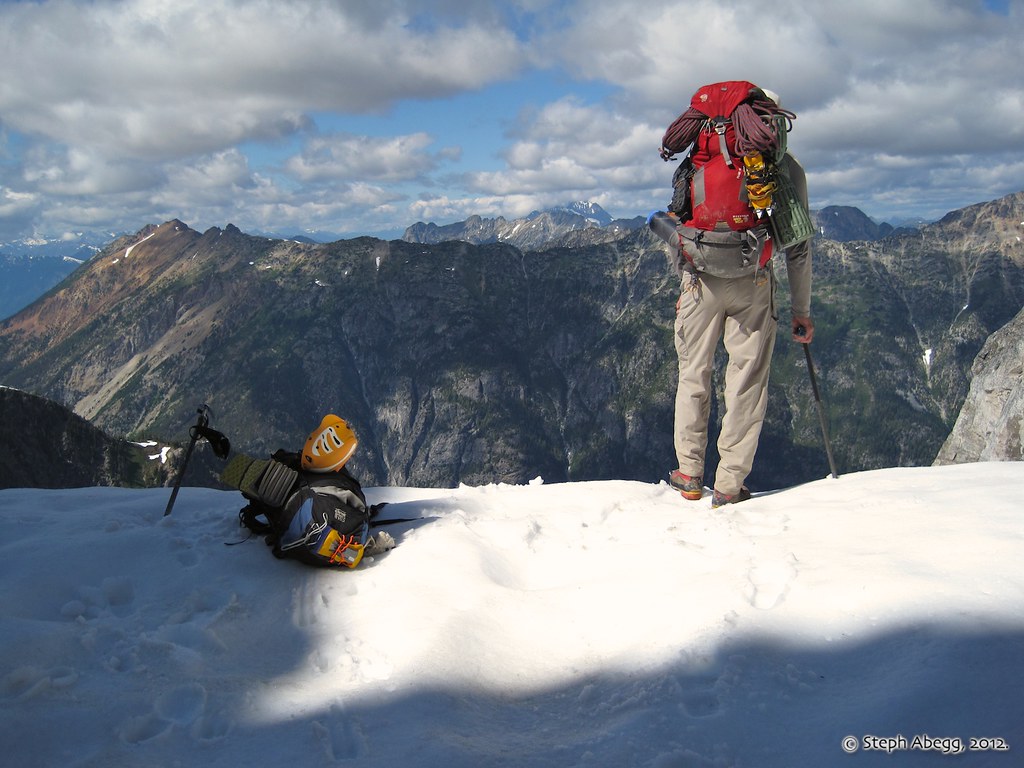
Finally, a high point with a summit register! We must have made it!
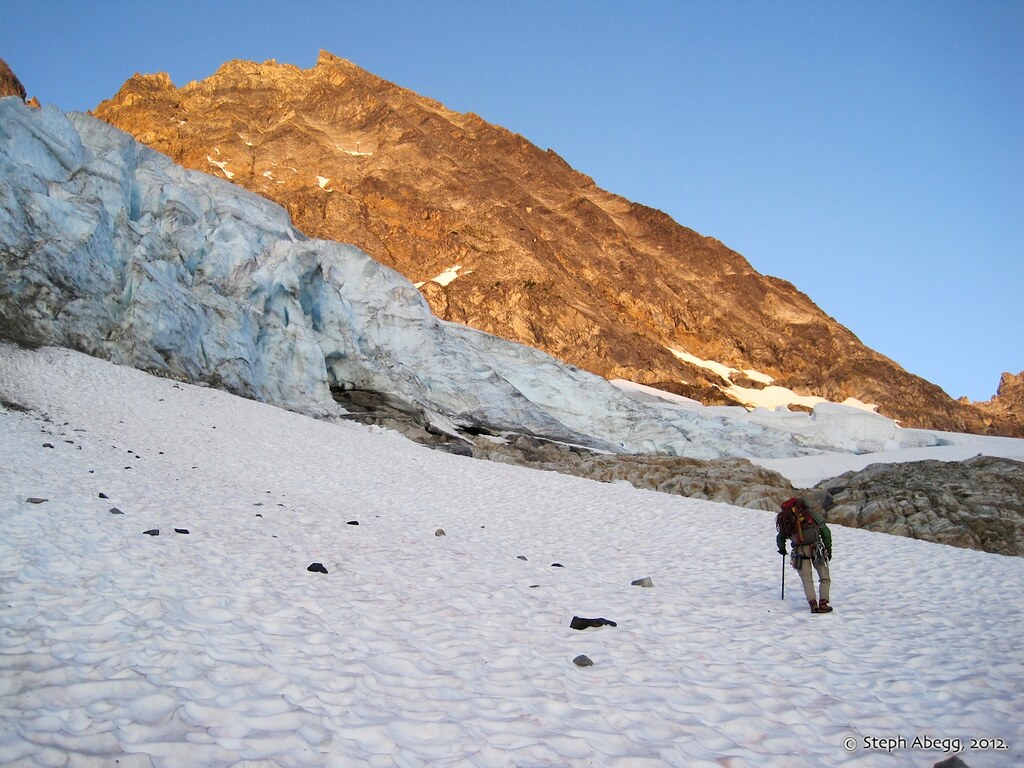
Our plan was to descend the Banded Glacier. (We had a few reasons for wanting to descend the Banded instead of the more-typical Douglas Glacier: (1) we had heard tales about 'schrunds and 'schwacking on the Douglas Glacier route (although I've since been told that the Douglas Glacier approach is easy and the 'schwacking is "not too bad", so I'm not sure what to think other than to go in and see for myself!), (2) thanks to a helpful friend we had some great beta for the Banded Glacier that made it seem rather straightforward if we nailed the route, and (3) the Banded Glacier just sounded like wild and spectacular terrain.)
The Banded Glacier has some huge cracks, so with the poor visibility we needed to be extra careful. From the Banded-Douglas col, we knew we wanted to take the right side of the glacier down. There ended up being only one major crack we had to navigate, but it was a huge one. Fortunately, there was a decent (albeit narrow) snow bridge. From here, the descent was as straightforward as predicted.
As we descended the upper Banded Glacier, the clouds began to lift. Here we can see Banded Lake at the toe of the Banded Glacier. Brief windows of visibility gave us confidence that our route was a good one.
We made a quick and uneventful descent of the right side of the Banded Glacier. Once on snowfields below the glacier we unroped and descended to the lake. We contoured the lake for a ways and then ascended a gully about 500-700 ft to a col (I think this is what others have referred to as "Christmas Tree Col"). Said col is about a third of the way from the right edge of the photo, just to the left of the highest snow tongue.
Route overlay of our descent of the Banded Glacier. Now that we had visibility, we could appreciate the rugged beauty of this area.
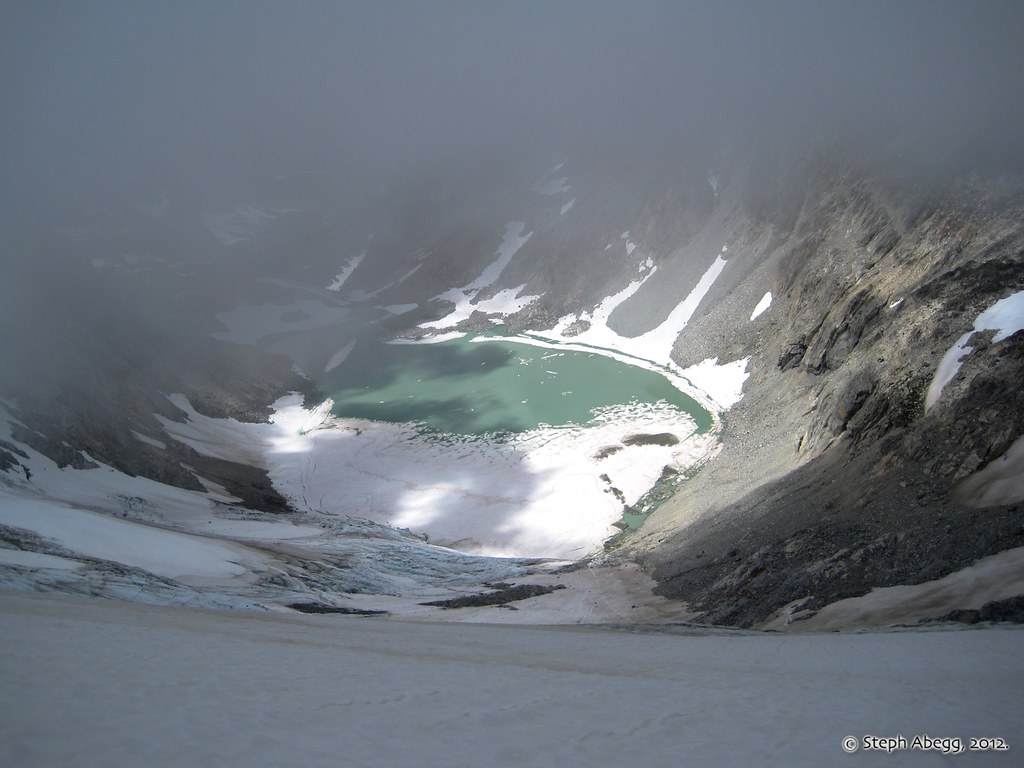
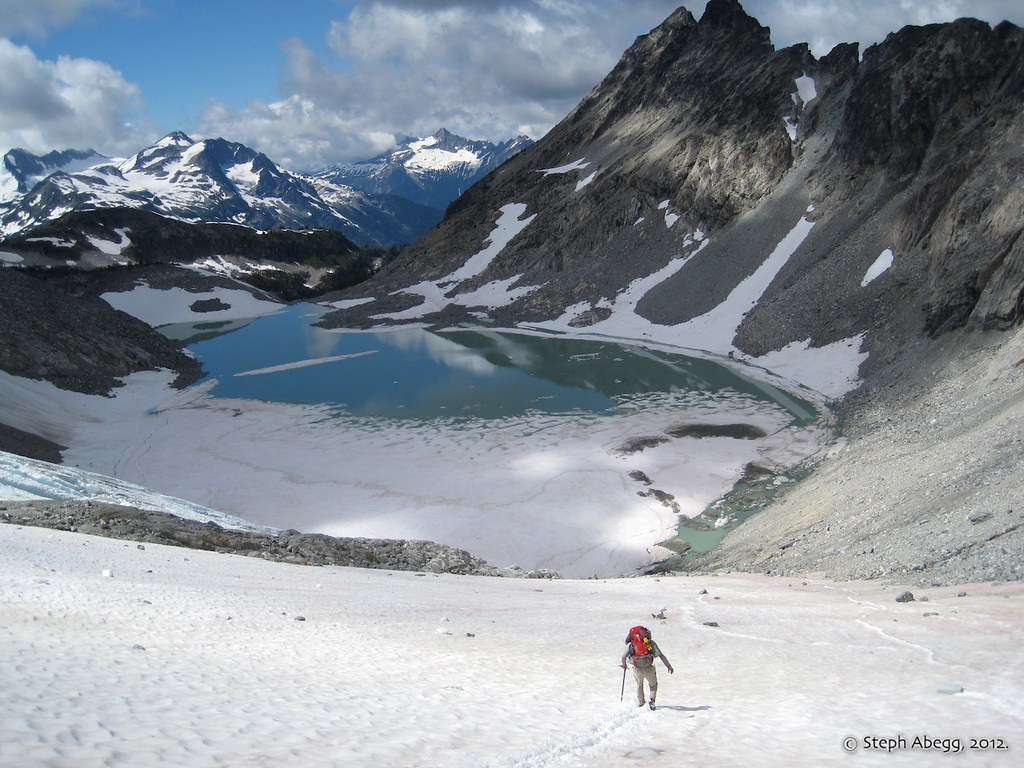
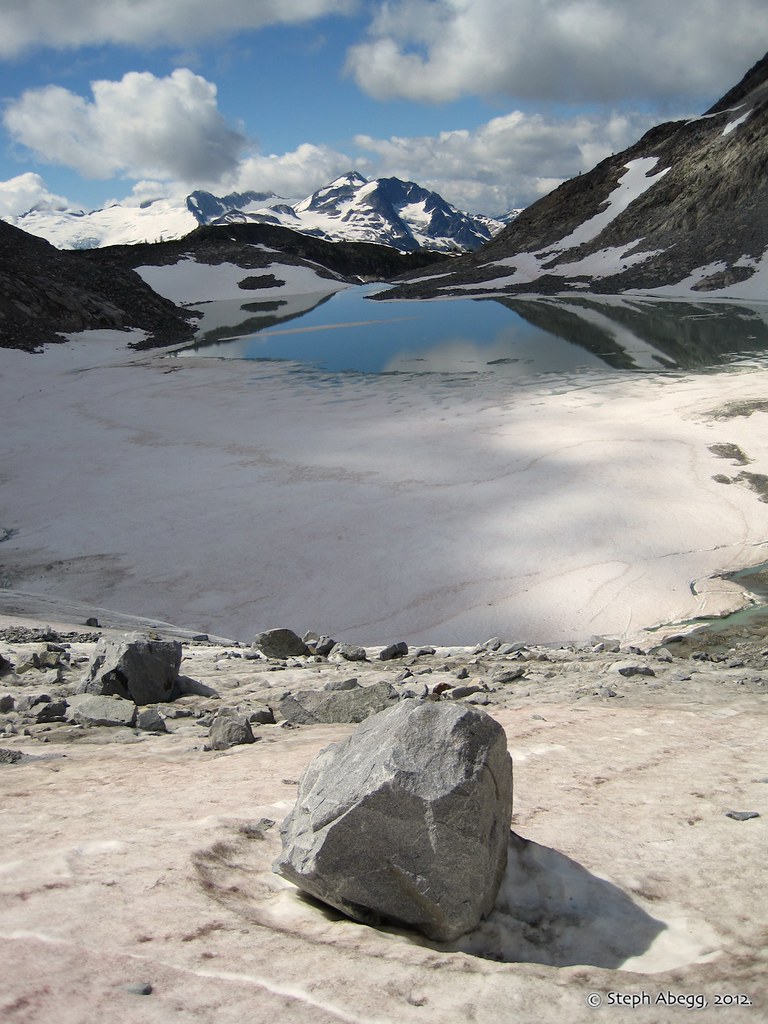
Beautiful Banded Lake
The toe of the Banded Glacier and Banded Lake. Banded Lake is much larger than the map shows due to glacier recession.
Traversing talus around Banded Lake. The talus was on top of bullet-proof glacier ice, so at times the terrain had the solidarity of a pile of marbles.
Ascending to "Christmas Tree Col." Photo by Brian Walkenhauer
At the north side of "Christmas Tree Col." The west end of Ragged Ridge (Red Mtn) beyond.
From the col we descended down and a little left to a lake at 5200 ft.
In the basin near Lake 5200, looking back up at the way we came (we came down a break in the cliffs on the right of this photo). From here we followed the drainage creek down to Fisher Creek trail (there was a faint climbers path we managed to stick to on occasion).
We hit the Fisher Creek trail at about 3600' and then hiked about 5 miles eastward along the Fisher Creek trail to Fisher Camp (5200') where we stayed the night.
DAY6: Hike out via Easy Pass.
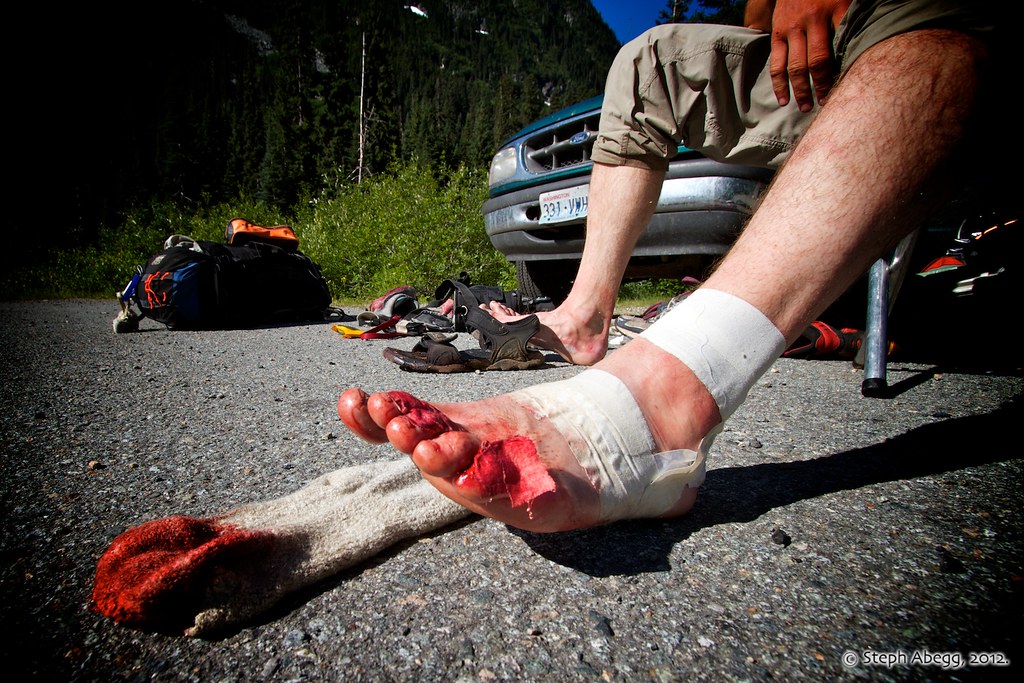
Mesachie Peak from the Fisher Creek Trail. We had discussed climbing this on the final day before hiking out, but our feet were pretty tired (Brian had blisters of some sort and my recovering leg had had enough) so we just hiked out.
Mt. Logan from Easy Pass. From Fisher Camp where we had stayed the previous night, it was 2.1 miles (and 1300 ft up) to Easy Pass and 3.5 miles (and 2800 ft down) from there to HWY 20.
We had stashed a bike at the Easy Pass trailhead, but our "let's try hitchhiking until we see a Subaru" technique resulted in a quick ride in the backseat of an Outback shared with a friendly dog named Mookie.
The perils of wearing sandals on a trail. (Brian's feet were hurting so he wore sandals for the final hike out. In the last couple of miles before the road, he stubbed his toe pretty badly.)
And the now-regular installment of the escapades of a tiny stuffed (becoming not so) white multi-nick-named mountain goat....
•THE ADVENTURES OF "THUNDER BILL"•
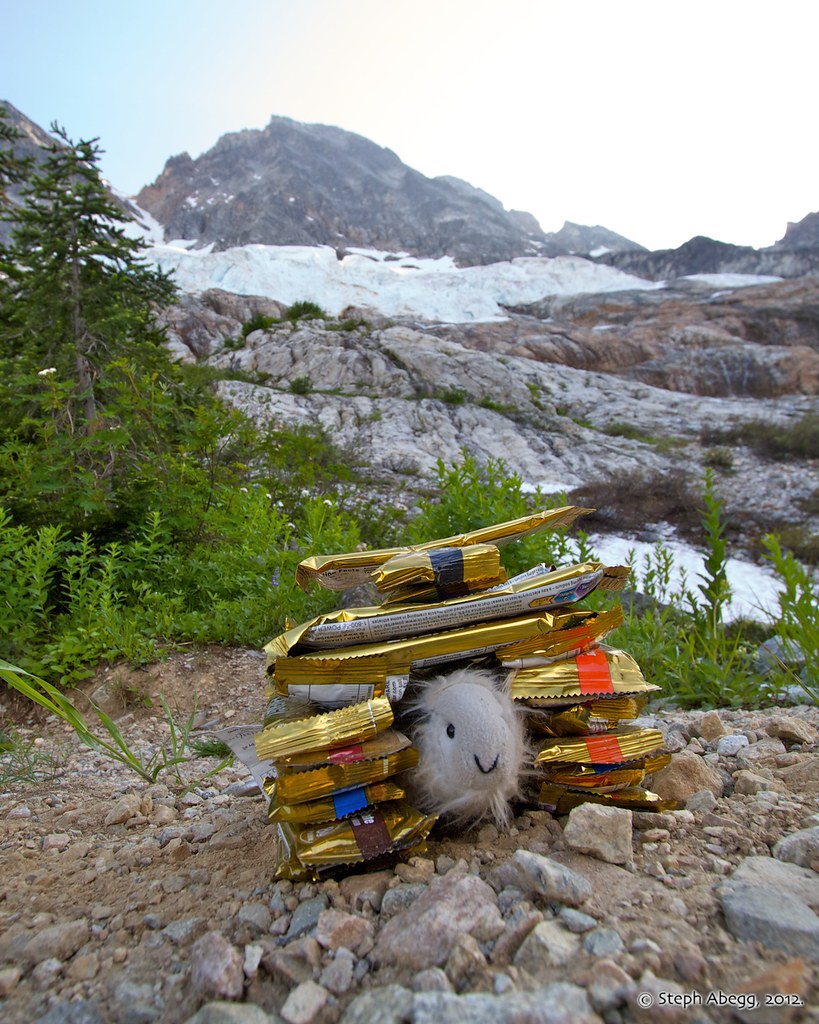
On the first night of the trip, Billy enjoys his power bar temple.
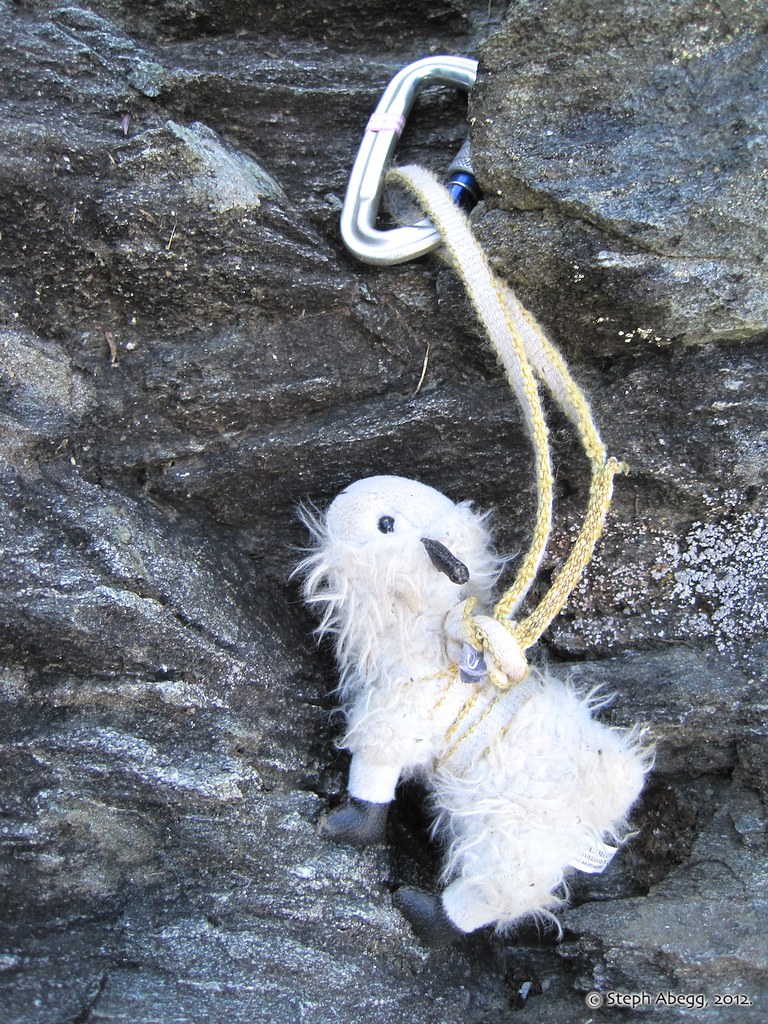
Billy climbing somewhere on Goode's NE Buttress.
Billy asserts himself as an essential member of the climb.
Billy summits the highest point on Goode.
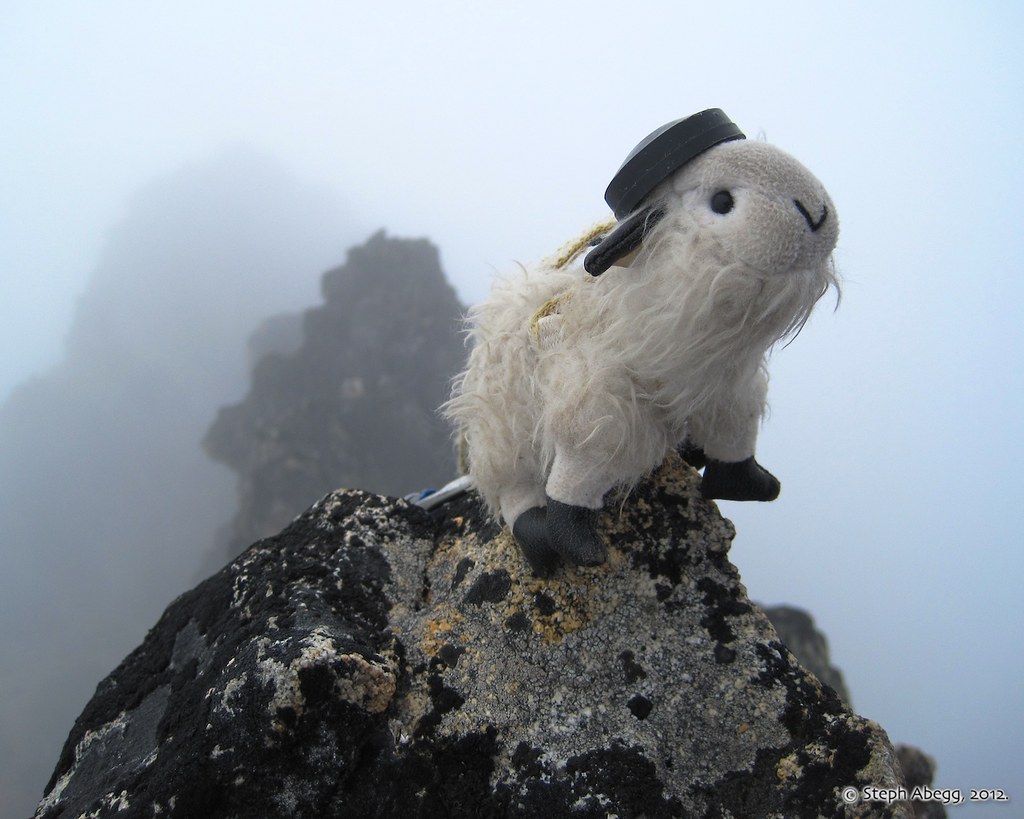
Billy is becoming a more daring climber as the summer progresses.
Billy and his power bar wrapper crown on Storm King.
Billy hides from the mosquitoes in the Park Creek valley.
Billy and his woolly mammoth shadow give a sense of scale to the glacial striations (i.e. scratches/gouges) on this glacier-carved slab on the NW side of Booker.
Billy finds some balloons in the snow and has a party on the summit of Booker.
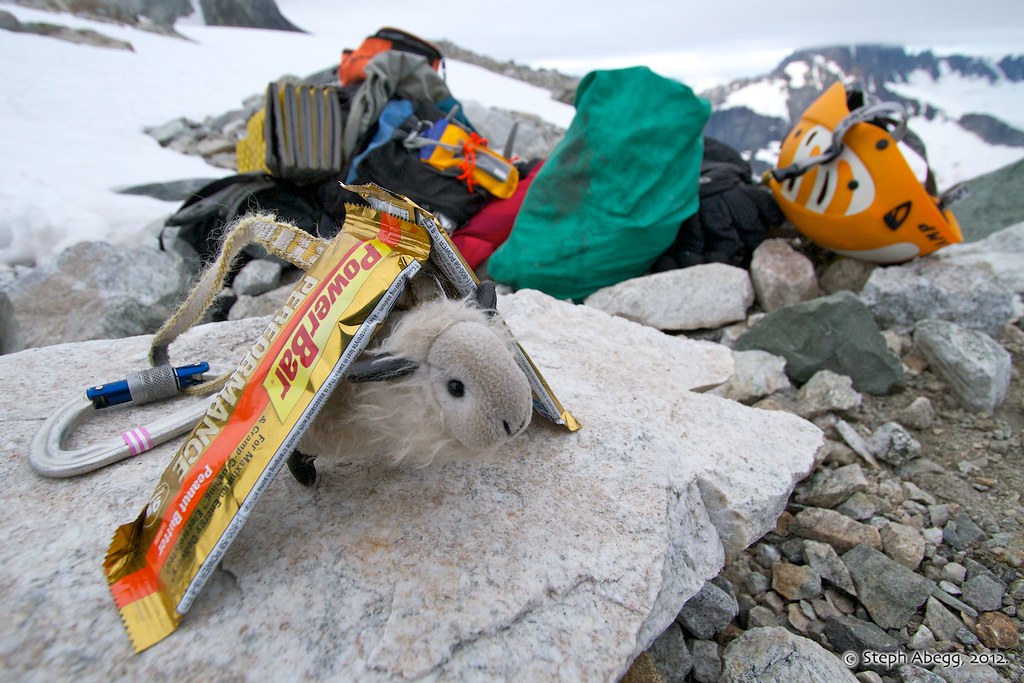
By Day 5, Billy's power bar temple has reduced to a lean-to.
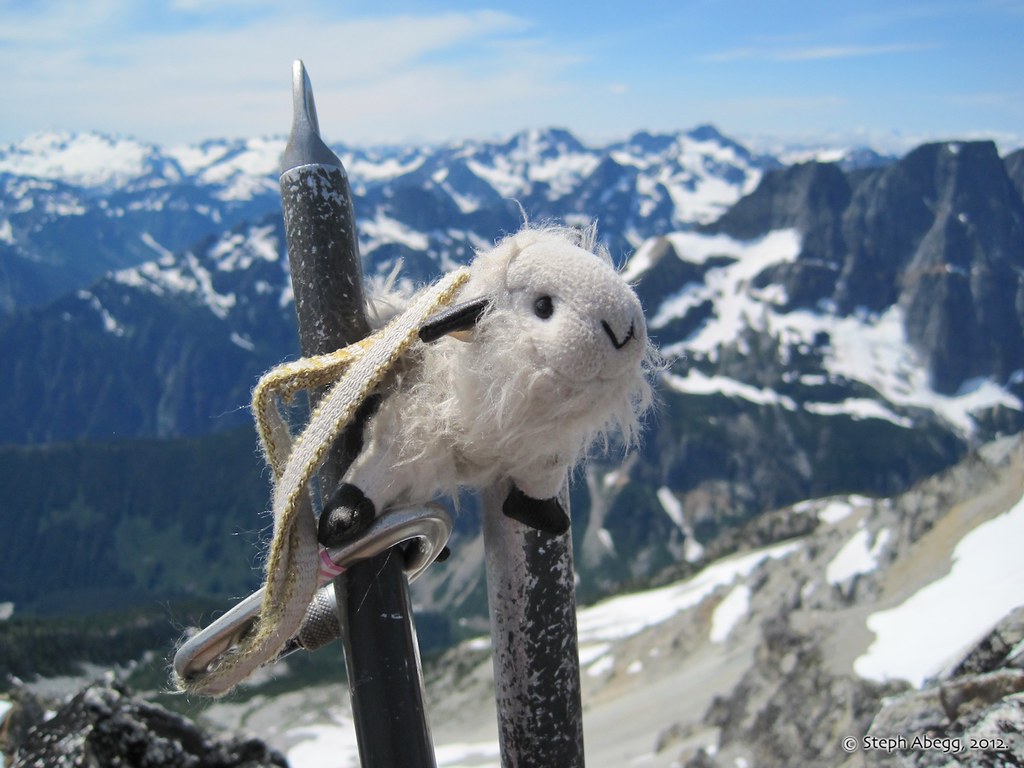
Billy on the summit of Logan, wearing his fuel canister cap helmet.
Hanging out at camp. As usual, he turns his more winsome right side toward the camera.
Useful beta. Updated route information. Corrections. Historical notes. Interesting facts. No fluff please. Please do not put links in your comment, as my spam filter will filter those comments out.